• Blog
  • About
  • Press
  • Privacy

Let’s be social!

  • Skip to primary navigation
  • Skip to main content
  • Skip to primary sidebar
  • Skip to footer
Sawdust 2 Stitches

Sawdust 2 Stitches

  • Tutorials
    • Around the House
    • Organization
    • Wall Decor
    • Sewing
  • Makeovers
    • R.V.
    • Room Makeover
    • Furniture Makeover
    • Decor Makeover
  • Build Plans
    • Small Builds
    • Wall Decor
    • Dresser
    • Tables
    • Seating
    • Shelving
    • Hidden Compartment
  • Seasonal
    • Summer
    • Spring
    • Fall
    • Winter
  • Home Tours
    • First Home
    • Current Home
    • 70’s Ranch Home
  • Workshop

Blog

Add Character by Adding a Gorgeous DIY Garage Trellis

August 30, 2021

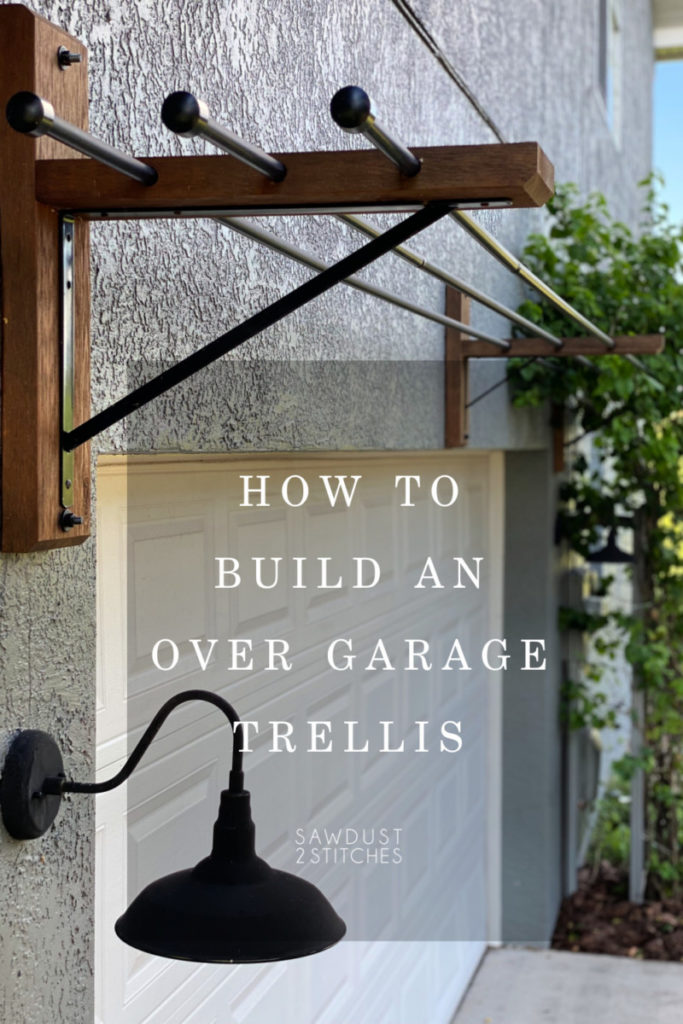
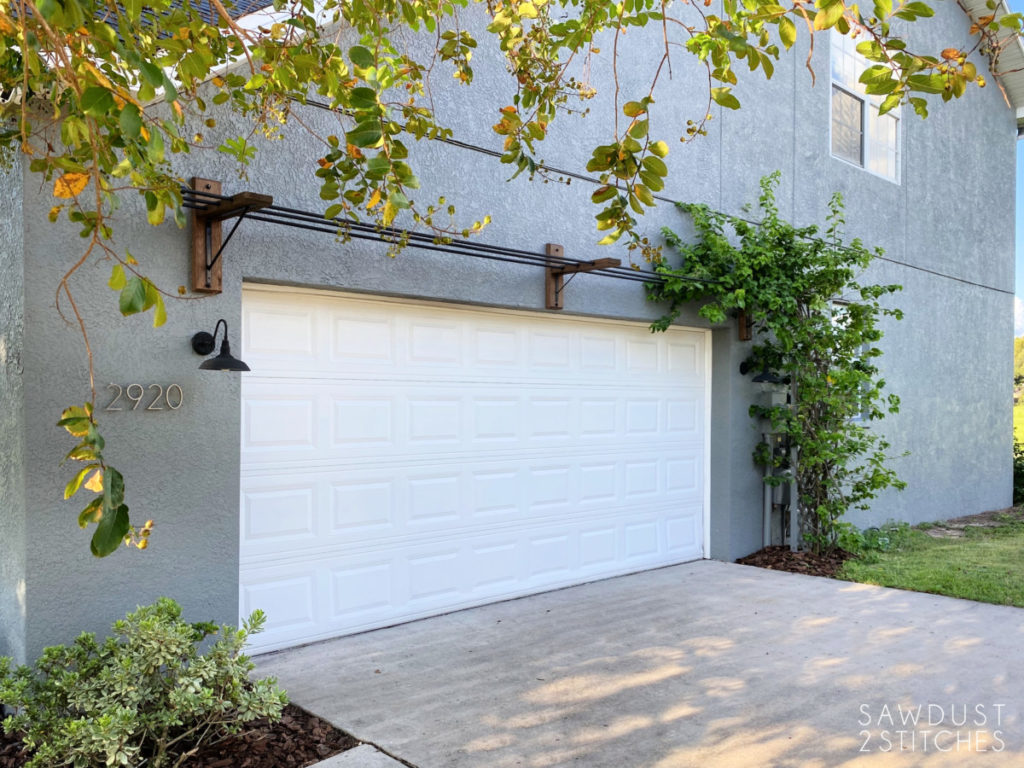
I have been on the hunt for an affordable over the garage trellis option. After searching high and low I ultimately decided a budget friendly garage trellis did not exist. Instead of wasting more time searching I put on my thinking cap and designed and built my own affordable and aesthetically pleasing over the garage trellis!

Tools Suggested Materials Used 
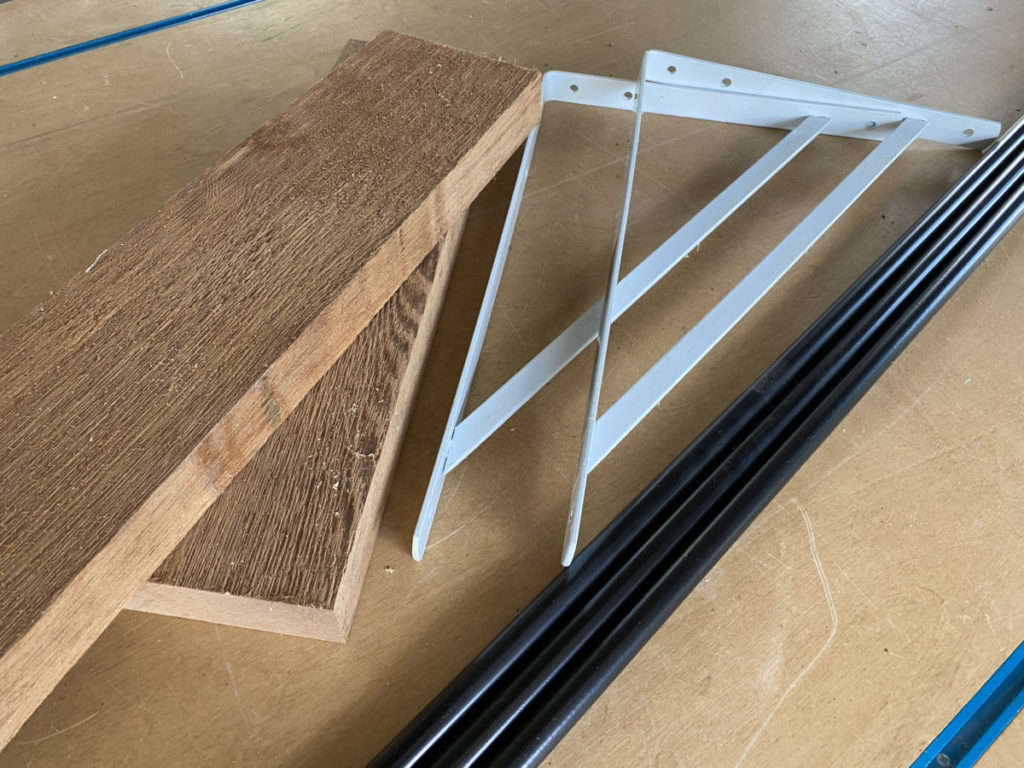
 Miter Saw
Drill Press
7/8” Paddle
Drill Bit 
Tape Measure 
Speed SquareT
able Saw (Optional*)
½”  Drill Bit ½”
Masonry Bit 
Hammer Drill  
 2×6 Cedar Boards 
(x9) 4” Screws
(x1) Shelf Bracket
(x2) Large BracketBracket Screws
(x6) 4”Anchors
(x6) Ikea Curtain Rods (or Conduit)
Black Matte Spray Paint   

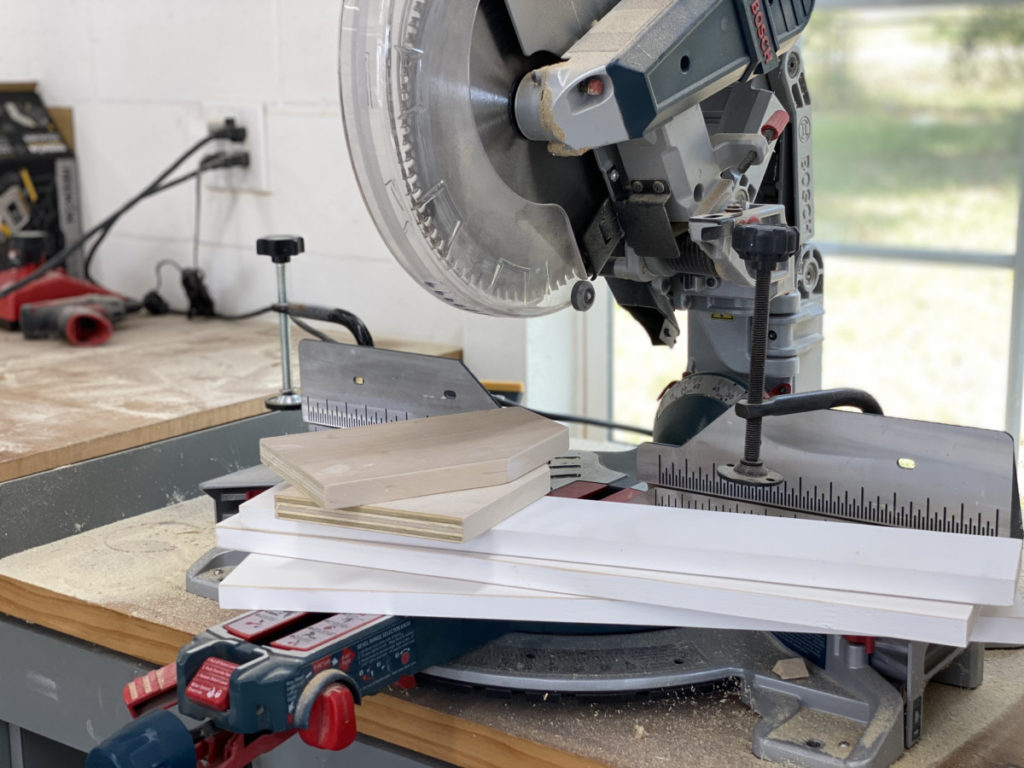
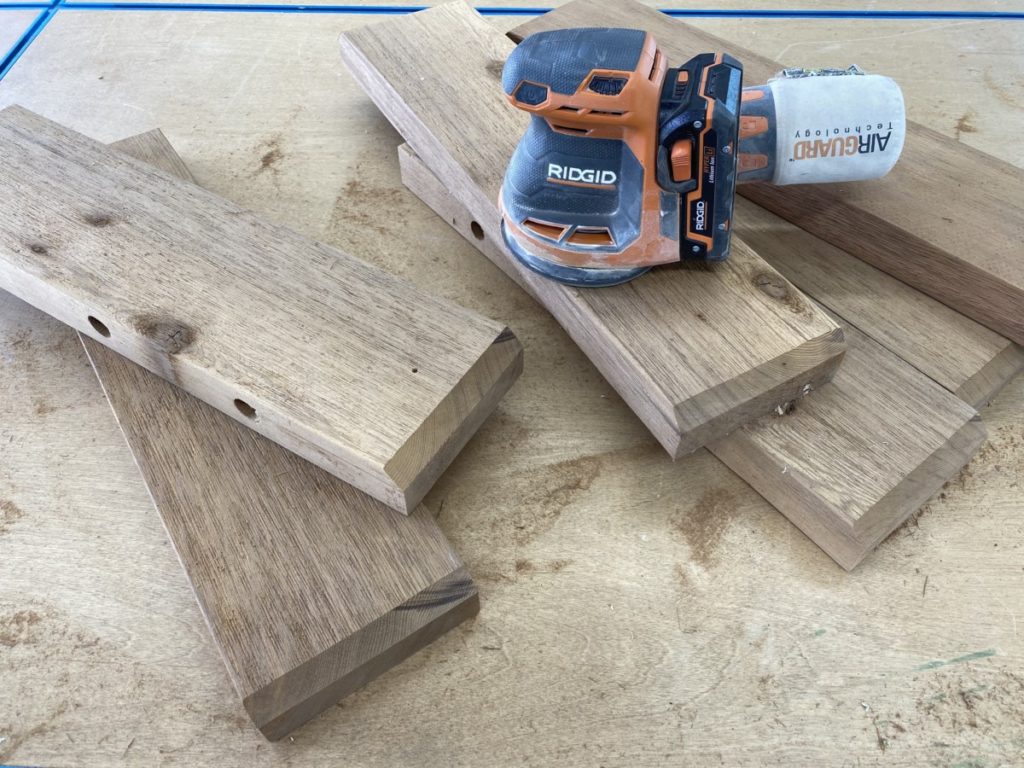
Cut Boards for Corbels

Cut all necessary boards. (Determined by the desired number of corbel/brackets.) In my case I utilized a total of three brackets to span over a 2-car garage entry.  I used to “Large” corbels for the sides, and one “Small” corbel as a center support. 
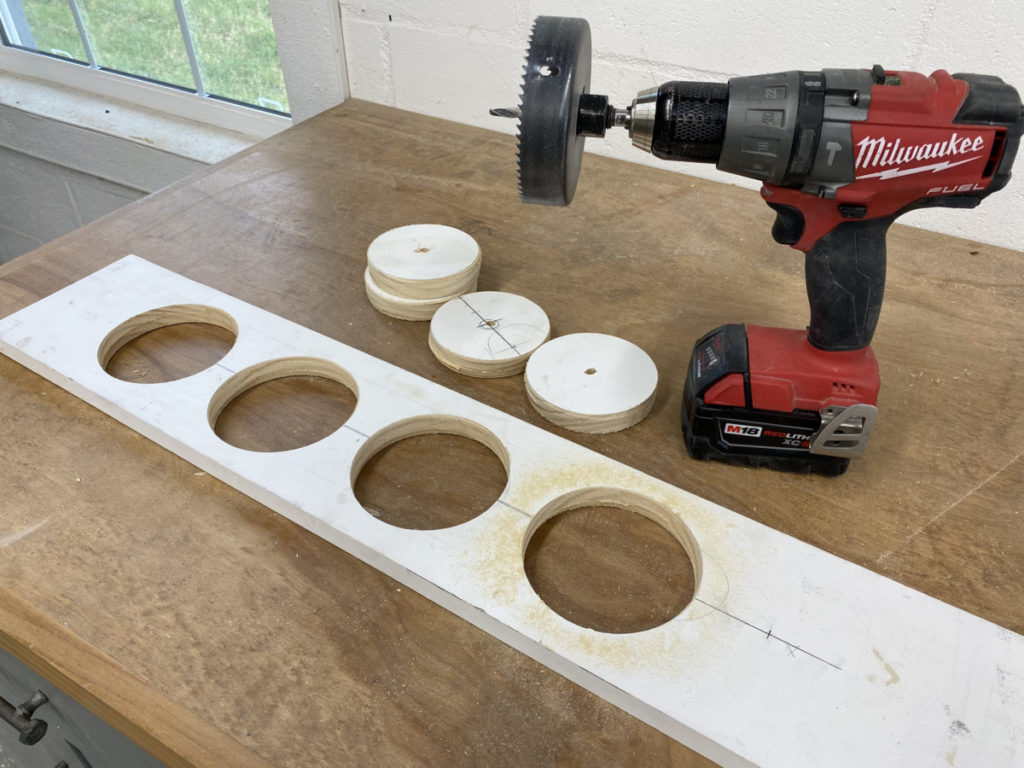
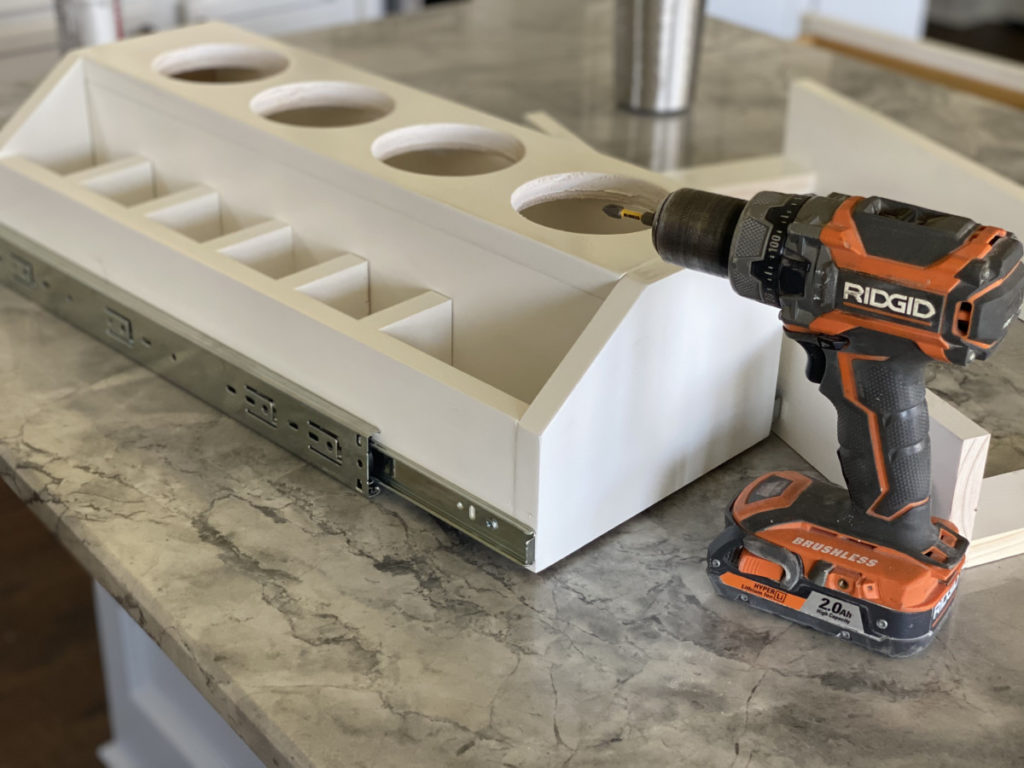
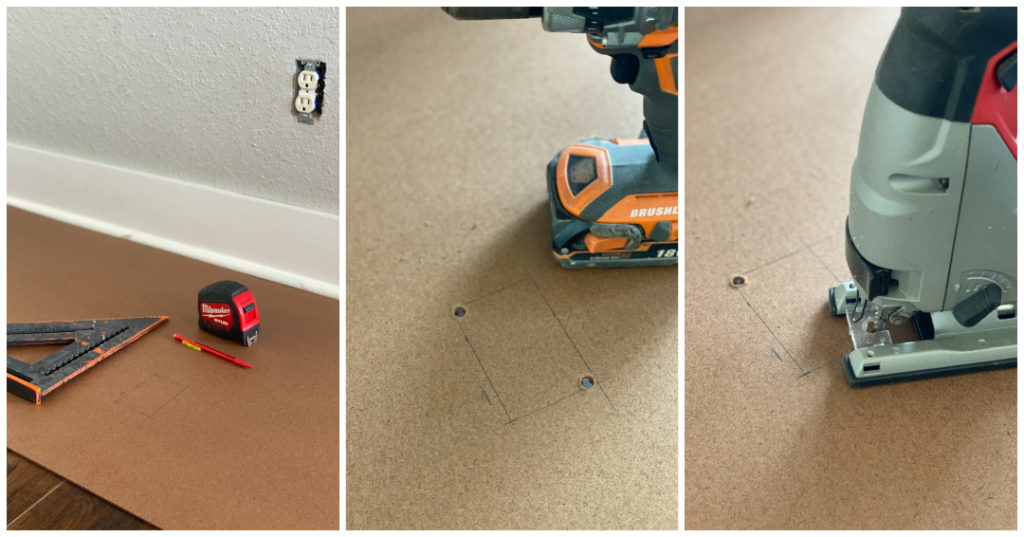
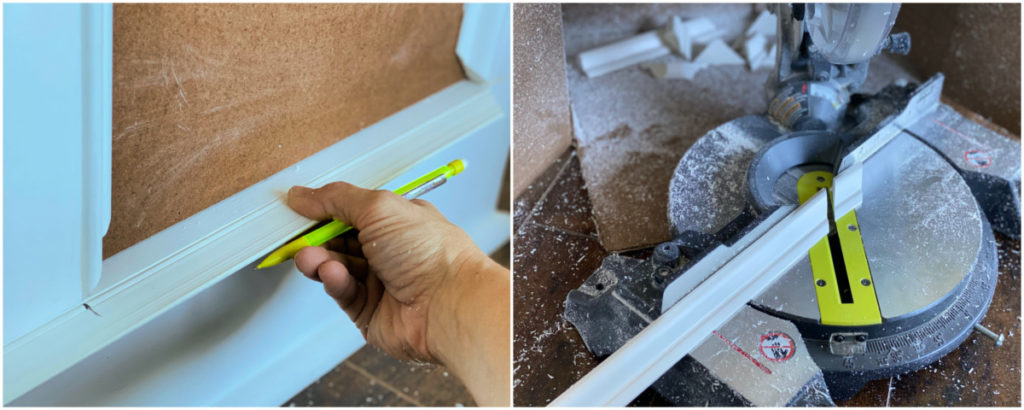
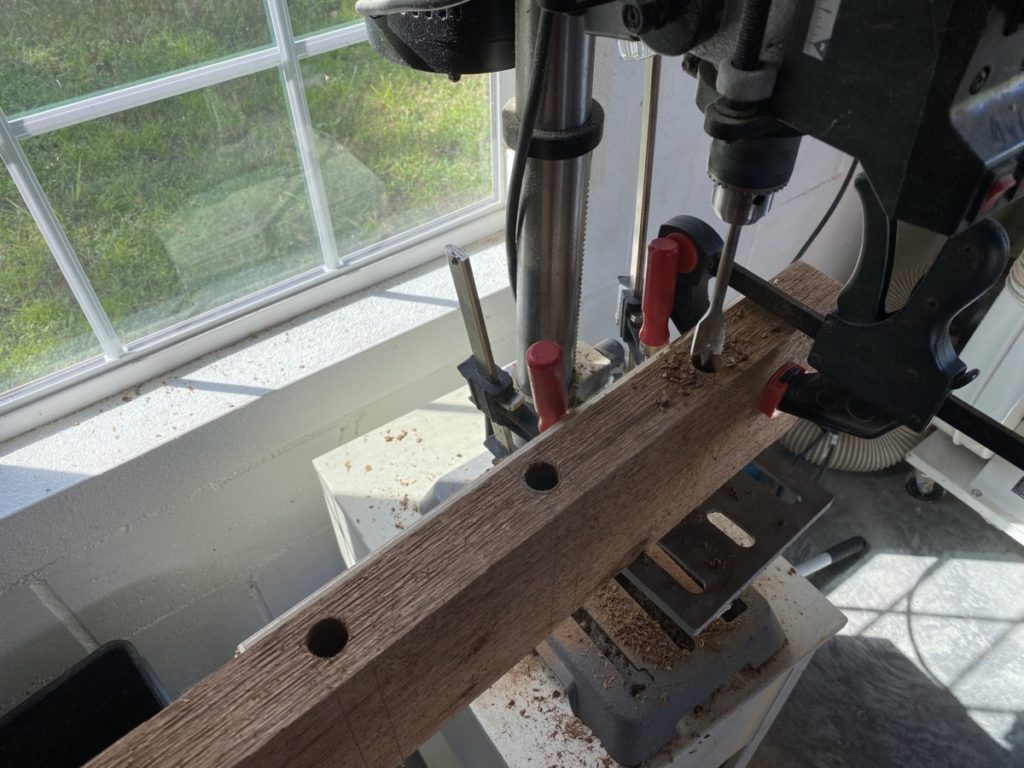
Drill Holes

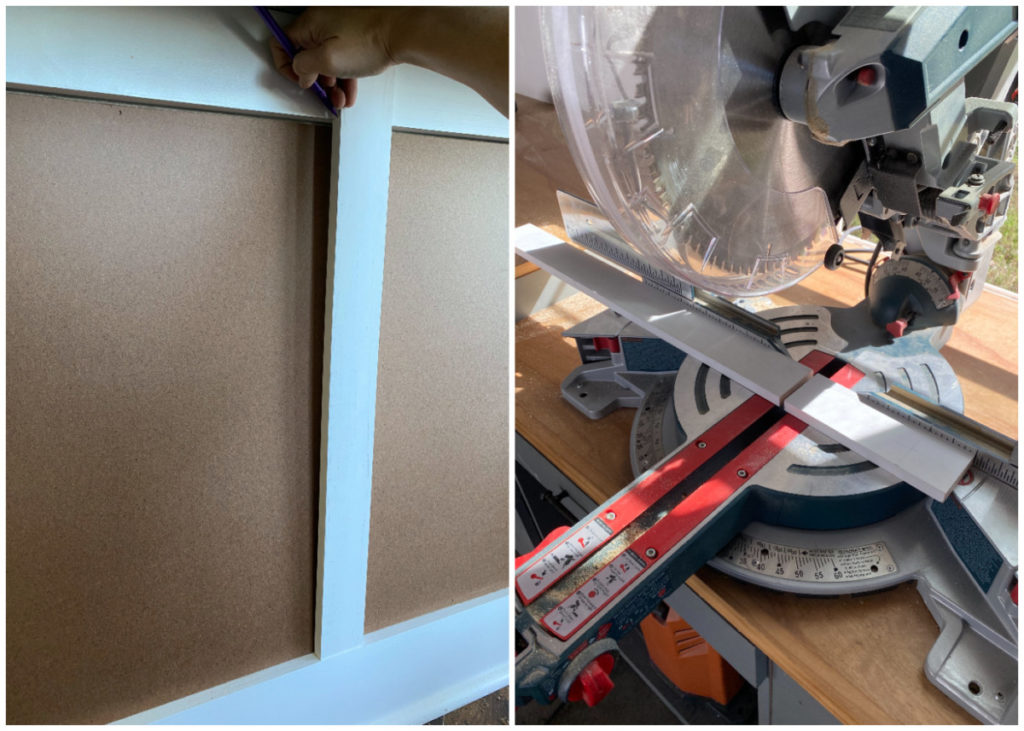
I found that it was very helpful using a speed square accurately mark the hole placement.  Word to the wise, mark the placement for all the corbels at the same time.  This will ensure that the holes will all line up when ultimately run the poles through the corbels. 

*Something to consider:  Before drilling determine the best size bit for your rods.  I used inexpensive IKEA curtain rods.  These rods worked best when I used a 7/8” paddle bit to dill out the hole. 

 I opted to use a drill press; this required a lot of resituating the depth of the drill as I drilled through the board.  While it required a little work, I highly recommend using a drill press. 

If using a drill press is not possible, a drill is still an option. It will just require a very level and steady hand. 

Another Option:  Drilling straight holes through the entirety of the 5.5” board is definitely the trickiest part of this build, there are a few ways to adjust the skill level.  Using a 2×4” board as opposed to a 2×6” board will make the step easier.  It will change the overall aesthetics, but it is an option. 

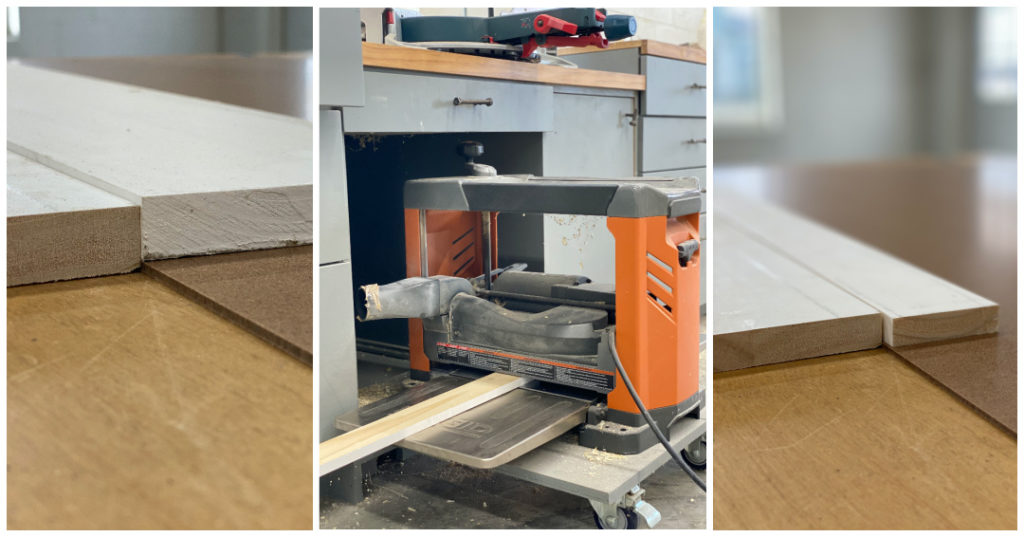
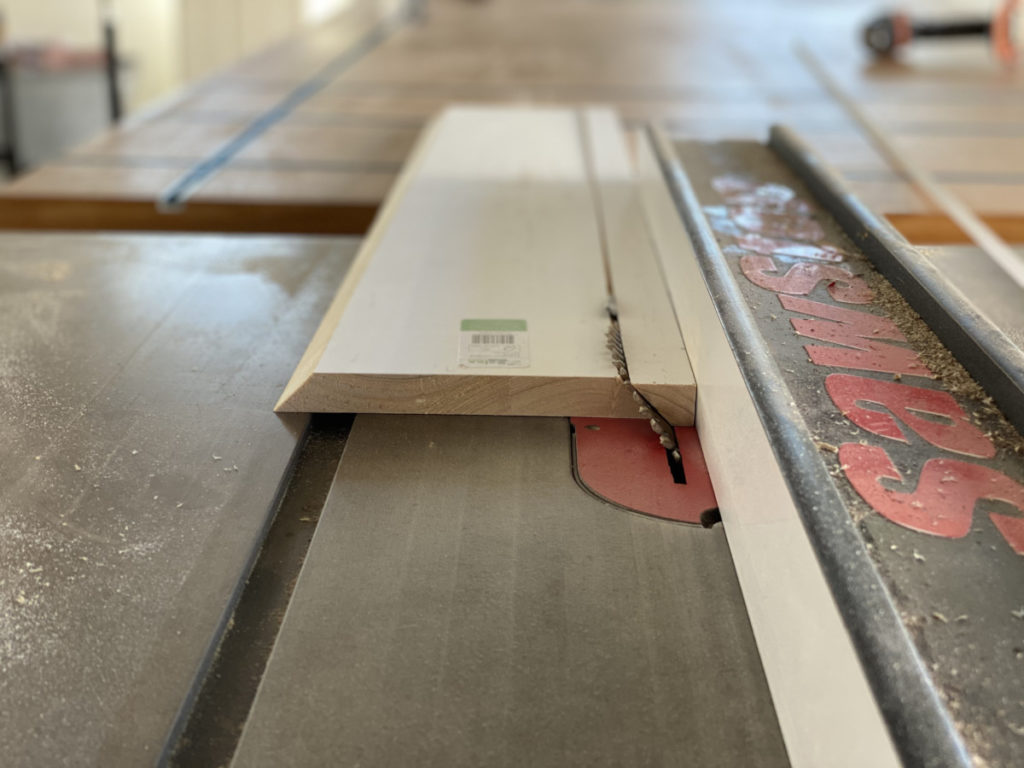
Cut Chamfered Edge on Corbel Board (Optional)

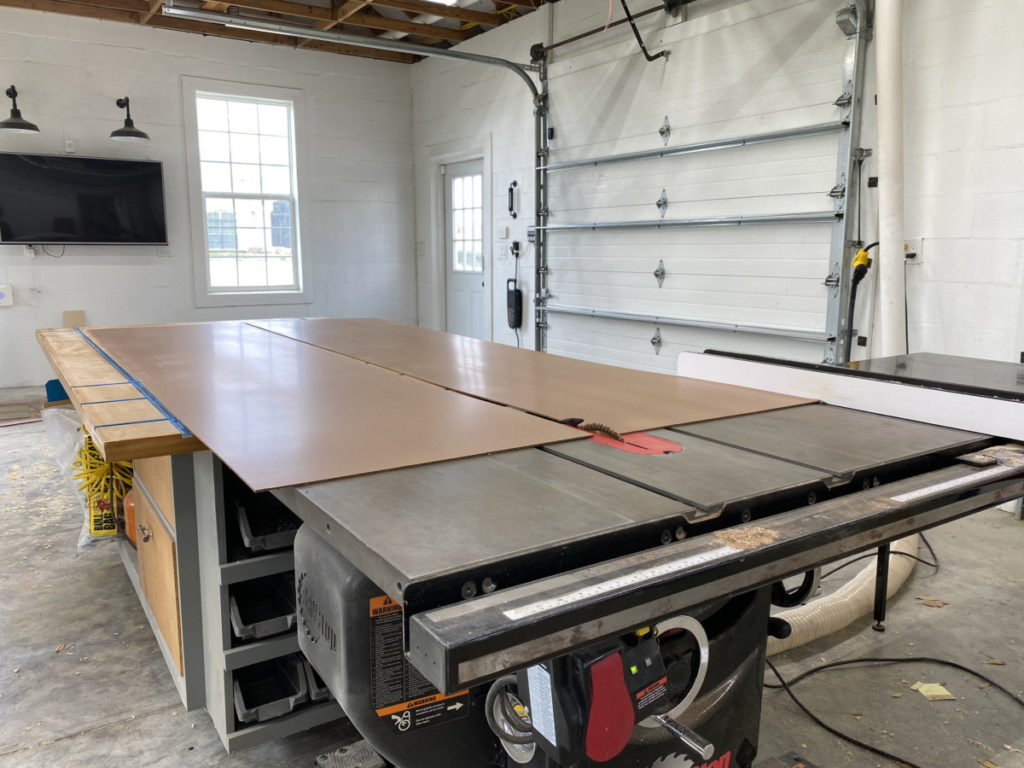
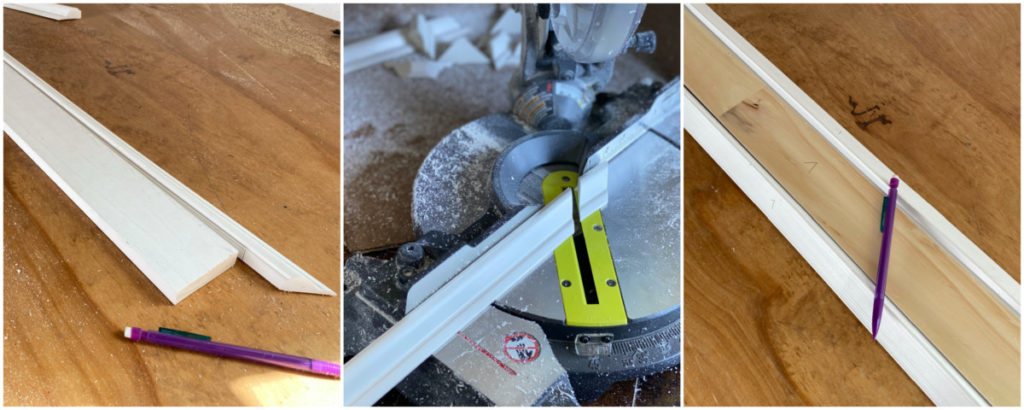
 I opted to add a chamfered edge to the ends of my boards.  This is not a necessary step, I simply wanted to jazz up my corbels. You can achieve this look. By either using a router or a table saw. 

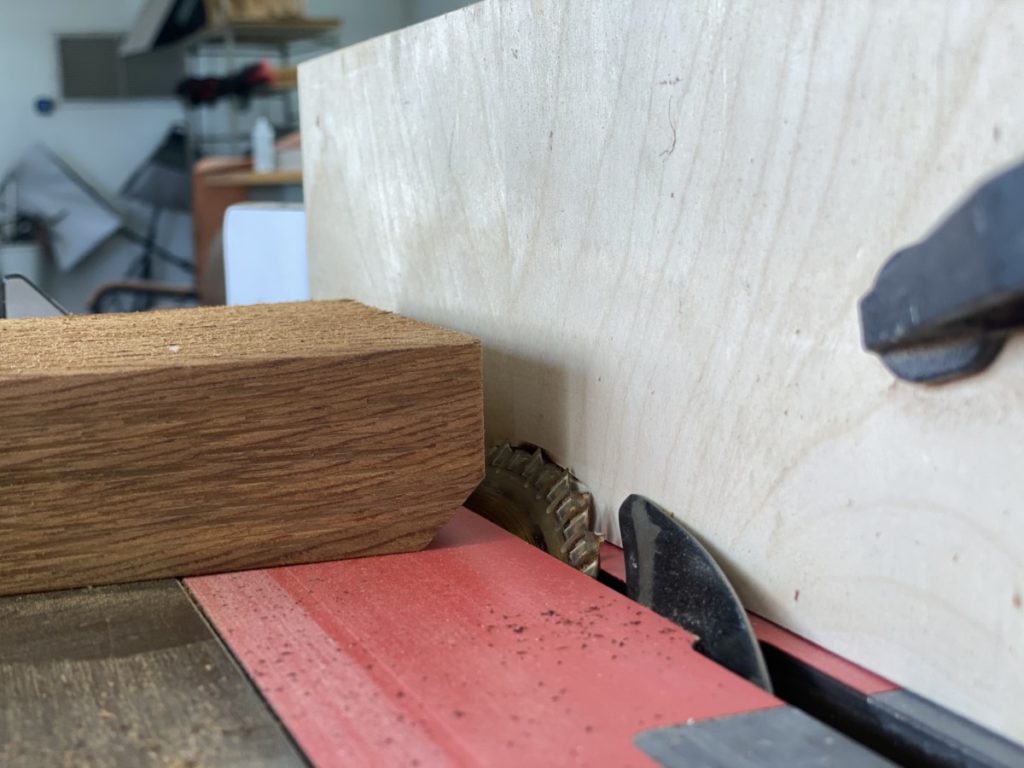
In order to create a chamfer edge, I set my table saw blade on a 45 degree angle. In order to prevent cutting my rip fence I used clamps to secure a scrap board to the fence. 

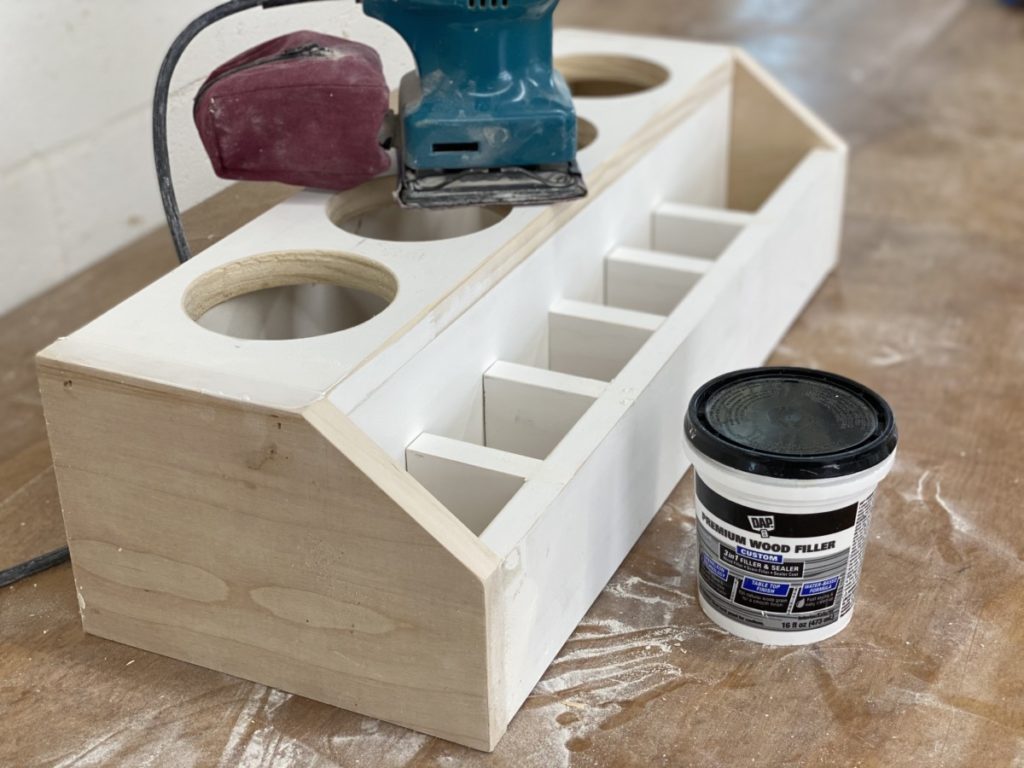
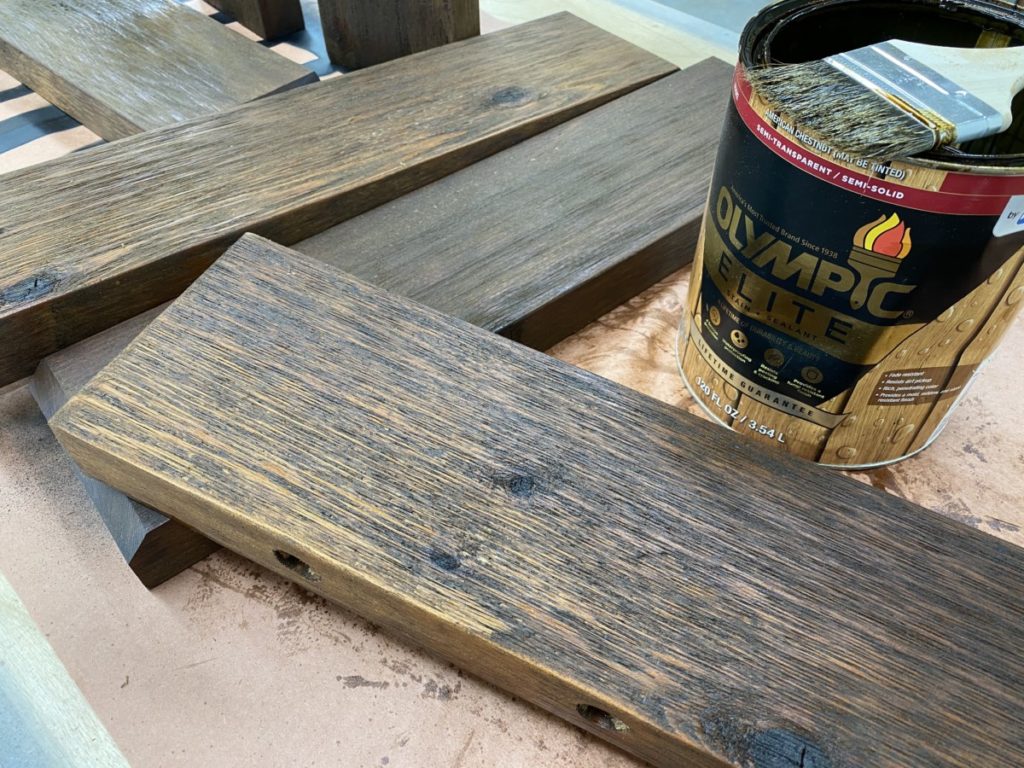
Sand and Seal Corbel Boards

Before assembling I sanded all my boards and then treated them with and exterior stain and sealer. 

I used Olympic Elite exterior Stain and Sealant in the color “American Chesnut” I used this same stain when I created my “Vertical Planter” and I loved it so I used it again.
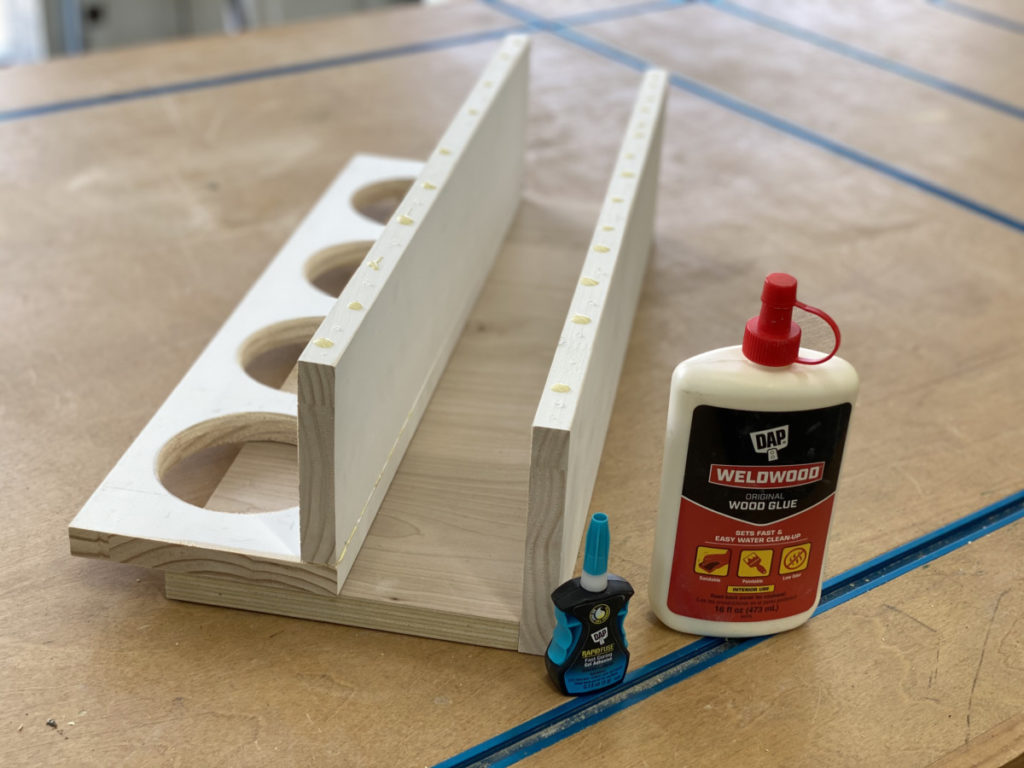
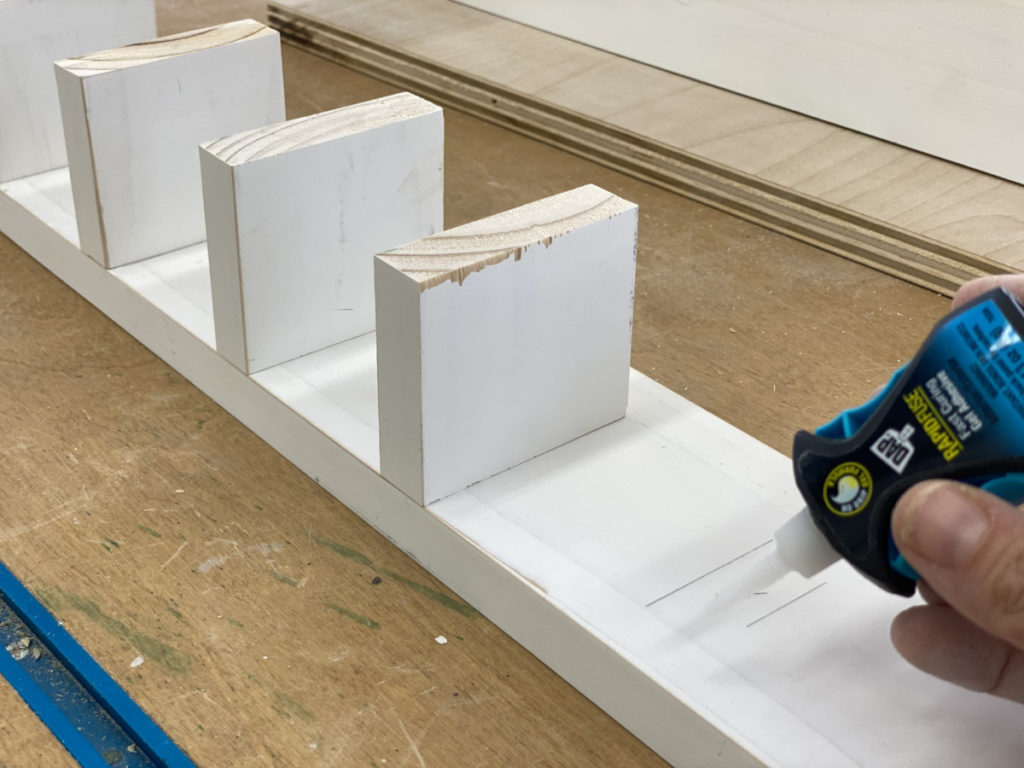
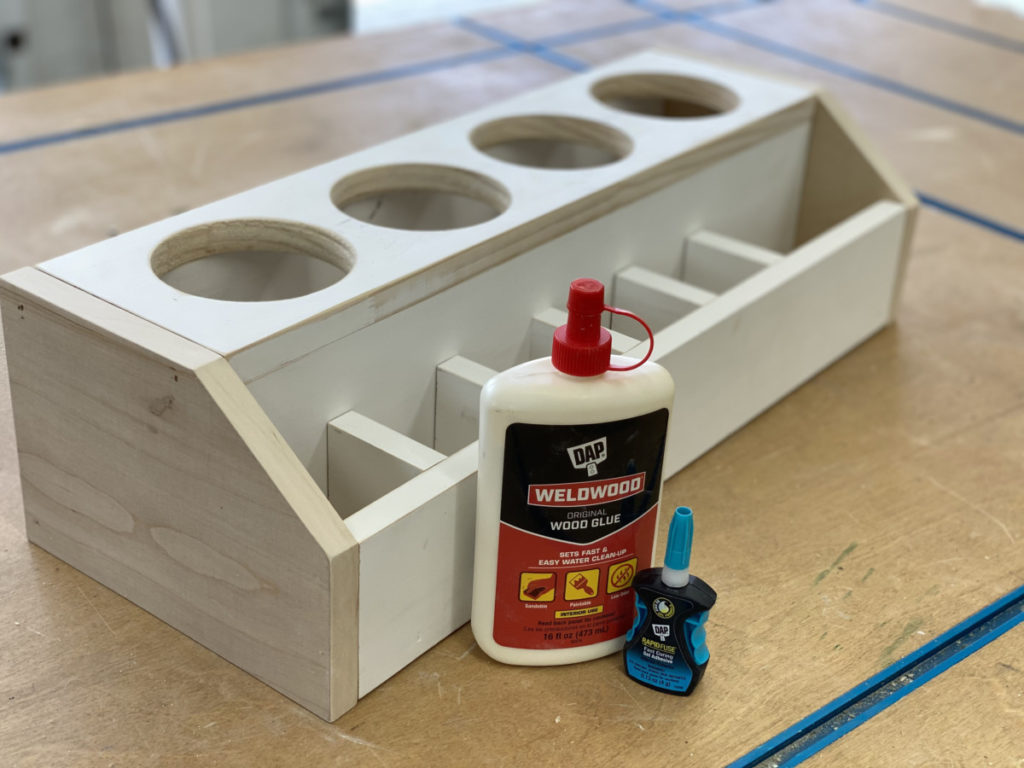
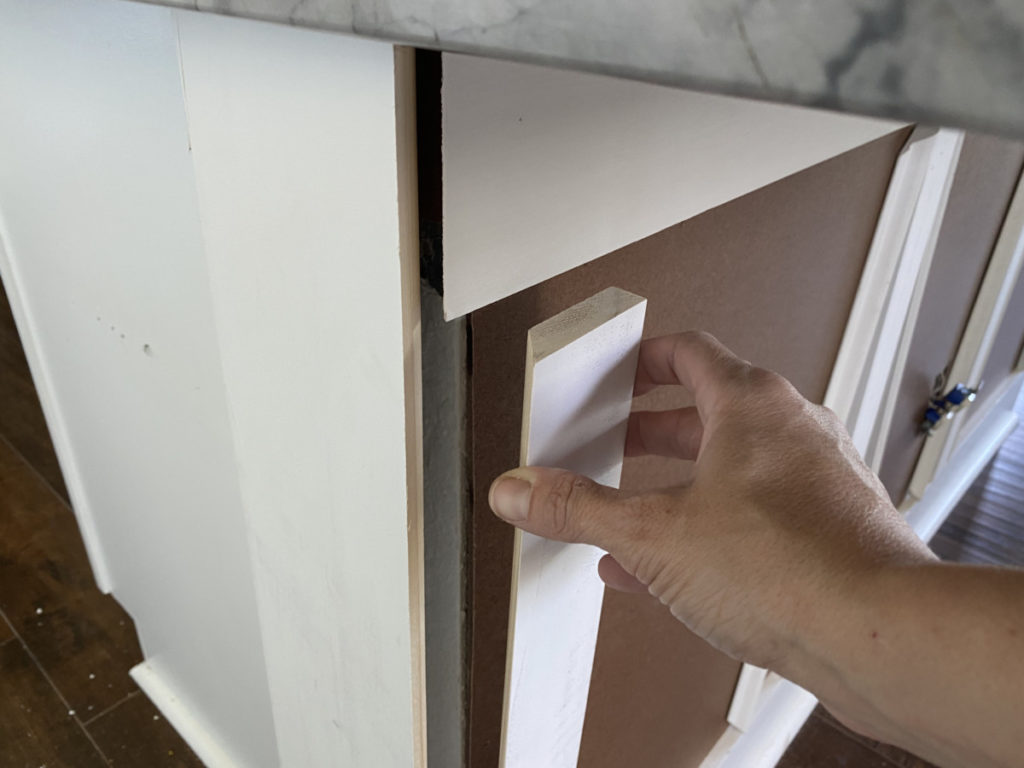
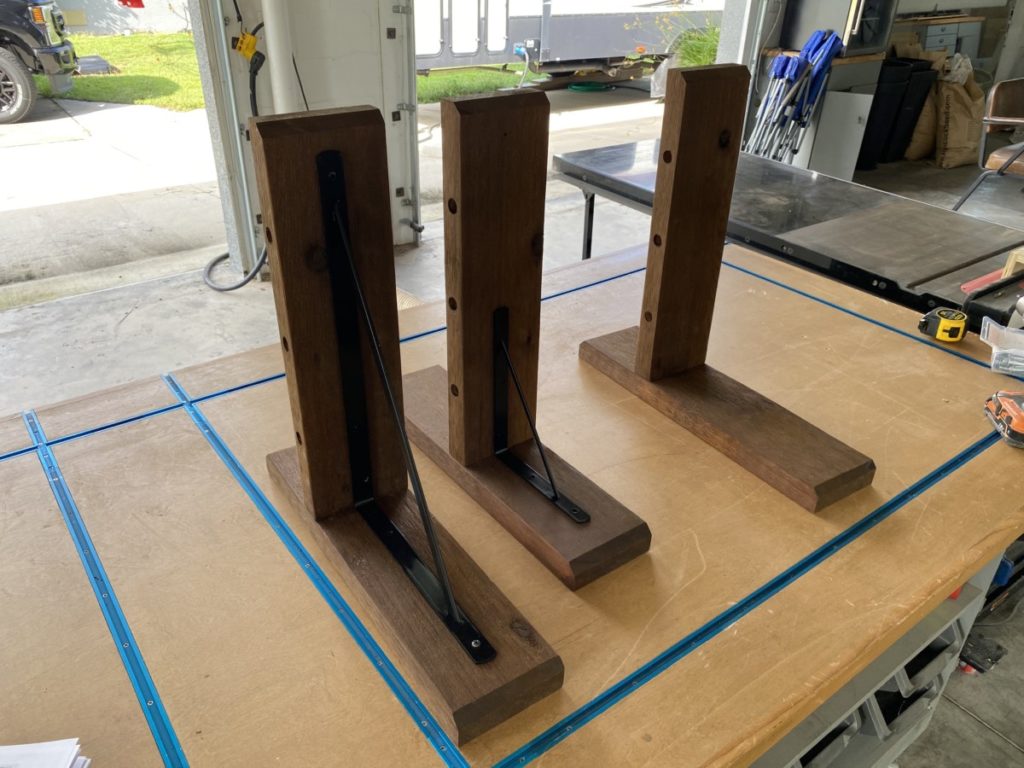
Construct Corbels

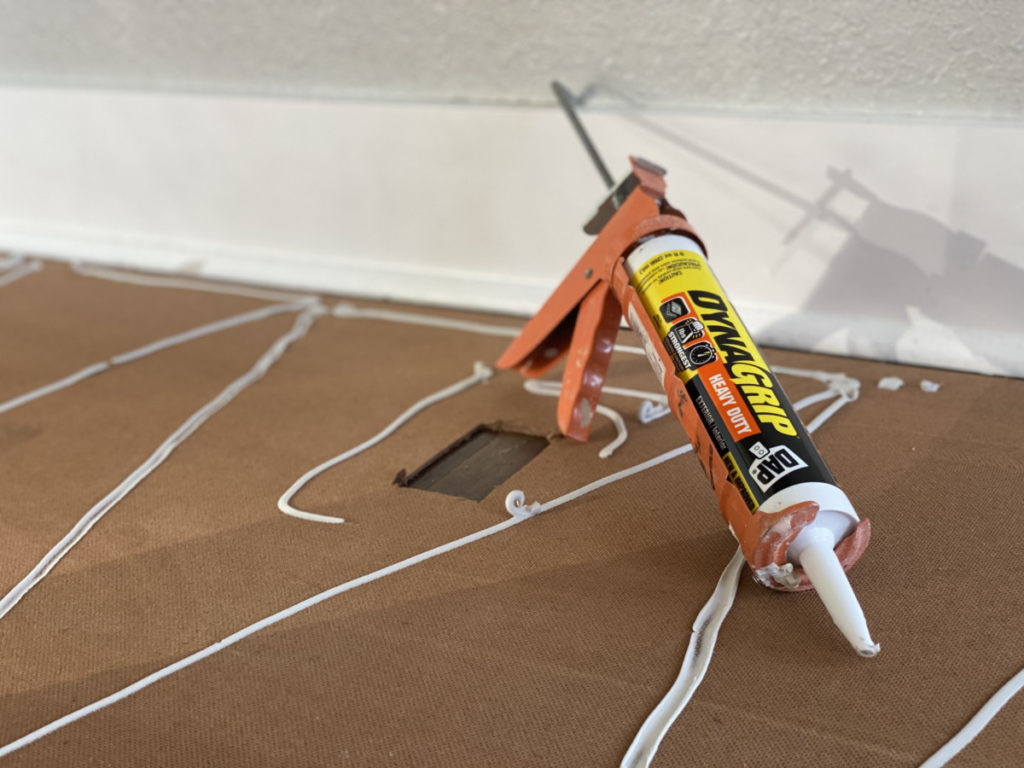
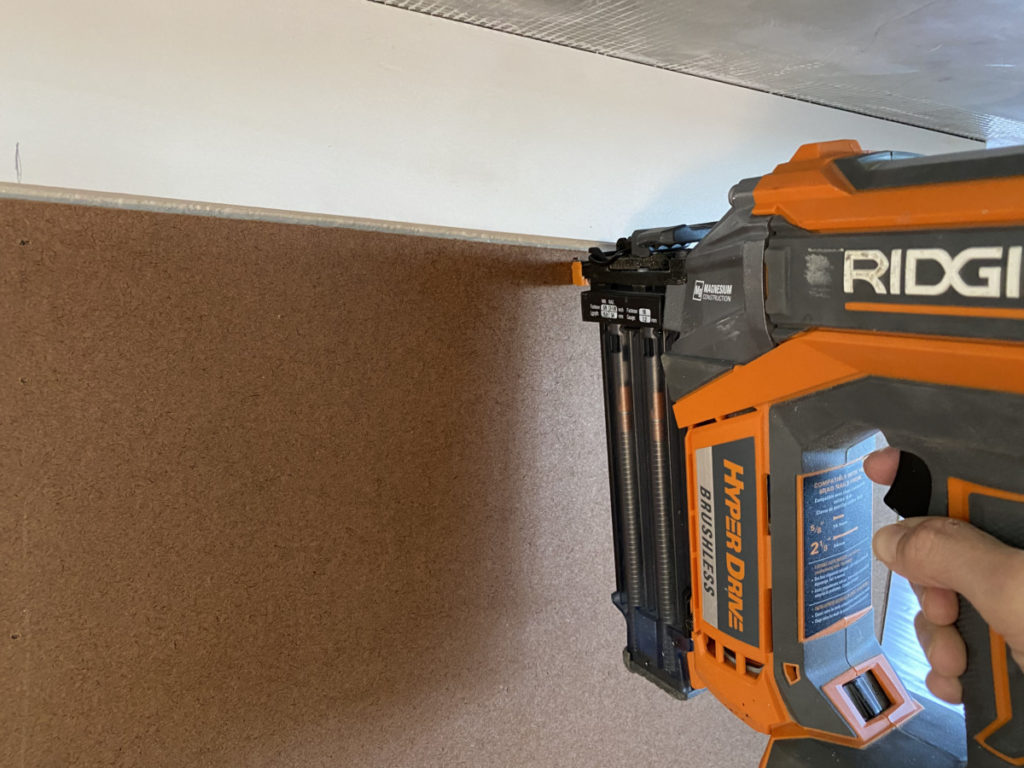
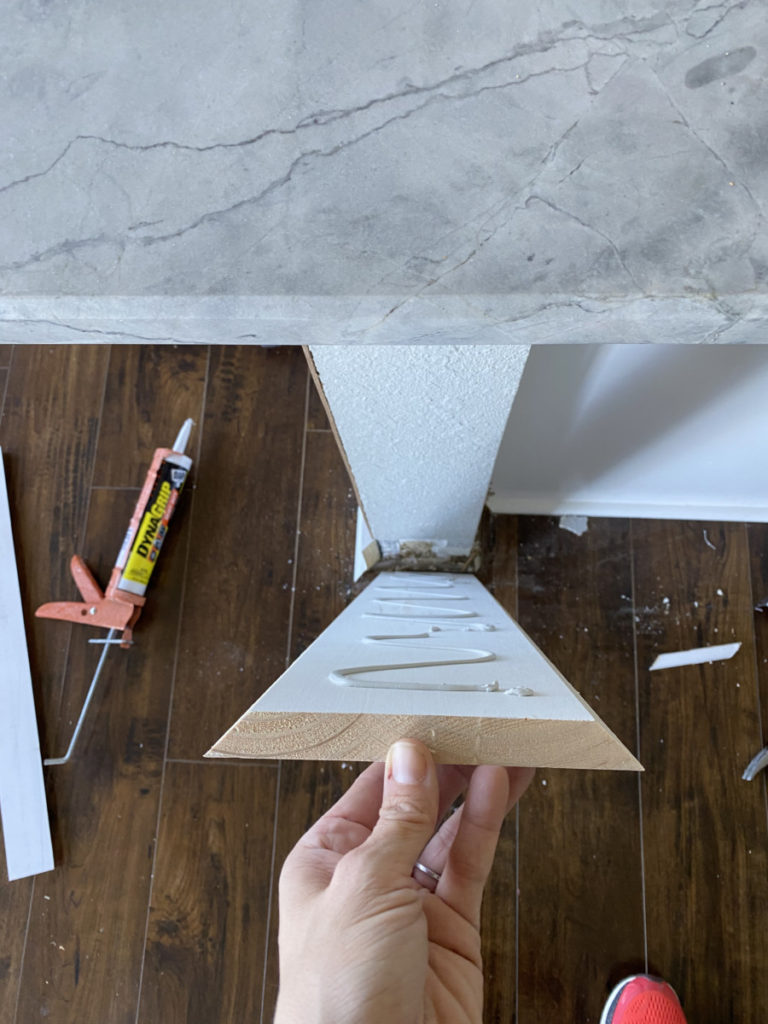
Using 4” exterior use screws secure the horizontal board to the (soon to be wall mounted) vertical board.  Reference the PDF Plan(s) to see the designated measurements. 

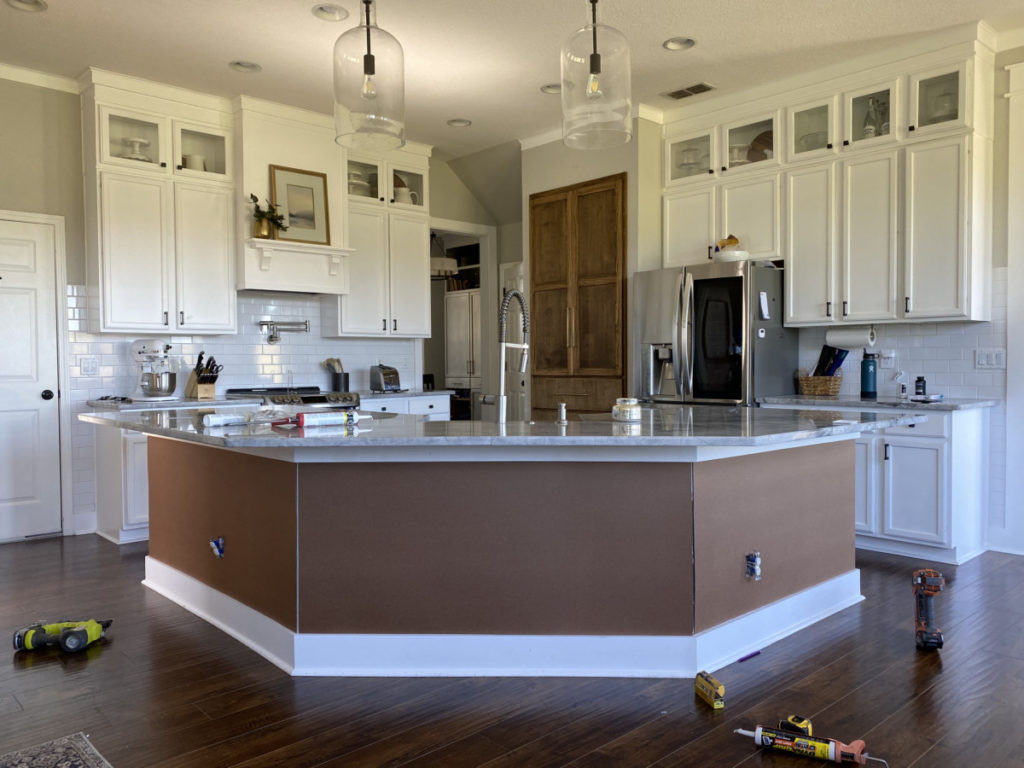
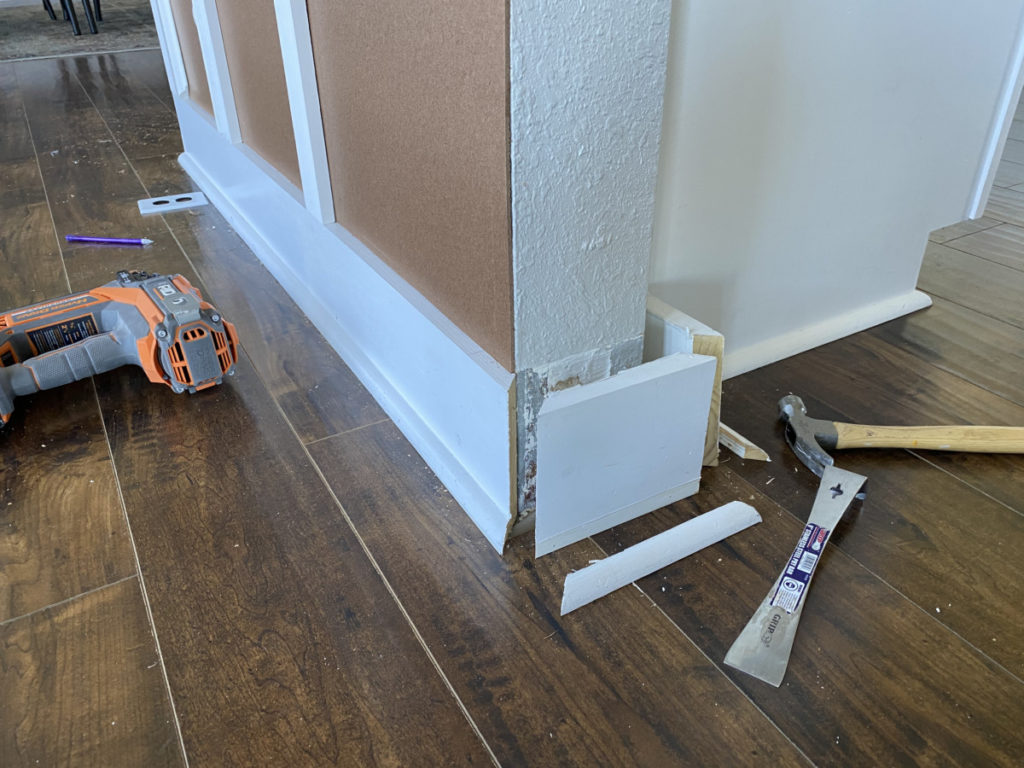
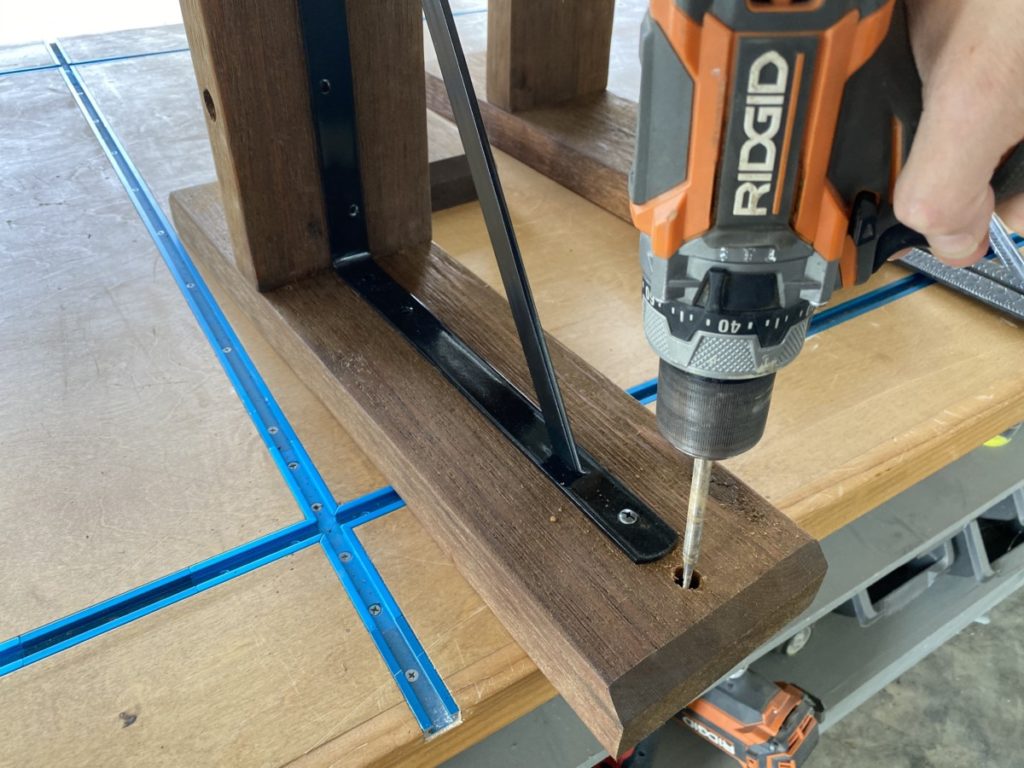
Secure Corbels to Wall

 In my case I will be attaching my trellis brackets to our stucco/block home.  Seeing as I will be drilling into concrete, I’ll need to take a few extra steps. In order to secure it into masonry I will need to use a sleeve anchor.  They are basically a mollie for concrete. I am using a 4” long by 1/2” diameter sleeve anchor. 

To use these anchors, I need to drill a ½” hole to accommodate the sleeve. I drilled a hole at both the top and the bottom center of my brackets. 

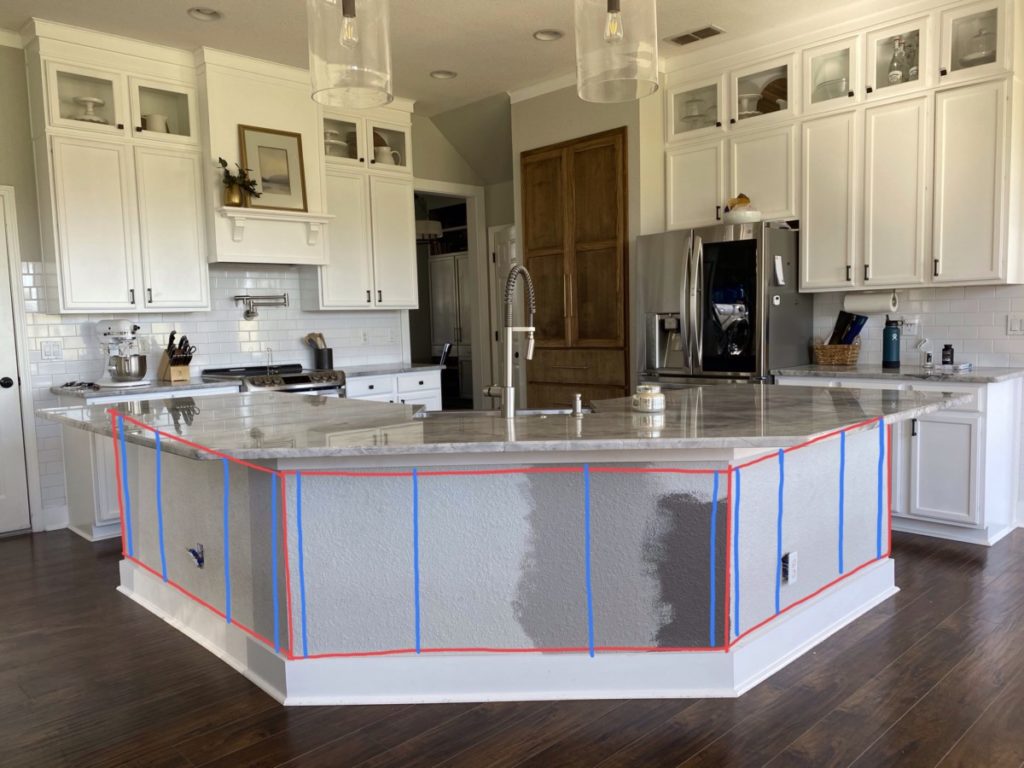
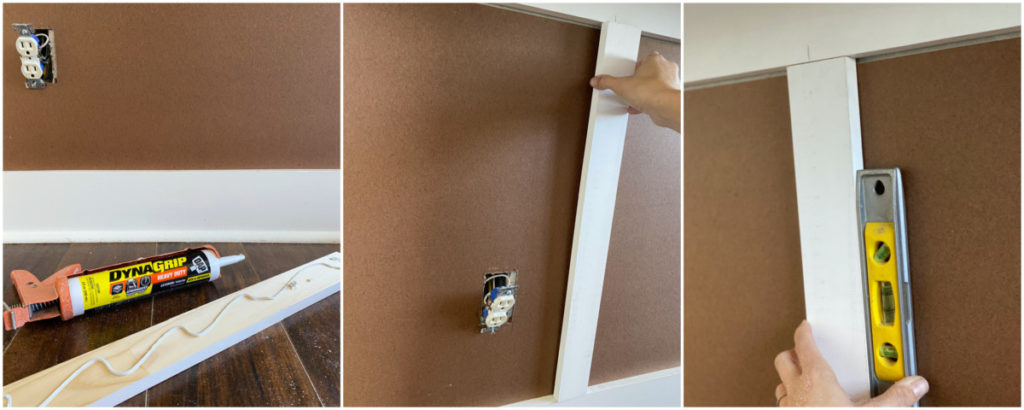
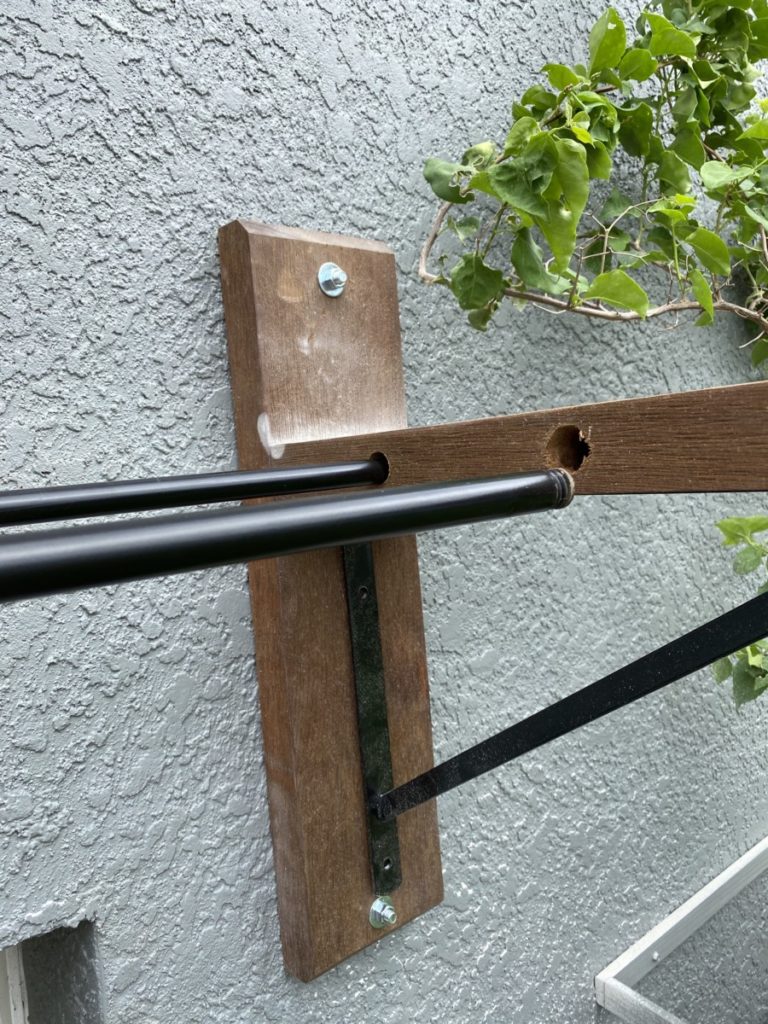
BEFORE YOU GET DRILL HAPPY…  take the time to check, double-check, and triple-check the placement of the corbels.  They will need to be perfectly level in order to accommodate the poles that will run through them.  I began by installing my center bracket first and then took careful measurements to figure out the positions of the side corbels. 

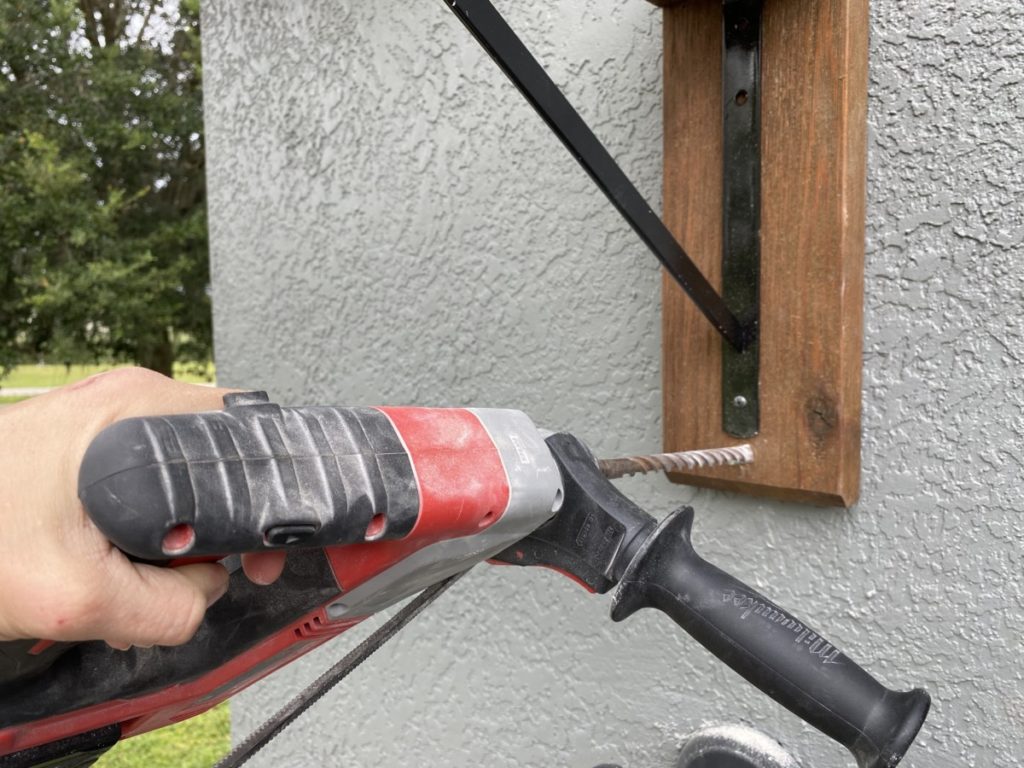
Once the holes were drilled in the bracket, I positioned the bracket in the desired location.  While holding the bracket in place I used the holes pre-drilled as a template for drilling holes in the masonry. 

Drilling holes in masonry is not as scary as it sounds, so long as you use the right tools. I suggest a ½” masonry bit and a “hammer drill”.  (Pictured below is a “Rotary Hammer Drill”.) 

 I drilled a hole approximately 3” deep into the masonry. This measurement considers the length of the anchor and the depth of the bracket board

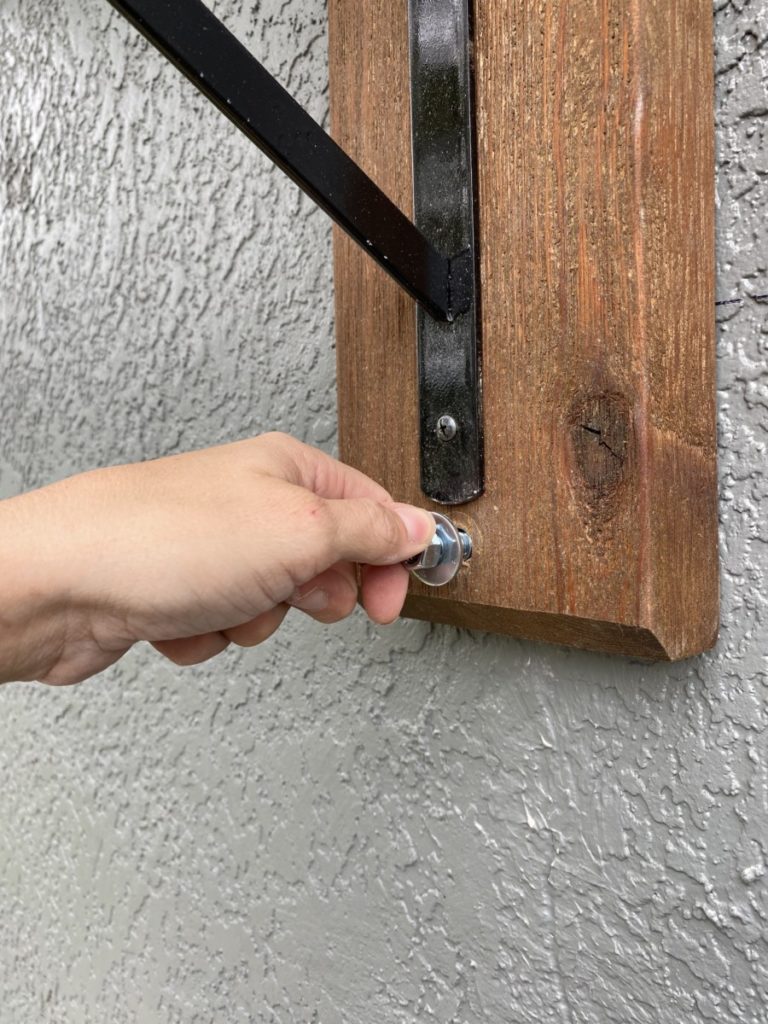
After hole is drilled into masonry, insert the anchor sleeve through the wooden bracket and into the hole drilled in the masonry.  It should be a snug fit but should slide in without the use of tools. (If necessary. use a rubber mallet to tap into place.)

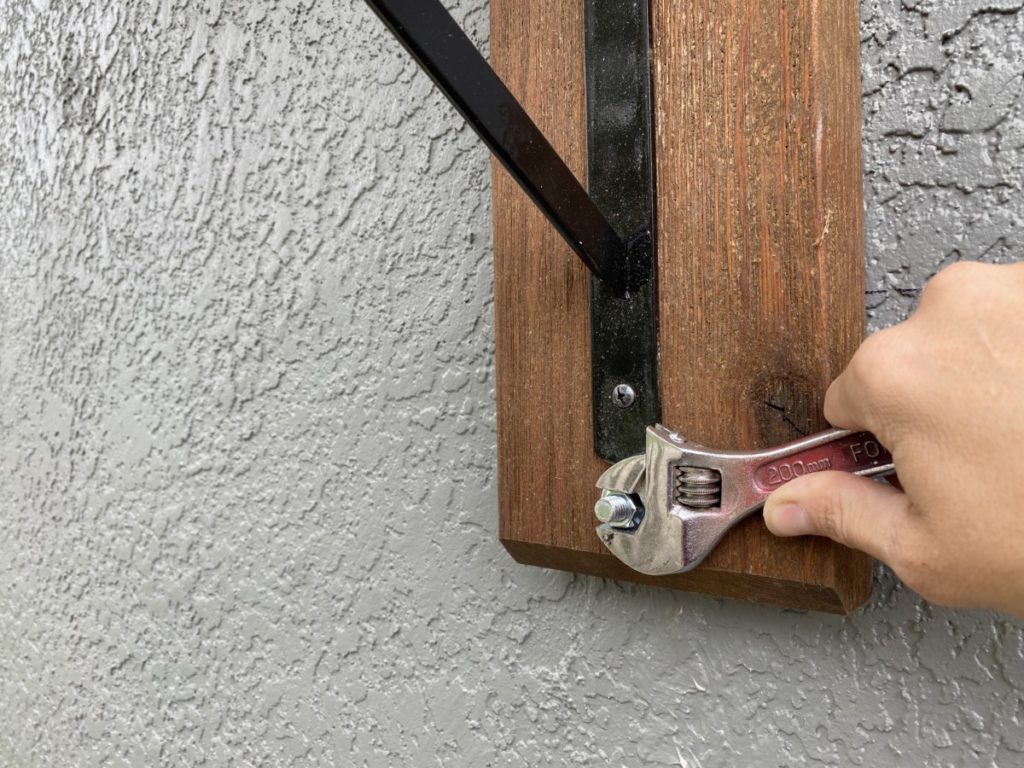
Once the anchor is in place use a wrench to tighten the anchor.  The anchor will expand as you tighten the bolt ensuring that the bracket is securely attached to the wall.   

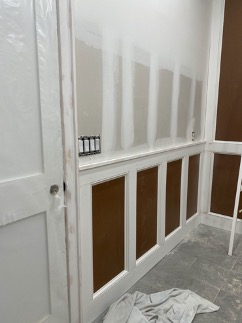
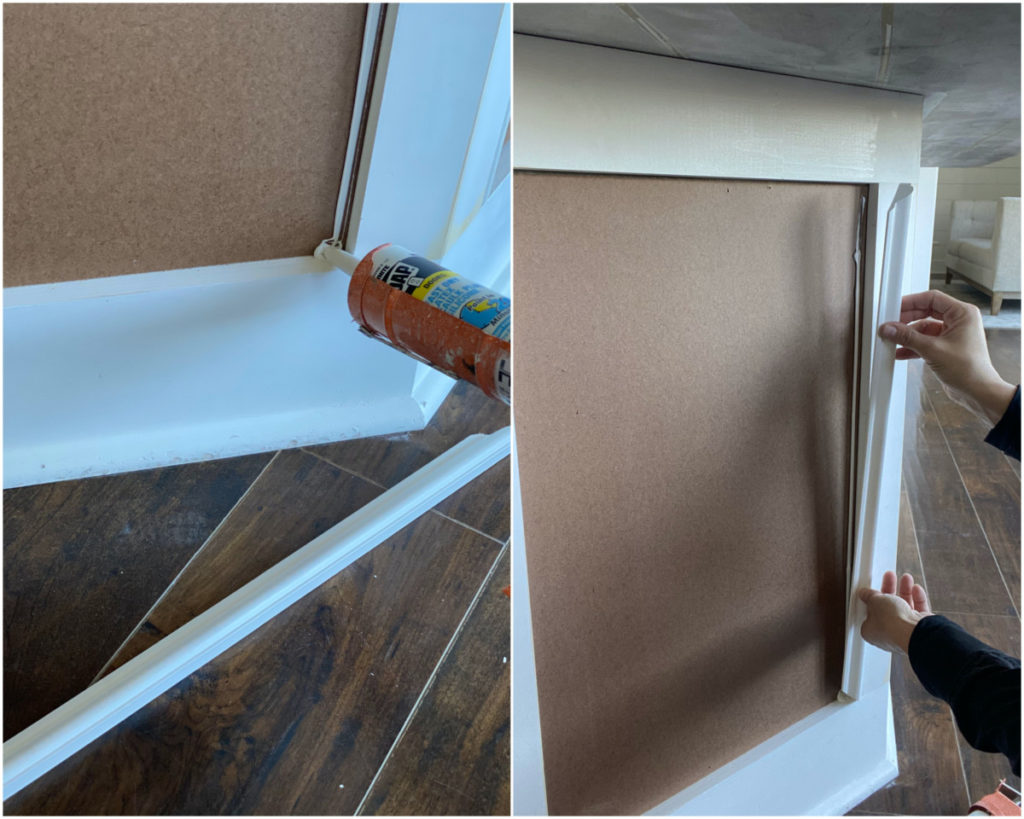
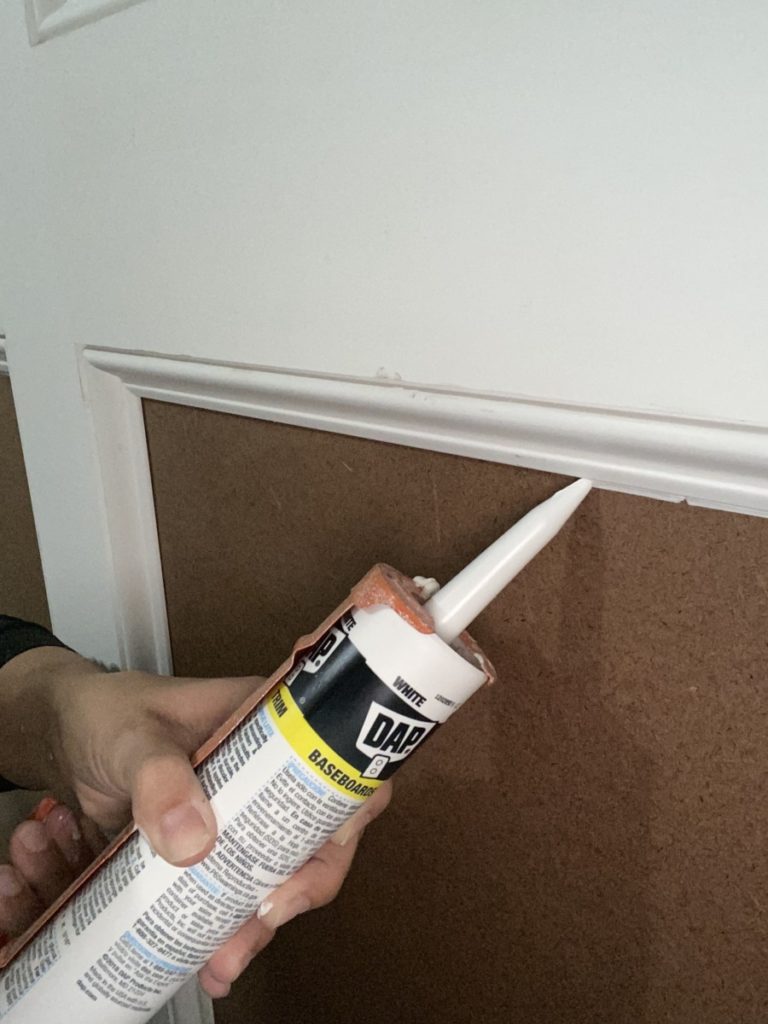
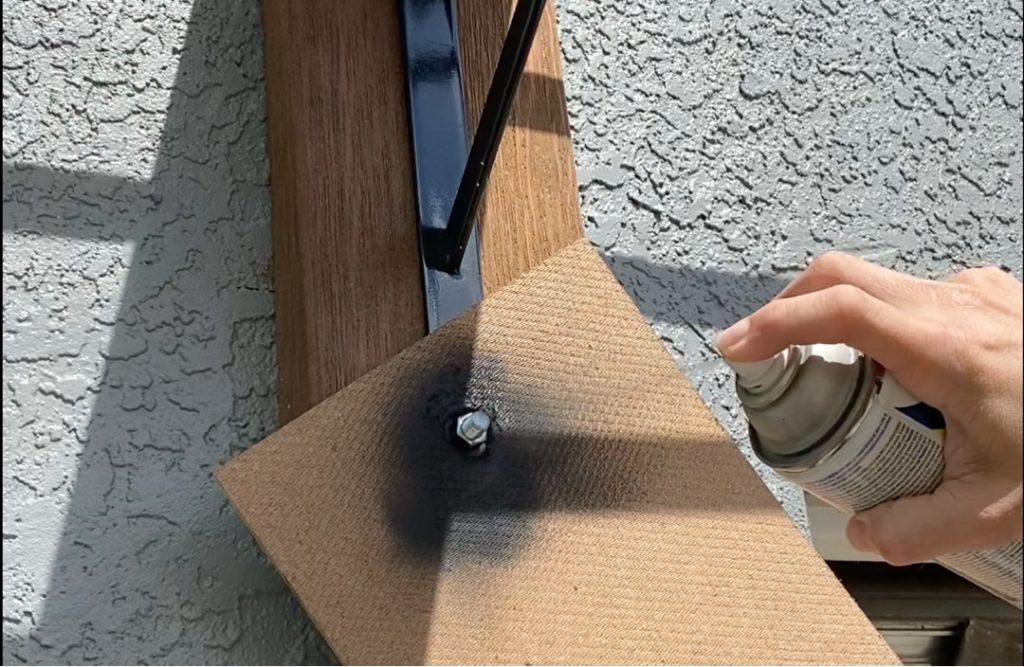
    I knew I wanted the hardware to all be black, however I also knew that painting them before tightening the bolts would scratch up the paint job. Instead, I installed all the hardware and then cut a 1” hole in a scrap piece of paneling and used it to mask off the rest of the corbel and expose the unpainted nut. I used a satin black paint and primer and it worked like a charm. 

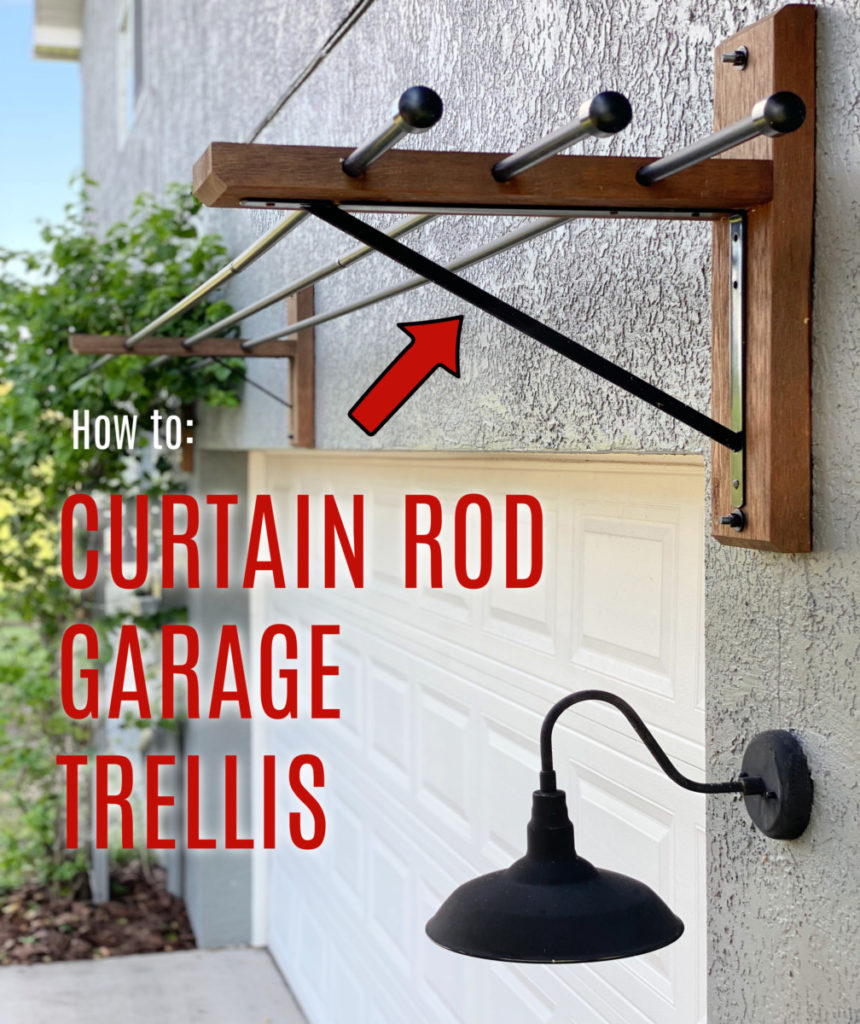
Almost done!  In order to complete the over the garage trellis we needed to connect our  corbels. To do this I used inexpensive  curtain rods from Ikea.  I found that they worked excellent and the fact that the could extend made it a great option.  

Another great option would be using ½” electrical conduit.  I liked using the curtain rods because they came with everything I needed to add finials (end caps),  but fear not I have a tutorial  how-to add finials to electrical conduit curtain rod here. 

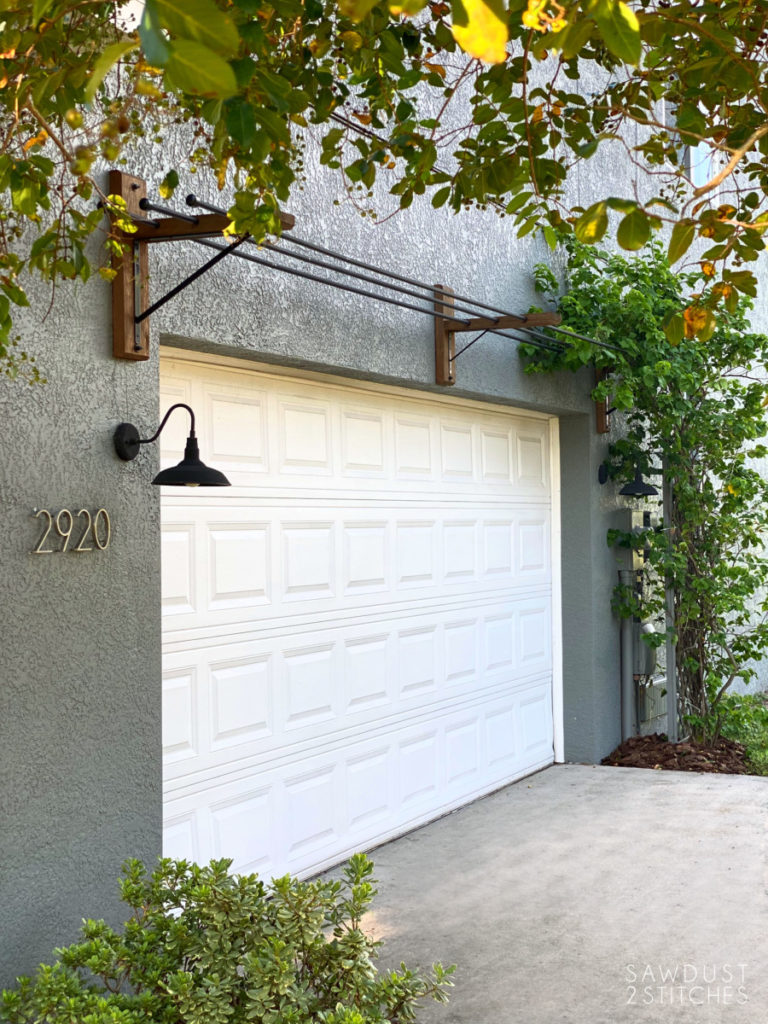
 Once all the rods are in place, add finials (if desired) and add a vining variety plant. I opted for Bougainvillea that I purchased a few month prior to building my over the garage trellis.   In order to help it reach the new corbels I did build a small trellis that would bridge distance between the corbels and the ground. 

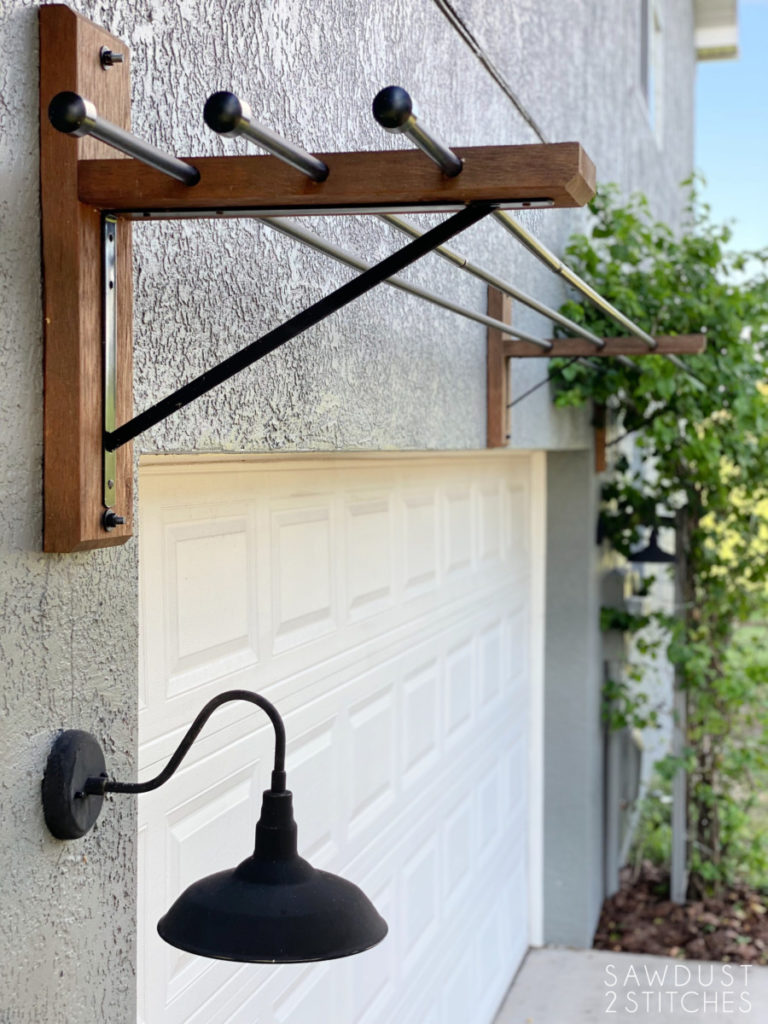
 That just about wraps up yet another homerun DIY project.  I had looked into over the garage trellis options for years and never found anything affordable.  I’d like to think that I knocked this inexpensive DIY out of the park. 

 Thanks for following along. 

Take Luck, 

Corey

Make it easy to organize your projects by Pinning it !

Convert a Cabinet into Vanity

June 15, 2021

 The Master Bathroom is complete, and it is everything I could have ever dreamed for.  The original bathroom was completely gutted, including the original corner vanity unit.   I loved sitting to do my hair and makeup,  but I really did not like the corner layout.  So I gave up my hair and makeup vanity.  It wasn’t until after it was gone that I realized how much I missed it.   However,  if you know me I am  more of the creative problem solver. So, I solved the problem!   I am excited to share the total reveal of this  cabinet that I converted into a hair and makeup vanity.

Creating a Vanity Cabinet

 Let’s  start at the beginning,  by first discussing the cabinet that would house/hide my hair and makeup vanity.  In the original bathroom layout there was a blank wall, and on the other side  of that wall was a hall linen closet.  I decided it would better suit us to have the  linen closet face into the bathroom.  So I ripped out the wall and  put together a handful of remade cabinets to create a beautiful  linen closet with a ton of character.  If you want to read more about  how I achieve this look I wrote a tutorial charing how I created office built-ins using the same technique. 

 So,  I now had a great linen closet in  my bathroom,  but that did not change the fact that I didn’t  have  bathroom vanity,   but don’t worry I still have a few tricks up my sleeve.   I you have been following along for a little  while you know I have a fixation for hidden storage.  Case and point,  my kids  desks.   2020  found us in need of a school room and I still needed an office,  so I concocted these beauties.  They are standard cabinets that I tricked out with pull-out workspaces for my kids.  I took a page out of that playbook and applied it that concept to my  linen closet that would too be my makeup and hair vanity.

After the cabinet was installed I felt that the drawer was naturally a great place to start. (If you are looking for more information on how I installed the unit into the wall I would point you toward my built-in pantry in my kitchen. )

Makeup Storage

 While pull-out workspace is a really cool concept,  I feel like I could still improve the project.  Not only did I  use the drawer as a pull-out workspace… I increased it’s storage capacity!  I present to you the  two-tier drawer.  You can get all the details on how to build this two-tier drawer here. 

Vanity Mirror

Now that the makeup storage was covered I needed to move onto a the next obvious step… a mirror. While I do not have a full written tutorial on how I accomplished this, I DO have it all documented in my Instagram Stories.

For this project I used this Mirror that I purchased on Amazon. ( Last I checked it is no longer available in White, but does have a black or gold option.)

Hot Tool Organizer

Now that I had a mirror and makeup storage I am good to go right ? NOPE, I simply can’t leave well enough alone. I decided that not only did I need a place to store my hair tools, I wanted them organized to the extreme. So I designed and built a pullout storage caddy that would safely store hot only hair tools, but heated hair tools.

You can get all the details and build plans here.

 Hair dryer and curling iron storage.

Hidden Bathroom Vanity

In conclusion, when you add a tricked out drawer, tuck-away mirror and pull-out hot tool storage I feel like I can safely say that you have the ultimate makeup and hair vanity.

DIY Hair and Makeup Vanity

Hot Tool Storage/Organization Drawer

June 4, 2021

*Plans for this Hot Tool Storage Organization Drawer are brought to in partnership with DAP. This post does contain affiliate links. *

If you have been around for a little while you are aware of my recent Master Bathroom Renovation. I love everything about the new bathroom setup, but admittedly I do miss my seated vanity area. As ugly as the layout use to be, I still missed sitting to do my hair and makeup. Well I had a crazy idea that would convert a cabinet into a seated vanity area. I already converted the drawer into extra make up storage . ( You can get all the details here.)

Next thing I needed to was to figure out my hot tool storage. I am lucky enough to have DAP as a great sponsor that allows me to create and share awesome content like these build plans for Hot Tool Storage!

Tools Suggested Materials Used
     -Safety Glasses       -DAP Weldwood Wood Glue
    – Hearing Protection       – DAP Rapid Fuse
     -Drill      –DAP Premium Wood Filler 
     -Tape Measure      -1¼” Pocket Hole Screws
     -Miter Saw      – ¾” Plywood  (Common Boards) 
     -Tablesaw      – Metal Utensil Holders
     -Pocket Hole Jig       –Electrical inset Outlet (Optional)
     –2″Hole Saw *optional      –22” Ball Bearing Drawer Slide
    – 4″ Hole saw  

If you would like access to complete build plans for this “Hot Tool Storage Drawer” are available here.

Prepping Materials

When using build plans I like to  begin by preparing all my boards according to the provided cut list.  (If you would like full build plans they are available here.)

I find that reading through the plans completely is always a huge help, especially when the project includes small pieces and specialty cuts.

Hot Tool Storage Assembly

When designing the Hot Tool Storage Drawer I found the actual assembly process to be very tricky! With small pieces and close quarters it makes using a drill and nail gun extremely difficult! That’s where my favorite DAP adhesives come into play!

Instead of trying to use a nail gun or use a drill and need to hide unsightly pocket holes DAP RapidFuse saved the day. It creates a super stron hold without using traditional metal fasteners. When using Rapid Fuse only a few dots! Rapid Fuse is very strong and forms an instant bond. I like to alternate dabs of it with DAP Weldwood.

The combination is remarkable. The RapidFuse holds instantly (within 30 SECONDS!) and the Welwood Wood Glue will cure and create a permanent continuous point of contact.

Can we say Dynamic Duo?!

Prep for Finish on Hot Tool Storage Drawer

Once the unit and base are assembled it’s time to make it pretty! I planned on painting this unit, and one thing I have noticed is this, paint makes most blemishes more noticeable. So, before I paint I use DAP Premium Wood Filler to fill any gaps, cracks or holes. It dries quickly and sands nicely that helps procure a perfect finish once painted.

Install Hot Tool Storage Drawer

This unit was designed to accommodate a 24″ deep cabinet, and I use every square inch of it! These plans utilize a 22″ full extension ball bearing drawer slide.

If you are new to installing drawer slides no worries! You can read more about my preferred method to install drawer slides in this project post.

The last thing necessary to install the unit is mounting the base in the cabinet. I try to make sure that there are at a minimum two fasteners with a strong hold to keep the unit from tipping out when the drawer slides are completely extended and the drawer is fully loaded.

*Extra*

I am ALL about the “Extra”. It says it right there in my tagline “I can’t leave well enough alone.” Its true. In true Sawdust 2 Stitches fashion I went over the top and added an outlet to the end cap of my unit. If you are interested in finding out more about how I included this is my build you can get more details in the Build Plans.

Well, there you have it, a functional, and dare I say BEAUTIFUL way to organize you hair accoutrements? A big shout out to my sponsors that help make this possible!

Two- Tier Drawer Storage

June 3, 2021

While the bathroom renovation solved a lot of problems, it did present a small hiccup. No worries I have a solution : Two-Tier Drawer Storage

If you have been following along for a little while  you are aware of our major bathroom renovation.  During this makeover we gutted the original cabinets and nixed the weird corner layout.  I hated the layout, it felt weird and congested. HOWEVER,  it did have one benefit; the original layout included a seated vanity area.

The Problem?

 Shortly after completing the bathroom I realized how much I enjoy sitting and putting on my makeup.  This was a conundrum. I had just taken out my seated vanity, but I had an idea! Lets go ahead and needlessly. complicate matters in the effort of being lazy whilst applying makeup. 🙂

There are quite a few steps to this vanity conversion process, but the first one I’m tackling is creating a work space and adding accessible storage for may makeup. In the past I have used double tier storage in my workshop organization. I decided to take a page out of that playbook and add additional/functional storage to my existing drawer. Creating two tier drawer storage is just what this space needed.

I have full build plans available here. (The drafted version is intended for a 36″ frameless base cabinet.)

The Solution

Just look at all that beautifully organized storage! There are still plans to trick out this cabinet in order to create a fully functional vanity, but this is a great start!

I have plans on using the top tier as a “workspace” for when I am doing my hair. A heat resistant pad that will remain in this top area for when I am working with hot tools. Also… I am going let you in on a secret… I will also store all the accoutrement to apply my lashes. Yes, I even DIY my own lashes. 🙂

I added some plastic organizer bins to bottom drawer, they worked great to organize all of my makeup. So far I am loving this system. First I apply my makeup and then pull out the top drawer to work on my hair.

I know I am missing a few key components like, a mirror and lighting, but don’t you worry I have that covered. You can see how I am incorporating drawer slides and turntables to make the most ingenious tuck away mirror on my Instagram stories.

Master Bathroom Makeover

April 20, 2021

 The master bathroom…  I have never been known to be a procrastinator, nor am I known to shy away from a challenge, however our master bathroom seems to be an exception to both character traits.  Our master bathroom is the last untouched room in our home. Reason being, it is a HUGE undertaking not to mention it is a big investment!   It took us nearly 5 years and the help from The Home Depot to light that fire! 

Now that it’s done, I can’t believe it took me this long to take the plunge, the end reward is WELL worth the effort. 

While I am so excited to show the finally reveal allow me to take you through a brief review of the steps we took in order to achieve our dream bathroom. 

  Our master bathroom actually did have some great qualities.  I cannot complain about the square footage or the high ceilings.  They definitely were huge advantages when designing the space.  However, that is the extent of the “pros” (in my opinion).  While there was plenty of space, the layout was not great, and it actually left some square footage on the table when they installed a corner unit vanity.  The shower and tub were in good locations, but the wall dividing the shower created a very cave like feeling and closed off the room.  While the tub was “okay”, I have always dreamed of a freestanding tub. With the many changes I wanted to make we decided the best approach was to gut the bathroom and start from the ground up.  So that is just what we did! 

Demo

 I think as a general consensus taking the first step in a major project is always the hardest.  You pass that point of no return and you are committed.  That can be a seriously scary thing.  Whether your doubts are in your abilities or possibly in your tool supply… to that I say: “Where there is a will there is a way.”

There are plenty of resources out there to help supplement your “know-how”.  There are so many professional resources that walk you through each step! Home Depot actually has a ton of online “How-to-Guides” by the pro’s!  You can check out their library of resources here. 

But that brings us to the more tangible limitations…tools.  AGAIN, The Home Depot has got you covered! Obviously, The Home Depot is your one -stop-shop for all this tools, but what if you are aren’t ready to invest in some of the larger tools, or possibly don’t have the space to store larger tools?   The Home Depot has the answer.  Did you know that you can RENT tools in-store?

  You can check out all the amazing options here: The Home Depot Tool Rental

 If this picture of all those readily available tools doesn’t make your heart happy, then you might be denying your inner DIY loving heart.  Just saying. 

 The demo part of this process definitely required bringing in some scarcely used tools which would be a great opportunity to rent instead of buy.  Just a thought. 

Drywall Ceiling

After the demo was complete and we were down to ground zero, it was time to start rebuilding.  For us the most logical place to start was by repairing all the walls.  

We wanted to start with a fresh, blank canvas. So, we repaired and, in some cases, replaced the dry wall that was removed during the demo process.  It was at this point that we also added Durarock to the shower. 

It was amazing how much more opened the room felt once we had the dry wall replaced and skim coated all the surfaces to remove the texture.

At this point we actually. Deviated away from our original plan.  The original plan did not include a planked ceiling, but the heart wants what the heart wants. We postponed our timeline and tackled adding nickel gap board to the ceiling. 

It was a fairly quick project.  The majority of the time was actually allotted to installing the fir stripping that we attach to the rafters that we would then attach our nickel gap boards to (running perpendicularly). 

We used these Nickel Gap Shiplap Boardand I am very pleased with their quality, and they look beautiful with a paint finish. 

Shower and Floor Prep

In the past all of my tile jobs have been limited to backsplashes and floors.  It was always in a decorative capacity.  When it came to tiling for practicality it was a whole new beast. After watching many online tutorials we were able to figure out grading the shower pan and waterproofing the walls.

Once all the walls were prepped it was time to get the tile.  Again, if you are new to DIY something like selecting tile and calculating how much you will need can be overwhelming.  The Home Depot is here to help.  Did you know that they have project calculators?  The “Project Calculator” is an awesome little feature that allows you to plug in your space dimensions, the type and size of the material you are using (in this case tile) and the feature will calculate home much tile you will need for your specific project.  The project calculator is not limited to just tile,  it has options for calculating materials for a plethora of projects. 

After agonizing over my tile selections, I finally was able to select my colors. (There were seriously so many great options, I had a hard time narrowing it down!) 

Ultimately, I went with Bianco Dolomite or the shower wall tile, Bianco Dolomite Hexagon for the shower floor and FLOOR TILE.

  If you have been around awhile,  you are well aware that I very rarely  ever hire out  help especially if the project is in my wheelhouse.  Well  this time my sanity won out. We ended up hiring help with the tiling portion of this project. I pride myself in doing everything myself, but this is one decision I do not regret!  If you are looking for more information on tiling make sure you check out The Home Depot’s “How-To Tile a Shower”  for more information. 

Doors

Our home came with very basic builder grade doors, they weren’t bad but they weren’t great. I believe at this point in the project I was at the “If you give a mouse a cookie” phase. I had already gutted the entire bathroom and created my dream bathroom, why stop short? I went ALL in, and man am I glad I did. The doors actually became a focal point and carry the color up the wall. Oddly enough the doors are one of my favorite parts of the room.

I selected a simple Two Panel Door that was beautiful! (No fake wood grain on this beauty!) I also realized how much a door knob could add to the look of a door! I found these Schlage Aged Bronze Door Knob.

Install Storage

The bathroom was really coming together at this point, but I still had a few tricks up my sleeve.  While the bathroom was quite large it was desperately lacking storage space.  Luckily for me, the bathroom wall also shared a wall with our hall linen closet. So, I pulled a switcha–roo. I opened up the back side of the cabinet (that shared a wall with the bathroom) and closed off the original access (removing the door and adding drywall etc.)  

 By opening up this space to the bathroom instead of the hall it gave me room to add a linen closet and TONS of character. 

If you have been following along you KNOW I have a love for built ins. I recently built a  Custom Pantry that I created specifically to fit in a empty wall cavity.  Shortly before that I created a custom Built-In Storage Armoire using two pre-made pantry cabinets. Well for the bathroom linen closet I took a page out of both tutorials and combined both ideas.  I used several different pre-made cabinets to create one MEGA linen 

Linen Closet 

  • Hampton Bay Pantry Cabinets
  • Hampton Bay 12” Upper Cabinet
  • Liberty Hardware 12” Pulls

Install Trim Work

 We are in the home stretch now! As much as I wanted to slap some paint on this sucker and call it good… I knew I wanted the classic elegance of wainscoting. 

 I don’t know about you but something as simple as trim work can totally elevate the space! 

 If you want to add trim to your space, you can check out either of these two tutorials. 

  • Kitchen Island Makeover
  • Guest Bedroom Accent Wall

I am always amazed at how much trim can add to any space.  Here are the materials I prefer to use when trimming a room. 

Trim Work Materials: 

  • Nickel Gap Shiplap Board (Ceiling)
  • 1”x 3” Finger Joint Board  (Door Casing) 
  • 1”x 4” Finger Joint Board  (Vertical and Horizontal Wainscoting) 
  • 1” x 6” Finger Joint Board (Baseboards)
  • 1”x 8” Finger Joint Board (Interior Window Trim) 
  • Hardboard Panel MDF (Back of Wainscoting) 
  • 8’  Base Cap Molding  (Interior Wainscoting)
  • Two Panel Door

Prep and Paint

 When it comes to painting, I am always torn on the painting method I want to take.   I am normally really anxious to get going, so rolling really calls to me.  However, I am always so much happier with the final product when I use a sprayer.  I feel like both methods take about the same amount of time; the difference is when spraying you spend the majority of that time prepping rather than painting. 

I wasn’t going to cut corners on this bathroom, so I rolled up my sleeves and pulled out the painter’s tape, painters’ plastic, and paper.  I needed to cover anything that would not be painted. 

Once everything was prepped, I got to work spraying.  When spraying I use the Fuji Spray Semi-Pro Sprayer. OR, if you aren’t ready to invest in a sprayer you can always rent one  from The Home Depot.

  • Wall Color- Snowbound
  • Trim/Wainscoting- Agreeable Gray 

Install Fixtures

Vanity Area

   This is the best part of the project, when you start to bring in all the major pieces and you start to really see the space come together.  When selecting a vanity, it was important to me to have a nice countertop and have plenty of storage space.   I went back and forth on quite a few different colored options but decided on something simple. If I ever want to change the look of the bathroom it is much easier to do if I have a blank canvas. Plus, the linen closet/armoire was going to be a nice warm wood tone, and I didn’t want to have to compete with it (color wise). 

 I selected the Home Decorators Collection Double Vanity and I love it. 

 I paired the vanity with a gorgeous 48” Glass Warehouse Brass Vanity Mirror/. If you have been around a little while you might recognize it from my Powder Bathroom Makeover. (I used the 36” version in the powder room.) I found that Delta faucets in their “Champagne” color collections paired best with my color palette. 

The finishing touch for this space was the Home Decorator’s Collection Mini Pendant.  They were the perfect size, they hung at the right height, and you couldn’t beat their price, however I needed something in brass and black.  No fear, this is a DIY blog, is it not? If you have never spray painted a light fixture, no worries I have got you covered.  Quite literally one of my very first blog posts covered this very topic! 

Vanity Area Products:

  • Glass Warehouse Vanity Mirrors
  • Home Decorators Double Vanity
  • Delta Trisnic Widespread Mount
  • Vanity Hardware (5 1/8” pulls)
  • Vanity Hardware (Knobs)
  • Vanity Light Fixture Pendant (I spray painted mine.)

Tub Area

Which brings us to the tub area.  Words do not quite describe how excited I was for this particular area.  I have never found soaking in a tub very relaxing, probably because I would sit and stare at my surroundings and think of all the potential the space had.  NOW the space has met its potential and I can sit and soak it in… in my freestanding tub with a brass faucet. 🙂 

 When selecting my tub it was more than just aesthetics I had to consider. There were logistics to be considered, namely the size!  My space allotted for the tub was not huge, so I needed to find a tub to fit those dimensions.  After looking at a ton of options I landed on the Vanity Art Bordeux Tub.   Naturally with an elegant looking freestanding tub, I needed to freestanding tub filler to match.  I found that the Jacuzzi Contento Tub Filler was the best bang for my buck and a very close match to the tone of brass I had throughout the rest of the bathroom.

 I finished off the area with the Progress Lighting Linen Shade Chandelier.  If it looks familiar, that’s probably because it is! I loved this fixture so much in my Office Makeover that I decided to use it in the bathroom as well. 

Tub Area Products: 

  •  Freestanding Tub
  • Jacuzzi Freestanding Tub Filler
  • Linen Shade 6-Light Fixture

Shower Area

Ready to wrap this project up? ME TOO!  The last area I needed to tackle was the shower.  Long before we ever started the bathroom makeover, we dreamed of having two shower heads in a bigger shower.  Well, try as we might we just couldn’t configure any way to make it work. We exhausted a lot of options but ultimately decided it wasn’t in the cards. 

But wait, I might not have been able to swing two full size shower heads, but a handheld option might be just the ticket! PLUS, I am really digging the look of the sliding bar in the shower, so everything works out. I have two shower heads per se, and it looks like a million bucks. 

 I used the Delta Stryke Shower Head and Valve(s) and the Delta Slide Bar Hand Shower. 

As I was doing my research for glass shower enclosures, I realized I had to have my class custom fit. After doing a little inquiring I found that some Home Depot locations do work with specialist that can custom cut glass.  Check with your local Home Depot to see if that location offers those services. 

Shower Area Products: 

  • Delta Sliding Bar w/ Handheld Sprayer
  • Delta Elbow for Handheld Sprayer 

In Review

Are you ready to see how this whole space came together?

Drumroll please…I give you my Master Bathroom Makeover!

I will admit that a bathroom remodel is not for the faint of heart, but IT IS doable!  I personally have put off this project for years because of the intimidation factor. I didn’t exactly know what I was doing. However, I did not let that stop me from trying!

 I looked to other colleagues for advice, scrolled through all the professional tutorials The Home Depotwebsite had to offer, and called in reinforcements when I needed it. Sometimes extra help comes in the forms of professionals and sometimes it just means more tools than what you have access too.  If that is one of your hurdles, cross it off of your excuse list.  The Home Depot is a great resource for tool rental, professional tutorials, AND they can even help with your custom projects with help of their material calculators. 

No matter the skillset or the toolbox you can improve your home if you have will to make it happen! 

Sources: 

Tub Area Products:

  •  Freestanding Tub
  • Jacuzzi Freestanding Tub Filler
  • Linen Shade 6-Light Fixture

Vanity Area Products:

  • Glass Warehouse Vanity Mirrors
  • Home Decorators Double Vanity
  • Delta Trisnic Widespread Mount
  • Vanity Hardware (5 1/8” pulls)
  • Vanity Hardware (Knobs)
  • Vanity Light Fixture Pendant (I spray painted mine.)

Shower Area Products: 

  • Delta Sliding Bar w/ Handheld Sprayer
  • Delta Elbow for Handheld Sprayer 

Linen Closet Products:

  • Hampton Bay Pantry Cabinets
  • Liberty Hardware 12” Pulls

Trim Work Products: 

  • Nickel Gap Shiplap Board (Ceiling)
  • 1”x 3” Finger Joint Board
  • 1”x 4” Finger Joint Board
  • 1” x 6” Finger Joint Board
  • 1”x 8” Finger Joint Board
  • Hardboard Panel MDF
  • 8’  Base Cap Molding
  • Two Panel Door
  • Schlage Aged Bronze Door Knob

Tile Products: 

  • Bianco Dolomite Tile (Shower Wall) 
  • Bianco Dolomite Hexagon (Shower Floor)
  • FLOORING

Board and Batten Island Makeover

March 15, 2021

Kitchen Island Makeover Image: Ashley Navarro

As we have slowly transitioned our builder grade home into a custom masterpiece there has been one kitchen project that has been left on the table. The island. I think it stayed on the bottom of the “to-do que” because I felt like it wasn’t really visible. It was an afterthought. Boy was I wrong, after completing this project I can testify that something small and “less visible” can make a HUGE impact on the aesthetics of a space. Today I am going to show you how I took a builder grade drywall island into a designer asset.

Tools Suggested: 

  • Utility Knife 
  • Pry Bar/Flat Bar
  • Hammer 
  • Tape Measure 
  • Tablesaw / Circular Saw 
  • 18g or 16g nailer
  • 1/4″  drill bit 
  • Drill 
  • Jigsaw
  • builders square
  • Miter Saw 
  • Level

Materials Used:

  •  DAP DynaGrip Adhesive  
  • 1 1/2″ finish nails
  • 1/8″ MDF Panels
  • 1×6″ Primed Finger Boards 
  • 1×4″  Primed Finger Boards 
  • PVC Base Cap Moulding 
  • DAP AlexPlus Paintable Caulk
  • DAP Plastic Wood Filler or Spackling
  • Paintable Caulk 
  • 2 1/2″ Angled Paint Brush
  • 6″ Foam Roller(s)
  • Paint Tray(s)

Cut Panels

After the planning phase is complete it is time to apply the boards (1/8″ MDF panels).  In many cases you may  choose to forgo this step.  I have seen plenty of DIY bloggers attach their batten directly on top of drywall. I choose to take this extra step because of the texture of my drywall. My home has VERY HEAVY  knock-down texture.  My vision for this accent wall did not include a “HEAVY knock-down texture”.

Adhere Panels

Before attaching the panels to the bare wall, liberally apply. DAP DynaGrip adhesive to the back of each panel. This adhesive gives instant adhesion but still allows for repositioning. It basically. is a second set of hands when installing panelling, and it is awesome!

For additional security I use a 16g or 18g nailer to essentially clamp my board in place while the DynaGrip cures .When  securing the panel to the wall I would advise only nailing along the edges. If you nail along the edges all the nail holes will be hidden by  battens/trim. 

Cut Out Outlets

The process of installing paneling is fairly simple. The most complicated part of this step is accommodating outlets. Before you start breathing heavily into a paper bag,  grab your tape measure,  you are going to need it!  Honestly, this is not hard at all. Simply take the measurements of where the outlet would land on your paneling, and then cut it out. Use a tape measure to transfer where the intended outlet will be. Then using a jigsaw cut a space for the outlet.

Prep Battens

OK, here is where this project gets a little interesting. As I stated before, my plan is to use my existing baseboards… well that creates a small problem, actually about 1/8th” problem. As you can see demonstrated in the first image below. When I put down my MDF paneling it raised my work surface 1/8th”. Because the paneling does not run below my baseboards my batten boards will be 1/8th” higher profile.

This can be circumnavigated by removing your baseboards and applying paneling first. However, I have a plan that would work easier for me…The answer? My planer. I just sent the battens through my planer and shaved an 1/8th off my 1×3 boards order to make my battens and baseboards sit at the right elevation.

Cut Battens

 Take the time to measure each board individually. (Odds are that each opening has some slight discrepancies.) Truth be told, I like to cut to fit, meaning I mark my board in place and then cut.

Cut Interior Trim Pieces

After completing a few trim projects in my day I have learned a few tricks and this is one that I love. I plan to add interior trim to the battens. Instead of cutting all the battens, installing, and then taking the interior measurements to cut the trim pieces, I work smarter not harder. After I cut the batten (& make sure it fits properly) I then cut the trim pieces that will (eventually) be installed on either side of the batten. I will not install these trim pieces until later on, so I make sure to label each piece for quick reference later on. Smart right !?

Adhere Battens

Back to the battens, again I enlisted the help of DynaGrip to install my battens. As I installed each vertical batten I ensured that they were straight by enlisting the use of a level. Once they were correctly positioned (using my previously drafted plan) and level, I nailed them in place using 2″ finish nails.

Corners

My island is not a square or a rectangle and it has a few angles thrown in there. In order to accommodate these angles I needed to use a little bit of middle school geometry. My island has two 45 degree angles, in order to create two boards that meet on a 45 degree angle I needed to divide that in half… which is 22.5. I set my table saw to a 22.5 degree angle and ripped my vertical batten with a 22.5 degree cut on one side. Repeat this step twice for each angle. ( You will need two boards per joint.)

End Posts

The end posts on my island were probably the trickiest part. My “posts” extend out past my actual cabinets, so I have a weird drywall post. I resolved that the easiest solution would be to wrap the posts in 3/4″ boards so that they would be uniform with my battens. The first thing I needed to do was remove the existing trim .

Much like I did for the angles on my island, I would need to rip (cut the length of) my board with angles on the edges in order to create a mitered corner. See as I am wrapping a rectangle it was comprised of all 90 degree angles… so when creating a joint we know that each board needs to be cut at 45 degree angles.

Again, I ran my board through the tables saw with my first 45 degree cut, I then measured and marked how wide my board needed to be. The goal is to have the inside measurement ( short end to short end, not outside angle to outside angle) be the same width as your post. To create this board I ended up using a 1″x8″ primed board. The length will be determined by the overall height of the island. (Floor to the bottom of the countertop.)

The last step for wrapping the end posts is the sides of the end cap. I wanted to keep the dimensions/style as the rest of my island so I used 1×3″ boards ripped with a 45 degree angle on one edge in order to create a mitered 90 degree angle on both sides.

Attach both end cap and side battens in the same manner the previous battens were installed.

Make Repairs

Typically I wait until all my trim work is complete before patching holes. This project is a little different. You see the trim I plan on adding to the interior has a higher profile than my battens. I wanted to fill the board joints and then use a sneer to create a perfectly flush finish. With the intended trim it would make suing the sander impossible (without damaging and flattening the trim in the process.) SO… that is what I am using a sparkle to fill my joints before the trim work is complete.

Add Interior Trim

The process for installing the interior trim is very similar to the previous steps. Measure, cut install. The only major difference in this step is that we will be cutting our trim pieces on a 45 degree angle.  By doing so it will create beautiful mitered corners.

I am using a base cap PVC molding. I like using PVC molding. It is easy to work with, flexible, paintable and affordable. When cutting my trim I err on the long instead of the short side. If it is just a “huh” to long it seems to pop into place and stays snuggly I’m place. That is always my goal with trim. After the initial dry fit I apply caulk to the back of the trim piece and re-install it.

While I did not need to use a nailer to secure them, you can! If you do need to use a nailer take a few minutes to run through and fill any  nails holes of gaps with DAP wood filler or DAP spackle.  (Before painting, you will want to  sand off the excess filler with a sanding block. The filler will need to be completely dry before attempting to sand.  So while waiting for the filler to dry we will move on to the next step.

  Last thing needed is a little bit of caulk. In order to achieve a gorgeous end product we need to add a small bead of caulk to the interior of the edge cap moulding.  This will hide any unsightly gaps. I hands down prefer using DAP Alex Plus caulk. It is easy to work with and dries in 20 minutes allowing me to move on the next step without delay.

Prime, Prep and Paint

Are you guys excited? I am excited! Before we start painting we are going to take one very important step to ensure our end product turns out beautiful and stays looking that way!   While MDF board is a great cost effective product, it can be a little fickle. It has a very smooth and shiny surface, both of which are not ideal for painting… this is where a good primer will be your best friend. It is important that you prime in order to achieve good adhesion of your top coat! 

If you want more tips and trips for priming and painting board and battens check out my tutorial here: “Moody Board and Batten Room”

Color Selection:

While I was extremely antsy to apply the top coat I did do a a few test paint swatches. On the far left is “Dorian Gray” by Sherwin Williams, the far right is “Mega Greige” by Sherwin Williams. In the middle is their love child. ( I mixed the two colors 50/50.) Ultimately I selected “Dorian Gray” by Sherwin Williams and I am not upset about it!

Kitchen Island Makeover Image: Ashley Navarro

If you want to see more about the journey this kitchen has been on, you can get more details here. 

Source List: 

  • Wall Color- “Repose Gray” by Sherwin Williams 
  • Island Color- “Dorian Gray” by Sherwin Williams
  • Pantry Cabinet
  • Light Pendants
  • Bar Stools- Facebook Market Place Makeover 
  •  
  • previous
  • Page 1
  • Page 2
  • Page 3
  • Page 4
  • Page 5
  • Page 6
  • Interim pages omitted …
  • Page 47
  • next

Primary Sidebar

  • Facebook
  • Instagram
  • Pinterest
  • Twitter
  • YouTube
IMG_9167 (1).jpg fd
DIY & Design

Meet Corey

Hi everyone, my name is Corey, and I have a problem. I can’t leave well enough alone… The best therapy usually involves a variety of power tools. So, in the few “spare” moments I am not entertaining my two beautiful, rambunctious, boys, I can typically be found hunched over a sewing machine and/or covered in sawdust. All in the efforts to create a perfect balance of aesthetics and practicality in our home.
read more

Join our mailing list!

DIY & design ideas - right in your inbox!

Featured

Stair Tread Makeover

Categories

  • 70's Ranch Home
  • Around the House
  • Build Plans
  • Crafts
  • Current Home
  • Decor Makeovers
  • Dresser
  • Exterior
  • Fall
  • First Home
  • Furniture Makeover
  • Hidden Compartment
  • Kitchen
  • Lighting
  • Makovers
  • Master Closet
  • Organization
  • R.V.
  • Room Makeovers
  • Seasonal
  • Seating
  • Sewing
  • Shelving
  • Small Builds
  • Smart Home
  • Spring
  • Summer
  • Tables
  • Tablescape
  • Tutorials
  • Uncategorized
  • Wall Art
  • Wall Decor
  • Winter
  • Workshop

Footer

Contact Me: Corey@Sawdust2Stitches.com

Latest ‘Grams

Follow on Instagram
2020 © Your Blog Name
theme by soleilflare
Enter your name and email and get the weekly newsletter... it's FREE!
Your information will *never* be shared or sold to a 3rd party.