
If you aren’t a stranger around here, you are probably already up to speed on the recent office renovations. But if you are new here, might I suggest checking out phase one of this room makeover.
Brief Recap: I had been planning on an office makeover for some time. However plans changed. I was getting two new office mates! (My 11 and 9 year old would be joining me at home for school.) With the new developments I found myself in need of plenty of functional yet beautiful storage. I wanted to maximize every square inch of the office and thus this project was dreamed up, enjoy!
Tools Suggested:
- Drill
- Clamp
- Tape Measure
- Table Saw
- Pocket Hole Jig
- Hardware Jig
- Paint Roller/Brush/Sprayer
- Sanding Sponge
Materials Used:
- (x2) Pantry Cabinets
- (x6) Brass Hardware
- (x1) 3/4″ Plywood
- (x2) 1×2″ Common Board
- (x1) 1×6″ Common Board
- Nickel Gap Boards
- 1 1/4″ Pocket Hole Screws
- Any additional trim boards to math existing molding and baseboards.
- Paint or stain of choice. (Pictured: Sherwin Williams Repose Gray 150%)
Secure Cabinets Together
Again, if you have been following the office makeover you are probably aware that I have been using pre-made cabinets. As I was brainstorming additional office storage I found myself perusing pre-made cabinet options and found a winner! I found pantry cabinets in-stock at my local Home Depot! #winning
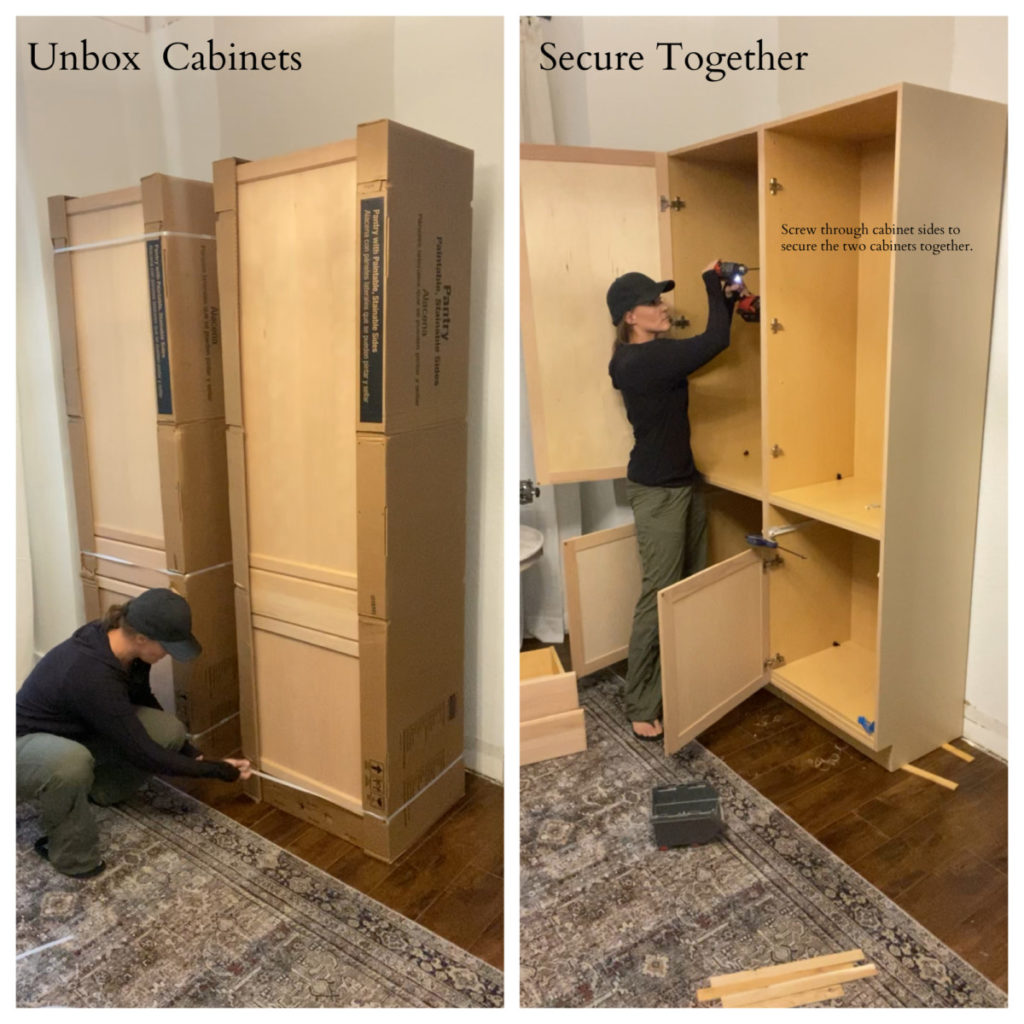
First things first. Unbox the cabinets intended to create a built-in. The cabinets will need to be secured together so that they are essentially one unit. In order two align them properly, I used clamps to hold the two cabinets together while I secured them together.
I recommend securing the two units together on the interior sides of the cabinets. I secured them at 8 different points, using a 1 1/4″ wood screw.
After the two units are essentially one it will need to be leveled and secured to the wall. Most homes are level, mine is not. Ha, I needed to use several shims to make my cabinet level. Once the unit is level it can be secured to the wall. (I will hide the gap when adding trim.)
Mark stud placement and drive a 3″ screw through the interior back of your cabinet and into the stud behind it. Repeat this step a minimum of 4 times per unit.
Change Door Orientation
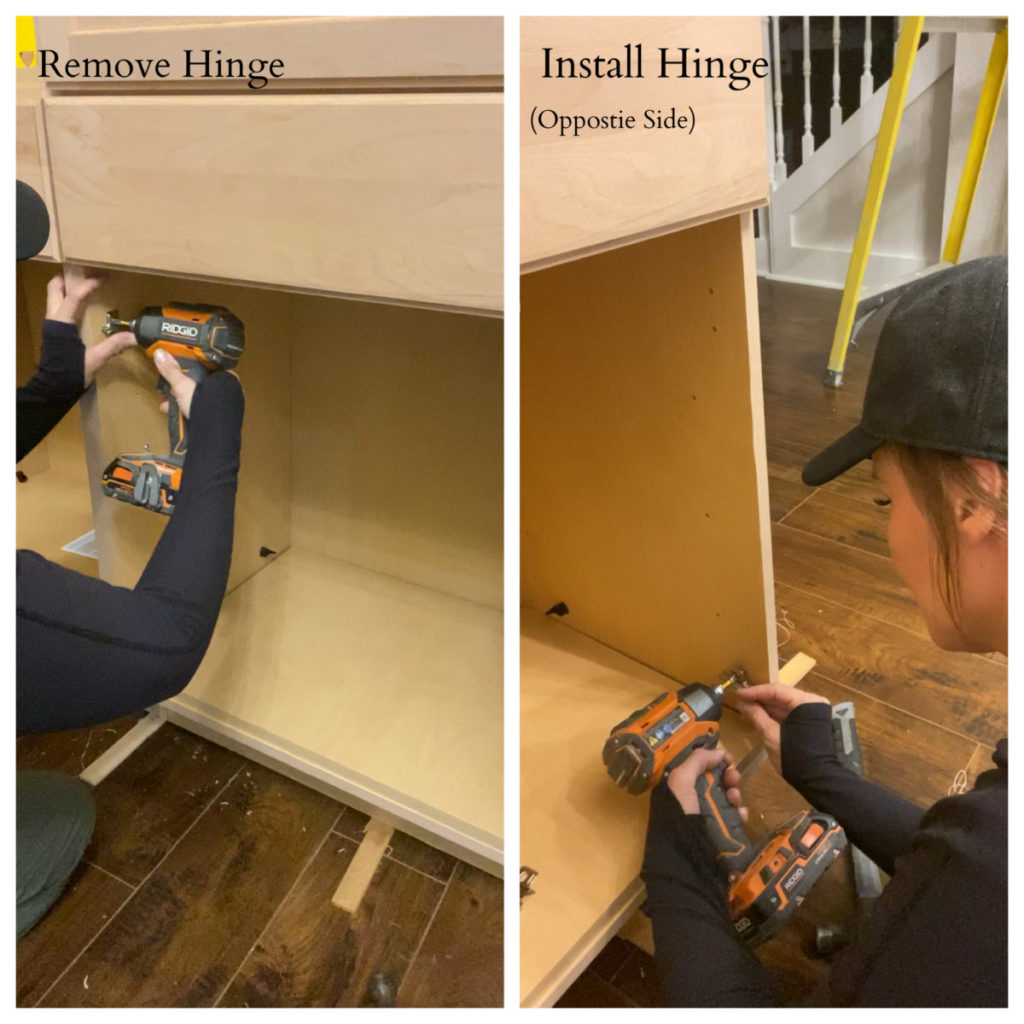
Most pre-made cabinets will have doors that swing out in the same direction. I wanted my cabinet doors to both swing out as if it were an armoire. In order to achieve this look, I needed to change the orientation of one of the doors. SOME cabinet companies anticipate this and add pre-drilled holes to accommodate a quick switch.
Others do not, in which case you will need to transfer the measurements to the blank side and reinstall the hinges. I did this for both top and bottom swing out doors.
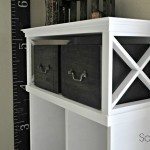
Build Upper Unit Carcass
Now we are to the fun part, building! Before you dismiss this project because of its perceived skill level, take a beat and hear me out. It’s just a box you guys! Just a box. In order to get the correct sizing you just need to follow some formulas.
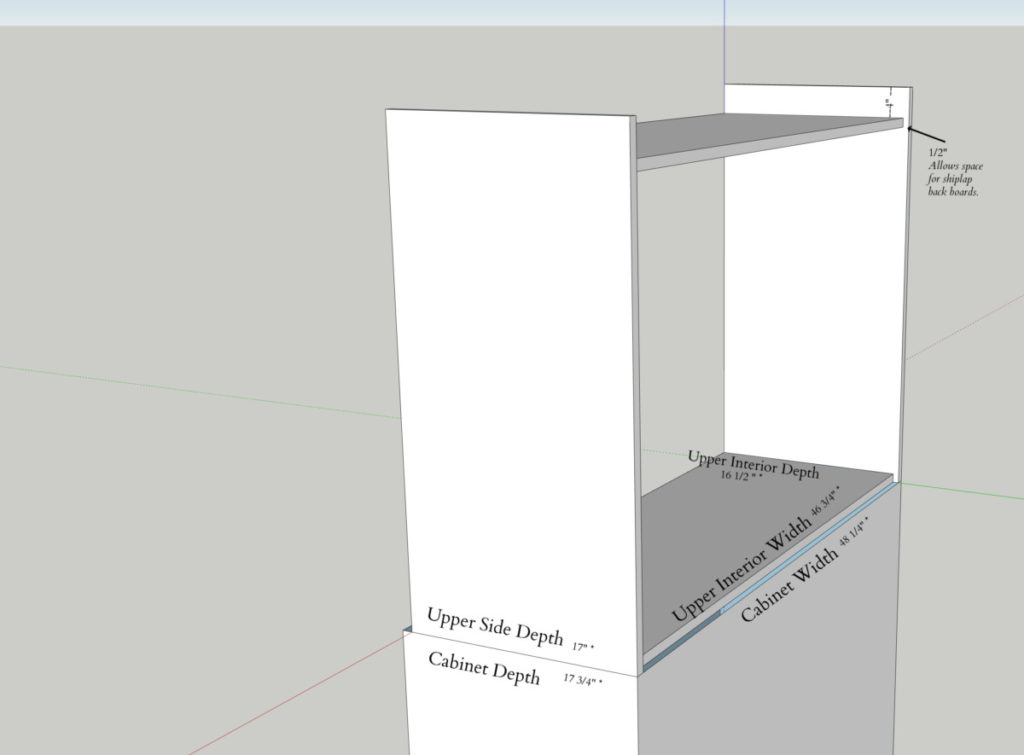
WIDTH – Width of the installed cabinet – 1 1/2″= “Upper Interior Width”
DEPTH- Depth of installed cabinet – 3/4″ – 1/2″ = “Upper Side Depth
HEIGHT– This will vary dependent on your ceiling height. Mine are 10′ ceilings. Measure from the top of the already installed cabinets, to the ceiling, then subtract 1.5″. This will be the height dimension.
Upper Unit Sides (x2) = height x width
Upper Unit Top and Bottom (x2) = width x depth (If additional shelves are desired cut any additional boards to the same above dimension.)
Secure the upper interior boards to both side boards using pocket holes and pocket hole screws. The top interior board will sit 4″ from the top of the side boards. This will be hidden by a trim piece. If you prefer to just have a free standing unit without trim, then disregard the 4″ drop and install flush with the ends of the side boards.
Shelves
SHELVES*- If a shelf is desired it can be added now. My preferred method is to use a pocket hole jig and drill pocket holes along the long front edge and both ends. (If the shelf is above eye level, I use pocket holes on the top of the board, if it is below eye level I drill pocket holes on the bottom of the board.) In this case I drilled pocket holes on the top of the shelf board and then secured a 1×2″ common board cut to the same length. This will reinforce the shelf and prevent from sagging. Using the pocket holes drilled on both ends secure to the interior of the cabinet carcass. The placement is personal preference. ( You can always make this and adjustable shelf if preferred.)
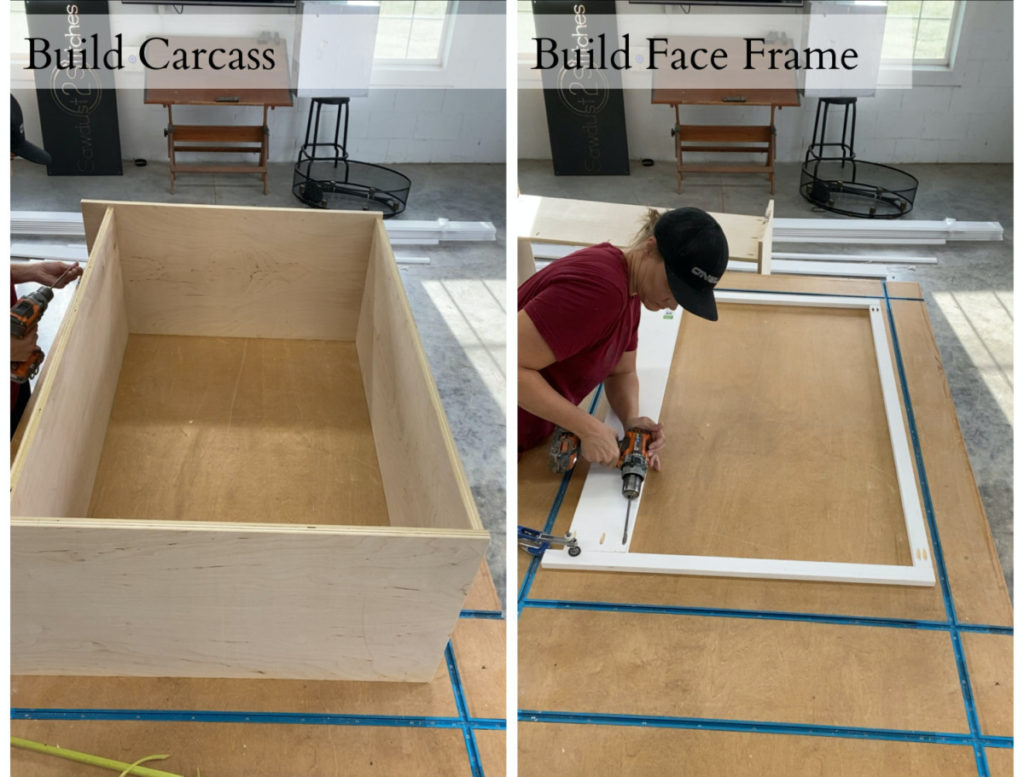
Construct Face Frame
After the box is assembled, the carcass will need a face frame. The face frame is comprised of 1×2″ and 1×6″ common boards. These four boards can either be attached directly to the cabinet using wood glue and a finish nailer, or you can use a pocket hole jig and secure them together on the back of both ends of the “rails”. ( See below image as a reference.)

Rail Length = Width of the base cabinet – 3″
Stile Height = This will vary dependent on your ceiling height. Use the same measurement that was used when cutting the “Upper Cabinet Sides”
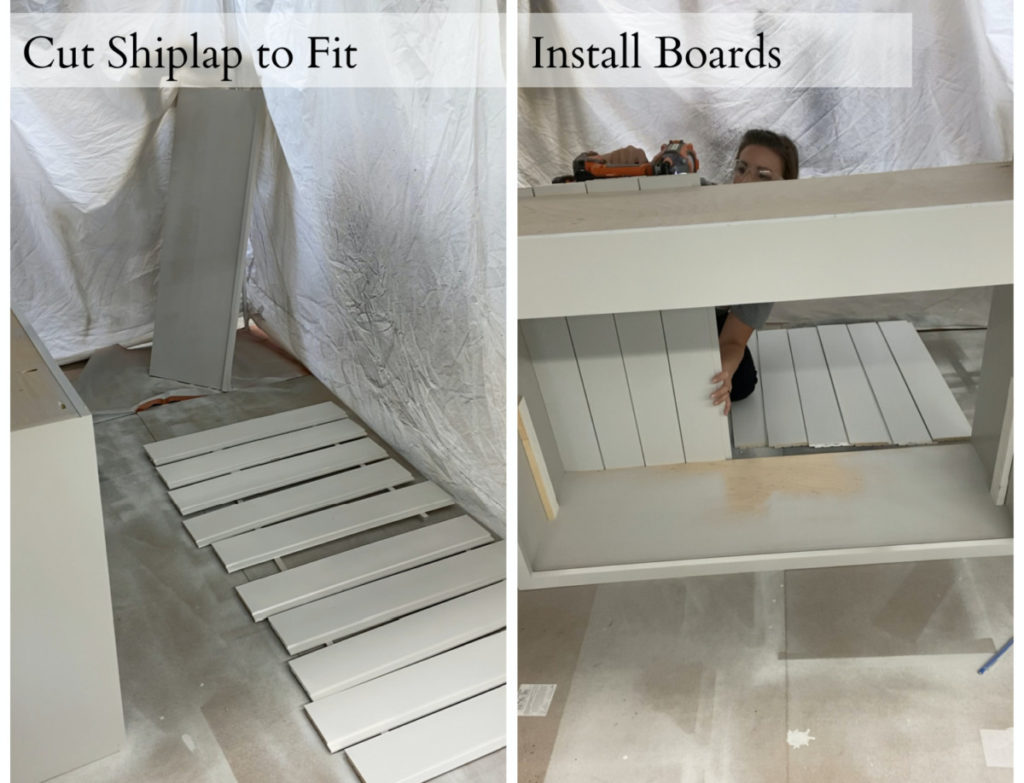
Cabinet Back
In order to create cohesion in my office I opted to back my open style cabinet with shiplap/ nickel gap boards. This is not necessary and a simple MDF board will do. In either situation it is a simple case of measuring the height and width of the back of your cabinet and cutting the boards to fit. I installed mine using wood glue and an 1.5″ 18. gauge nail .
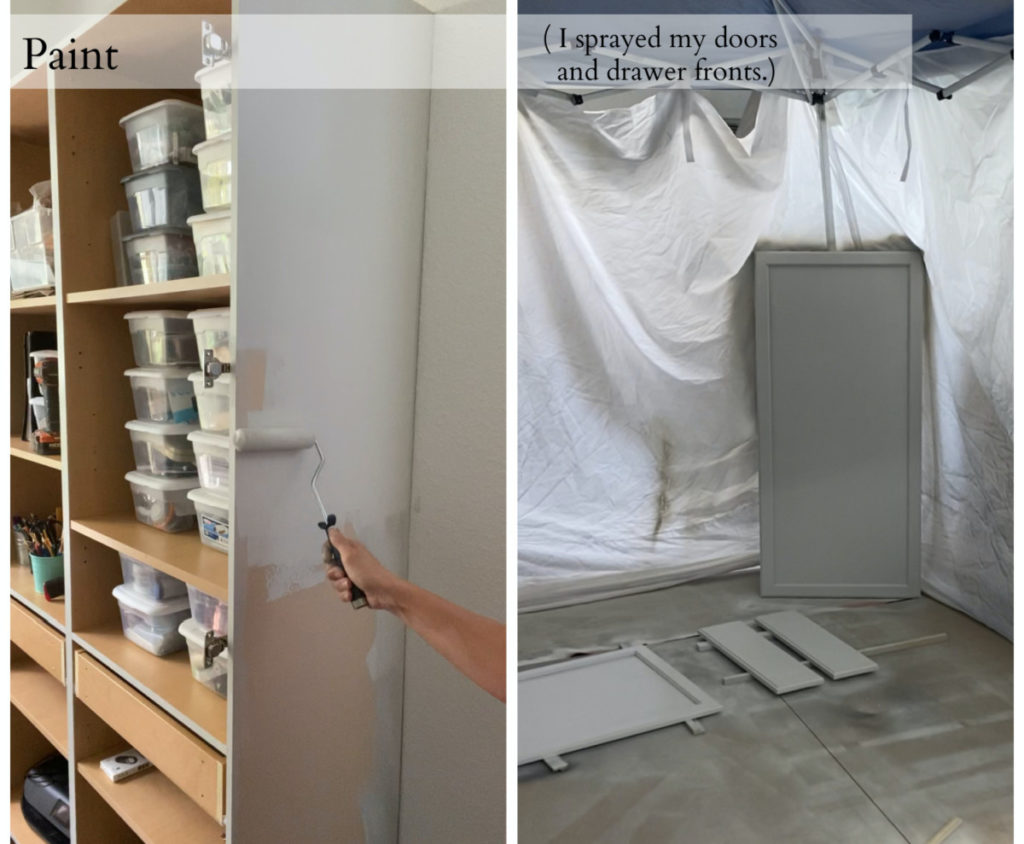
Paint (Can be painted once complete.)
Painting method and order are all a matter of personal preference. I opted to spray the cabinet doors and the custom made upper unit in my shop, and painted the pantry cabinets in place. (Sherwin Williams Repose Gray 150%)
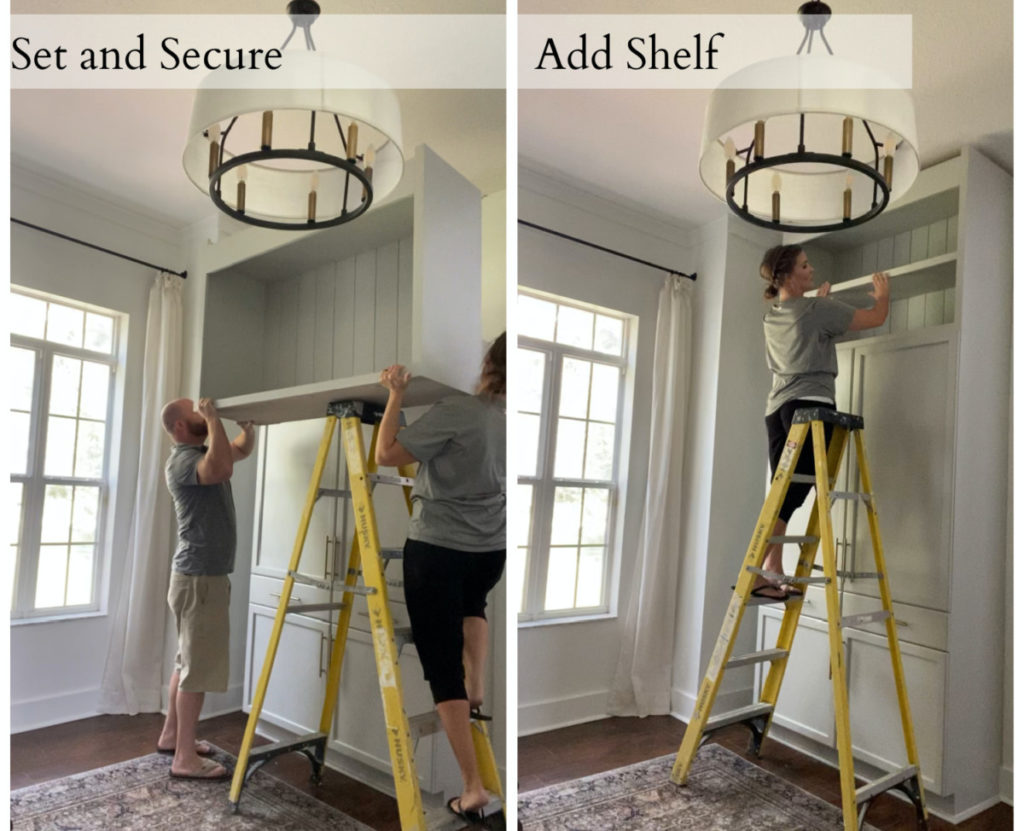
Install Upper Unit
I enlisted the help of my husband to set the upper unit. It was pretty beefy with the 3/4″ ship lap backing! Assuming all dimensions were carefully taken it should fit like a glove! Once properly placed drive 1 1/4″ screws though the top interior of the pantry cabinets and into the base of the upper cabinet (or vise versa). The goal is make sure the upper unit if solidly secured to the base cabinet.
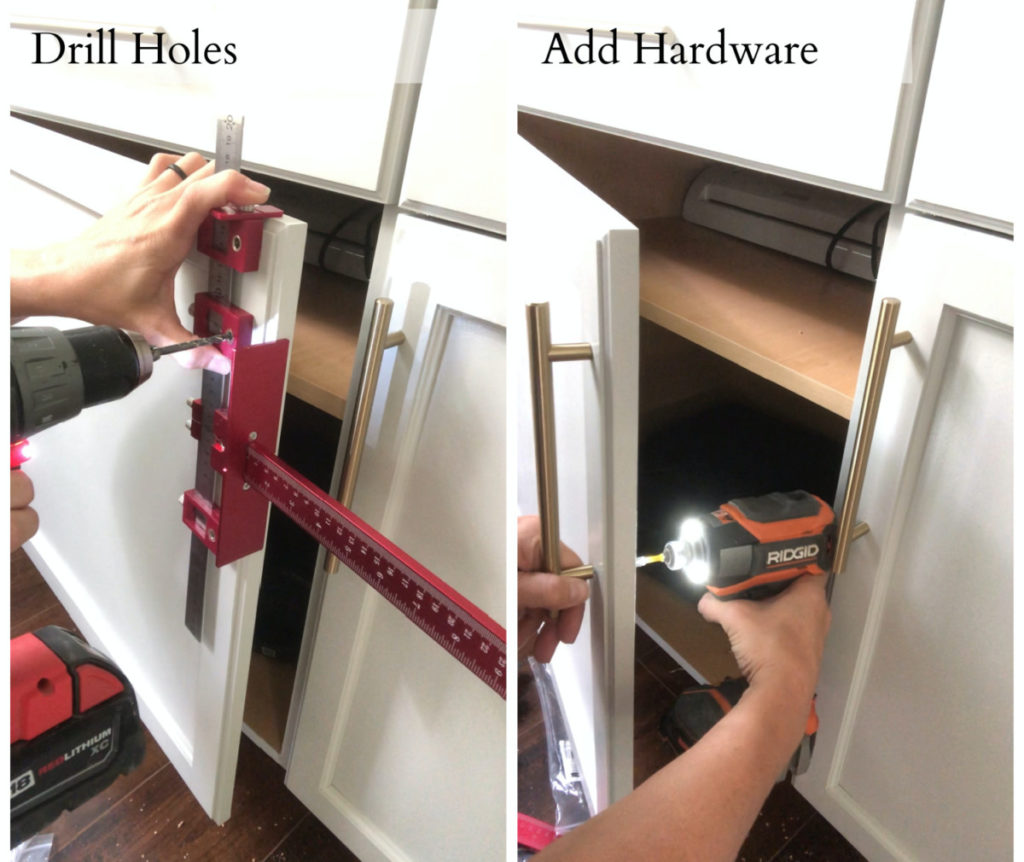
Add Hardware
Hardware is always optional, but when it comes to creating a truly custom look I think they are a must! My cabinets did not have any predrilled holes so I used the dimensions based on the hardware I selected.
When drilling hardware holes I suggest using a jig. I recently started using this one and I love it!
Add Trim Work
In my opinion, trim work is the element that turns a piece of free-standing furniture into a built-in. It just gives it this sophisticated look and I dig it! In this case
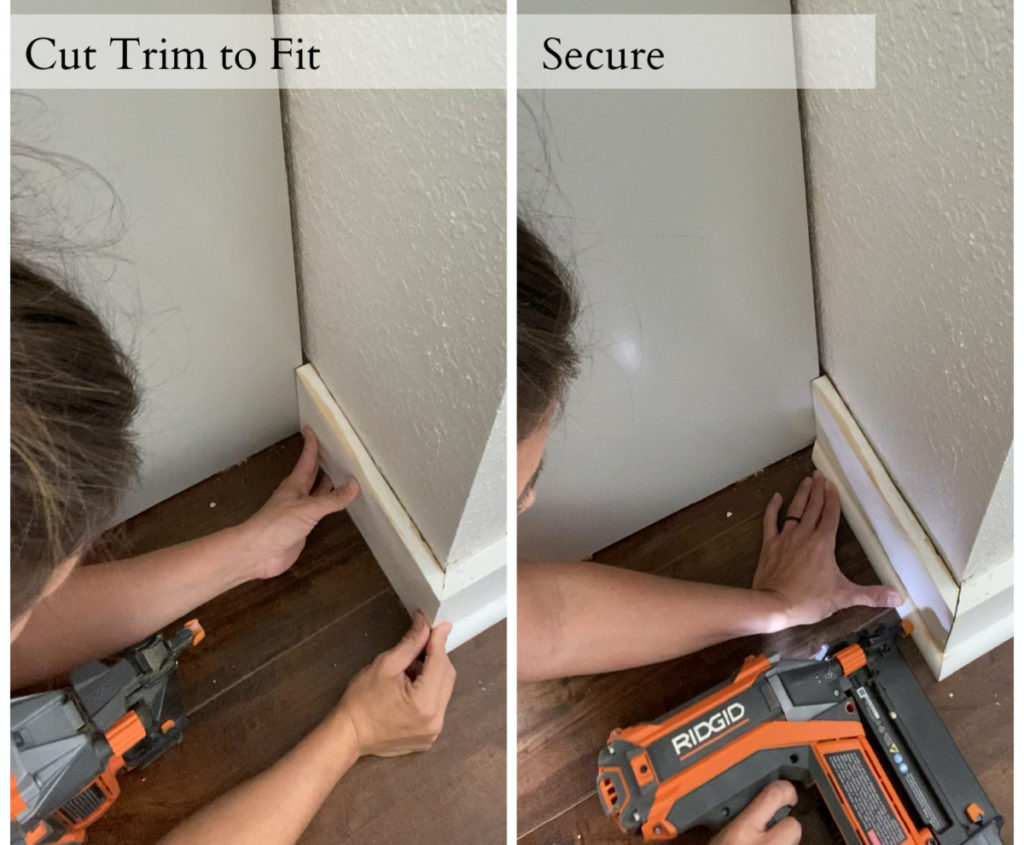
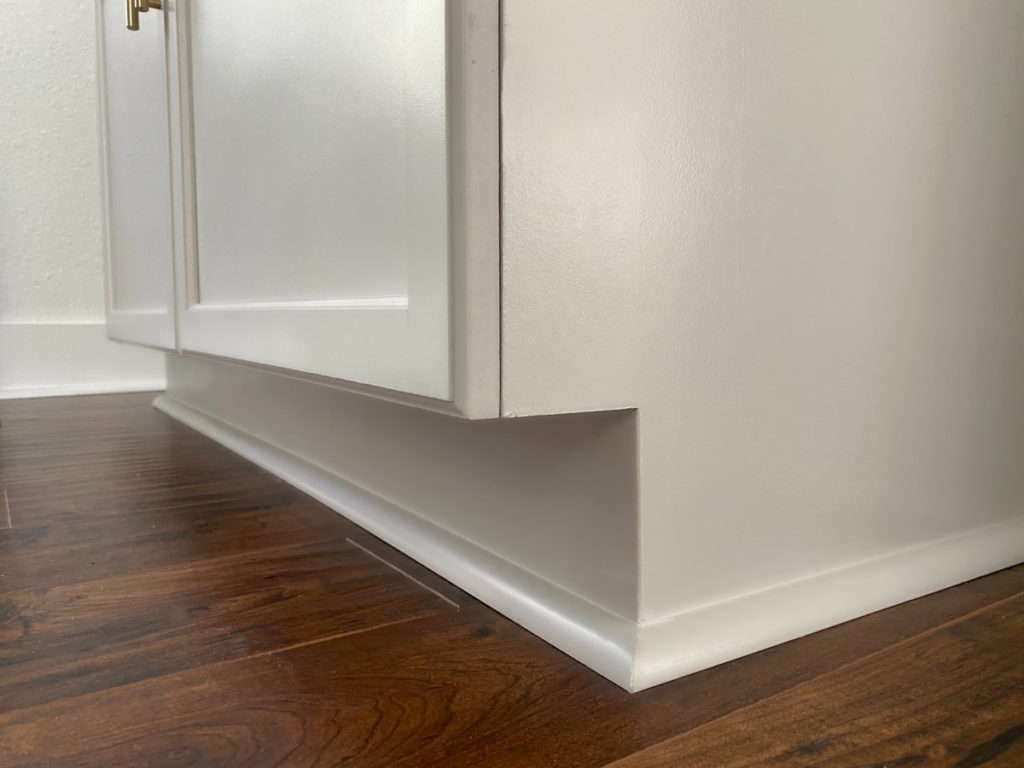
I reinstalled my baseboards and installed shoe molding around the base perimeter of my armoire. If you have any questions about installing baseboards I have a full tutorial here.
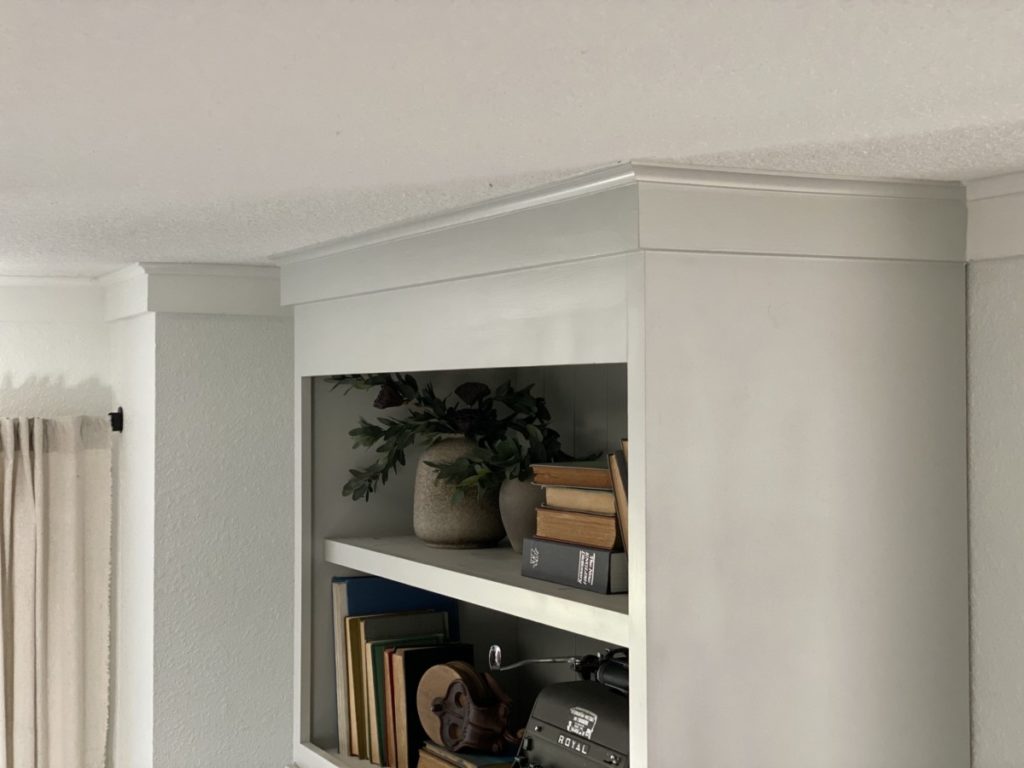
On the top of the unit I used the same crown moulding I had through out the room. The only struggle I had was figuring out want color to paint the moulding! Throughout the room the crown moulding and the baseboards are all pure white. Well, my built-ins are Sherwin Williams “Repose Gray”, I wasn’t sure what color the trim should be. After counseling with some friends it was decided it definitely needed to match the built in unit. So, my crown moulding actually changes colors in the corners! Rest assured, it looks great and I haven’t given it a second thought since. It looks bomb.
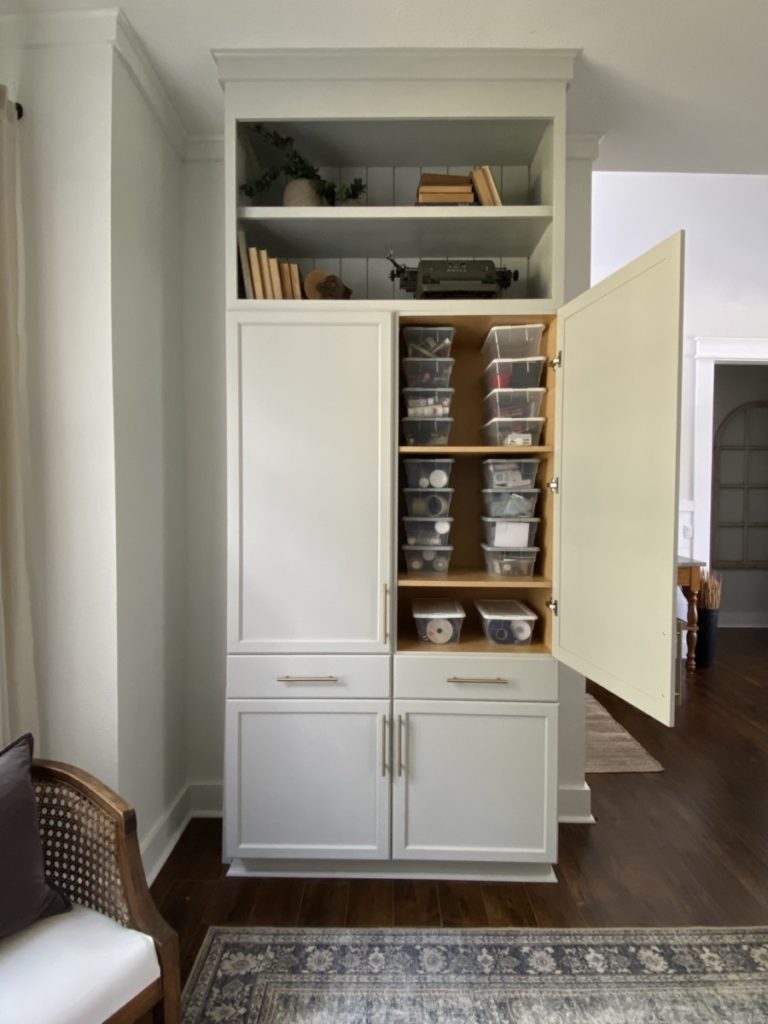
Well, what do we think? It’s amazing isn’t it? Beautiful, functional, and fairly easy. The ultimate DIY trifecta.
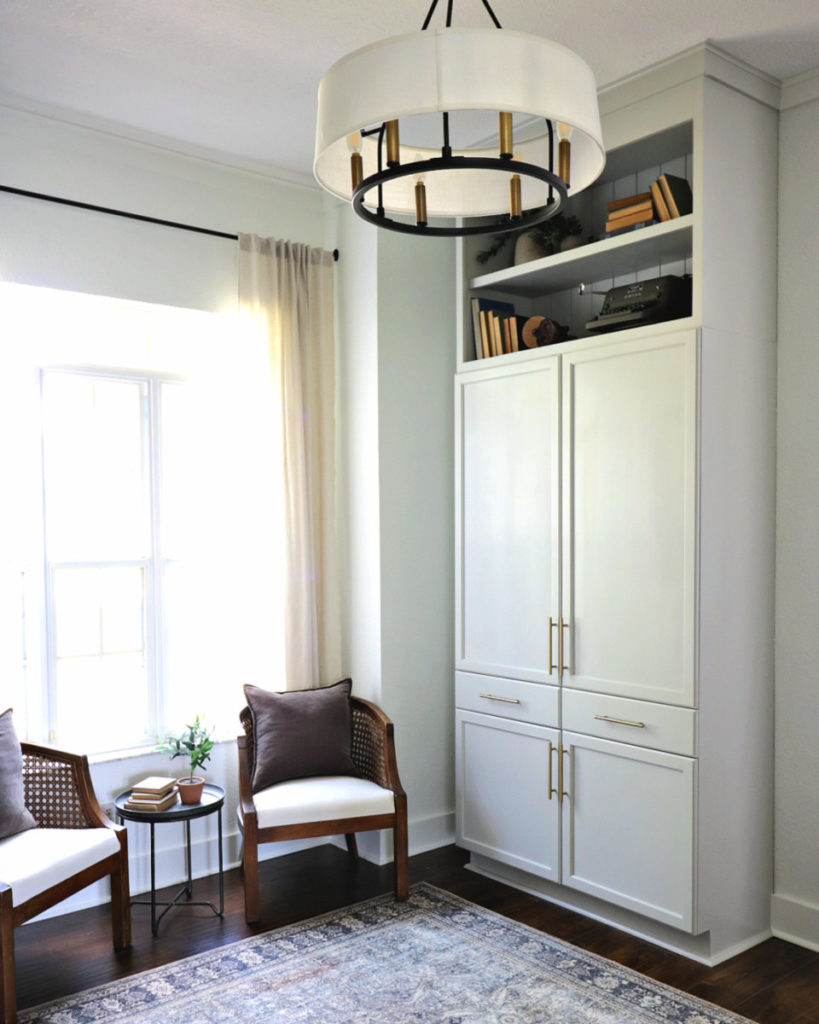
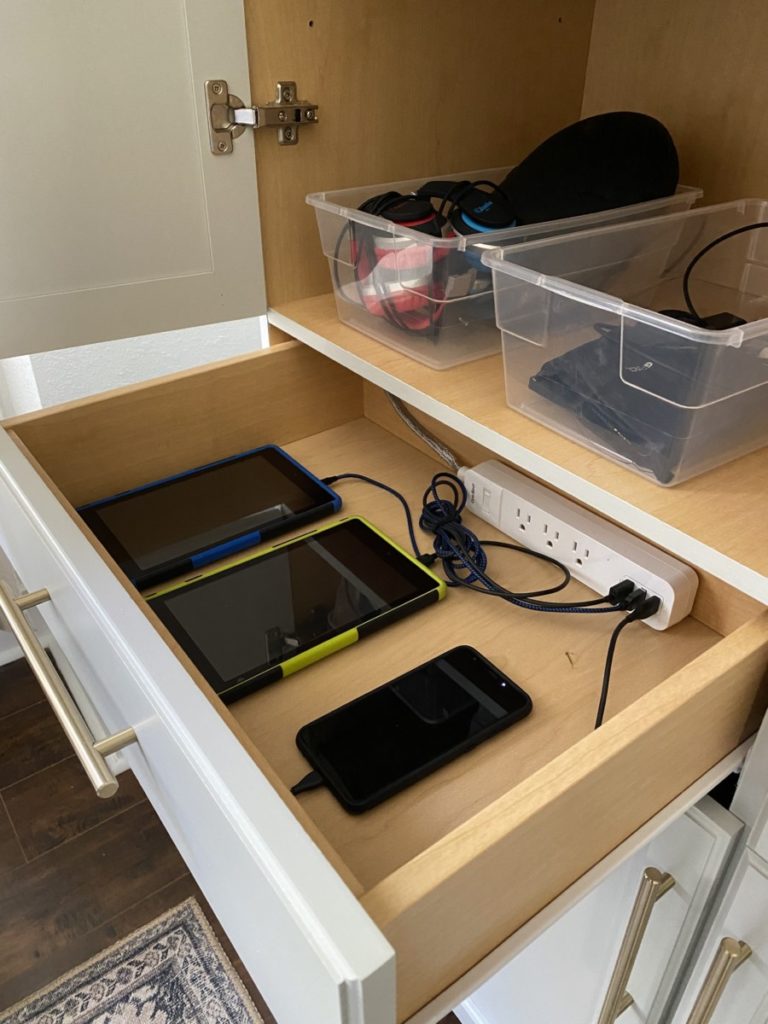
But wait there is more, I did mention it was functional right? I made sure to add some extra charging stations so that I could have my electronics!
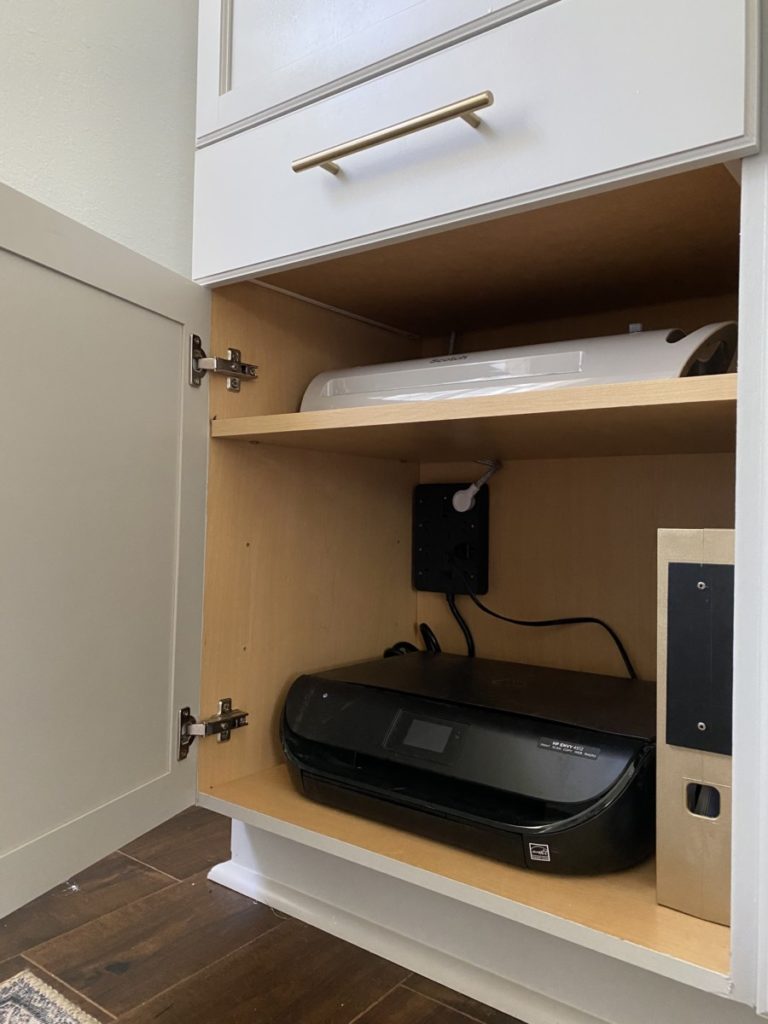
If you know me, you know I needed to add as much function as absolutely possible. I even added some power strips to the drawer that would serve as my kids electronics charging station. Now we always know where they are, and they go in the drawer when not in use. It is awesome!
Then of course there is the obvious storage. It holds so much stuff! Overall I call this build a complete success.
Thanks so much for following along.
Take Luck,
Corey


First let me say that you did a fantastic job on the cabinets, I love them. But I do have an issue with your wearing flip flops while doing this, as they are a safety hazard especially climbing a ladder. Love your remodel’s just be safe doing it.
Turned out beautifully! Thank you.
Great idea and super job! Giving me too many ideas here, lol.
Fantastic!! That’s why you are one of my favorite blogger. Thanks!!
These are an amazing organization project. The idea of having a charging station in the cabinet is great.
I enjoyed reading this. Thanks for sharing, Corey!