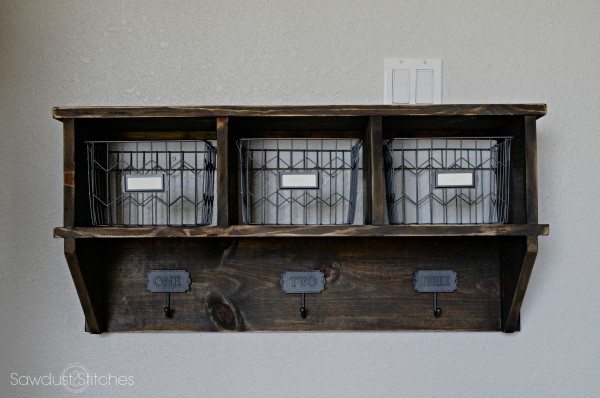
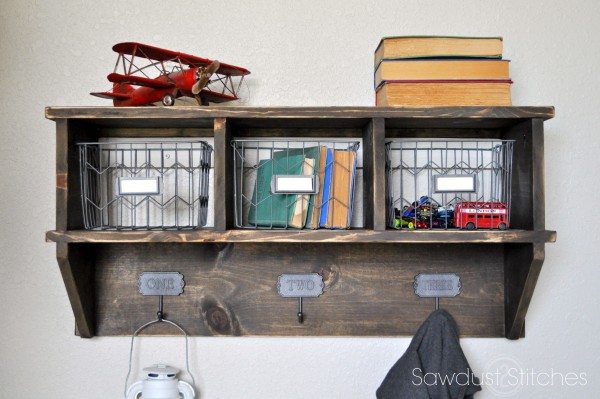
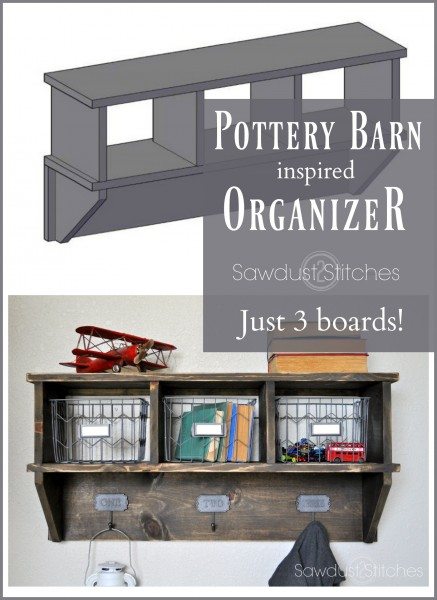
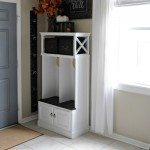
Hey all, I kind of pride myself on working fast, and knocking out projects like nobody’s business. But the last few months… whooa! I feel like I have not sat down since we moved. Granted the house is looking gorgeous, but some projects had to take a back burner, this organizer being one of them. Originally I wanted to have this done before the kids went back to school! (Whoops, missed that deadline.) Regardless, I wanted to build an organizer that (theoretically) I could lay out their clothing the night before school, and have a bin for shoes and socks. With the thought, that if they had their whole outfit (socks and all) out they could get themselves dressed. (Theoretically)
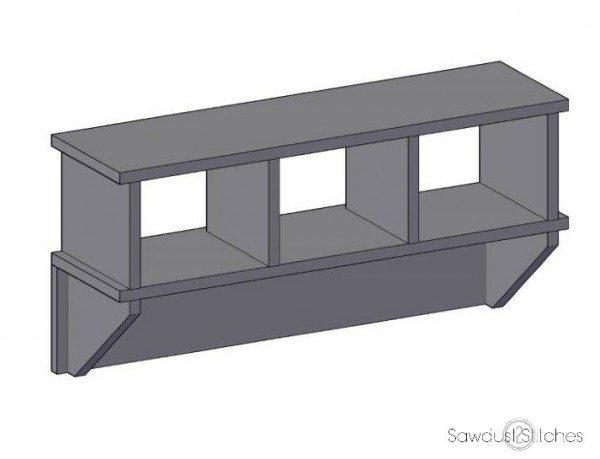
So…. I took inspiration from a Pottery Barn Organizer and designed this little beauty!

I’m excited to be teaming up with the great folks over at HomeRight on this project! It is through great companies like HomeRight and affiliate links that I can continue to provide all these tutorials at zero additional cost to my readers! So a big thank you to them! (More info. available here.) Make sure you enter to win your very own paint tent at the end of the post!
Pottery Barn Inspired Cubby Organizer
Supplies Used:
- (1) 1″x 10″ x 8′ Common Pine Board (Actual finished dimensions: 3/4″ x 9 1/4″ x 8′)
- (1 ) 1″x 8″ x 8′ Common Pine Board ( Actual finished dimensions : 3/4″ x 7 1/3″ x 8′)
- (1) 1″x 3″ x 8′ Common Board
- 1 1/4″ Kreg Jig Screws
- Stain and/or Paint
- Wood Glue
- 1 1/2″ Finish Nails
Tools Suggested:- Drill
- Drill Bit
- Kreg JIg
- Miter Saw
- Nail Gun
- Homeright Small Spray Shelter
- Homeright Spray Shelter

- HomeRight Finish Max Fine Finish Sprayer
Disclosure: Some of the links provided are affiliate links. By purchasing through these links it supports this site and helps keep content free. You can read more about how we do this with no extra cost to you.
Don’t forget to enter the GIVEAWAY at the bottom of the post!
![]()
-
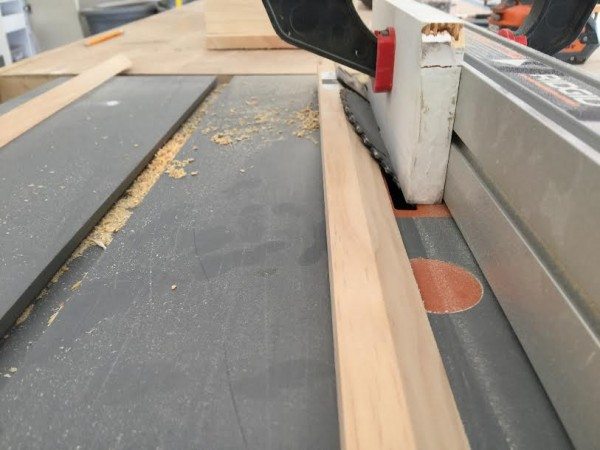
Step 1.
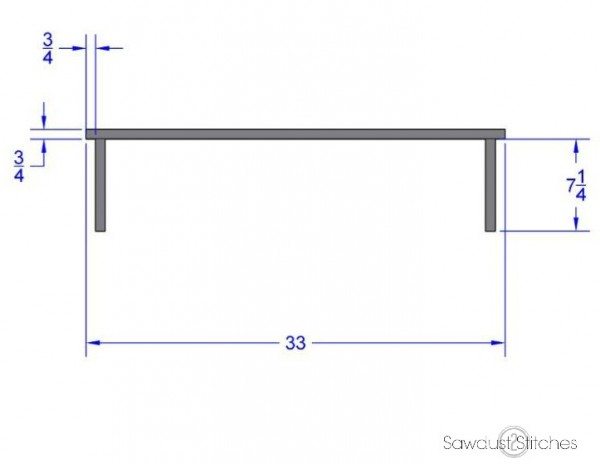
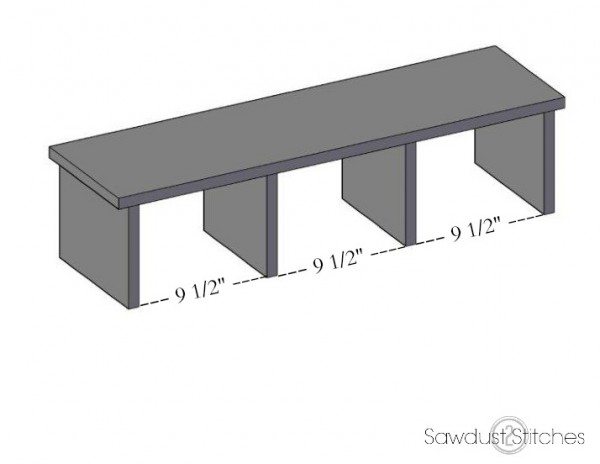
Cut List:
1’x 10″ Board
- (2) @ 33″ ( Top and Base Boards)
1″x 8″ Board
- (2) @ 9 1/4″ (End Supports)
- (2) @ 8 1/2″ (Center Dividers)
- (1) @ 33″ (Bottom Apron )
- (2) @ 8 1/2″ ( These will be modified to make the support corbels on the base.)
1″x 3″ Board
- (2) @ 30″ ( These will be modified to create a french cleat for installation.)
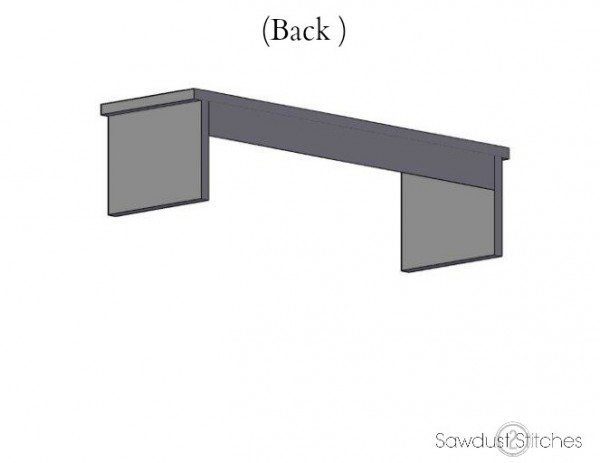
Step 2. Attach End Supports to the Top Board
Step 3. Cut French Cleat Boards
Step 4. Add Interior French Cleat
When attaching the back cleat make sure you position the cleat so that the 45 degree angle faces toward the front of the unit.
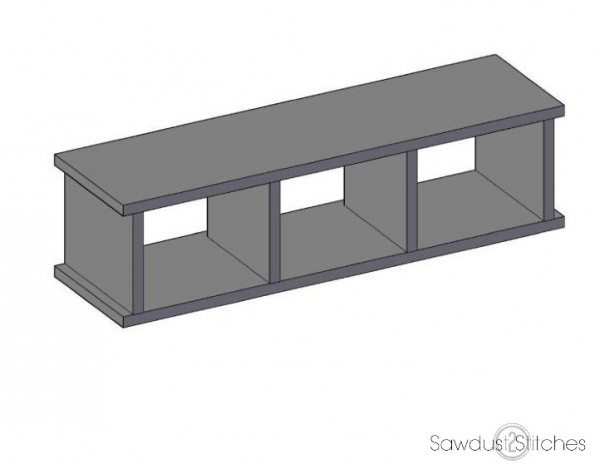
Step 5. Dividers
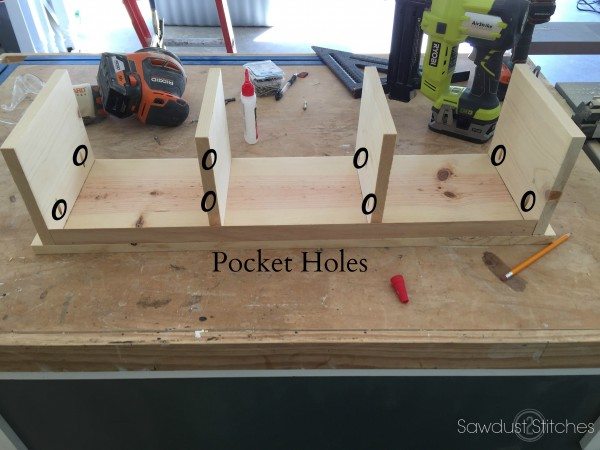
Step 6. Attach the Base Board
Measure the appropriate distance ( use Step 5 as a reference). Using 1-1/2″ wood screws from the underside, going through the 1″x 8″ board into the dividers and end supports.
Step 7. Add the Bottom Apron
Drill pocket holes along the top ledge of the board. Then using 1-1/2″ kreg screws attach the bottom apron board to the bottom of the cubby unit.
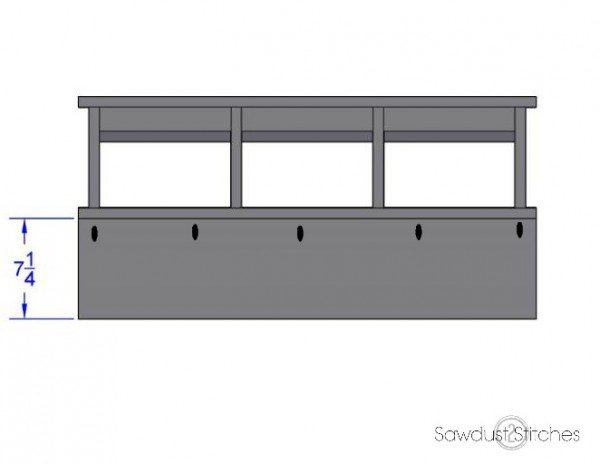
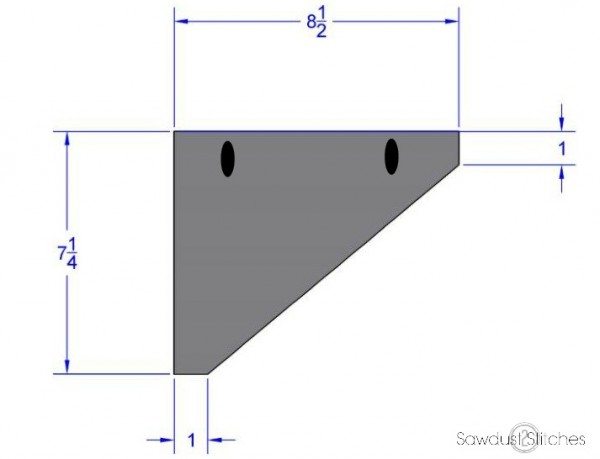
Step 8. Cut Corbels
Cut the 8 1/2″ x 7-1/4″ board into corbels. Once the boards/corbels are cut drill pocket holes.
Step 9. Attach Corbels/Supports
Step 10 . Finish
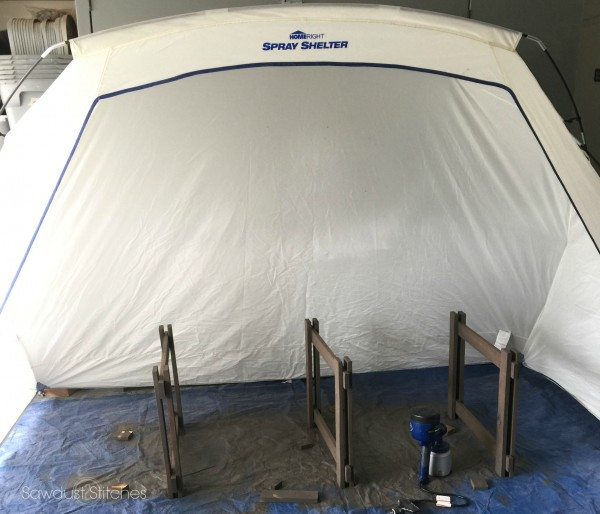
I was debating over painting or staining, but ultimately I decided to stain it so that it would match my son’s room. If I had chosen to paint I would have hands down used a HomeRight Finish Max Sprayer![]() and a Homeright Spray Shelter
and a Homeright Spray Shelter![]() . Because this was small build I quickly stained it, but when I do my large builds I normally opt to SPRAY my stain! Yup you can do that!
. Because this was small build I quickly stained it, but when I do my large builds I normally opt to SPRAY my stain! Yup you can do that!
Step 11. Add Hardware
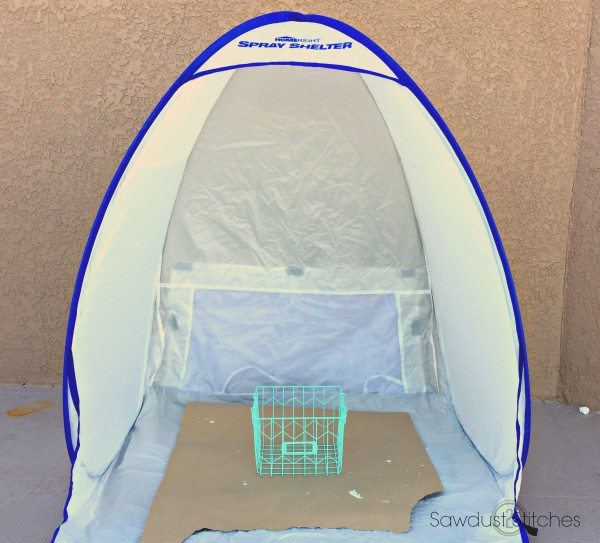
This is my favorite part, adding hardware! I feel like the right hardware can definitely take a build to the next level! I wanted there to be a mix of materials and metal is always a favorite. I found these awesome little wire baskets at Target in the dollar section! Woot woot! I love the dollar section! I got them all for $3 a piece, they were the perfect size, but the color… hmmm. It just wasn’t going to jive with the motif.
No worries we can handle that! I pulled out my handy pop-up Homeright Small Spray Shelter, and took care of that color in a jiffy!
I wanted to error on the side of caution, so I did a quick coat of spray primer. Followed by a coat of “Soft Iron” by Rustoleum. 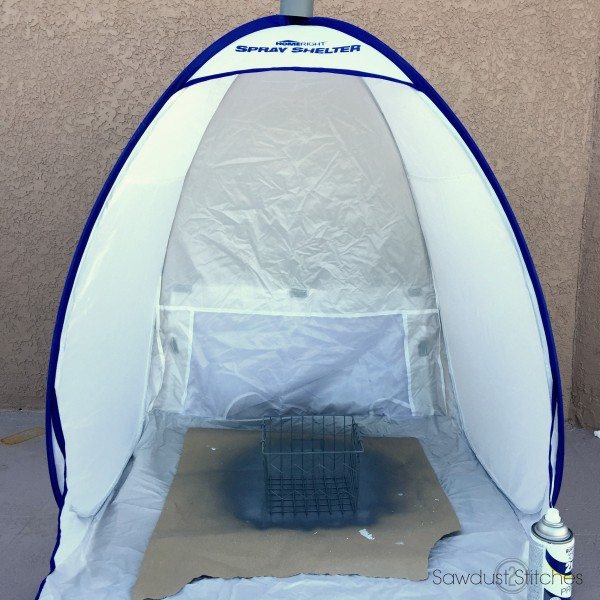
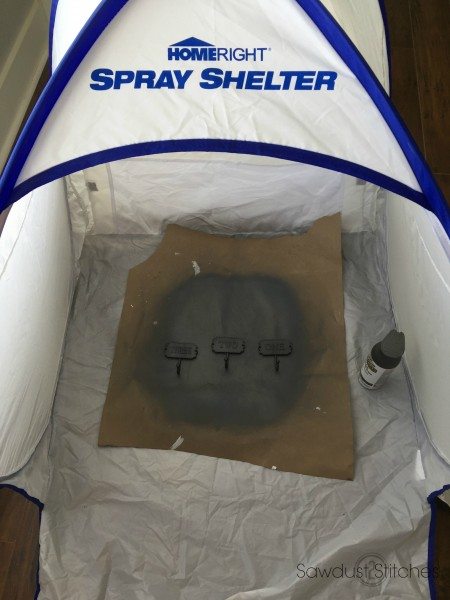
Next up, the hooks! Naturally they needed to match my baskets, so into the spray shelter they went! You will notice I even have the spray shelter set up inside, yup, I had no worries. This spray shelter works like a charm.
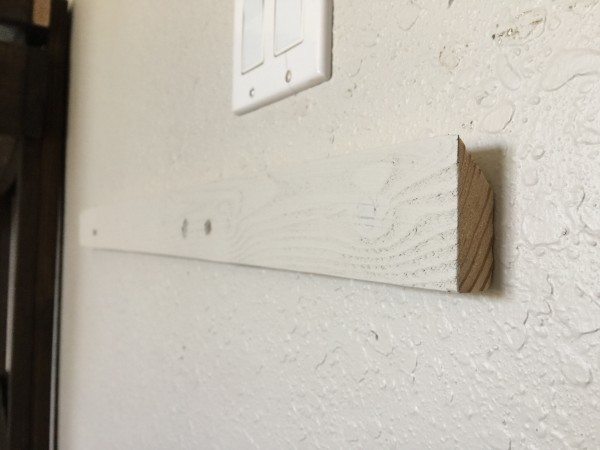
Step 12. Install Wall Cleat
All that is left to do is install! To attach the wall you will need to install the second cleat. When installing I suggest a 3″ screw and make sure you are solidly into (2) studs. I decided to paint my cleat the color of the wall so that it will blend in with the wall!
To install all you need to do is put the wall unit against the wall and drop the unit into place so that the cleats are puzzle pieced together!
That’s all there is to it folks! Side note: we used this for the first time yesterday morning and it worked like a charm! We had laid out my boys’ clothing the night before and put their shoes and socks in their cubbies, in the morning their alarm went off and they got themselves dressed and came downstairs with out me needing to holler up the stair even once! Ahh…. success!

ENTER TO WIN
a Rafflecopter giveaway
 Copyright secured by Digiprove © 2016


Love what you have done here. The cubby looks amazing.
I went over to Pottery barn and checked out their cubby organizer : yours wins hands down! You did a great job!