I am originally, from Ohio and grew up with a fireplace. I later spent a good portion of my adulthood in Idaho and Utah. Call me crazy, but I LOVE the cold weather and curling up by the fireplace. However, my husband had the audacity to get a wonderful job in Florida. We have since been here 12 years and I still miss my fireplace. Welp, I can’t change the weather, but I CAN do something about the fireplace! With the help of my friends at DAP I am going to create a traditional fireplace with a modern twist.
| Tools Suggested | Materials Used |
| Eye Protection | 3/4″ Plywood (2 sheets used) |
| Hearing Protection | 3/4″ Iron-on Edge Banding |
| Sander/Sand Paper | Crown Moulding |
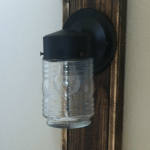
| Drill | Fireplace Insert (I used this one.) |
| Sponge Sanding Block | Paint (Snowbound by Sherwin Williams) |
| Pin Nailer | DAP Extreme Stretch Caulk |
| Miter Saw | DAP Plastic Wood All Purpose Wood Filler |
| Table Saw/ Circular | DAP Weldwood Professional Wood Glue |
| Crown Molding Jig | |
Building a Mantle
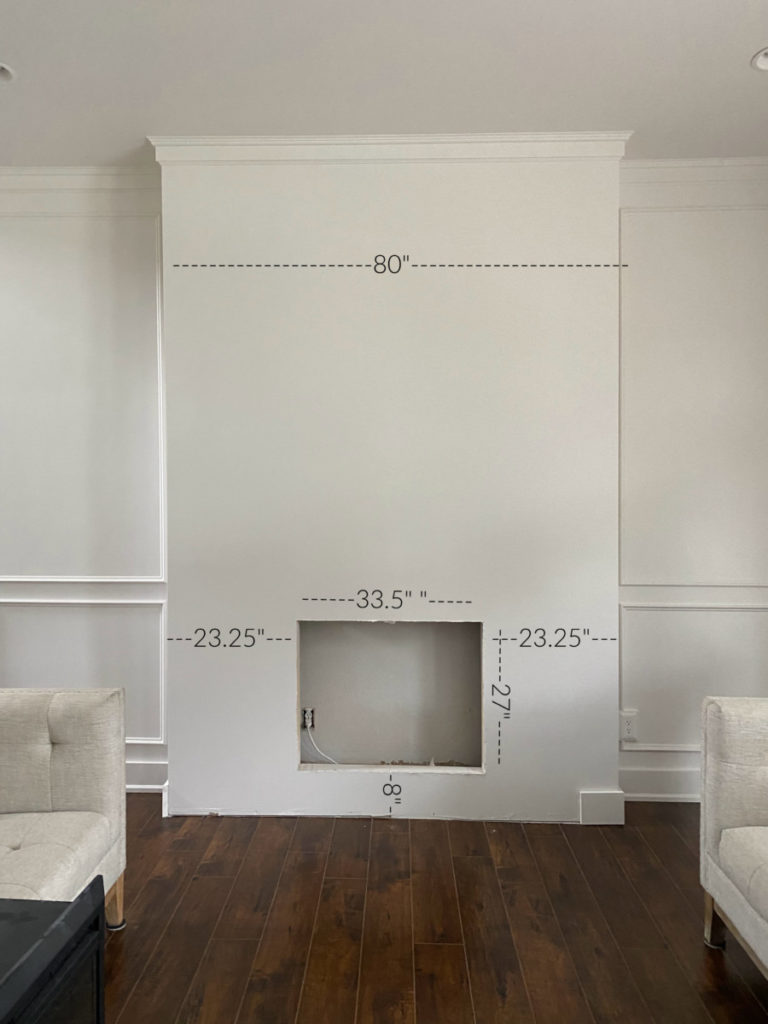
Let’s start at the very beginning. Before I could start designing my mantle I needed to build out a a small wall that would accommodate my fireplace insert. The size of the bump out wall is based solely on the desired look and the existing space. As a point of reference the wall my fireplace is on is 21′ long and 10′ high. I built the bump out wall approximately 80″ wide. (I also added blocking behind the drywall that would allow me to easily mount my t.v. above the fireplace.)
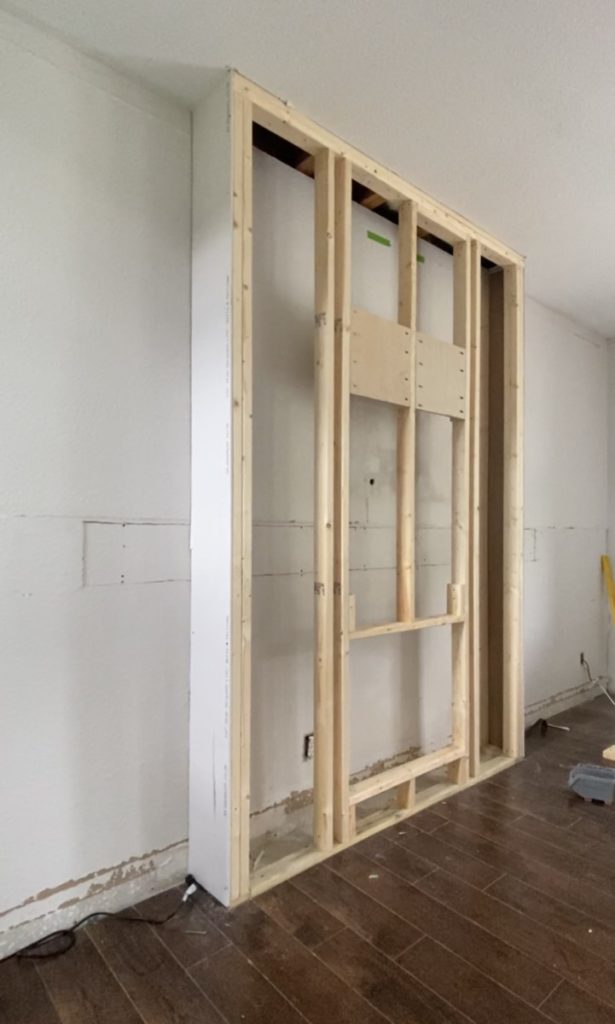
After the adding drywall, mudding and painting I was left with a wall with a hole specifically made for my fireplace insert. This is were the fun part begins, building!
Please keep in mind, that I am giving dimensions as a point of reference, not as actual build plans. All spaces and fireplace inserts will be different please adjust accordingly.
Building Mantle Surround
I built a basic template out of 3/4″ plywood that would serve as the base for my fireplace surround. I assembled the base using pocket holes and 1 1/4″ pocket hole screws.

Before I continued building, I did a quick dry fit to ensure the fireplace insert, the hole in the wall and the new template all lined up. They did, phew!

Building on the Base
Seeing as this is a free-standing piece, and will need to be transported I used EXTRA care when assembling! When assembling builds I always reach for DAP Weldwood Professional Wood Glue. It has a fast set time and an incredibly strong bond I know I can trust.
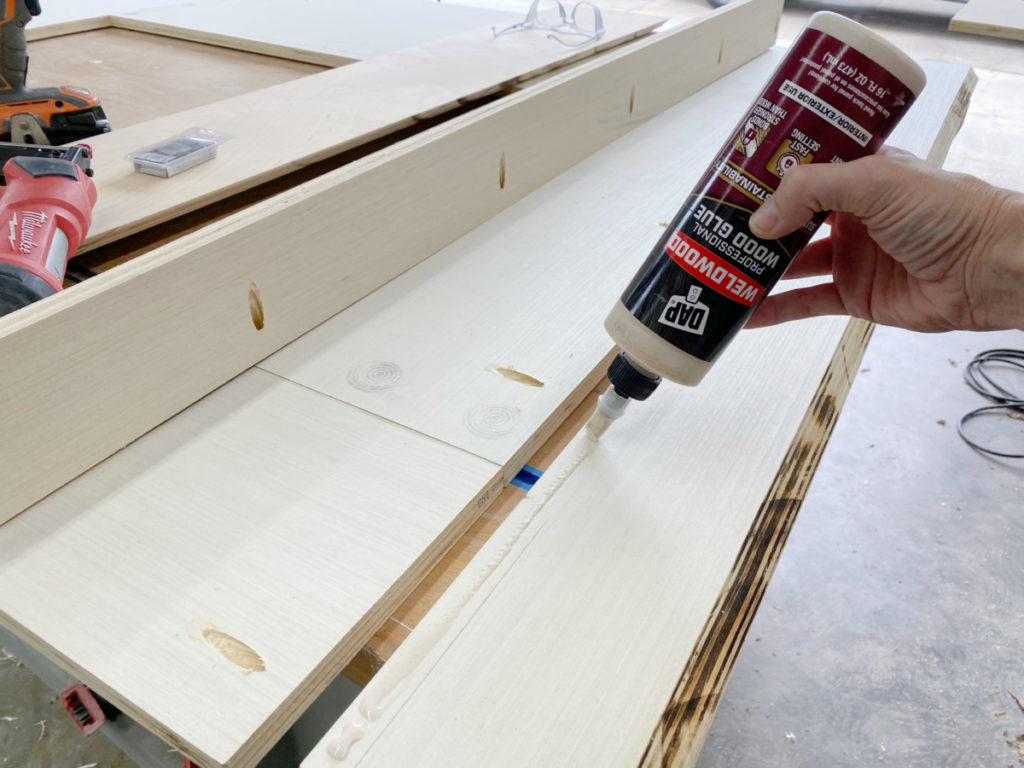
I did not want my mantle to be too obtrusive so I opted for a low profile. As you can see in the images below, I built the box style sides directly onto the newly built base.
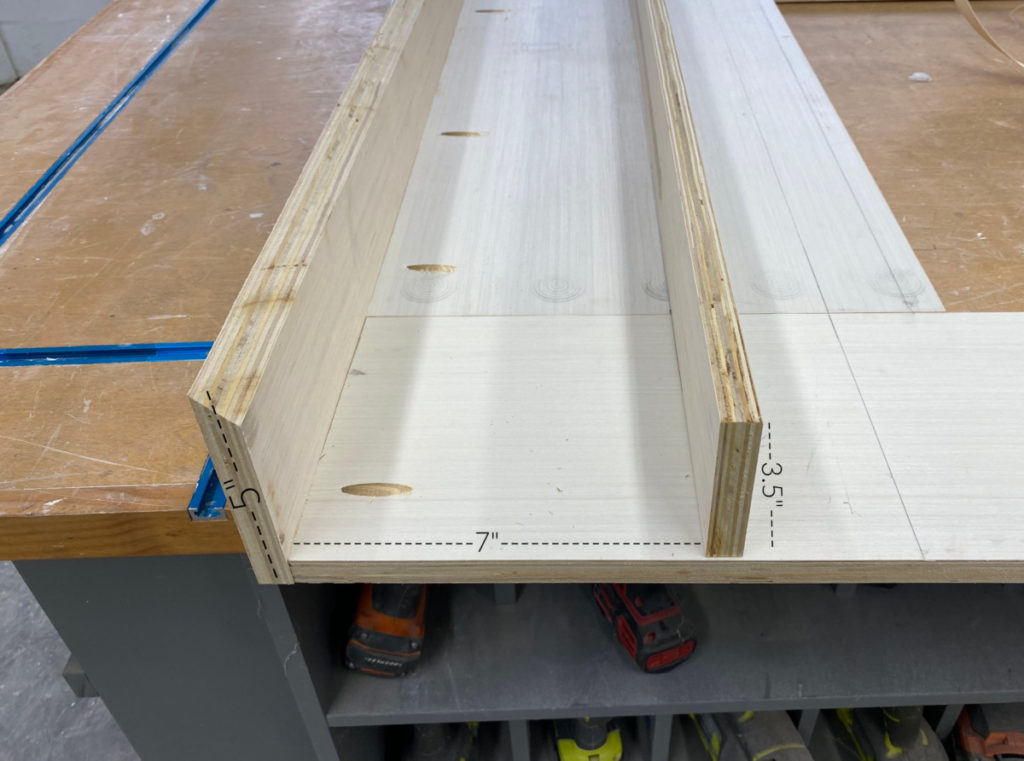
Here is another shot of the sides glued up. Note: I added a small piece of wood blocking that would support the top board during installation.
Build Up Header
After the two sides were built I created a very basic frame work that would serve as a header and bridge the remaining gap. This was constructed of 3/4″ plywood and was then topped with a 3/4″ slab.
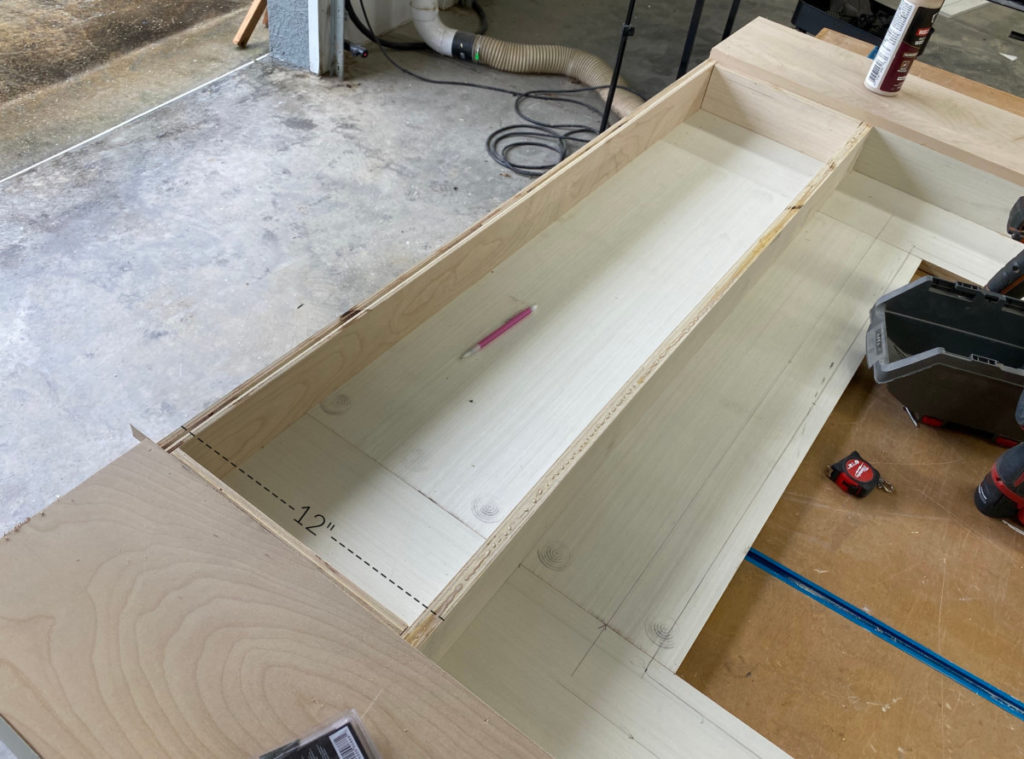
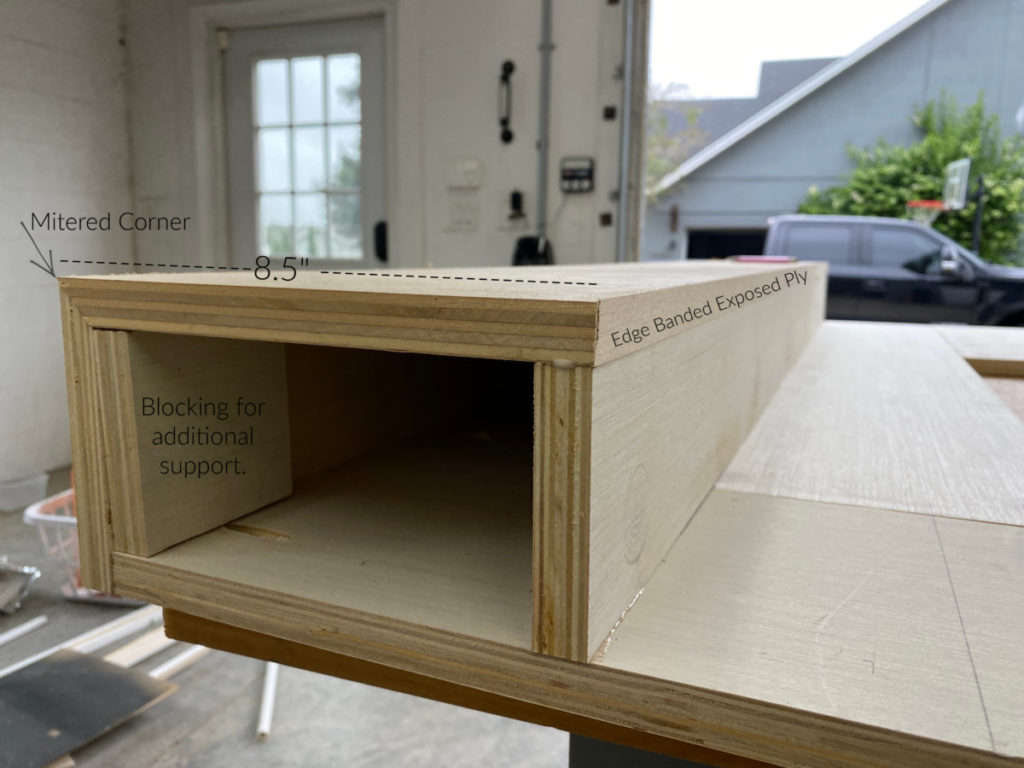
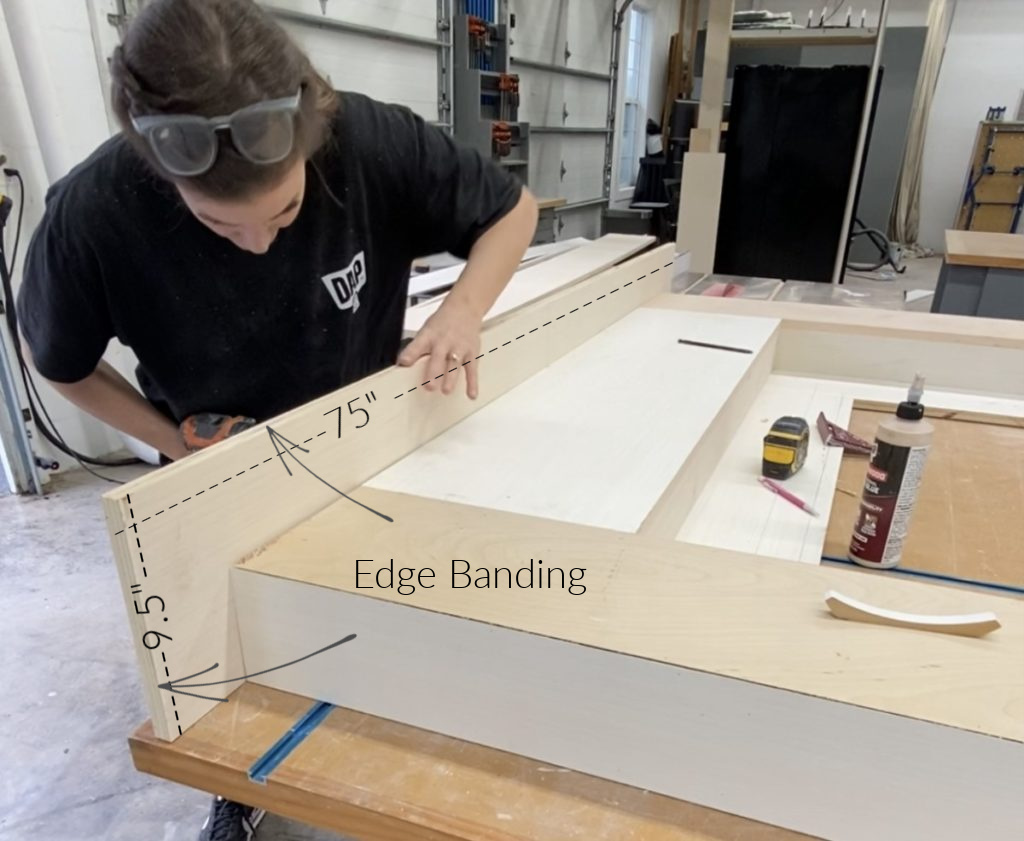
Once the sides and top are constructed we have our basic shell for the rest of the mantle. Please note that the interior 3/4″ side ply will be exposed and I recommend covering them with edge banding. ( Yes, you could have mitered all the edges to create a seamless joint, but I will be adding a crown molding that will hide the bottom of the butt joint.)
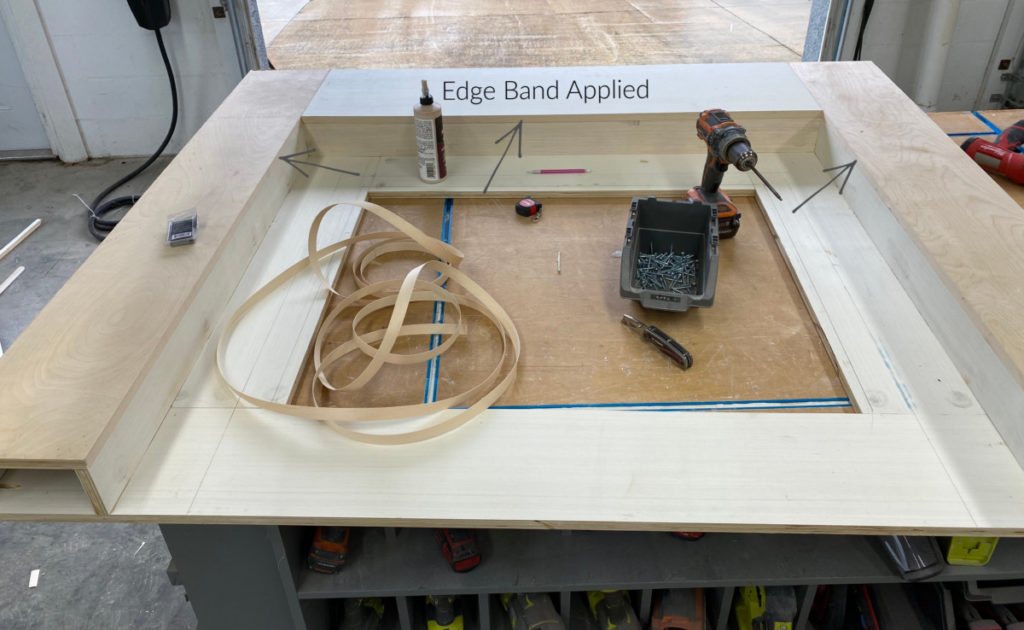
Next up is the mantle top. The goal was to have a low profile top while still being able to use it for seasonal decor. I determined that 9.5″ was the narrowest I could go while still accommodating my desired trim work. (Again, the side ply will be exposed on this piece. You can either band the edges OR you can purchase a 1×10 board.)
Prep Surface
I have said it before and I will say it again, THIS is the part that will make or break any build. Prepping your build for it’s finish. Whether that be paint or stain, always take the time to prep your project properly.
In this case I will be painting my mantle and I need to fill all nail holes and gaps. Plastic Wood All Purpose Wood Filler by DAP has always been my preferred filler for paint projects. It has a good consistency that is easy to work with, a quick dry time and dries HARD! Its perfect for filling the gaps in my mitered corners, because it will sand to create a nice crisp edge.
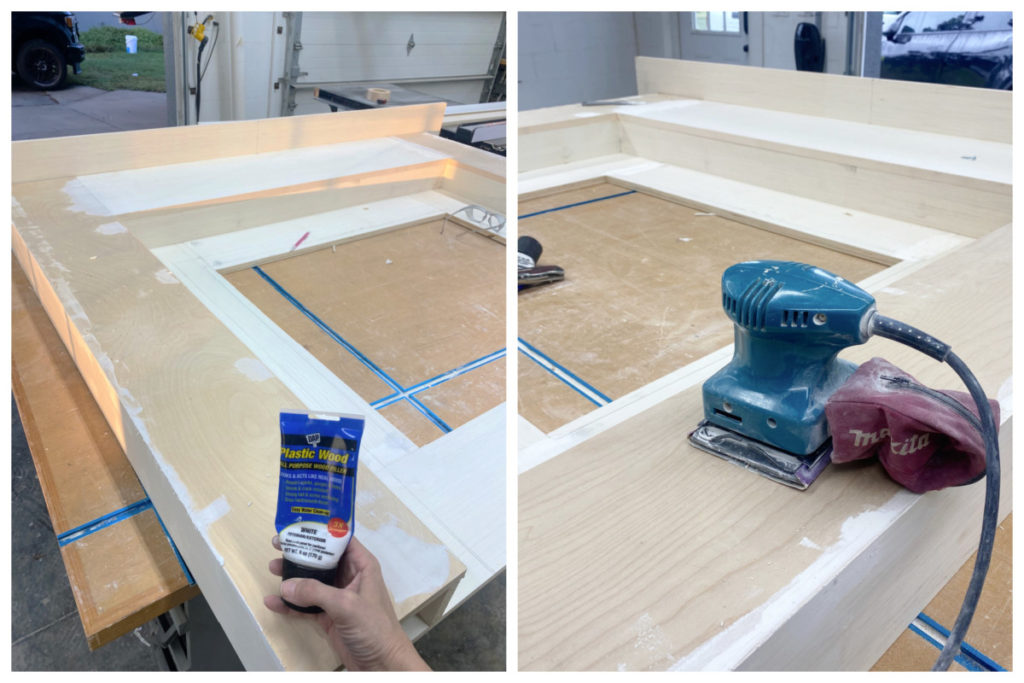
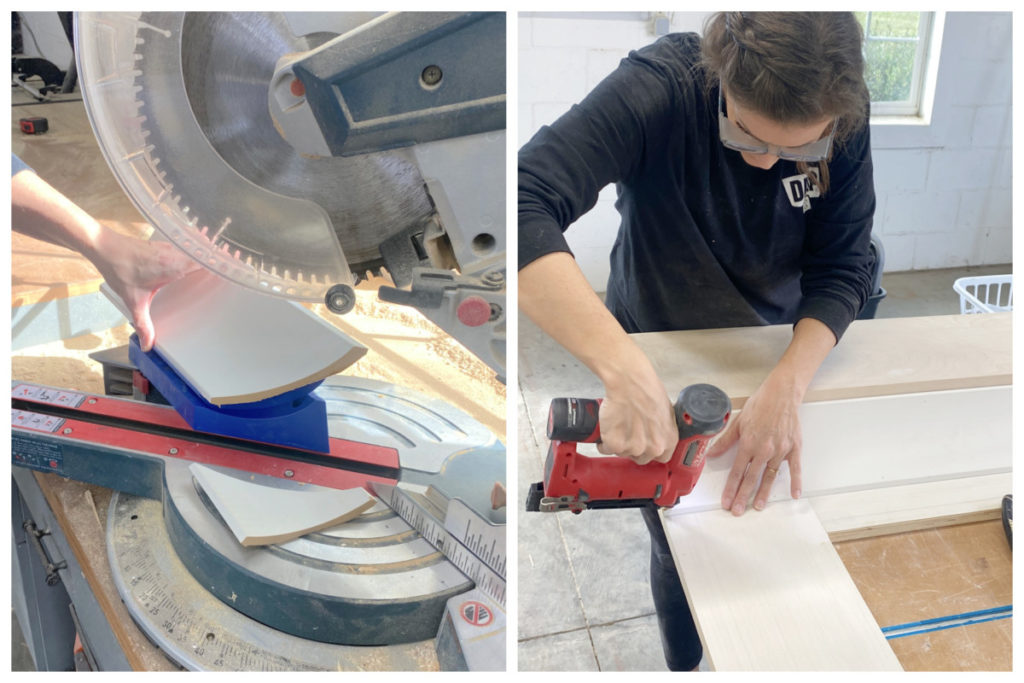
After all the holes and gaps are filled use a finish sander with a fine grit paper to smooth out the entire project. ( For this particular project, I am sanding before the entire project is complete BECAUSE once I install the trim moulding it will be harder to access with an electric sander. If you prefer you can wait until the build is completed for this step.)
Install Trim Work
Next up, trim work! So far the mantle is looking very box-y. Which may be your cup of tea, but I wanted to add a little visual interest and a transition between the different heights. Crown moulding was the perfect solution!
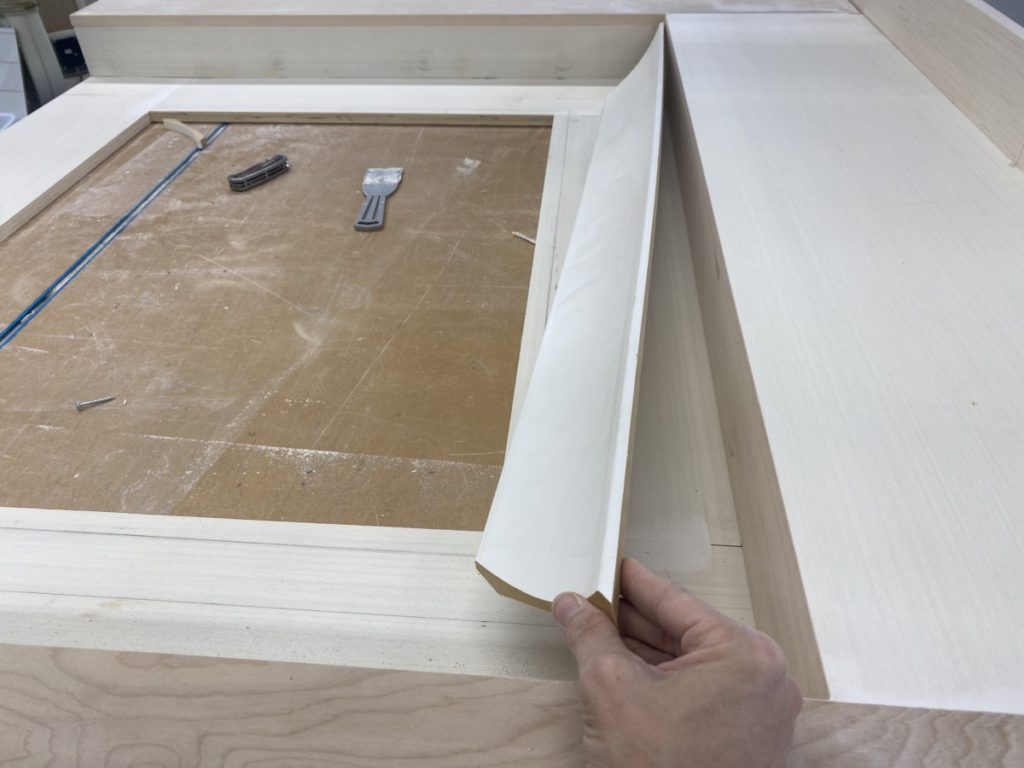
A word of caution, crown moulding can be very frustrating. Especially when you are using a large one like mine. I personally would never attempt this moulding without the aid of my Crown Molding Jig . My advice is this, READ the instruction manual that comes with it! Keep in mind you are working on a project that is NOT on the ceiling so you will have to reverse the instructions.
If this seems to daunting you could easily use other forms of trim and boards to add interest and a transition of layers.
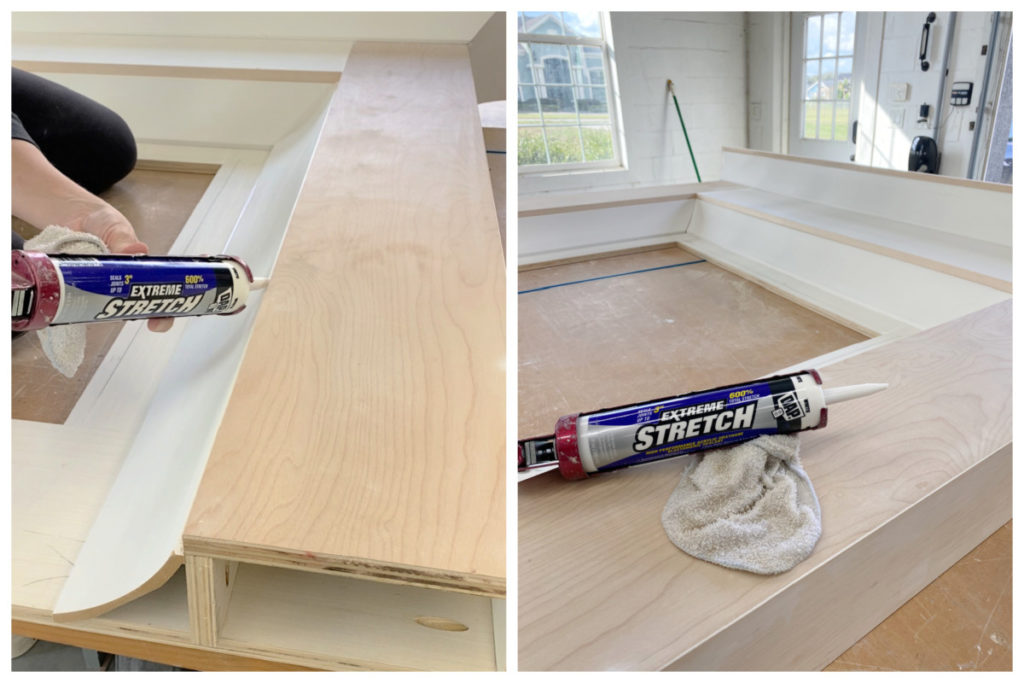
Caulk Seams and Gaps
At this point I had only a few pin nails to fill around the moulding. ( Again, I used DAP Plastic Wood All Purpose Wood Filler, and lightly sanded those areas.) Now it is time for the magic eraser of the DIY world. As I mentioned before crown moulding can be tricky, but DAP Extreme Stretch Caulk is VERY forgiving. It can completely hide wonky lines and unsightly gaps with ease! DAP Extreme Stretch is great for indoor and outdoor projects and is formulated to stretch over 600%. While this is not an functioning fireplace, it does act as a small space heater. Changes in temperature often lead to natural materials (like wood) contracting and expanding. Using DAP Extreme Stretch will prevent any seams popping and IS paint-able. Basically the best thing ever!
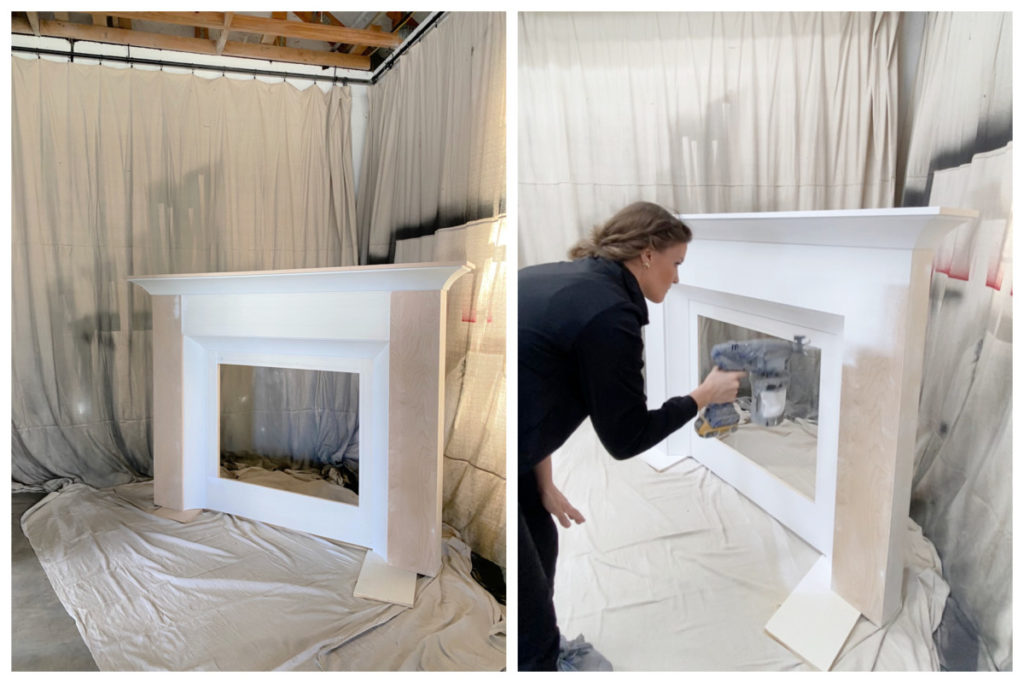
Prime and Paint
Last step, paint. If you know me, you know I opt to use a paint sprayer whenever humanly possibly. This project was no exception. I am using the Graco TC Pro Sprayer, with Sherwin Williams Emerald paint in the color “Snowbound” with a semi-gloss finish.
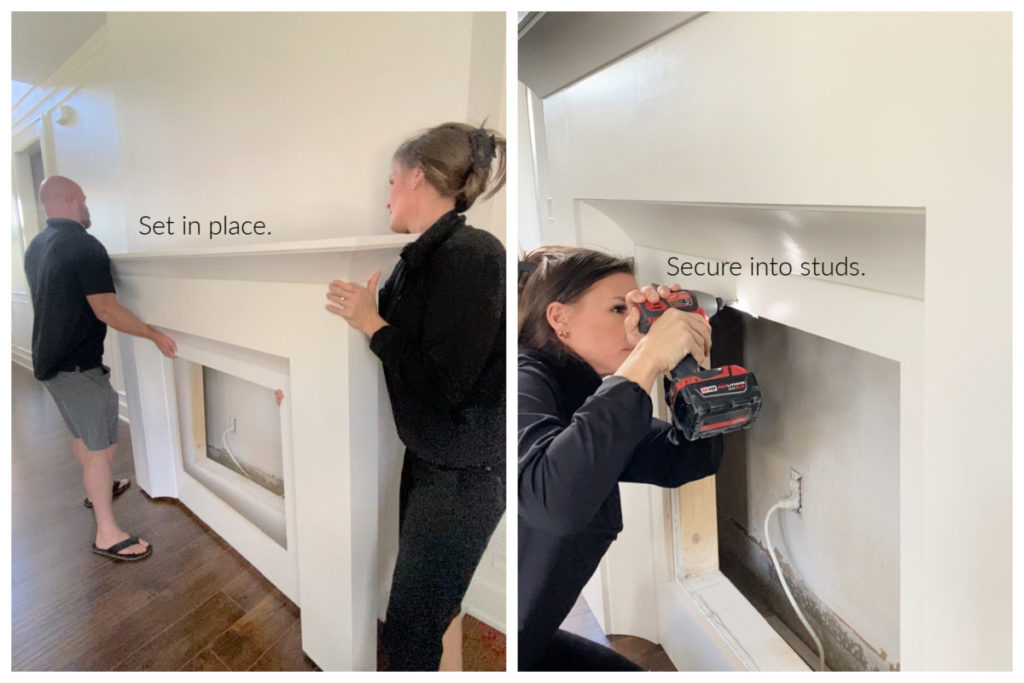
Install Mantle
Once the mantle is completely dry it is safe to install. This thing was HEAVY so I enlisted my husband’s help to carry it in, and set in place. I used 3″ screws around the perimeter of the opening to secure the mantel/surround to the wall. ( The lip of the fireplace insert will hide these screw heads.)
If you feel that it needs added security I would recommend drilling from the interior of the wall and into the back of the mantle as to avoid unsightly screws.
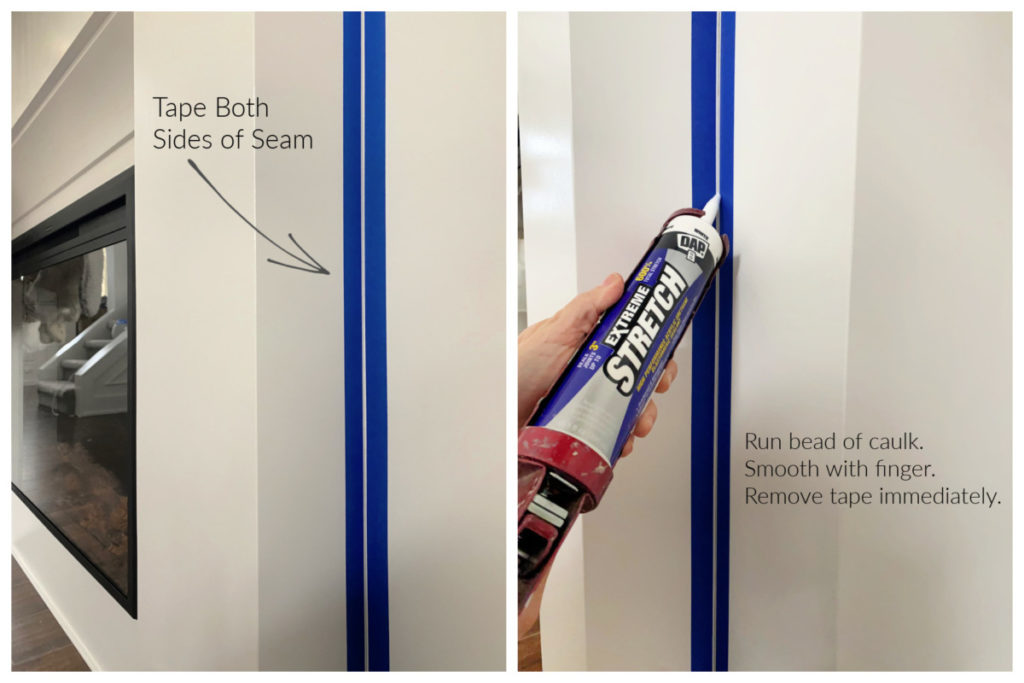
Last step: Make it Flawless! Before we hang up our tool belt, it is time to make this project perfect. With just a small bead of caulk you can blur the the lines of where the fireplace ends and the wall begins. I wanted this to be a very crisp line, and I had no intention of bringing out the paint, SO I used the tape trick.
What’s the tape trick? It is simply this, run a piece of painters tape on either side of your seam. (As seen below). Then run a minimal size bead of caulk down the line. Using a wet finger, or a baby wipe smooth the line. Immediately remove the tape, and you will have a PERFECT caulk line with Extreme Stretch Caulk. In this case the caulk color is nearly a perfect match, otherwise you could paint to desired color.
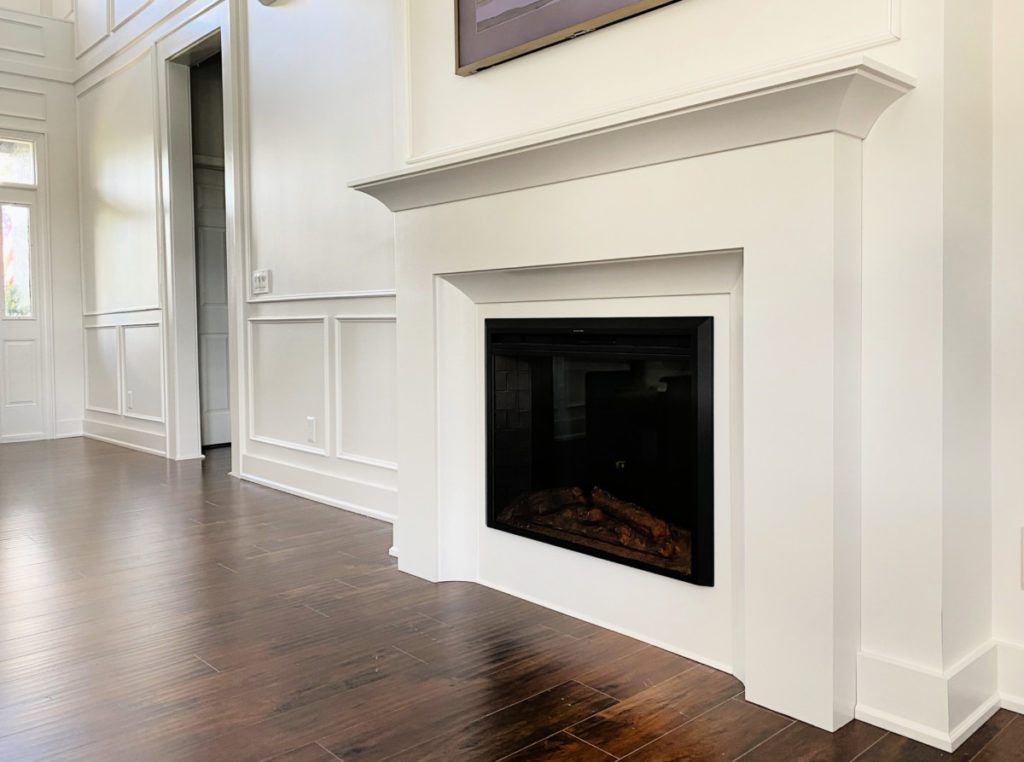
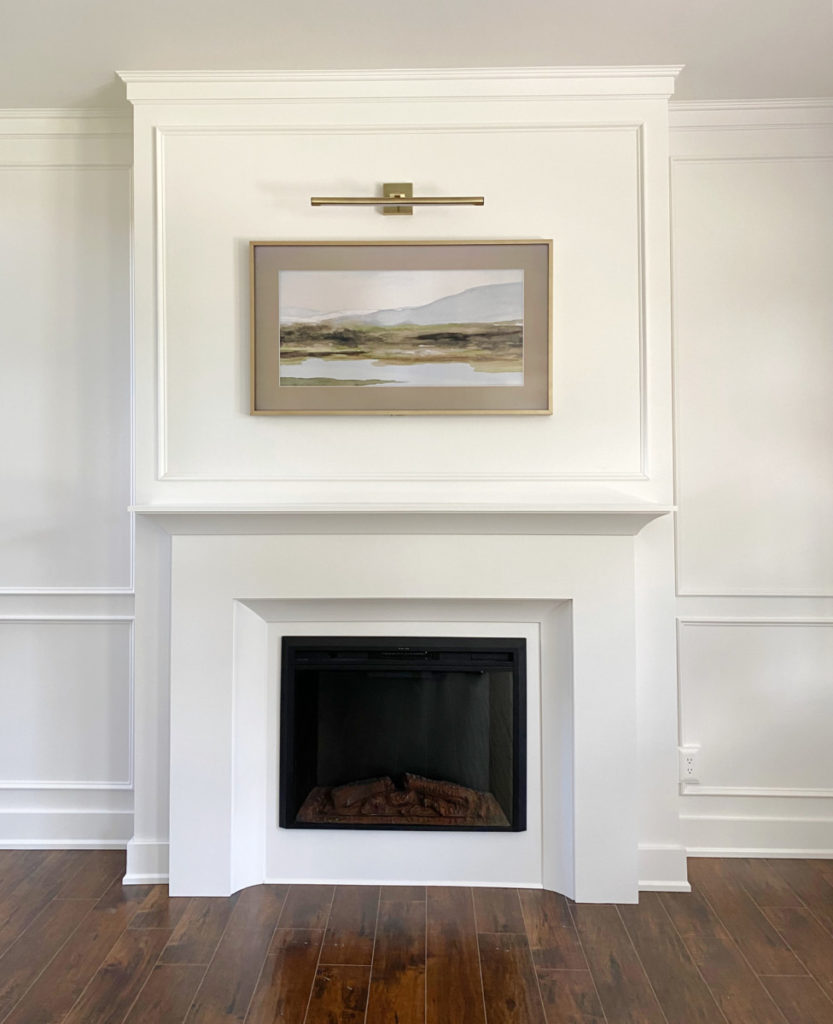
That’s it folks, all you need to do is pop in your insert and sit back and enjoy. ( My insert requires ZERO fasteners. Relies solely on gravity.) Pop it in, and enjoy your gorgeous new upgrade! As I stated before I was going for a traditional look with a modern twist and I think I nailed it, if I do say so myself.
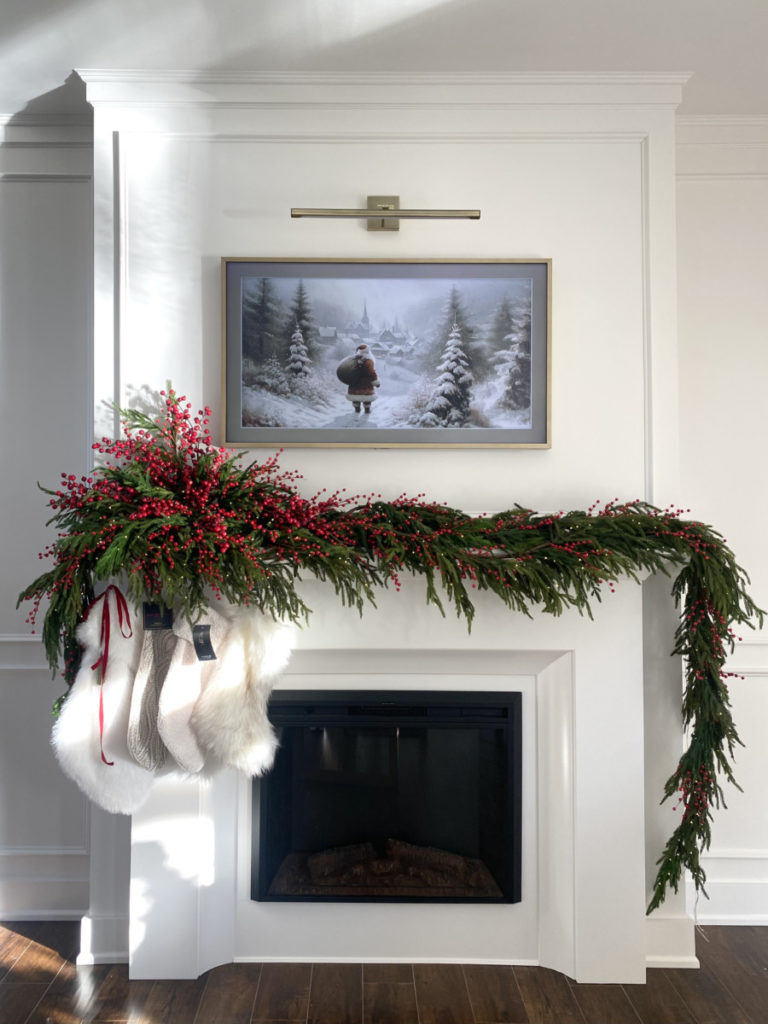
I can’t help myself, look how beautiful it is all dressed up for the Holidays!
Thanks so much for following along and “take luck”!
Corey