• Blog
  • About
  • Press
  • Privacy

Let’s be social!

  • Skip to primary navigation
  • Skip to main content
  • Skip to primary sidebar
  • Skip to footer
Sawdust 2 Stitches

Sawdust 2 Stitches

  • Tutorials
    • Around the House
    • Organization
    • Wall Decor
    • Sewing
  • Makeovers
    • R.V.
    • Room Makeover
    • Furniture Makeover
    • Decor Makeover
  • Build Plans
    • Small Builds
    • Wall Decor
    • Dresser
    • Tables
    • Seating
    • Shelving
    • Hidden Compartment
  • Seasonal
    • Summer
    • Spring
    • Fall
    • Winter
  • Home Tours
    • First Home
    • Current Home
    • 70’s Ranch Home
  • Workshop

Shelf Under Cabinets

March 3, 2023

The dimensions of this build will be based on the dimensions of your cabinets. Therefore a comprehensive cut list is not included.

Begin measuring the entire width of your cabinets.

 Things to consider when measuring:

  • If there are several cabinets in a row, measure the entire width of the adjoined cabinets.

                 Width of Cabinets + ½” (overhang) + ½” (overhang) = Length of 12 ½” & 10” horizontal boards.

  • If the cabinet series dead ends into a wall.

Width of Cabinets + ½” (overhang)= Width of Boards  12 ½” & 10” horizontal boards.

  • If the cabinet series dead ends into walls on both sides= Width of the cabinets= Width of 12 ½” & 10” horizontal boards.

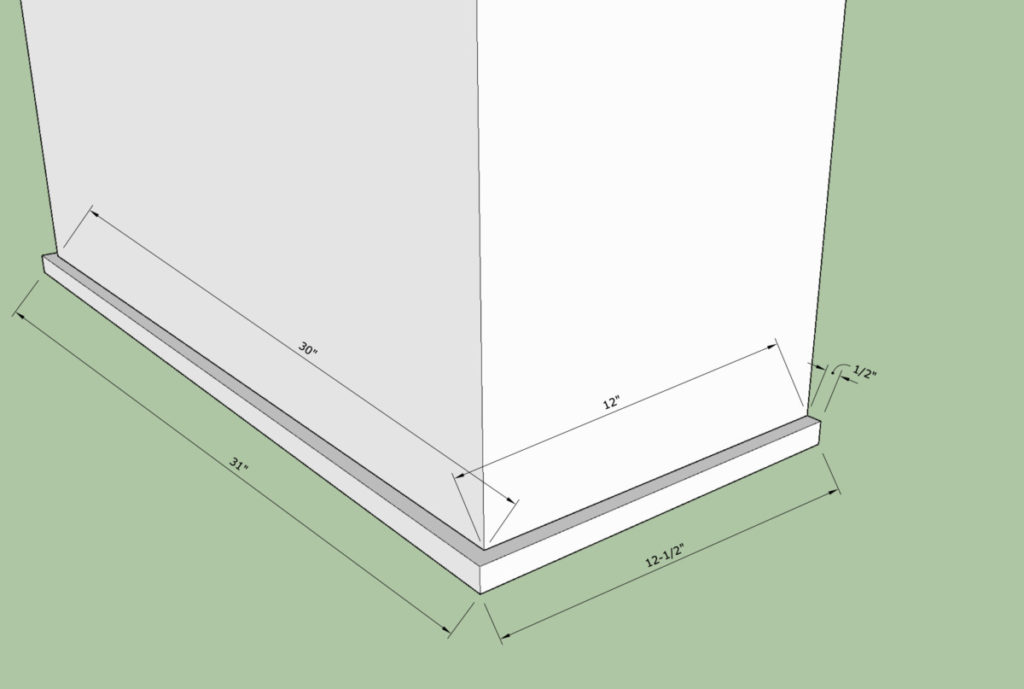
 The depth of “Upper Cabinets” is fairly universal.  However, for clarity sake, you take the depth measurement of your cabinets and add ½”.


Prep Boards

 I used 3/4″ Plywood for all of my boards. In order to hide the exposed ply  I used edge banding to wrap my boards edges. 

Before assembling I prefer to sand my boards.
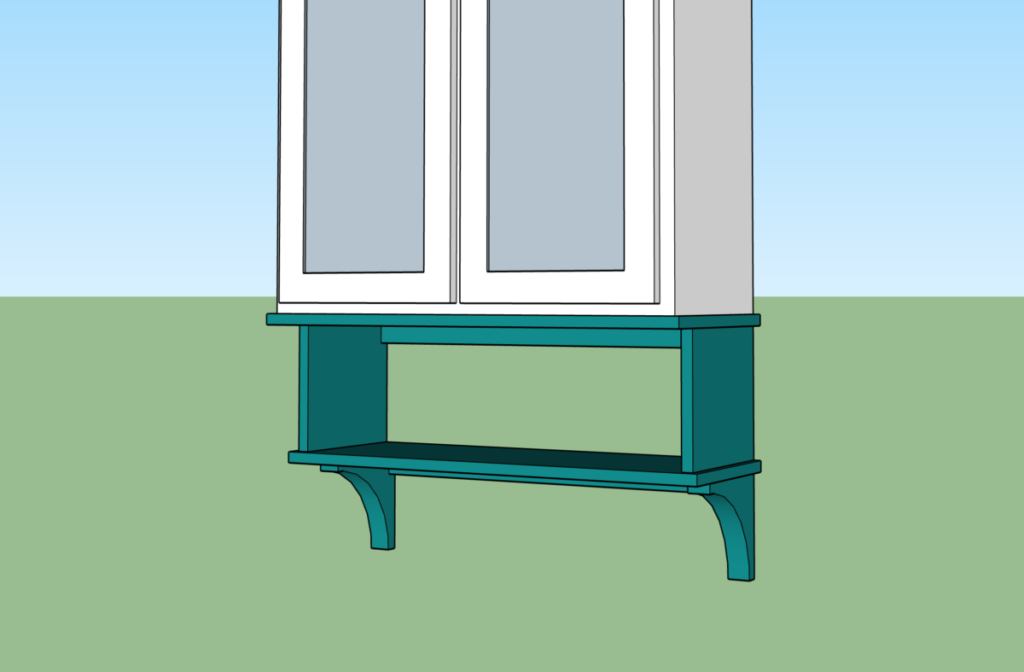
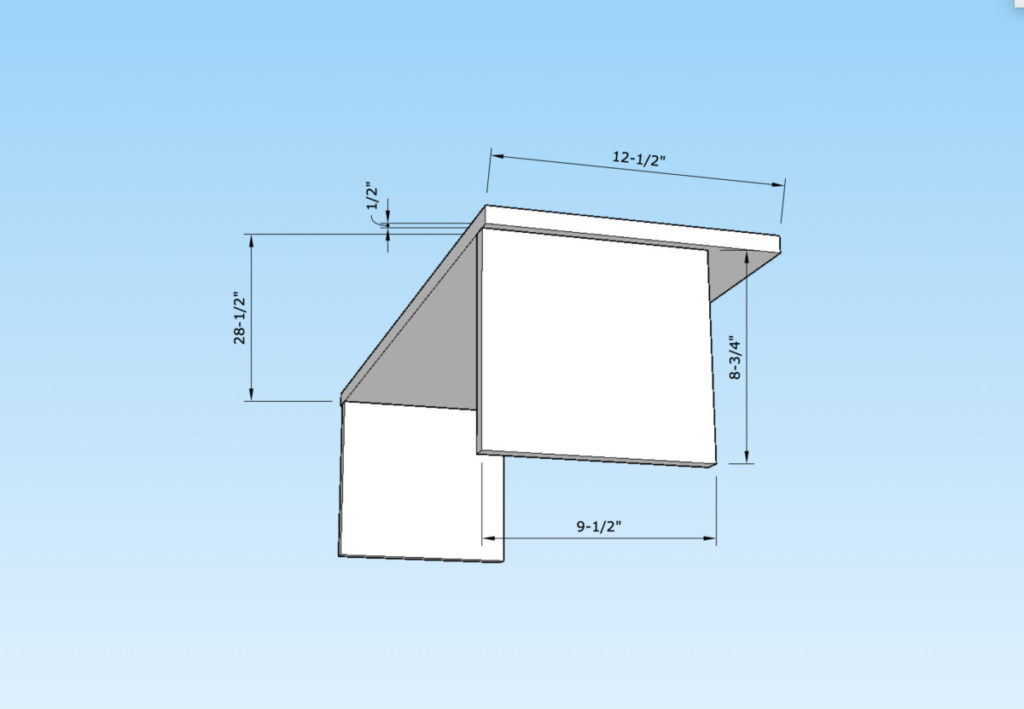
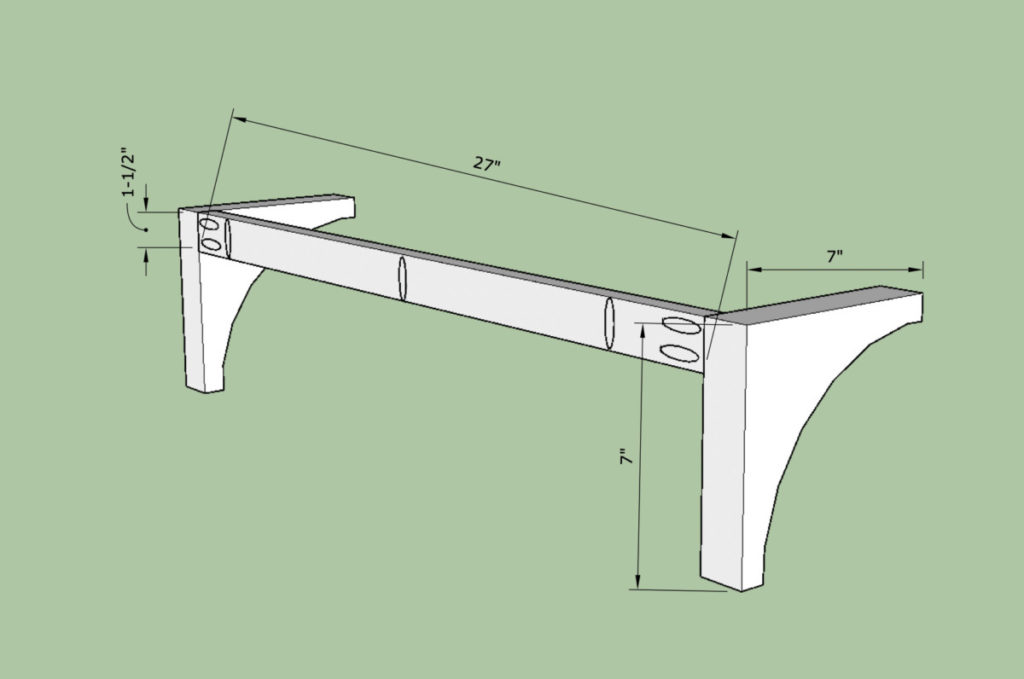
 

Attach Sides

Secure the sides to the top board by driving 1.5″ screws through the top board and into the sides below. Use the diagram below for dimensions and spacing.

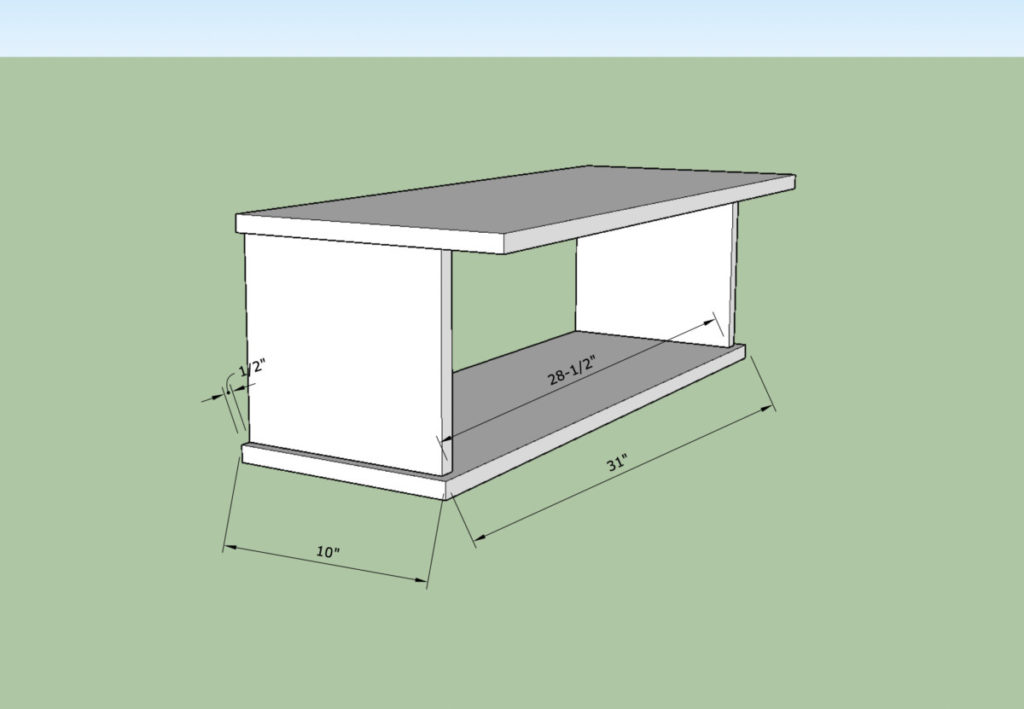
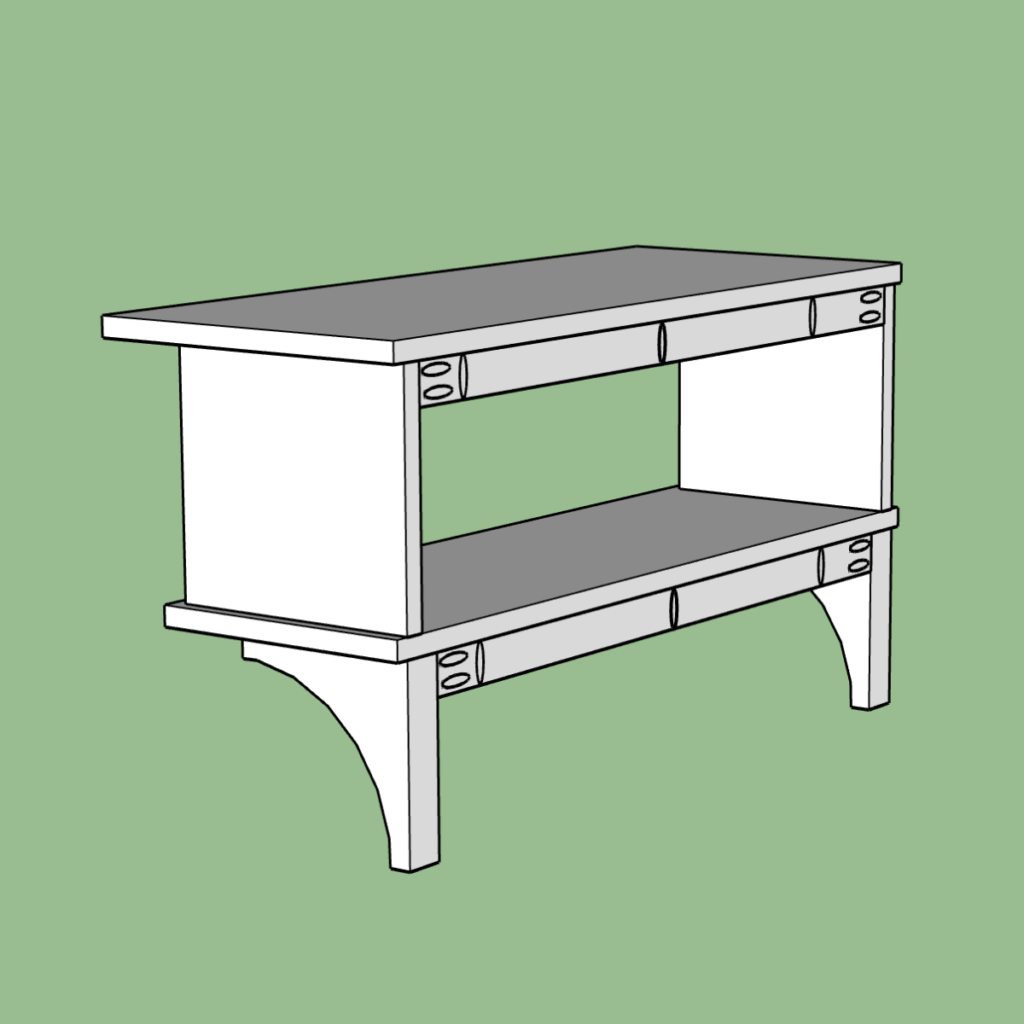
Attach Bottom of Under Cabinet Shelf

Using 1.5″ screws secure the bottom of the shelf by driving screw through the bottom shelf and into the side supports above it. ( See diagram below for more dimensions and spacing.)

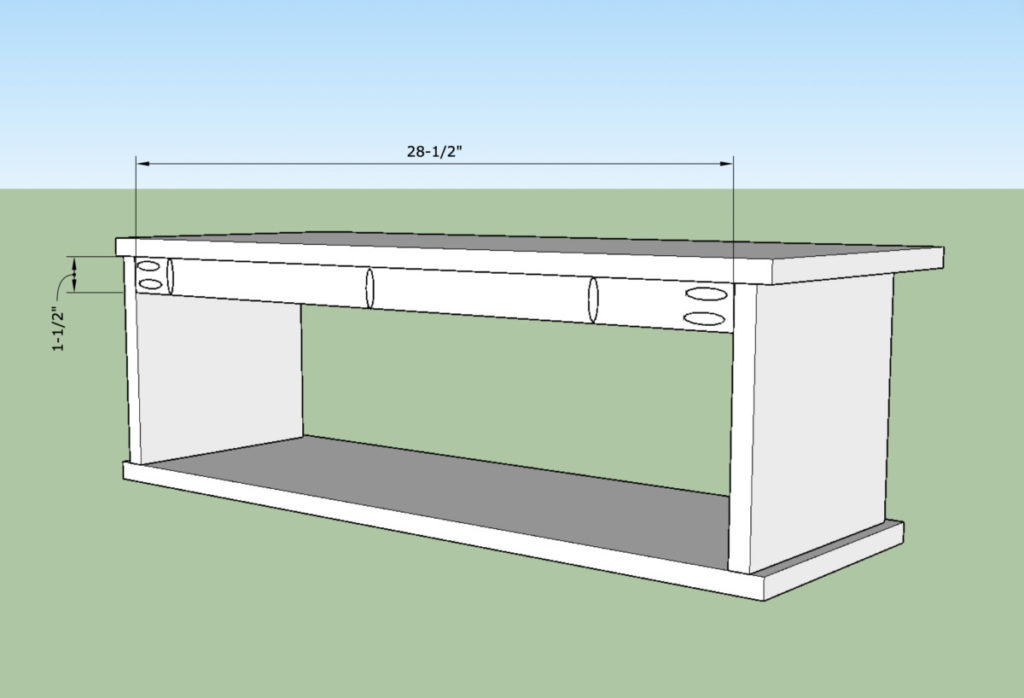
Attach Back Support for Shelf Under Cabinet

 Using  1.25″ pocket holes screws secure the upper back support to the interior of the shelf.  See the below diagram for dimensions.

Assemble Base of Under Cabinet Shelf

 Using the below diagram  drill pocket holes and attach the back bottom support to the sides of corbels. ( The dimension of this board will vary based on your cabinets.)

Width of Horizontal Boards – 1/2″(overhang) – 1/2″(overhang) – 1 3/4″ (corbel) – 1 3/4″ (corbel) = Interior Bottom Support

Attach Base Support

Using  DAP Weldwood and 1 1/4″ pocket hole screws,  secure the support to the bottom of the shelf. (See diagram below for dimensions and spacing.)
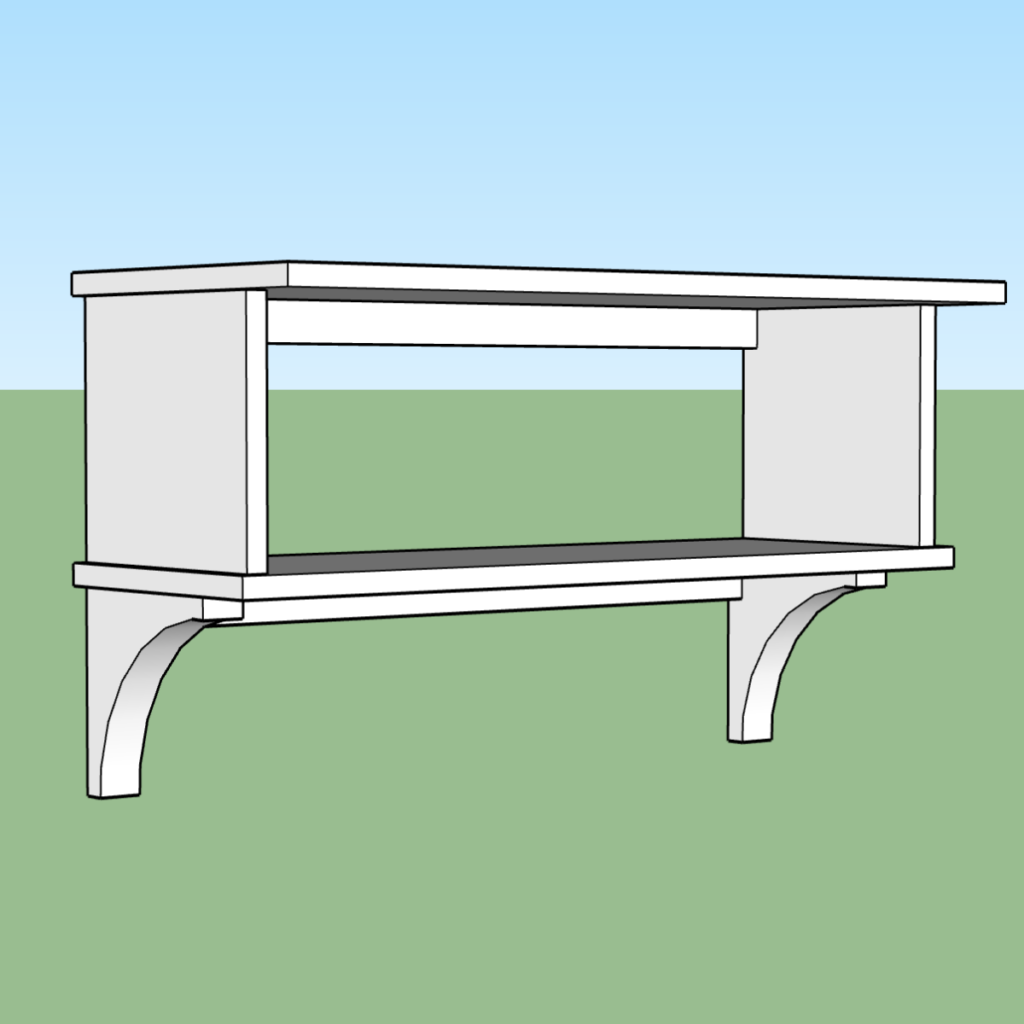
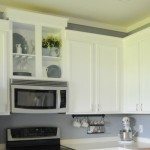
Attach to Cabinet

For more details on how I secured the shelf to the cabinet see my full tutorial here.

More from my site

  • Chalkboard CalendarChalkboard Calendar
  • Distressing FurnitureDistressing Furniture
  • Dresser Makeover into a Mini MudroomDresser Makeover into a Mini Mudroom
  • Wall PlanterWall Planter
  • How to: Ombre Painting Wall  ArtHow to: Ombre Painting Wall Art
  • Halloween DecorHalloween Decor

in Uncategorized

you may also like
Stair Tread Makeover
Building a Mantle
Guitar Display Case
Convert Cabinet to Dog Crate

Primary Sidebar

  • Facebook
  • Instagram
  • Pinterest
  • Twitter
  • YouTube
IMG_9167 (1).jpg fd
DIY & Design

Meet Corey

Hi everyone, my name is Corey, and I have a problem. I can’t leave well enough alone… The best therapy usually involves a variety of power tools. So, in the few “spare” moments I am not entertaining my two beautiful, rambunctious, boys, I can typically be found hunched over a sewing machine and/or covered in sawdust. All in the efforts to create a perfect balance of aesthetics and practicality in our home.
read more

Join our mailing list!

DIY & design ideas - right in your inbox!

Featured

Stair Tread Makeover

Categories

  • 70's Ranch Home
  • Around the House
  • Build Plans
  • Crafts
  • Current Home
  • Decor Makeovers
  • Dresser
  • Exterior
  • Fall
  • First Home
  • Furniture Makeover
  • Hidden Compartment
  • Kitchen
  • Lighting
  • Makovers
  • Master Closet
  • Organization
  • R.V.
  • Room Makeovers
  • Seasonal
  • Seating
  • Sewing
  • Shelving
  • Small Builds
  • Smart Home
  • Spring
  • Summer
  • Tables
  • Tablescape
  • Tutorials
  • Uncategorized
  • Wall Art
  • Wall Decor
  • Winter
  • Workshop

Footer

Contact Me: Corey@Sawdust2Stitches.com

Latest ‘Grams

Follow on Instagram
2020 © Your Blog Name
theme by soleilflare
Enter your name and email and get the weekly newsletter... it's FREE!
Your information will *never* be shared or sold to a 3rd party.