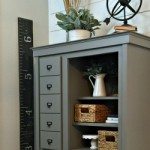
Does this cabinet look familiar !? You may recall me making a nearly identical cabinet into a MEDIA CABINET.

Well, I picked up both of these cabinets at a garage sale for $5.00! They weren’t in perfect shape, but they were made of decent wood, and I knew I would have definitely spent more to make them from scratch. It really was a no brainer for me.
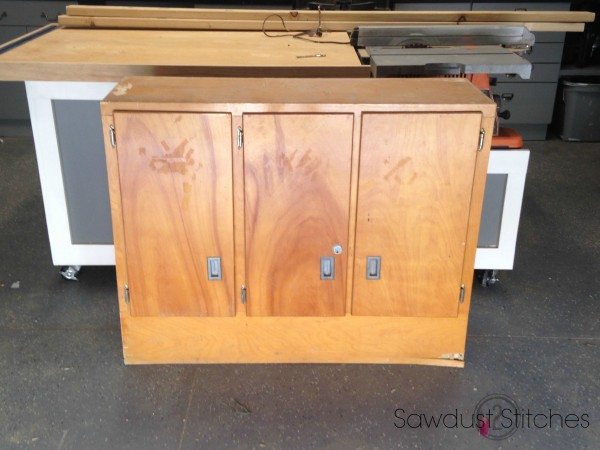
This was definitely a play it by ear sort of project. I dove in with reckless abandon. I just started ripping that sucker apart.

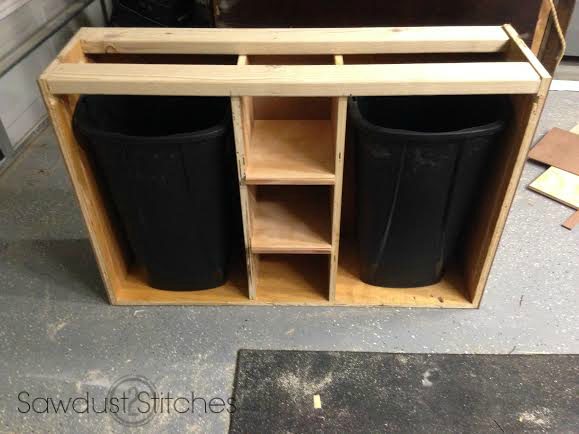
Using the shelving I removed from the unit, I built this little cubby system. Why?
- A.) To give it a little character.
- B.) To take up and dead space in between the two garbage cans.
 Fit like a glove. (Phew)
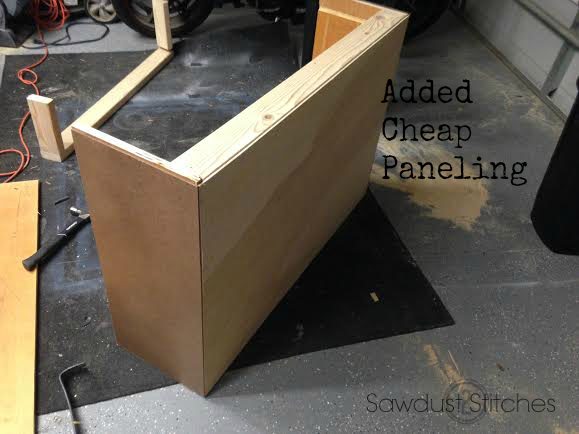
 Once, I had all the internal components mapped out, I started on the exterior. The frame of the cabinet was very sturdy, but it had more dings and blemishes than I cared to try and buff/sand out. Instead, I used leftover paneling to cover the exterior. (Notice I used all my scraps, made evident by the fact that they are all different. I knew I was painting it, so it didn’t matter) ! $0 spent

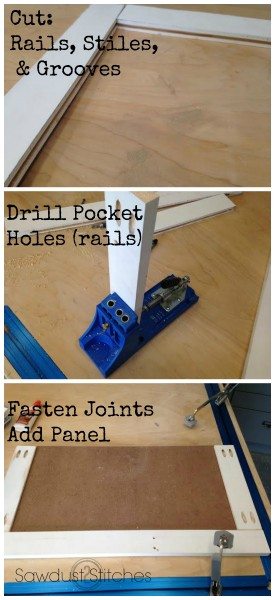
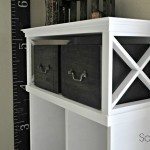
Once the paneling was all in place, I began adding some bulky trim pieces. I used primed 1×3″ and 1×2″ finger board. I then made some custom trim to trim out my cubbies. 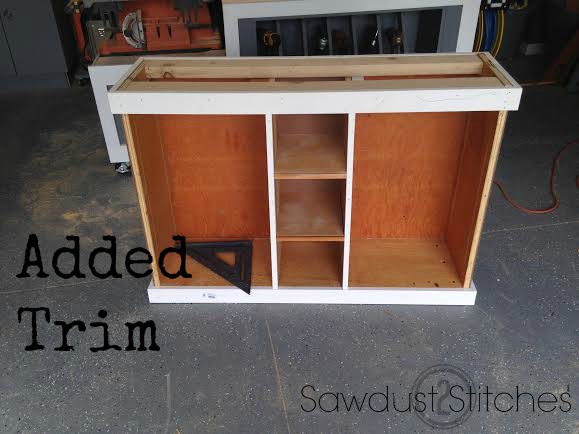
Next I needed to build my cabinet doors. This is in NO WAY, SHAPE, or FORM, a complete tutorial, but rather brief synopsis of my door making.
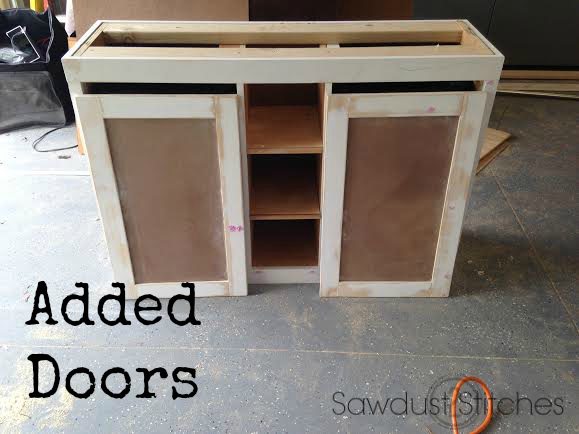
 This is when it really started coming together!
I primed and painted the back of the doors before I proceeded to install them. (Using hinges) 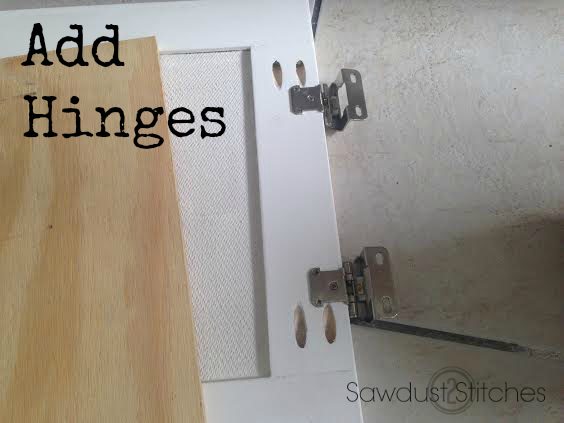
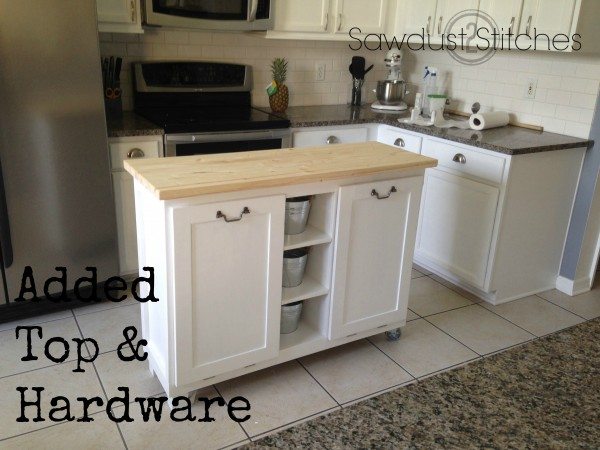
Next, I added castors and legs to the island. I wanted to be able to easily move it, but did not want it to serve as an amusement park ride for my sons. ( Keep reading to see why I wanted it mobile.)
I was then ready for the finish work. I filled holes, sanded, primed, sanded, and then painted it. I used Behr “Ultra Pure White” Glossy, it is the same color as my cabinets and cleans up nicely. I then installed my pulls. I actually purchased a TON of these from Lowes when they were discontinuing them for cheap!
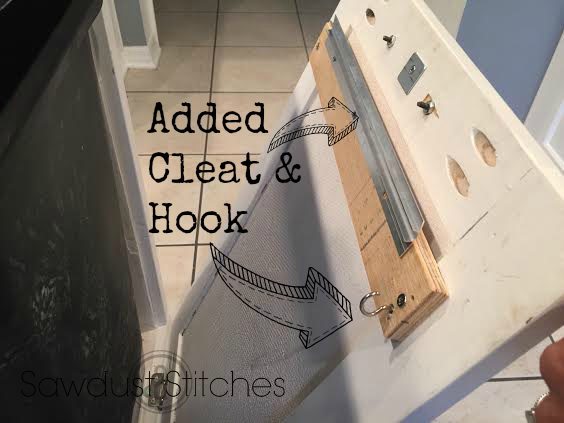
I was of course making this whole contraption to fit the garbage cans I had, and this cleat system is what worked best for me. I only used one side of the cleat, and attached it to the inside of the cabinet door.
The lip of the garbage can rests on the cleat, making it easy to remove and the weight of the can holds the door shut when not in use. I then connected a chain that ran from the interior of the cabinet and connected to the door. Ensuring that I did not have landfill on my kitchen floor. 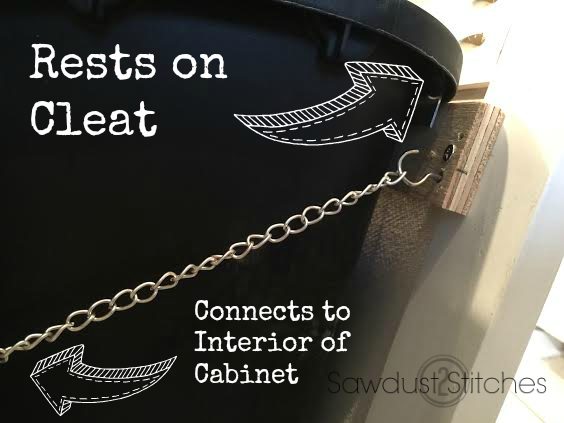
It took me a while to decide on a finish for the top. Ultimately I opted for Jacobean by Minwax, with a Satin finish. ( I was not planning on using it as a cutting board.) As an afterthought I added this towel bar. It was the perfect finishing touch. 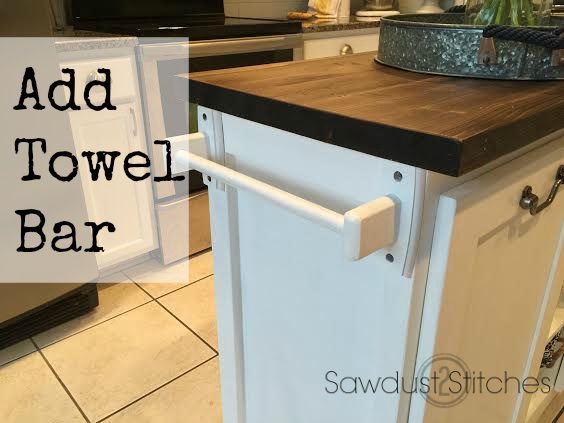
That pretty much sums it up! It hides the garbage can, and I no longer need to take 312 daily trips to the garage to access the recycling. SO NICE!
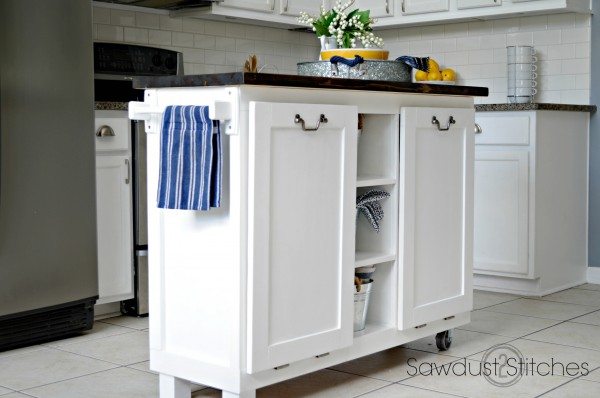
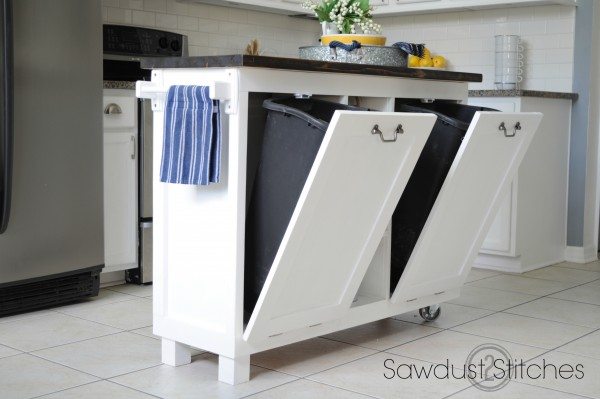
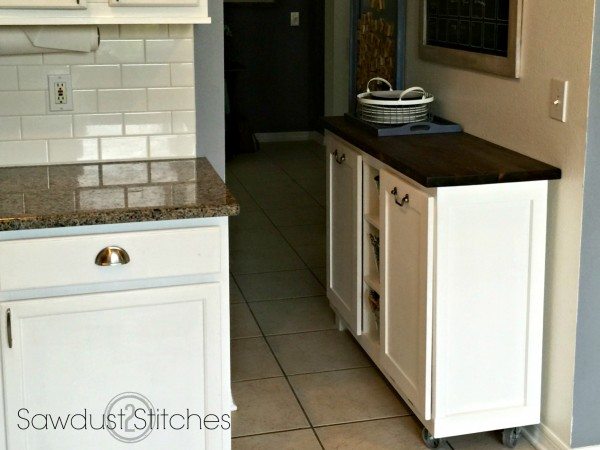
One last feature, as you recall I put casters on it because I wanted it to be moveable… and this is why. I don’t have a huge kitchen and was always afraid a island would be too bulky and get in the way. Well, I made this island to the dimensions that it would fit in the small hallway between the kitchen and the front room! So if I want it out for mopping, or entertaining guests, its no big deal! Just wheel her away! It’s love people.
So, that is the basic premise of how I turned a $5.00 garage sale cabinet, into a kitchen island!
Thanks for reading and take luck,
Corey


Thanks for posting and giving me an idea for this. We just moved into our new home, but there is no place for garbage and recyclables in the kitchen. I did not want an unsightly waste can in the middle of the kitchen so I will build as soon as I unpack and setup my shop.
Awesome! I love the idea of hiding your trash cans like that. Have you gotten your Kreg Jig System yet? I can’t wait to see what you’ll do with that beast!
I did Cassie! I busted that sucker out and am LOVING it! Some projects are in the works! 🙂
This is so amazing!! With our future in the Marine Corps coming to a close and getting ready to build a home, this is giving some fantastic ideas on how to keep things under budget and still be amazing! As always, you inspire me!!
What an amazing transformation! You always make the ugliest cabinets look like a million bucks. I cannot get over how awesome this turned out 🙂
Well THANK YOU so much! I am not-so-secretly pleased with this one! It’s now one of my favorites!
EXACTLY! I was thinking about glides too, but I will let you in on a secret, I LOATHE installing those suckers. Hahah.
You are so stinking clever! When we redo our kitxhen I want to reconfigure the awkward peninsula we have now to aore open layout that allows for an island and this one would be perfect!
Well color me flattered, thanks Rebekah! I have seen your site/work, I am sure it will be simply lovely!
Wow, I think you should approach every project with “reckless abandon”, this is AWESOME! I will definitely be on the hunt for some similar cabinets, a project like this would be a great option for a craft room too. 🙂 So glad I found you on the Haven FB group post, looking forward to meeting you in person!
Hahah reckless abandon is my preferred method. Haha. Glad you found me, and I look forward to meeting you too! It will be my very first!
Holy Smokes this is amazing!!
Hi there! Could you tell me where you got the top from and what type of wood it is? I’m a newbie to anything with wood haha. Trying to do this project as cheap as possible without sacrificing beauty. Yours looks amazing!
I was feeling particularly lazy that day, and I was a little pressed for time. I actually purchased a slab of wood from Lowes. I would typically piece the top together with wood glue and pocket holes, but… like I said I was pressed for time that day. Thanks for reading and good luck!
This is ingenious (only to be surpassed by the gun cabinet/mirror!!!). Can I ask what did you use for the top? Is that butcher block? It looks so thick and I love the stain. Very cool!
I was feeling lazy that day and a little pressed for time. They sell these slabs at Lowes, and they look similar to butcher block. It was about $25 for the top? Thanks so much for taking the time to comment.
Lady, you are an inspiration!!! Love your style!! It’s clean and classy, ad if you were to open some kind of bohemian boutique, with limited edition pieces, I could see them selling out fast!! (Well, the trash cans would need to be some other material than plastic, I think, but people would pay good money for that work!!)
Are you an expert in capentry or something?
Haha. Can you keep a secret?… I just pretend to know what I am doing 😉
Love it! I sent it to hubby as my wishlist.
Haha, Tina, THANK YOU. I am actually a stay-at-home-Mom, that likes to learn new things. I worked along side my Dad who was a contractor. He taught me the basics of tools. It just snowballed from there. Thanks for taking the time to comment and for reading along! (P.S. I have another good repurpose coming up on Wednesday 🙂