
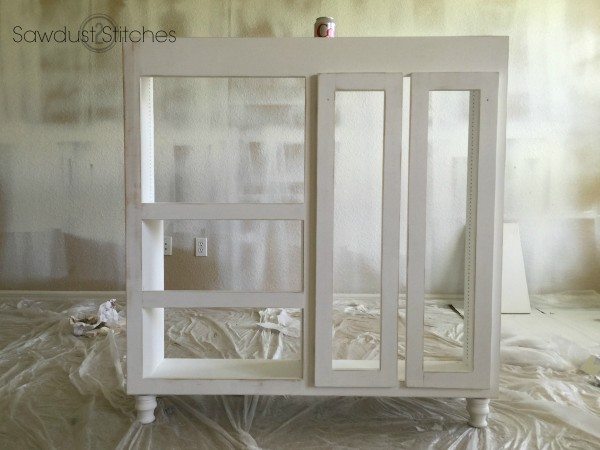
Hey all! You all KNOW I love a good furniture makeover/upcycle/re-purpose project right ? Well, if you didn’t I am telling you now! (You can check out my other re-purposed furniture projects here.) There is something about the challenge! (As a builder it is normally easier for me to start from scratch.) I love working with something plain ol’ Jane and giving it a very satisfying transformation. Admit it, you love that part of Fixer Upper, Princess Diaries, etc… For today’s project I am teaming up with the great folks at Kreg, to show you, you don’t need to be a skilled craftsman to add the “WOW” factor to those old pieces of furniture gathering dust ! So let’s do this, let’s give this old cabinet a makeover!
Disclosure: Some of the links provided are affiliate links. By purchasing through these links it supports this site and helps keep content free. You can read more about how we do this with no extra cost to you.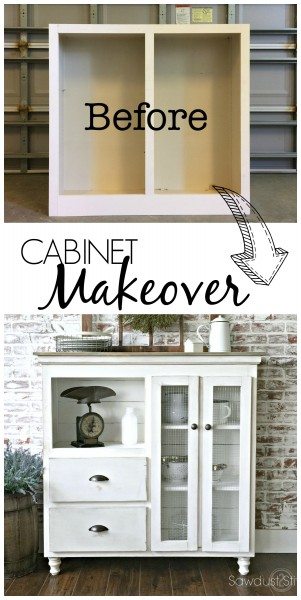
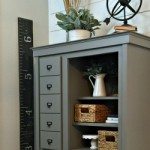
Cabinet Makeover
Supplies I Used:
- Old Cabinet in need of a facelift
- Materials for Faceframe (1″x 3″ and 1″x 2″ boards are common)
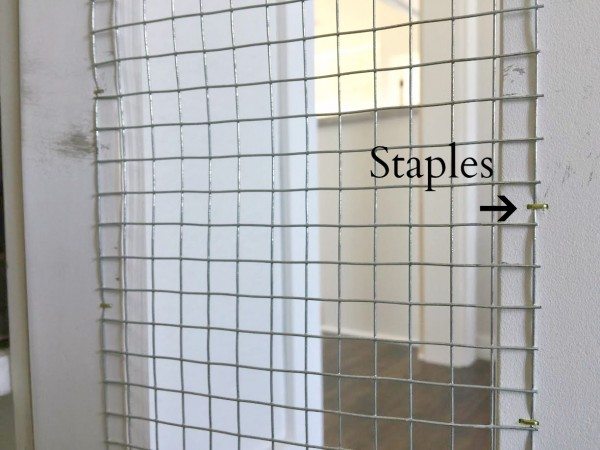
- Chicken Wire
- Concealed Hinges
- 1/2″-3/4″ Plywood (for constructing the drawers)
- Heavy Duty Stapler (attaching chicken wire to interior of doors)
Tools I Used:
- Kreg Pocket Hole Jig

- Steel Prybar (I used this to remove original the original face frame)
- Miter Saw
- Drill
- Kreg Drawer Slide Jig
- Kreg Concealed Hinge Jig
- Kreg Cabinet Hardware Jig
- Heavy Duty Stapler
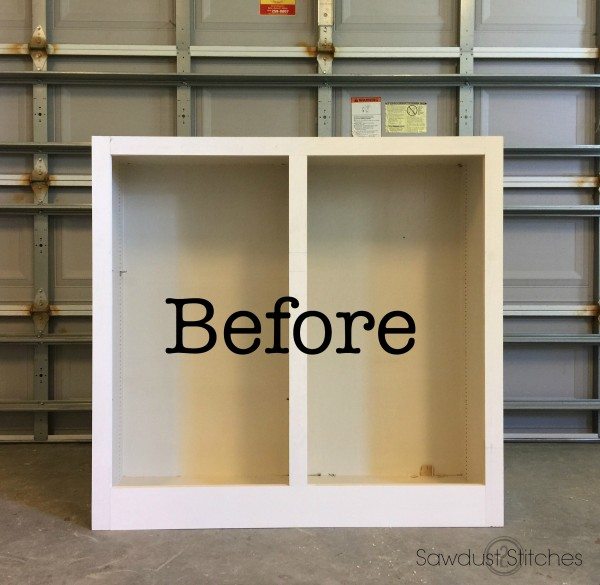
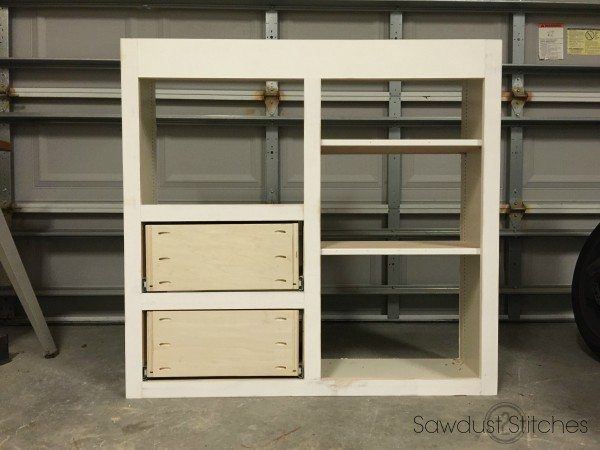
Step 1. The Carcass
Ok, I know “carcass” may sound a little morbid, but not worries, I am not loosing my mind to the nature channel. “Carcass” is what cabinet makers refer to the base of a cabinet. (Now you will sound official should you ever need to contribute to conversation at a woodworkers convention. You’re welcome.) Moving on.
Alright this part is not always necessary, but for the vision that I had for this, it would make it easier. Which leads perfectly into …

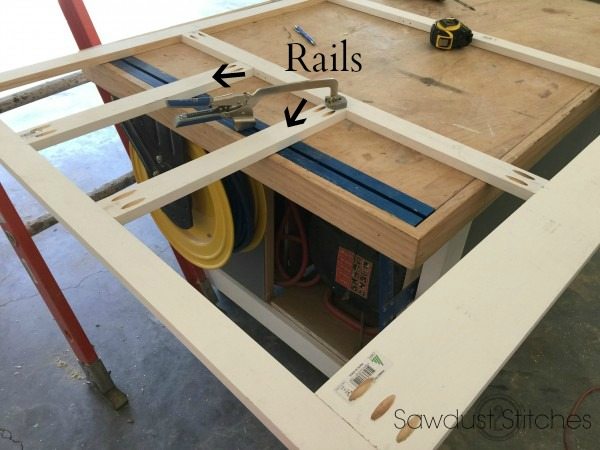
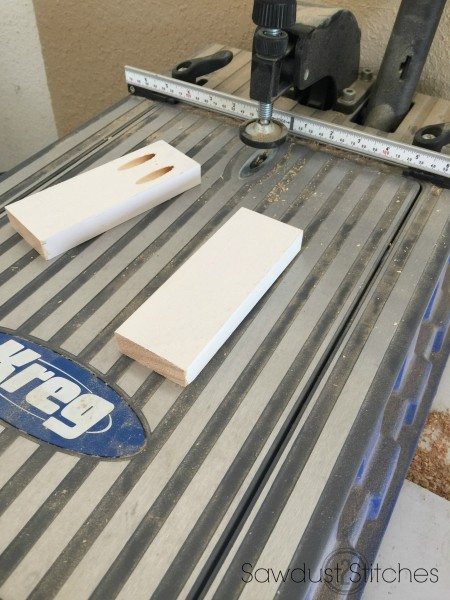
Step 2. Building a Face Frame
Making a Face Frame is once of the easiest things you can do totally change the entire look and function of a piece. I was able to use part of the original face frame and simply add a few rails. (“Rails” are the wooden pieces that run horizontally. As opposed to “Stiles” that run vertical.) Look at you, learning vernacular like a beast!
There are a lot of methods to making a “face frame”, my preferred method, (and by far the easiest in my opinion) is using a Kreg Pocket Hole Jig![]() . They are very user friendly, and make it possible to join the rails and stiles perfectly!
. They are very user friendly, and make it possible to join the rails and stiles perfectly!
Step 3. Attach Face Frame
Alright, now we are ready to re-attach our face frame. There are several ways to do this, you can use Kreg Pocket Hole Jig![]() or you can use wood glue and clamps.
or you can use wood glue and clamps. 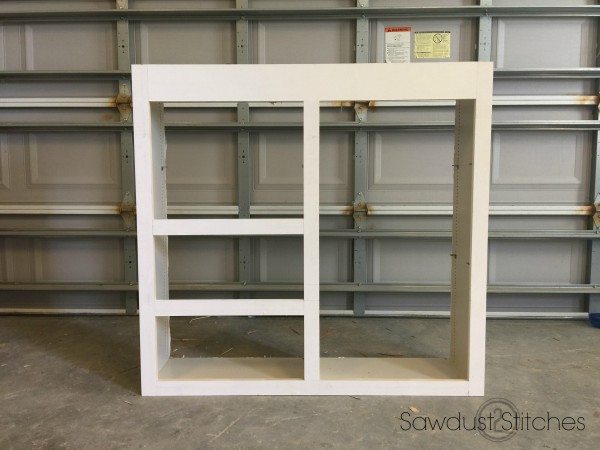
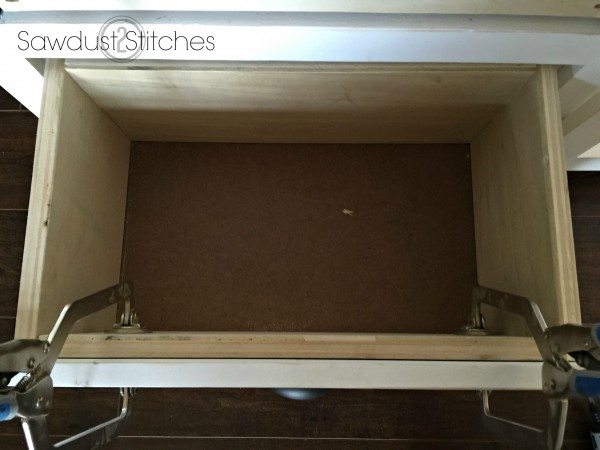
Step 4. Bring your “A” game! (Add drawers)
Remember those “rails” we added? This is why I did it… I wanted to add drawers! Never made a drawer ? It’s not hard , you are essentially making a box! The one thing that always freaked me out about adding drawers was installing the glides! Am I right ? Seriously they left me cursing and then breathing into a paper bag. ( I can do hard things, I can do hard things!) 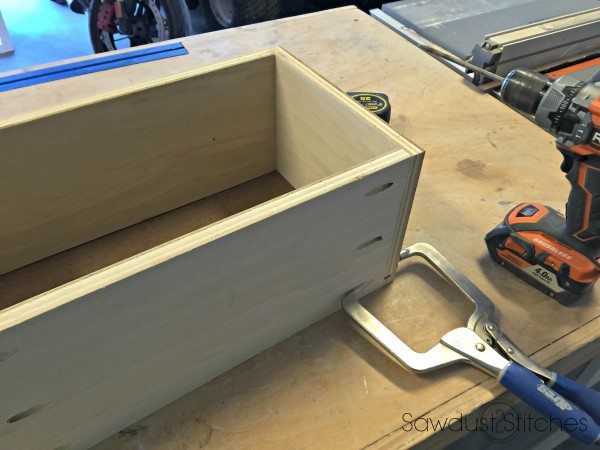 Kreg must have heard my cry of obscenities, because they created a jig that would save me time and bring my shop talk back to G-rated… Well, that’s a lie, but it was definitely closer to a PG-13 level.
They created these beauties! GAME CHANGERS.
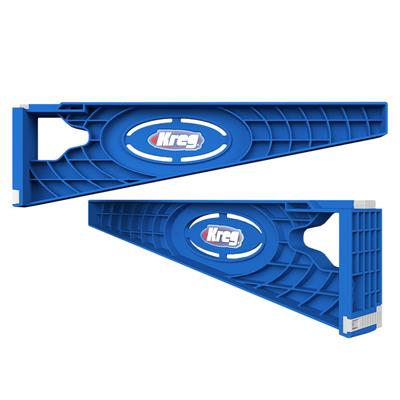
These Kreg Drawer Slide Jigs level, measure, gives you an extra set of hands, and makes dinner. Ok, maybe not make dinner, but you get what I am saying, these things help me get it right the first time! These jigs clamp right in place and have tabs that hold it perfectly in place. Seriously, game changer.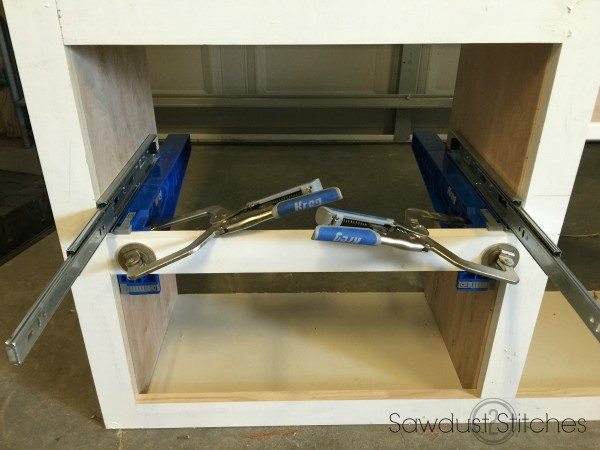 But wait there is more! They not only help install the glides to the cabinet, they perfectly allow you to install the slides to the drawers themselves. No more adjusting and drilling a hundred tiny holes and praying you get it right. The drawers are positioned for perfect alignment.
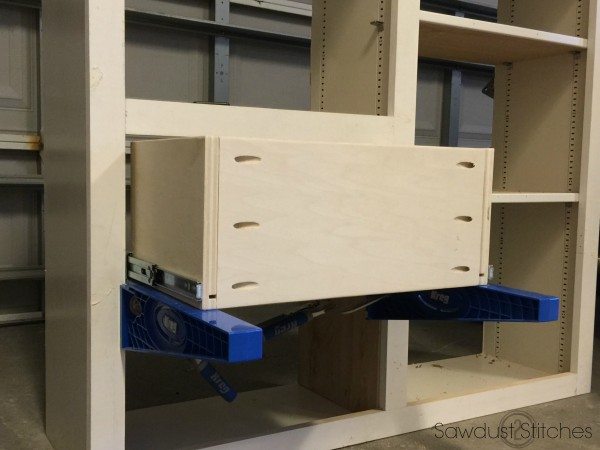
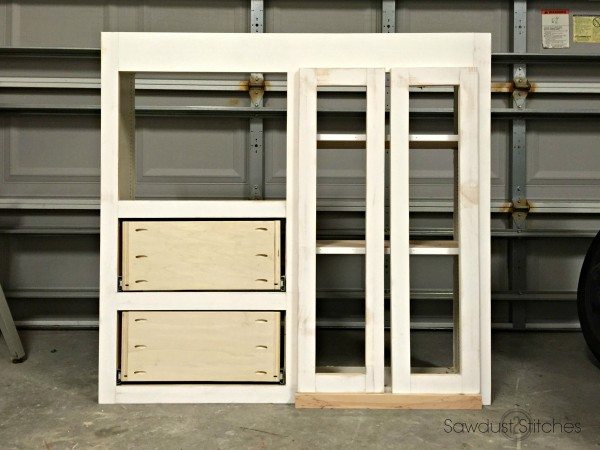
Step 5 . Add Doors
Another great way to bring your makeover to the next level is to add doors! I wanted to have something that would give it character, not just a paneled door. So, formed two empty frame doors.
 It is a very simple build that only requires adding Kreg Pocket Holes to the rails. Clamp them down and screw them in place…Phrasing.
  Now for the hinges… Installing hinges use to send me running for my paper bag. Not anymore! I used the new Kreg Concealed Hinge Jig
![]() . You just clamp it in place and drill, then repeat. Perfection.
. You just clamp it in place and drill, then repeat. Perfection. 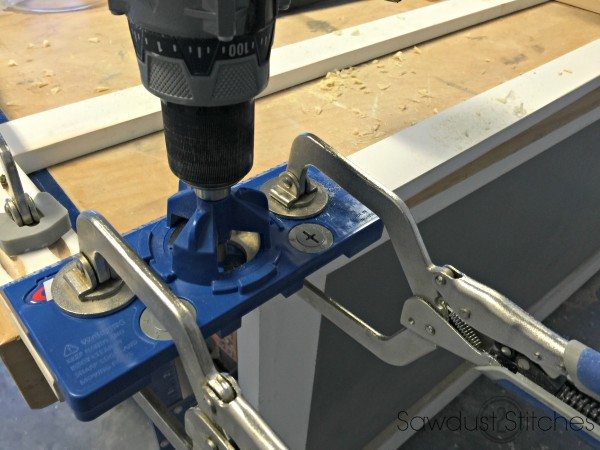
When it comes to adding the doors I like to put them on a board that rests on the ground and then attach the hinges to the interior of the cabinet. This little trick will ensure that the doors sit perfectly with no wonky business going on.
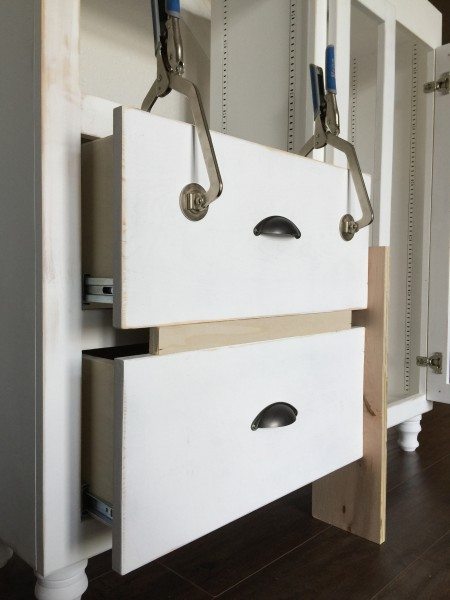
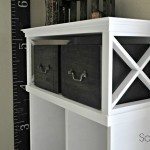
Step 6. Add Drawer Fronts
Next I made my drawer fronts from a piece of 1’x 10″ pine. I measure so that the drawer would be 1″ wider AND taller that the opening for the drawer. (This will create a 1/2″ overlap all the way around.) I picked my hardware and was ready to install. Again Kreg ingenuity to the rescue. They have create a Kreg Cabinet Hardware Jig that allows yo to adjust the exact placement of your drilled holes, and has preset notches for standard width handles, pulls, and knobs! My favorite part, is the steel collar that allows your drill to essentially become a pseudo drill-press. The collar ensures that the hole is drilled STRAIGHT! ( I am ashamed to admit I have had my kitchen cabinets hole placement have a little bit of crazy-eyed action going on. No more! 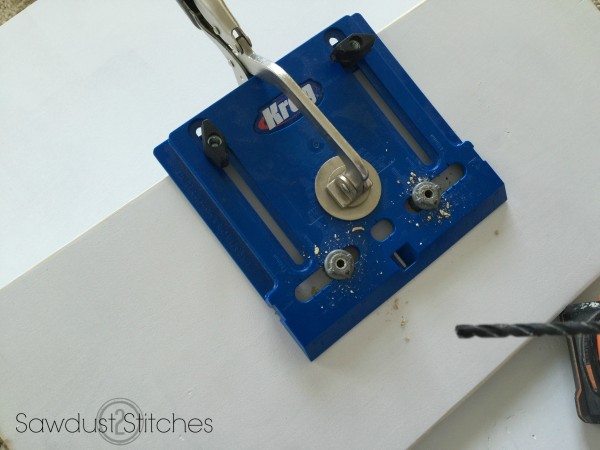
Now that the drawer front has the pull/handle installed, I was ready to attach the drawer front to the drawer. I used clamps to hold the drawer front in place and used
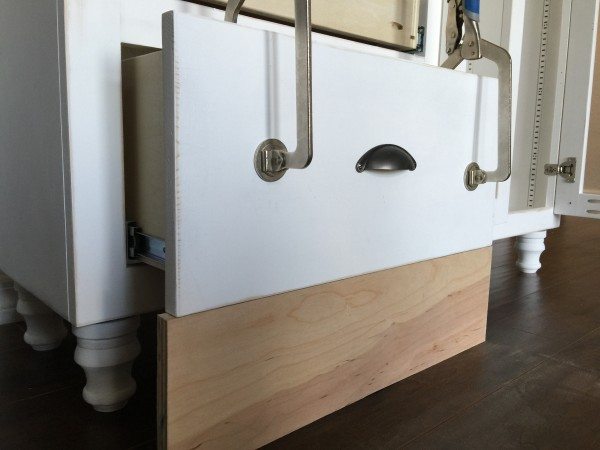
I like to use the same tip to add my drawer fronts as I did my cabinet doors. (See step 5. )
Step 7. Finishing Touches
I wanted to give it a little height and some farmhouse character, so I added some screw on legs right before I painted it. ( I removed the drawer hardware so that I could use a paint sprayer to apply the paint.)
 While that was drying I took the back ( that we already removed), and cut it up! Yup, I cut it up into about 5.5″ strips, sanded the edges, and then painted them white as well. This will create a fun shiplap look for the backing. Once the strips were dry I reattached them to the back with wood glue , and reinforced with 1″ finish nails.
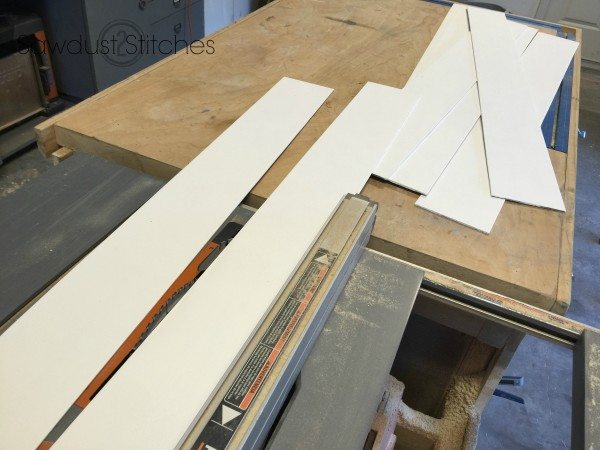
I also added some trim and a wood slab to the top to add balance to the top. Also, I really wanted this to be a two-tone piece (paint and stain combined in the same piece). The new trim and top slab of wood, would allow me to create the “two-tone” look. 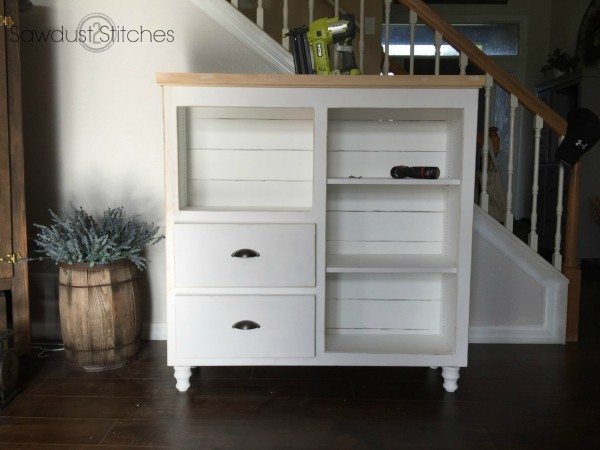
The only thing I needed to do was re-attach the doors and add “chicken wire” to the inside of the doors and this baby was done!
Ta-Da! Mind BLOWN! #micdrop
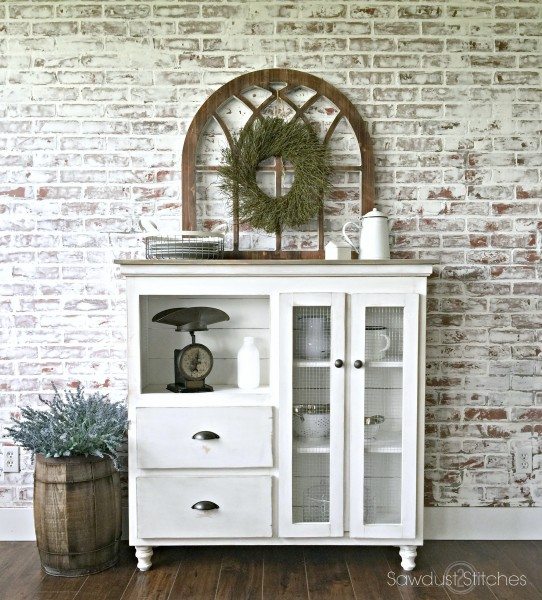
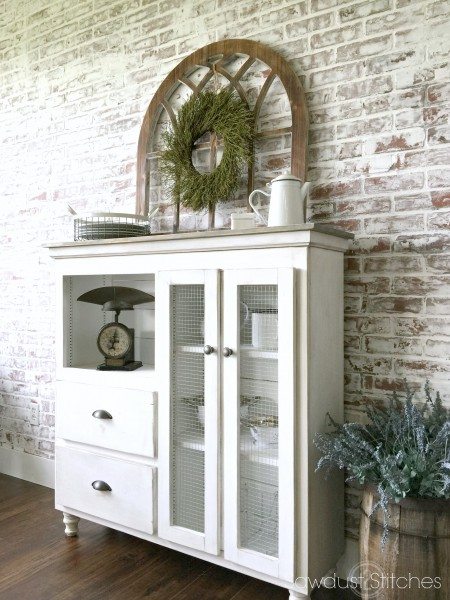
Well there you have it folks, yet another win for re-purposed projects everywhere!
Take Luck,
Corey
 Copyright secured by Digiprove © 2017


Brilliant!
I love it! I am interested to know where to find an arched “window” similar to yours which is hanging above your cabinet.
WOW! All I can say is WOW!! A real beauty and such good instructions. Have pinned this so if I run onto a carcass I think I can fix, I’ll know how to do it.
OMG! beautiful and you did a fantastic job, great tutorial.
Correy – thank you for the great ideas. one question… did you add a stile to cover the gap between the doors?
I did! I need to go back and add a picture of that! I added it directly to the door itself to close the gap.
What is behind the space between the doors? Looks like there is a stile there. Great build, I love it!
I do wish, however that it didn’t take so many specific tools to do this. Too much of an investment for one
project!
This looks SO good! I am loving the chicken wire door. Fantastic job!
Best,
Kelly
I’m amazed and VERY impressed! LOVE this piece. Maybe, one day… sigh. (First time reader, here!)
hello there, i’ve readen the blog. it’s really intersting and the DIY projects which requires stapling you’ve done it very well. I really like your work dude.
thanks for the lovely post.