Today I am excited to be teaming up with the great folks over at Crates and Pallet to bring you some AWESOME new build plans featuring their ever popular Large Wooden Crate! I am sure you have seen these available at many large retailers, including Home Depot.,,
Which bring me to some other exciting news! I am teaming up with some of my favorite blogger friends Jaime from That’s My Letter and Jen from The House of Wood, along with the wonderful folks Crates and Pallet to bring you some giveaways!
Enter below for your chance to win a $50 Home Depot gift card! (Three winners will be chosen!)
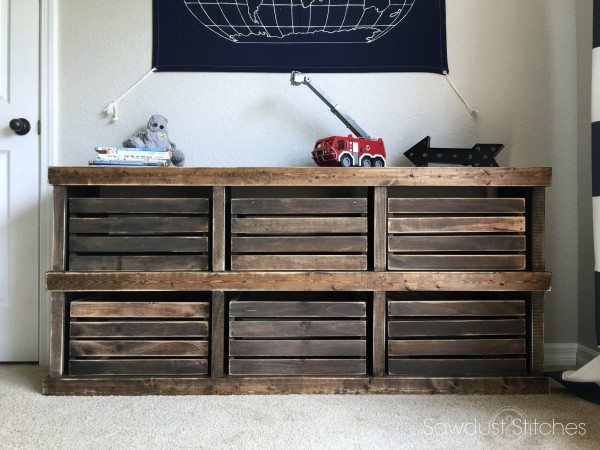
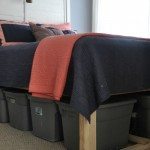
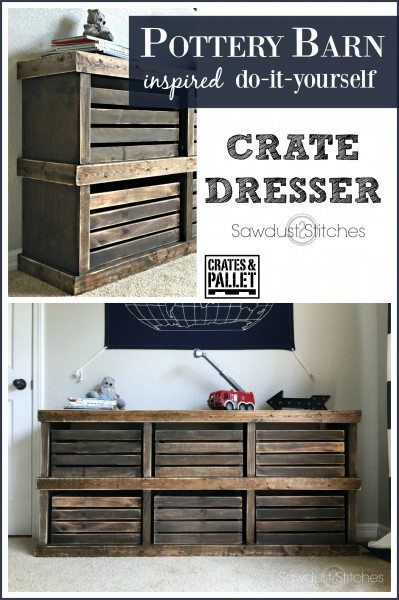
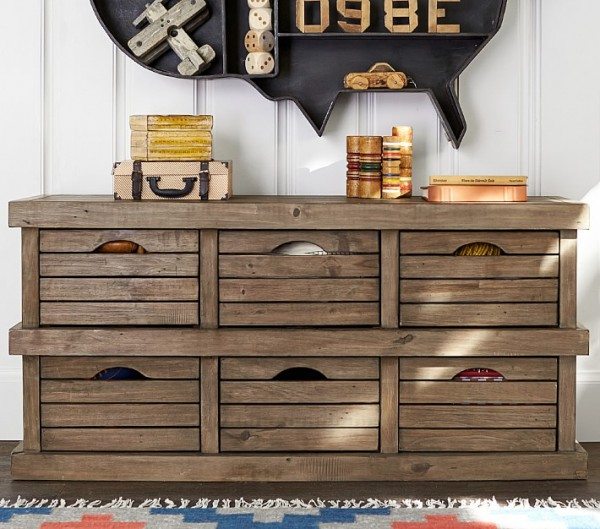
When it comes to hiding toy clutter, I love to reference Pottery Barn Kids for great inspiration! They recently carried a”Low Crate Storage” dresser, it was perfect solution for the kids room/ toy room dilemma. They don’t currently carry this piece of furniture, but that is no problem, because today I am going to show you how I made my own using the “Large Crate” from Crates and Pallet!
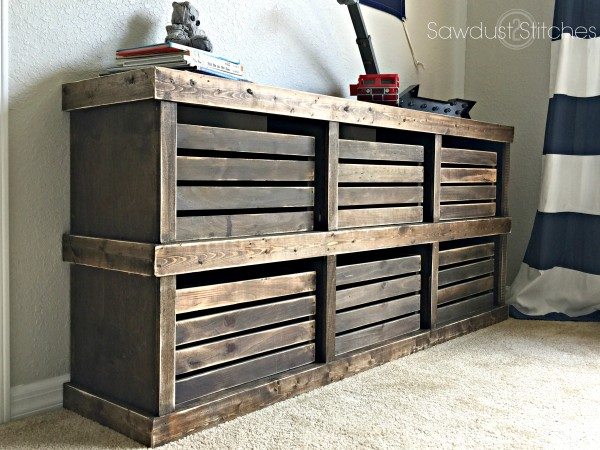
How to Make a Pottery Barn Inspired Crate Dresser
Materials Used:
- (1) 4’x 8′ 3/4″ Plywood
- (3) 1″x 3″ Board
- (3) 1″x .5″ Board (Typically found with specialty woods, mine came in 3′ pieces)
- (6) Large Crate
- 1.5″ Pocket Hole Screws
- 1.5″ nails
- Wood Glue
- Wood Stain
Tools Suggested:
- Drill
- Kreg Jig
- Table Saw
- Nail Gun
- Miter Saw
- Sander
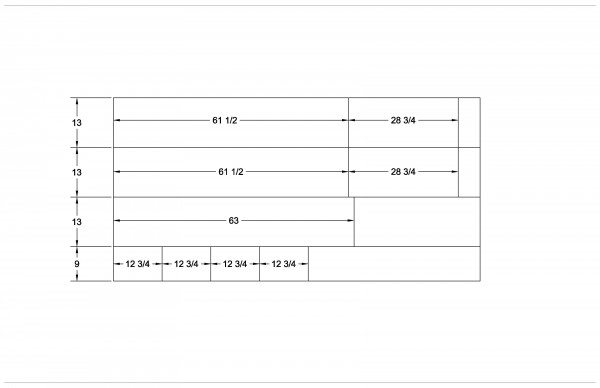
Cut List:
From the 4’x 8′ x 3/4″ (See Diagram Below)
- (2) @ 61 1/2″ x 13″
- (1) @ 63″x 13″
- (2) @ 28 3/4″x 13″
- (4) @ 9″x 12 3/4″
From 1″x 3″ Boards
- (3) @ 64 1/2″ WITH 45° angles on BOTH ends.(It will measure 64 1/2″ from long point to long point)
- (6) @ 13 3/4″ WITH 45 ° angle on ONE end. (It will measure 13 3/4″ from straight cut to long point)
From 2″x 1/2″ Board
- (6) @ 11″
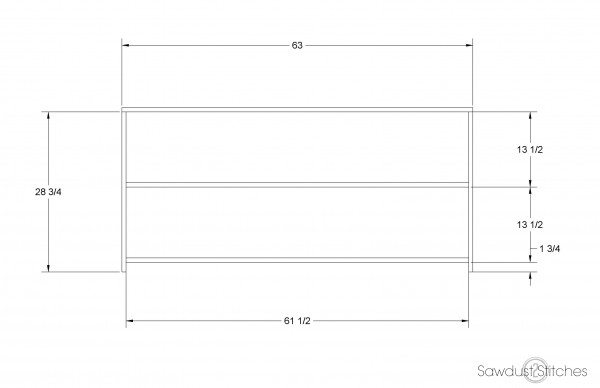
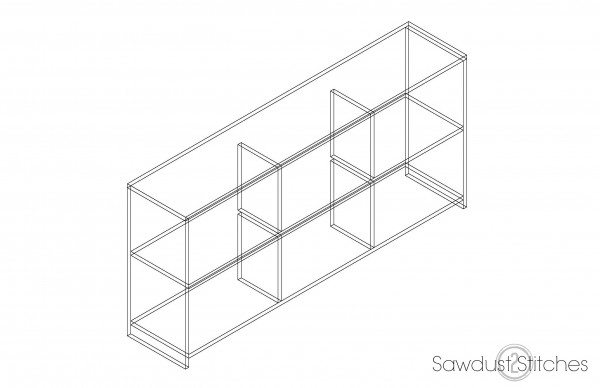
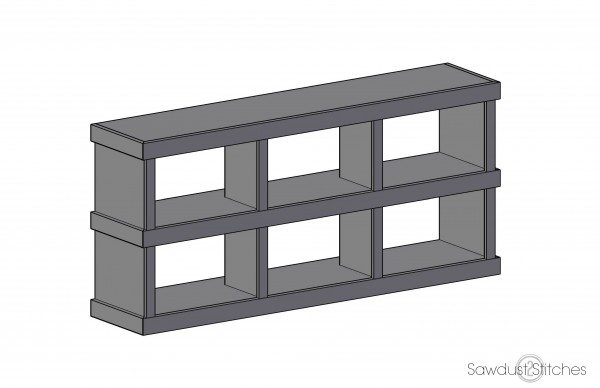
Step 1: Assemble Frame
When joining the plywood together, I suggest using wood glue, pocket holes, and pocket hole screws at all joints.
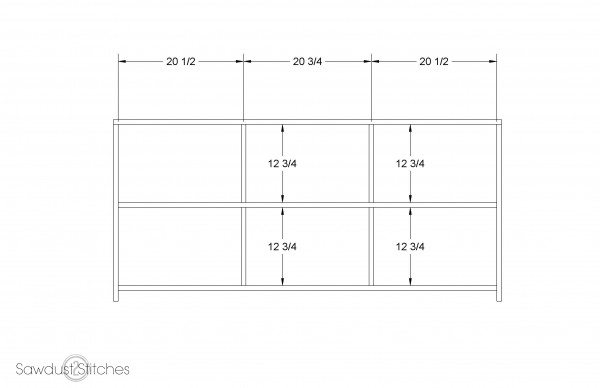
Step 2: Add Dividers
Again, when I join plywood together I always use pocket holes, and pocket hole screws. For added security I usually use wood glue as well.
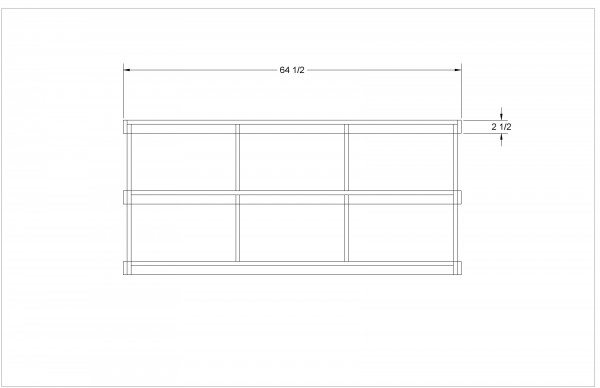
 Step 3: Add 1″x 3″ Trim
After the base unit is assembled, attach the 1″x 3″ trim boards. When attaching mine, I used 1 1/2″ finish nails and for added strength I used wood glue as well. ( This piece is going in my kids toy room, so I will basically just slather the entire thing in wood glue, for good measure.)
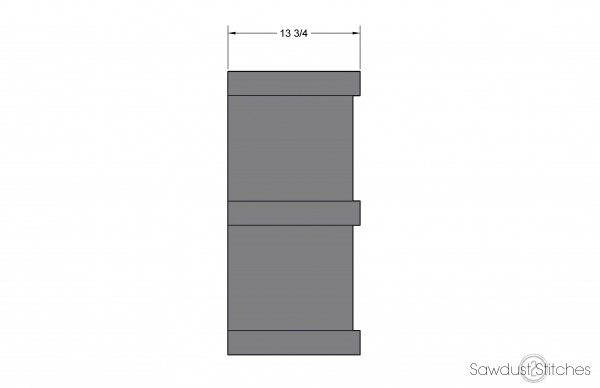
Repeat the same process on the sides. Just slather it, and attach with 1 1/2″ nails. When attaching these, mind that they are square… (You can do hard things!)
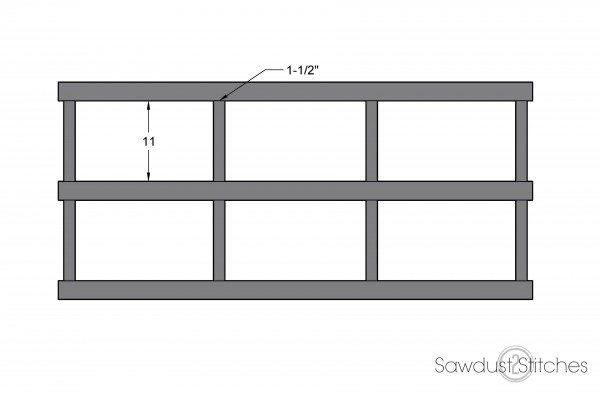
Step 4: Add 2″x 1/2″ Trim
You are almost there! All you need to do is add the 1/2″ trim pieces. Same routine, slather, and then nail.
Step 5: Finish
At this point you are essentially done building! Now for the fun part… (I’m trying to be an optimist… today.) Next you GET to fill all the nail holes! Once the filler has dried, you have the opportunity to sand the entire unit! Lastly, pick your color and finish that sucker! I used Jacobean by Minwax. (It is my Ol’reliable.)
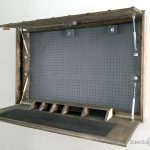
Step 6: Add Back Panel (if desired)
I set my dresser up against a wall so there was no need to add a piece of back paneling. However it is an option, should you need it. If not, step back and enjoy the fact that you are done! And soon, very soon there will be far less toys strewn about the floor. (Haha, good luck with that Momma!)
Thanks so much for stopping by! Make sure you enter in the giveaway at the beginning of the post and you check out these other awesome sites to see how they use crates!
That’s My Letter
Take Luck,
Corey
 Copyright secured by Digiprove © 2016