*This post contains affiliate links and is paid for in part by DAP partnership.
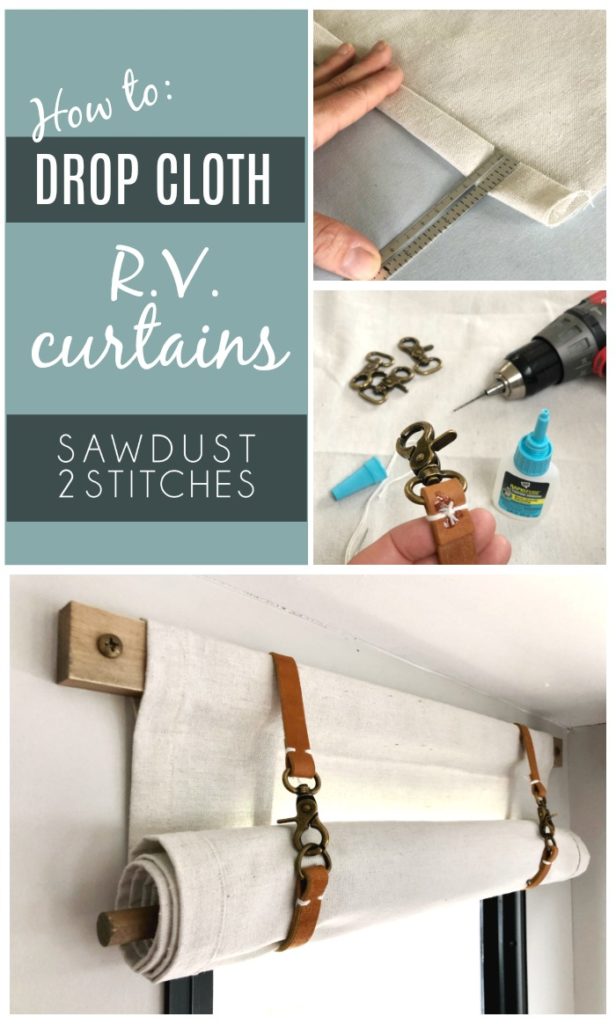
We are currently in the midst of our second camper renovation. (You can see our first one here.) There have been plenty of decorative decisions to be made, but the fate of the R.V. curtains had already been decided. I made these curtains for our last R.V. and I absolutely loved them! Actually it would seem a ton of readers loved them, so I finally took the time to write up the process I used to create these R.V. curtains that add a ton of character.
Tools Used
- Rotary Cutter
- Cutting Mat
- Straight Edge
- Sewing Machine
- Upholstery Needle
- Straight Pins
- Drill
- Saw
- 1/8″ Drill Bit
- 1/4″ Drill Bit
Supplies Needed
- Drop Cloth
- Brass Lobster Clasp
- 3/4 Brass D- Rings
- 5/8″ Leather Strap – Amazon
- White String (Thin)
- DAP Rapid Fuse
- 1 1/4″ x 1/4″ Button Head Screws
- Gold Spray Paint
- Oil Rubbed Bronze Spray Paint
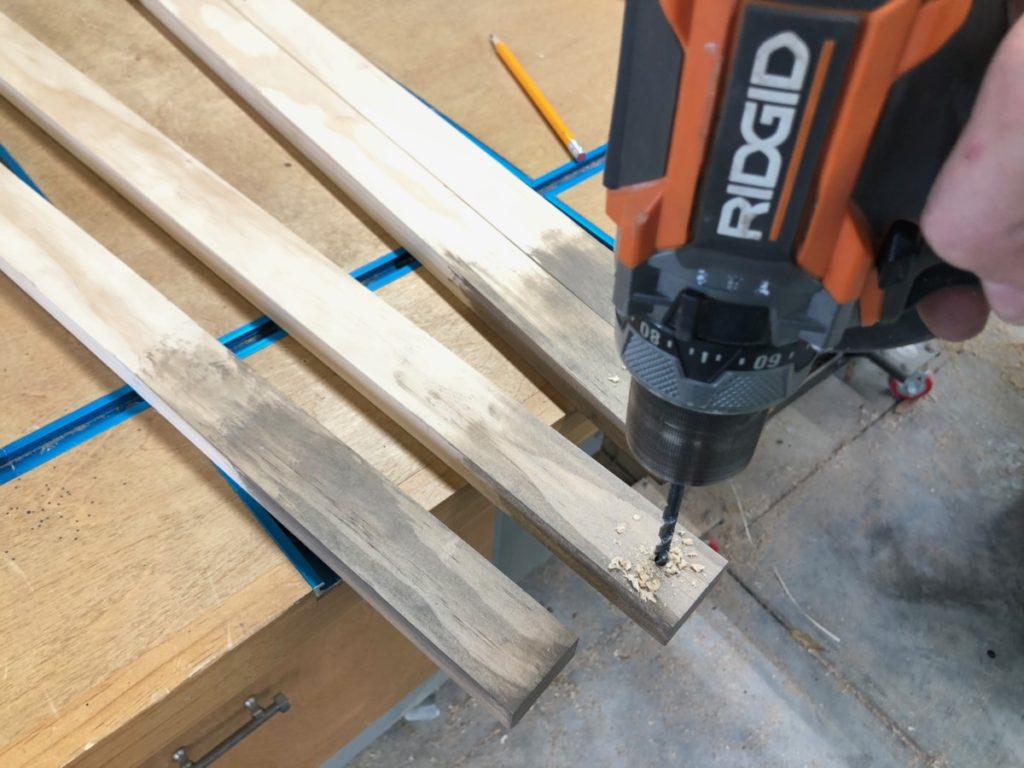
- 1″x 2″ Select Prime Boards
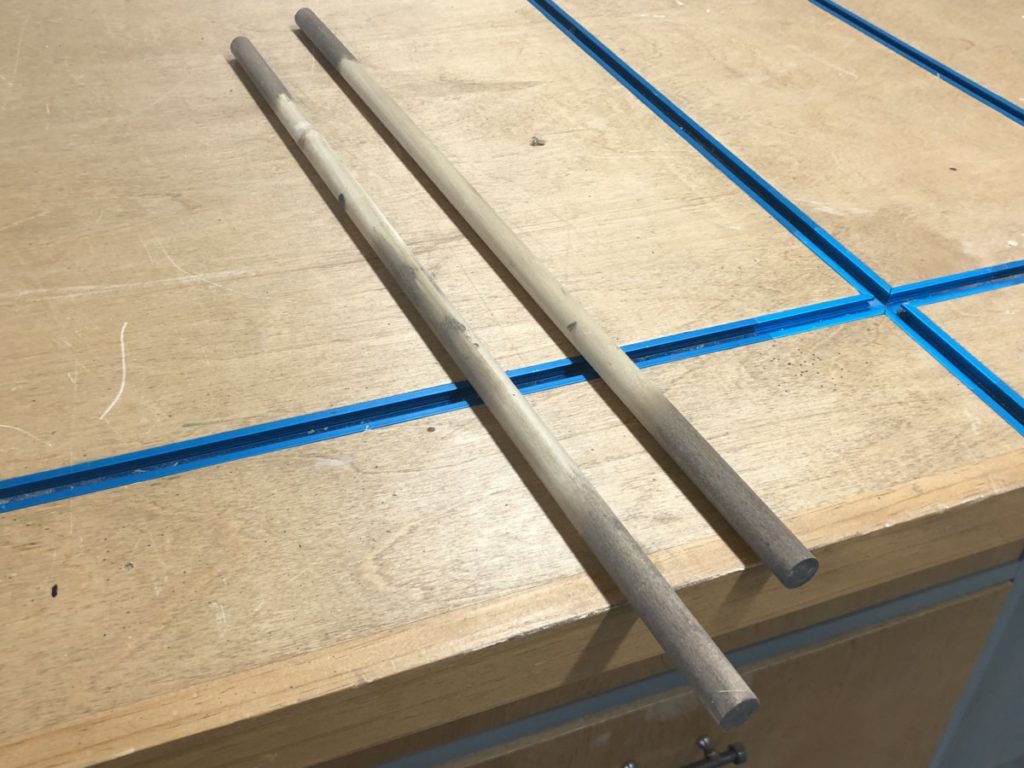
- 3/4″ Dowel Rods
R.V. Curtain Panel Material
Measure the total width you would like your curtain to be. (I determined the width of mine by measuring the window and adding an additional 1 inch on each side to allow some overhang.)
Window Width” + Overhang “(Opt.) + 1.5″ Hem + 1.5” Hem = Fabric Width
Window Height ” + Over Hang “(Opt.) + 6.5″ Top Rod Pocket + 5” Dowel Rod Pocket = Fabric Height
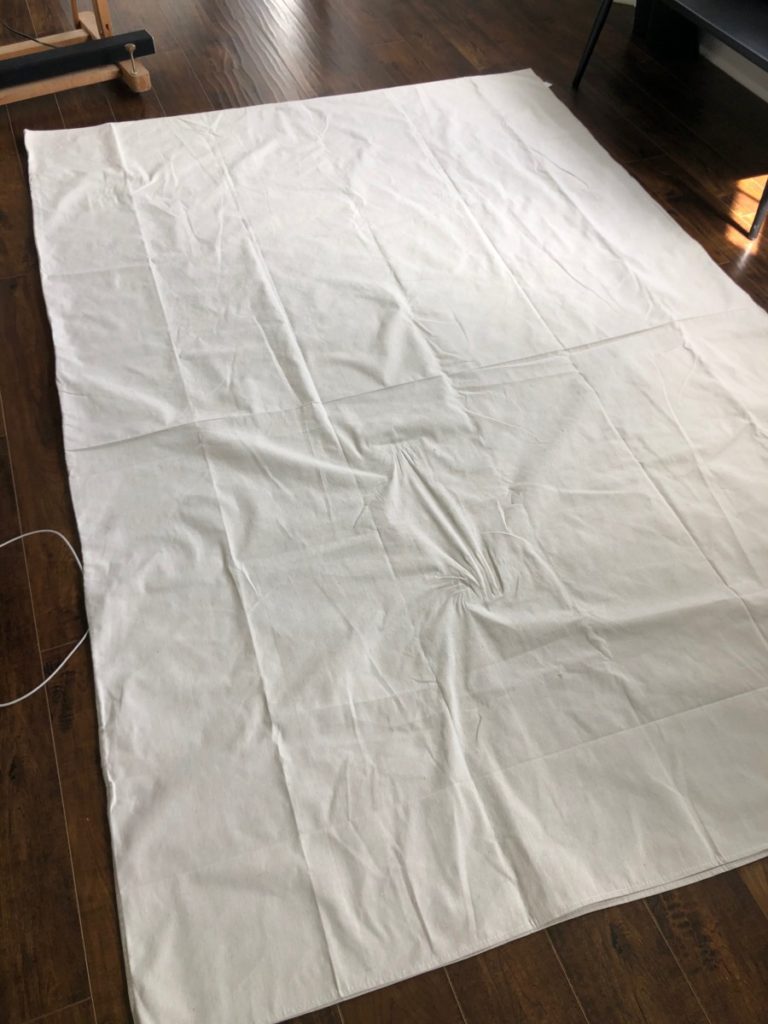
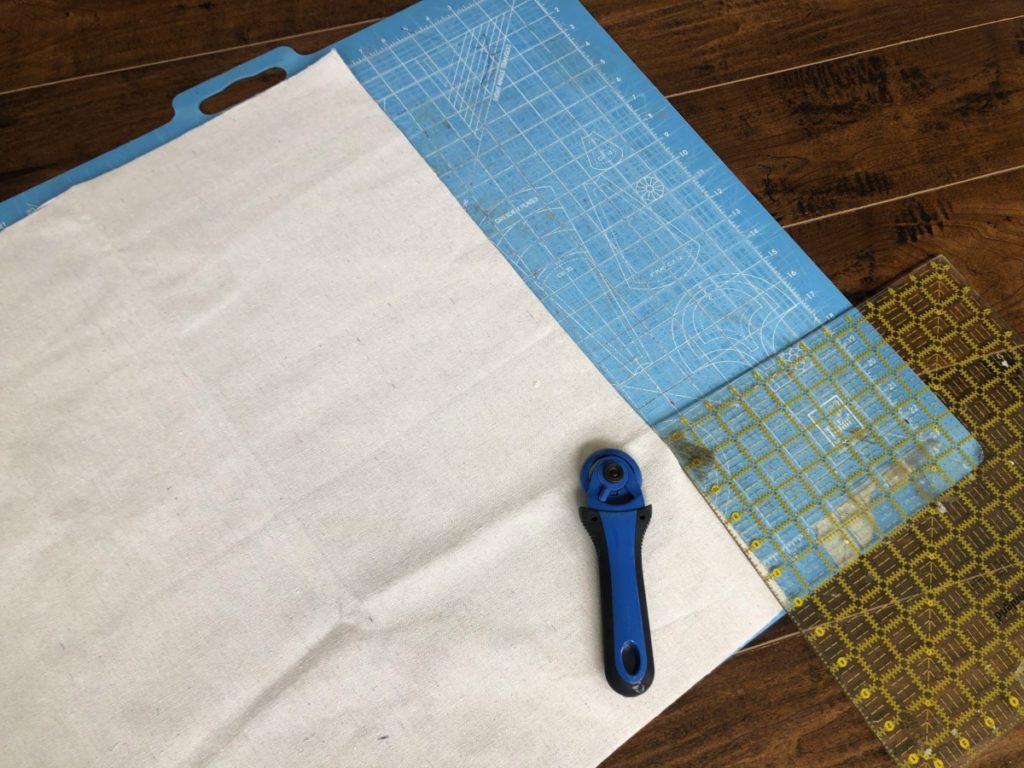
After measuring, double, and triple checking we are ready to cut. Before cutting any piece of fabric I like to iron the fabric. When cutting large pieces of fabric I use a rotary cutter, a straight edge and cutting mat. If you do not have access to these tools, you can always use scissors, a tape measurement and all of your patience.
R.V. Curtain: Side Hem
Once the fabric is cut establish the orientation of the curtain. We are going to being by hemming the sides of the curtains. (Not the top and bottom.)
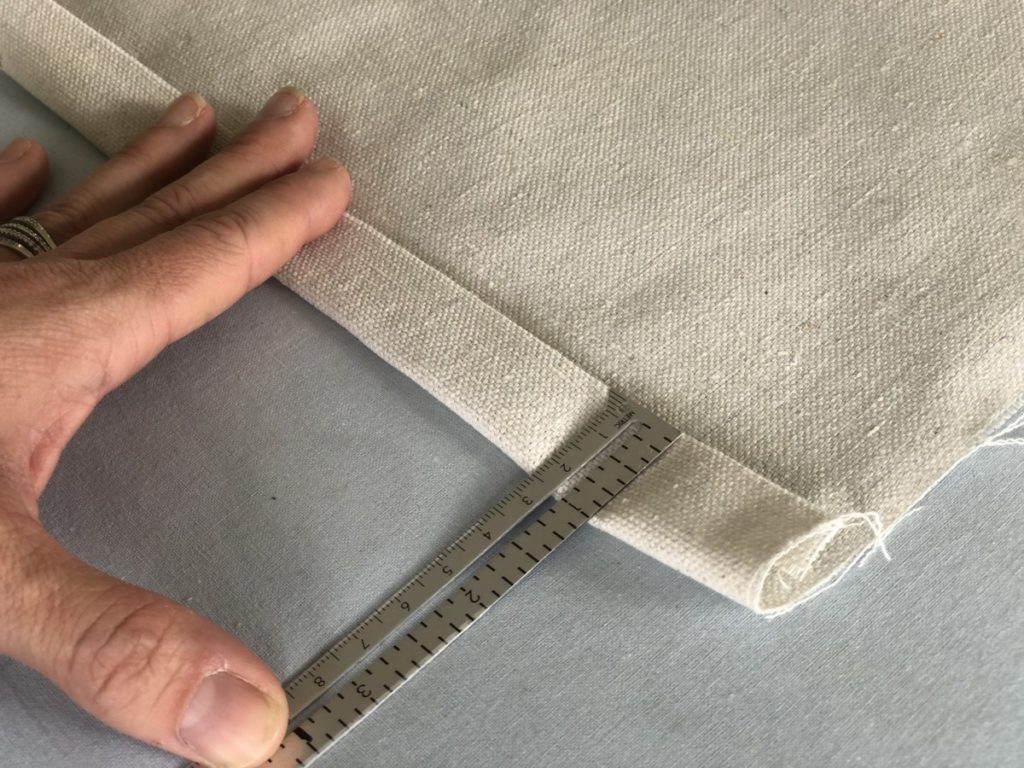
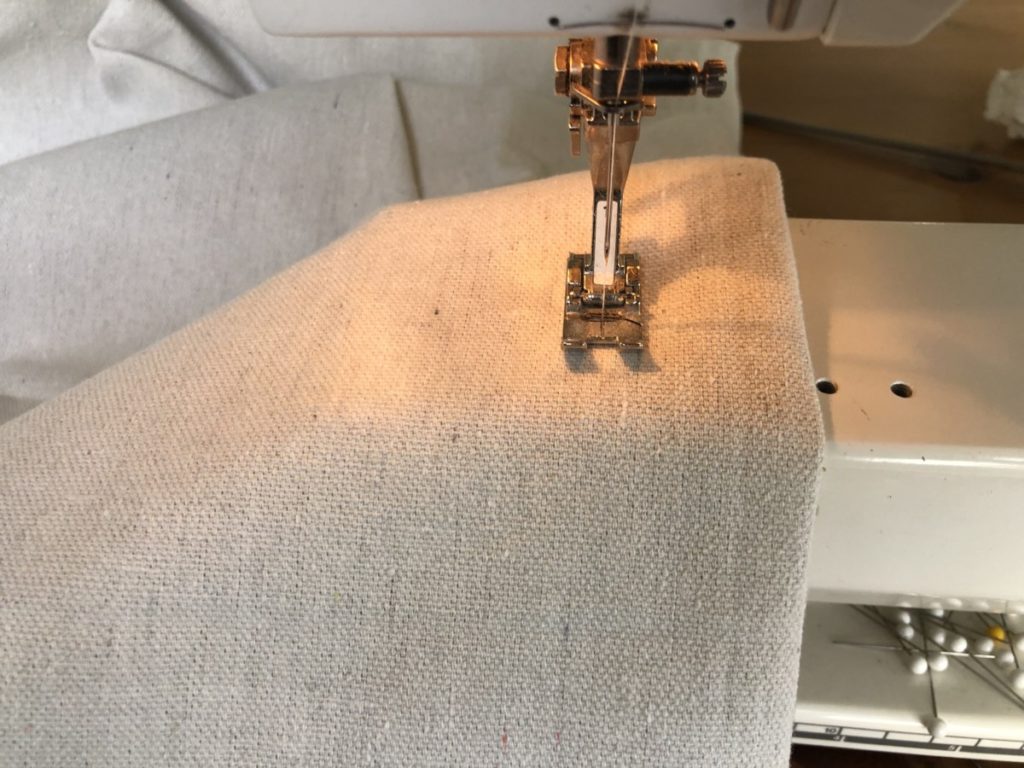
When hemming the sides I turned over the edge 1/2″ and then ironed it to create a crease. After that I did this same process again, only this time I turned it down 1″ then ironed to solidify the fold.
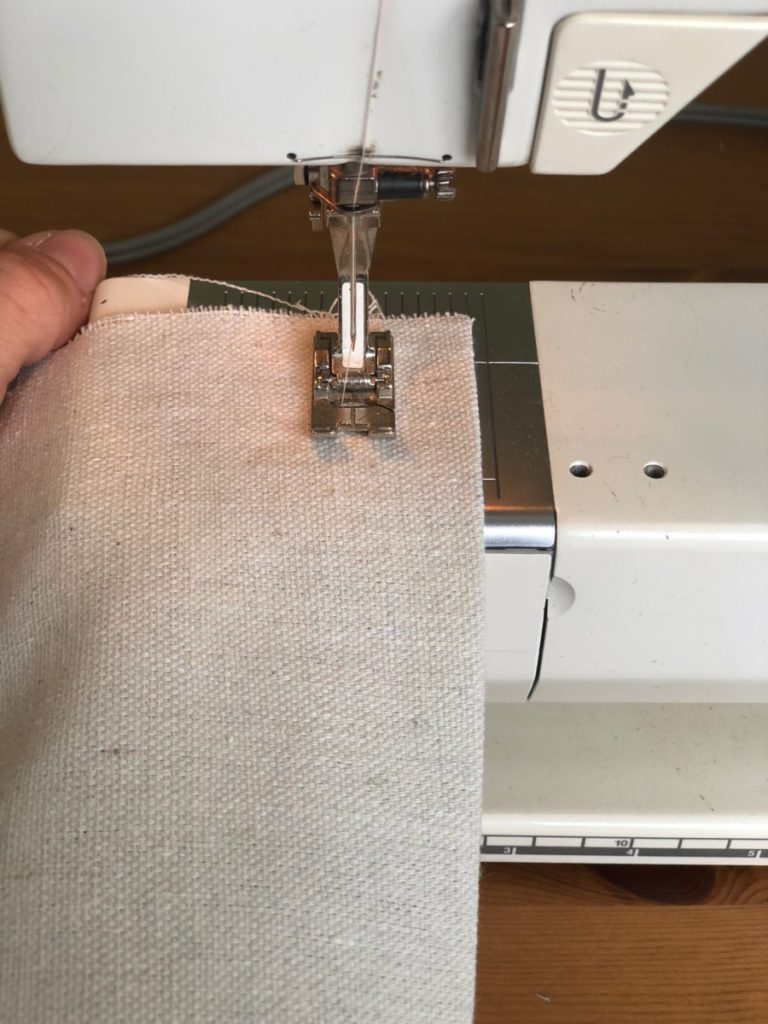
Once the sides were both ironed down I proceeded to stitched the pressed hem. I stitched about 3/4″ from the edge on the front side of the curtain. I repeated this on both sides of the curtain.
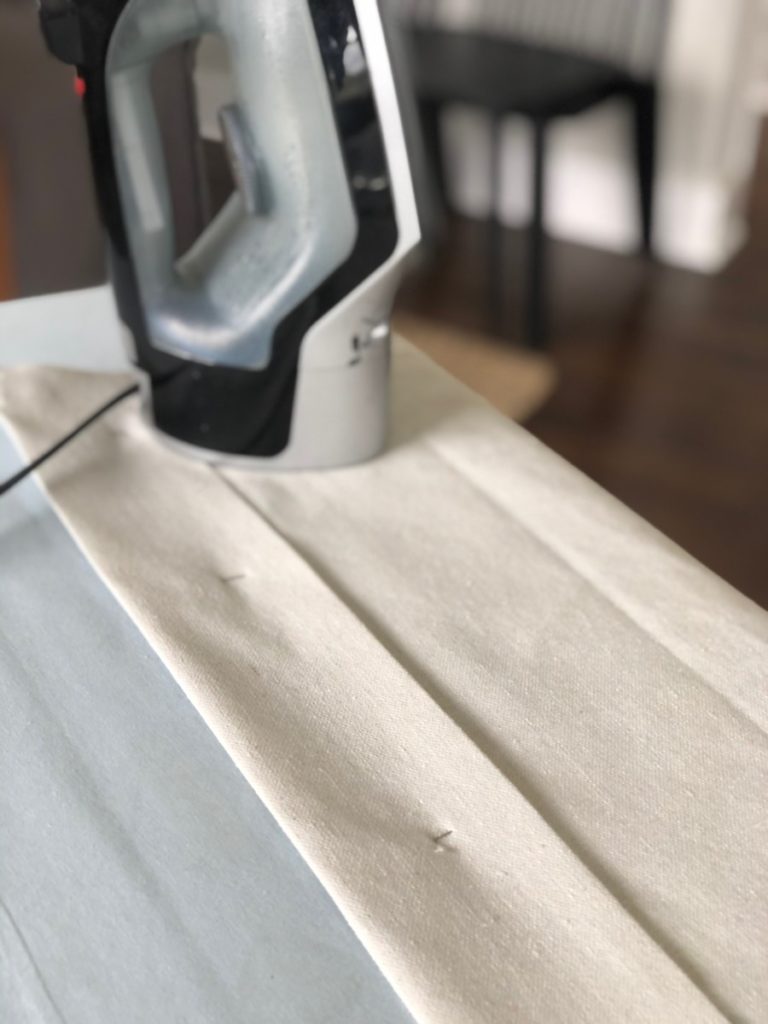
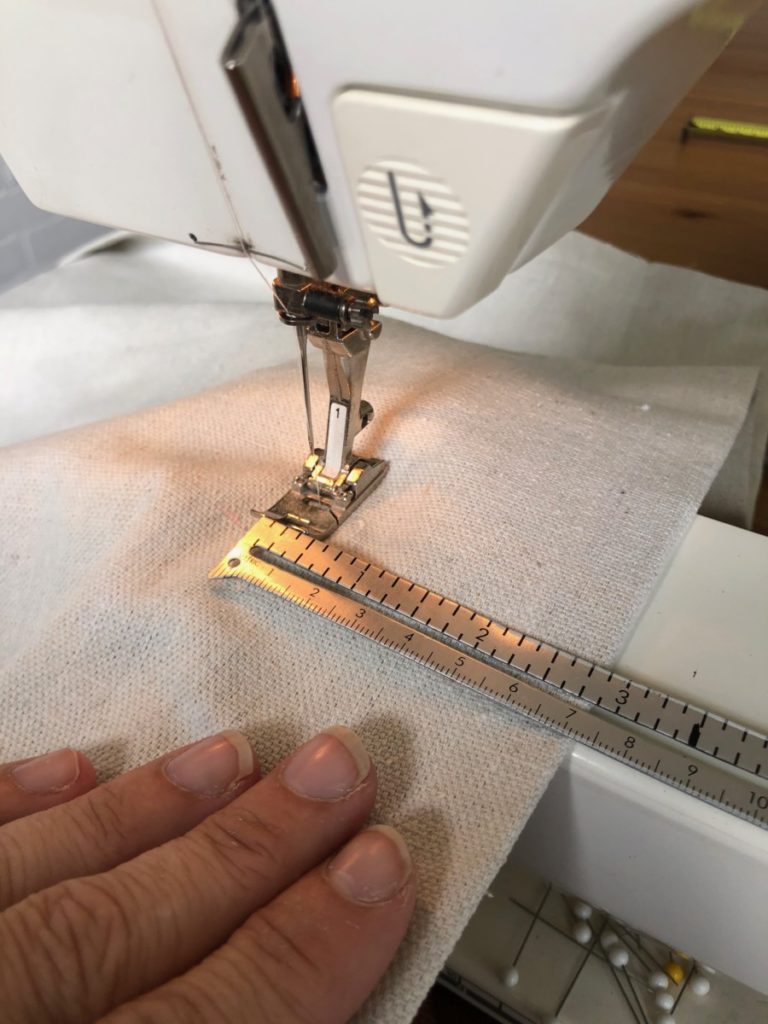
R.V. Curtain: Top Hem (1×2 Pocket)
Next up is the top pocket that will house the 1 x 2″ board that will serve as the curtain rod.
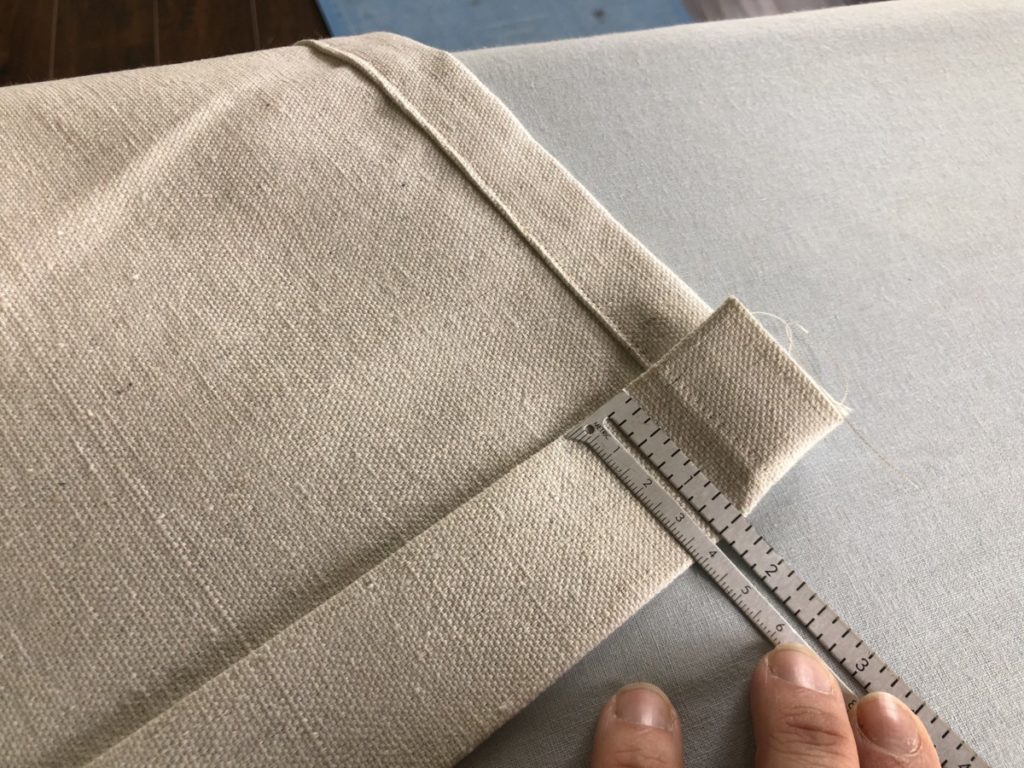
To do this I turned down the top of the fabric 1/2″ and ironed the fold to create a crease.
I then turned down the fabric an additional 3″ from the edge of the iron crease, pinned in place, and then ironed again. This will be the pocket that the 1×2″ board will slide in.
Once securely pinned, flip front side facing up and stitch approximately 2 3/4″ inches from the edge of the fabric. (This will be stitching the fold shut.)
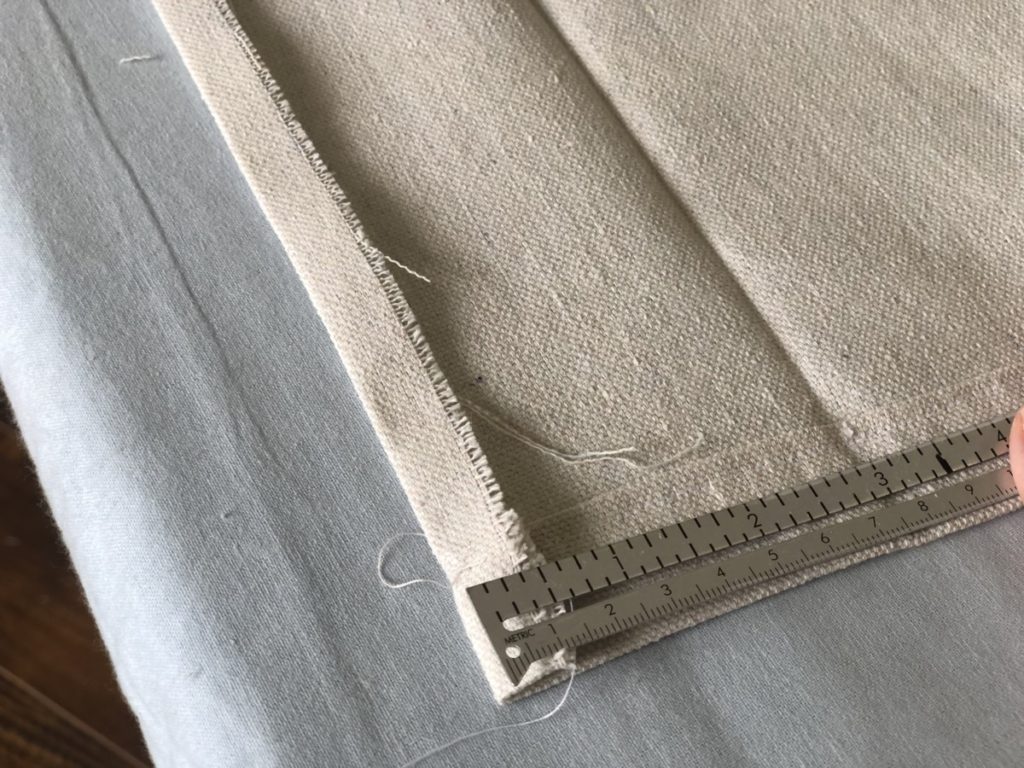
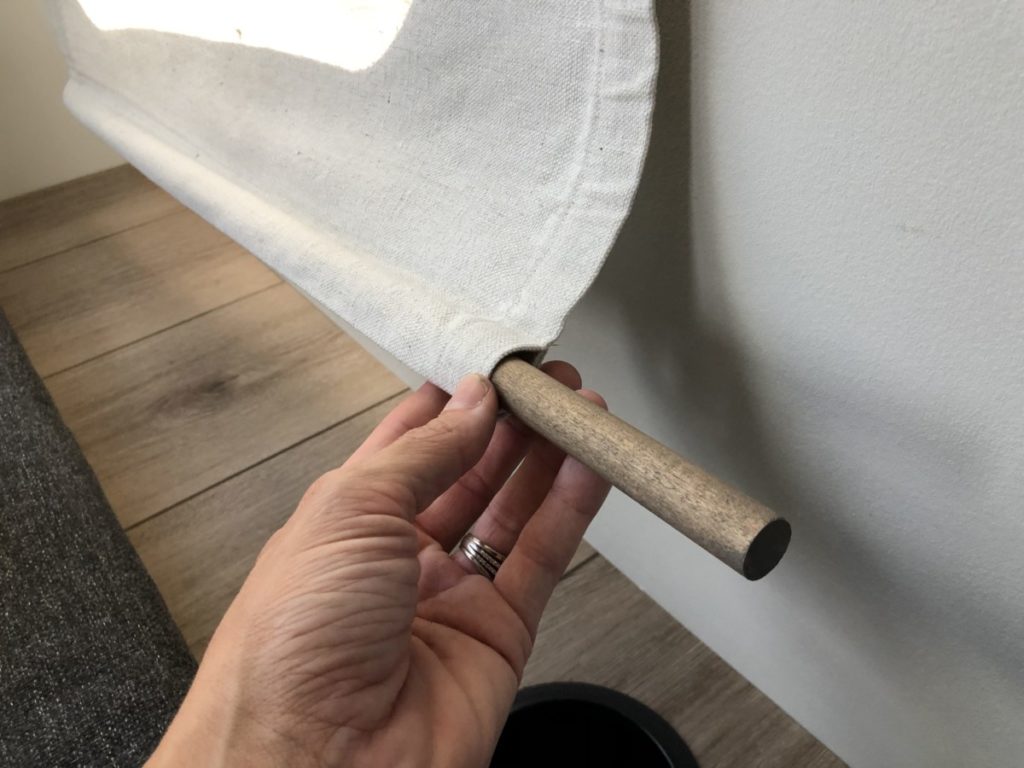
R.V. Curtains: Bottom Hem (Rod Pocket)
Next I hemmed the bottom edge while also creating a pocket that would house the dowel rod. I first measured 1 1/2″ from the edge of the fabric, folded up and used and iron to crease the fabric.
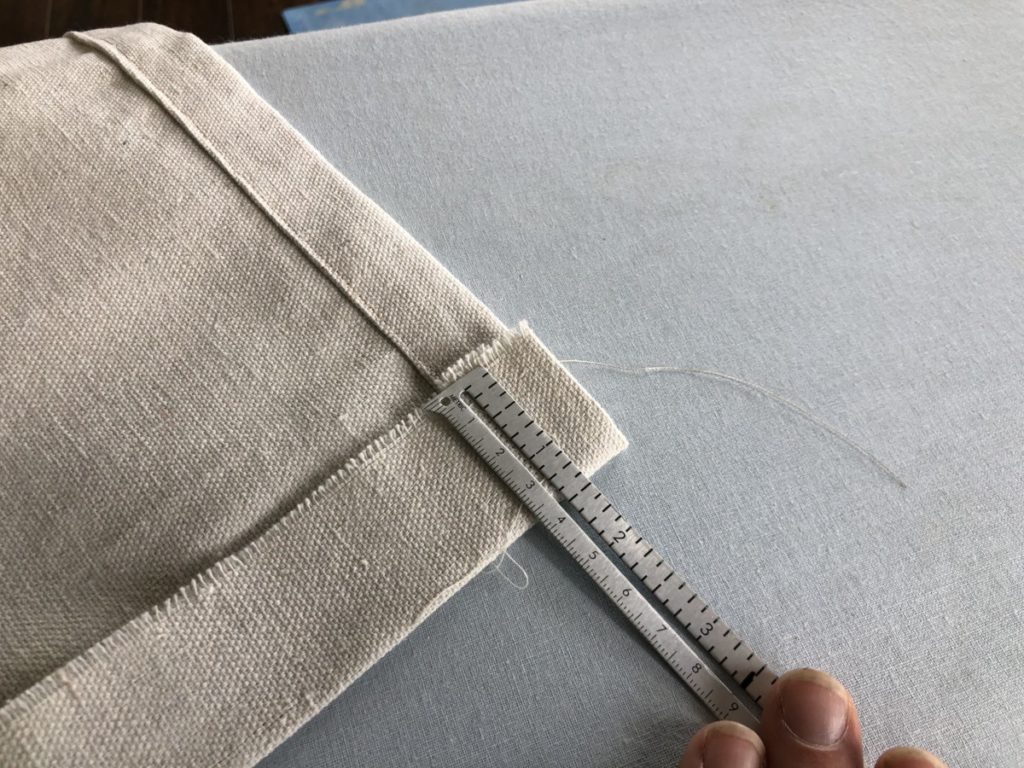
I then repeated the same step again, folded up 1 1/2″ from the bottom hem and then used an iron to crease the fabric.
Once the hem/pocket was precisely measured and crisply ironed I flipped it front side facing up and ran it through my sewing machine. I stitched approximately 1 1/4″ from the bottom crease. This will create a long pocket for the dowel rod to slide into.
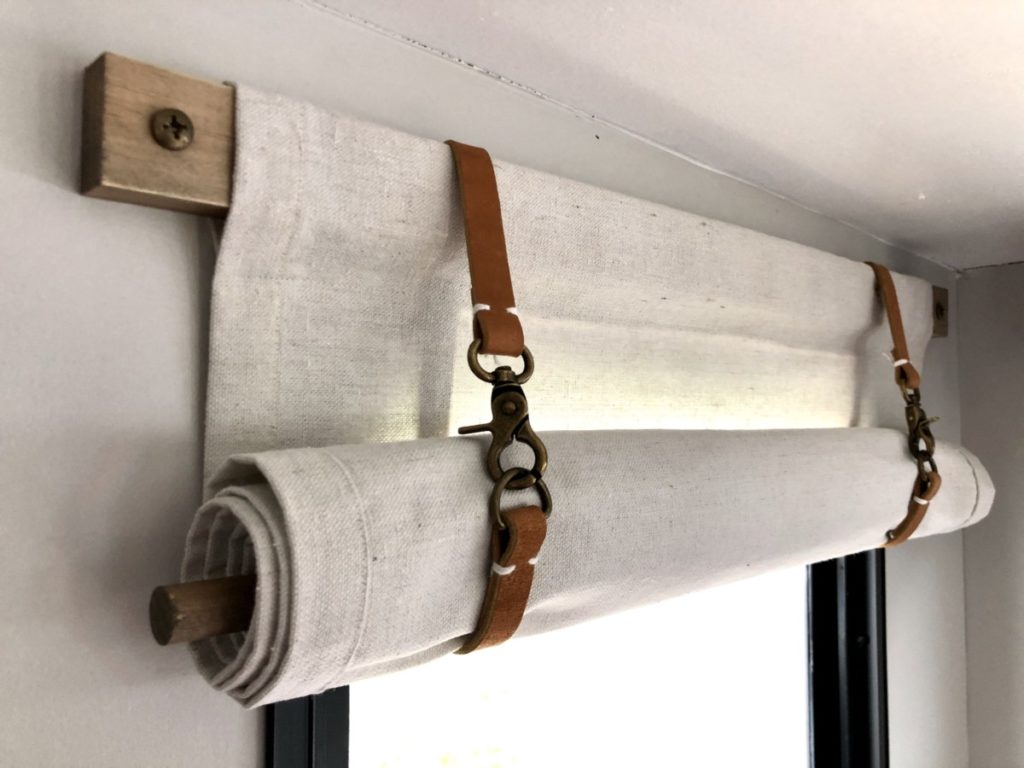
R.V. Curtains: Straps
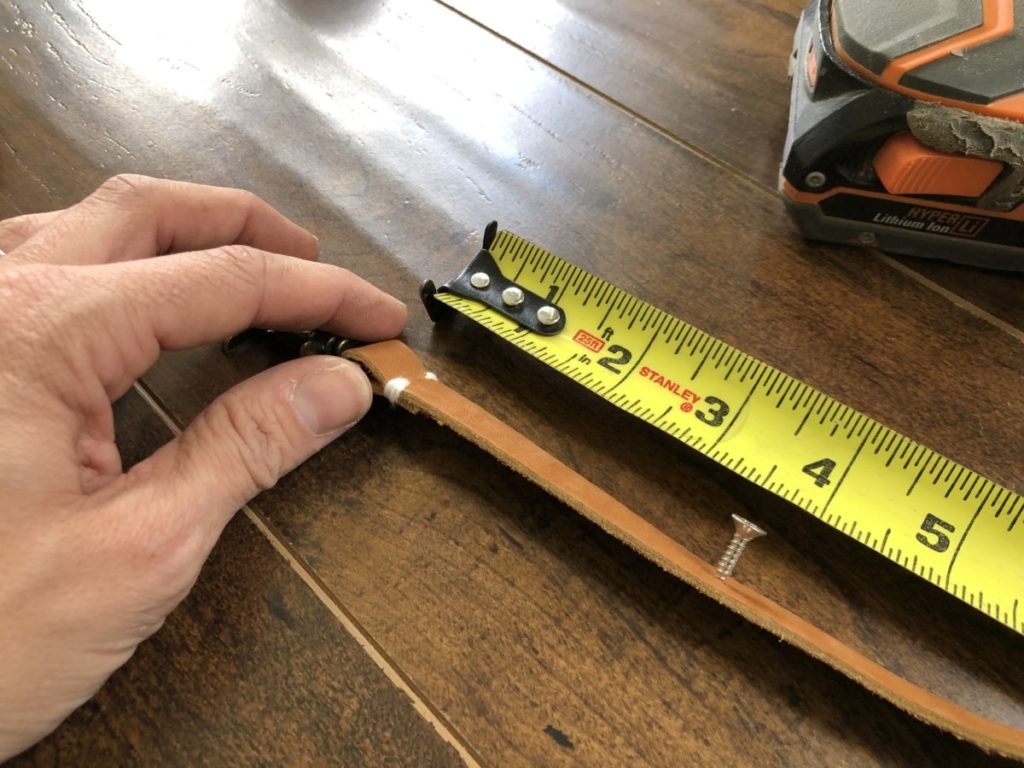
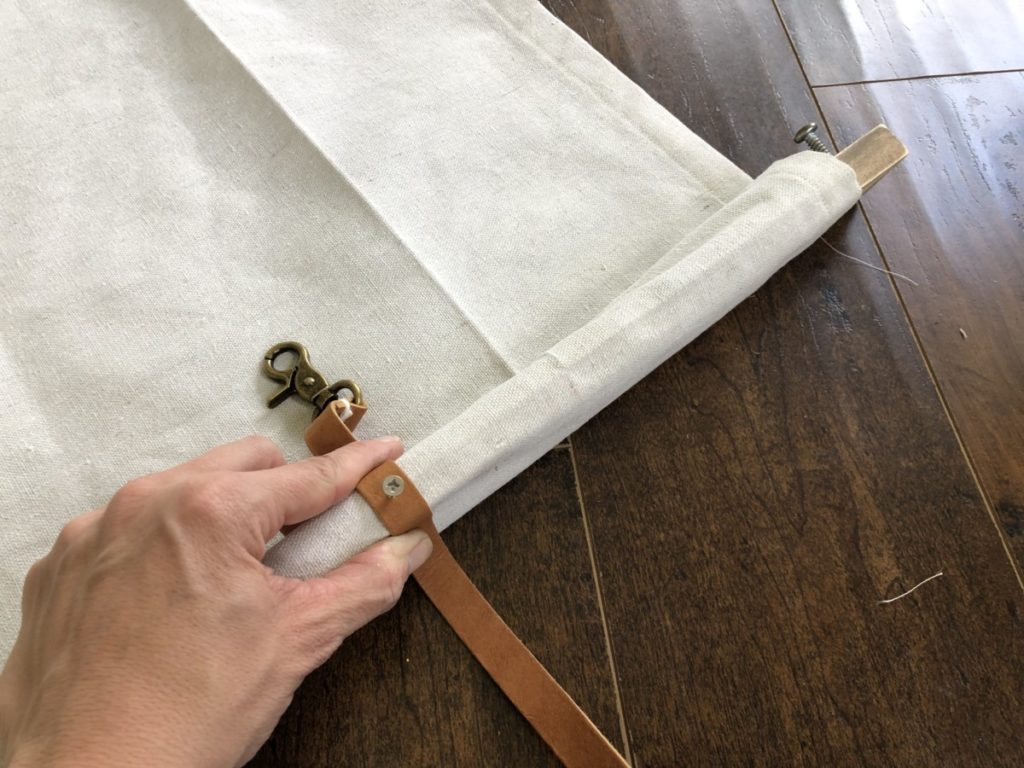
Next up, the straps that will hold the rolled up curtains in place! This is my second camper that I have used this method in and I love it! I have also looked high and low for different options when it comes to hardware and straps and I finally found my favorites. I ordered these leather straps online. The straps are originally 72″ long, I found that I could get two full curtains from one 72″ roll of leather strips. So, I cut the strap into 4 equal parts, creating x4 strips roughly 18″ long.
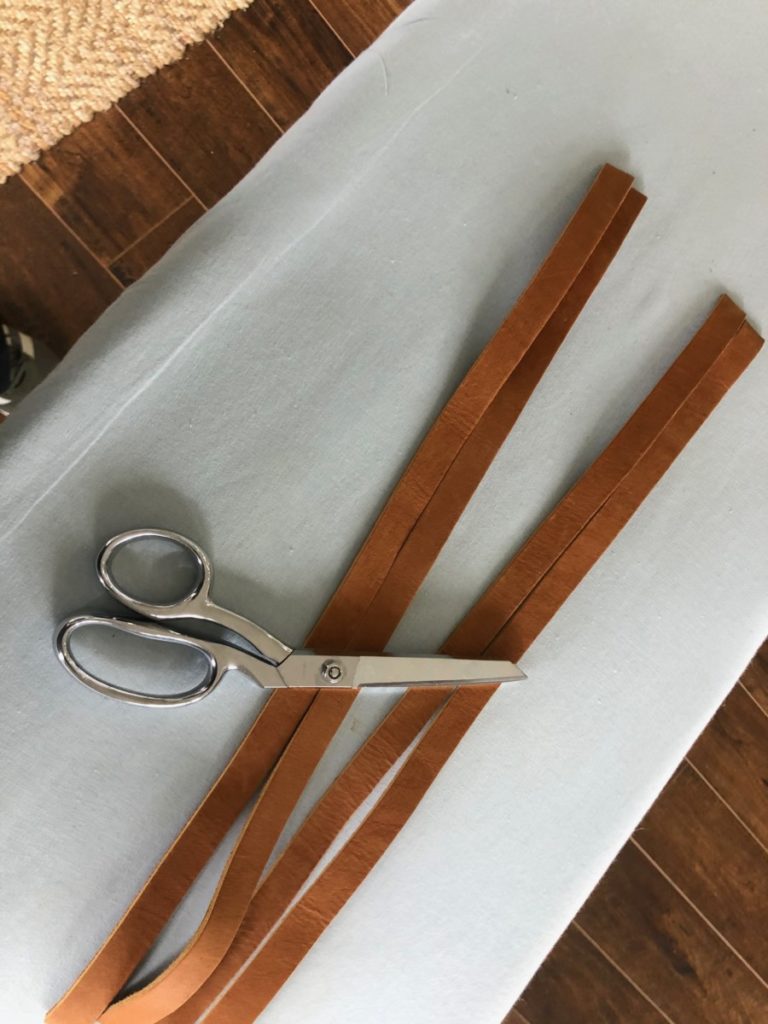
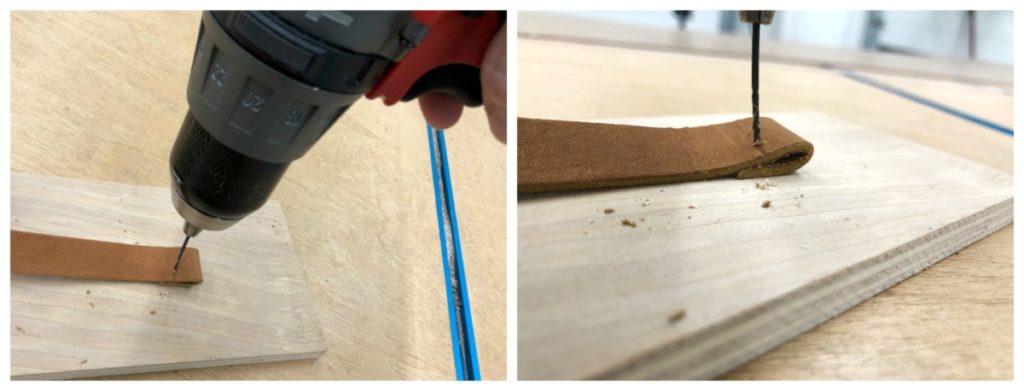
Once the straps were cut I headed out to the work shop. While it is possible to sew through a leather strap with a lot of effort and patience, I opted for an easier route… a drill. I turned the strap over on itself and using an 1/8″ drill bit I drilled two sets of holes. I did this on both ends of each strap. So there should be a total of 8 holes in each strap, 4 on each end. (See images below for clarification.)
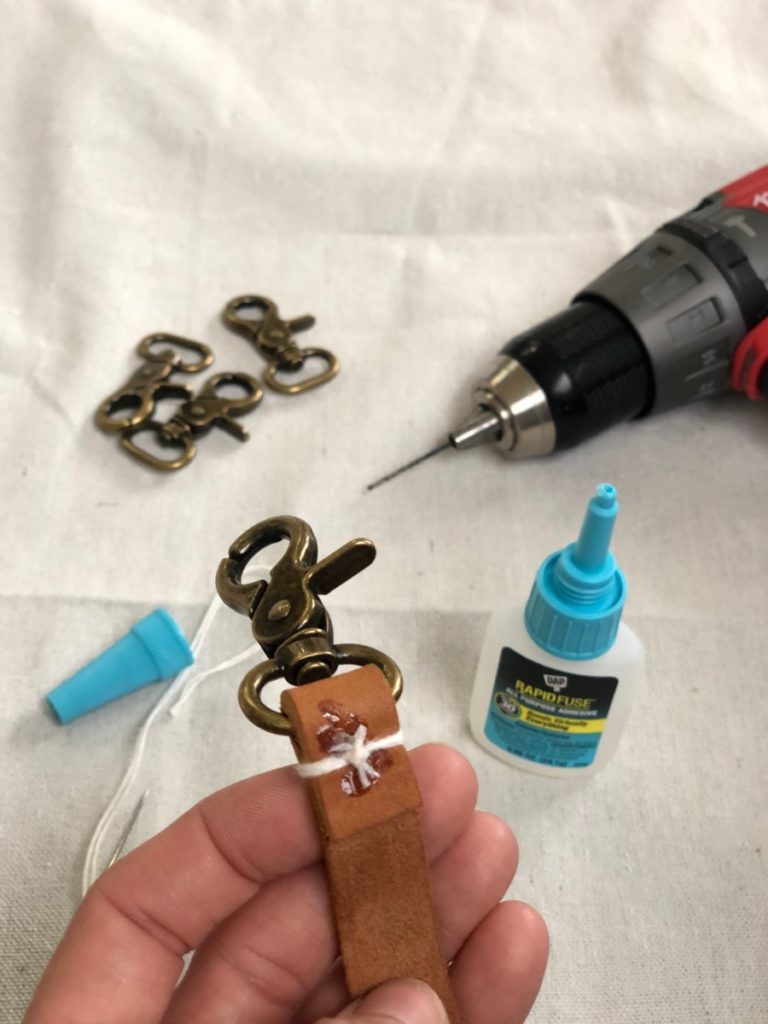
Once all the holes were drilled I was ready to secure the “D-Ring“. Again I searched all over and I found these antique brass ones online. In order to sew these d-rings in place, I used an upholstery needle and some thick thread (Cross-stich floss should do the trick). Below I show the steps I used to sew the d-rings in place.
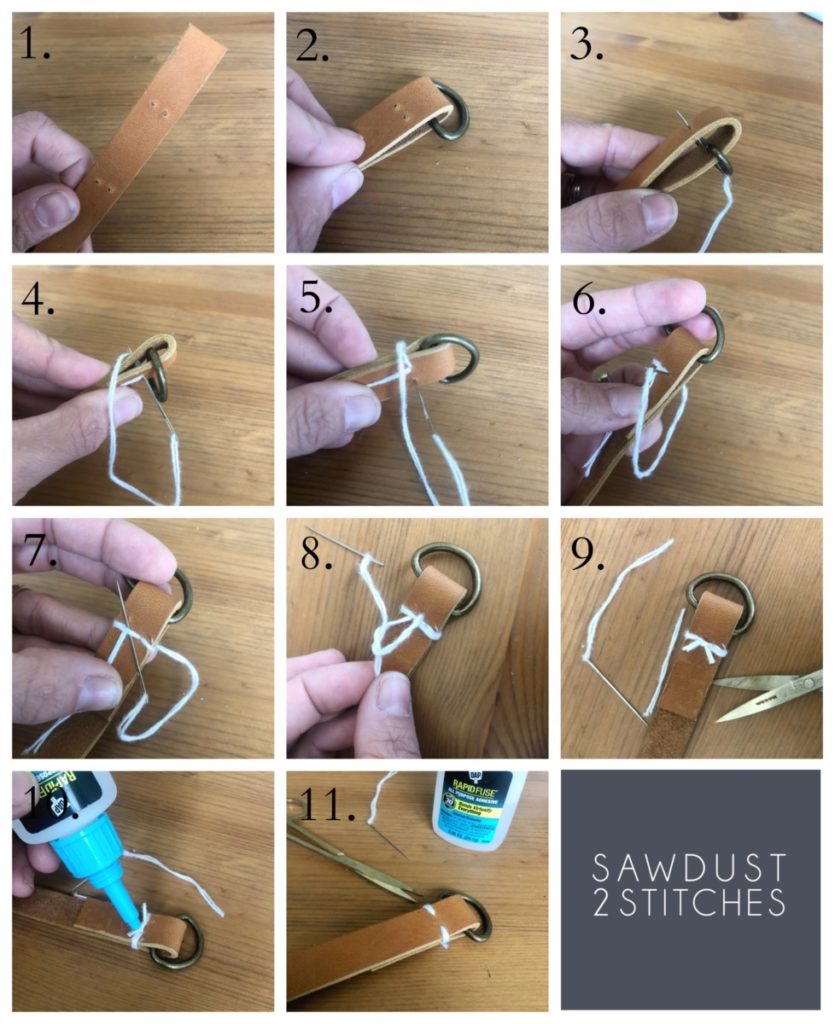
Once all the d-rings are secured on one end of the strap it is time to install the brass lobster clasp on the opposing end.
Pro tip: I like to secure the final knot with just a dab of DAP RapidFuse glue. It ensures that the knot, and the hardware aren’t going anywhere after all of that hard work!
R.V. Curtains: Installing Rod
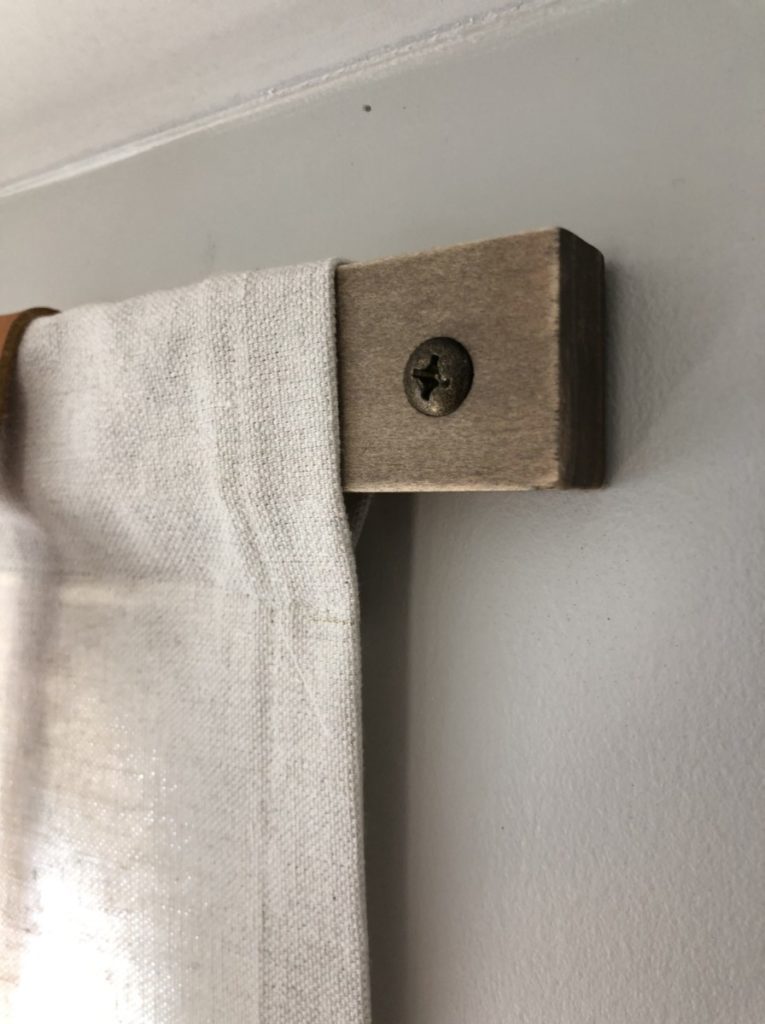
Next up the “curtain rod”. Not really are curtain rod at all, but it is the system by which the curtain panel will hang. For this I used a standard prime 1×2 pine board. To determine the length of my board I measured the finished width of my curtains and added 3 inches. (Allowing 1.5″ to be exposed on both sides.)
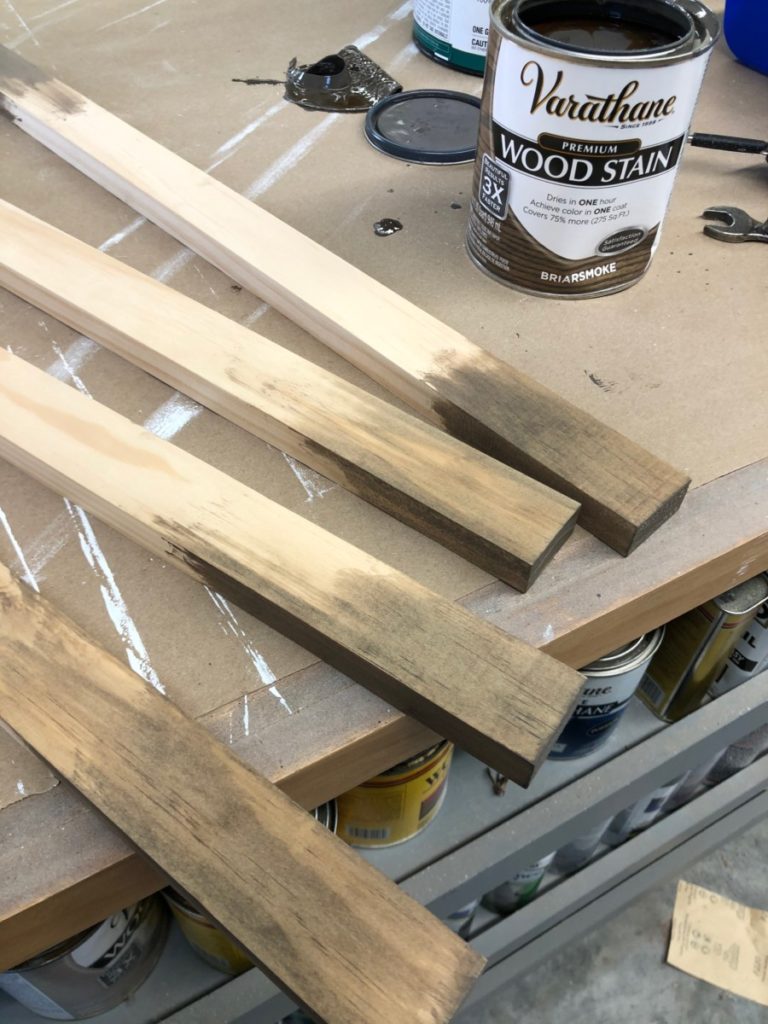
Before installing pick a stain or paint color of your choosing. I opted for Briarsmoke by Varathane. (You can stain the whole board but only the last few inches on either end will be exposed.)
Once the stain was dry, I used a 1/4″ drill bit to pre-drill a hole through the ends of both boards. I placed mine approximately 3/4″ from the end of the board centered. I did this on both ends.
Prepping Install Hardware
At this point the board can be installed using your own choice of faster. I wanted mine to have a vintage industrial vibe so I opted for a large button head screw and utilized some spray paint.
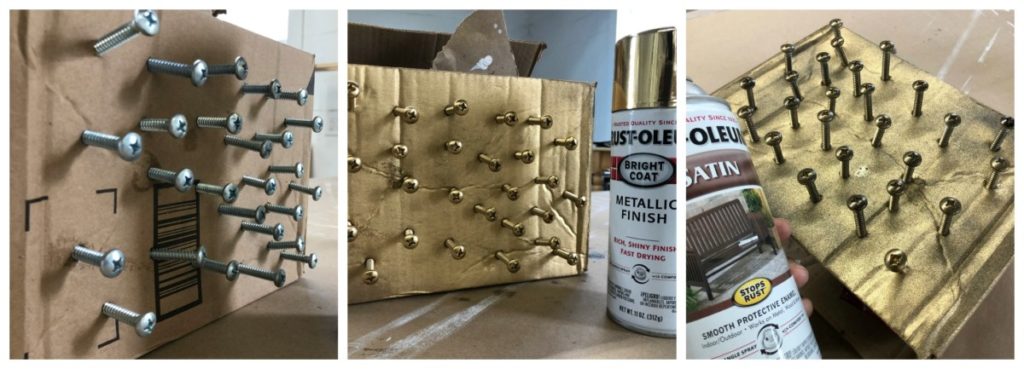
If you want to achieve that vintage brass look for your R.V. curtains, here is what I did. I sprayed all my screws with Rustoleum Metallic Finish Gold Paint, once it was dry I lightly dusted the gold screws with a spritz of Oil Rubbed Bronze. It seemed to do the trick and was a nice match for the d-rings and lobster clasps I used on the curtain straps.
Once the 1×2″ board is dry, slide it into the top (wider pocket). If all your calculations are done properly, the 1×2″ board should hang about of the pocket with about 1 1/2″ exposed on both sides.
In order to prevent the curtain panel from shifting on the board I used small screws to hold the straps and the r.v. curtain panel in place.
Using a drill drive the screws through the 1×2″ board into the the wall. (Depending on what type of wall/placement you may need to enlist the help of a mollie to help secure the curtain in place.)
Last thing you need for these R.V. curtains is to slide the bottom dowel in place.
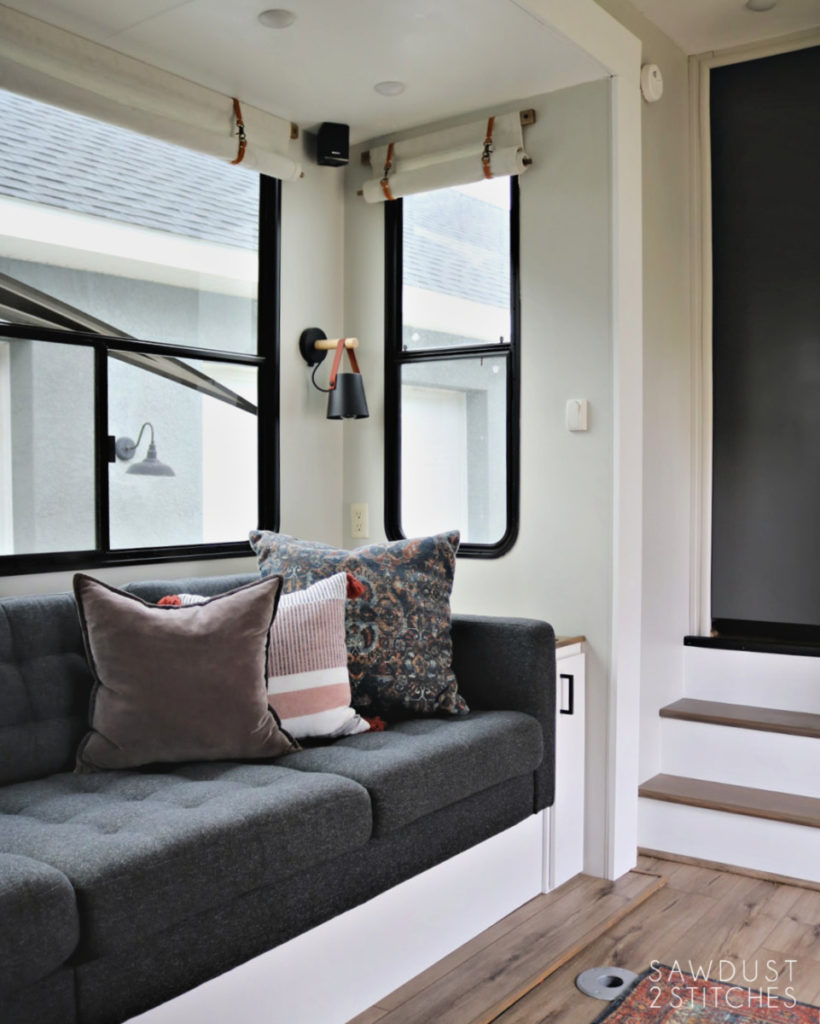
In my opinion these are the perfect option for a R.V. curtains! They are low profile and still add a lot of character to an otherwise bland space. In general there aren’t that many places you can add decor to a camper, so this is a great way to add some pizzaz!

Looking for more inspiration? Make sure you check out the rest of this toy hauler renovation and our first camper makeover below.
- R.V. Makeover Painting with a roller
- R.V. Bathroom Makeover
- R.V. Sofa and Dinette Makeover
- R.V. Makeover Reveal
- Kitchen- Toy Hauler
- Living Area- Toy Hauler (Coming Soon)
- Master Bedroom- Toy Hauler (Coming Soon)
- Bathroom- Toy Hauler (Coming Soon)
- Dining/Garage- Toy Hauler (Coming Soon)


Ooh, I’m soooooo in love with your DIY curtains!! That’s such a great idea and really some curtain alternatives.
Unfortuantely I’ve two left feet that I can’t sew some for myself. So, thankfully you’ve made such a detailed approach and I’ll give it to my taylor as a handout 😉
This may seem like a silly question, but do you actually use these or are they more for decoration. If you use them is it possible to post some pictures of them hanging down. I would like to see how they look. These are really cool. I might be making some for one of our bedrooms, that’s why I would like to see them rolled down. Thanks so much!
I’m wondering if you could add some reflective material for temp control as a liner so they are not only cute, but help with temps?
My search for the perfect RV curtains is over! After looking at literally hundreds of diy projects, this is by far the best I have seen. They are both classic and modern. The instructions are detailed, yet simple. I excited to get started. Thank you so much (: