This post is sponsored by The Home Depot*
Christmas in 2020

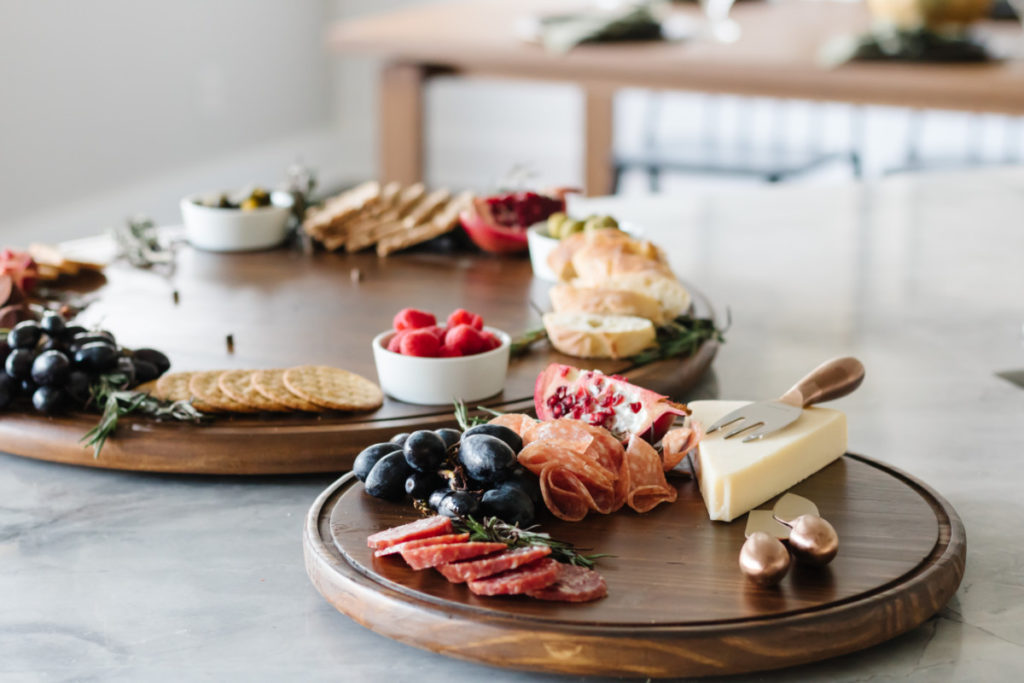
I think we can all agree 2020 has been an endless parade of unknowns. As a whole we have adapted, made changes, and tried to find our new norm. As a general consensus I don’t think that all these changes have been ideal. However, I will say that it has created lots of opportunities to try new things. Now more than ever is the perfect time to dive into DIY and create one-of -a kind gift for the Holidays! Today I’m going to show you how to make a Lazy Susan that doubles as a serving tray/charcuterie board, it would be the perfect gift for anyone who loves to host!
If you are looking for more great homemade gifts be sure you check out The Home Depot for more holiday gift ideas.. They have DIY gift ideas/tutorials that are a great and inexpensive ways to personalize holiday gift giving.
Tools Suggested:
- Router (Optional)
- Tape Measure
- Pencil
- 1/8″ Drill Bit
- 1/4″ Drill Bit
- Drill and Phillips Bit
- Finish Sander
- Paint Brush (or preferred stain and sealer applicant)
Materials Used:
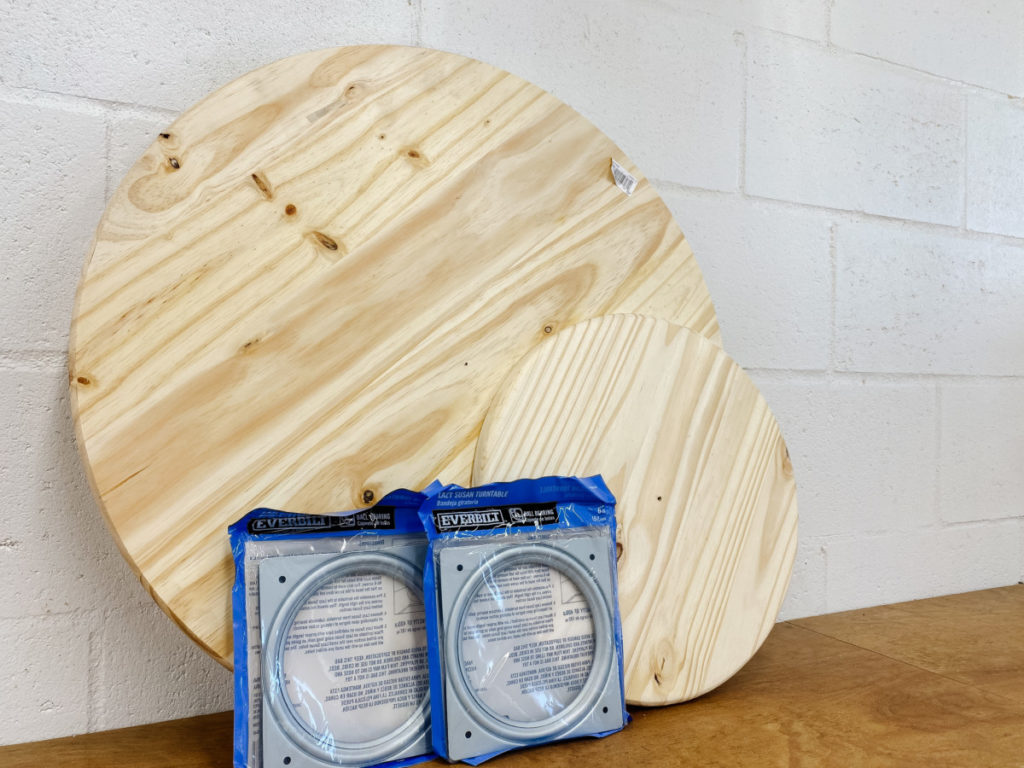
- 12″ Laminated Wood Round
- 24″ Laminated Wood Round
- 1/4″ Dowel Rod
- (x2) Lazy Susan Turntable
- Wood Glue
- Sand Paper
- Stain
- Polyurethane
Materials
While there are many different materials one could use to create a tiered Lazy Susan, I opted to use two laminate wood rounds (12″ & 24″ ) and two “Lazy Susan Turntable(s)”.
Add Decorative Flourishes(Optional)
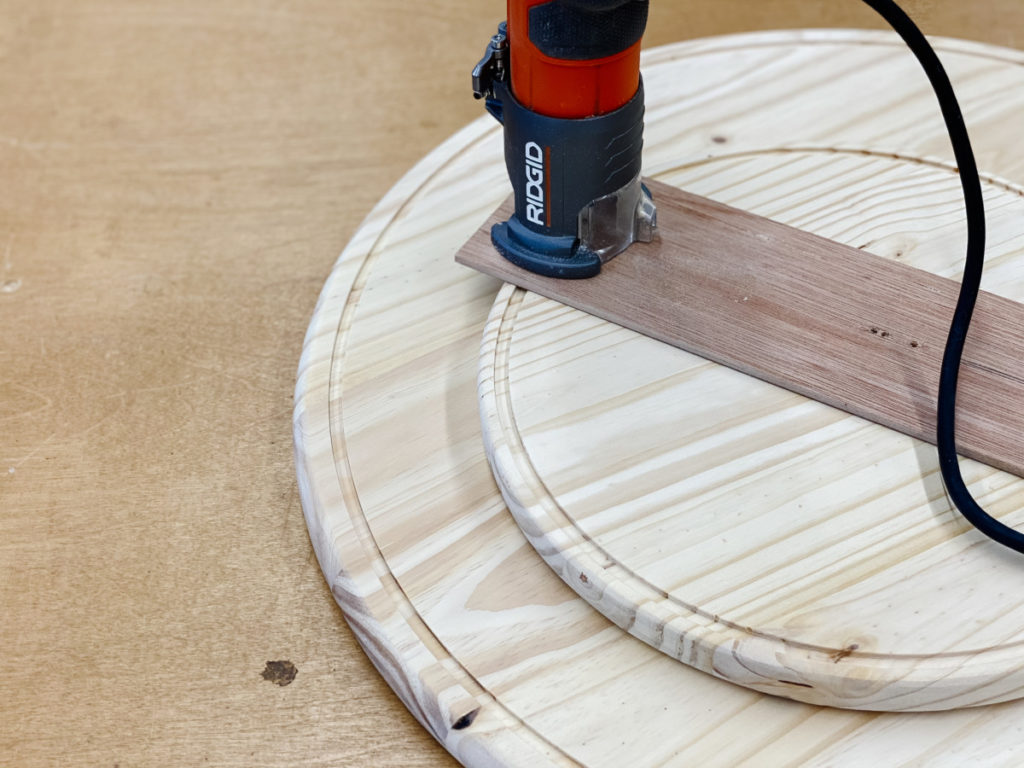
While adding decor is not a necessary part of this project, it it fun way to add your own touch to a personalized gift. There are many options such as painting, wood burning, or carving. I opted to add a small routed groove around the perimeter of each of my circle rounds. I felt like it gave it a more custom feel. ( In order to do this I created a simple jig that pivoted from a screw in the center of my wood rounds.)
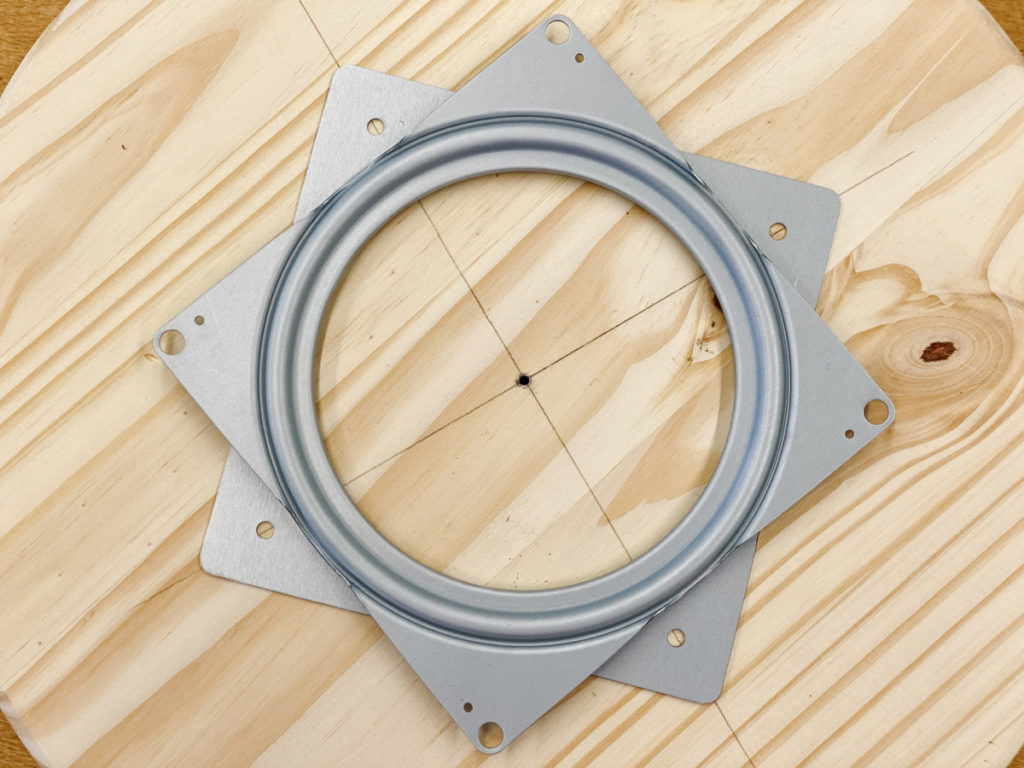
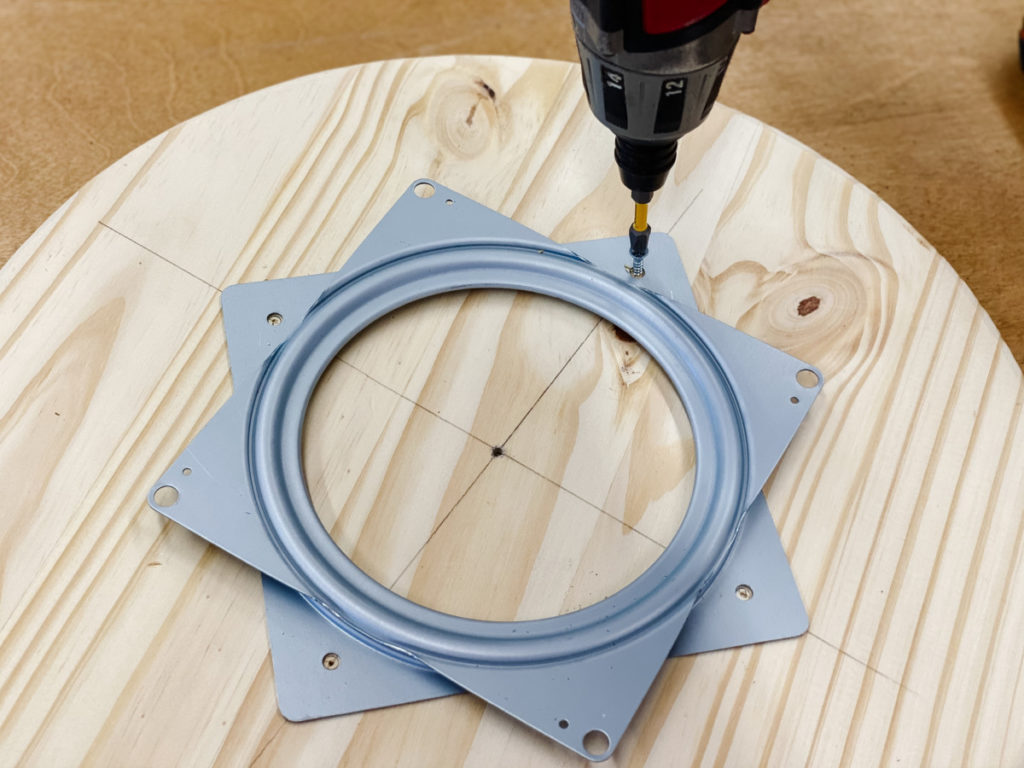
Secure Turntable to Small Circle
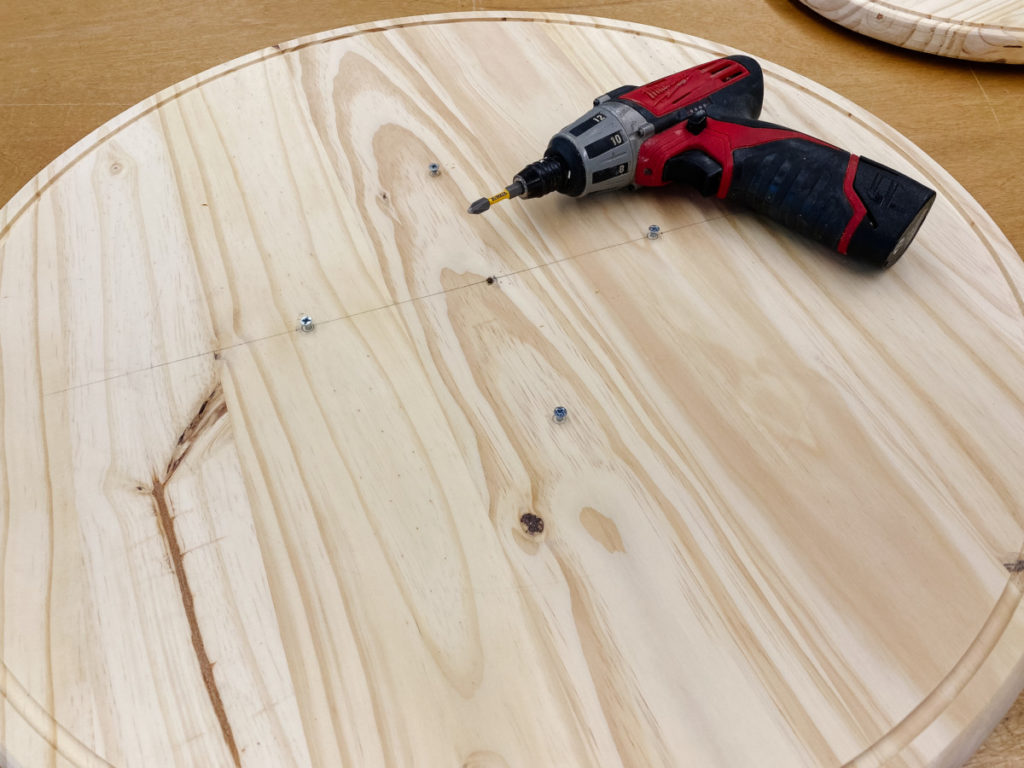
Find the center of the small round board, and mark screw placement.
Pre-drill the previously marked screw holes with an 1/8th ” drill bit.
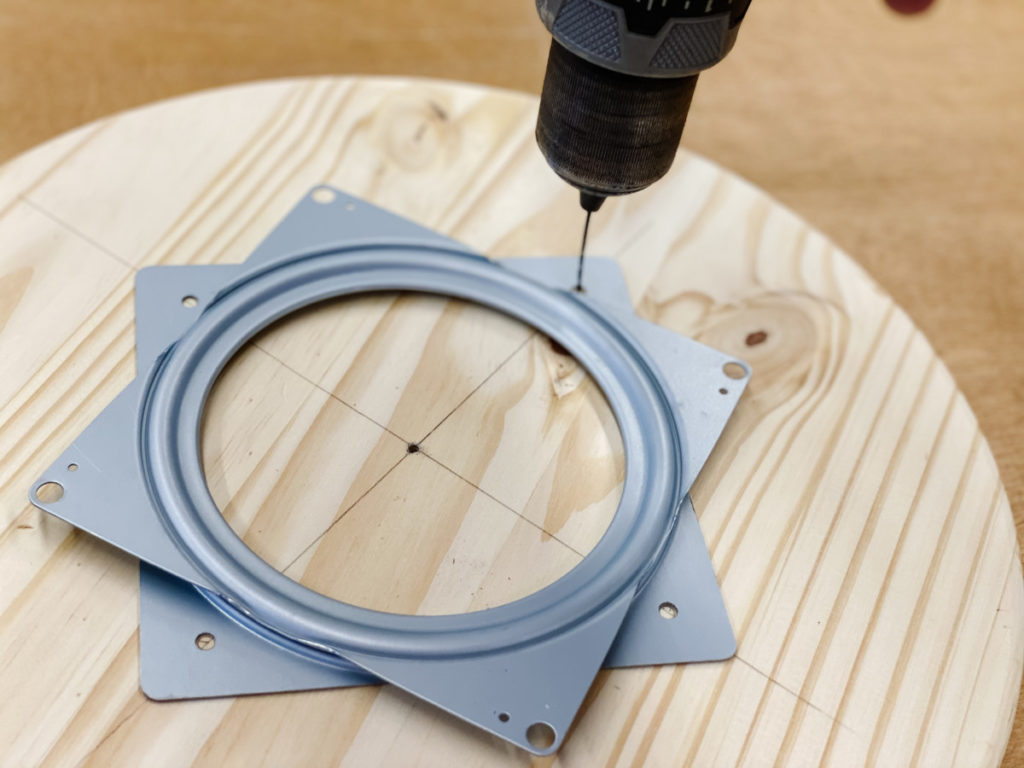
Secure turntable using 1/2″ screws.
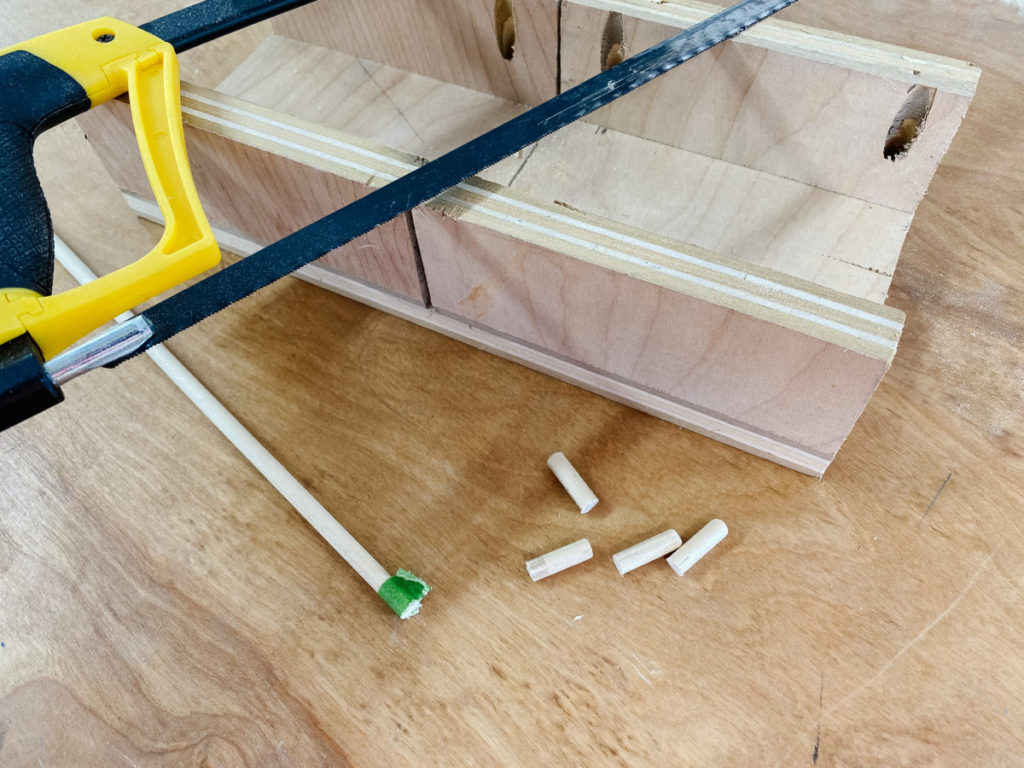
Mark and Add Dowels
The end-goal for this project is to have two turntable trays that can be used independently or stacked for a tier effect. In order to have them stack securely I needed to add little pegs to prevent the top tier from shifting on the bottom tier.
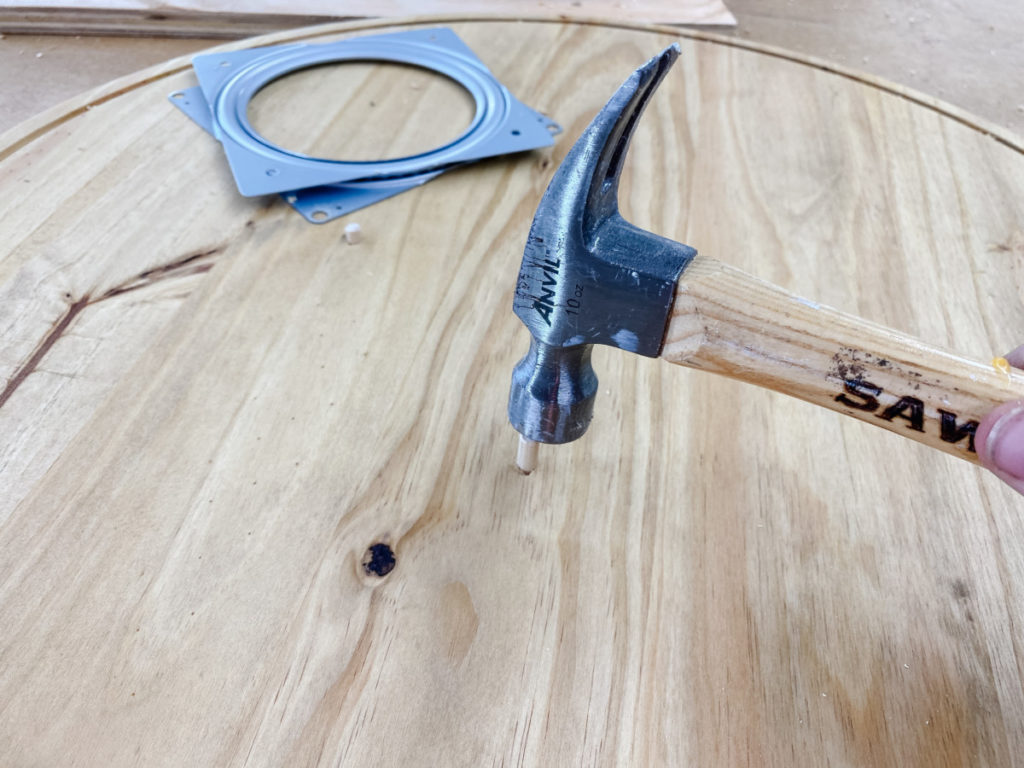
In order to create the pegs I used a 1/4″ dowel rod and cut (x4) 3/4″ pieces.
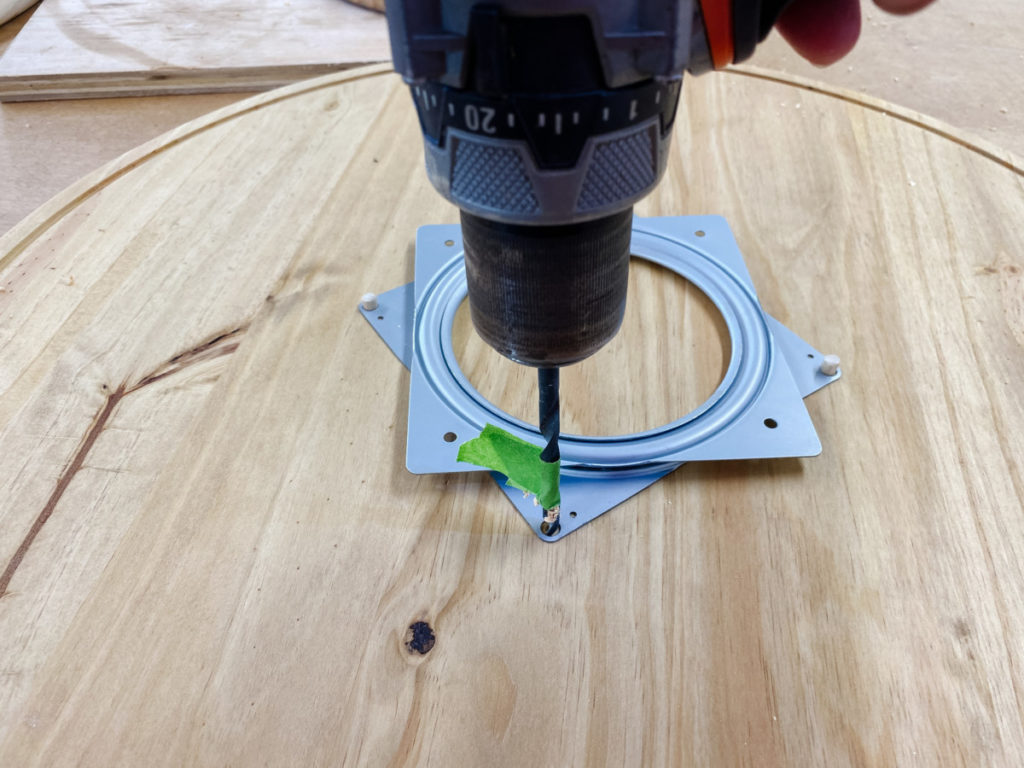
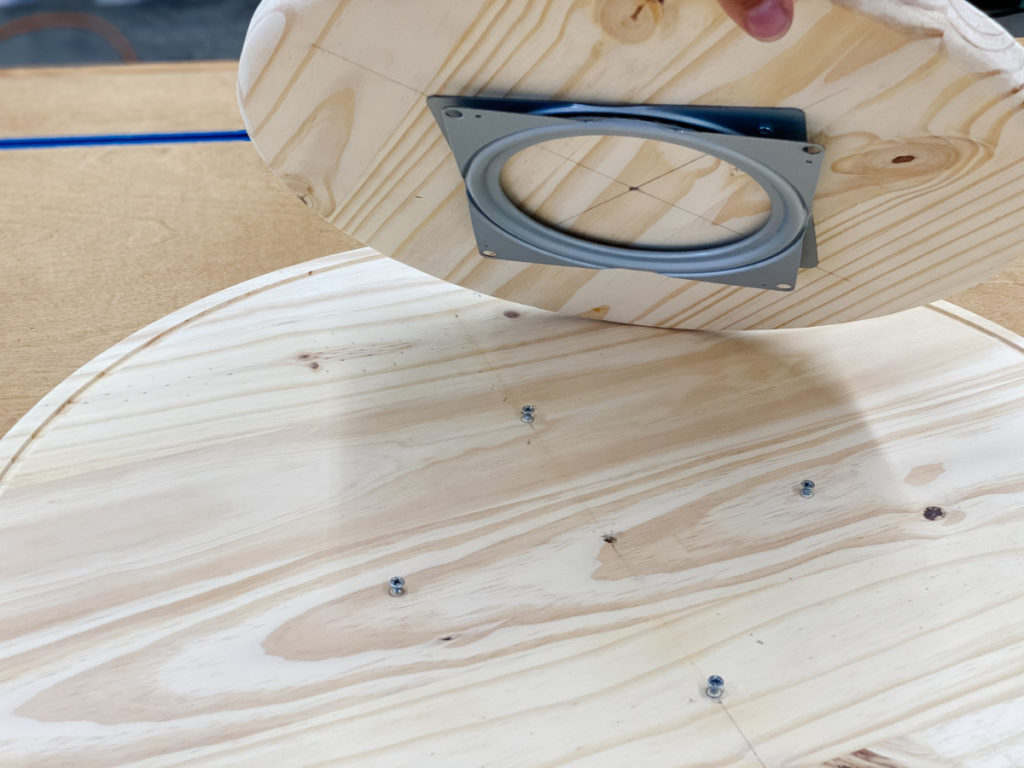
Place the second Lazy Susan Turntable centered on the top of the large wood round. Use the turntable as a template to mark the placement of the LARGER holes. Using a 1/4″ drill bit, drill 1/2″ deep holes as straight as possible.
Now it’s time to place the pegs. Add a dab of wood glue to the bottom of the pegs and firmly push into place.
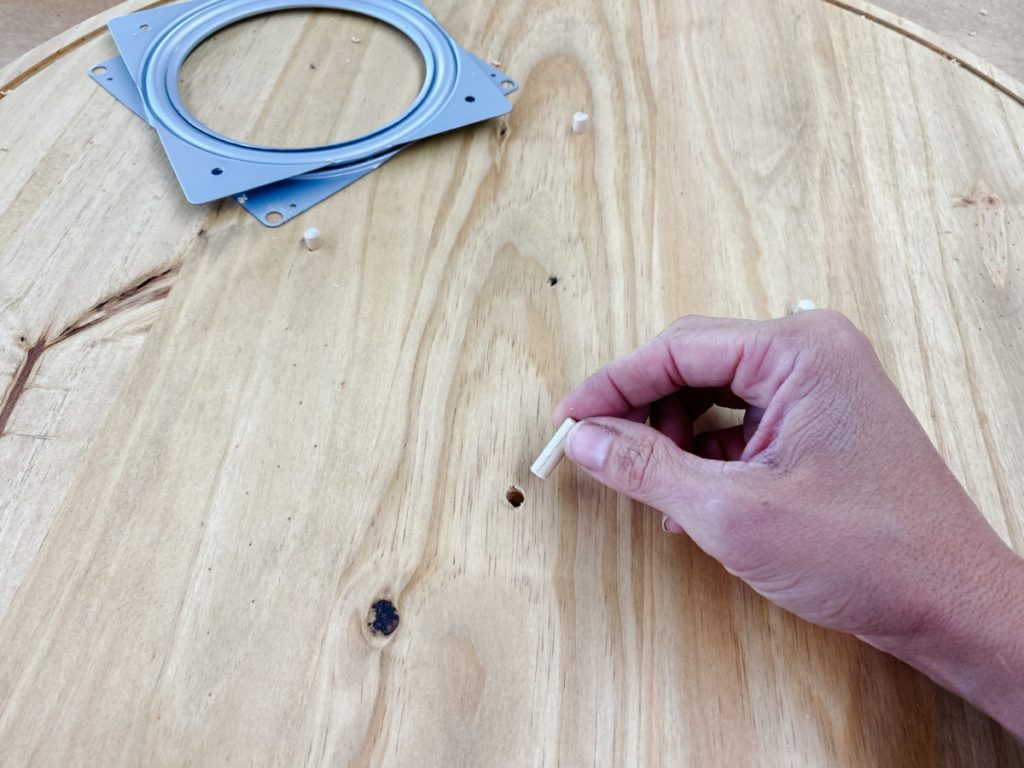
If necessary use a hammer to gently tap the dowels into the holes.
Alternate Option (Mark and Add Screws)
Now, if the dowel rod idea seems a little tricky, no worries I have got you covered. (You can do this!)
The point of the dowel rods is to hold the turntable in place . We can accomplish the same principle by adding a few small headed screws (placed the same way the dowels were). I opted for the dowel rods because they can be stained and are less obtrusive should someone wish to use the large one by itself.
Whether you opt to use the peg or screw method, the results are the same. These four screws/dowels will allow you to drop the small turntable tray on top without it shifting.
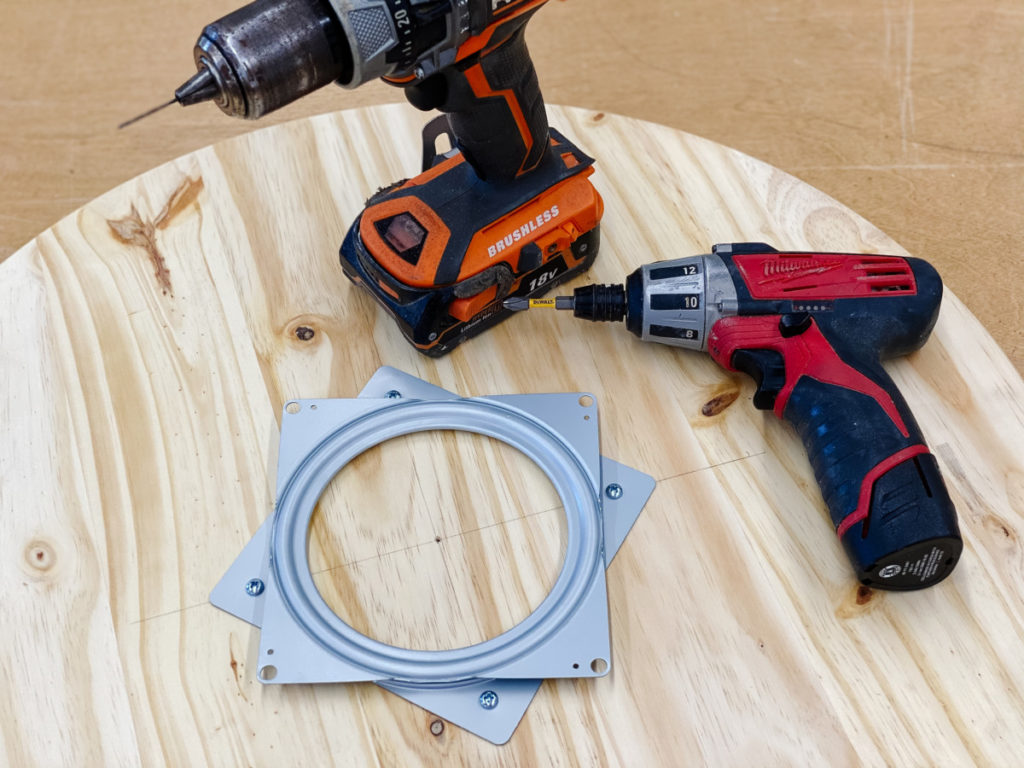
Secure Turntable to Large Circle
Use the same steps used to secure the first turntable to the smaller tray to the bottom of the larger wood round.
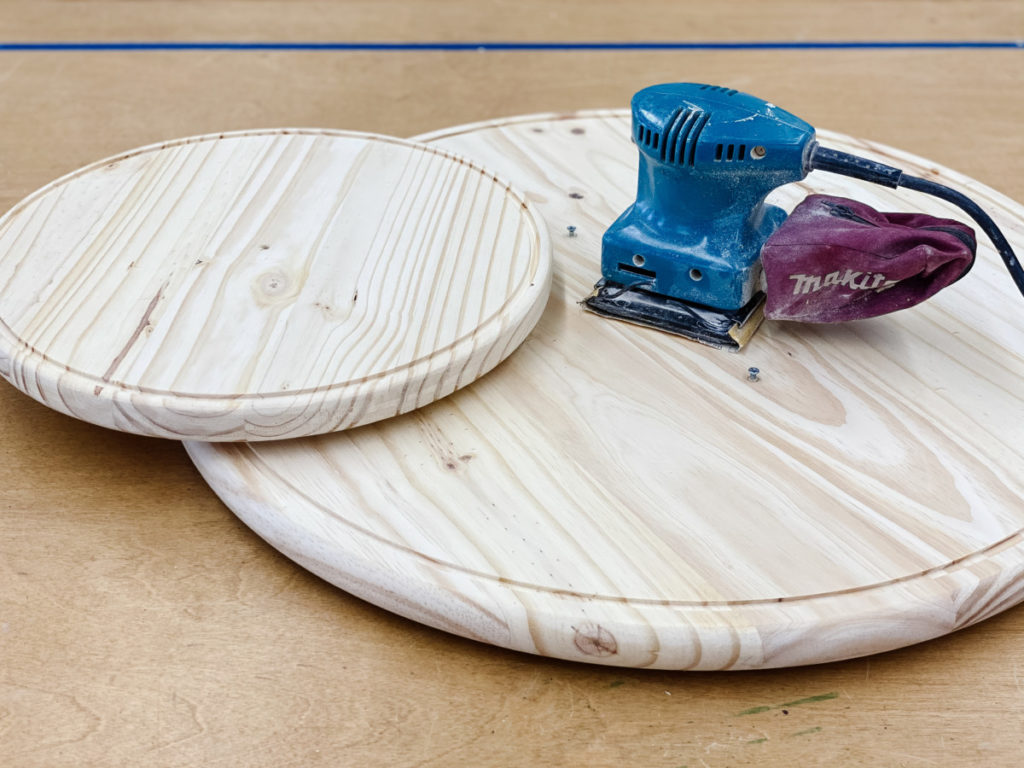
Sand
A great way to really personalize this gift is by adding some color! Before we start staining or painting I would suggest sanding both trays with some fine sandpaper.
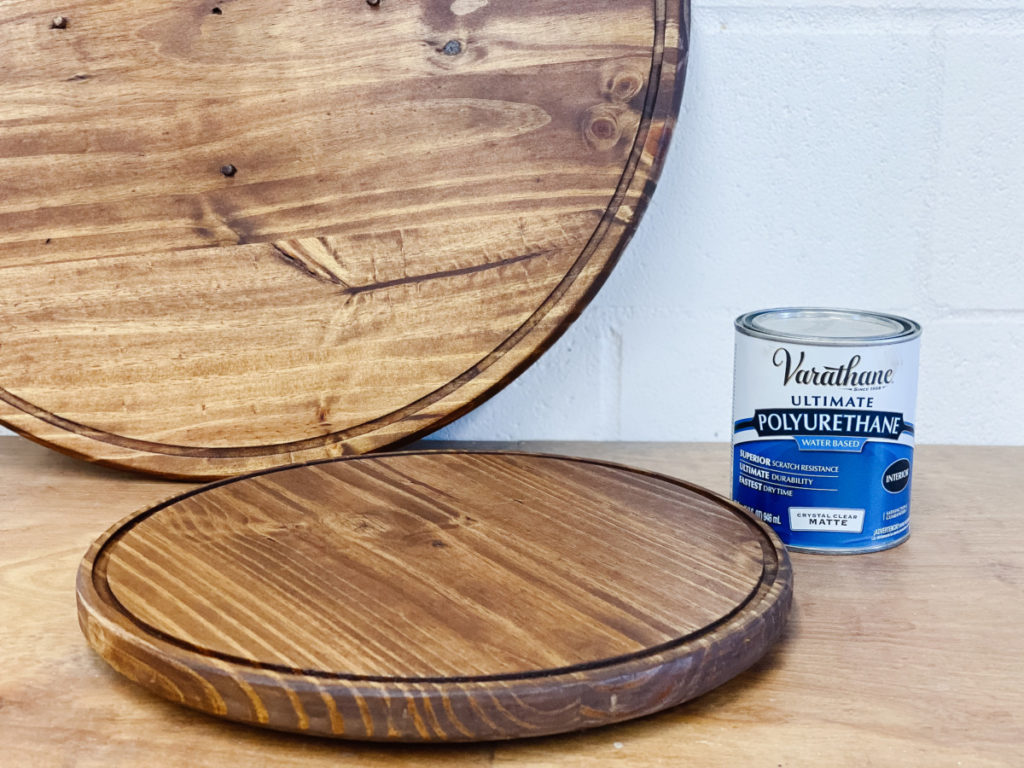
Stain
As I said before, the finish is a great way to really personalize this gift! You can use their favorite color or if you can recollect what wood tones they use in their kitchen that is probably a safe bet!

Seal
Because this item could potentially be used for food items make suer you check your sealants before applying. The Home Depot has a handy list of “Food Safe Finishes” if you are at all uncertain of which product to use. Seeing as I used a stain first my best bet was using a “film finish” meaning that it will seal a previously stained surface. I used WaterBased Polyurethane. The biggest thing to ensure it is food safe is allowing it to cure completely before use.
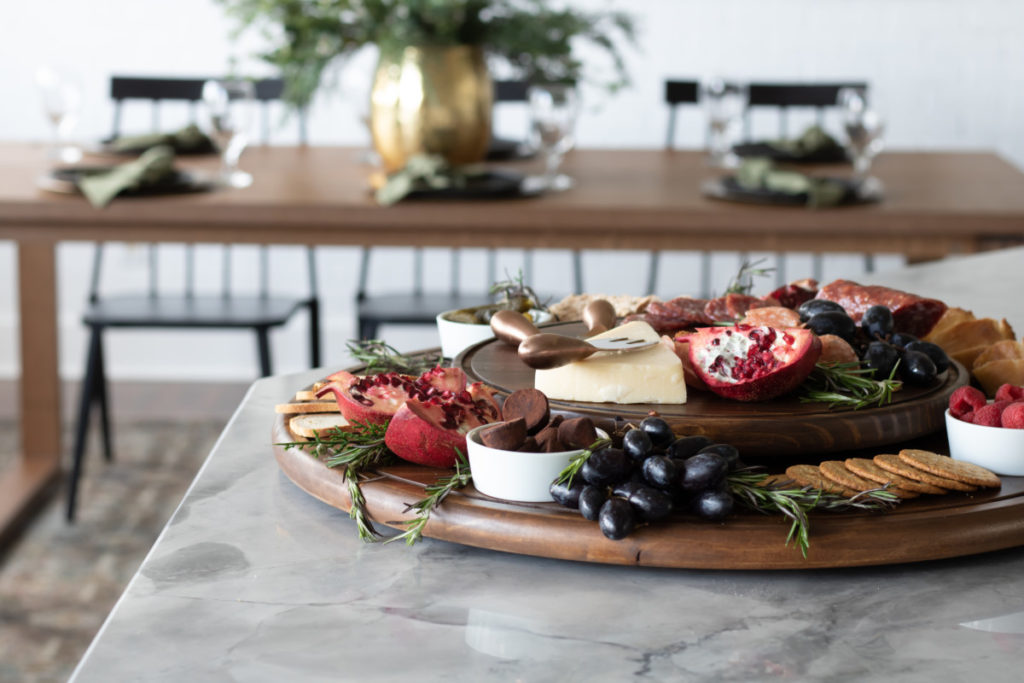
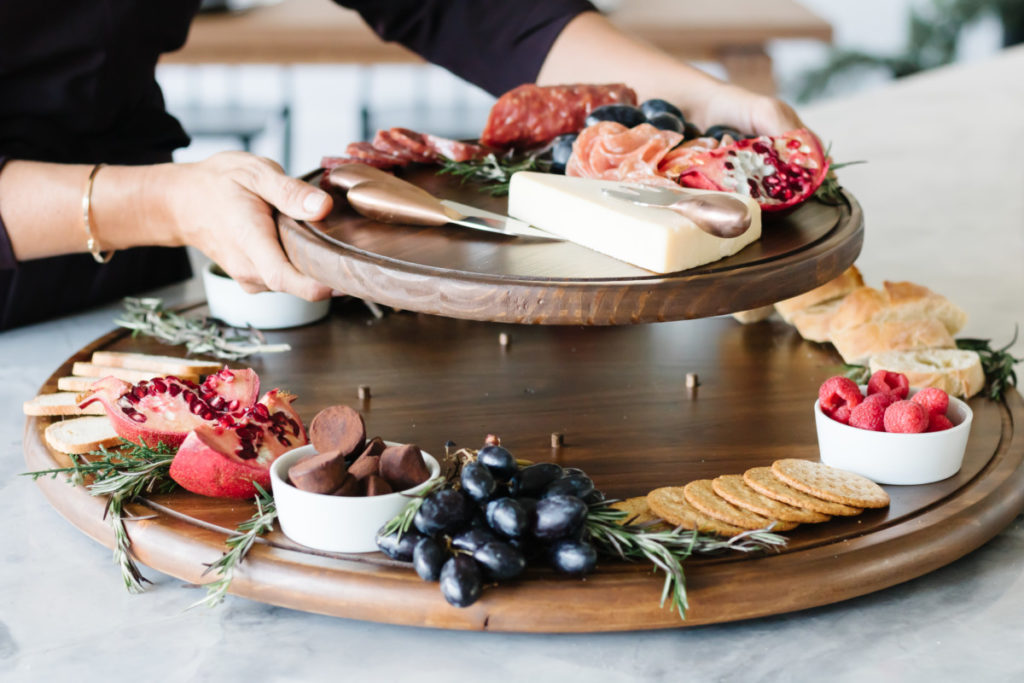
You did it! How simple was that? Just two boards and two turntables and you have an impressive DIY gift that anyone would love!
Thanks for following along and make sure you check out all the other great gift ideas on The Home Depot’s website.


Thoughtfully designed and beautiful.
Such a great idea! Love the simplicity.