*This post is sponsored.
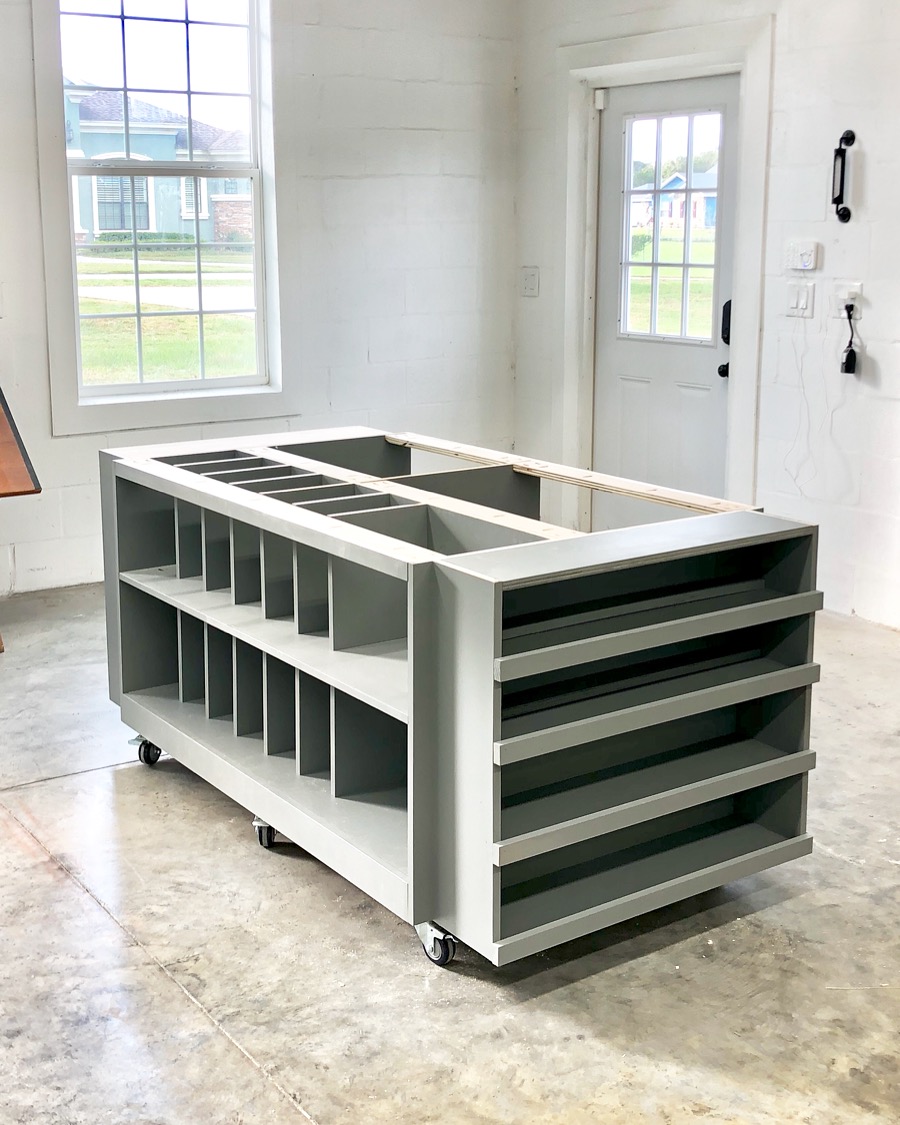
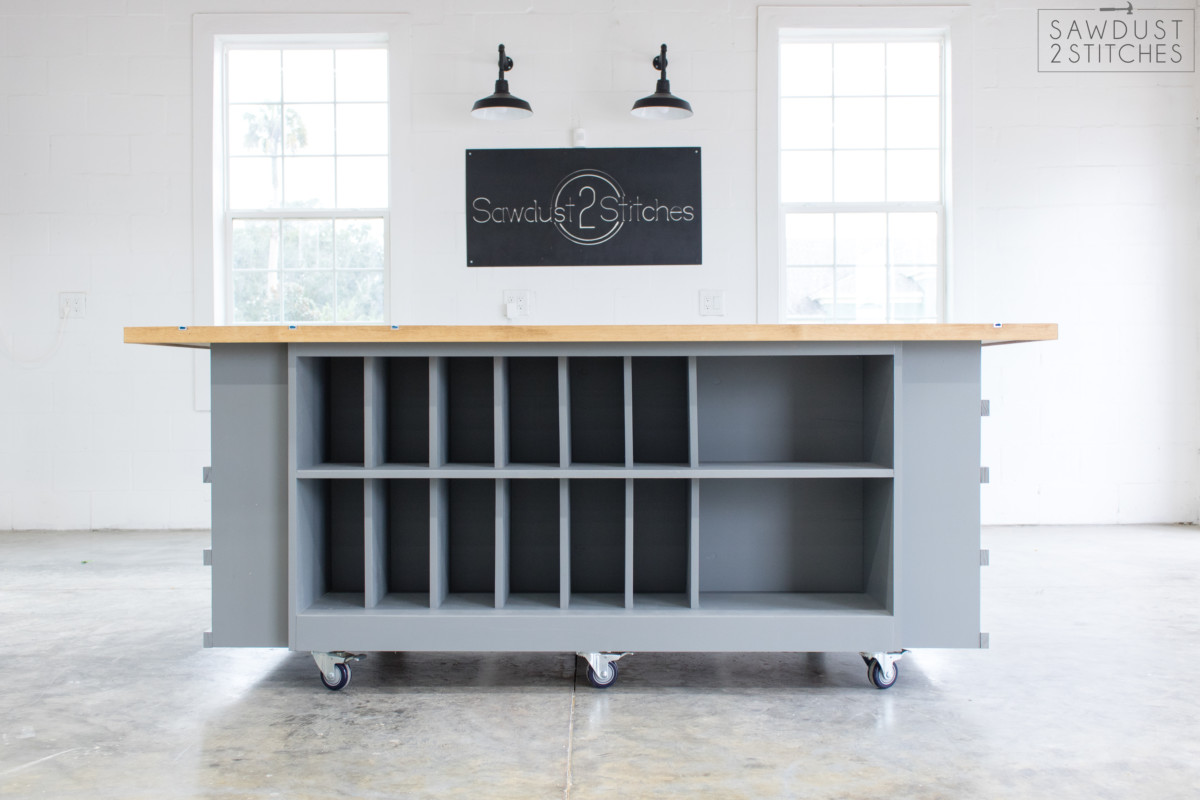
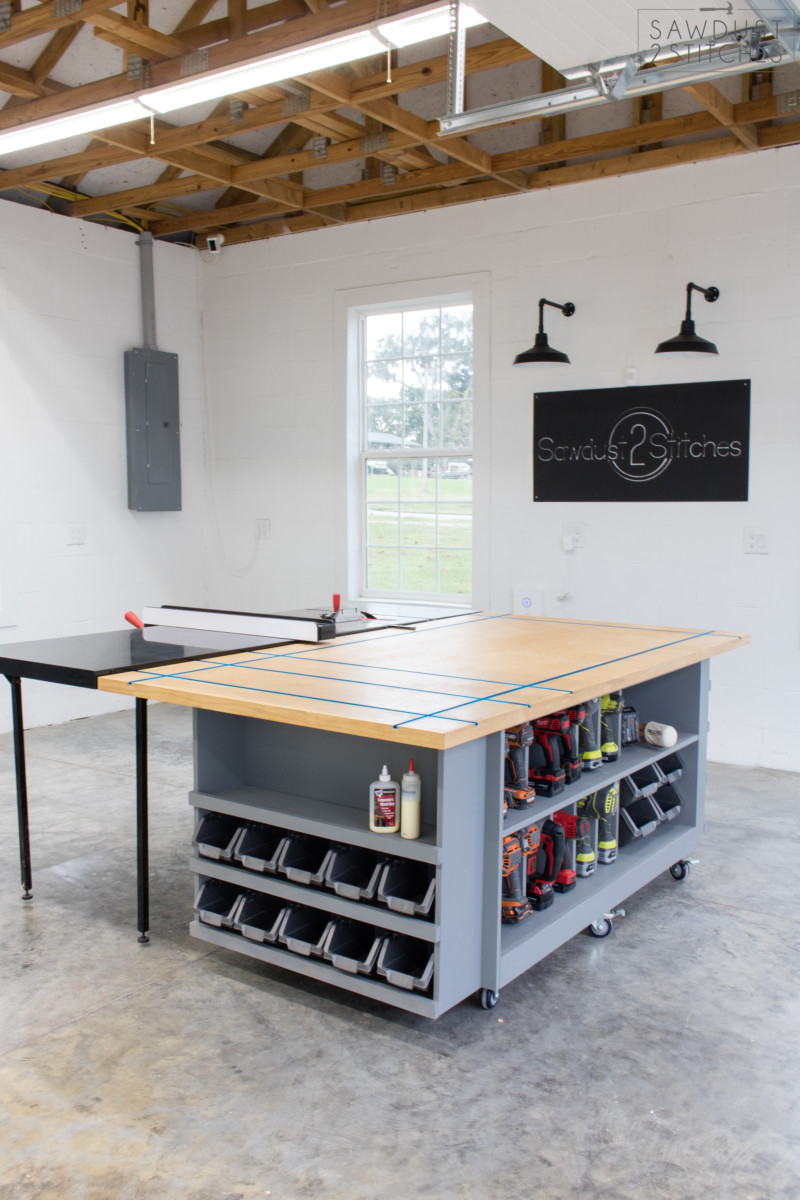
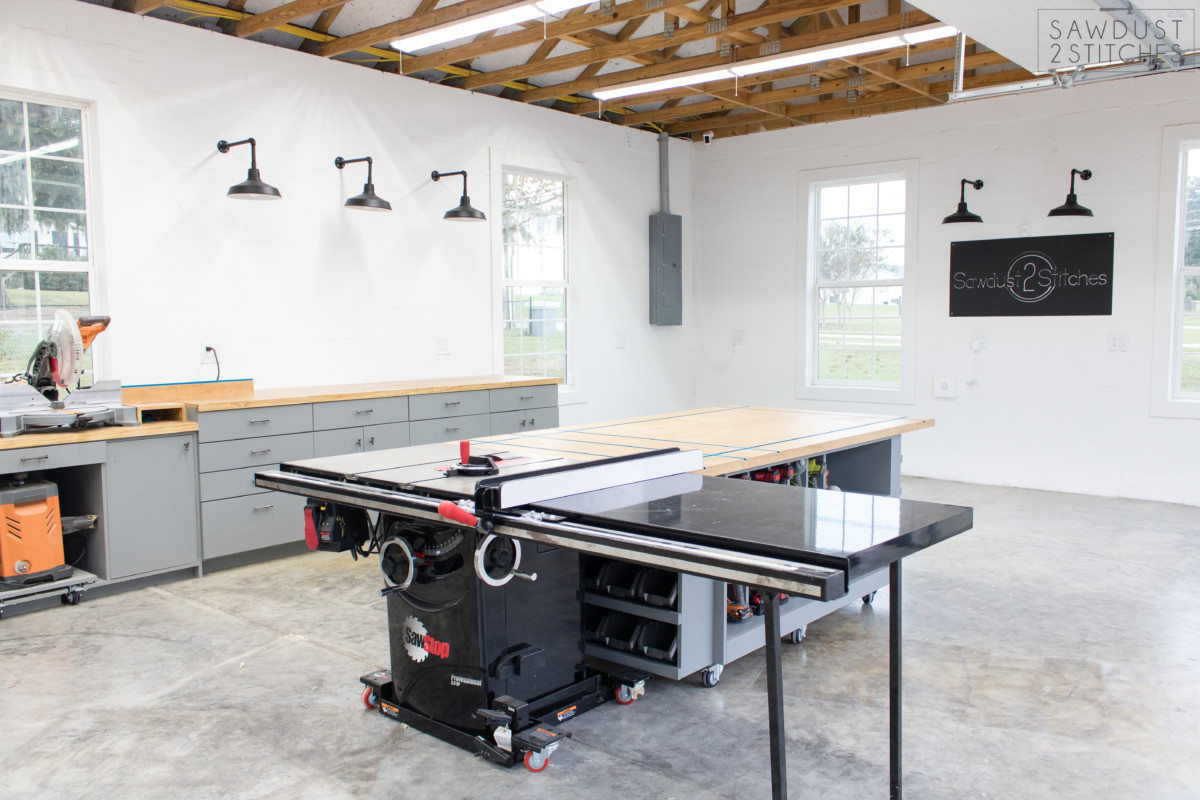
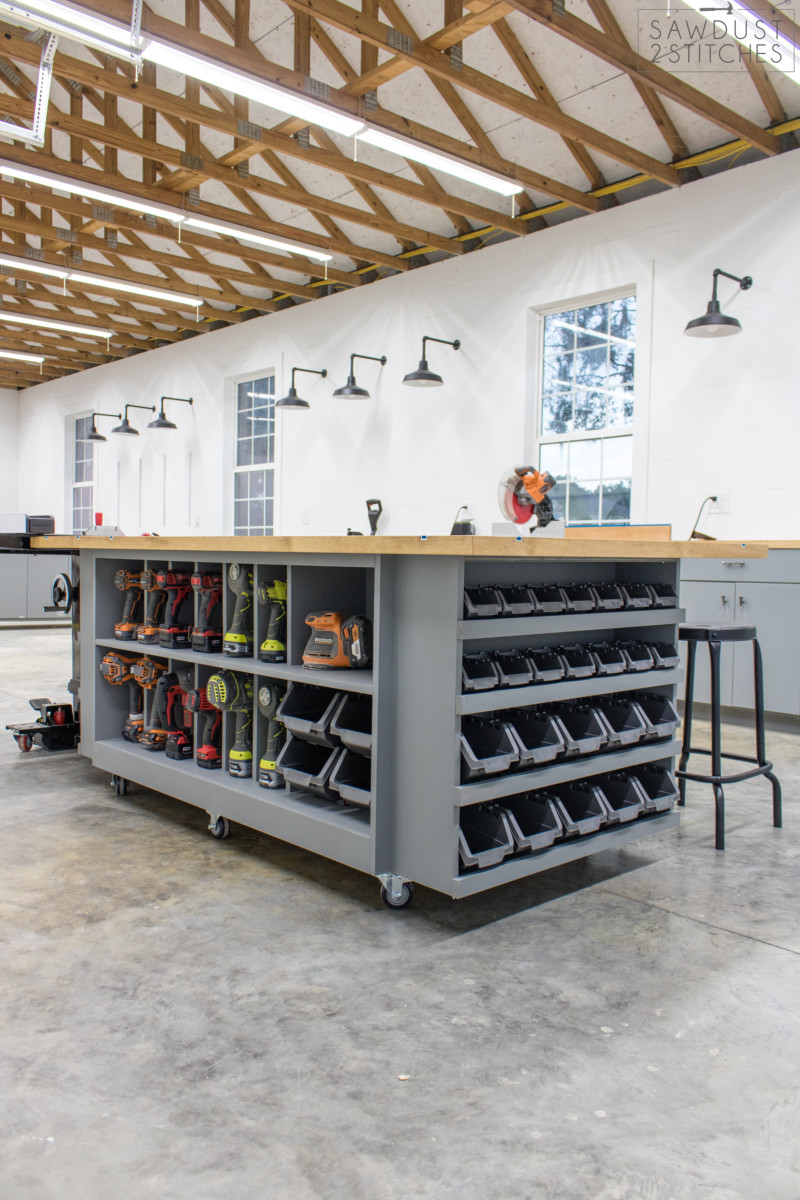
I have been mentally planning this workbench assembly table for years! I knew I wanted a larger workstation that could also serve as an out feed table as well. Every once in a while I would have a weird cut and I would have to wait for my husband to get home so that he could catch the board as I fed it through. Too many times I have had to put a project on hold to wait for my husband to roll in. Not any longer! I am happy to report that I can now feasibly cut a full sheet of plywood without needing a second person present!
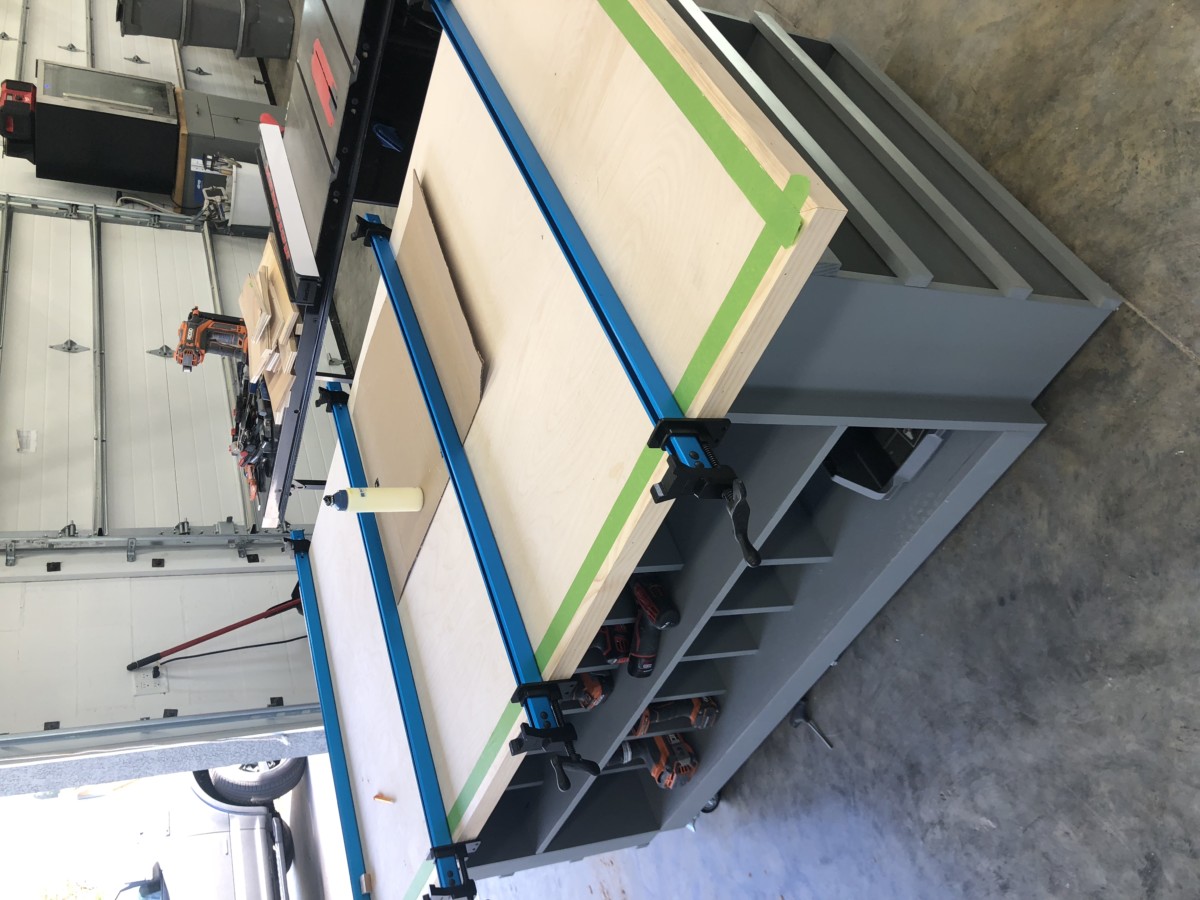
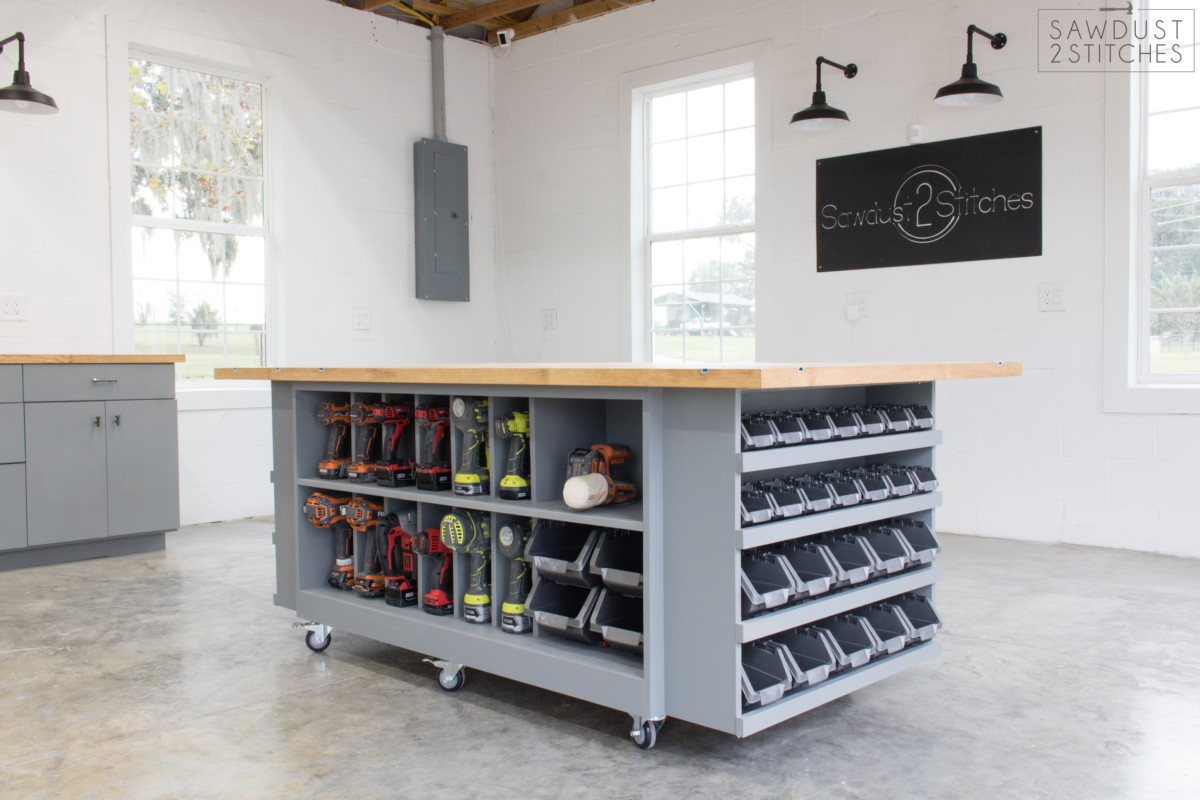
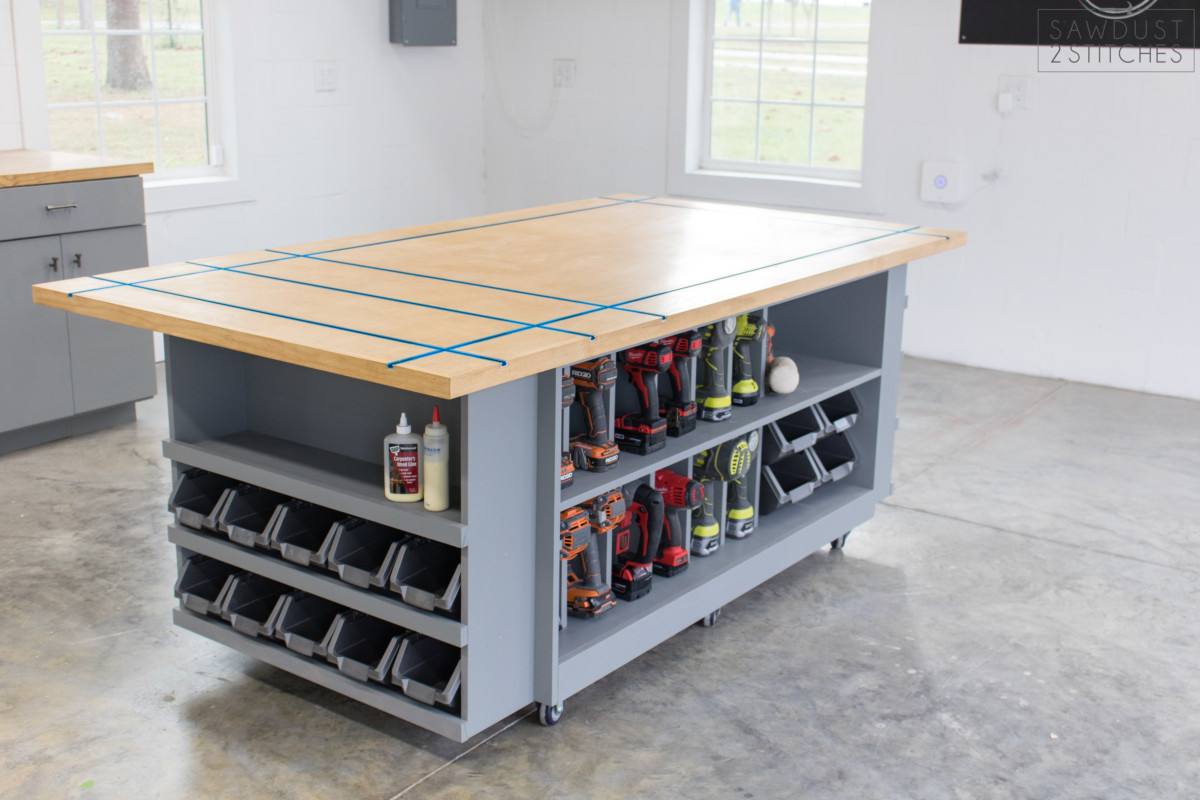
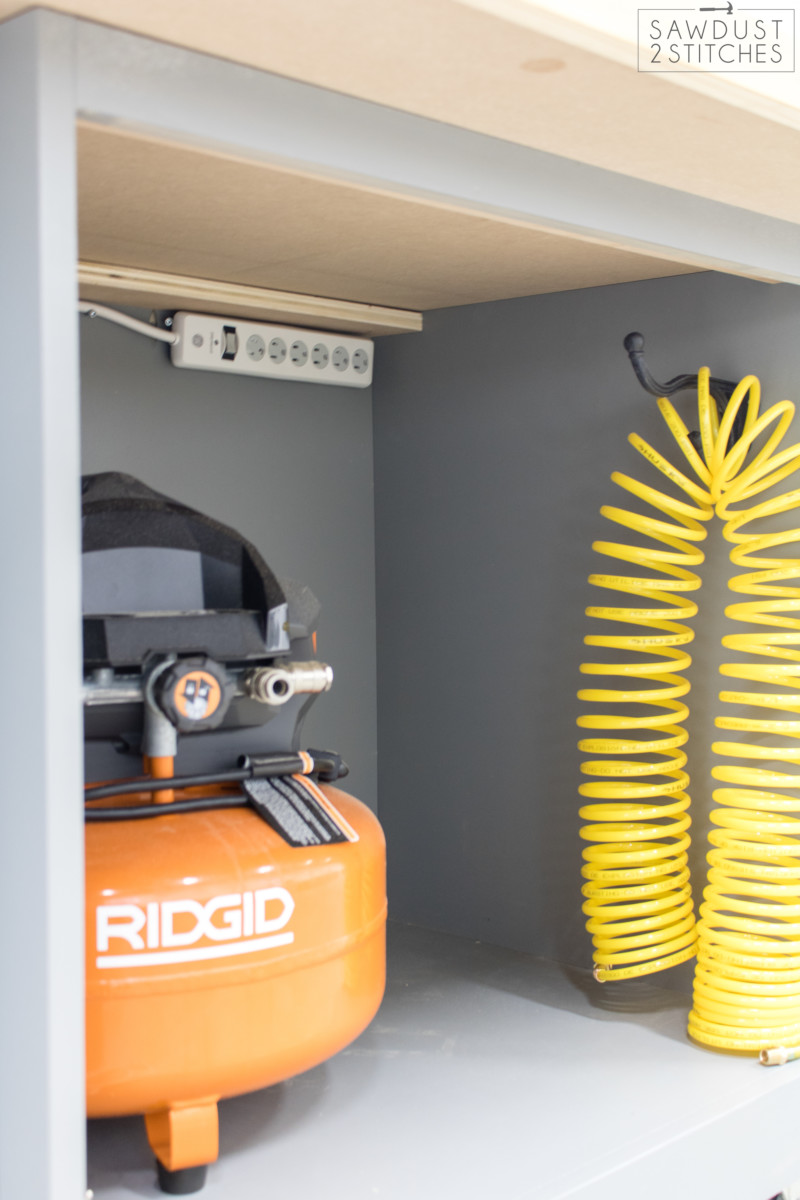
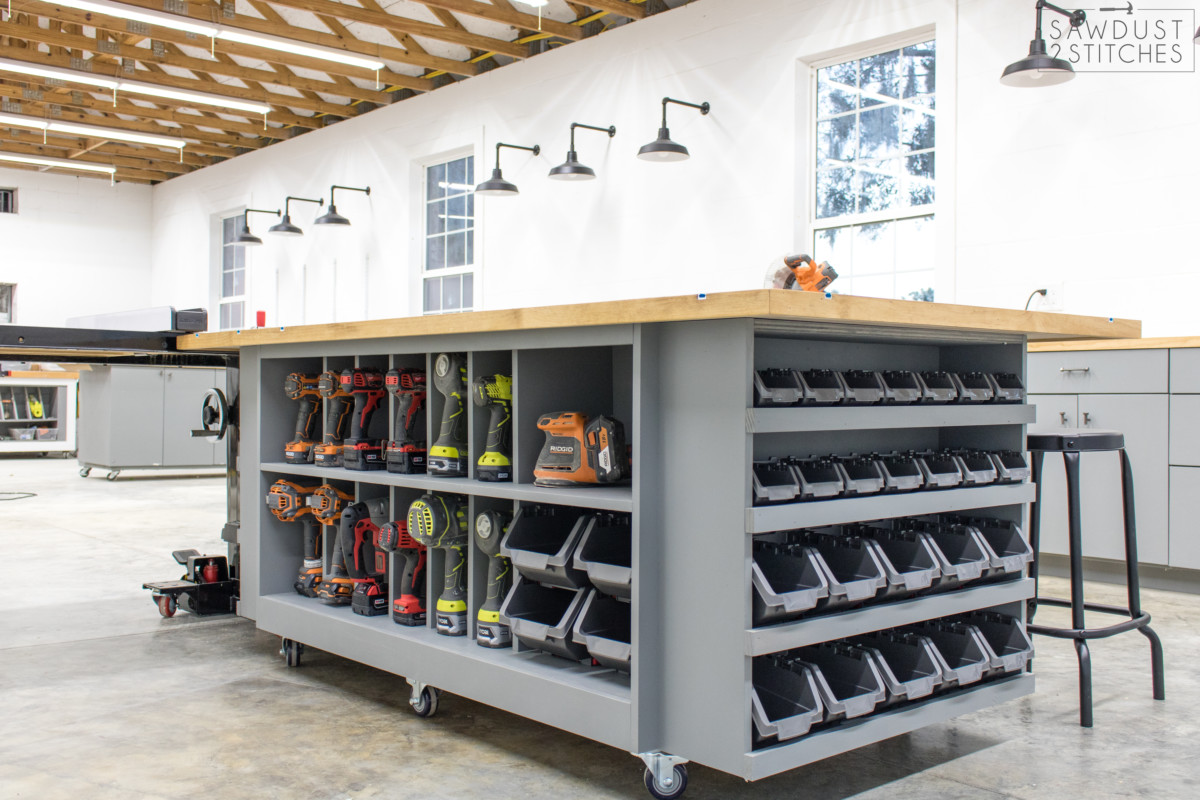
Because I was making this bigger, I might as well make it BETTER! I teamed up with the great folks at Rockler to really trick this bad boy out! It is complete with clamp tracks, great storage, and castors that move this beast around like a dream!
As always I used my go-to , Purebond Plywood. It is a beautiful top quality plywood that is responsibly harvested from sustainable sources, it is also formaldehyde-free and made with soy-based adhesives. You can learn more about the Purebond difference here.
*

Tools Suggested:
- Miter Saw
- Drill
- Pocket Hole Jig
- Table Saw (or a track saw)
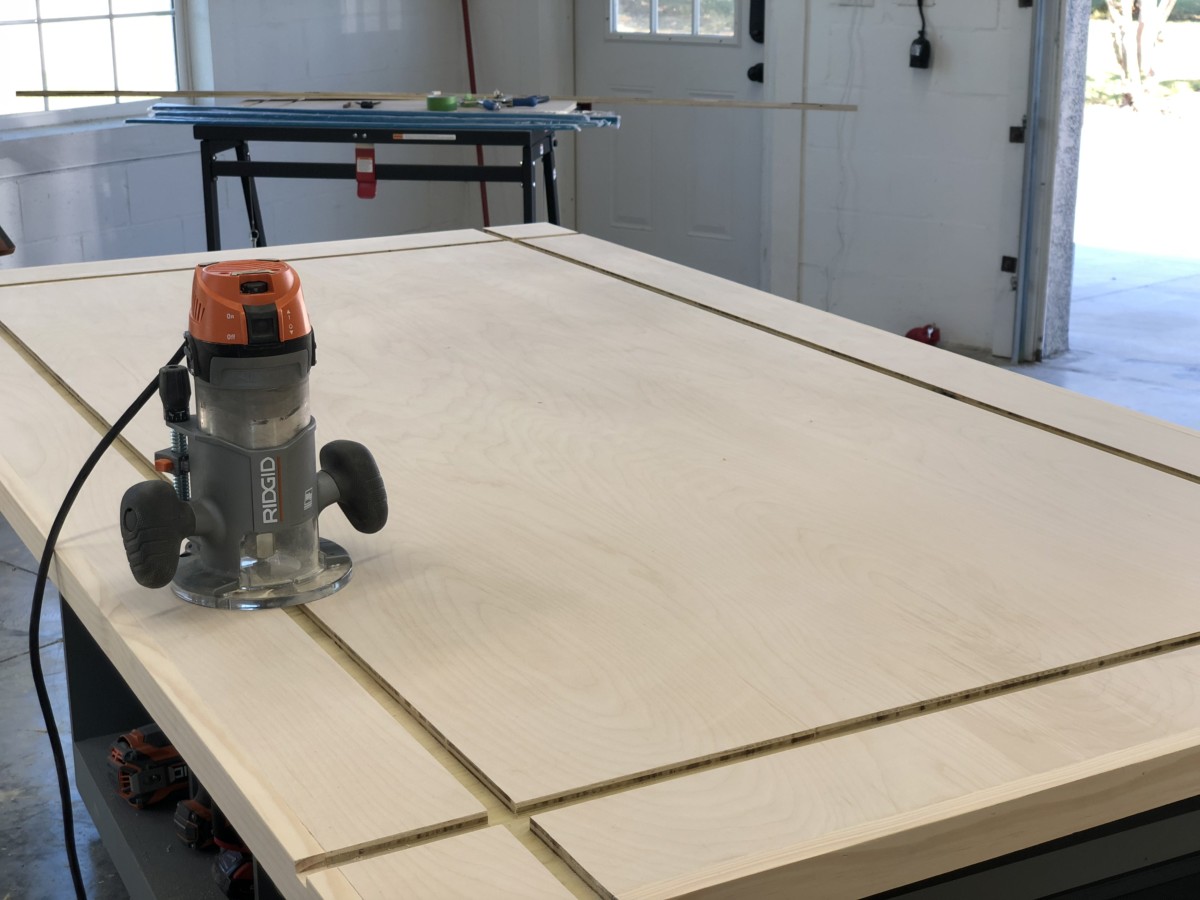
- Router (for optional tracks)
- Sander
- Rockler Drawer Slide Jig
Supplies Used:
- (x 5) 3/4″ Purebond Plywood
- (x 1) 1/2″ MDF 4×8 sheet
- (x 4) 2″x 3″ Boards
- (x 7) 1″x 2″ Primed Finger Board (Or Premium Pine)
- Wood Glue
- 1 1/4 ” Pocket Hole Screws
- 3″ Wood Screws
- 3″ Rockler Castors
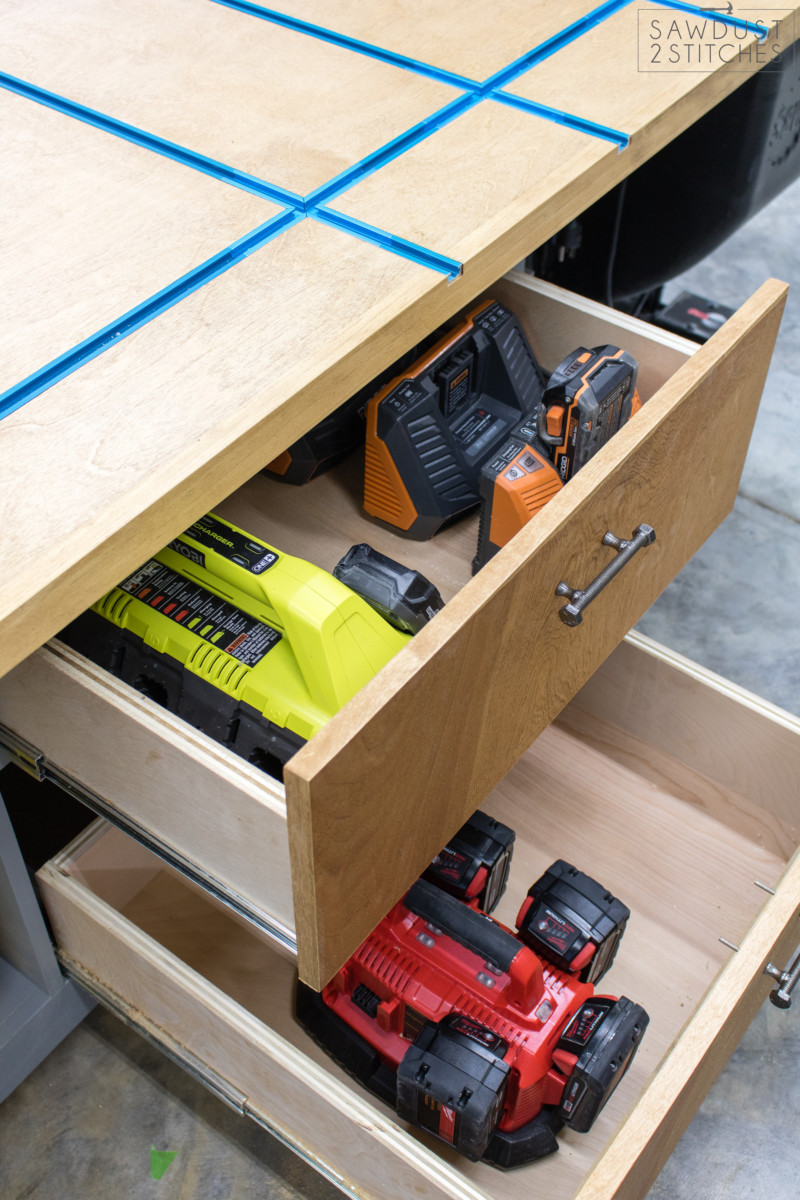
- 20″ Drawer Glides
T-Track Top (Optional but absolutely suggested!)
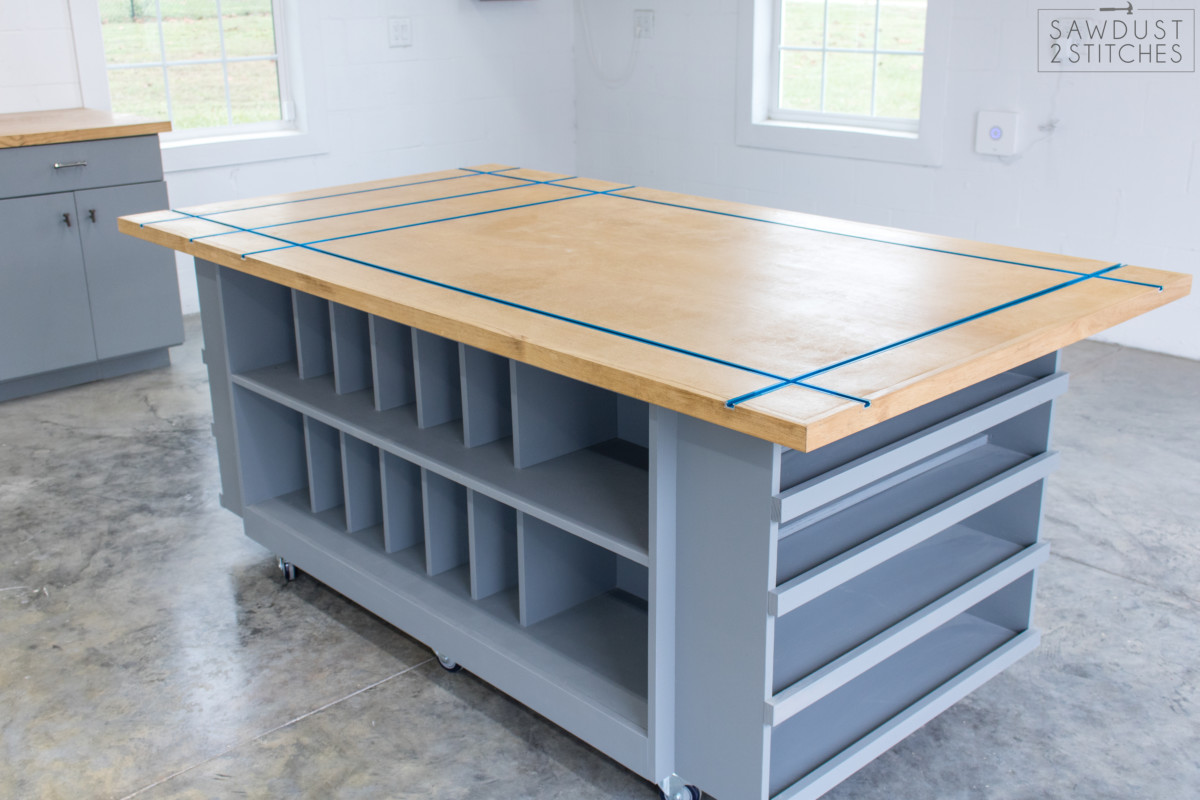
Want to build it for yourself!? I have build plans available here. The overall dimensions are 84″x 46.5″x 34″
If you want to see more behind the scenes, I have the insider scoop saved to my IG stories.


*I acknowledge that I am partnering with Rockler and Purebond. As a sponsor I am receiving compensation in the form of products and services. All expressed opinions and experiences are my own words. My post complies with the Word Of Mouth Marketing Association (WOMMA) Ethics Code and applicable Federal Trade Commission guidelines.
 Copyright secured by Digiprove © 2018


This storage table looks awesome, it is great you are using materials form sustainable sources. Fantastic job!