*This post is sponsored by DAP and does contain affiliate links.
If you have been following the process of the R.V. Makeover then you are probably aware of the funky smell situation it had going on. I did what I could to remove absolutely everything that wasn’t nailed down. Scratch that, I removed everything that was nailed down too. My goal was to get down to “ground zero”. In doing it DID seem to eliminate a majority of the aroma, and it just made me feel better to start from scratch. Well, when it came to the R.V. Bathroom Makeover things were a bit more complicated. I couldn’t simply remove everything and paint everything like I had in the rest of the R.V…. or could I?? Whether I could/should, I decided I was going for it, I teamed up with the great folks at DAP and gave it hell!
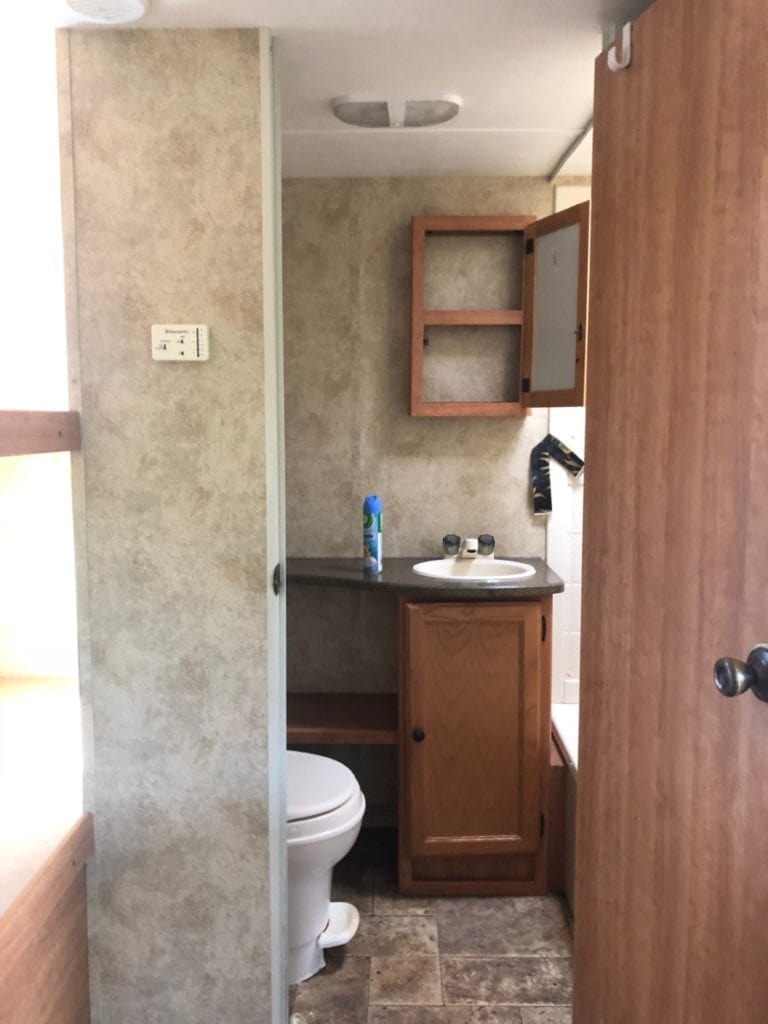
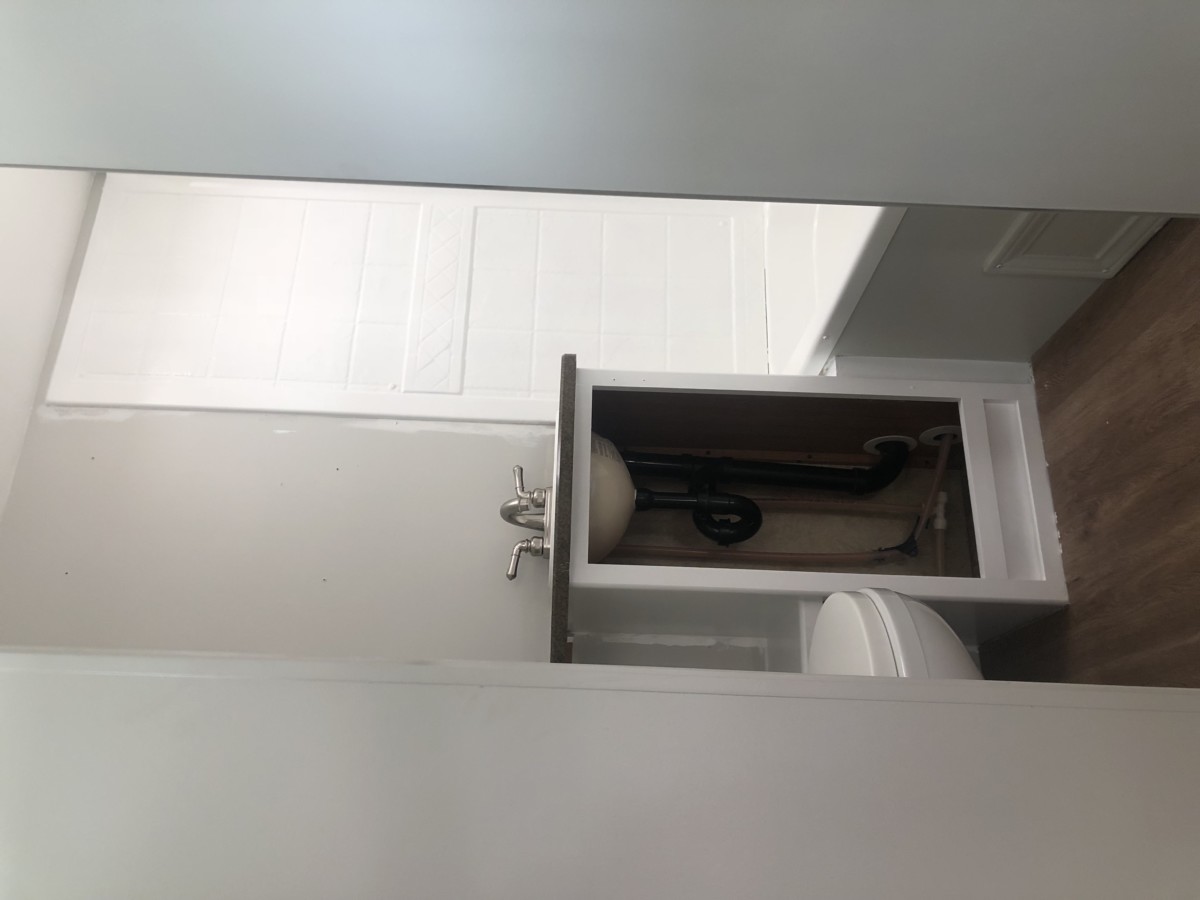
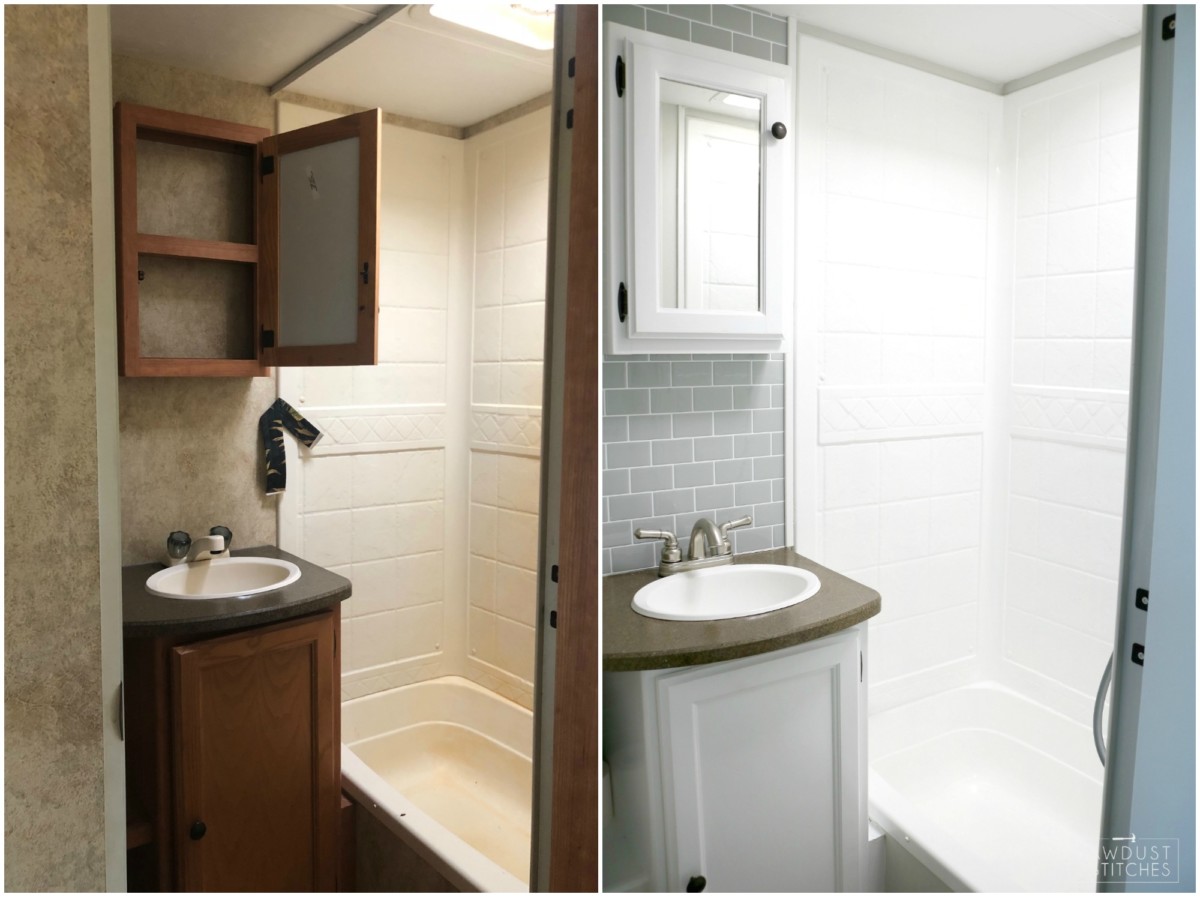
If you have been following the process of the R.V. makeover then you may recall the original origins of the bathroom. 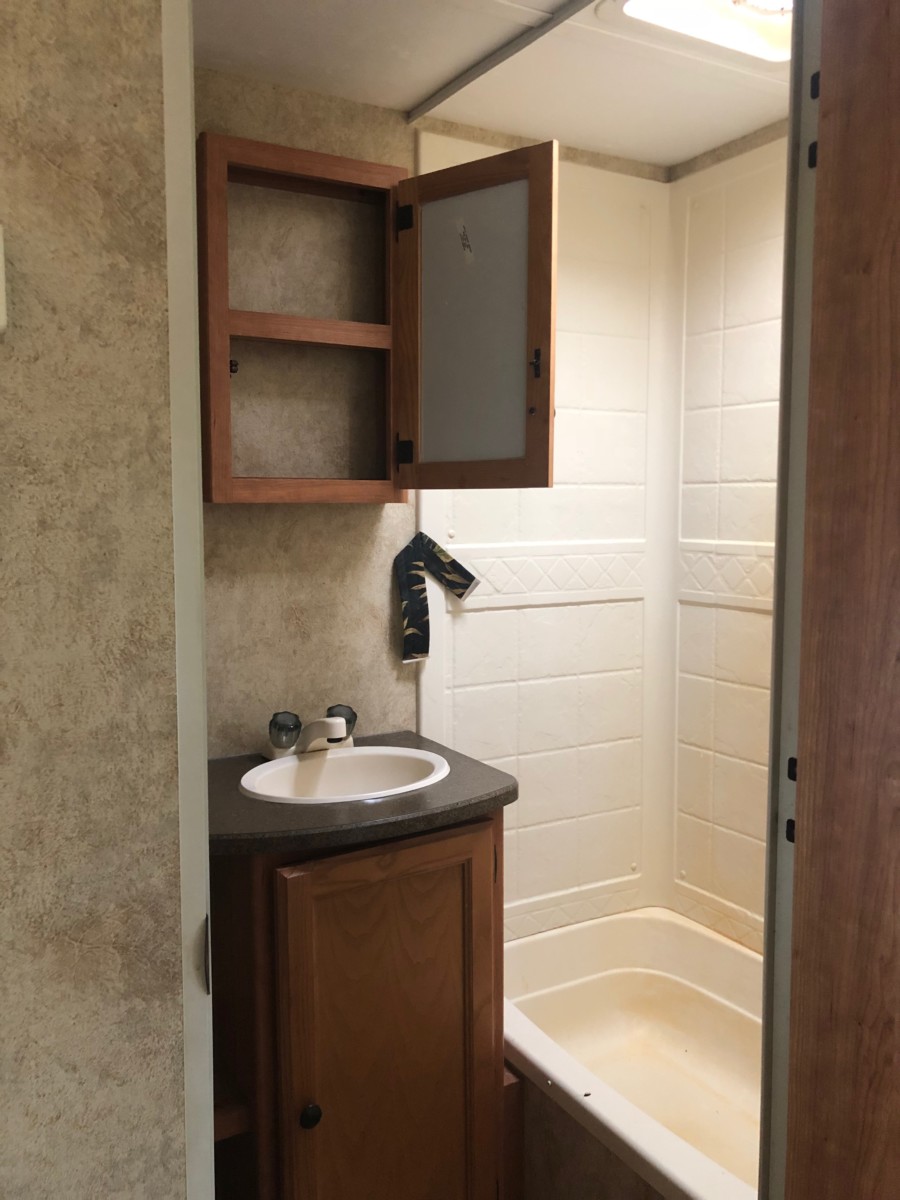
 I know it is not my place to judge… but when I am scrubbing a situation like this and my gag reflex is kicking in, I found it really hard not too. :/ Don’t worry. I humbled myself back down… but seriously how hard is it to clean your shower once a year!? Ok, I’m done I promise.
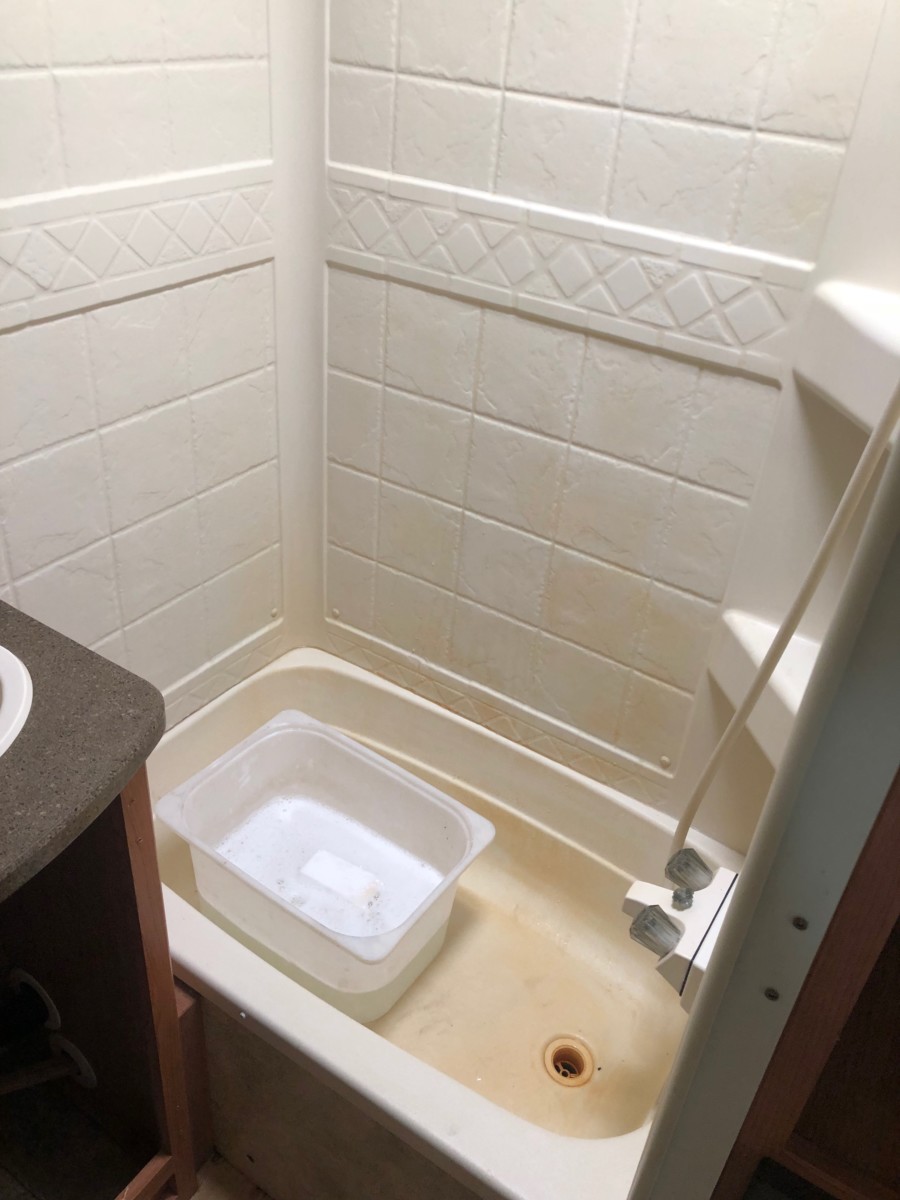
Full disclosure: I kind of cheated in the timeline of this makeover. The majority of the bathroom makeover took place at the same time the rest of the camper was in “Phase One”. Sorry if I loose authenticity cred, but I hate painting and I was not about to start that dreadful process all over again.
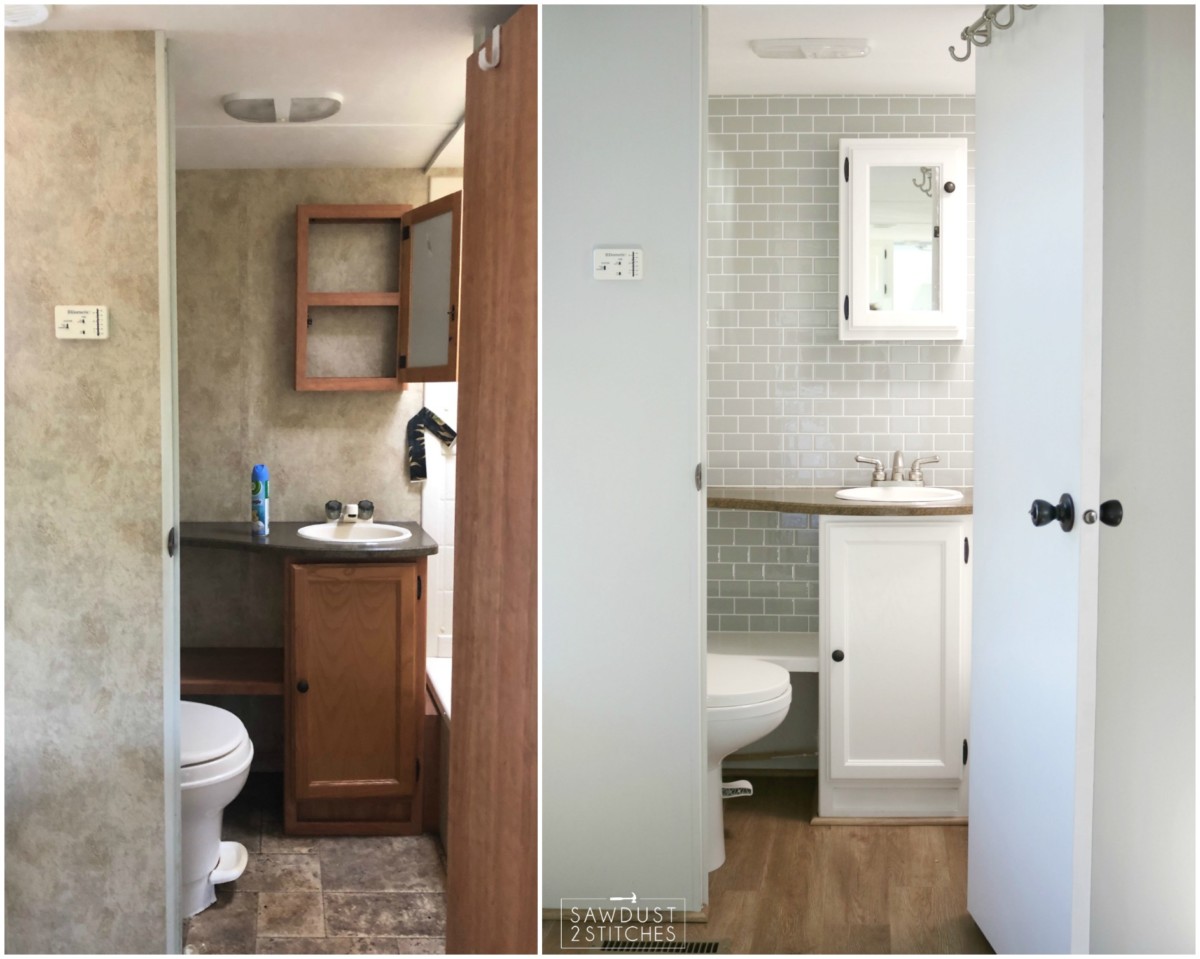
I began by taking it down to bare bones. The light fixtures, cabinet doors, shower curtains, flooring, toilet… yup the toilet had to go! I fully realize that the photos don’t fully emphasis how truly heinous this room was, but believe me, it was awful. As I was pulling the R.V. apart I started to find lots of reflags that indicated the type of lifestyle that inhabited this camper. In good conscious I could NOT keep the original toilet. I consider myself a tough girl, but I just couldn’t. It made me feel a bit of relief when my husband was completely supportive of this idea. (Complete reassurance in my tolerance and toughness.) However I was a little terrified about the potential price tag. If you have ever price out anything for an R.V. then you know that it is highway robbery for specialty pieces. THANKFULLY it turned out to be a fairly quick and reasonably cost effective upgrade. We found ours on Amazon, and I do not regret it!
 Once everything was out I followed the same process explained in “Phase One” in regards to painting. (If you want to hear more about how I went about it, and learn from my mishaps make sure you check it out.) Make sure you take the time to really scrub, sand, and rinse thoroughly before you even begin contemplating priming! They built these suckers to be extremely washable, which also means shiny and slick, and MY CAMPER did not like to take paint on the cabinets. ( In all my research I have yet to find another DIYer that had this problem so don’t freak out, just proceed with caution, and do your prep work!)
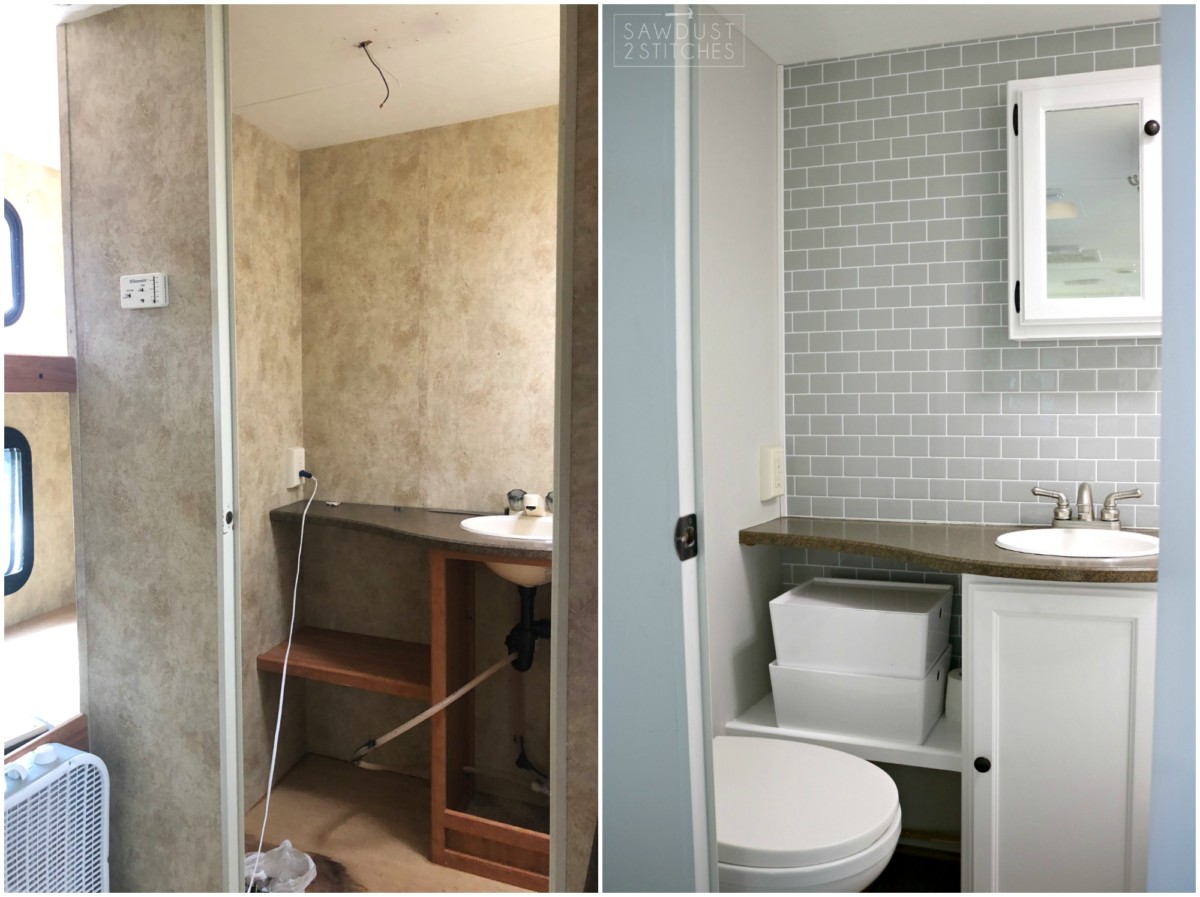
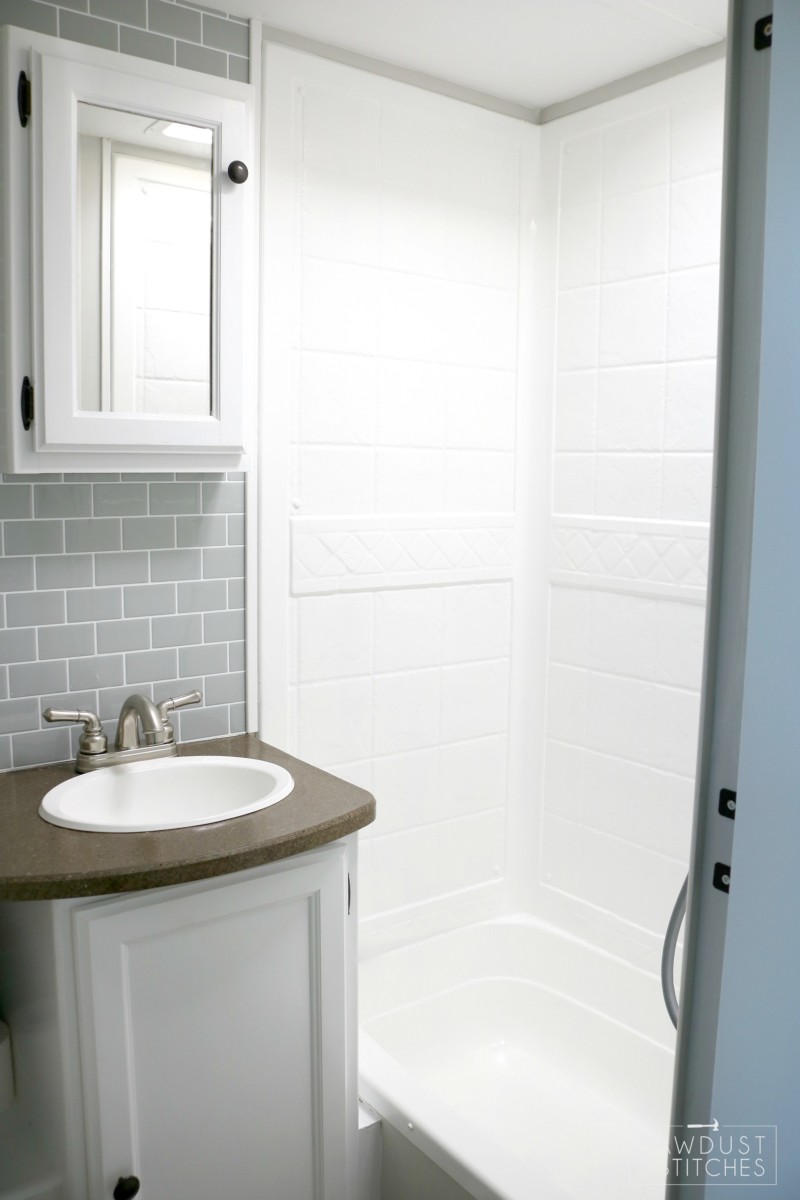
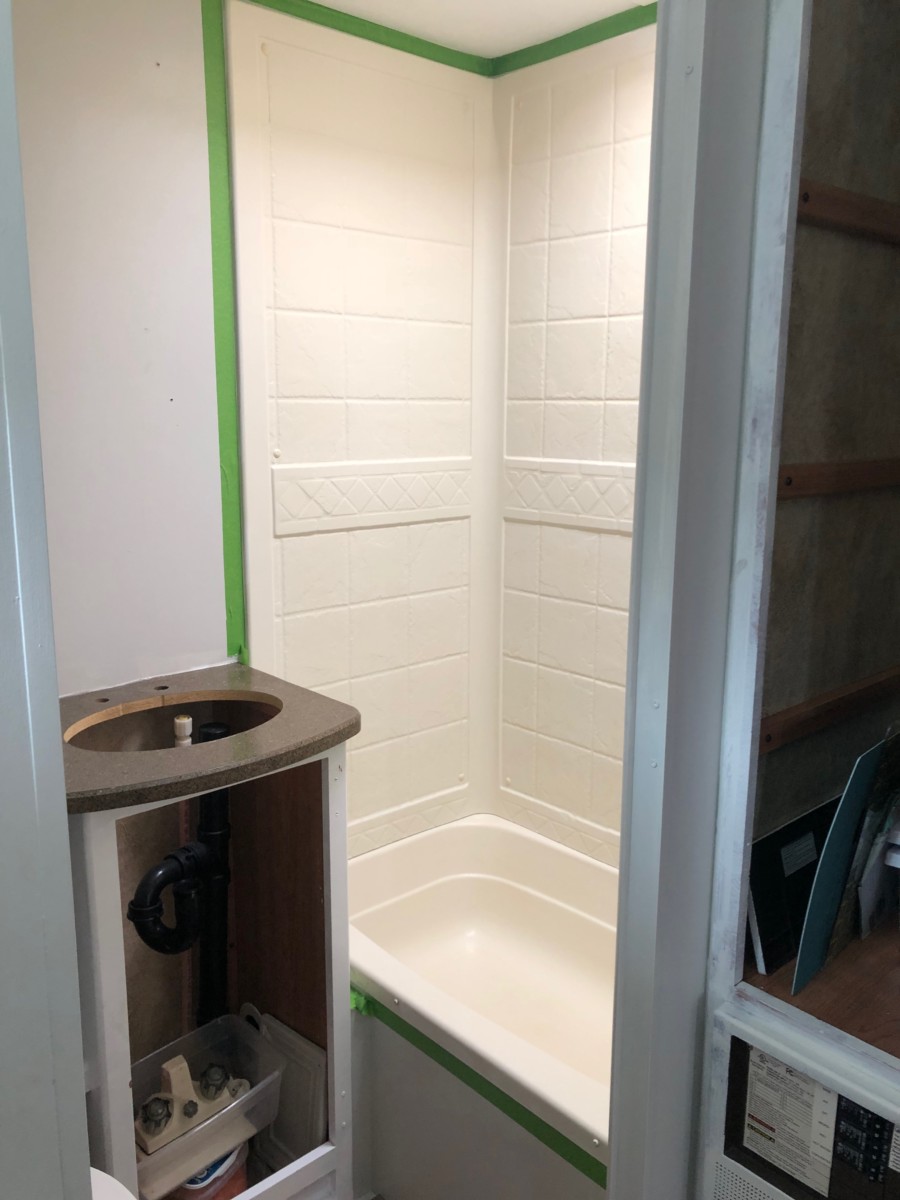
By the end of “Phase One” of the R.V. makeover I was left with a bathroom looking a little like this. The cabinets and the walls had a fresh coat of paint, nice clean flooring, and a NEW TOILET!!!! Woohoo. While the space was look infinitely better, it still wasn’t quite there. Next to the brand new white toilet, and freshly painted cabinets the shower and the sink were looking very yellow… so I thought I would try something new. Why not refinish the shower/tub and sink? So I pulled out the sink in the kitchen and in the bathroom and prepped them for a makeover as well. 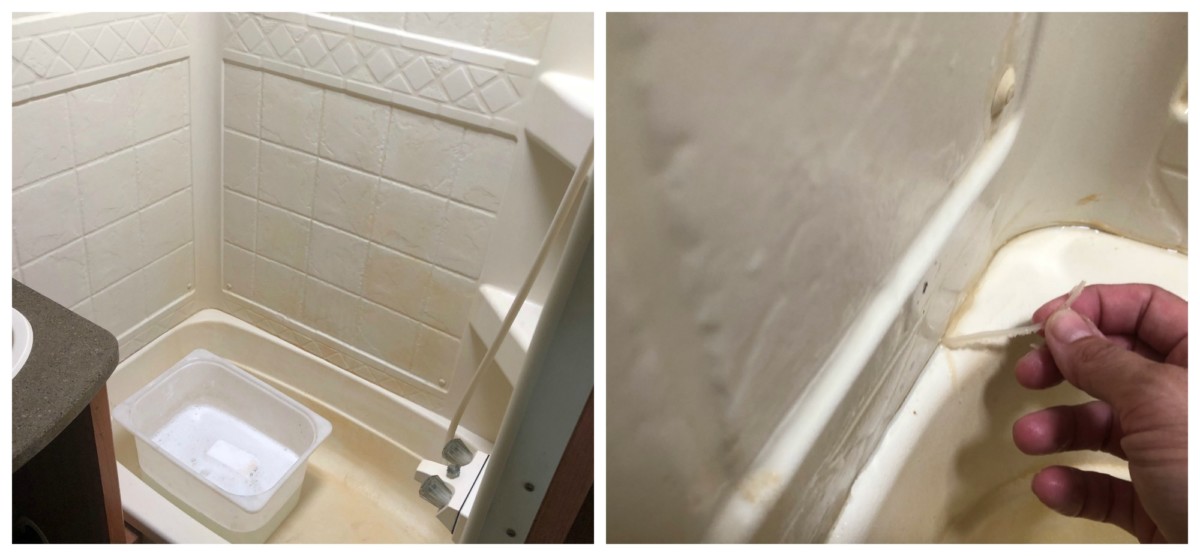 Once it was scrubbed sanded and prepped for paint. I taped off anything I thought necessary.

I have never used “Tub and Tile” by Rustoleum before, but it seemed to do the trick. It is a fairly straightforward process. It is a two-part system, and seemed to cover well. The only advice I can give is follow the directions on the can to the “T”, and work quickly! Have everything prepped properly, because I did notice that the mixture did seem to get tacky very quickly! Work fast, and try not to “over-work” it or it will create a bumpy surface.
I can not tell you how much painting the tub and sink changed my out look on the entire project, it was so light and bright! Once everything was dry I reinstalled the sink and added new hardware! I was able to find a set that was reasonably priced to replace the shower head and the sink faucet. SUCH A BIG DIFFERENCE!!!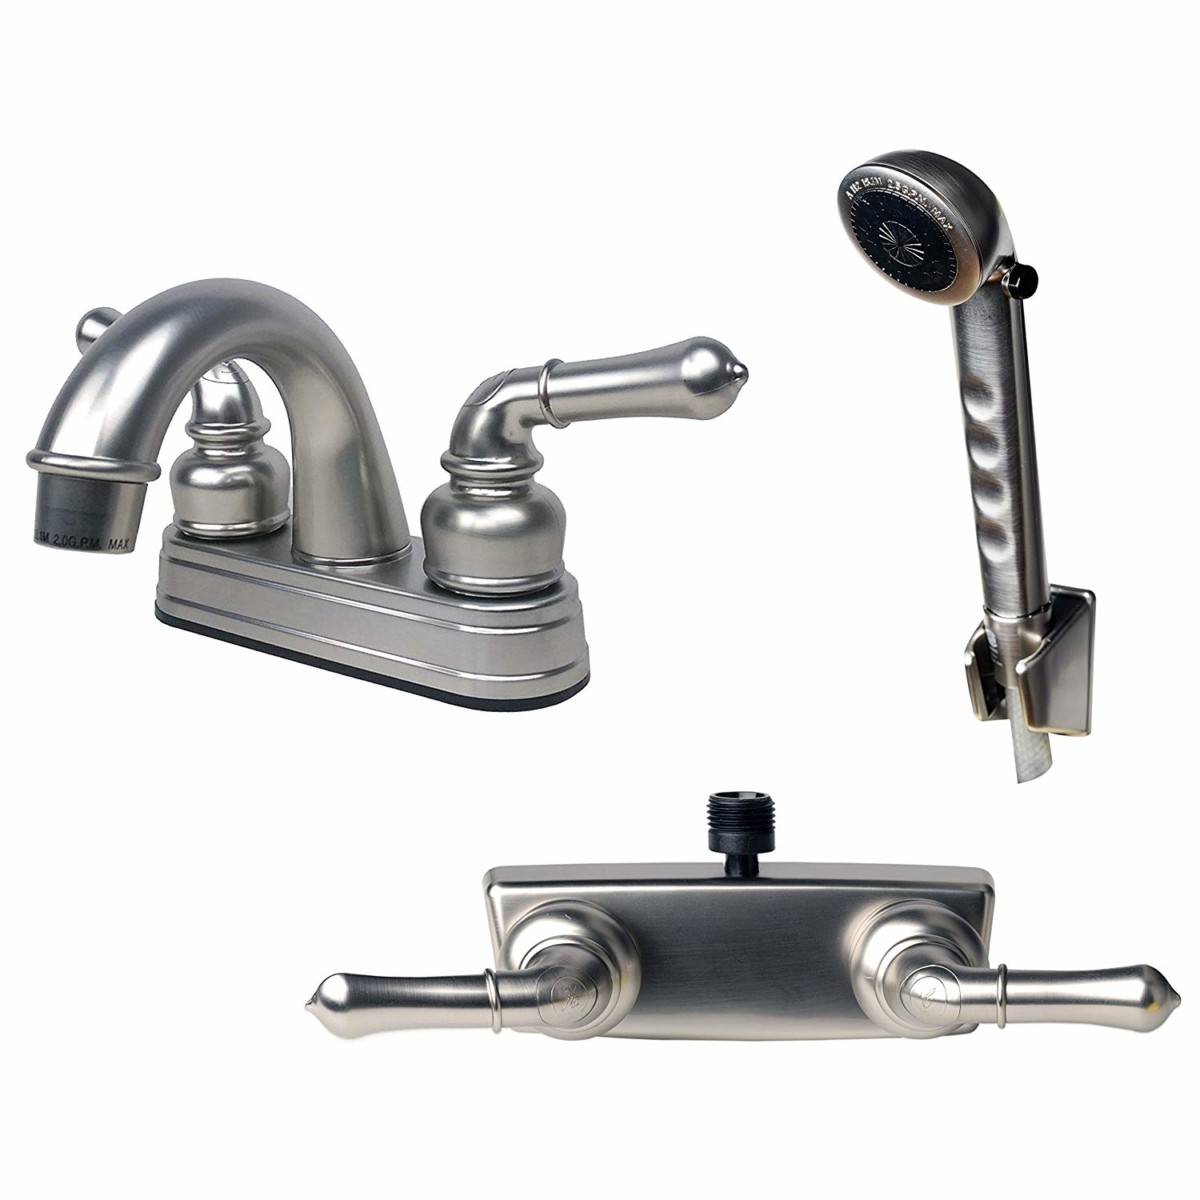
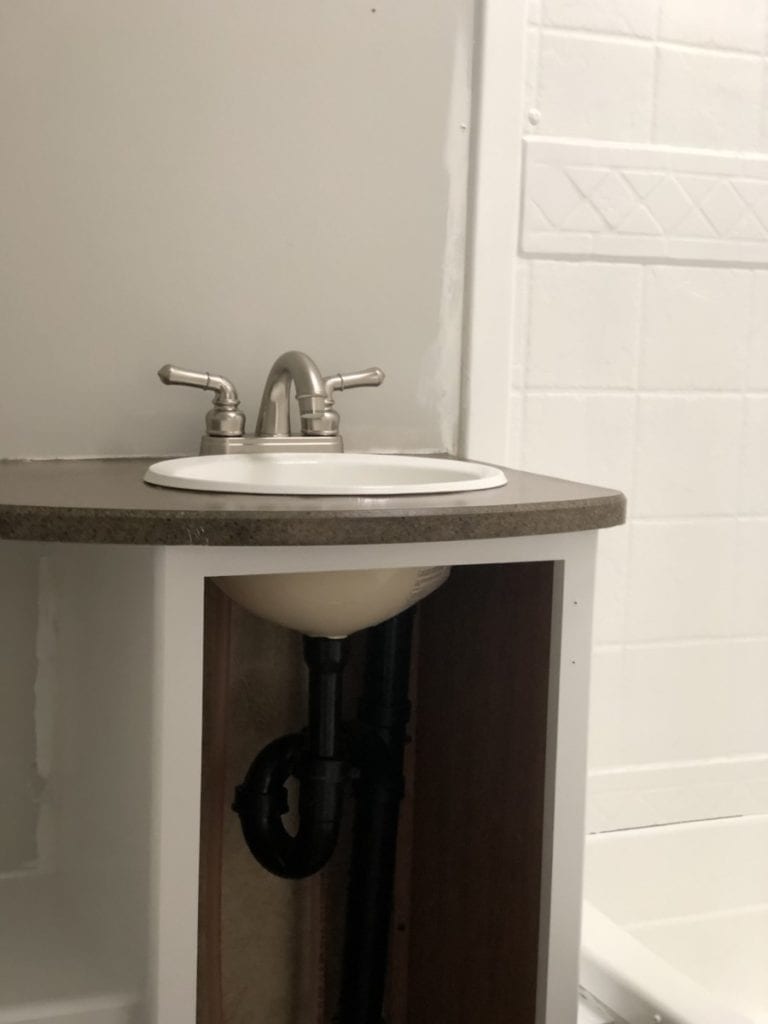
When working in a space like a bathroom it is REALLY important to make sure that anything that will be susceptible to water be sealed well! As I said earlier, I did have to remove what was left of the original caulk, so after the paint was cured I did have to properly seal it. To do this you need to compare different types of caulk. The majority of the time that I use caulk it is to finish trim work that will be painted. When trying to seal off water it requires something a little bit stronger. I prefer to use DAP Premium 100% Silicone. There are many options for kitchen and baths, but again I was working in a R.V. that will be constantly moving! I needed an option that would create a waterproof seal and would remain flexible. Bonus: this one is water resistant in 30 mins! I also used this to re-intall the sink after it dried, and it will prevent water from seeping under the edge of the sink and ruining the cabinet and anything stored in it. 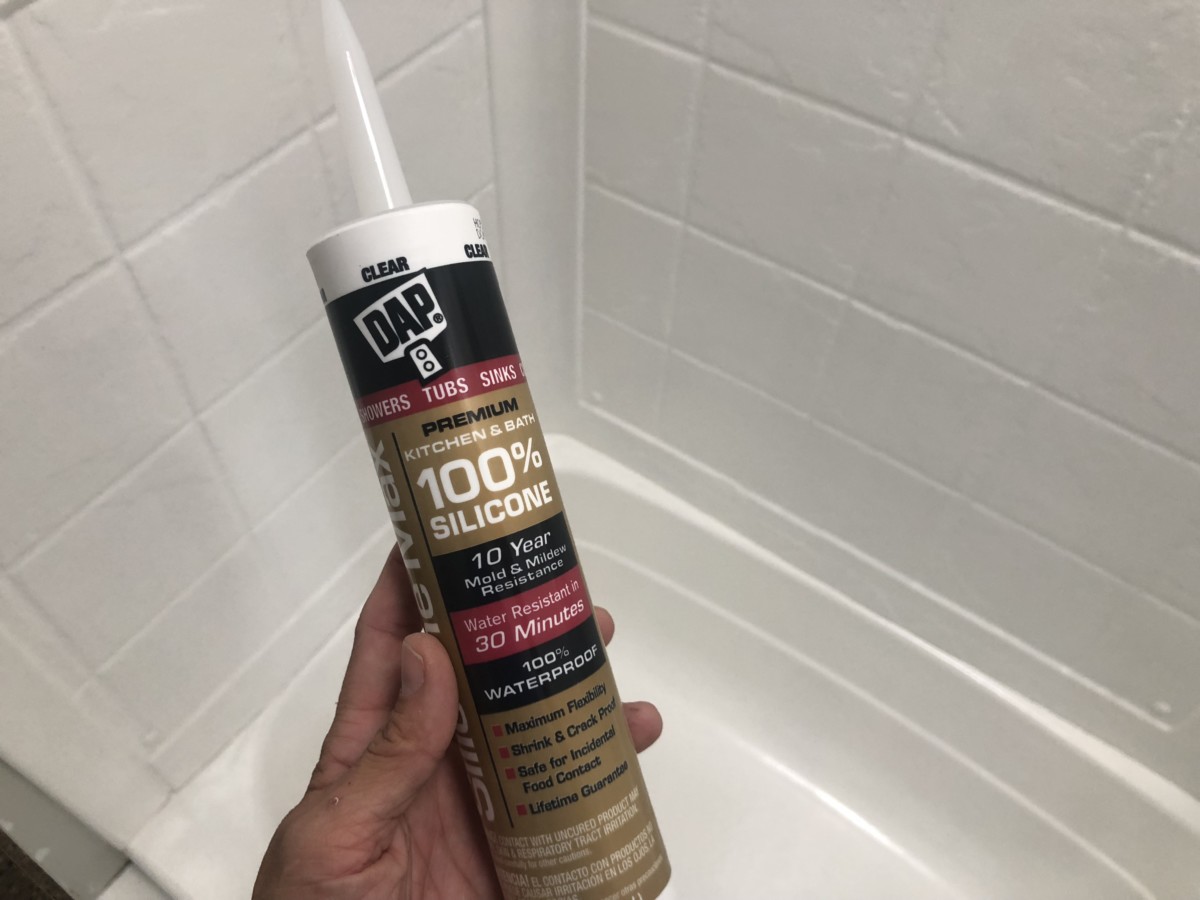
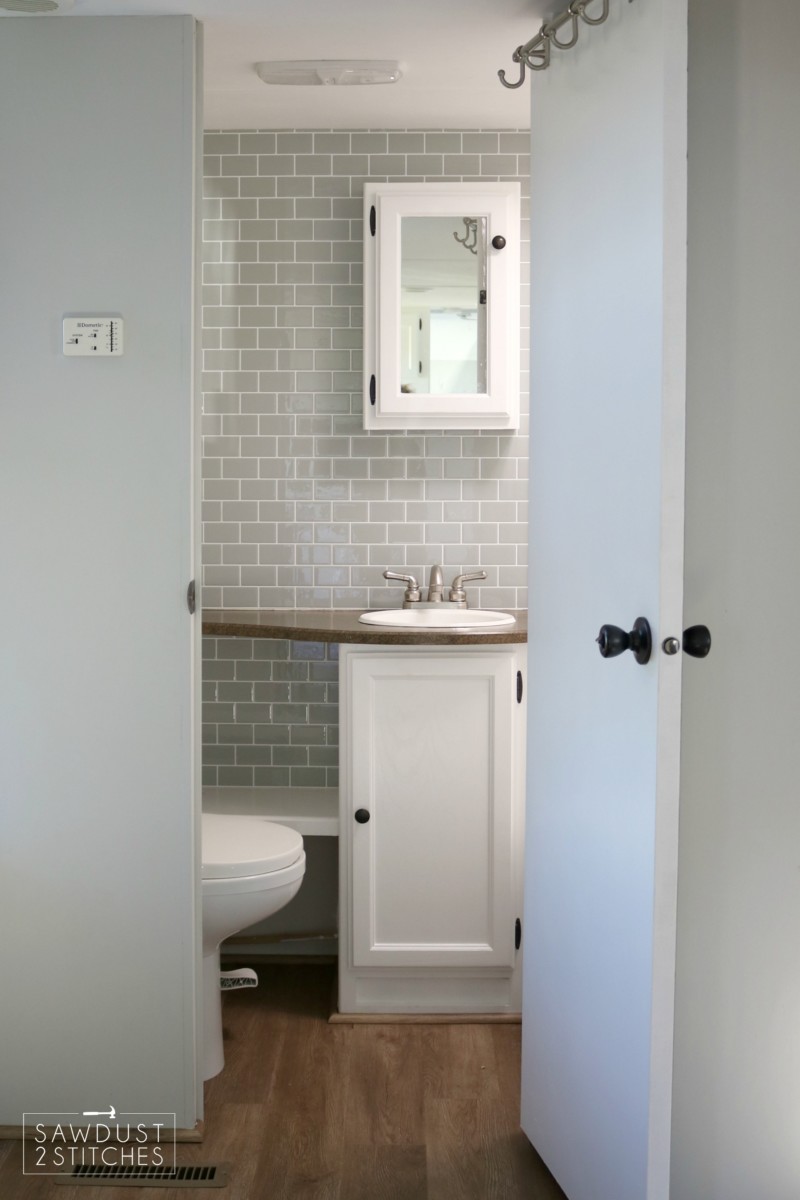
At this point the bathroom was looking pretty good. A fresh coat of paint on literally every surface, and a new toilet. I was feeling pretty good about life, but the party was just getting started. I was about to take this R.V. bathroom makeover to the next level. It was not only going to be a vast improvement, it was quite literally be prettier than any bathroom currently in my home. (Yeah, the bathrooms are on my to-do list.)
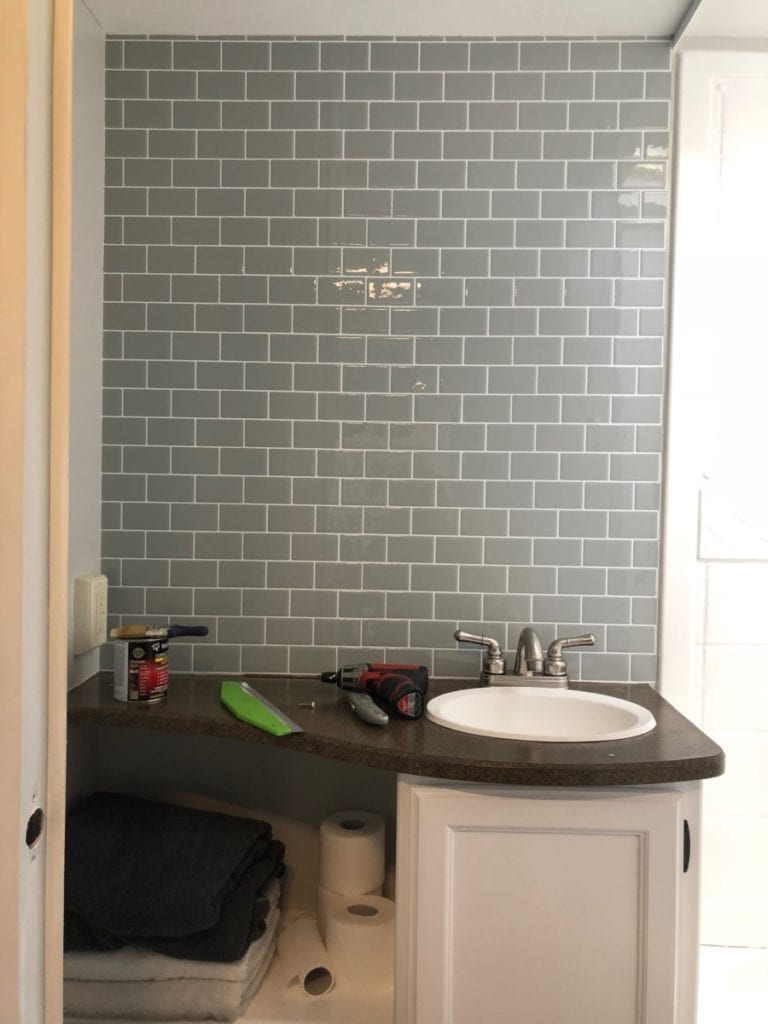
 It is no secret I am a big fan of subway tile. I have full intentions of using it in some, (if not all) of my interior bathrooms. However, I have the whole “light weight” and need for flexibility caveat I have been so exhaustively working around. Tile is neither light weight, or flexible by any means. So, I had to work around it. In my research I came across a peel-and-stick alternative. I have heard others using a flooring variety and had great success, so I started to investigate further. After looking around the world wide web, I was able to find a subway tile that I liked. I read the reviews… they were not really negative, but there were some reviews stating that some of the corners began to”lift” over time which sent me into a panic. So I started playing around with some ideas, and I have a real winner!
Why not glue it down? I started doing my research and found a great solution. DAP makes a contact cement that fit the bill perfectly! It is a basically a super strong rubber cement textured glue. It was thin enough to apply it on with a paintbrush but strong enough for a permanent flexible hold! 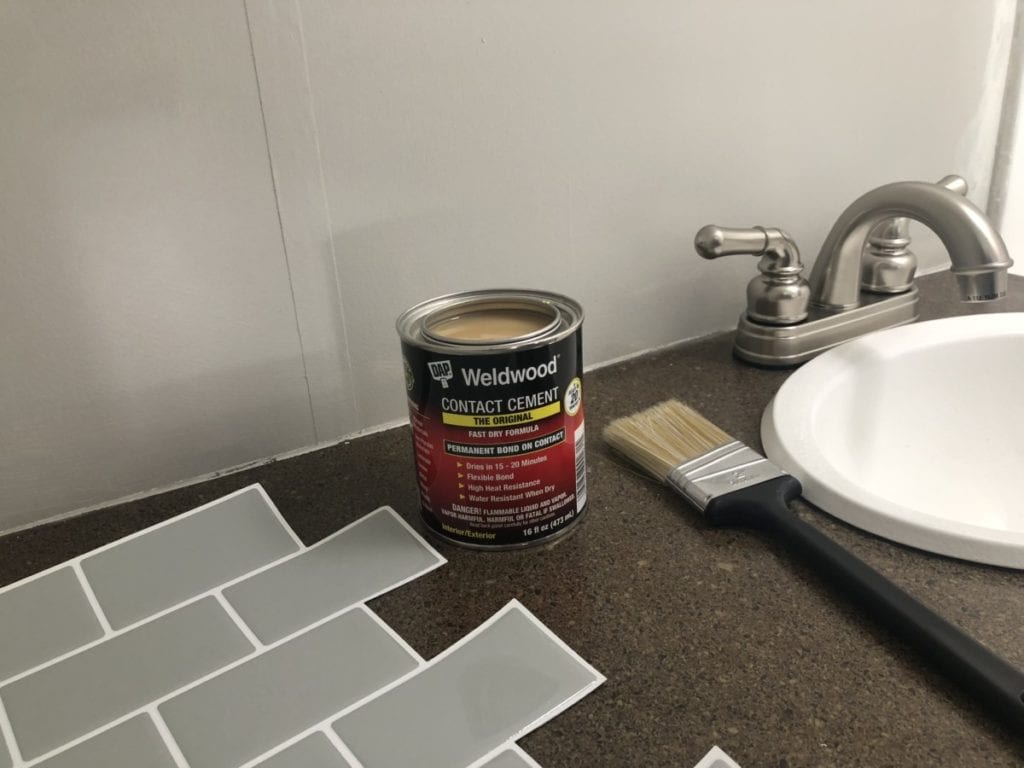 So instead of applying the peel-and-stick tiles as directed, I first painted the wall with DAP “Weldwood”. I worked in small sections, and covered the entire area with adhesive before installing. Let me tell you, it is a FAST BOND. This stuff dried quickly and keeps a flexible bond, which of course is important due to the nature of this project. My only caution to this project is take your time! When applying your tiles, take your time and make sure you have everything lined up properly the first time. This stuff has a nearly instant bond! I would suggest drawing a straight line utilizing a tape measure and a straight edge (no levels in a camper… there is a chance your r.v. isn’t on level ground to begin with) and making sure you use that line as well as the proceeding tile as your guide.
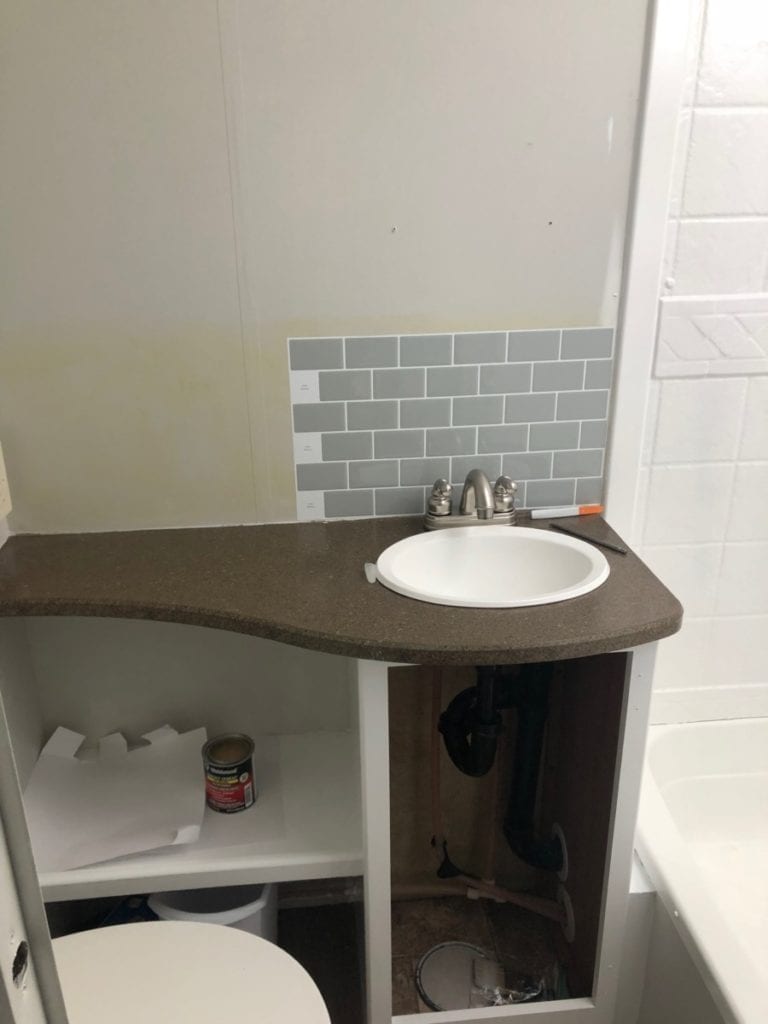
Once I had the first two in, I had the knack of it. (Another suggestion, if you have the ability to start in an inconspicuous area, I would start there!) I don’t say that to scare you, it’s not a hard project, I just wish I had thought to work out the kinks in the application process before diving right in. 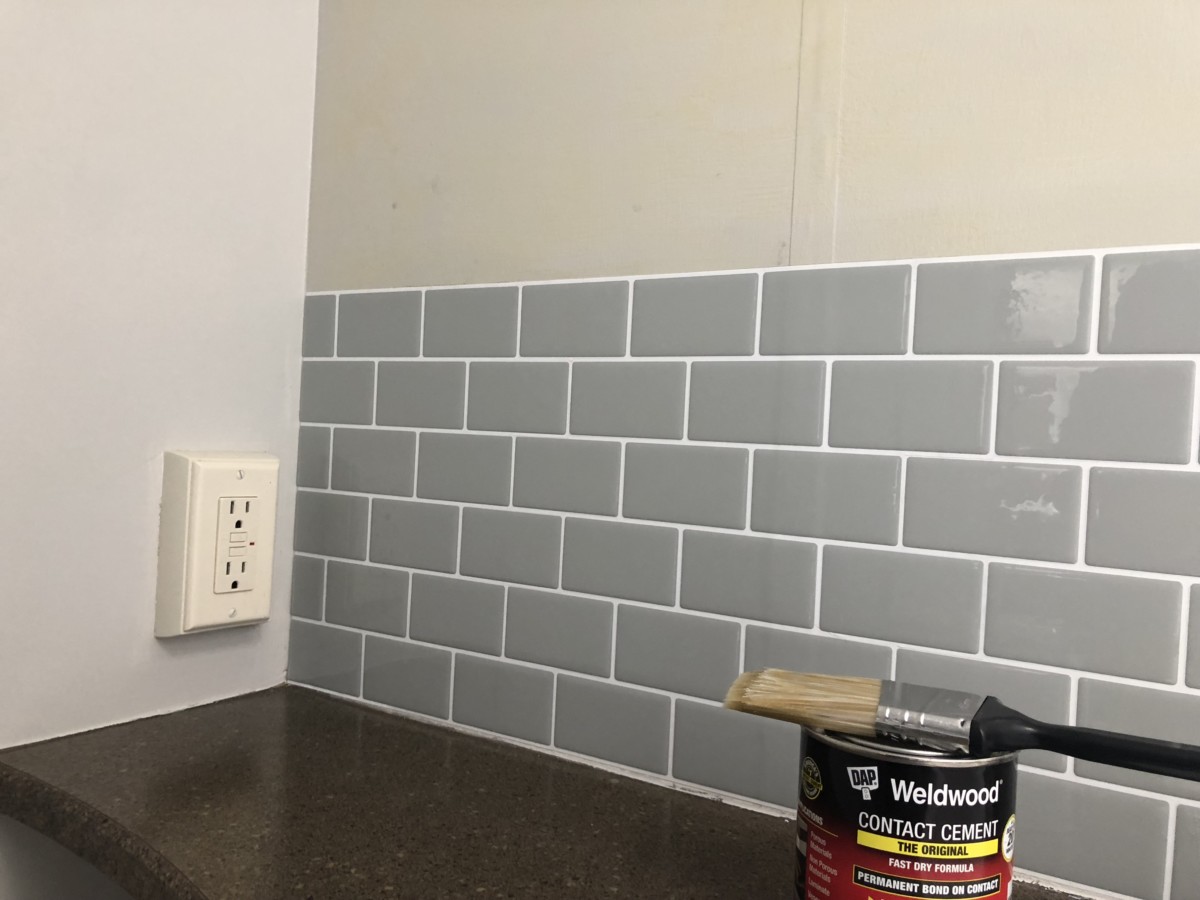
Once the first row was in, I was on a roll! These tiles are easy to cut to fit any space, I just used a my rotary cutter and a straight edge!
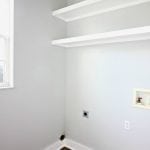
 I even had enough that I was able to use it in the little cubby space above my shelf. (This would have been a great place to try it out, but I wasn’t sure how much waste I was going to have. )
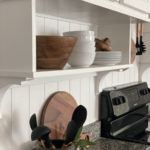
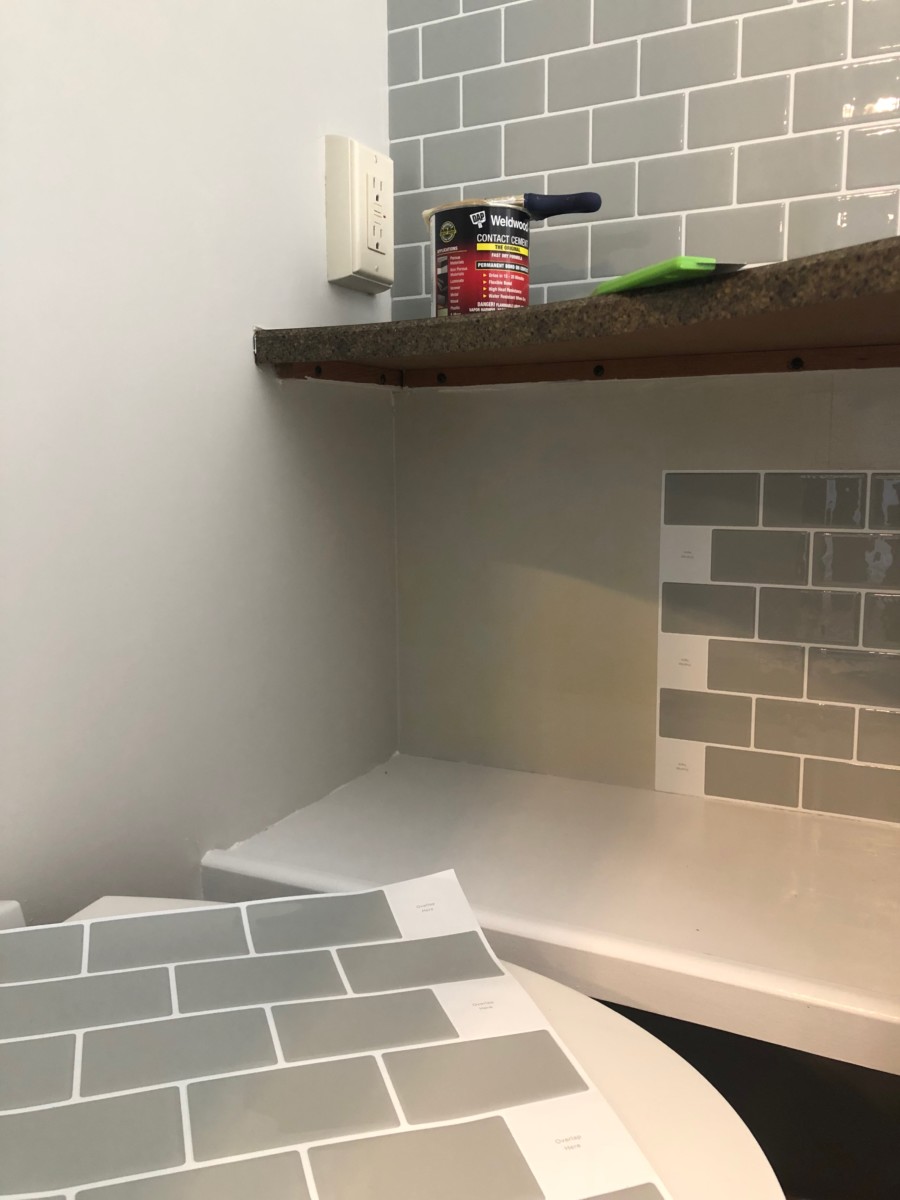 I loved this look so much that I actually used it as a backsplash in the kitchen. In the kitchen I opted for the white, and I love it! My only hesitation/warning: It is not recommended for high heat. I plan on making a “workstation” that will sit over my range while not in use, and I plan to lean it up against the backsplash when it is in use (creating heat). I have already tested the theory and it worked out perfectly.

Once the backsplash was in I just reinstalled the cabinet doors and the cabinet/vanity and I was nearly done! I have been working on a few details for the GRAND REVEAL. Some of those details do include new curtains for the shower. I am sewing a custom one using the existing track and hardware. But until then, let’s take a look at some awesome before and after photos!

Thanks so much for following along on this crazy little project and stay tuned I have a lot more coming! If you want to see more of the process hop on over to my Instagram account where I share daily updates in my Instagram “Stories”. I have also saved all of my stories concerning this makeover in my highlights labeled “R.V.”
Thanks so much for reading!
Take luck,
Corey
Source List:
DAP Premium Bath and Kitchen Caulk
Wall Paint Color – Sherwin Williams “Repose Gray” (lightened 25%)
Cabinet Base Color – Behr “Ultra Pure White” Semi Gloss
 Copyright secured by Digiprove © 2019


Wow, that is now a gorgeous bathroom! Great job!
Another RV room makeover beautifully. LOVE WHITE, makes everything look so bright & spacious.
Thanks for sharing,
Darlene
Nova Scotia
Amazing! Looks like a whole new room!
Girl you are so talented!
Pretty white in there. Glad it’s you who needs to keep it clean looking. Looks nice now, take a few pics after you put some days on that puppy.
LOVE watching your projects unfold!!
Looks great just like a small powder room in a house. No R.V. look.
Take luck!! You’re a Brian Regan fan!? Yay! Loving reading the RV makeover posts, like your blog a lot. This bathroom is super duper pretty. I’m racking up all my RV dream to dos and you’re totally inspiring me.