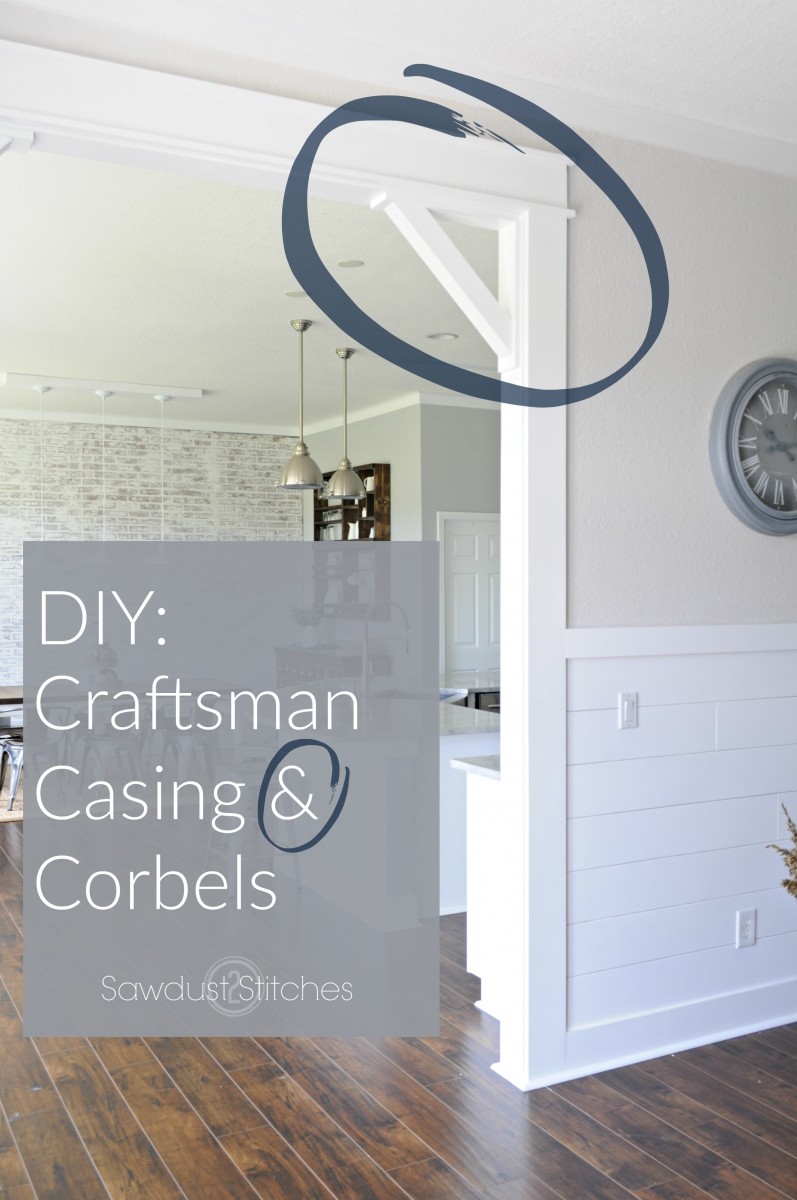
DIY Craftsman Door Casing – This post is sponsored by DAP*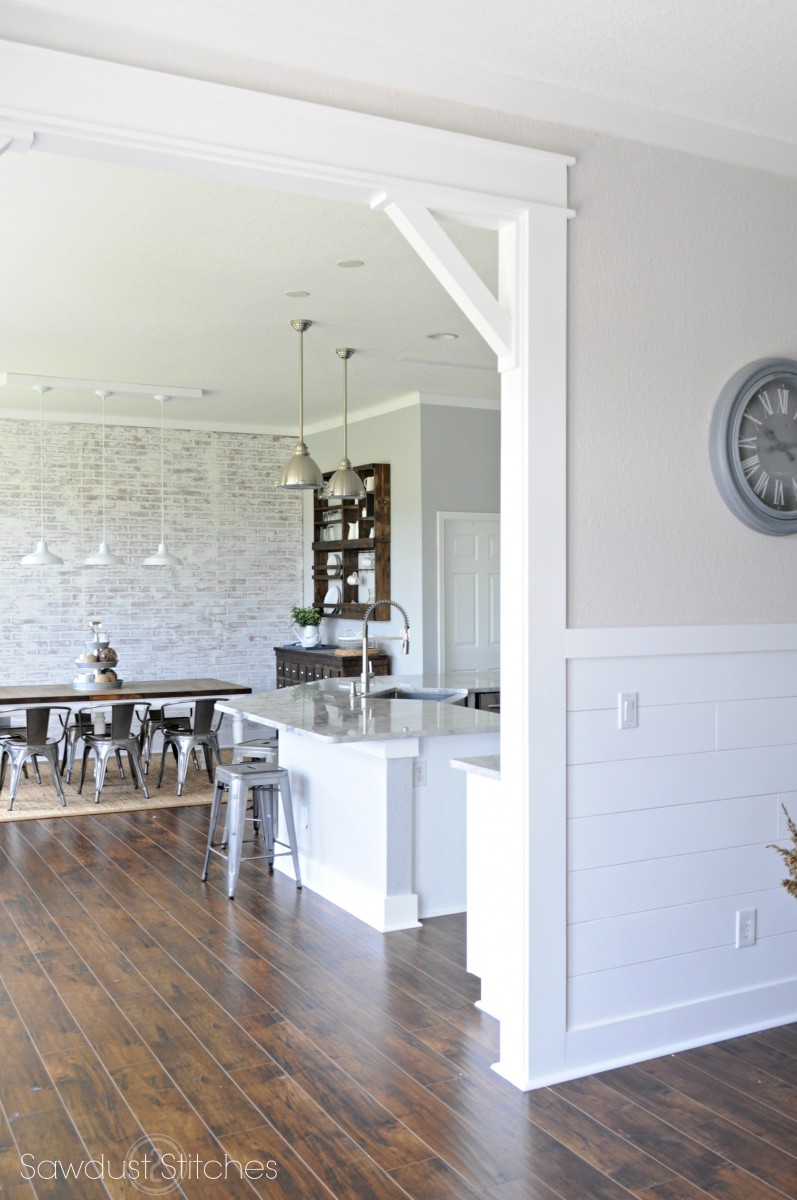
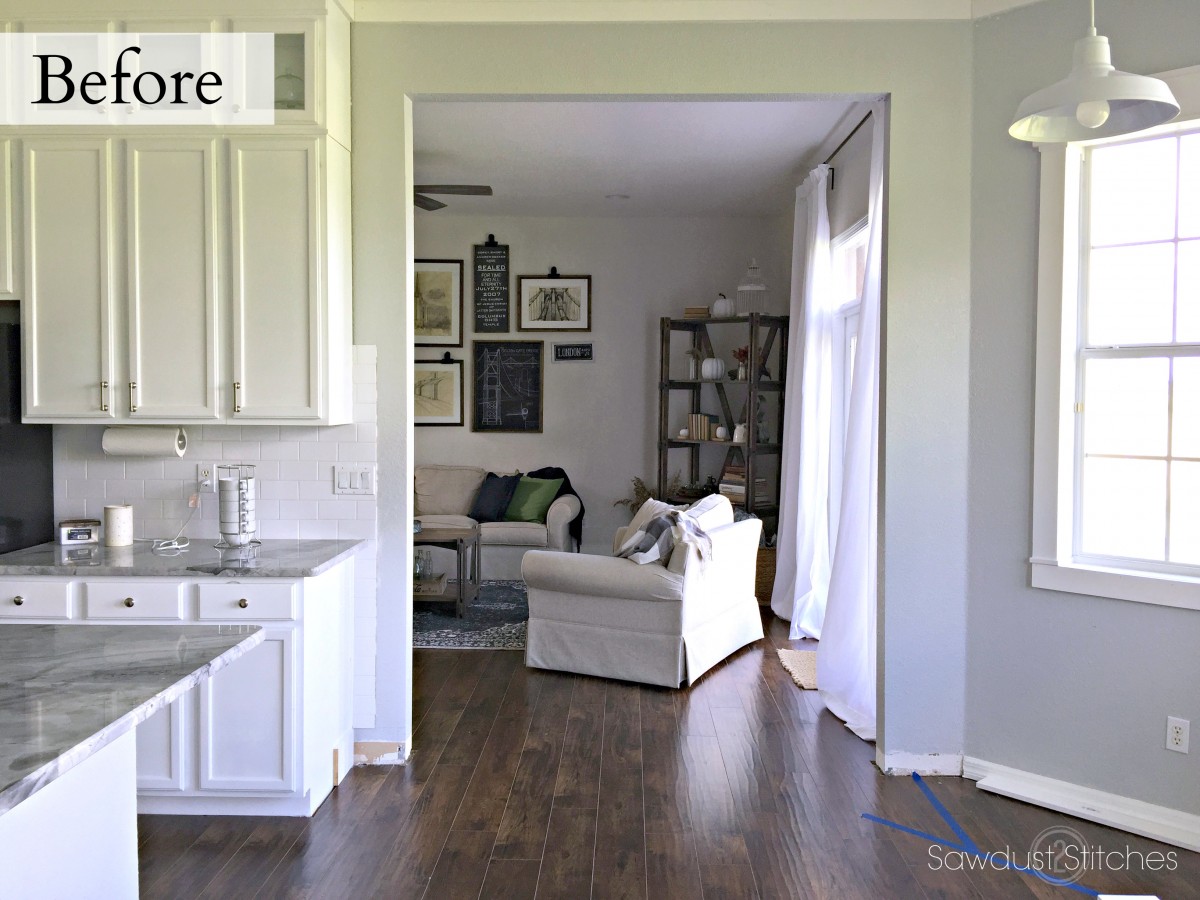
Hey all! I am still here, I promise. With the Holidays at an end, I find myself having a hard time getting back into the swing of things! Regardless, I am back and I am so excited to FINALLY bring you a long-awaited tutorial. When we moved into our home, it was VERY builder grade. It was a really nice home but lacked interest. So, what’s a girl to do? ADD some freaking interest! So I have teamed up with the great folks over at DAP to bring you a home upgrade that packs a punch!
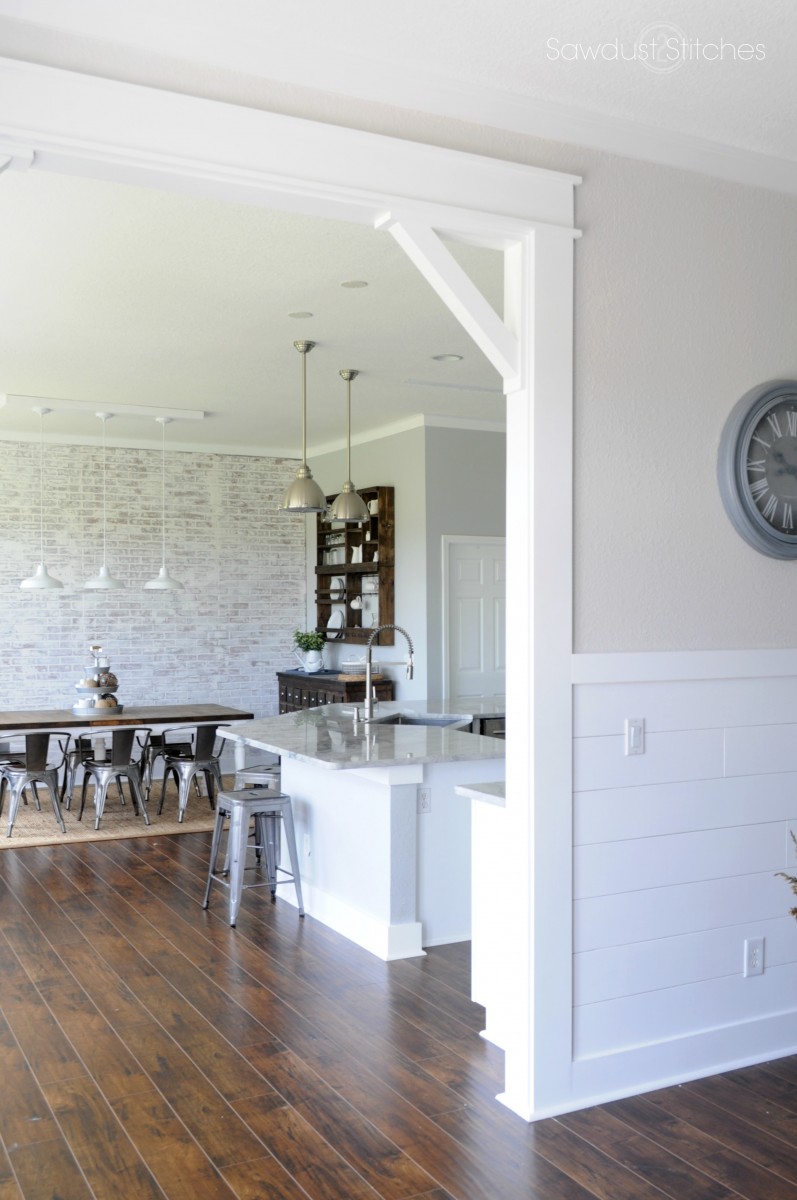
Today, I am showing you a DIY Craftsman Door Casing with classic corbels to give it a little something extra. Seriously, there was nothing wrong with this entry before, it was in no way an eyesore, but as soon as it was cased out it became a gorgeous feature. So, if you are looking to add character AND value to your home, look no further. THIS IS IT!
[pinit align=”center”]
How to Install DIY Craftsman Door Casing and Easy Corbels
Tools Suggested:
- Miter Saw
- Table Saw
- Nail Gun
- Sander
- Mallet
- Pry Bar
Supplies Used:
- Sandpaper
- DAP Alex White Caulk/ Caulk Gun
- (4) 1″ x 2″ Boards
- (9) 1″ x 6″ Boards (read all of tutorial before purchasing supplies because some board widths are apt to change)
- (2) 1″ x 4″ Boards
- DAP DynaGrip
- DAP Rapid Fuse Wood Glue
- DAP DryDex Spackling
DIY Craftsman Door Casing – Installing the Door Casing
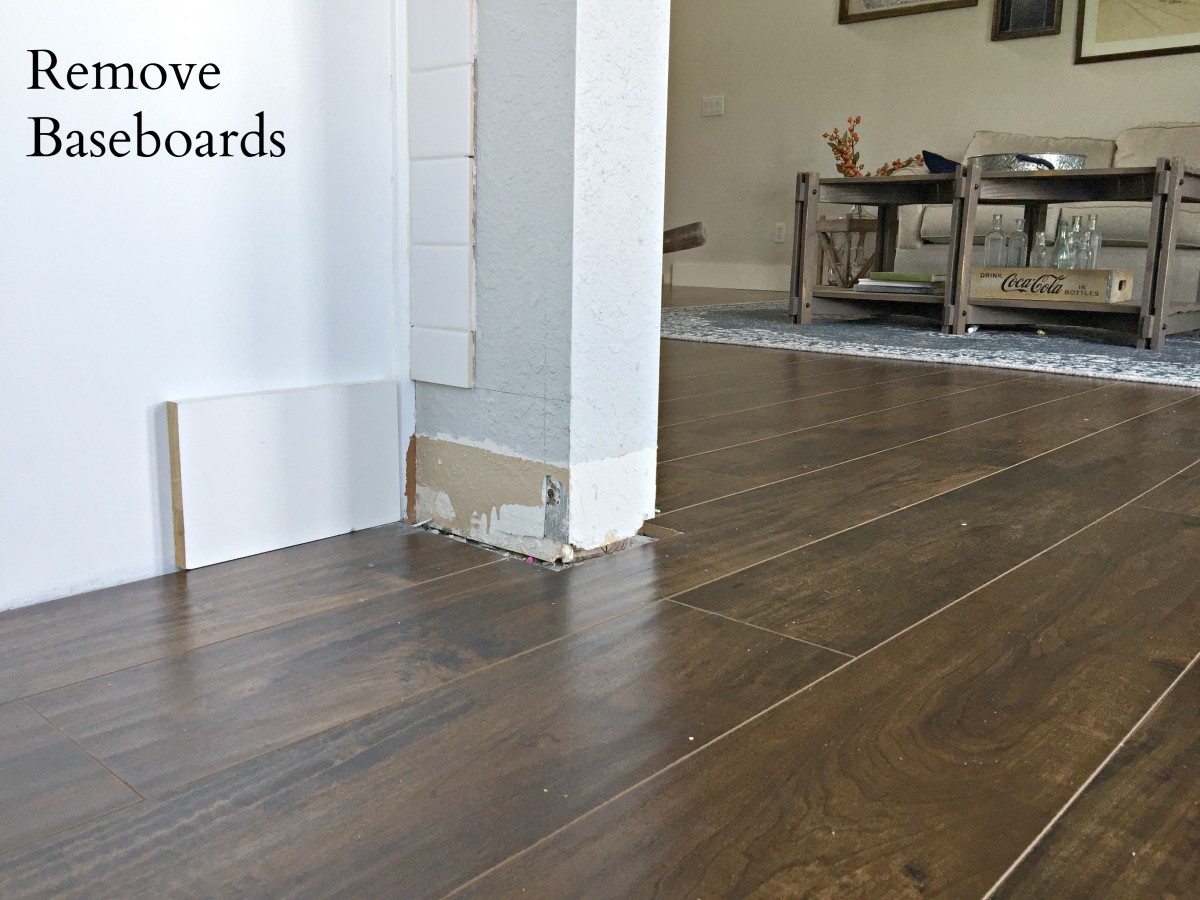
Step 1. Remove Baseboards
Out with the old and in with the new! I wanted the door casing to run directly into the floor and have the baseboard butt directly into the casing. In order to achieve this, I had to remove the base boards around the base of the door frames. Nothing a pry bar and a hammer can’t handle in a minute or two!
Step 2. Interior Top
Next we are ready for the interior casings. You will need to measure the interior with of the door frame.
In my case the width was 5″ wide. So I bought a 1″x 6″ board so that I could rip it down on the table saw to be the correct size. (You will need to do this for all three interior faces of the door frame.)
Once you have the board cut to the correct width you will need to measure and cut the correct length.
The width of my doorway was 75″, so I cut down my newly customized board to 75″. For good measure do a dry fit and make sure the board fits before proceeding…
If it fits we are good to go! I slapped on a liberal amount of DynaGrip to the back of the board. DynaGrip is some serious stuff! It is like having an extra set of hands! (Seriously, made life so much easier when installing faux shiplap! You can read all about it here.)
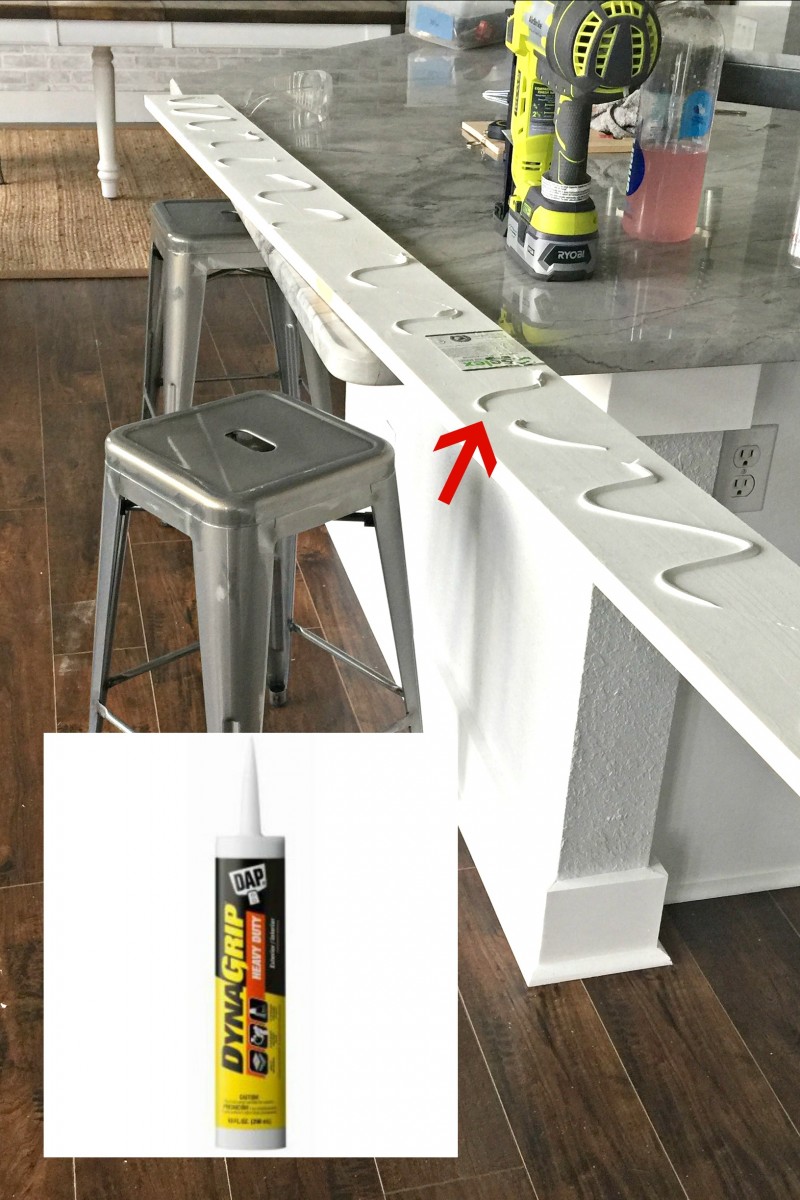
Once it is all adhesive-d up we are ready to install. Granted there is plenty of glue to hold it in place, I really don’t have that much patience or arm muscle endurance to wait for glue to dry. Therefore I reinforced with 2″ 16 gauge nails using a nailer. Worked like a charm. 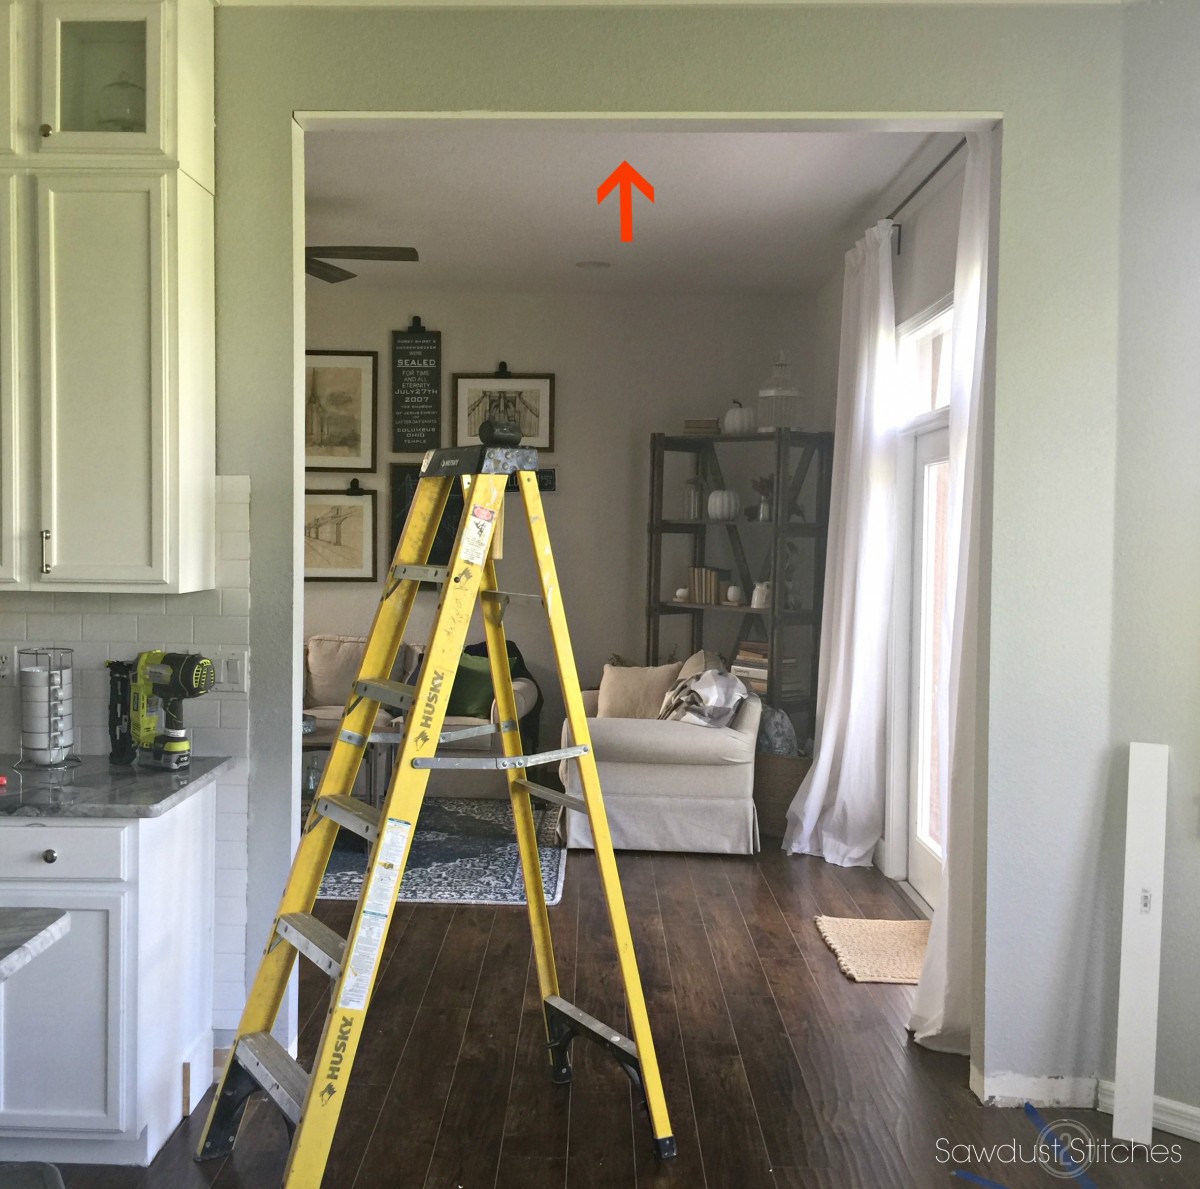
Step 3. Interior Sides
Once the top board is in place we are ready to move onto the sides. Same routine as “Step 2.” but , obviously it will be on the sides.
Step 3. Exterior Sides
Now we are ready for the exterior boards! Again I used 1″ x 6 ” primed fingerboard.
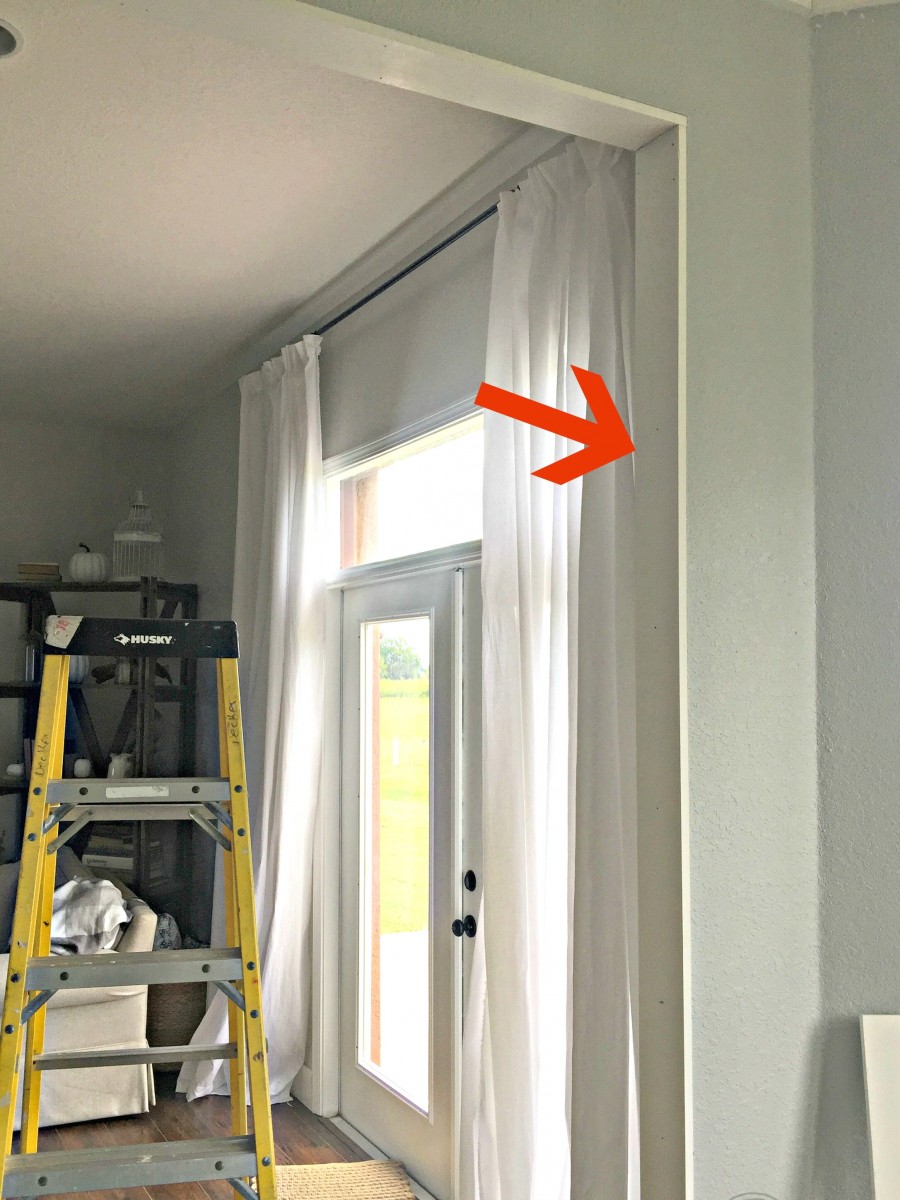
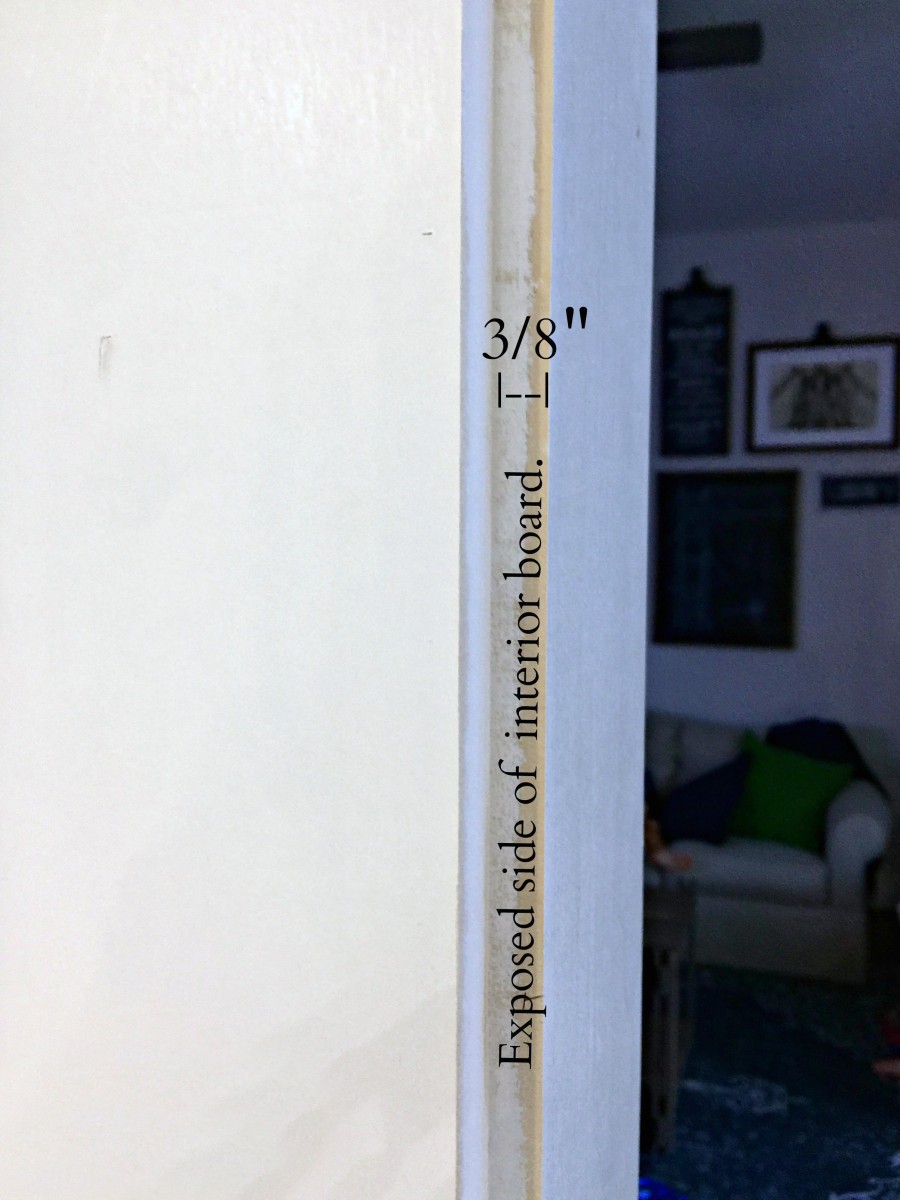
Here is the thing you will want to be aware of. When installing, I offset the new boards by approximately 3/8″. Basically you will want the interior trim’s side exposed about 3/8″. This creates a nice clean looks and gives you are little wiggly room for any discrepancies.
Keep this gap in mind when you measure the length of your boards. You will want to create that same spacing where your side board meets the (eventual) top header.
Basically if you are measuring from your floor to the inside of the top board, you will want to add another 3/8″s to your board. (Example: My floor to top board measurement is 108″, in order to create the same gap all the was around I need to cut my (new side) board at 108 AND 3/8″s.
Once you have all the math work done, install the same way you did for the other boards. Use DynaGrip , nail, yadda, yadda. 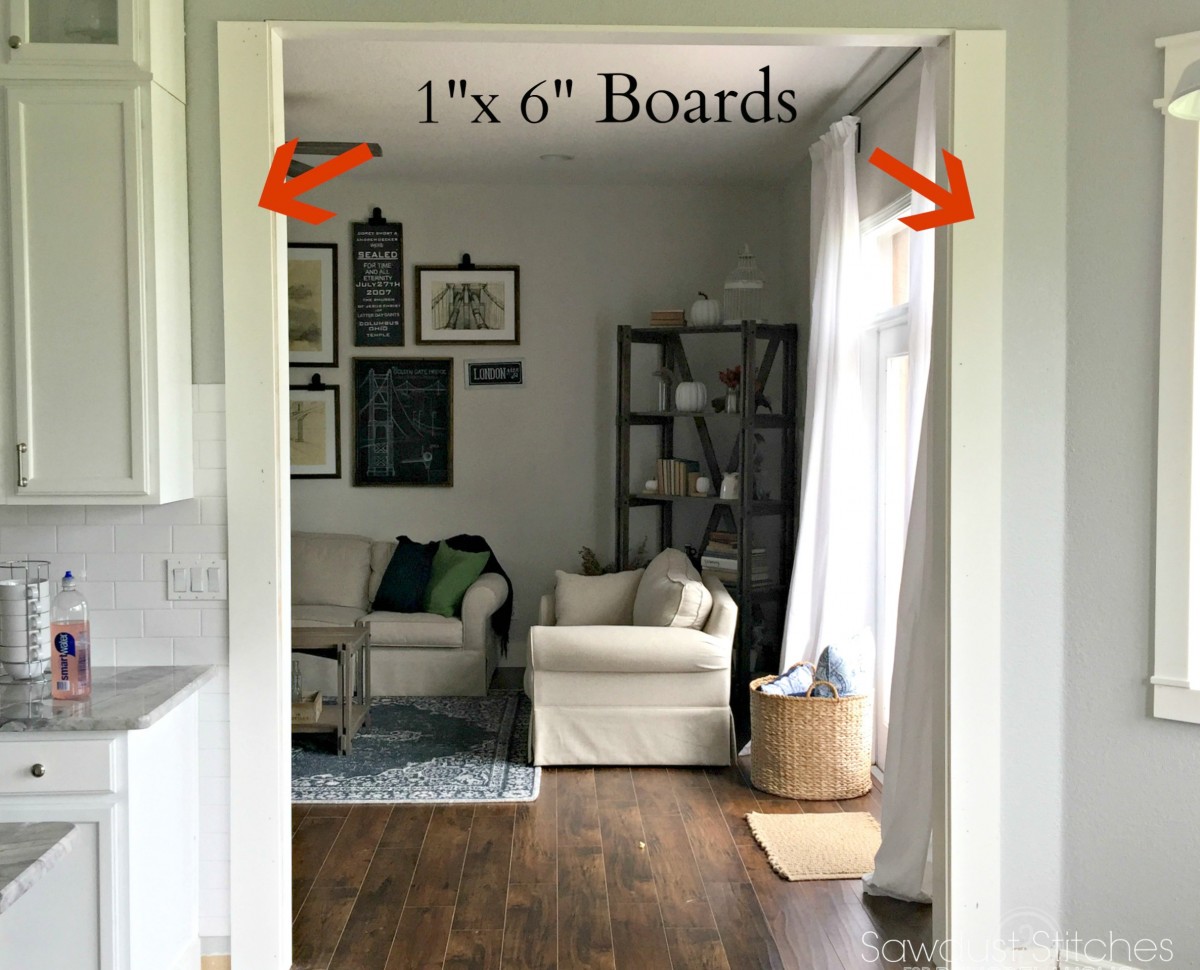
Keep in mind I am only showing one side of the entry in this tutorial, make sure you do both sides of the entry, or it will look a little funny.
Step 4. Build/Install Header
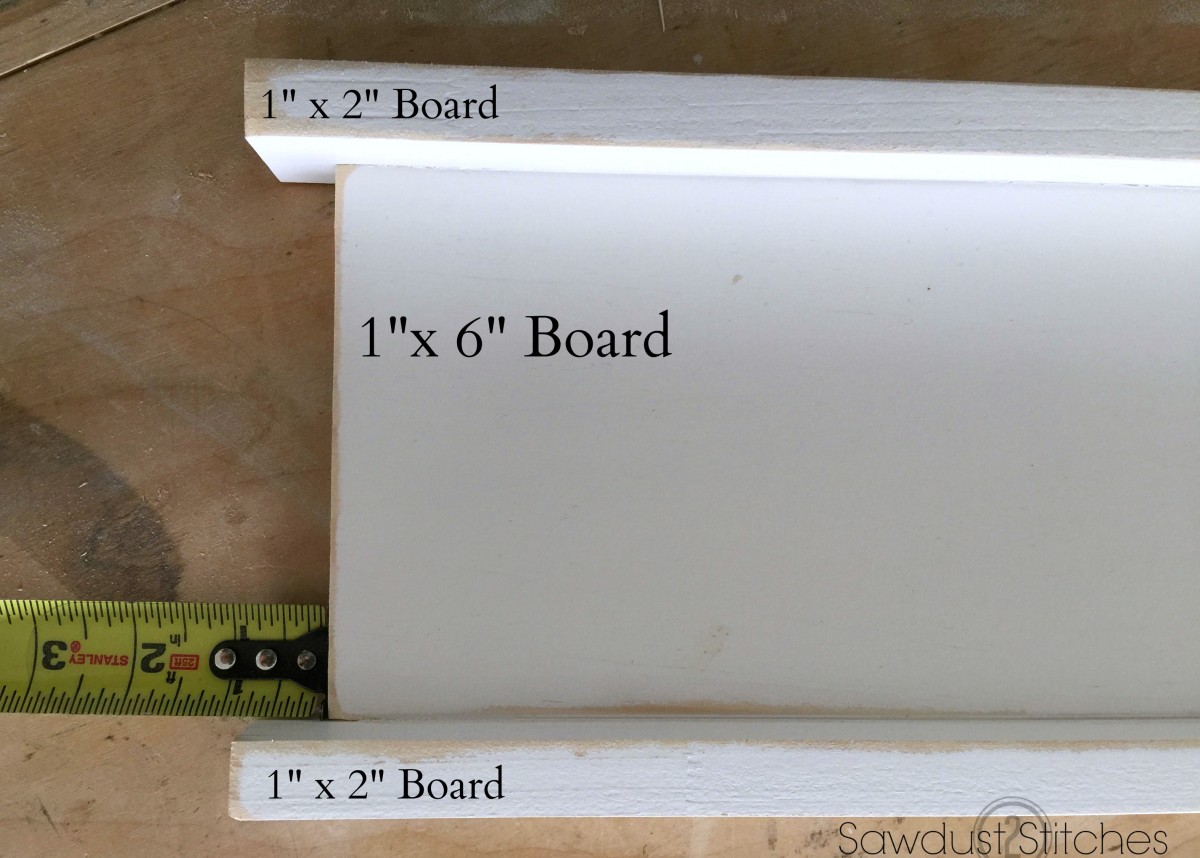
Next the header! I used primed 1″x 2″ finger boards (x2 for each header) and 1″x 6″ primed finger board (x1 for each header)
In order to get the measurement for the 1″x 6″ board you will need to measure from the outsides of your side casing. ( See image below)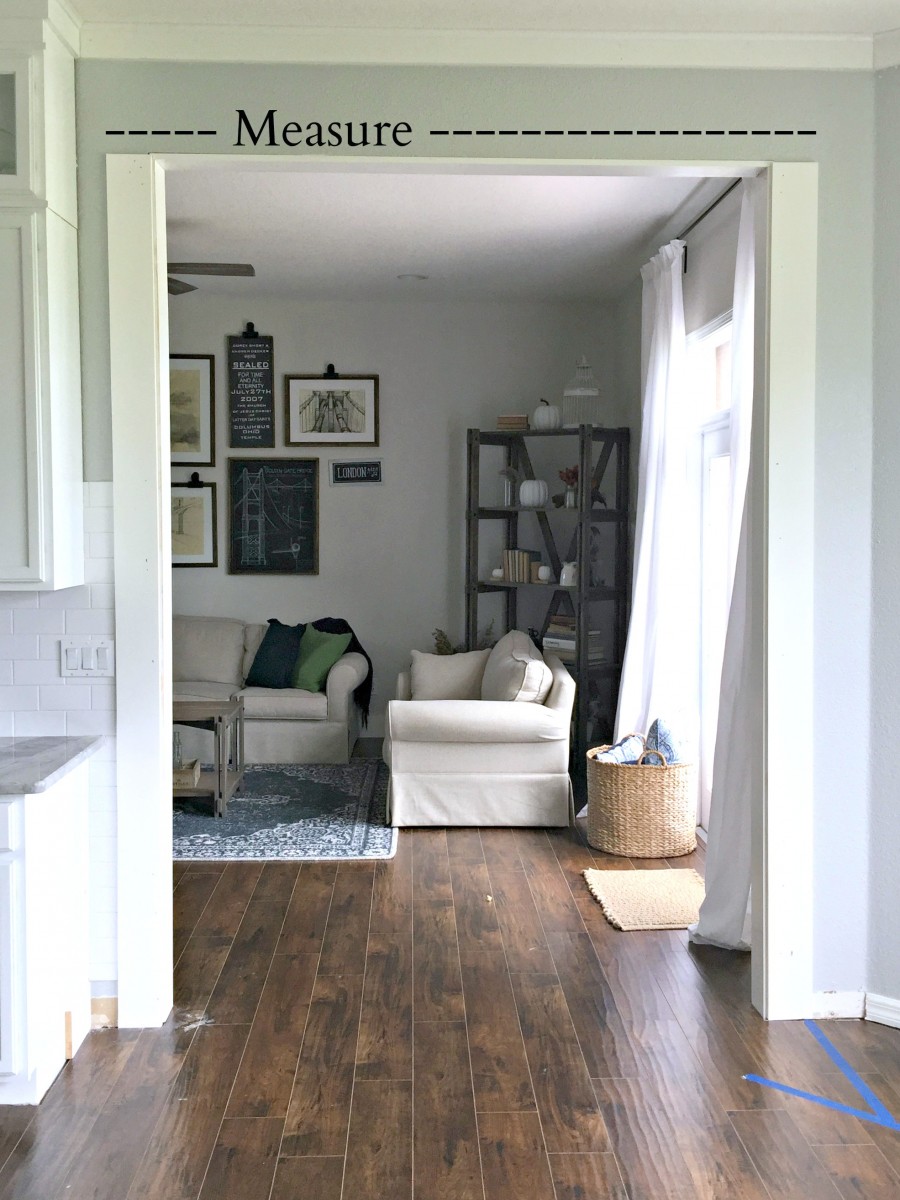
The 1″x 6″ board will be the same measurement as your above measurement.
The 1″x 2″ boards will 1-1/2″ longer. (For example my 1″x 6″ is 85″ long, I will then cut my 1″x 2″ boards at 86 1/2″) This will allow for a 3/4″ overhang on both ends. Simply apply a little wood glue to the outside ends of the 1″x 6″ boards and press the 1″ x 2″ board in place and then reinforce with a 1-1/2″ nail .
Next install the header in the same manner you did the other boards. Apply DynaGrip , and then reinforce with 2″ 16 gauge nails.
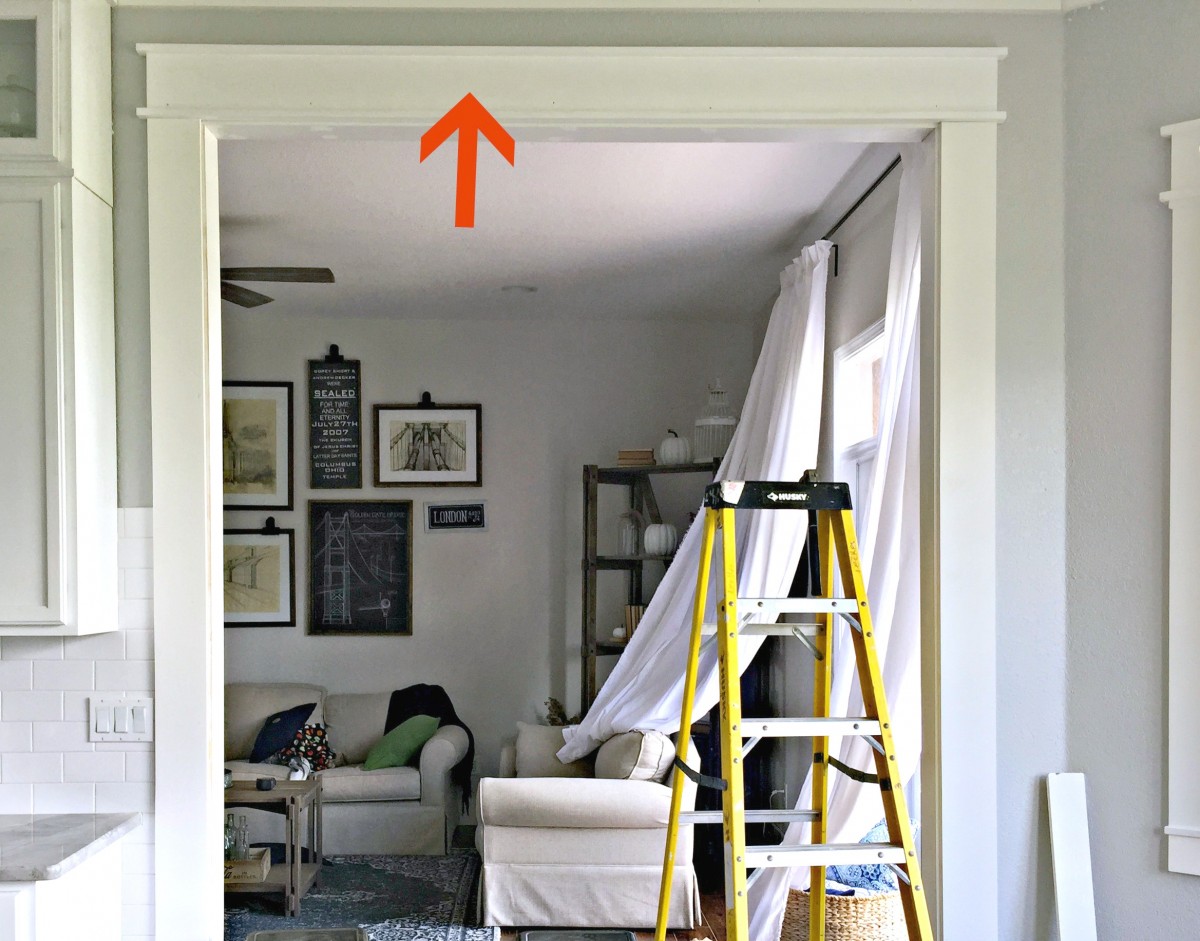
Again, don’t forget to do this to both sides of the entry, or your guests will have another reason to look at you wonky… I kid I kid.
Step 5. Trim Out the Base
The only reason I needed to trim out the base, is because of our newly installed flooring. The gap at the base was too wide, in most cases you will be able to butt right up to the floor with no need for trim.

DIY Craftsman Door Casing – Building and Installing the Corbels
Step 6. Decorative Corbels (Optional)
To make the corbels, I used 1″ x 4″ Primed Finger boards. Each corbel will need (x4) 24″ boards. (So a total of 8 if you are making 2 corbels.)
Using a table saw I cut all of my boards edges on a 45 degree angle.
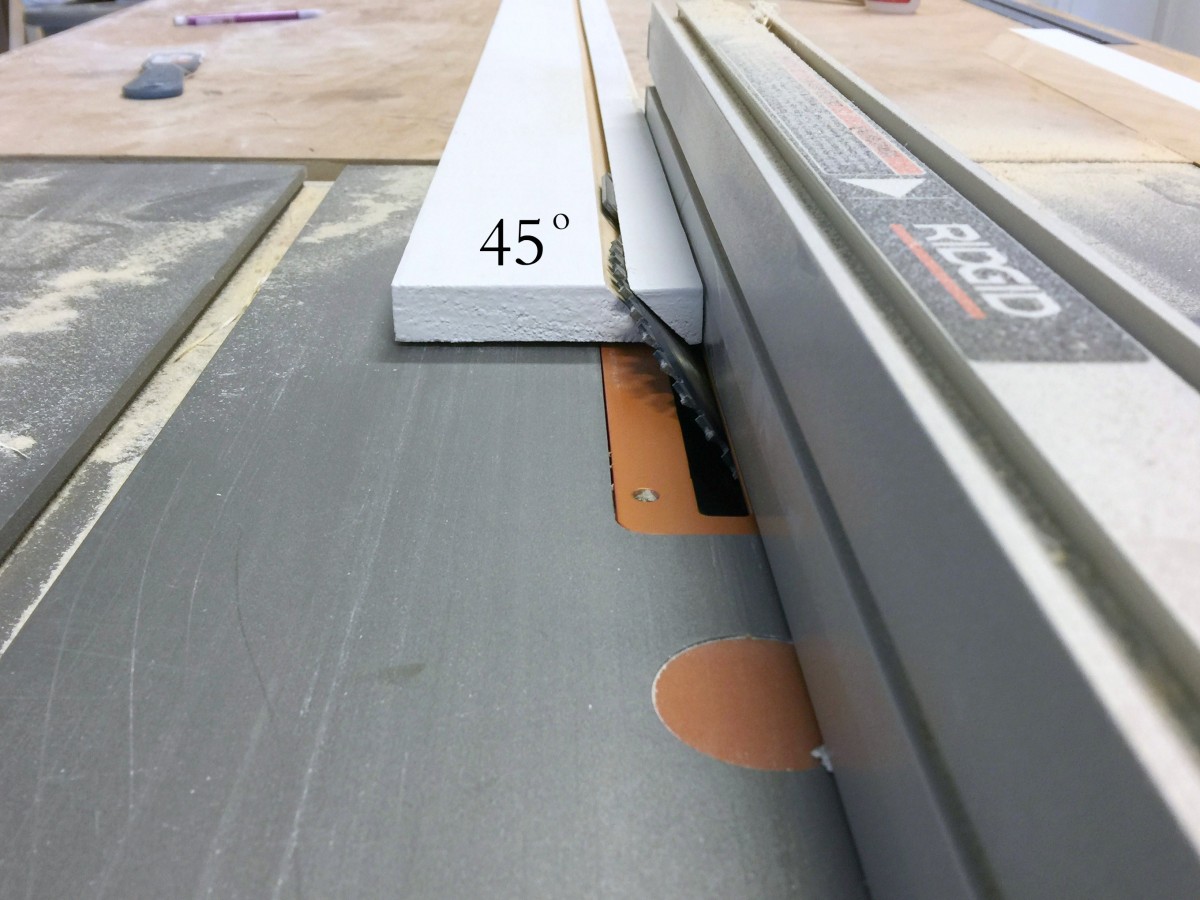 Once one side was complete, I rotated and cut a 45 degree angle on the other edge.
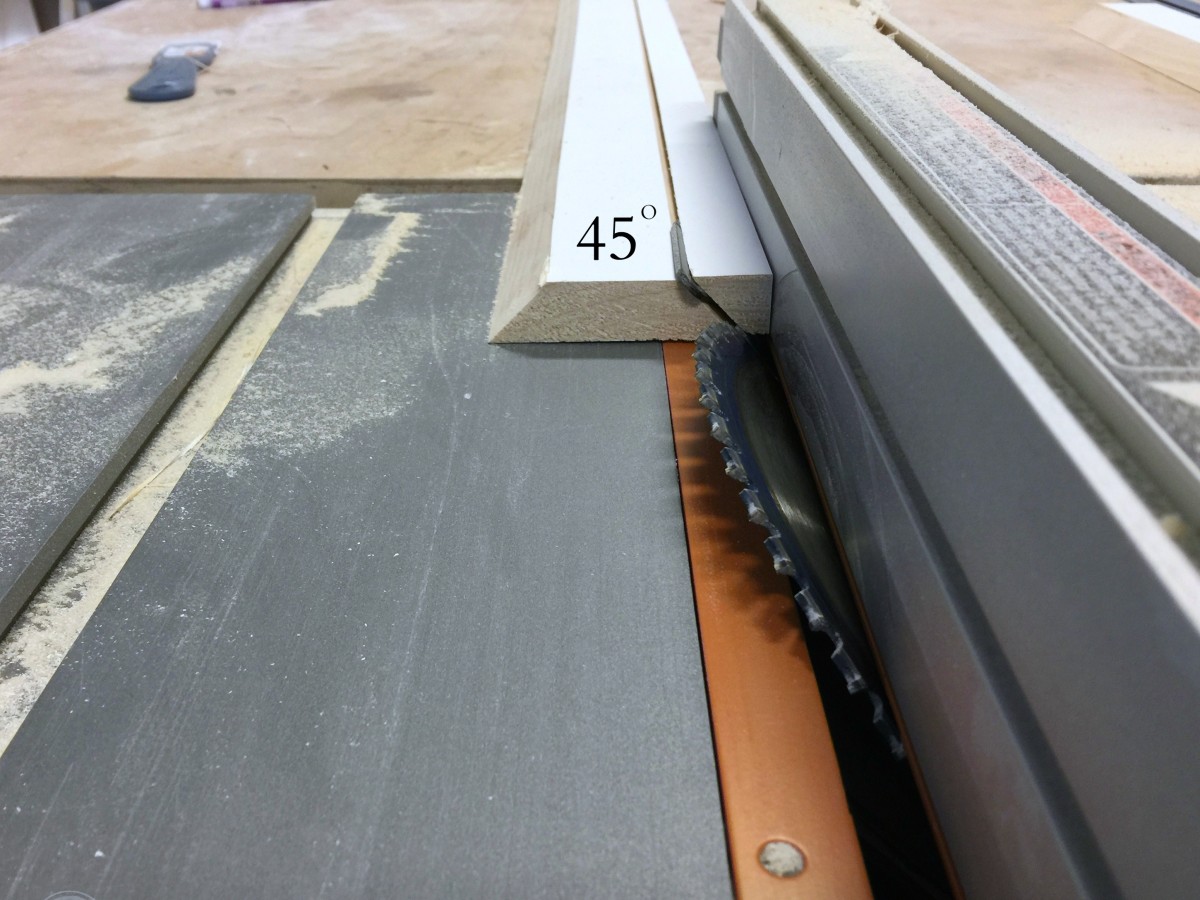
When put together these will theoretically make a hollow rectangle. 
When assembling them I used an DAP RapidFuse instant glue. It is basically a superglue for wood and it will change your life!
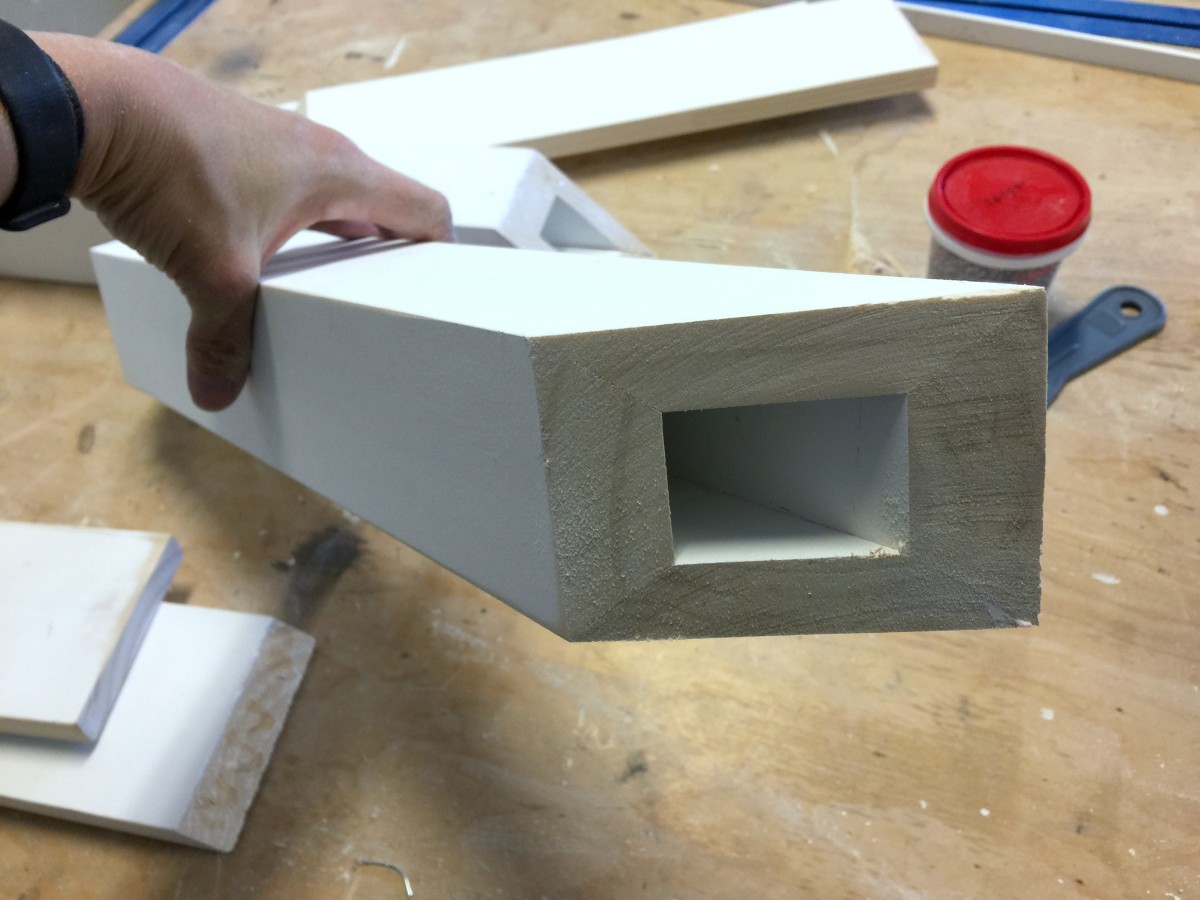
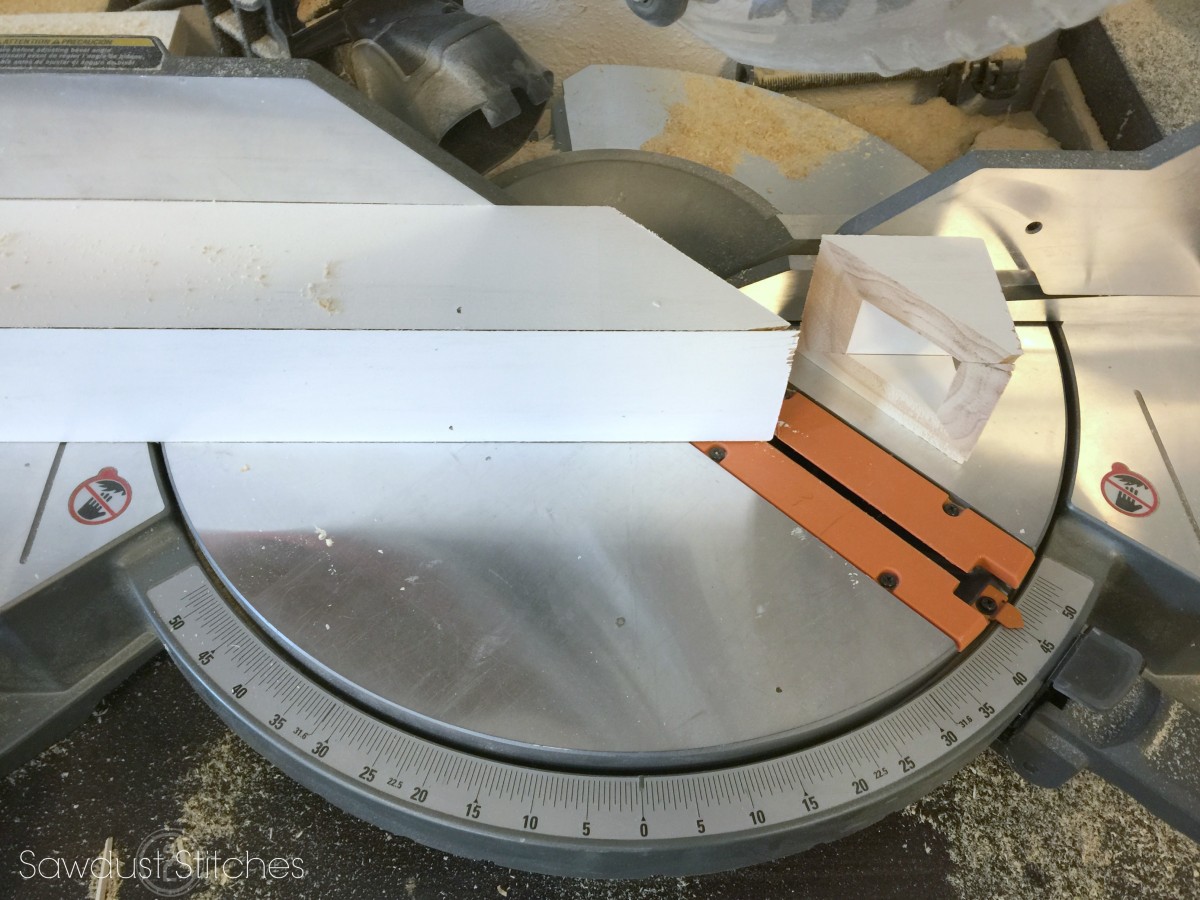
Once the glue is completely set, cut both the ends on a 45 degree angle. I made my corbels 24″ from long point to long point.
As a decorative touch I added 1″x 4″ boards to beef up the corbels. 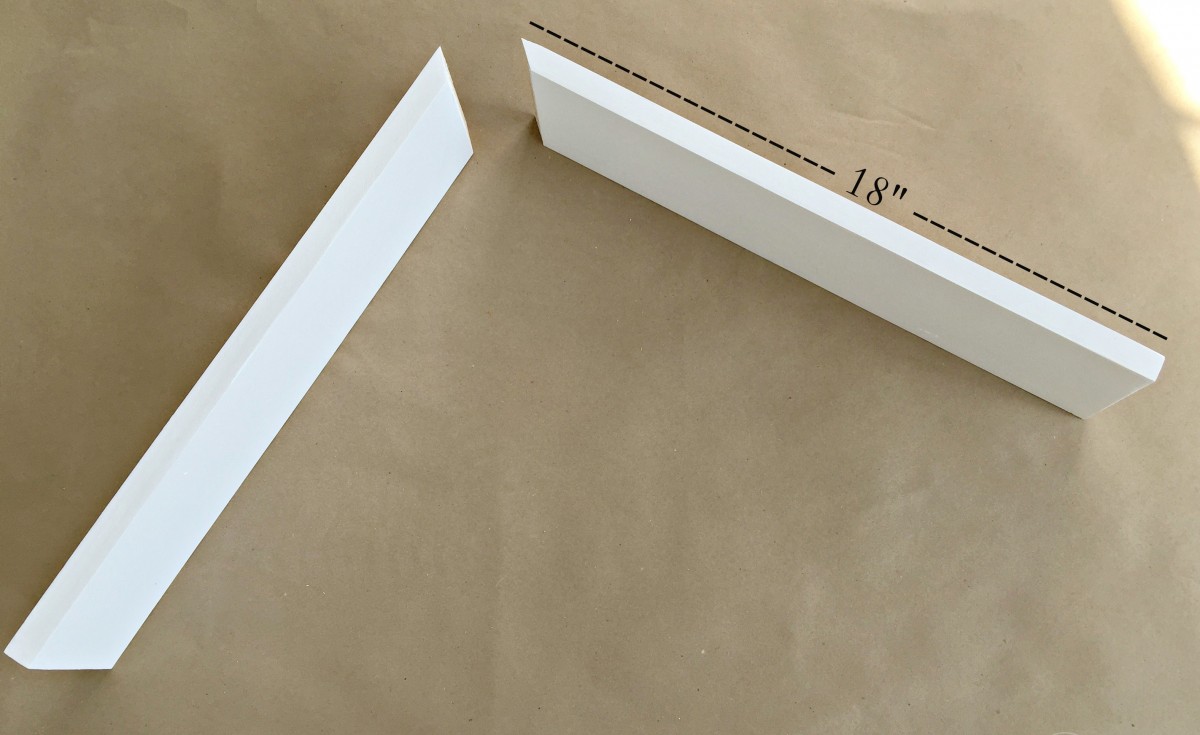
In a perfect world, all of the door frames and walls would be square. Alas, they are not. Because my walls are a little wonky, I needed to install my 1″x 4″ boards directly to the door frame. Again, I glued and then reinforced with screws.

Now I was ready for the corbels/supports. I applied a little glue to the ends of the 45 degree angles, and positioned them centered on the already installed 1″x 4″ boards. Once they were in position I “toe-nailed” (nailed them at an angle) through the ends of the angles directly into the secured 1″x4″ boards. Once these are installed 
DIY Craftsman Door Casing – Finishing
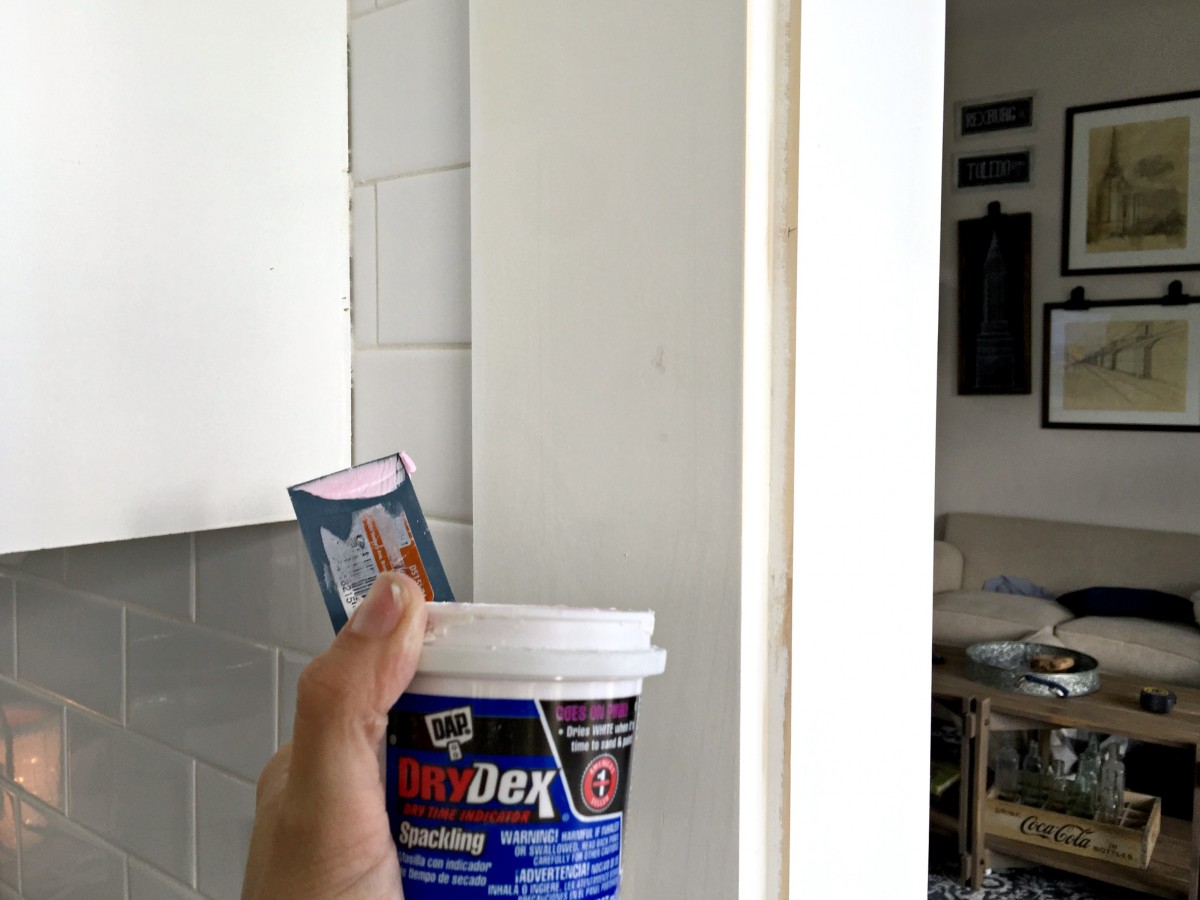
Step 7. Prep for Paint
Next I needed to prep for paint. Time to get rid of all the unsightly holes! To fill the topical holes I used a basic painter spackle/putty.
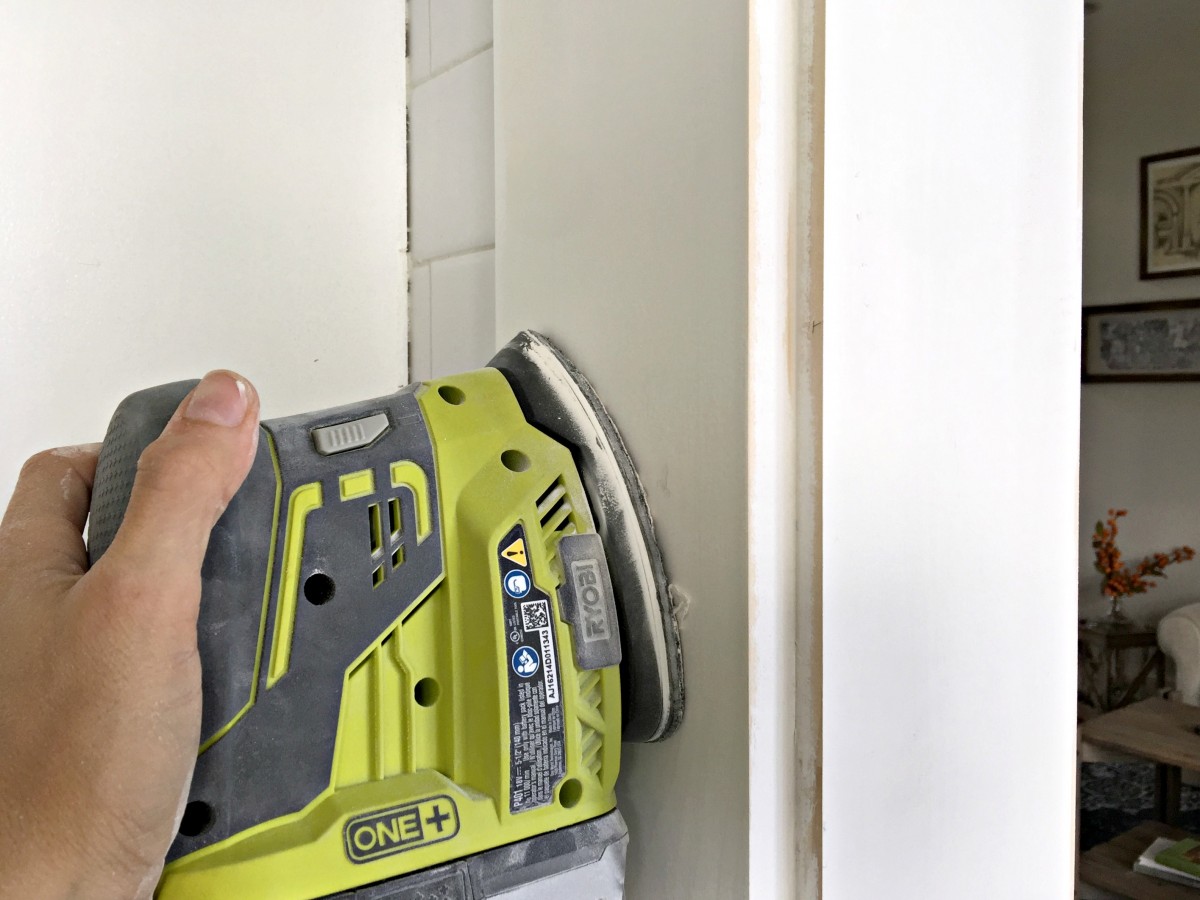
Once the filler had completely dried I did a once over with a finish sander.
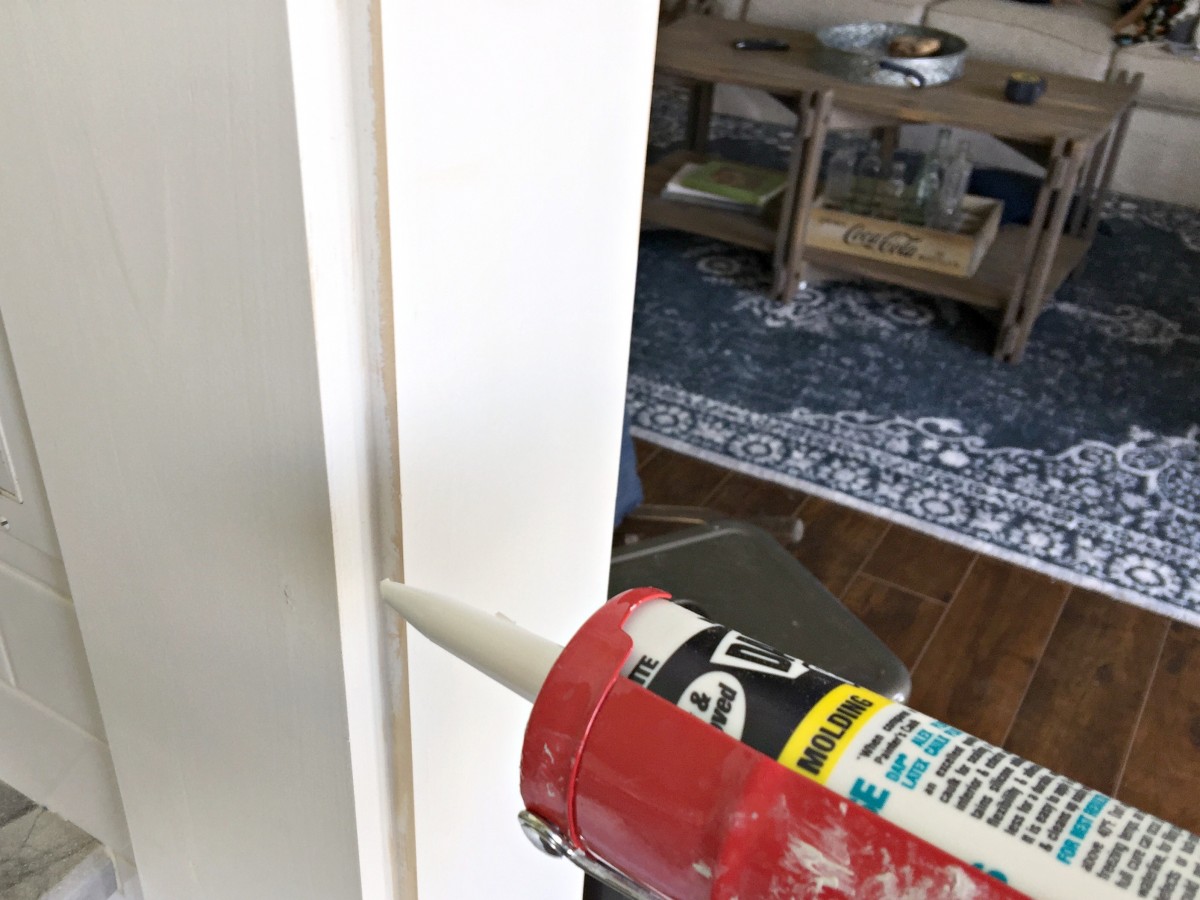
 Last thing I needed to do to prep for paint was caulk all the seams. The odds of all the boards meeting up PERFECTLY are slim-to-none. So don’t beat yourself up about it, caulk can be your best friend! It will make any unsightly gaps completely disappear. Abracadabra!
DIY Craftsman Door Casing – The Paint
Now all there is left to do is slap some paint on this sucker. I used “Ultra Pure White” by Behr in a semi-gloss finish.
Want to see what else I have been up to in our new home ? These are some of my favorite new additions!
Take Luck,
Corey


 Copyright secured by Digiprove © 2018


Beautiful! We have been doing this in our home-one down, two to go. Sadly, our openings aren’t tall enough for a corbel.
PS-every time I see your salutation, I wonder if you are a Brian Regan fan :)?
Good for you! And YES, I am a Brian Regan fan! 🙂