The beginning of the school year is always a personal wake up call to me in regard to our household organization. Nothing like 6 a.m. alarms and missing shoes to make you realize the disorder of your kid’s closet. There’s really nothing quite like a frantic hunt for matching socks and clean underwear to kick my butt in gear. I am happy to report this year I put an end to the morning madness and I am thrilled to be teaming up with DAP to bring you my “Kids Closet Makeover”.
*This post is sponsored by DAP and does contain affiliate links.

What I used:
| Tools Suggested | Materials Used |
| Drill | DryDex Spackling |
| Assorted Drill Bits | WeldWood Wood Glue |
| Table Saw | RapidFuse All Purpose Adhesive |
| Miter Saw | DAP Premium Wood Filler |
| Tape Measure | Alex Flex Premium Molding & Trim Acrylic Latex Siliconized Sealant |
| Paint Supplies | Alex Plus All Purpose Caulk |
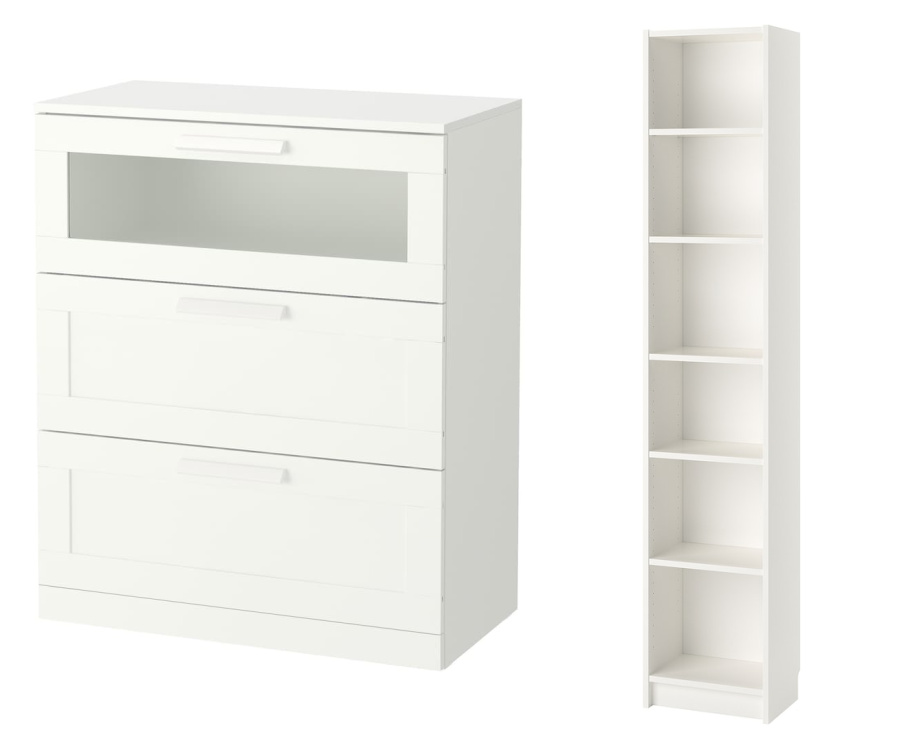
| Hearing Protection | IKEA Brimnes Dresser |
| Eye Protection | IKEA Billy Bookcase (x2) |
| 3/4″ Plywood | |
| 1×3″ Primed Finger Board | |
| Edge Banding | |
| Black Dresser Pulls |
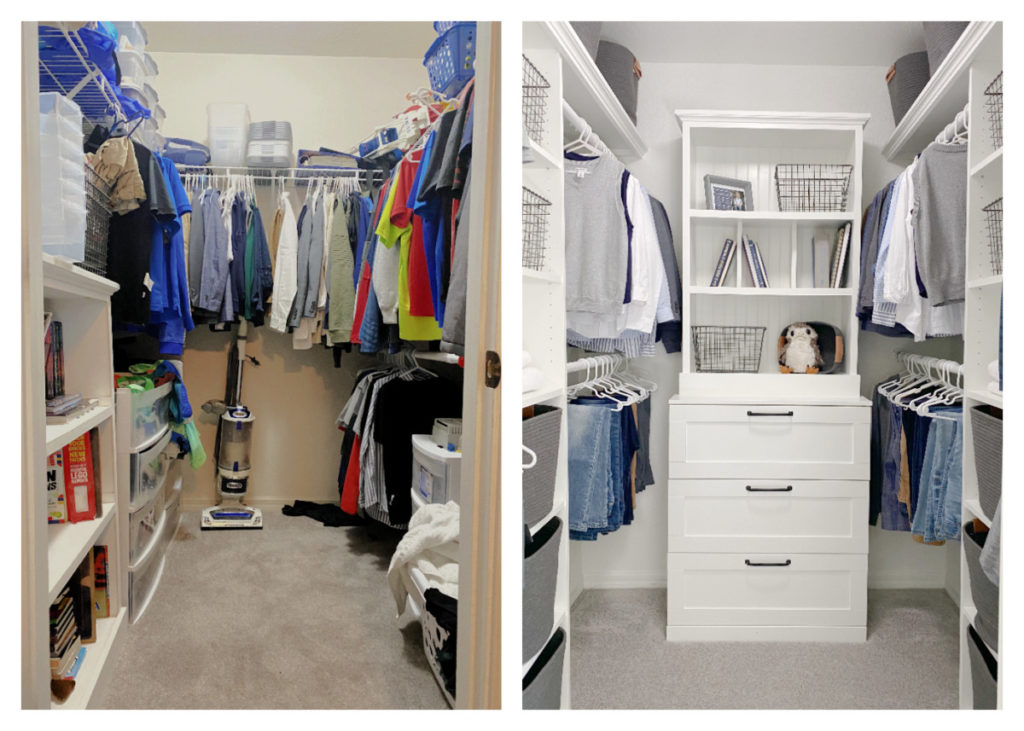
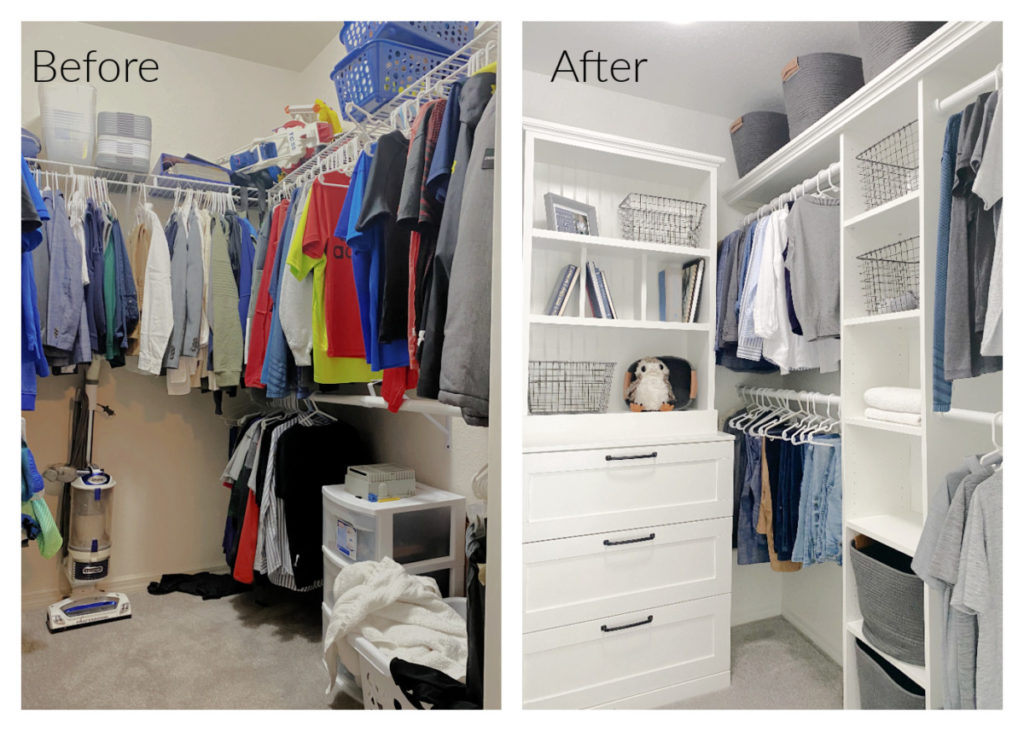
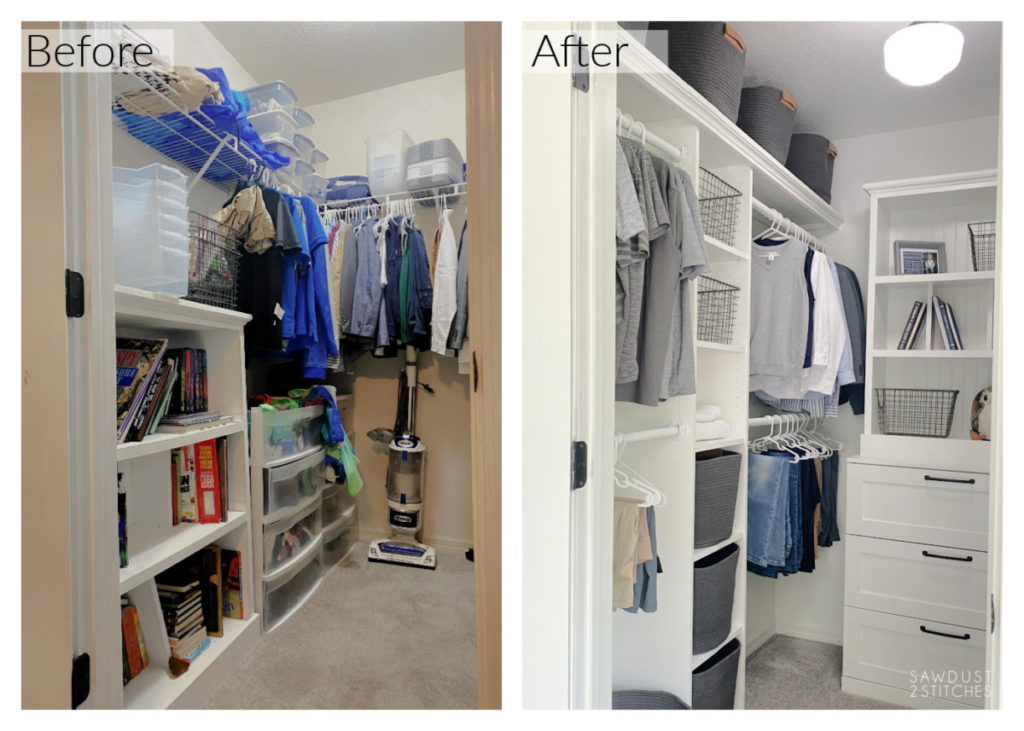
Kids Closet Makeover
Alright, let’s dive in and see what we are working with. Here it is, my kids closet. As you can see it came complete with the trademark builder grade wire shelving. I utilized as much hanging space as possible, but slowly random pieces of furniture slowly migrated into the closet giving false hopes of order…
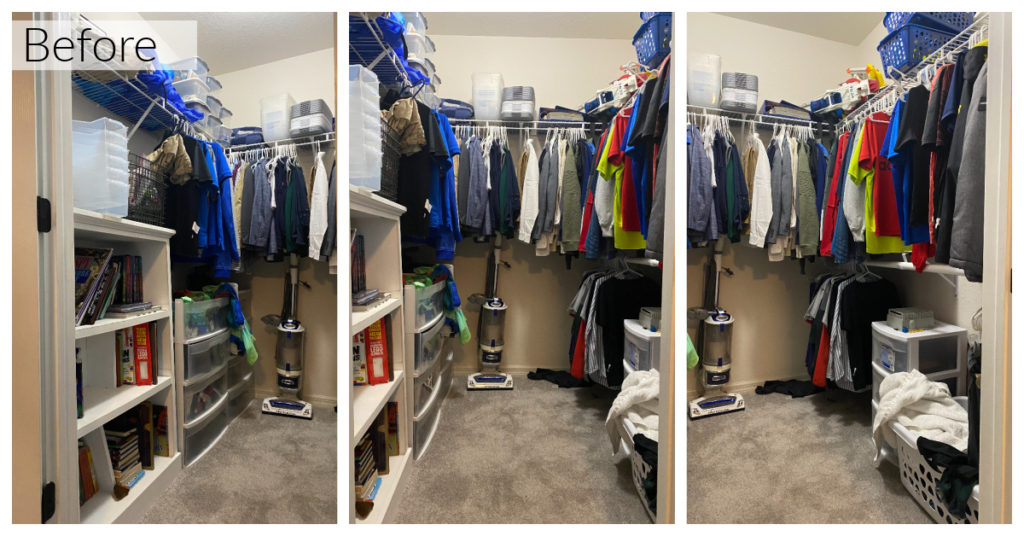
Where to begin? Time to clear everything out and really see what we are working with. After emptying the contents of the closet I was amazed how much bigger it felt when the floor was clear. *Note to self, do not line the bottom of the closet with bins and totes after this Kids Closet Makeover.*
Remove Existing Closet Shelving
Now that the closet is empty it’s time to take it one step further. I needed a blank canvas; which means the wire shelving has got to go! Removing wire shelving is a fairly straight forward process. Actually, I simply handed my 10 year old son a drill and he figured it out all on his own.
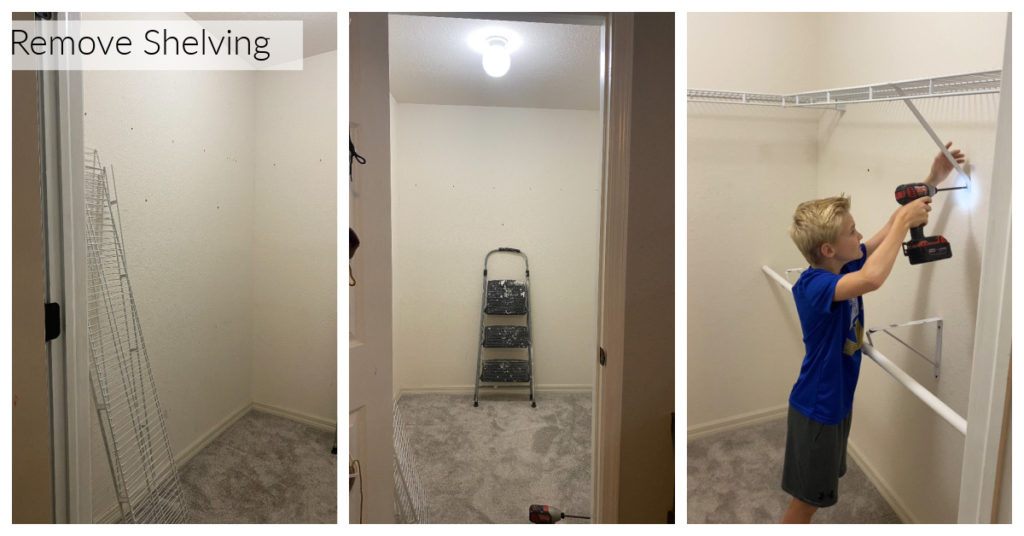
If he can do it, so can you! Contractors use all sorts of securing methods, odds are they probably use mollies. No worries, when you remove the brackets and mollies they will leave sizable holes, but no worries that is an easy fix!
Repair and Fill Holes
After all the shelves are removed it is time to repair the damages. I promised it was an easy fix and I make good on my promises. All that is needed to repair the many holes left behind is some DAP DryDex Spackling.
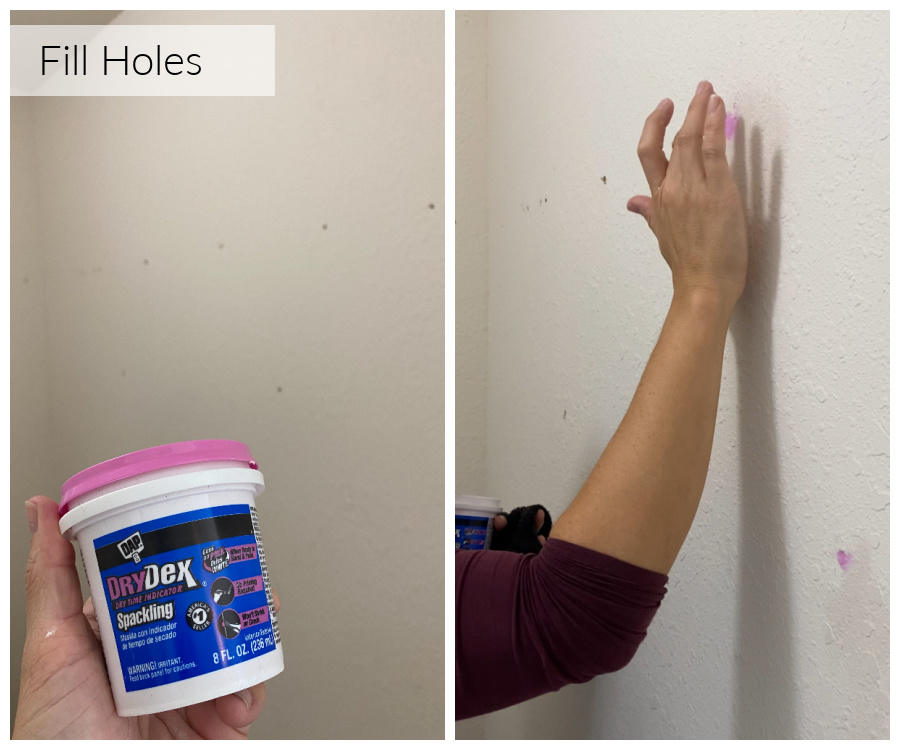
Rough Surfaces
I have several methods I use when filling holes. In this case I am filling holes on a very textured surface. When I have a textured surface I try to apply the spackling directly into the hole using my finger. After applying the spackling I use my finger tip to smooth out the spackling while trying to mimic the wall texture. This particular spackling is perfect for this application because it won’t shrink or crack! Added Bonus: It has a built in timer, it goes on pink and turns white when it is dry.
Smooth Surfaces
When repairing smooth surfaces I apply DryDex Sparkling more liberally, knowing that I will sand the surface to get a smooth, perfect match.
Assemble Ikea furniture (The BEST way.)
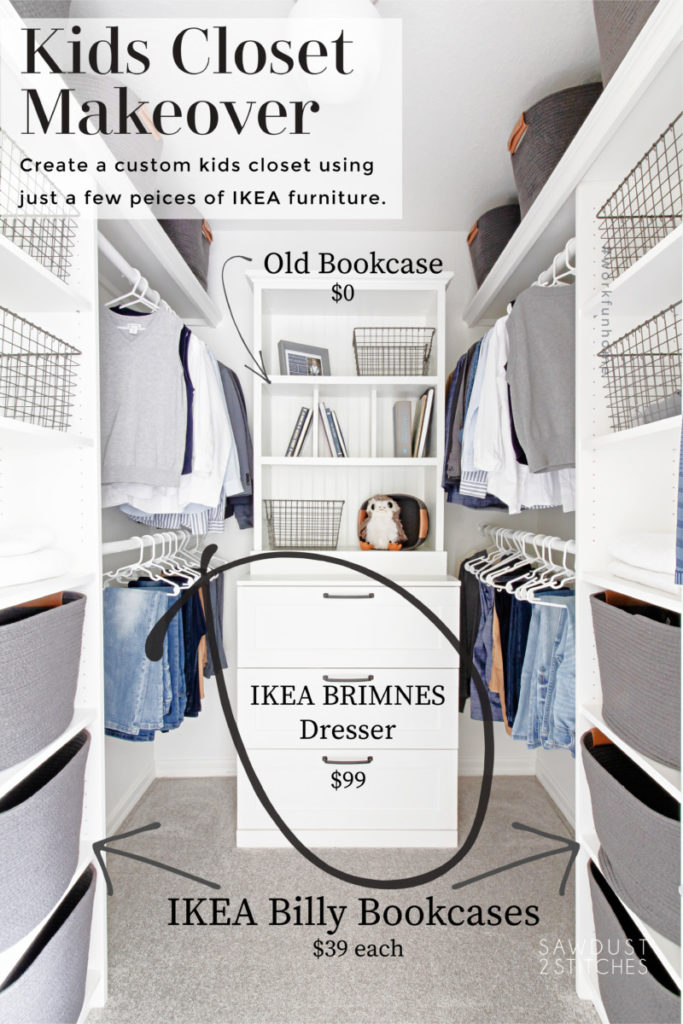
Now that everything has been removed, it is time to add more function and hopefully a little bit of aesthetic qualities. If you have been following my DIY journey then you KNOW I normally build everything. Well, today I am going to switch things up and keep you on your toes! For the kids closet makeover I opted to utilize some IKEA options. I selected the “Brimnes 3-Drawer Dresser” along with (x2) “Billy Bookcase“.
Don’t get me wrong, I I don’t have anything against IKEA. They create affordable furniture options that can fit nearly any budget, however when it comes to stability they simply aren’t as rugged as homemade. However, I have a little trick that will give these inexpensive Ikea pieces some added strength.
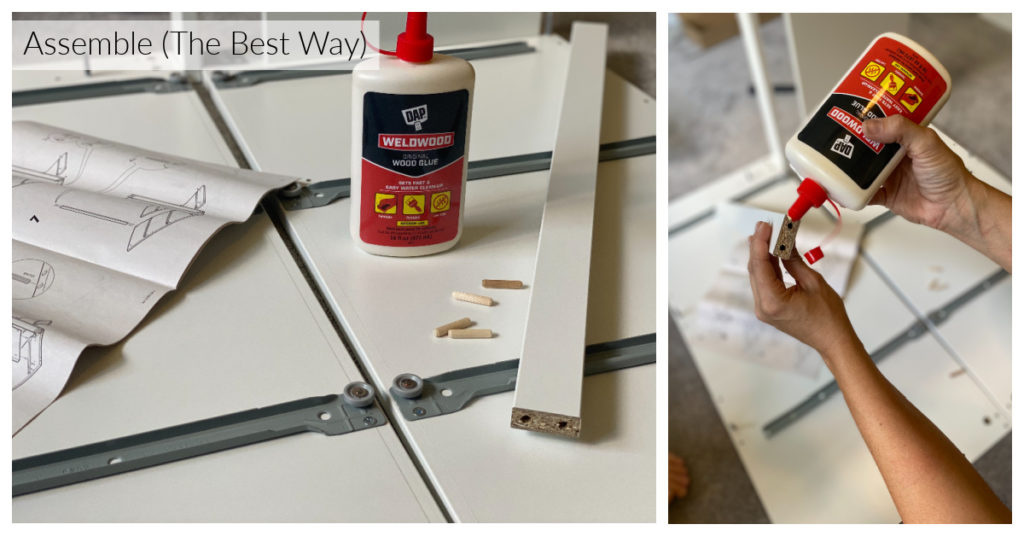
IKEA furniture utilizes locking bolts and wooden dowels to joint their furniture. Well, in the shop I always glue up my furniture, it only makes sense that I would give the same advantage to pre made furniture. I suggest using DAP Weldwood on all of the dowel rods and along any of the exposed MDF joints. Apart from this one added step, follow the IKEA assembly manuals as directed.
Custom Shelves
At this point we have two tall thin IKEA bookcases, a dresser and an old bookcase. All of these components by themselves are fine, but it felt a little disconnected. However, what if we were to create some simple custom shelving that would make the bookcases look like built-ins while also matching the old bookcase?! Sounds like a winning idea, right?

Cut Shelving
Let’s get started. First, I measured the depth and the length of my desired shelves. I opted to make my shelf hang about an inch past my book cases. ( I cut my shelves 13′ wide, and measured from wall-to-wall for my length dimension.)
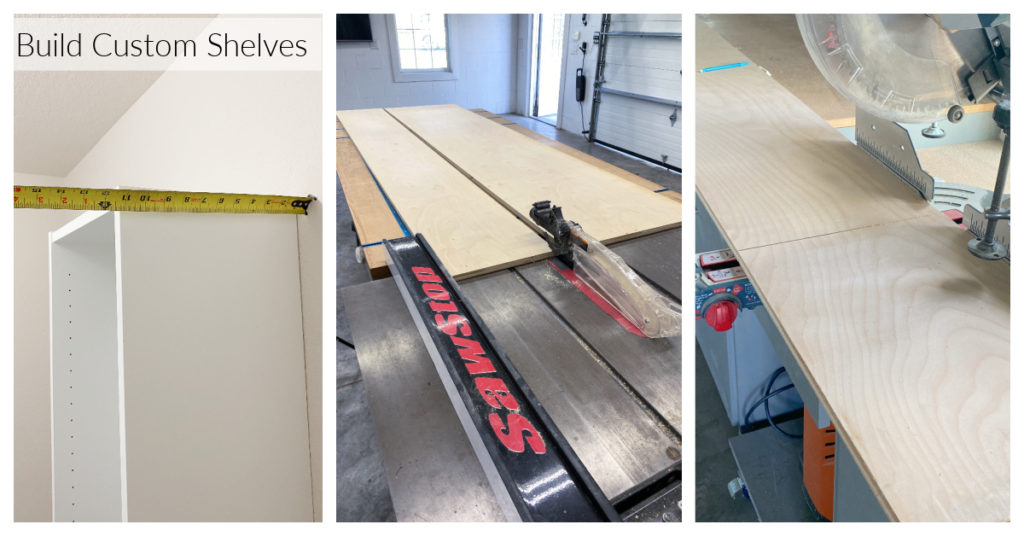
I wanted my shelving to have a nice finished edge. In order to accomplish this I banded the front edge of my plywood. If you are interested in learning more about applying edge banding you can check out my tutorial here.
After banding the front edge I was ready for the fun part! Adding character to the space. A great way to make any furniture piece look custom is by adding some decorative molding. In this case I wanted to mimic the trim work on my existing bookcase so that it would look cohesive.
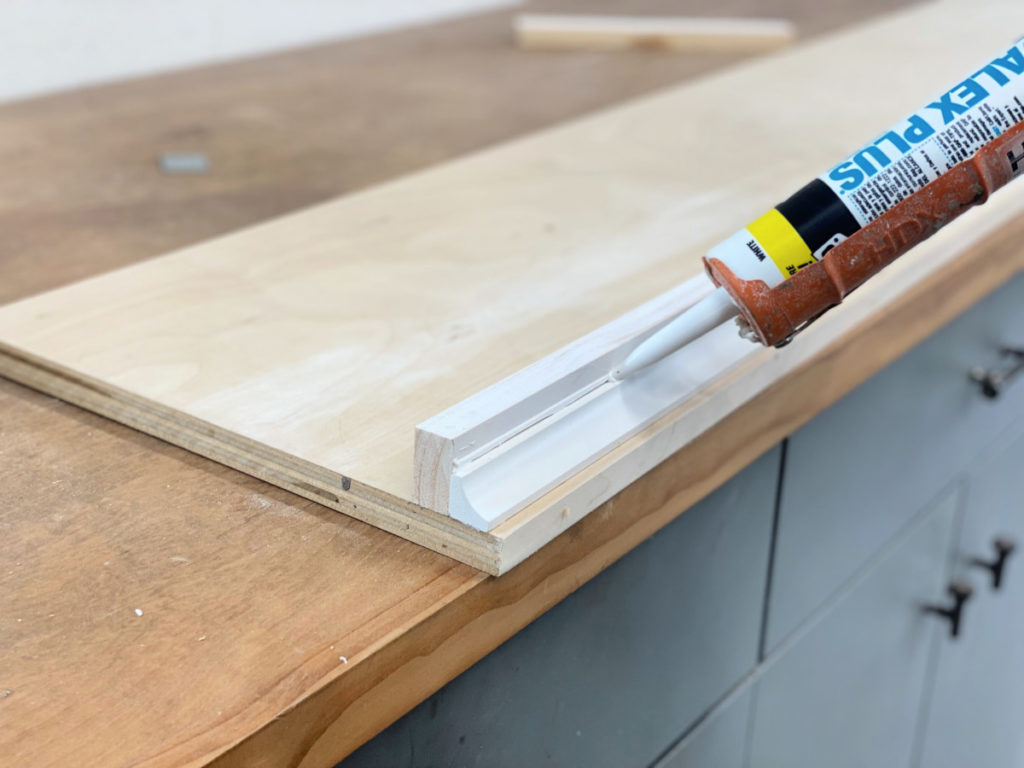
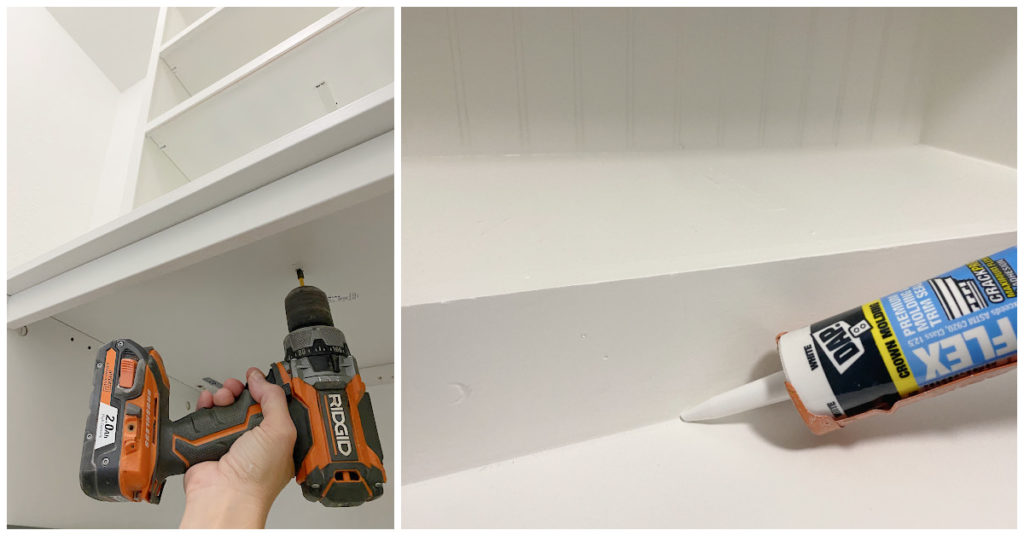
Support Closet Shelving
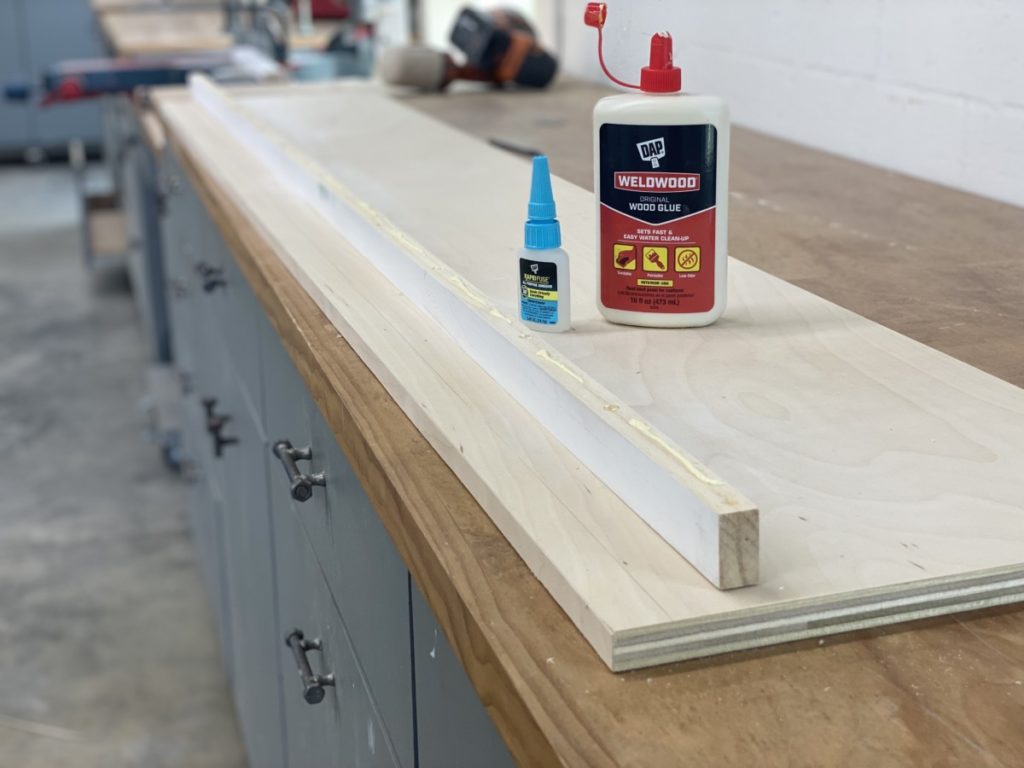
The first thing I needed to add was a primed 1×2″. The 1×2 would not only duplicate the trim on the bookcase it would also add support to the shelf edge. One of my favorite shop hacks is using DAP Weldwood and Dap RapidFuse in a morse code style application. The combination is remarkable. The RapidFuse holds instantly (within 30 SECONDS) and the Weldwood Wood Glue will cure and create a permanent continuous point of contact.
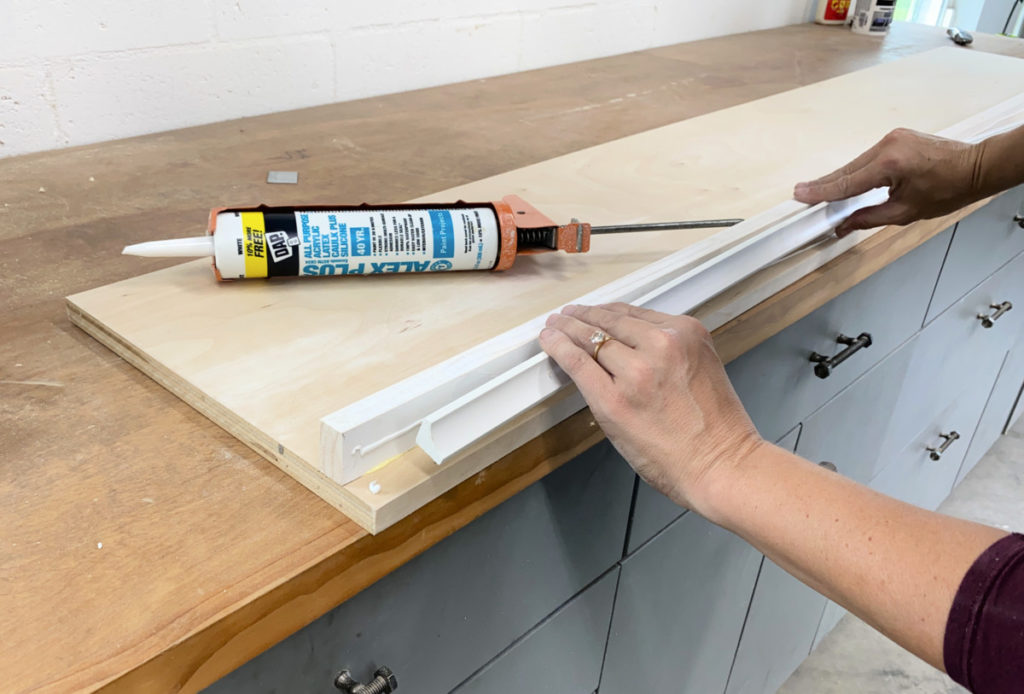
Add Decorative Trim
Next up? Decorative trim. I love using PVC “inside corner molding” to add a little bit interest. It is easy to work with, reasonably priced, and paint-able. Winning! Another great thing about PVC is how easy it is to install. It is flexible and in my experience doesn’t require fasteners. I have used it for many applications, and my method of choice is Alex Plus caulk. Yup, it works great as an adhesive and I seals the edges for a perfect finish!
Paint
All the walls are repaired and ready for a fresh start . All the bookcases are assembled and ready to be installed. The custom shelves are built and ready for their finish… it’s time to paint! I could have easily painted the room first, but opted to wait until all my pieces were ready so I could paint them all at the same time.
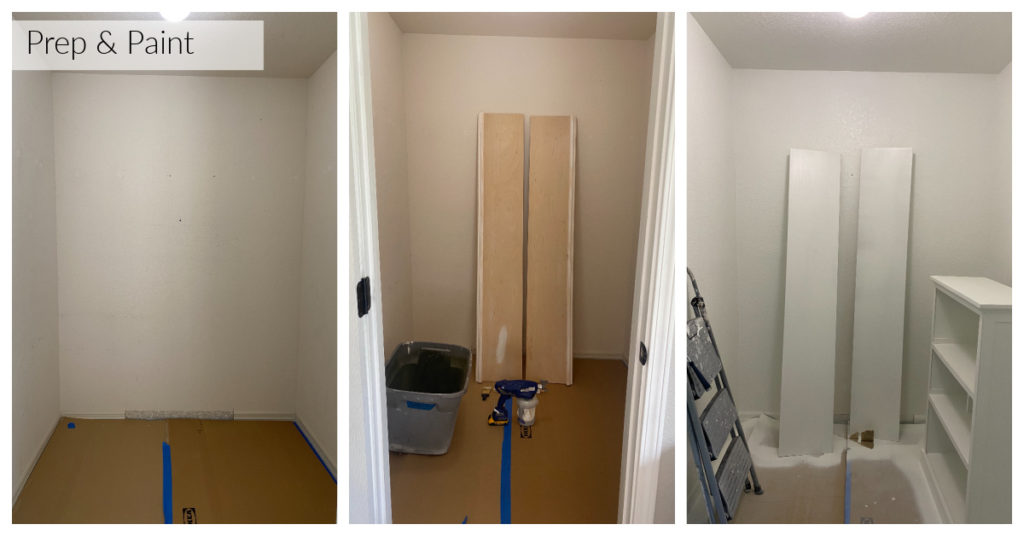
I essentially used the closet as a spray shelter to paint not only the room itself, but also my shelves, and give my old bookcase a fresh coat of paint.
Now, you may be wondering if my old book case will match my new IKEA dressers and bookcases? Valid question. I definitely wanted everything to match seamlessly and give the appearance of custom built-ins. In order to accomplish this I simply had Sherwin Williams color match my Ikea furniture. Easy peasy.
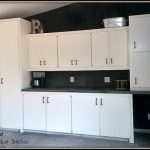
Bring In the Units
This is my favorite part, when you start to put things back together instead of tearing things apart! After the paint was dry I brought my bookcases and dresser back in and started installing. All of the IKEA furniture I purchased comes with brackets to secure the pieces to the wall.
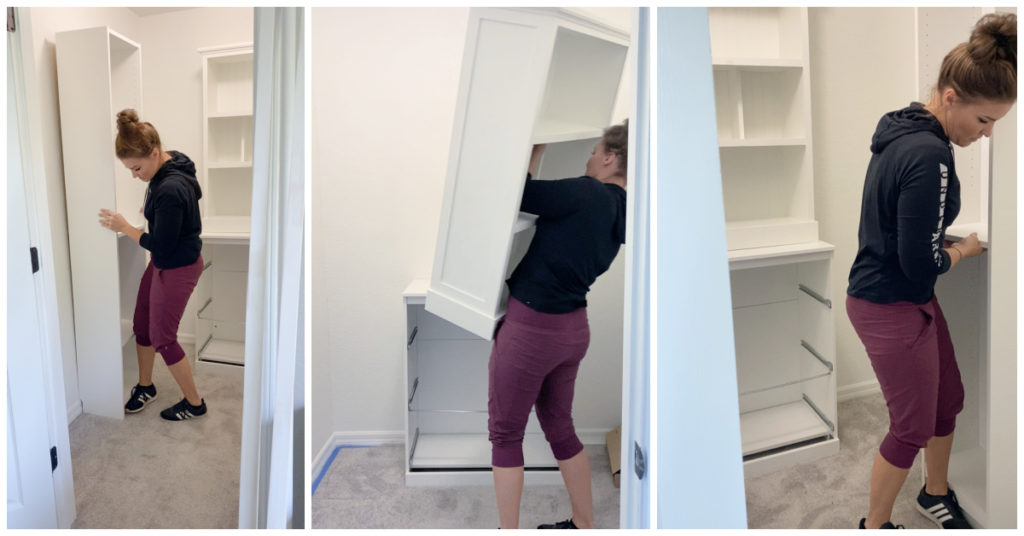
Combine Dresser and Book Case
Do you ever have one of those ideas that makes you feel super smart. This idea just so happens to be one of mine. As I previously mentioned, I had an existing bookcase that received a makeover nearly 9 years ago. Well, that bookcase has moved all over the country and ended up in the back of my kids closet. Instead of kicking it to the curb I decided to reuse it in the kids closet makeover.

The bookcase was in good condition and a really great size. After looking around IKEA I ultimately found the Bimnes dresser that had the perfect dimensions to be a suitable base for my bookcase. When you combine the two it becomes a super functional show stopper!
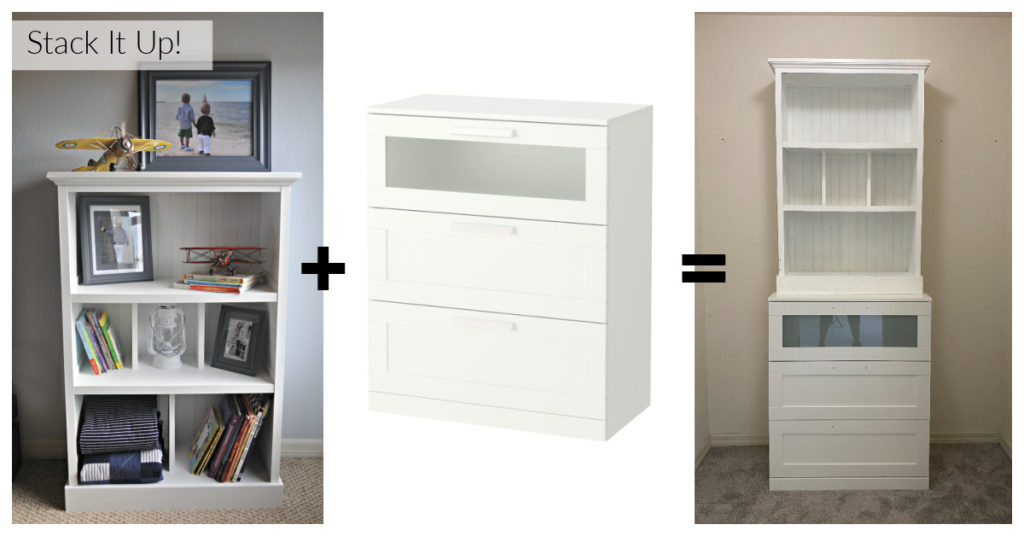
After properly securing the dresser to the wall I stacked my bookcase atop the dresser. Using screws I drilled through the interior top of the dresser into the base of the bookcase. The goal is to have the bookcase permanently affixed to the top of the dresser. After screwing the two pieces together, I then practiced additional caution and secured the upper bookcase to the wall as well.
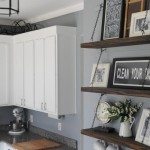
Install Shelves
Time to install those gorgeous shelves we made! I used a very basic support to hold up the shelves. If you want more details on how to install this type of shelf you can read my full tutorial here.
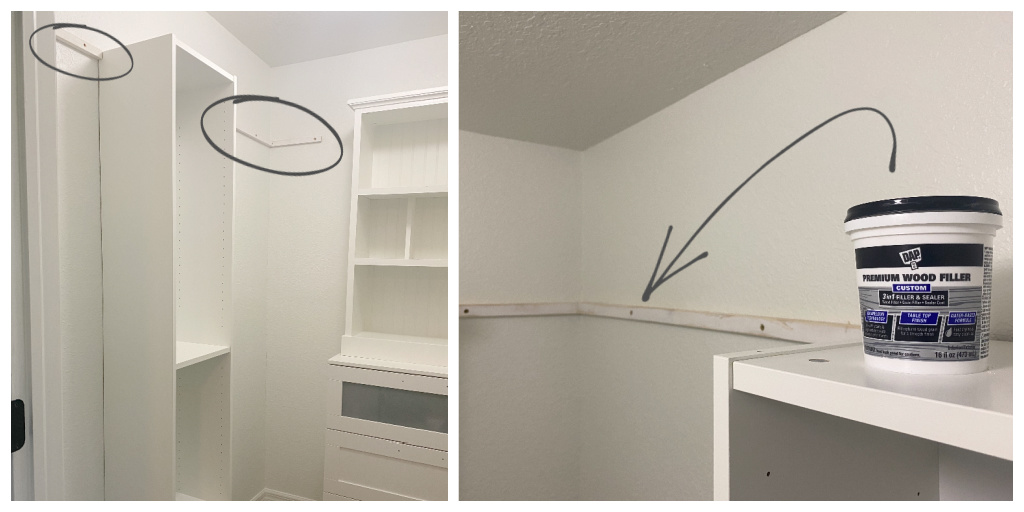
My biggest recommendation for this step is to hide the eyesores. In this case the screws stood out like a sore thumb(s). This is a simple fix, I used “DAP Premium Wood Filler” to quickly fill the holes. Thankfully it dries fast and doesn’t shrink allowing for sanding and painting shortly thereafter.
Unify with Caulk
After the supports are installed, and holes are filled and sanded it is time to add the shelf! The supports will create a sturdy base for the shelf, but as an added measure of precaution I also used 1 1/2″ screws to drive through the top of the shelves and into the supports below.
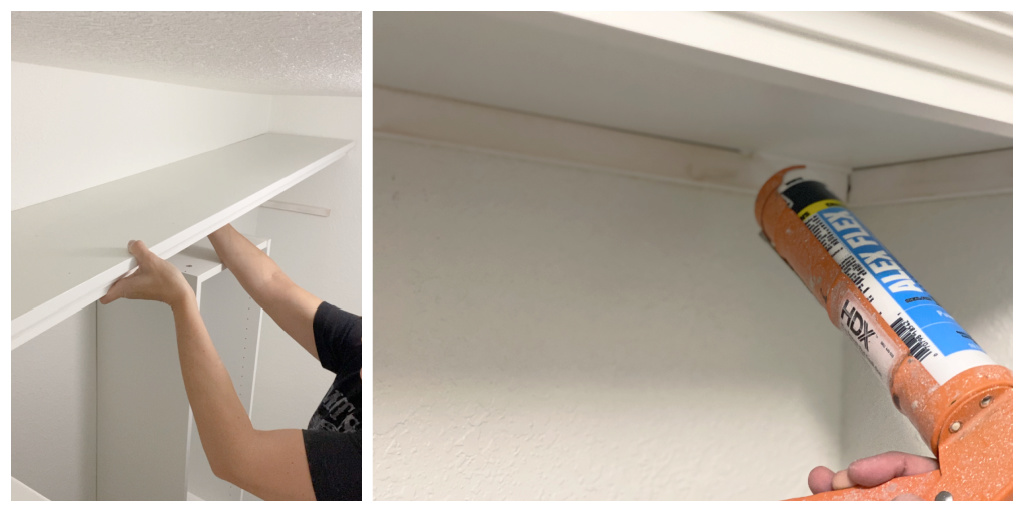
I truly and deeply feel that this shelf takes the random IKEA pieces and unifies them into a custom kids closet. The last thing needed to really create a custom built-in feel is CAULK. Yes, I have said it before and I will say it again, caulk is a stinking miracle worker! It is the magic eraser of the DIY world. Just a small bead of caulk will hide the most unseemly gaps.
As you may know I like to work fast pace so I always opt for “DAP’s AlexFlex”, it’s flexible with a quick dry time allowing for paint in just 30 minutes. Yes please!
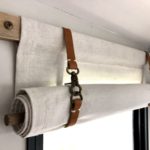
Add Clothing Rods
Now that we have the framework for a beautiful closet it is time to add rods. One would think that the rods would be the most simple of tasks. In reality I spent quite a bit of time brainstorming possibilities. Clothing racks hold a lot of clothing weight not to mention the occasional weight of children competing in their own personal Olympics .
While it is ideal to secure anything that will hold significant weight into studs, sometimes that is not an option. After considering a lot of options I ultimately chose to use toggle bolts and I do NOT regret it! They were perfect for this application.
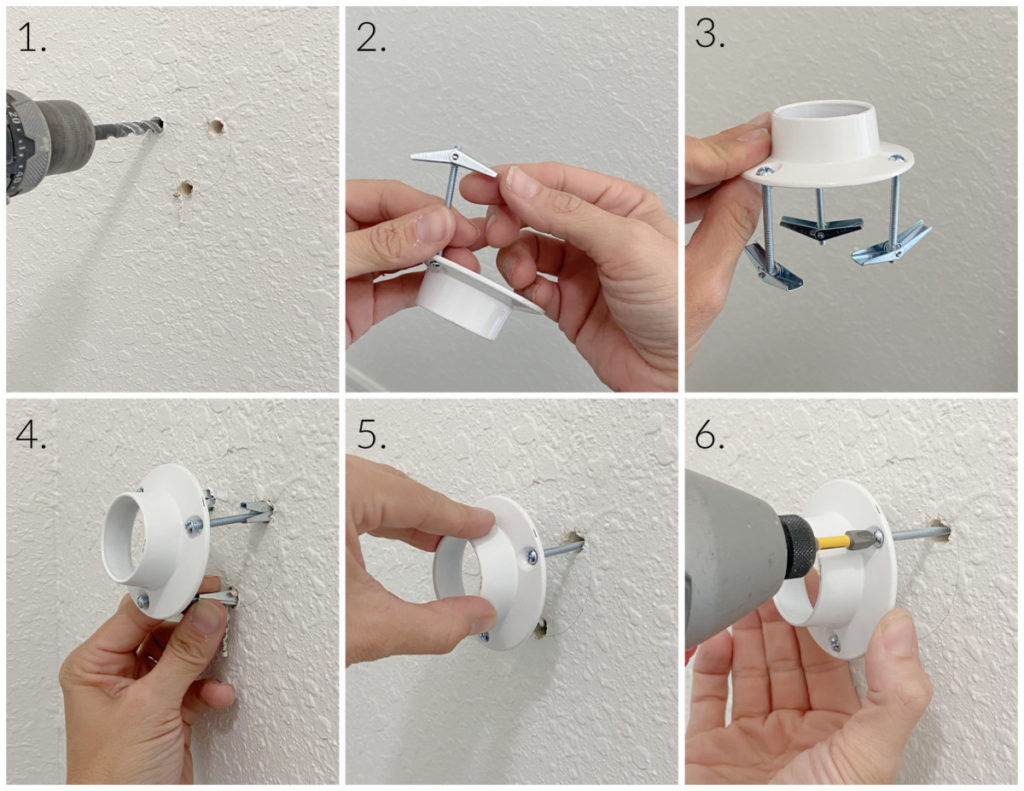
I used toggle bolts on the drywall and on the inside brackets I secured the rods directly into the “Billy Bookcases” with zero problems.
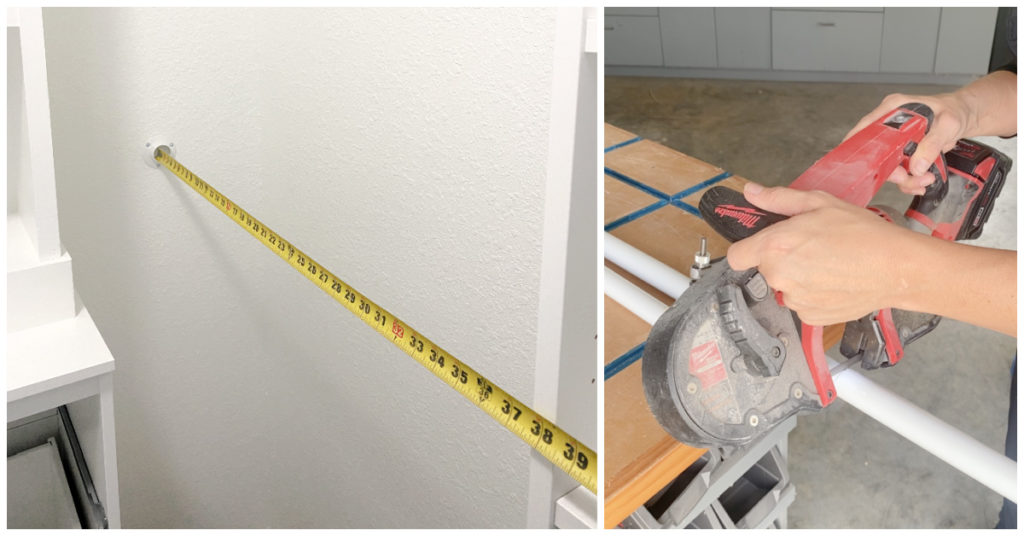
As far as rods… they come in many sizes and materials. However, if you have the option I would suggest using wood simply because they are easier to cut to size. I used metal ones which are easy to cut, but you do need to have a blade that is intended for cutting metal. (Or so it is suggested.)
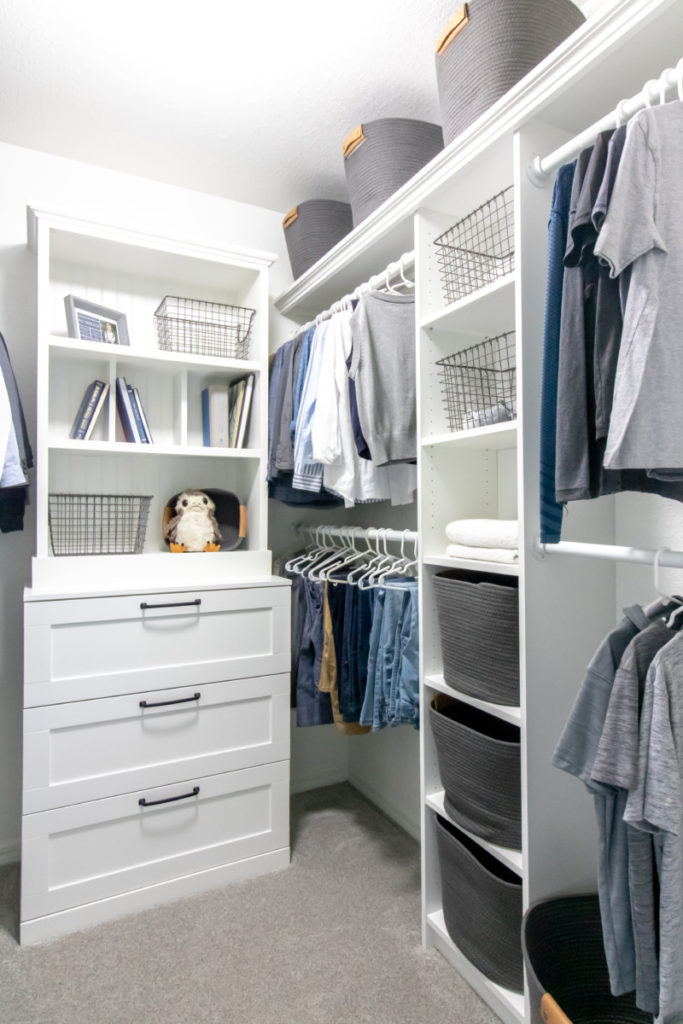
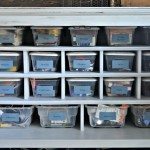
Add Decorative Baskets
My last suggestion would be adding decorative baskets. Not only will this bring in aesthetically pleasing uniformity, it will also help with organization! In the design world we lovingly refer to this as “form meeting function”. While the “Billy Bookcases” do provide plenty of sectioned storage, I needed place for hats, socks, underwear etc… Adding baskets was the perfect solution and added a ton of character to the space.
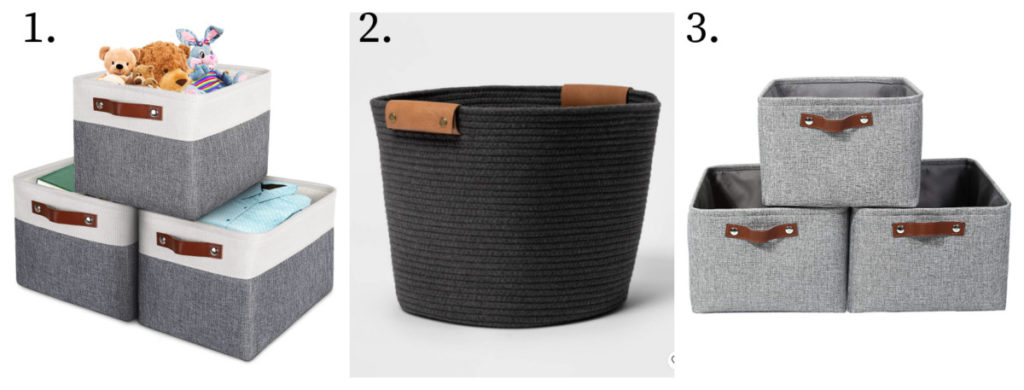
I found that finding baskets to fit the bookcase was a little trickier than I had hoped. So I did a little research and tried out a few options. Here are a few that worked well.
- Two-Tone Basket with Leather Detailing
- “Threshold Could Rope Basket” Target Baskets (No longer available.)
- Gray Baskets w/ Leather Detailing
Optional Additions*
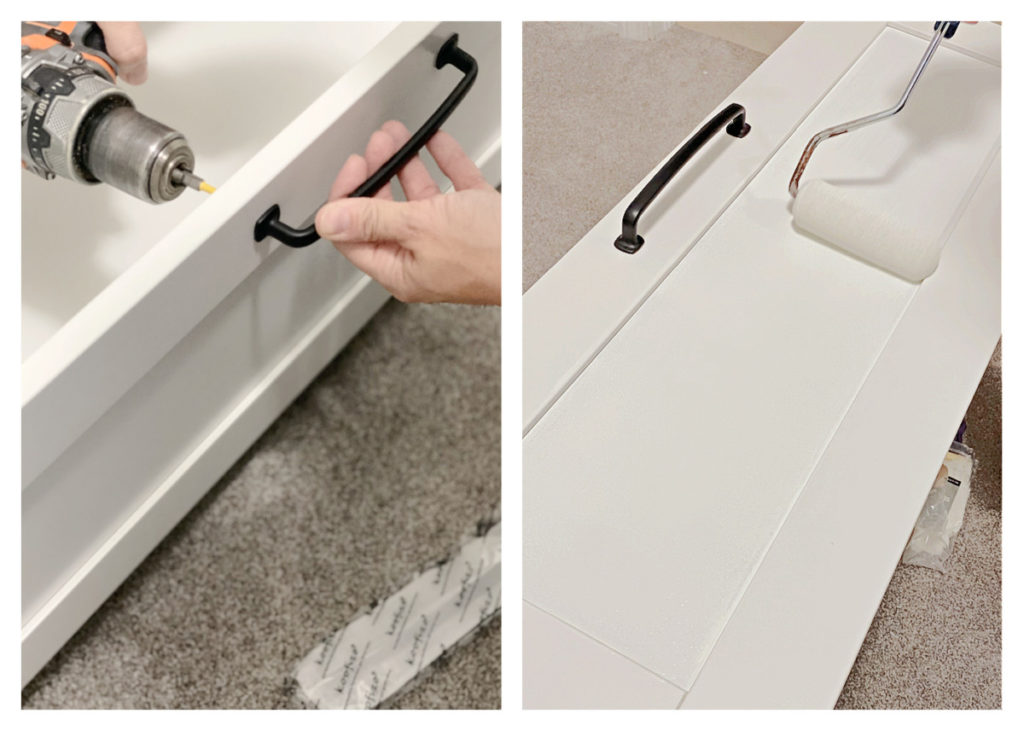
Okay, okay, I promise I am almost done. I made two last minute tweaks and I’m sharing them only because I highly recommend them. if you noticed earlier the “Brimnes Dresser” has an odd-man-out glass panel on the top drawer. I didn’t love it, so I scuffed it up, primed and painted it. No big deal. The last adjustment I made was the dresser pulls. They originally came with some less than appealing white pulls. We can do better! I swapped out the white for these fun new black drawer pulls.
Enjoy Form Meeting Function
Okay, NOW it’s time. It’s time to take back the closet and HOPEFULLY regain as much peace as you possibly can during your early morning run for the bus. 🙂
Who would have ever thought that just a few pieces of IKEA furniture and a hand-me-down dresser had so much potential!
Hopefully this helps you on your DIY journey. However, if you aren’t ready to tackle your closet just yet, make sure you pin the image below to your Pinterest boards for safe keeping! 🙂 Thanks so much for following along.
Take Luck,
Corey


perfect “KIDS CLOSET MAKEOVER ” . Thanks for sharing about suggested tools and material used.