Has anyone else noticed that hosting guests creates an unnecessary desire to accomplish ALL THE THINGS? Including but certainly not limited to paint touch-ups, cleaning the baseboards, losing 5 pounds, organizing the pantry, and NATURALLY giving the guest room a gorgeous accent wall. While this may not be a healthy thought process, I had an idea for a guest room accent wall that I just could not shake!
I had a dream that consisted of a rich dark color, inset moulding and oodles of character. I was more than eager to take on the KILZ #AccentWallChallenege ! It’s through our great partner KILZ® Brand that I can show you how you can create your own accent wall and elevate any space!
Tools Suggested:
- Utility Knife
- Pry Bar/Flat Bar
- Hammer
- Tape Measure
- Tablesaw / Circular Saw
- 18g or 16g nailer
- 1/4″ drill bit
- Drill
- Jigsaw
- builders square
- Miter Saw
- Level
Supplies Used:
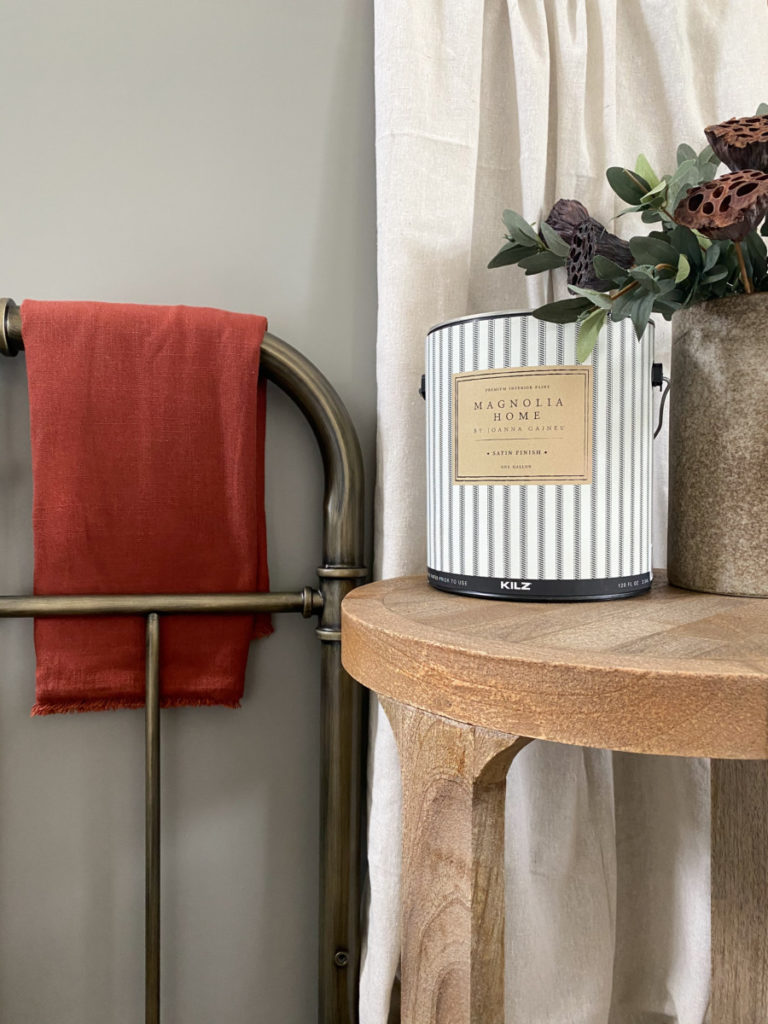
- KILZ 3® Premium Primer
- Magnolia Home by Joanna Gaines® Paint in “Before and After”
- Paneling Adhesive
- 1 1/2″ finish nails.
- 1/8″ MDF Panels
- 1×6″ Primed Finger Boards
- 1×4″ Primed Finger Boards
- PVC Base Cap Moulding
- Wood Filler
- Paintable Caulk
- 2 1/2″ Angled Paint Brush
- 6″ Foam Roller(s)
- Paint Tray(s)
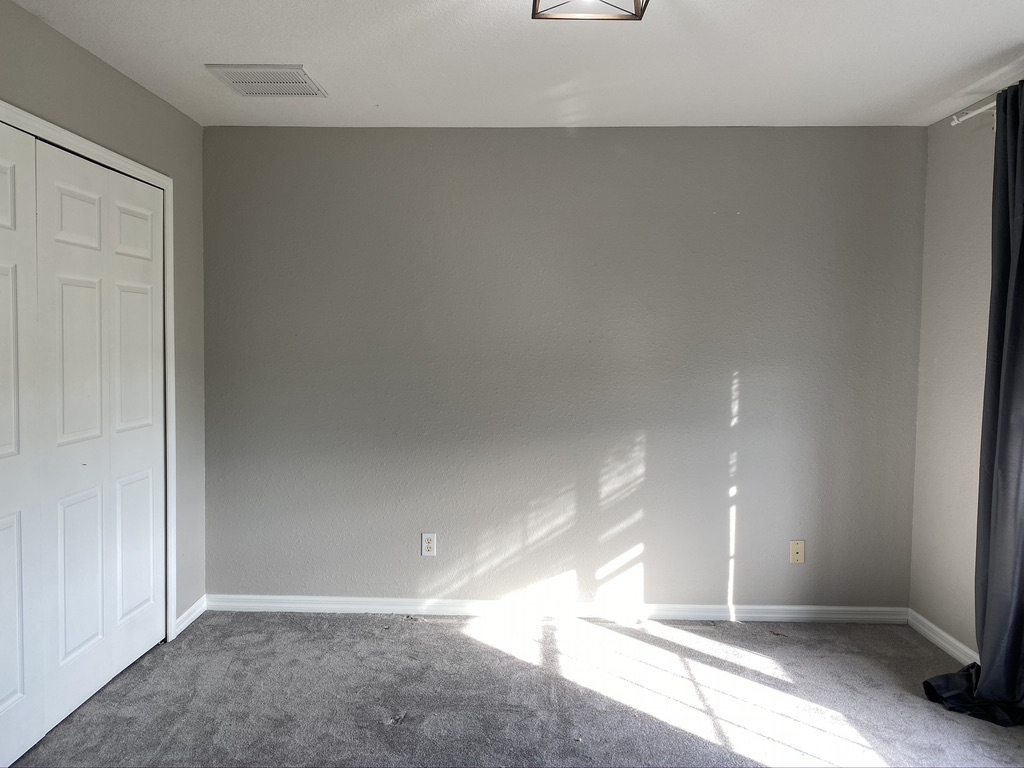
Clear the Room
Before we begin, let’s clear the room. In my experience plenty of workspace when installing board and batten is highly advisable!
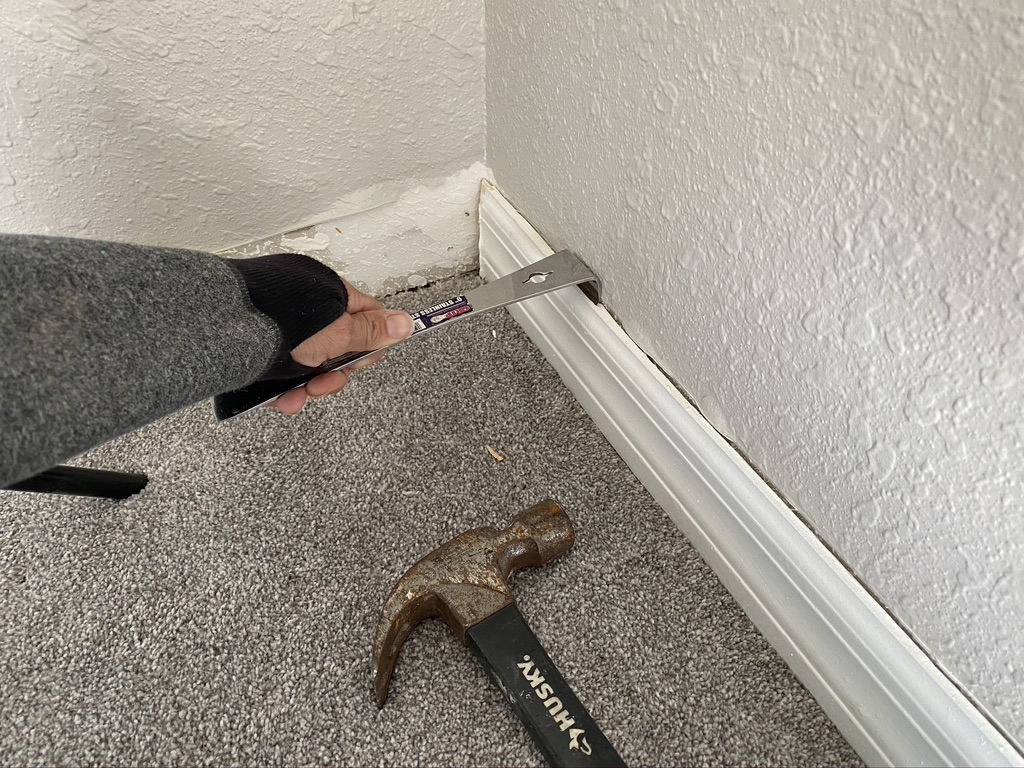
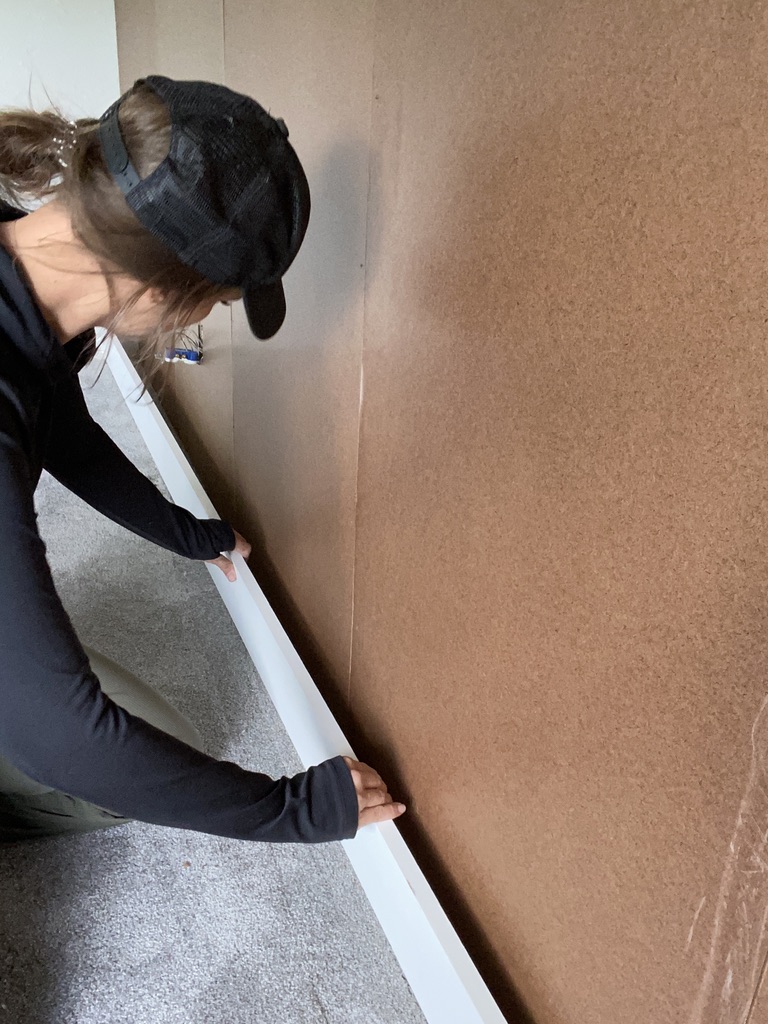
Remove Baseboards
Before I can actually begin installing the accent wall, I need to remove pre-existing baseboards and moulding if applicable. In order to do this , I run a utility knife along the top ledge where the baseboard meets the wall. In doing so I am cutting the caulk line and this will make it much easier to remove the baseboards.
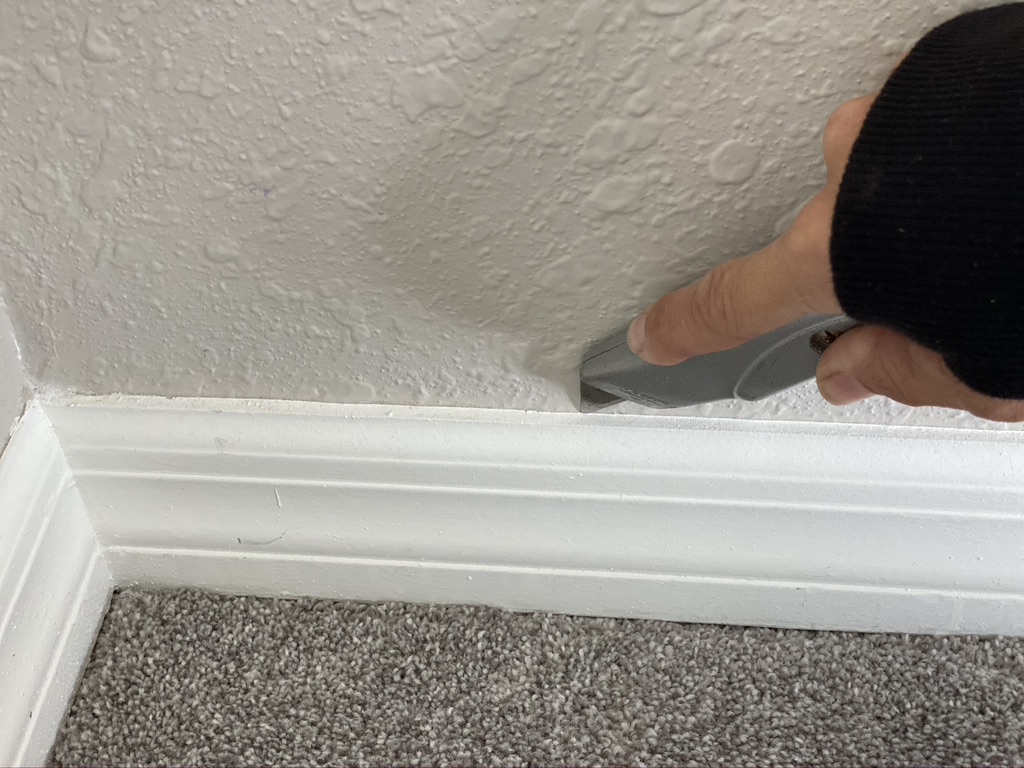
After the caulk line is cut, I use a pryer/flat bar to pull the baseboard away from the wall.
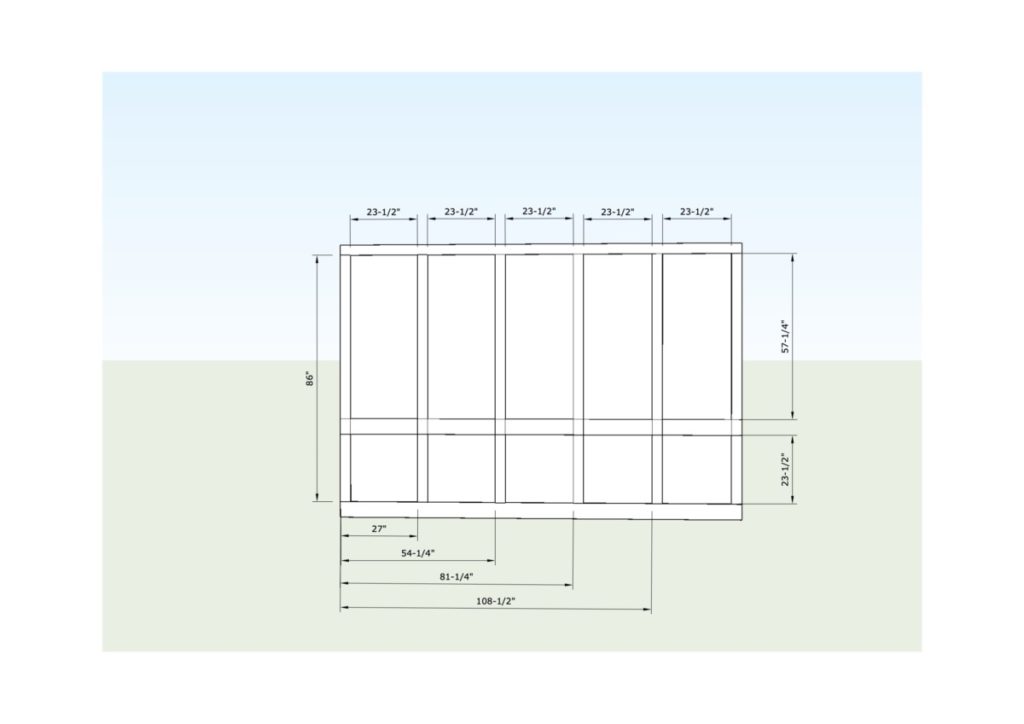
Map Out Wall
Before I can dive into the fun part, I need to map out my wall. Math is not my favorite, but you will be so grateful that you planned out your wall in advance. When mapping a wall take into consideration any outlets or light switches you do not wish to move. When planning my wall, I made sure that none of my “battens” (1×6″, 1×4″ boards) would not land on top of an outlet.
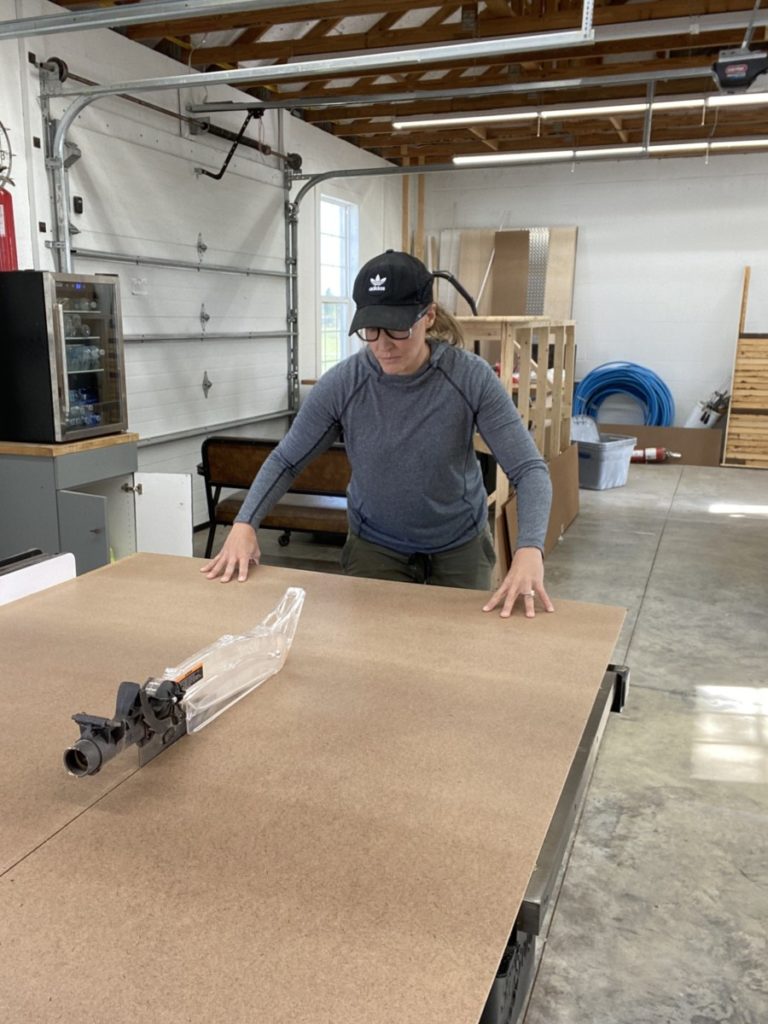
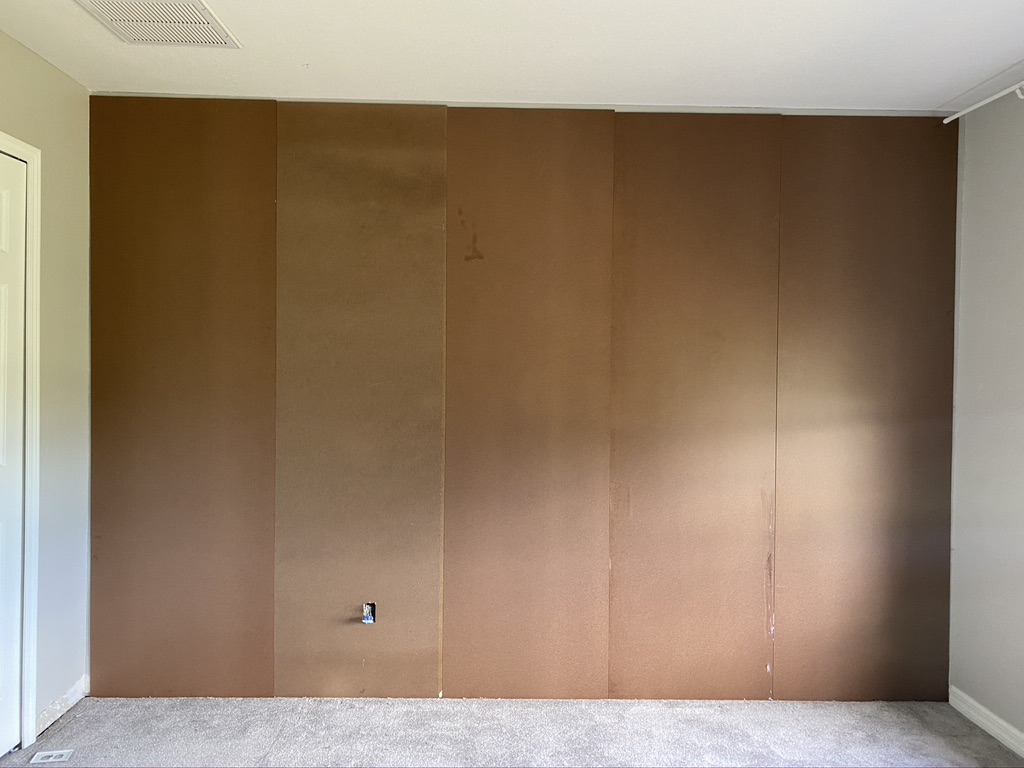
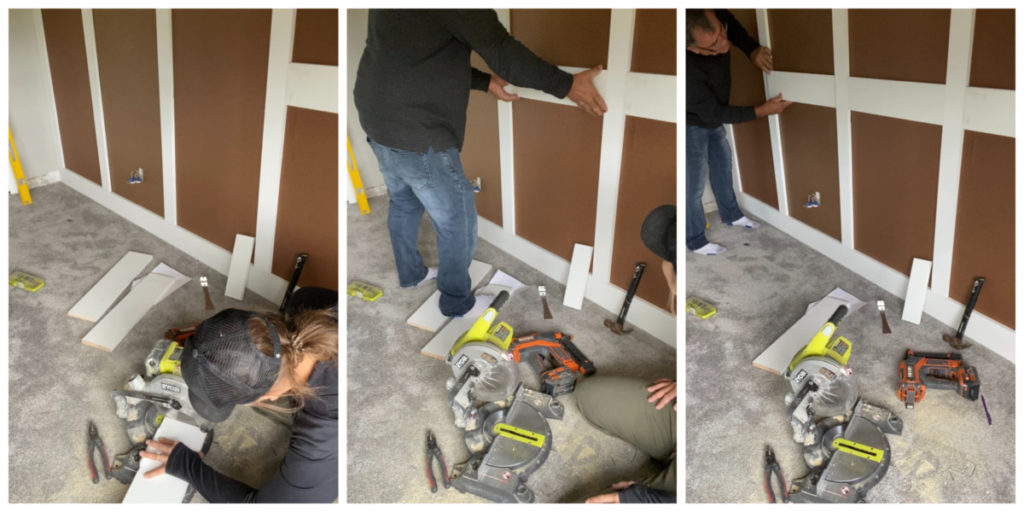
Cut Panels
After the planning phase is complete it is time to apply the boards (1/8″ MDF panels). In many cases you may choose to forgo this step. I have seen plenty of DIY bloggers attach their batten directly on top of drywall. I choose to take this extra step because of the texture of my drywall. My home has VERY HEAVY knock-down texture. My vision for this accent wall did not include a “HEAVY knock-down texture”.
When cutting panels I referenced my plans, and cut each panel so that the seams would be hidden behind my vertical 1×4″ boards.
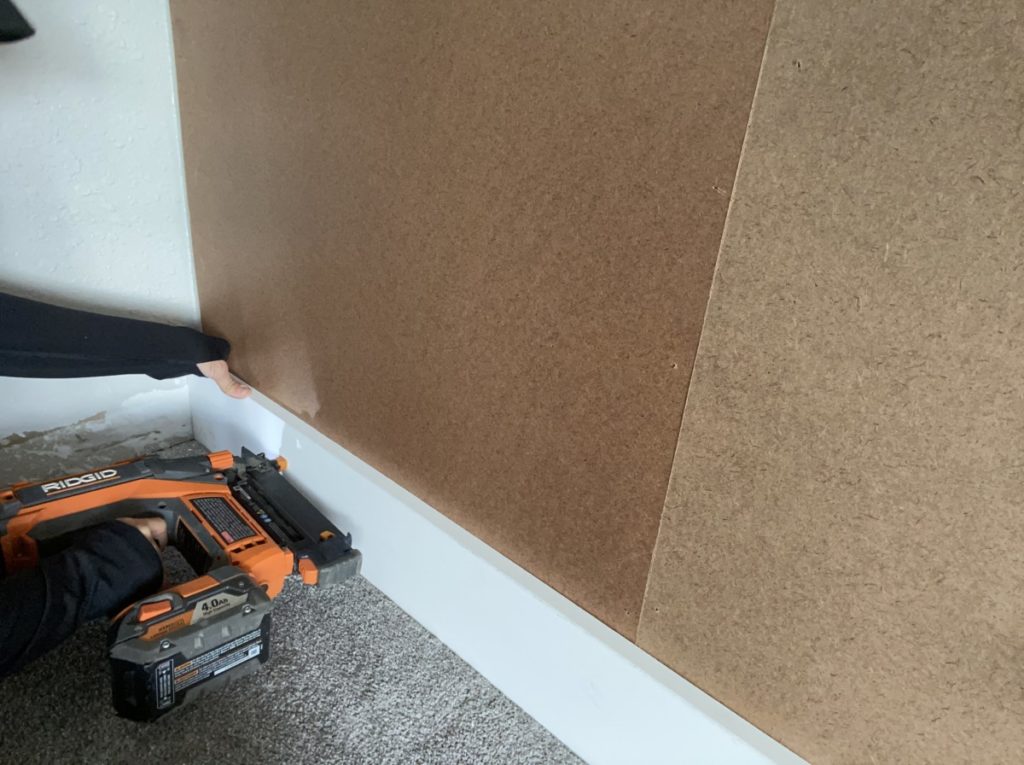
Apply Panels
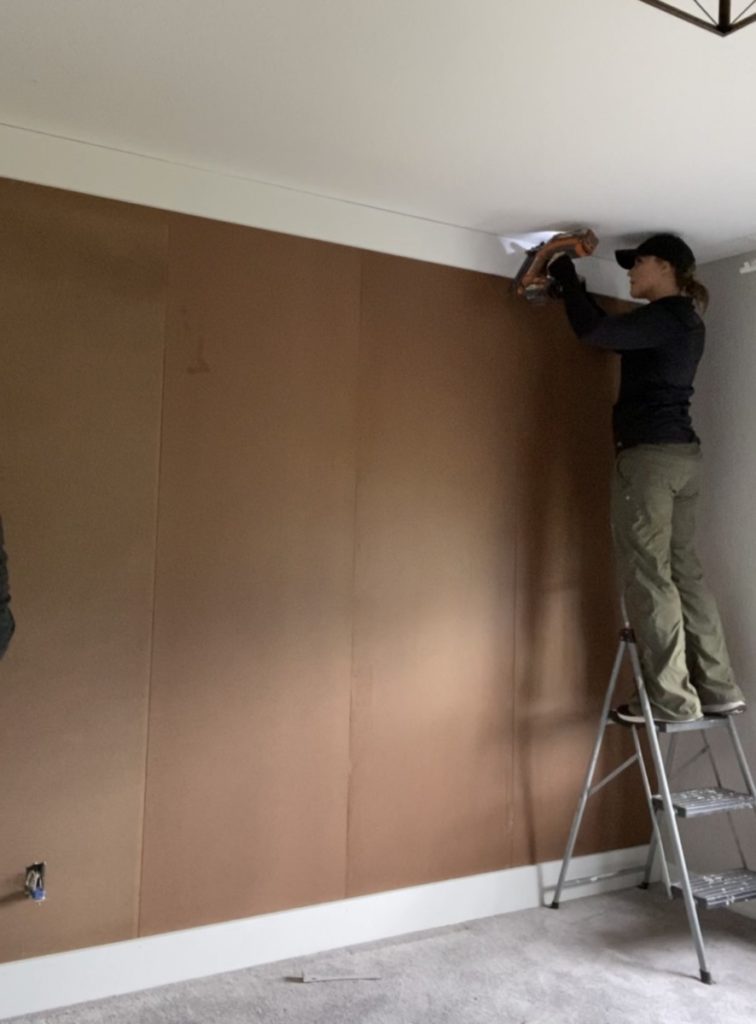
Before attaching the panels to the bare wall, I liberally apply paneling adhesive to the back of each panel before securing it to the wall using a 16g or 18g nailer.
When securing the panel to the wall I would advise only nailing along the edges. If you nail along the edges all the nail holes will be hidden by battens ( 1×4″ & 1×6″ boards). The adhesive will hold down the center of the MDF paneling.

This process will be repeated as many times as necessary to cover the entire space.
Accommodate Outlets
The process of installing paneling is fairly simple. The most complicated part of this step is accommodating outlets. Before you start breathing heavily into a paper bag, grab your tape measure, you are going to need it! Honestly, this is not hard at all! Simply take the measurements of where the outlet would land on your paneling, and then cut it out. Use a tape measure to transfer where the intended outlet will be. Then using a jigsaw cut a space for the outlet.

Install Moulding and Baseboards
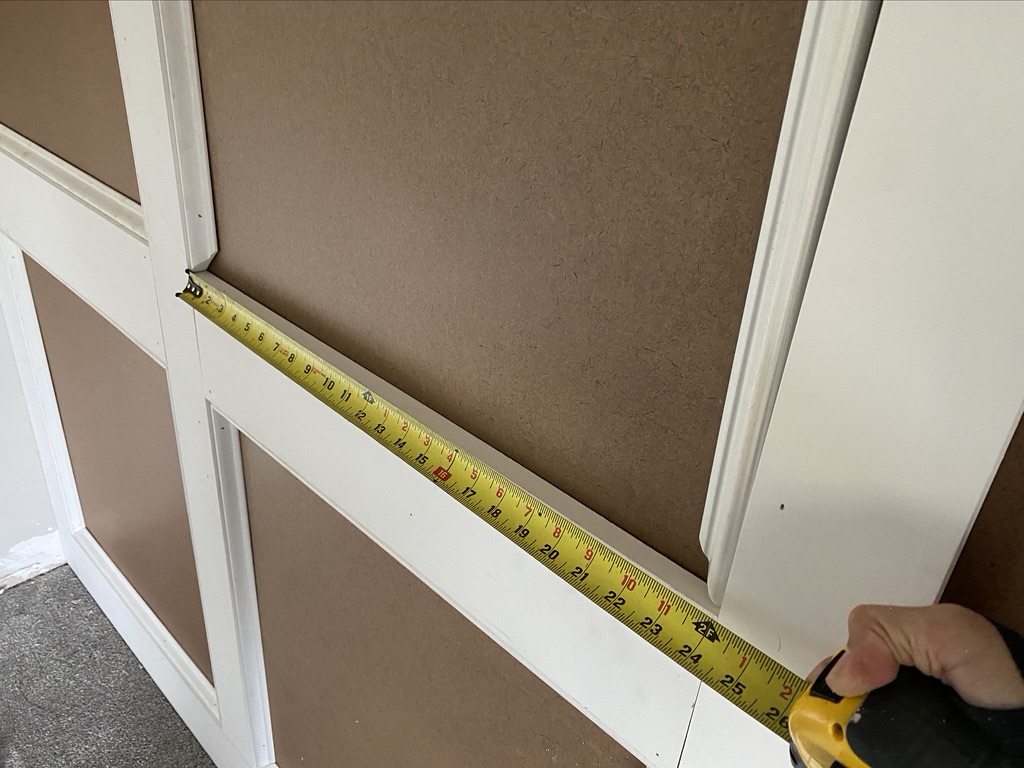
Once all of the MDF boards are installed we are ready to add the battens (1×4″ & 1×6″ boards). To begin, measure the wall length (take measurements for both ceiling and floor measurements.) In a perfect world, where all the contractors build rooms square this would not be necessary. Alas we do not live in such a world, so take the time to measure both.
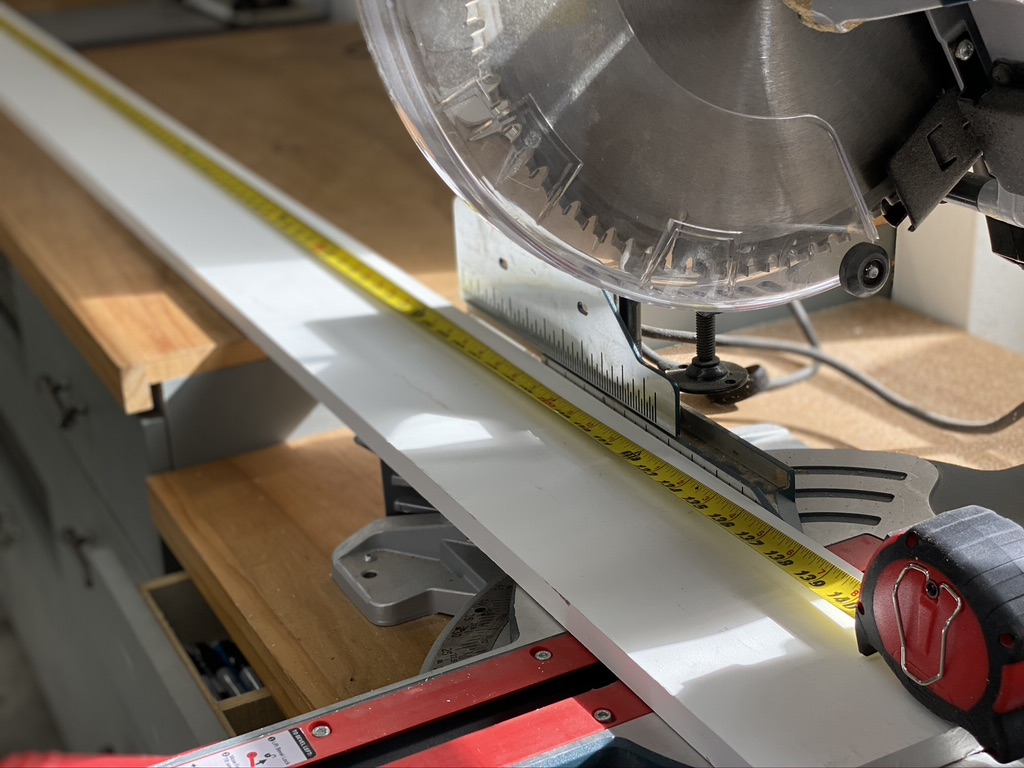
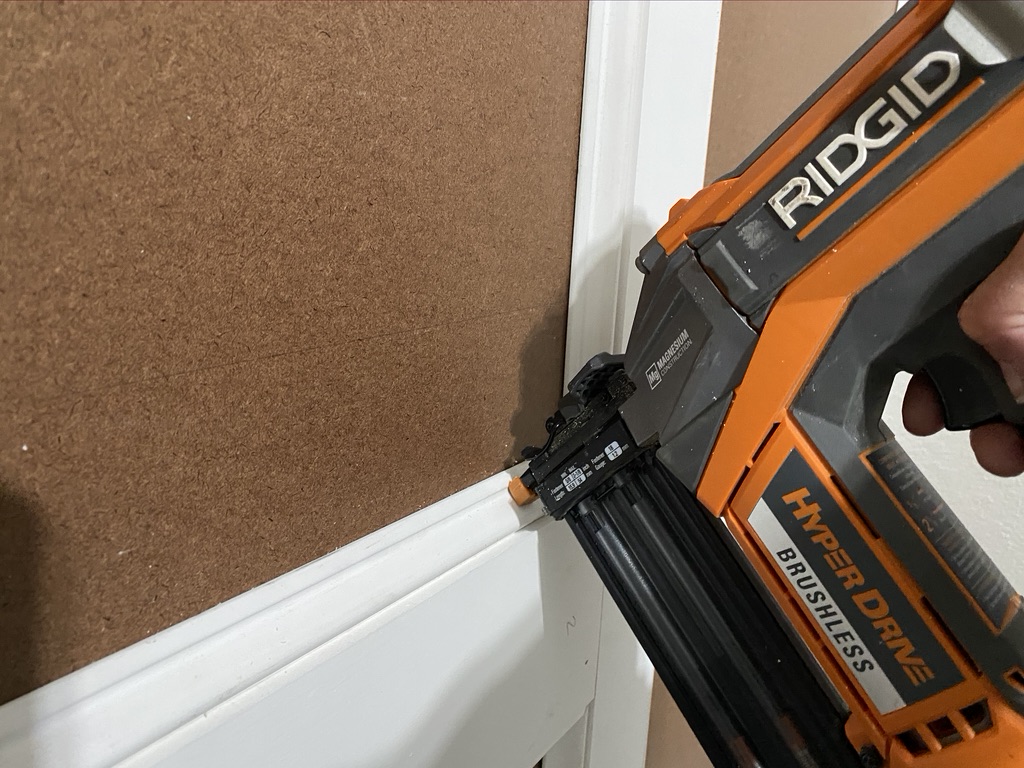
I opted to use 1×6″ boards as the baseboard and the top trim piece. Once both pieces are measured, marked and cut, install using 2″ finish nails.
Cut and Install Vertical Battens
It’s time to hide the MDF panel seams! Again take the time to measure each board individually. (Odds are that each opening has some slight discrepancies.)
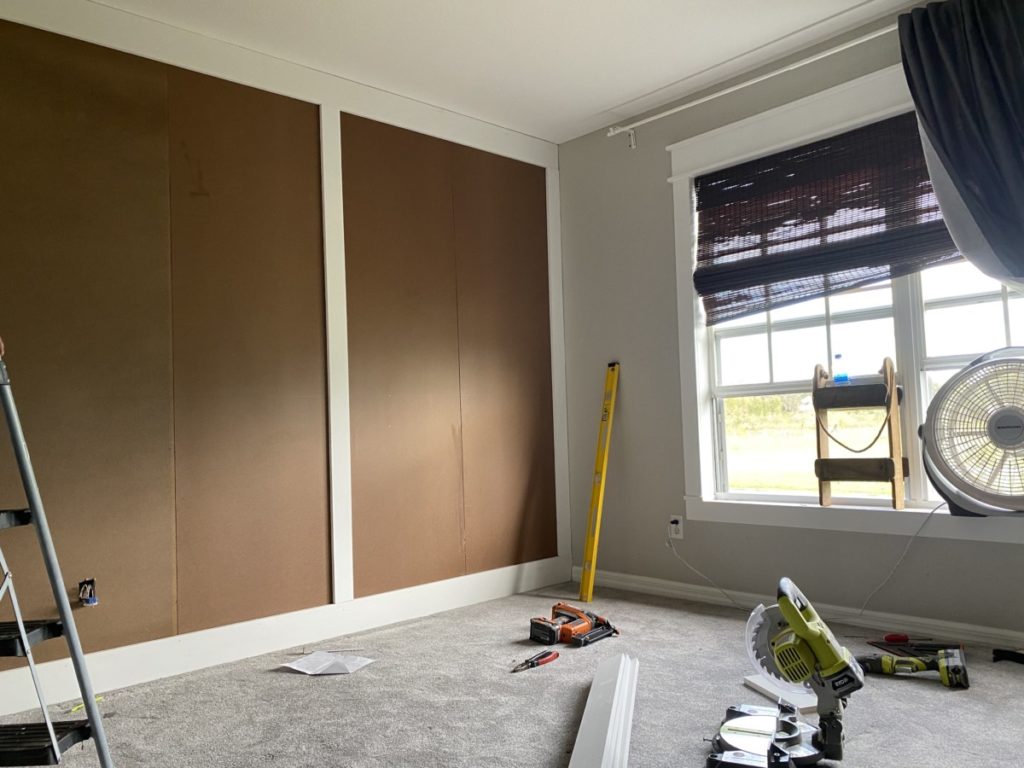
As you install each vertical batten ensure that they are straight by enlisting the use of a level. Once they are correctly positioned (using your previously drafted plan) and level, shoot them in place using 2″ finish nails.
Install Horizontal Batten Boards
If desired add additional horizontal boards. Again, always measure each opening and use a level when installing.
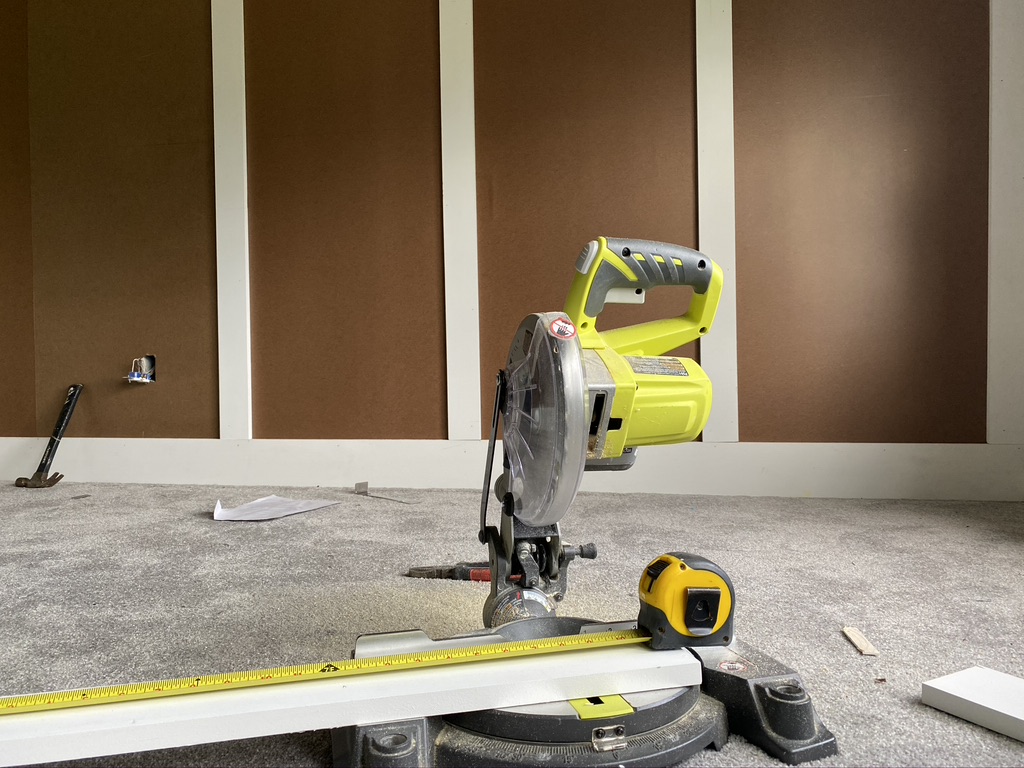
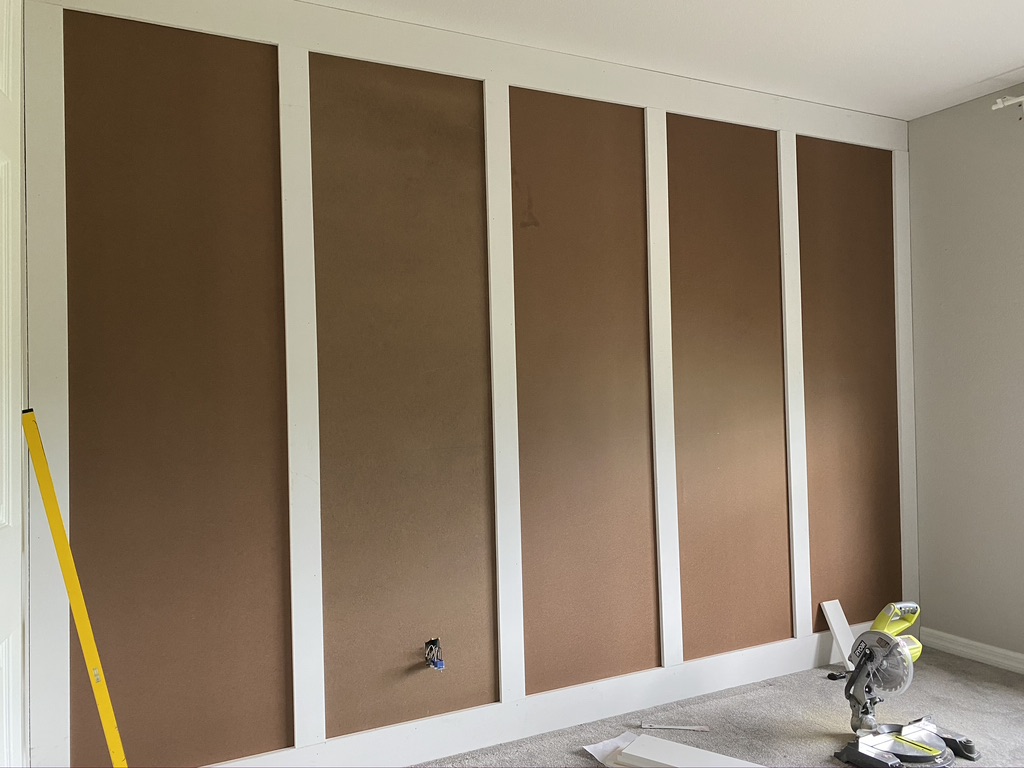
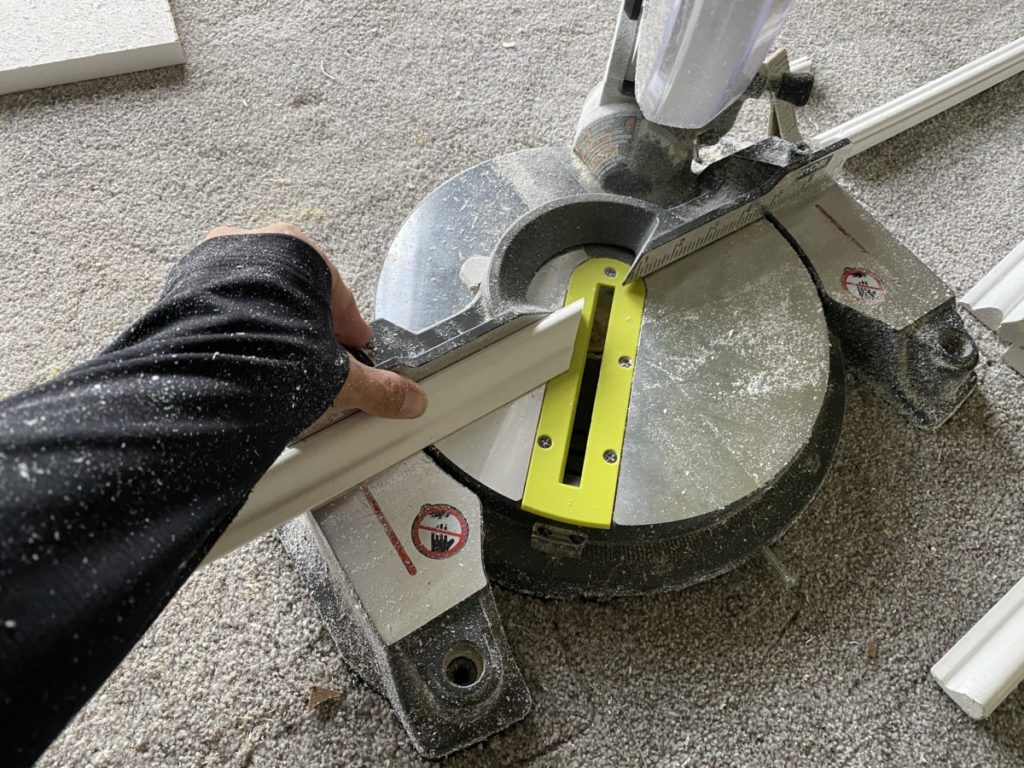
Add Decorative Trim
Remember when I said I wanted to “oodles of character”? Well my DIY friends, this is what an “oodle” worth of character looks like: 40 additional pieces of trim. I decided to add base cap moulding to the interior of all of my battens.
The process for installing the interior trim is very similar to the previous steps. Measure, cut install. The only major difference in this step is that we will be cutting our trim pieces on a 45 degree angle. By doing so it will create beautiful mitered corners.
Caulk and Fill
We are getting so close to the fun part, just hang with me for one more final step before we bust out the paint brushes! Take a few minutes to run through and fill any nails holes of gaps with a wood filler. (Before painting, you will want to sand off the excess filler with a sanding block. The filler will need to be completely dry before attempting to sand. So while waiting for the filler to dry we will move on to the next step.
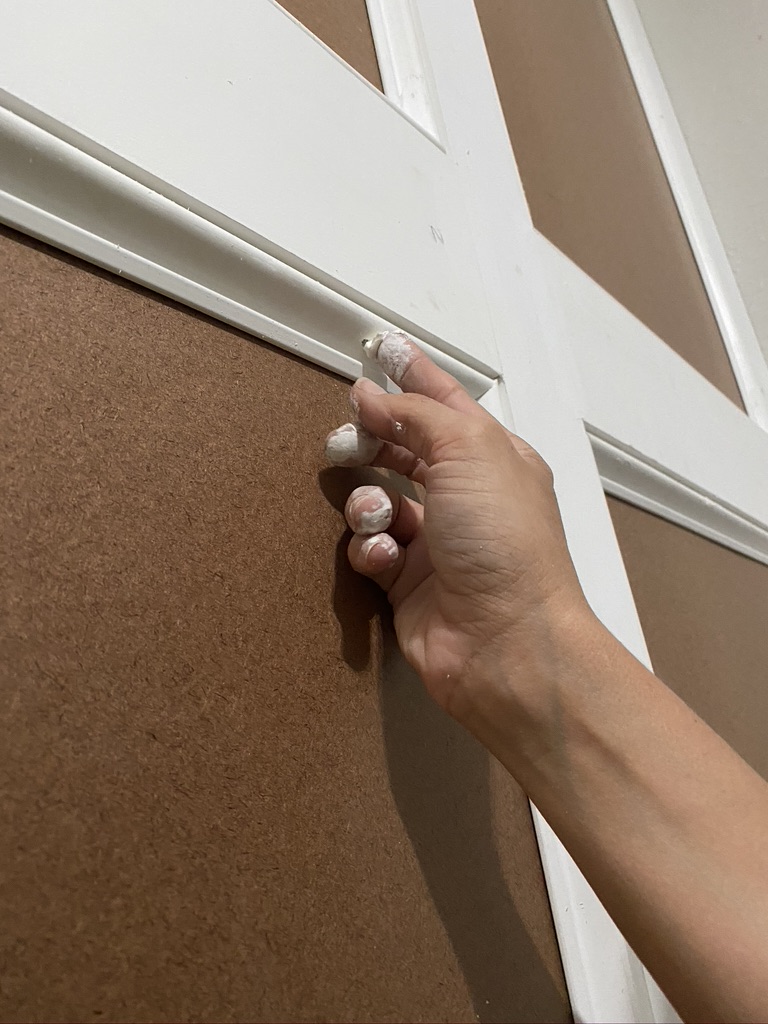
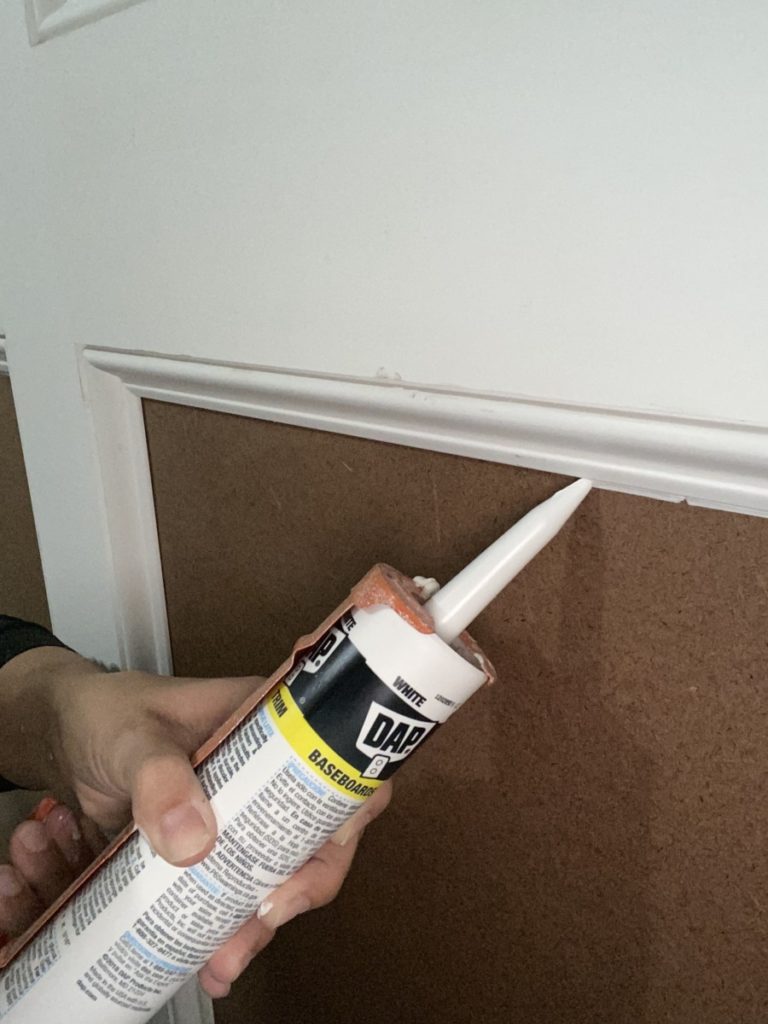
Almost there, we almost get to paint I promise! Last thing needed is a little bit of caulk. In order to achieve a gorgeous end product we need to add a small bead of caulk to the interior of the edge cap moulding. This will hide any unsightly gaps.
While the caulk is drying get ready for the most rewarding part of this project. Priming and painting!
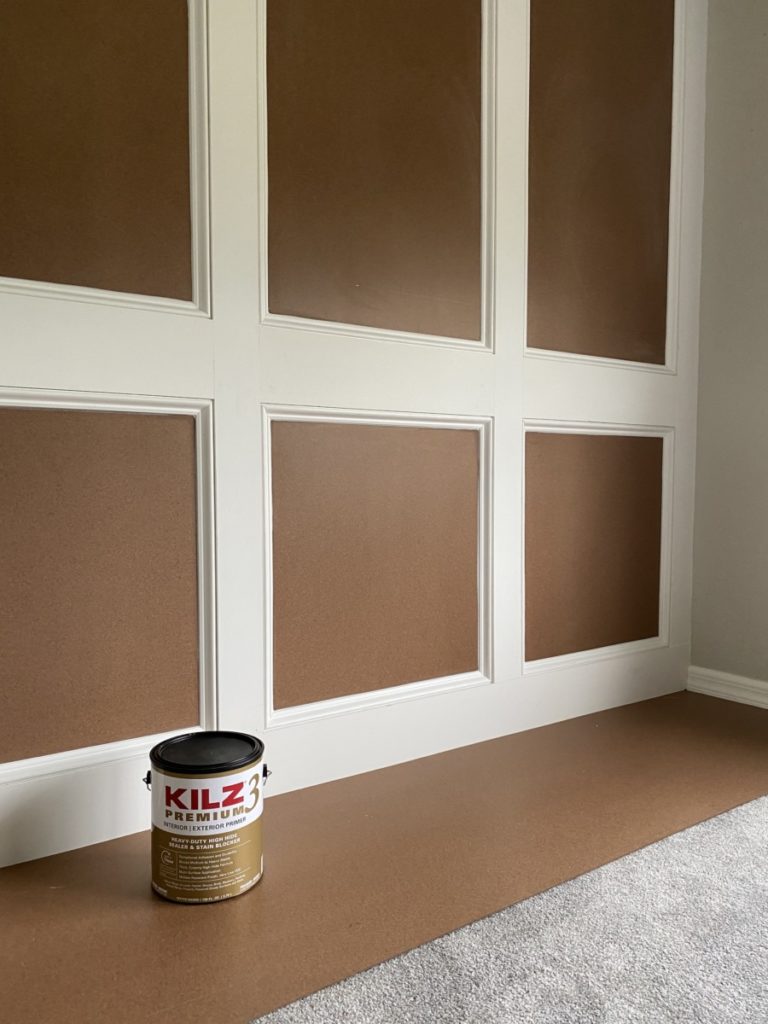
Priming
Are you guys excited? I am excited! Before we start painting we are going to take one very important step to ensure our end product turns out beautiful and stays looking that way! While MDF board is a great cost effective product, it can be a little fickle. It has a very smooth and shiny surface, both of which are not ideal for painting… this is where a good primer will be your best friend. It is important that you prime in order to achieve good adhesion of your top coat!
While this is a simple fix, a good Primer like KILZ 3 Premium primer can also help with many different DIY woes. If you have been around for a while you know that KILZ saved me when renovating my camper. It adhered to my cabinets like a charm, covered water damage, mystery stains, and even got rid of some funky odors. So yes, I am a big advocate for priming!
I suggest using a 2 1/2″ angled brush to apply KILZ 3 Premium primer to cut in all edges and paint all detailing trim. Take extra care to thoroughly paint all PVC trim. PVC trim is another excellent cost effective product but needs some extra help from KILZ primer to ensure proper paint adhesion.
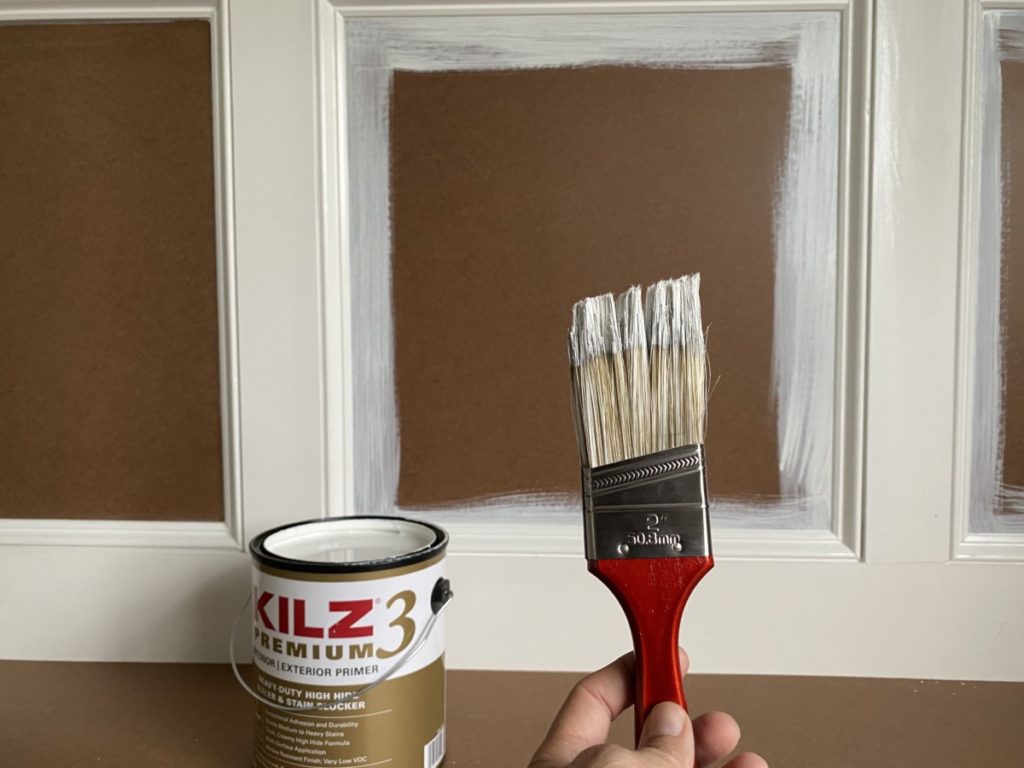
After all edges are cut in and molding painted, it is time to break out the big guns… it is time for a 6″ foam roller. While I am normally a huge advocate for spraying my paint and primer on I was absolutely amazed at how smooth this primer went on with a cheap sponge roller!
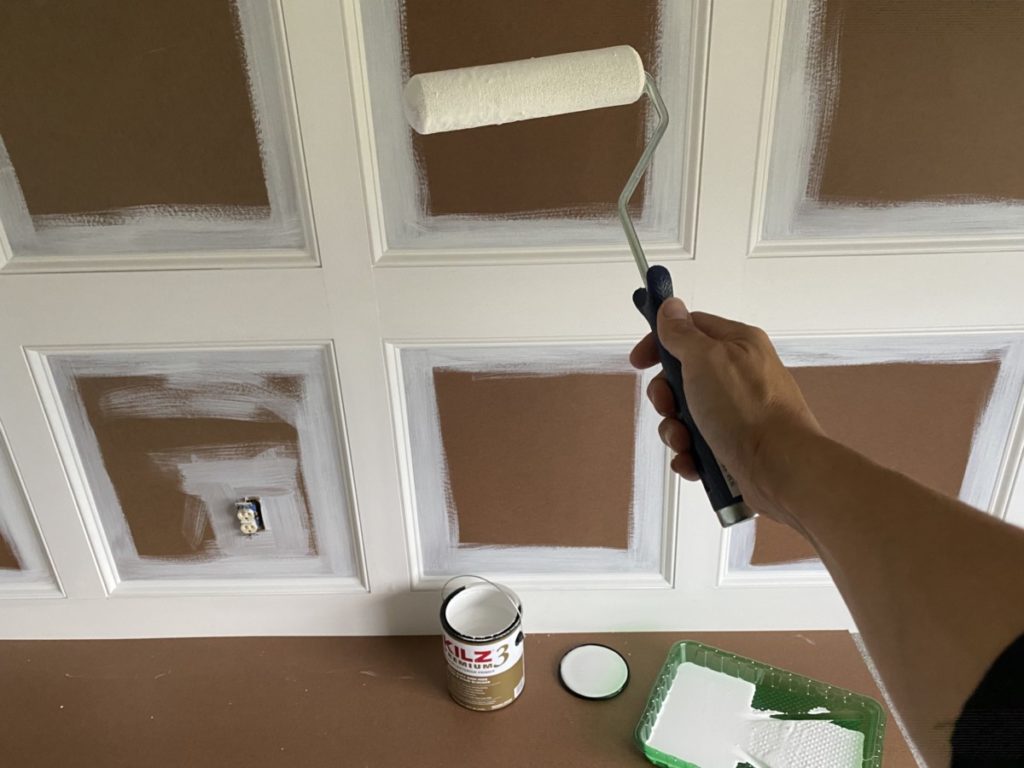
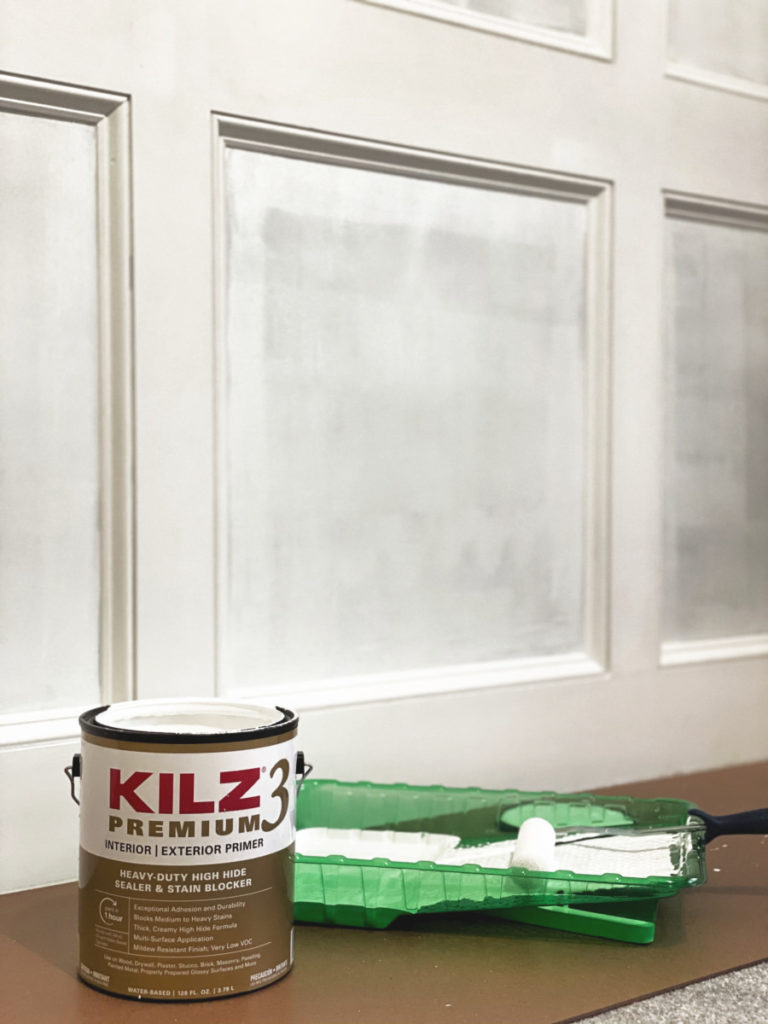
Now we wait… just kidding. KILZ 3 Premium primer is ready to paint in one hour! I cannot even begin to tell you how happy that makes this stir-crazy, impatient DIYer. By the time I had all my paint supplies gathered my primer was dry and ready to top coat!
Paint
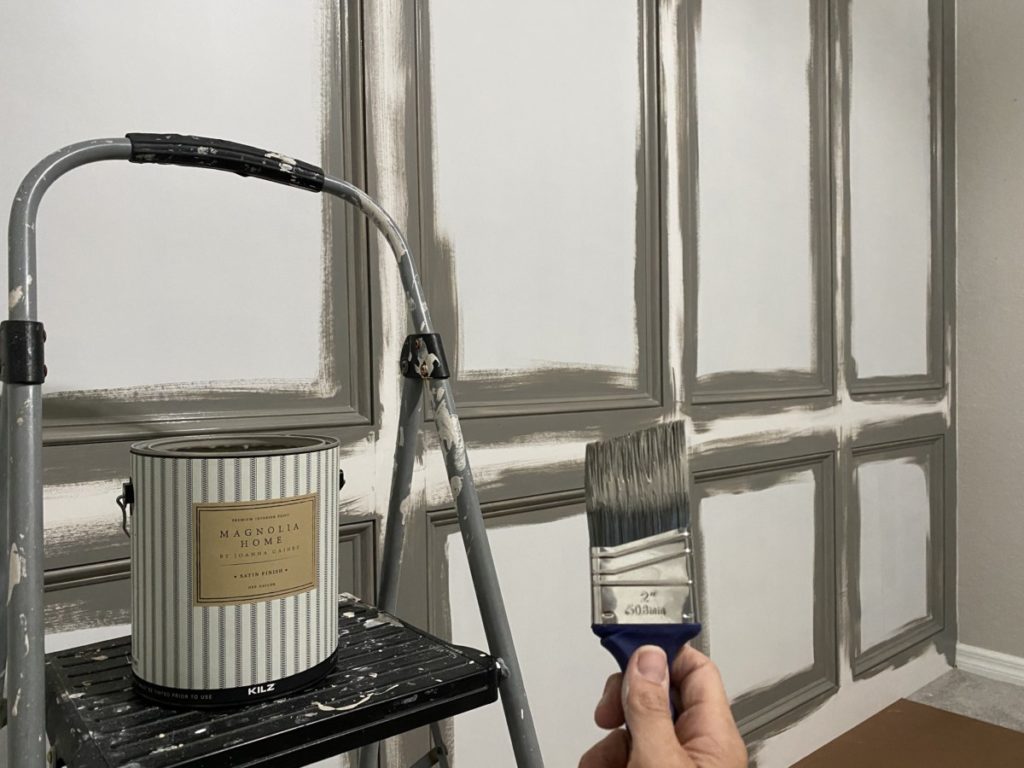
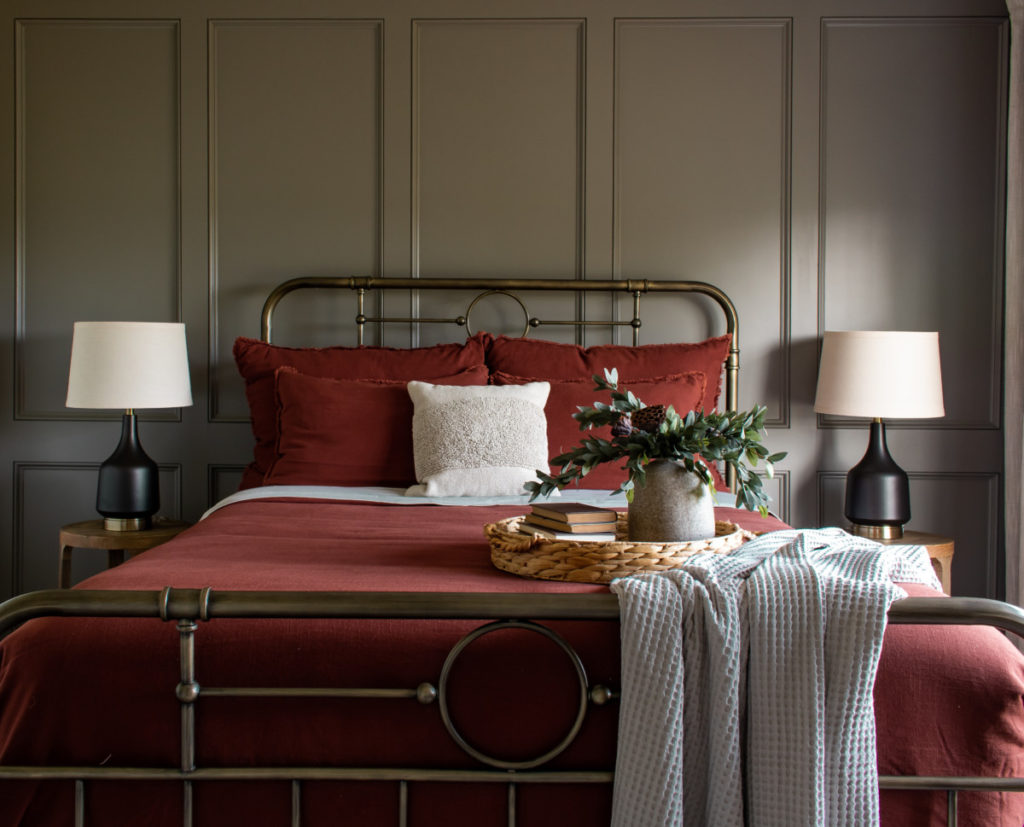
Following the same steps for priming, I applied my topcoat. As I mentioned at the very beginning of this project I wanted something a little dark and moody. I didn’t want it to feel like a cave, but I wanted a moody feel. After scouring the internet for inspiration I found my muse. Magnolia Home by Joanna Gaines paint to the rescue!
Browse All Magnolia Home colors Here
I mean how can you go wrong when you combine KILZ quality with Joanna Gaines color selection!? I was torn between several colors but ultimately decided on the color “Before & After” from the Magnolia Home by Joanna Gaines paint line.
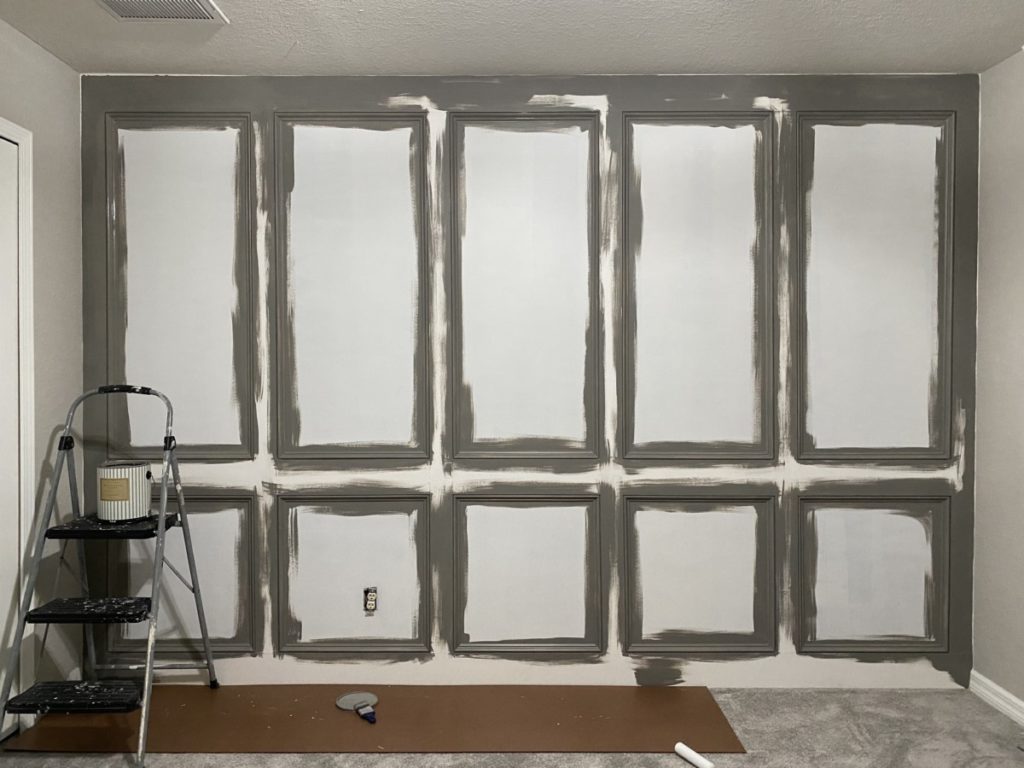
Just look at this color !? It takes this beautiful accent wall to an entirely new level! I will admit, this is my first time using this particular paint and I am SOLD! It went on buttery smooth. I honestly didn’t think it was possible to get this smooth of a finish unless you used a sprayer. The Magnolia Home paint went on perfectly and covered beautifully. I cannot wait to try more colors throughout my home!

This room is absolutely transformed and I give full credit to this accent wall! Go ahead, try and imagine this room without that wall. It’s amazing how just one wall can change the entire feel of a room.
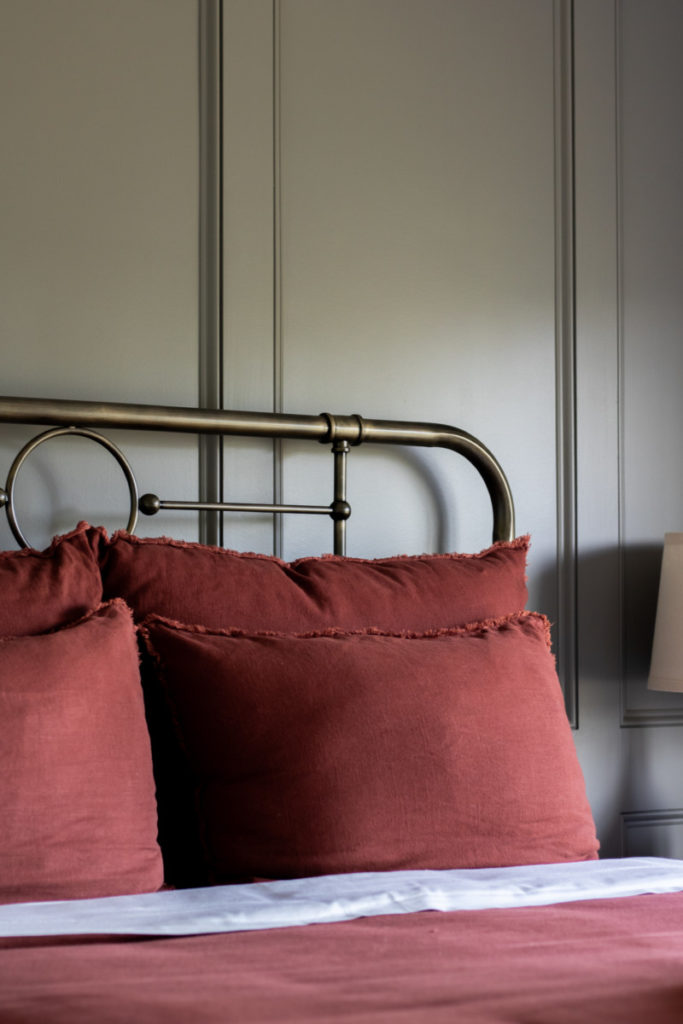
- Paint- Magnolia Home by Joanna Gaines paint in “Before & After”
- Brass Bed- Amazon
- Clay Bedding-Target
- Bed Skirt- Amazon
- Light Fixture-Amazon
- Throw- HomeGoods
- Night Stand- Target
- Rug- Amazon
- Curtains-HomeGoods
- Seagrass Tray- Target


Hi
Could you tell me the name of the bed you got from Amazon? Love everything you do !!
Thanks
Emmy
melaenis1@gmail.com
Outstanding vision and execution as usual. Looks awesome.
A home run as usual! Gorgeous wall and terrific instructions.
GORGEOUS!
Stunning, love it! Gonna have to try that color for sure.
Beautiful room! You have inspired me!
I was going (still am) to do something similar. My walls are solid masonry, so I have to use masonry fixings to attach the panels. Thank you for the detailed instructions!
Another thing I would do differently would be to prime and paint the panels before attaching the trim.