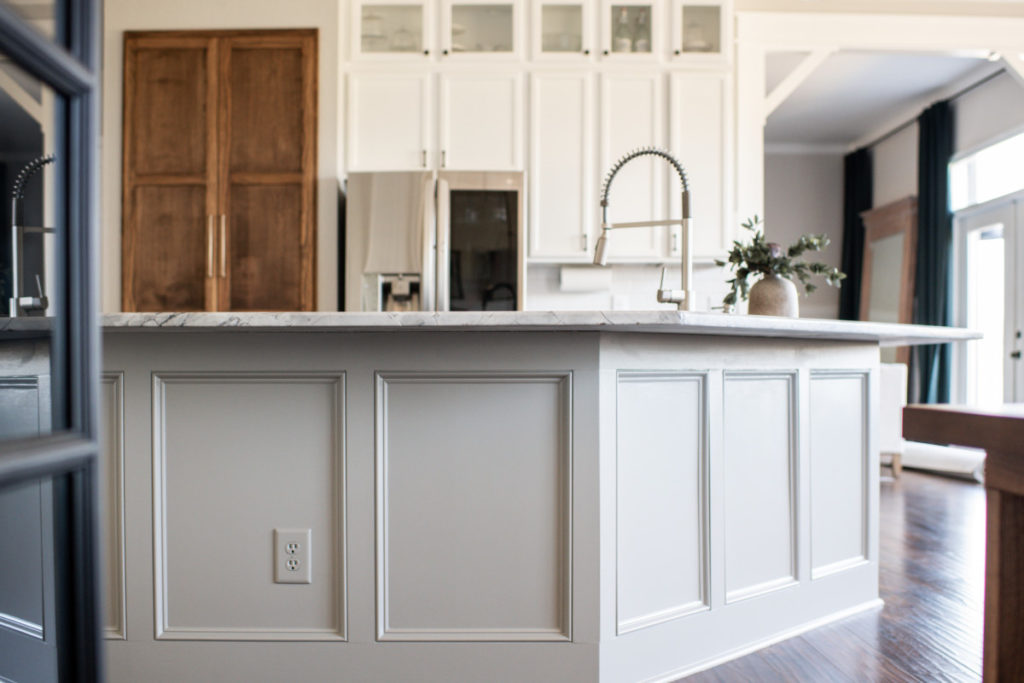
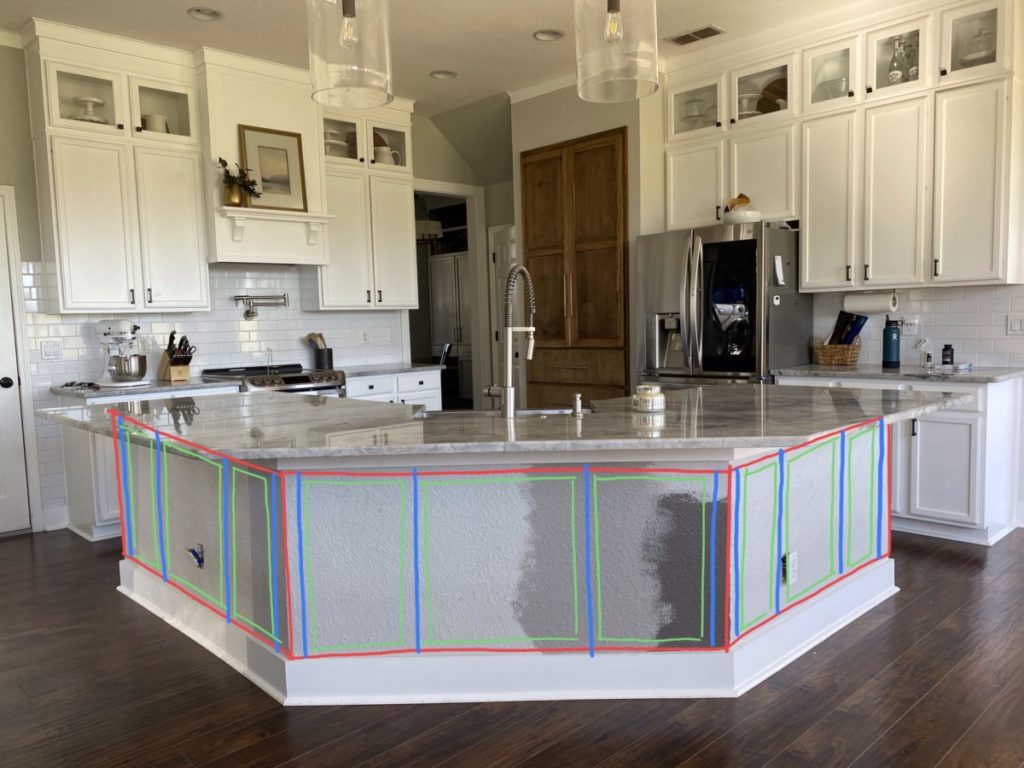
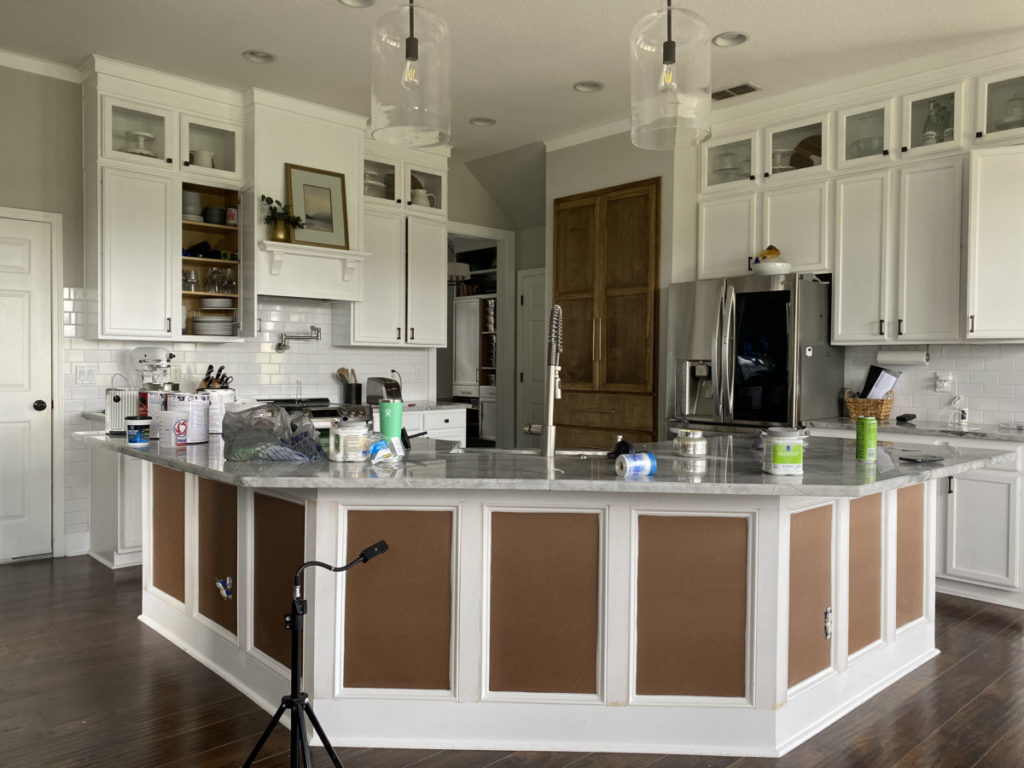
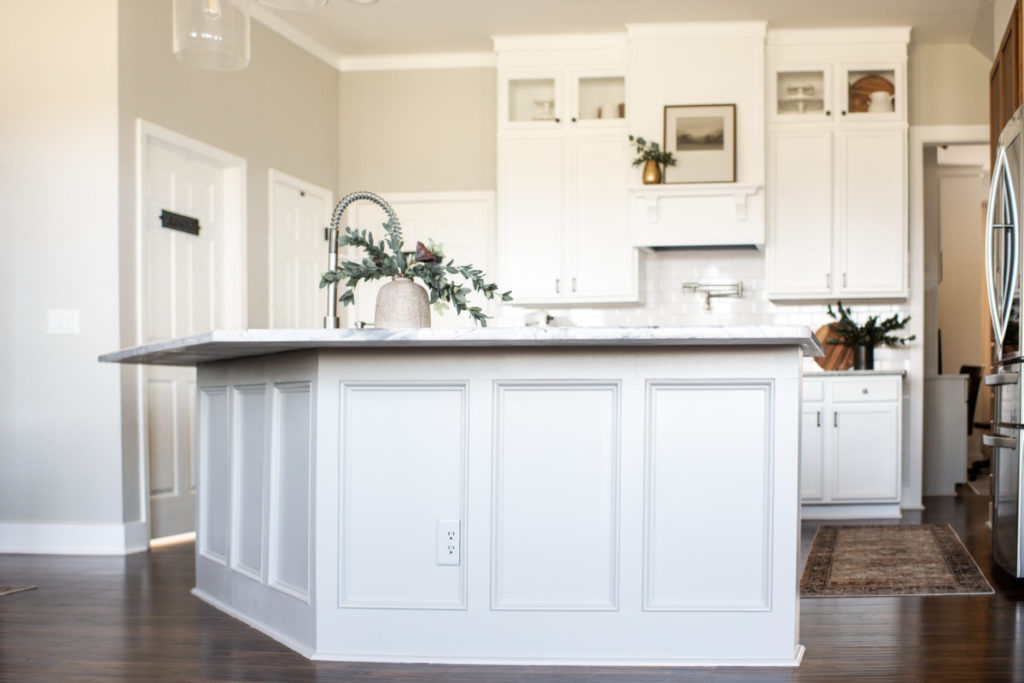
As we have slowly transitioned our builder grade home into a custom masterpiece there has been one kitchen project that has been left on the table. The island. I think it stayed on the bottom of the “to-do que” because I felt like it wasn’t really visible. It was an afterthought. Boy was I wrong, after completing this project I can testify that something small and “less visible” can make a HUGE impact on the aesthetics of a space. Today I am going to show you how I took a builder grade drywall island into a designer asset.
Tools Suggested:
- Utility Knife
- Pry Bar/Flat Bar
- Hammer
- Tape Measure
- Tablesaw / Circular Saw
- 18g or 16g nailer
- 1/4″ drill bit
- Drill
- Jigsaw
- builders square
- Miter Saw
- Level
Materials Used:
- DAP DynaGrip Adhesive
- 1 1/2″ finish nails
- 1/8″ MDF Panels
- 1×6″ Primed Finger Boards
- 1×4″ Primed Finger Boards
- PVC Base Cap Moulding
- DAP AlexPlus Paintable Caulk
- DAP Plastic Wood Filler or Spackling
- Paintable Caulk
- 2 1/2″ Angled Paint Brush
- 6″ Foam Roller(s)
- Paint Tray(s)
Cut Panels

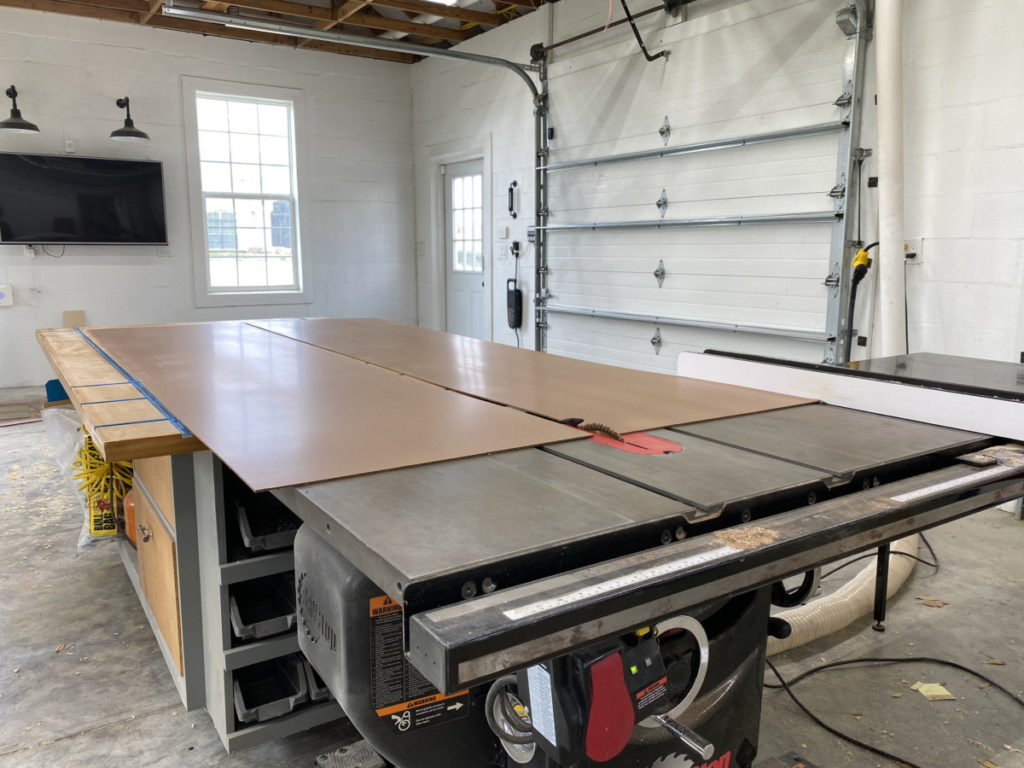
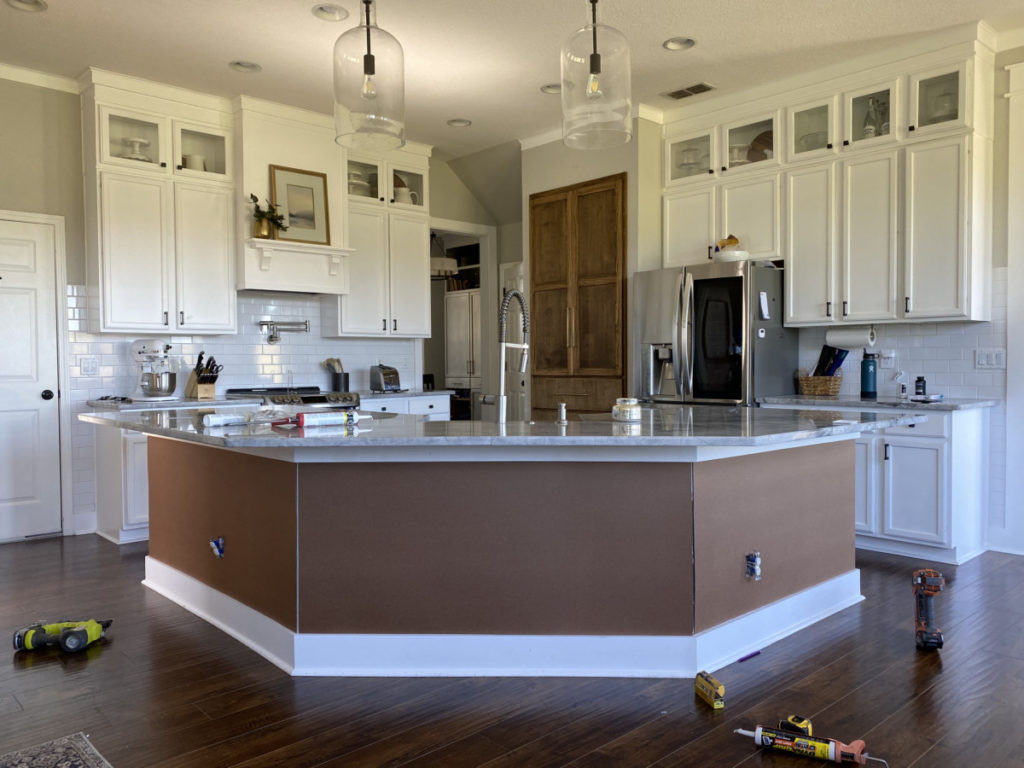
After the planning phase is complete it is time to apply the boards (1/8″ MDF panels). In many cases you may choose to forgo this step. I have seen plenty of DIY bloggers attach their batten directly on top of drywall. I choose to take this extra step because of the texture of my drywall. My home has VERY HEAVY knock-down texture. My vision for this accent wall did not include a “HEAVY knock-down texture”.
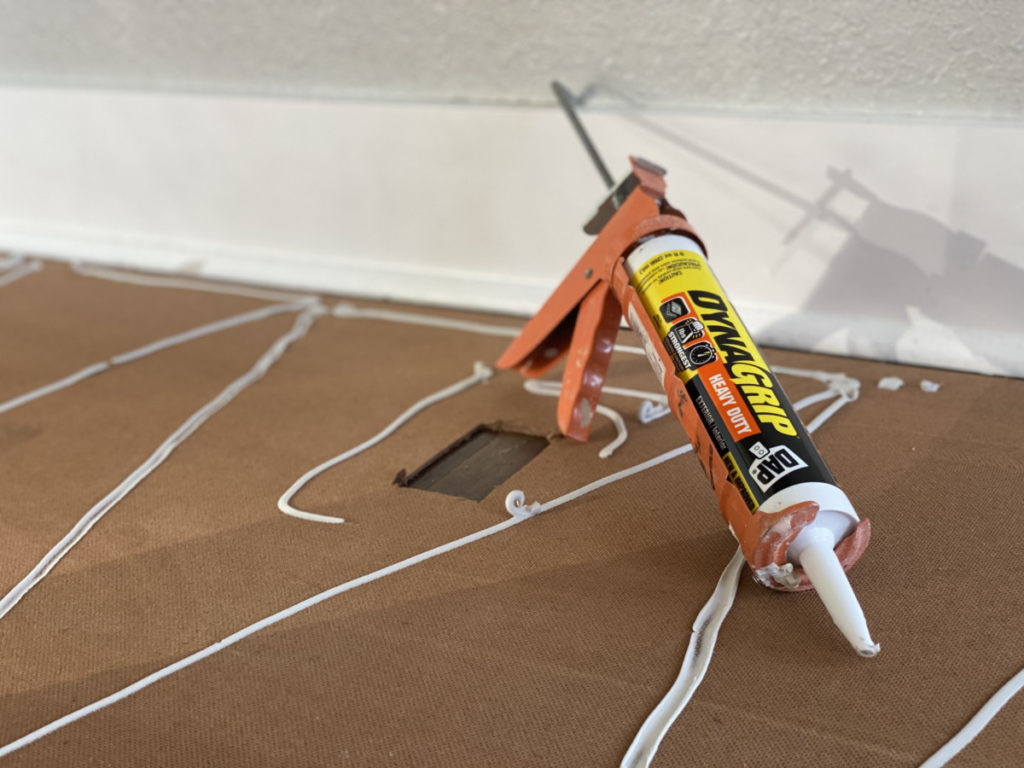
Adhere Panels
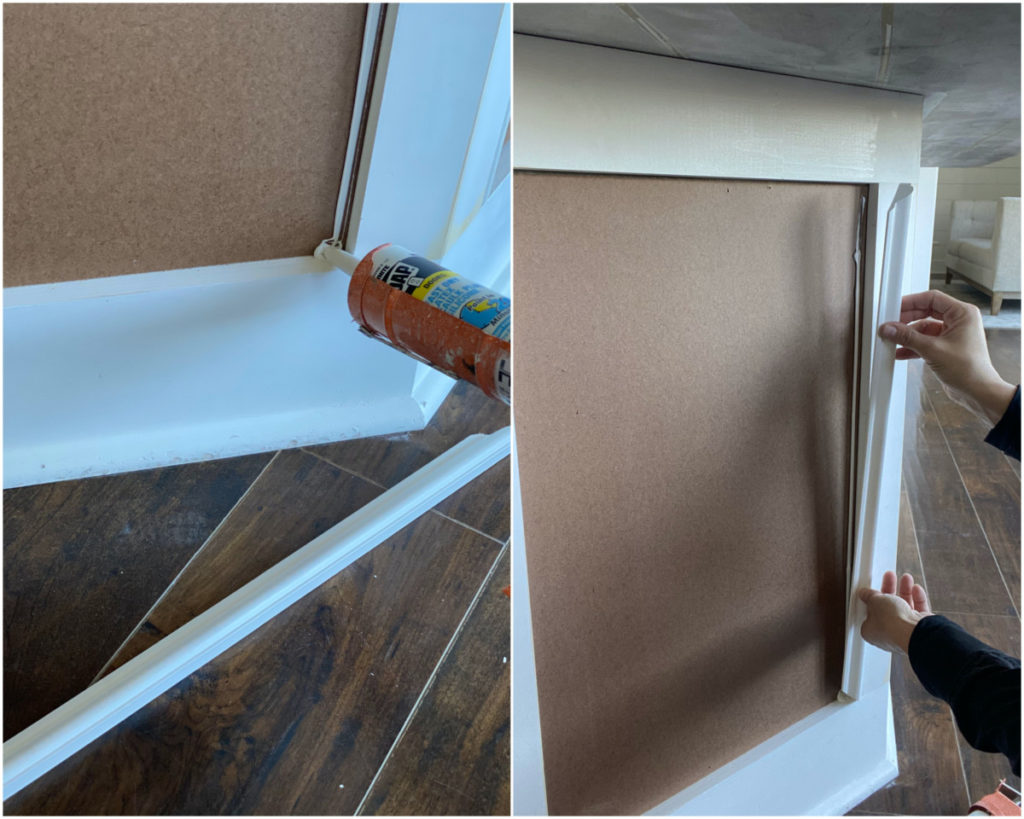
Before attaching the panels to the bare wall, liberally apply. DAP DynaGrip adhesive to the back of each panel. This adhesive gives instant adhesion but still allows for repositioning. It basically. is a second set of hands when installing panelling, and it is awesome!
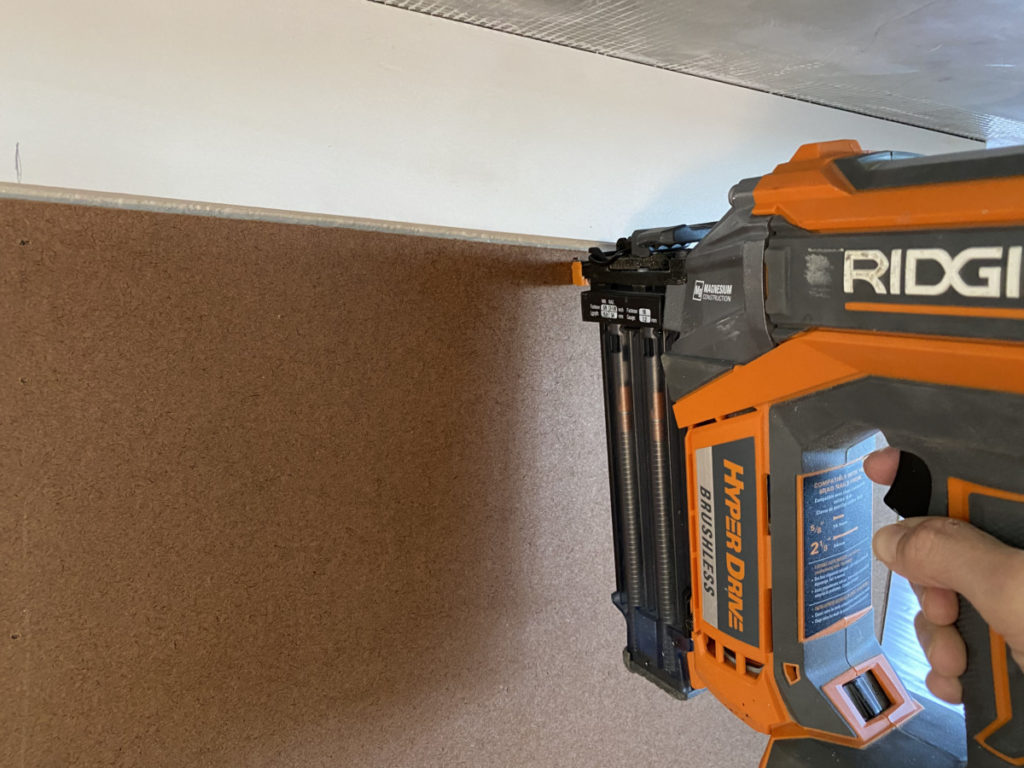
For additional security I use a 16g or 18g nailer to essentially clamp my board in place while the DynaGrip cures .When securing the panel to the wall I would advise only nailing along the edges. If you nail along the edges all the nail holes will be hidden by battens/trim.
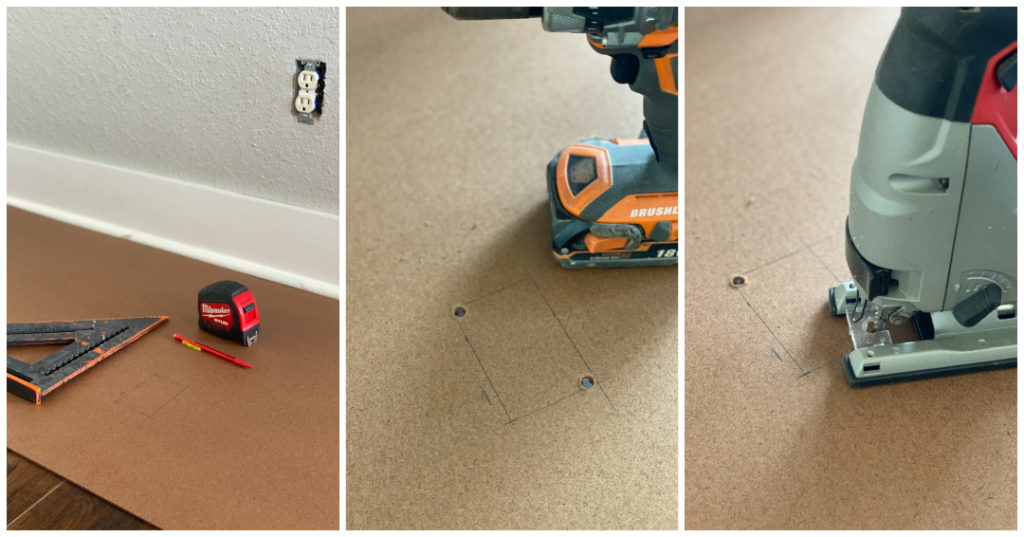
Cut Out Outlets
The process of installing paneling is fairly simple. The most complicated part of this step is accommodating outlets. Before you start breathing heavily into a paper bag, grab your tape measure, you are going to need it! Honestly, this is not hard at all. Simply take the measurements of where the outlet would land on your paneling, and then cut it out. Use a tape measure to transfer where the intended outlet will be. Then using a jigsaw cut a space for the outlet.
Prep Battens
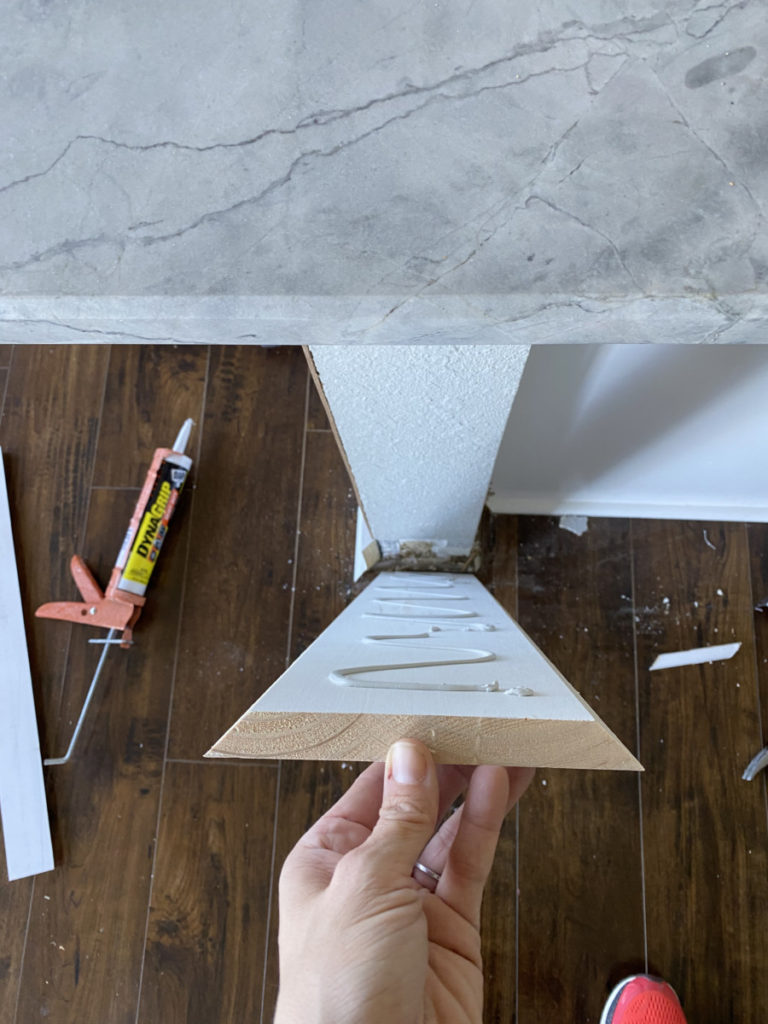
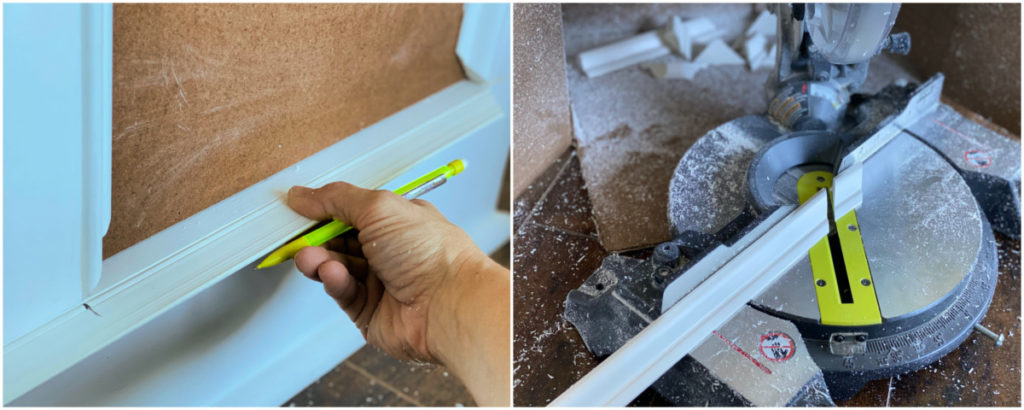
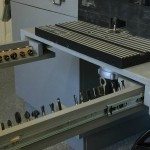
OK, here is where this project gets a little interesting. As I stated before, my plan is to use my existing baseboards… well that creates a small problem, actually about 1/8th” problem. As you can see demonstrated in the first image below. When I put down my MDF paneling it raised my work surface 1/8th”. Because the paneling does not run below my baseboards my batten boards will be 1/8th” higher profile.
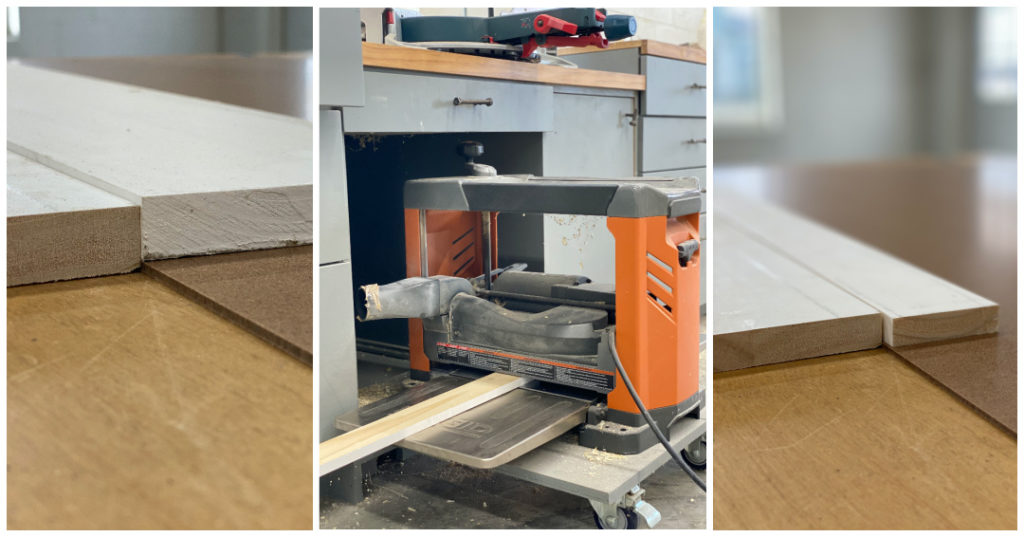
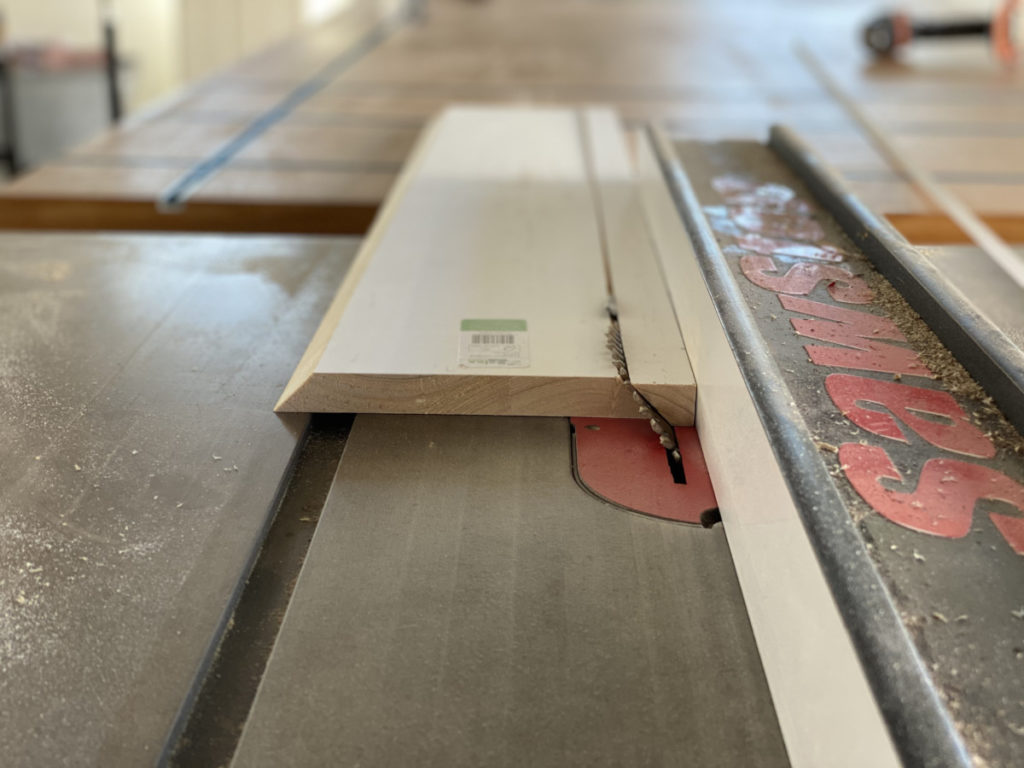
This can be circumnavigated by removing your baseboards and applying paneling first. However, I have a plan that would work easier for me…The answer? My planer. I just sent the battens through my planer and shaved an 1/8th off my 1×3 boards order to make my battens and baseboards sit at the right elevation.
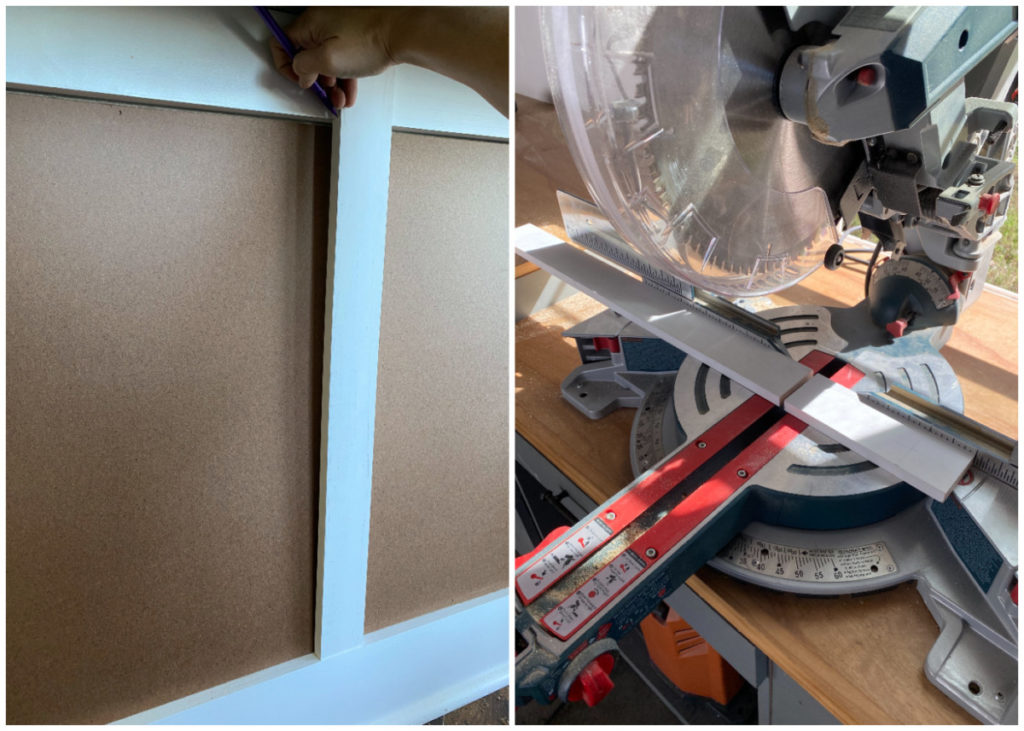
Cut Battens
Take the time to measure each board individually. (Odds are that each opening has some slight discrepancies.) Truth be told, I like to cut to fit, meaning I mark my board in place and then cut.
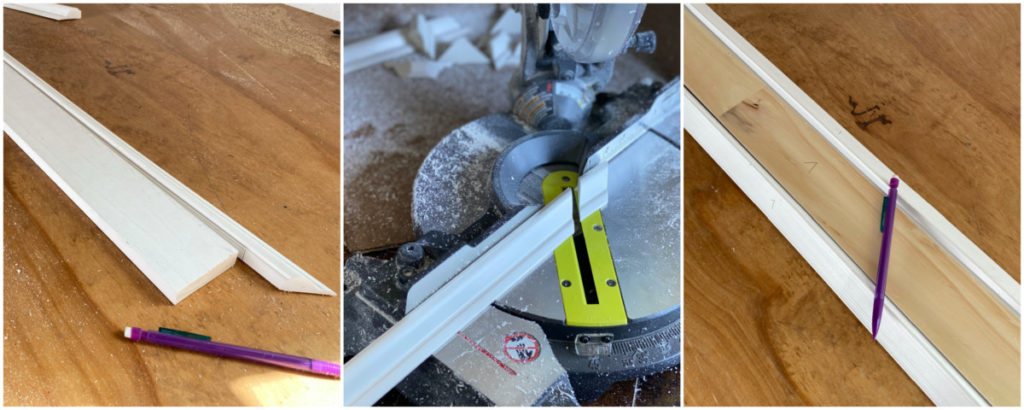
Cut Interior Trim Pieces
After completing a few trim projects in my day I have learned a few tricks and this is one that I love. I plan to add interior trim to the battens. Instead of cutting all the battens, installing, and then taking the interior measurements to cut the trim pieces, I work smarter not harder. After I cut the batten (& make sure it fits properly) I then cut the trim pieces that will (eventually) be installed on either side of the batten. I will not install these trim pieces until later on, so I make sure to label each piece for quick reference later on. Smart right !?
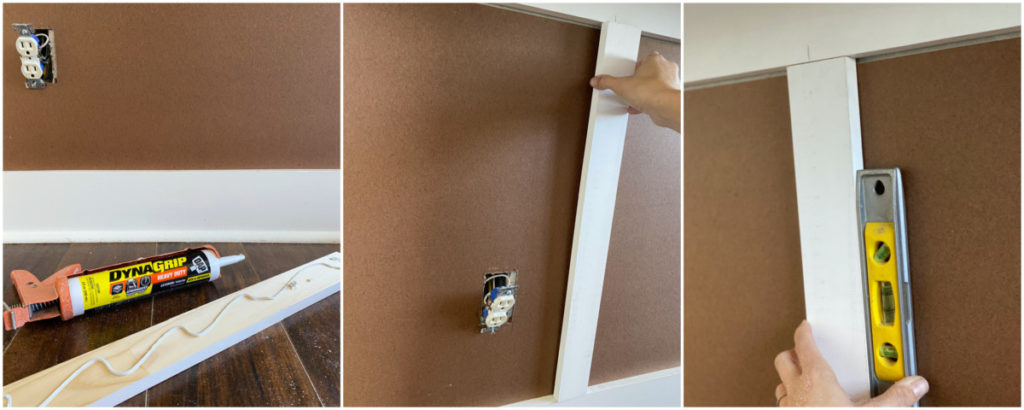
Adhere Battens
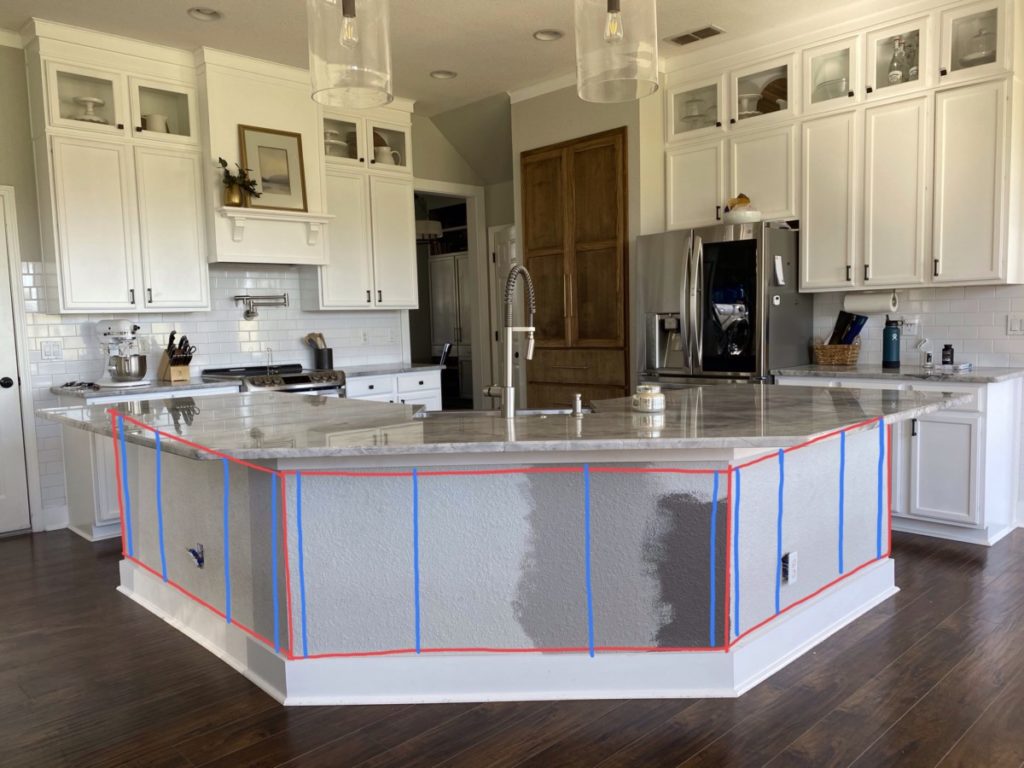
Back to the battens, again I enlisted the help of DynaGrip to install my battens. As I installed each vertical batten I ensured that they were straight by enlisting the use of a level. Once they were correctly positioned (using my previously drafted plan) and level, I nailed them in place using 2″ finish nails.
Corners
My island is not a square or a rectangle and it has a few angles thrown in there. In order to accommodate these angles I needed to use a little bit of middle school geometry. My island has two 45 degree angles, in order to create two boards that meet on a 45 degree angle I needed to divide that in half… which is 22.5. I set my table saw to a 22.5 degree angle and ripped my vertical batten with a 22.5 degree cut on one side. Repeat this step twice for each angle. ( You will need two boards per joint.)

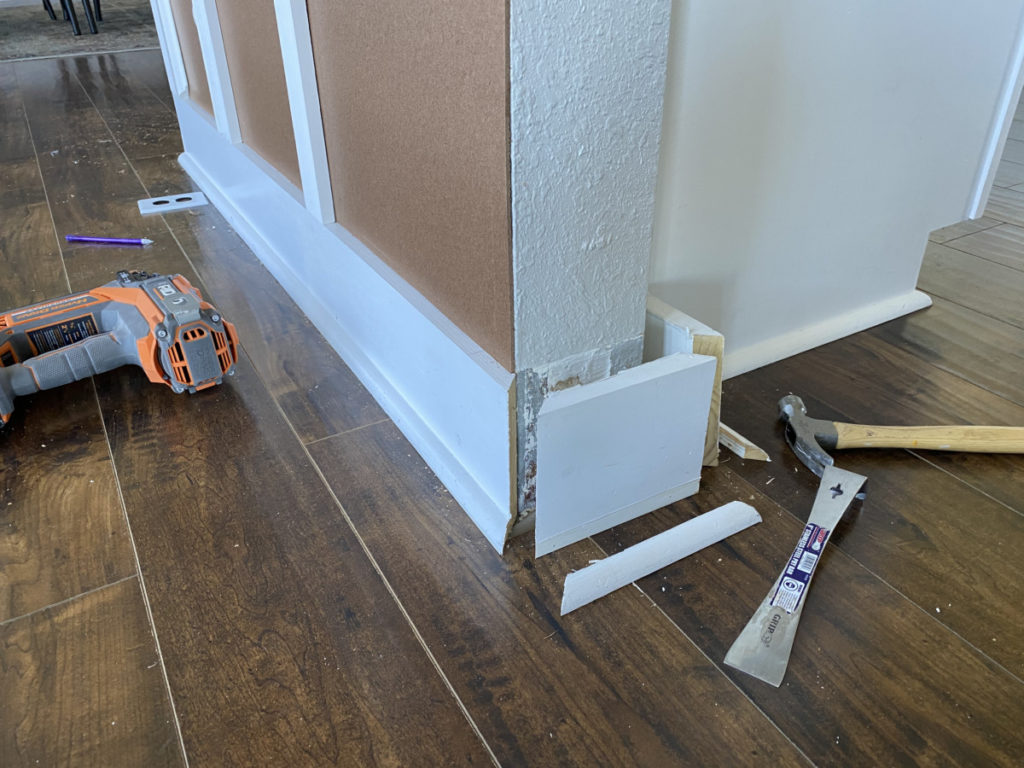
End Posts
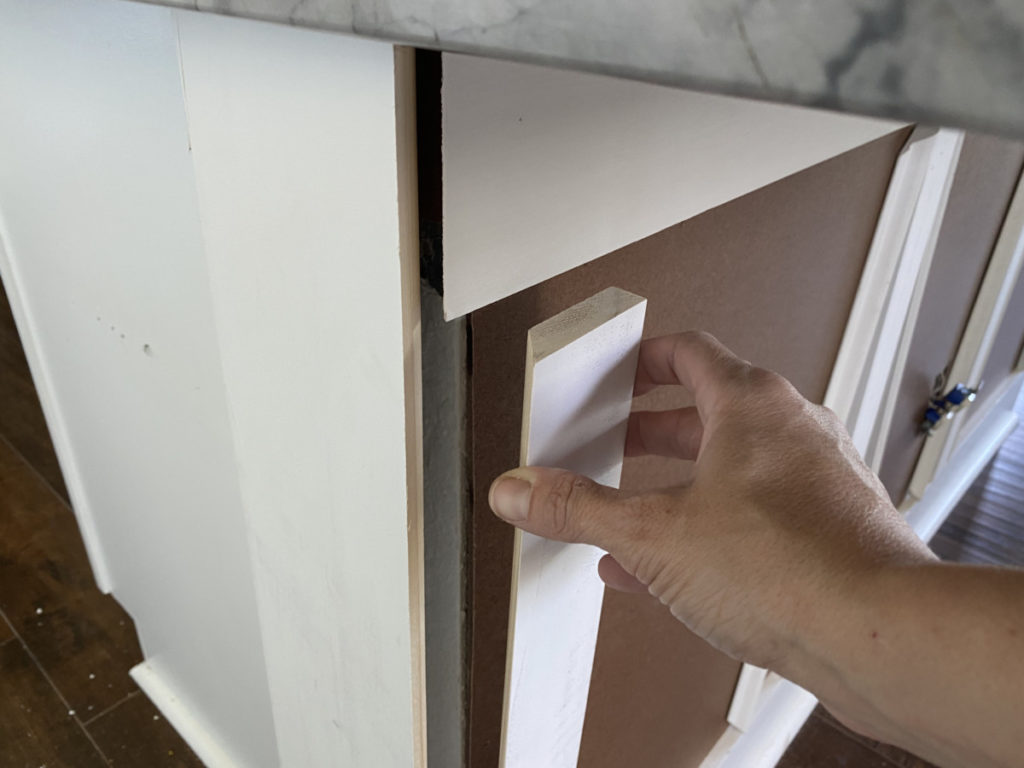
The end posts on my island were probably the trickiest part. My “posts” extend out past my actual cabinets, so I have a weird drywall post. I resolved that the easiest solution would be to wrap the posts in 3/4″ boards so that they would be uniform with my battens. The first thing I needed to do was remove the existing trim .
Much like I did for the angles on my island, I would need to rip (cut the length of) my board with angles on the edges in order to create a mitered corner. See as I am wrapping a rectangle it was comprised of all 90 degree angles… so when creating a joint we know that each board needs to be cut at 45 degree angles.
Again, I ran my board through the tables saw with my first 45 degree cut, I then measured and marked how wide my board needed to be. The goal is to have the inside measurement ( short end to short end, not outside angle to outside angle) be the same width as your post. To create this board I ended up using a 1″x8″ primed board. The length will be determined by the overall height of the island. (Floor to the bottom of the countertop.)
The last step for wrapping the end posts is the sides of the end cap. I wanted to keep the dimensions/style as the rest of my island so I used 1×3″ boards ripped with a 45 degree angle on one edge in order to create a mitered 90 degree angle on both sides.
Attach both end cap and side battens in the same manner the previous battens were installed.
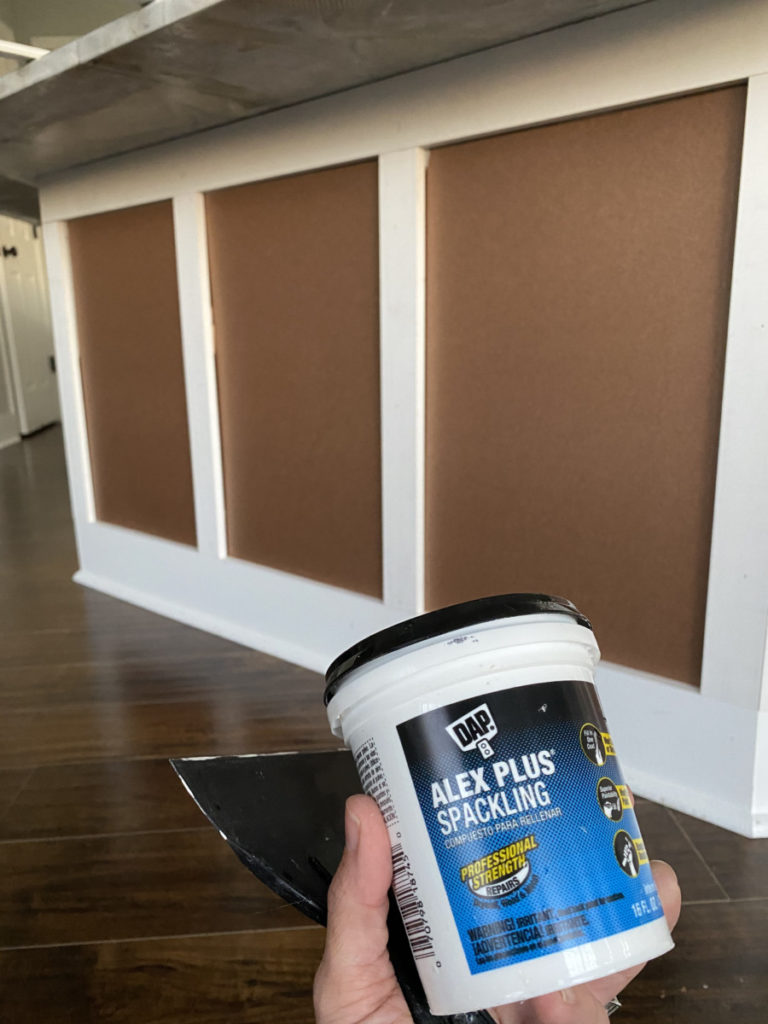
Make Repairs
Typically I wait until all my trim work is complete before patching holes. This project is a little different. You see the trim I plan on adding to the interior has a higher profile than my battens. I wanted to fill the board joints and then use a sneer to create a perfectly flush finish. With the intended trim it would make suing the sander impossible (without damaging and flattening the trim in the process.) SO… that is what I am using a sparkle to fill my joints before the trim work is complete.
Add Interior Trim
The process for installing the interior trim is very similar to the previous steps. Measure, cut install. The only major difference in this step is that we will be cutting our trim pieces on a 45 degree angle. By doing so it will create beautiful mitered corners.
I am using a base cap PVC molding. I like using PVC molding. It is easy to work with, flexible, paintable and affordable. When cutting my trim I err on the long instead of the short side. If it is just a “huh” to long it seems to pop into place and stays snuggly I’m place. That is always my goal with trim. After the initial dry fit I apply caulk to the back of the trim piece and re-install it.
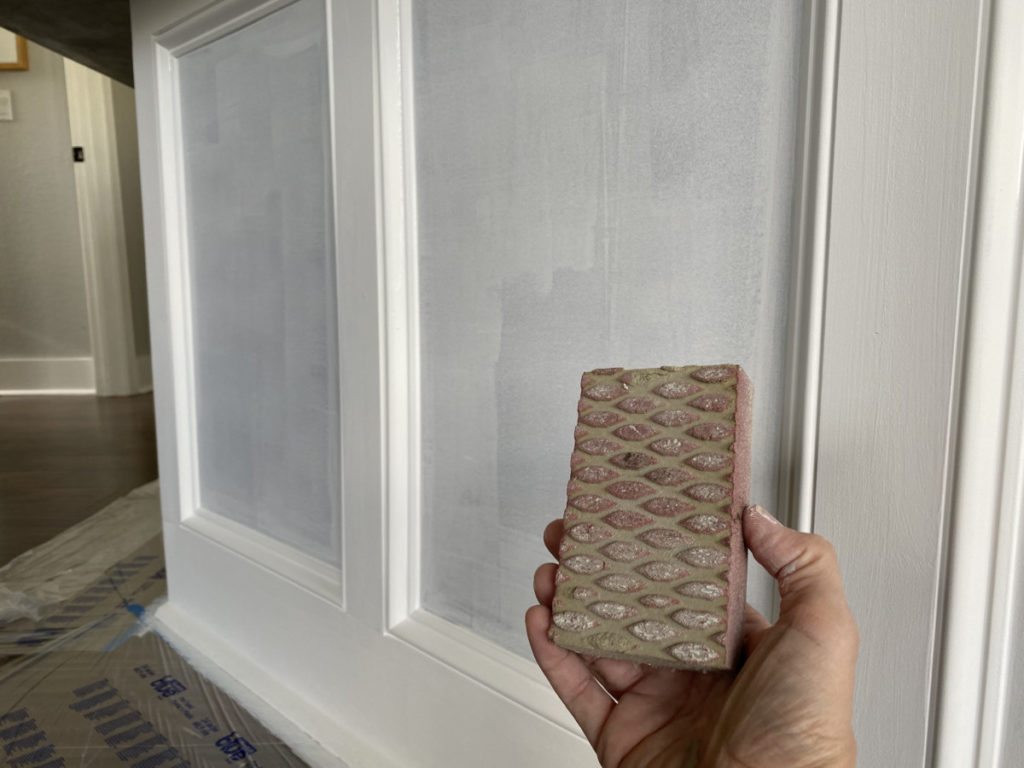
While I did not need to use a nailer to secure them, you can! If you do need to use a nailer take a few minutes to run through and fill any nails holes of gaps with DAP wood filler or DAP spackle. (Before painting, you will want to sand off the excess filler with a sanding block. The filler will need to be completely dry before attempting to sand. So while waiting for the filler to dry we will move on to the next step.
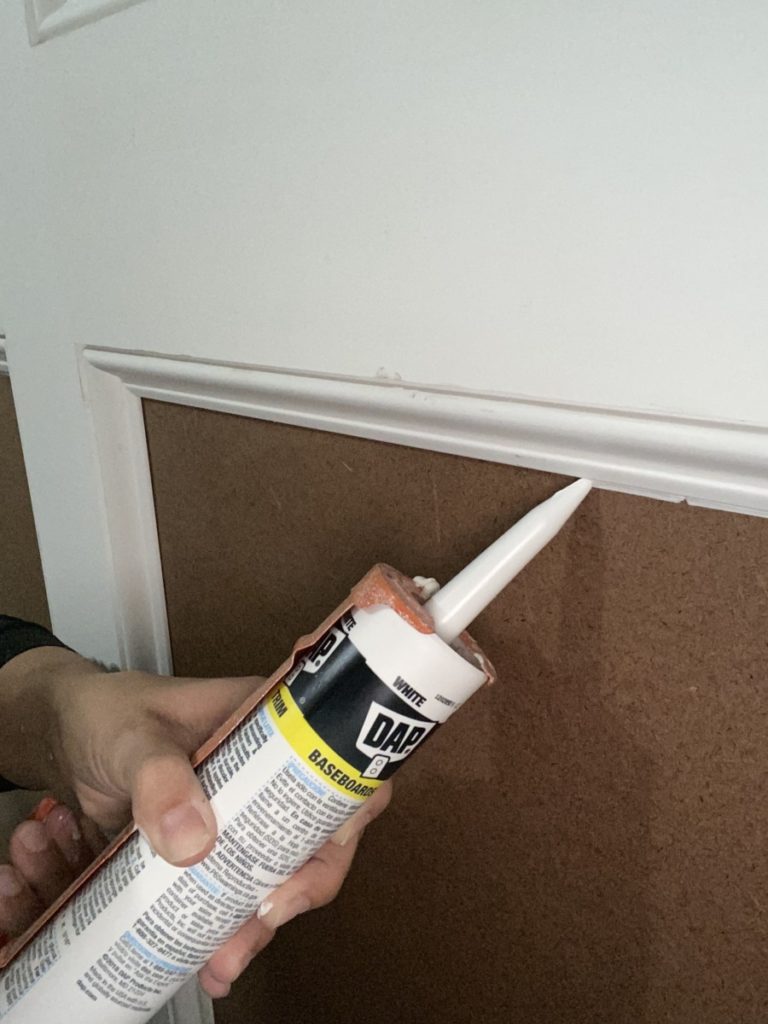
Last thing needed is a little bit of caulk. In order to achieve a gorgeous end product we need to add a small bead of caulk to the interior of the edge cap moulding. This will hide any unsightly gaps. I hands down prefer using DAP Alex Plus caulk. It is easy to work with and dries in 20 minutes allowing me to move on the next step without delay.
Prime, Prep and Paint
Are you guys excited? I am excited! Before we start painting we are going to take one very important step to ensure our end product turns out beautiful and stays looking that way! While MDF board is a great cost effective product, it can be a little fickle. It has a very smooth and shiny surface, both of which are not ideal for painting… this is where a good primer will be your best friend. It is important that you prime in order to achieve good adhesion of your top coat!
If you want more tips and trips for priming and painting board and battens check out my tutorial here: “Moody Board and Batten Room”
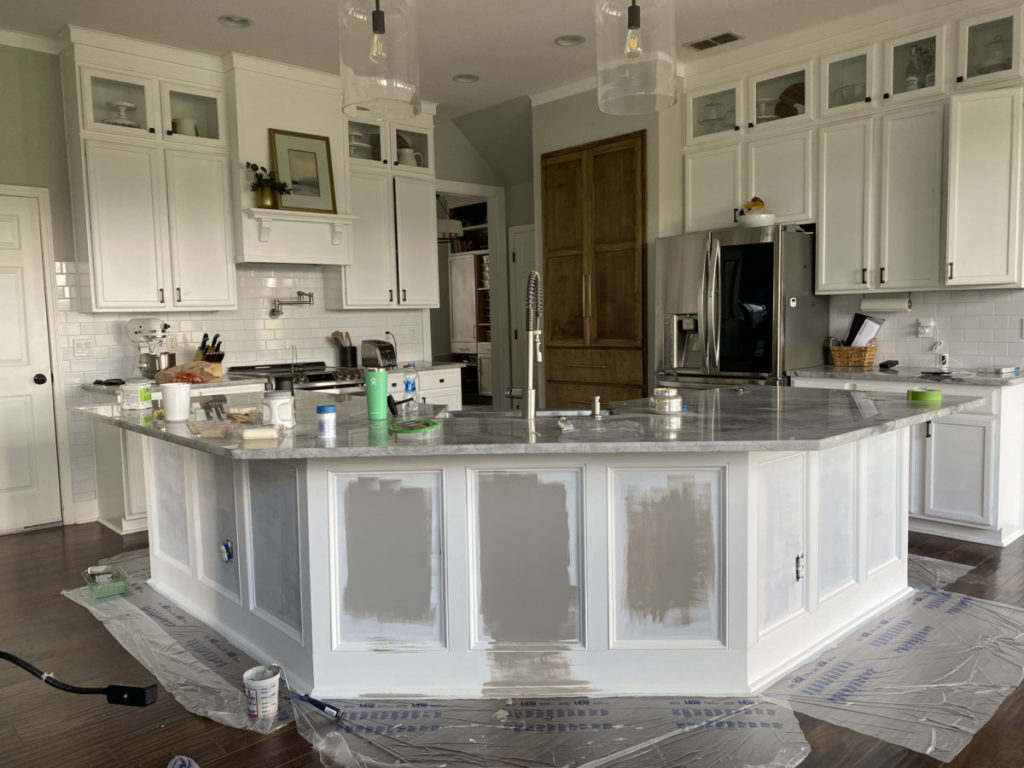
Color Selection:
While I was extremely antsy to apply the top coat I did do a a few test paint swatches. On the far left is “Dorian Gray” by Sherwin Williams, the far right is “Mega Greige” by Sherwin Williams. In the middle is their love child. ( I mixed the two colors 50/50.) Ultimately I selected “Dorian Gray” by Sherwin Williams and I am not upset about it!
If you want to see more about the journey this kitchen has been on, you can get more details here.
Source List:
- Wall Color- “Repose Gray” by Sherwin Williams
- Island Color- “Dorian Gray” by Sherwin Williams
- Pantry Cabinet
- Light Pendants
- Bar Stools- Facebook Market Place Makeover


Thank you for such an inspiring blog.
This is such a beautiful upgrade, love it!
Your craftsmanship is beautiful. I was blown away by the wall you did with the entertainment center. After I saw you do that I figure you can do anything and with exceptional quality.
That is GORGEOUS!!! You did a fantastic job!