Originally our stair well was nothing special. It did have really high ceilings, but that was it. The only thing that stood out was that it was very poorly lit. ONE can light to brighten the entire area. It had orange oak and off white contractors flat paint. Nothing to write home about. UNTIL NOW!
I wish I had a decent picture of the original! I do however have a few process pictures, just to give you a better idea
of the progress made. See the yellow post ? All the dark brown you see was originally THAT color. Unfortunately, I do not have a blog post for that one… It happened within days of moving in… Back before “Sawdust 2 Stitches” was around.
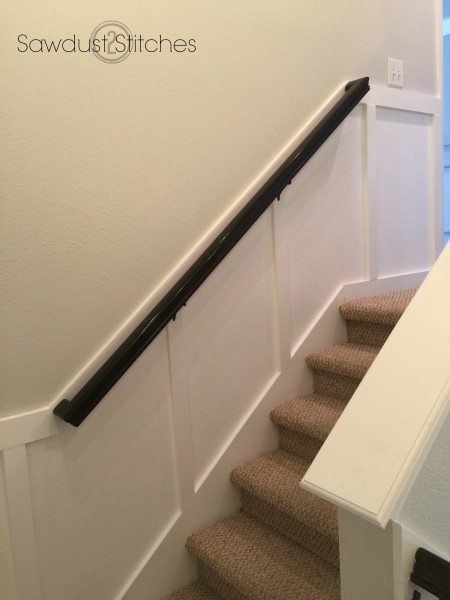
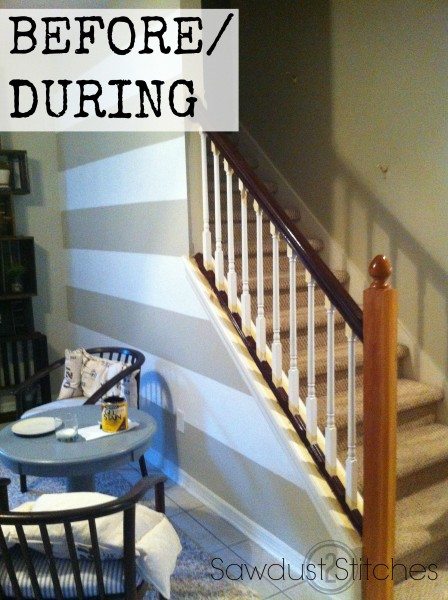 Brief synopsis: Polyshades are awesome, I used it on ALL the hand rails. I also spray painted all the mounting hardware with Rust-o-leum “Oil Rubbed Bronze”.
Moving on. I then add some character by adding “Board and Batten” to the stair well. You can see the full tutorial HERE.
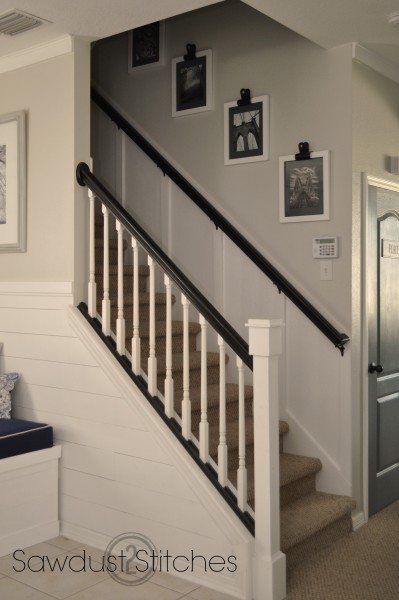 I continued the board and batten up the entire staircase and through the landing as well.
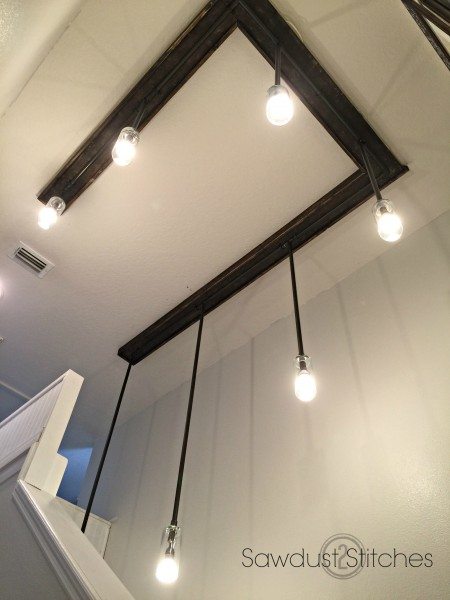
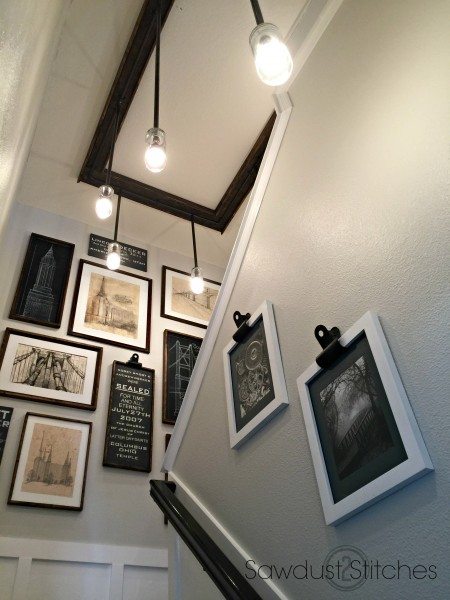
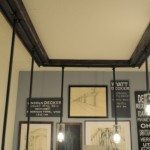
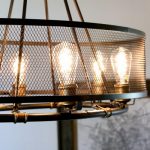
Next on the agenda ? The lighting, or more accurately the LACK of lighting. This project was NOT an easy task, but I am in love with the way it turned out! Believe it or not, this fixture is made of wood (obviously), PVC pipe, Dollar Tree vases and Ikea lamp cords. You can get more details HERE!
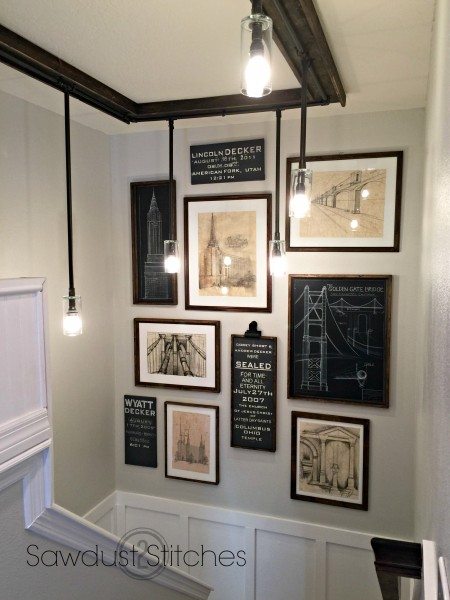
Last thing that needed to be addressed ? The large blank wall. It was MASSIVE and so, so, empty… Anything I could find that was large enough was REALLY expensive; and truth be told, I didn’t really love anything I found.
I decided I wanted to do a gallery wall. However, I did not want it full of smaller frames with images you would not be able to see! I envisioned large black and white architecture images… You know what is NOT cheap large art prints.
You know what is cheap ? Poster Board!
I grabbed some black and white poster board, and charcoal pencils, and went to town! (If this is intimidating, LOOK HERE for some easy alternatives!)
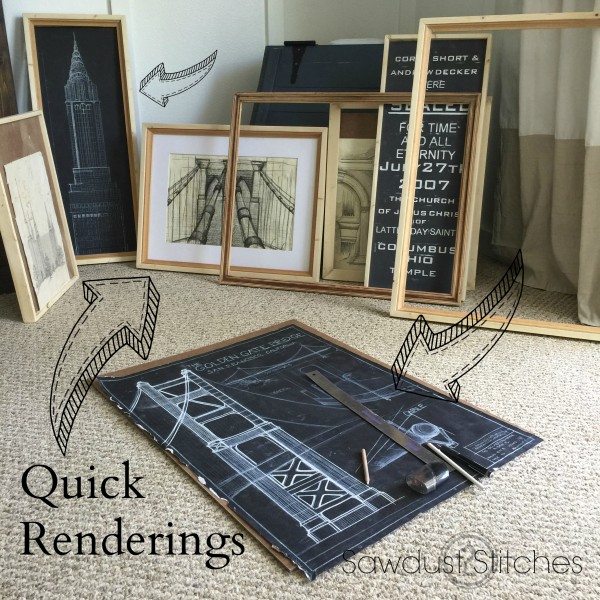 That solved the issue of the art work. Now I needed BIG frames. You know what is expensive ? Large custom frames. You know what is cheap? 1×2″ boards!
I can show you how to make your own rustic custom frames HERE!
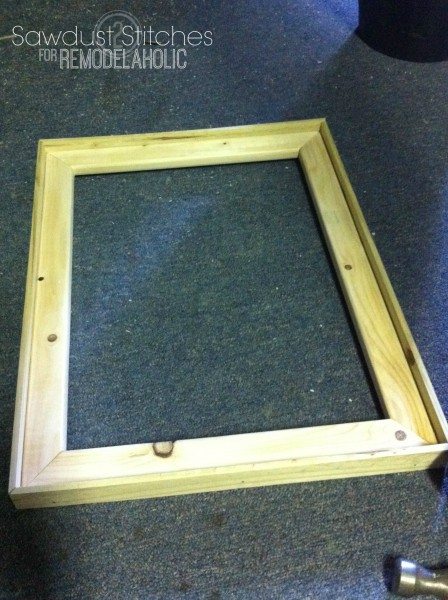 For less than $20, I made all the frames and the artwork. Booyah!
That pretty much sums it up! A little bit of money and a lot of elbow grease go a long way! 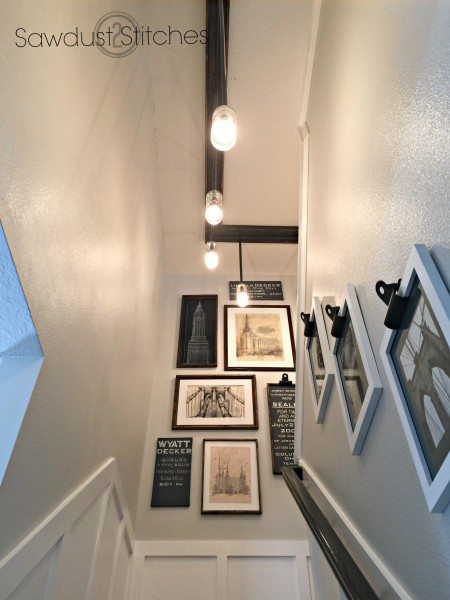
 Thanks for stopping by!
Take Luck,
Corey
 Copyright secured by Digiprove © 2015


Thats really beautiful. Good job!!
Thank you Gina, and thank you for taking the time to comment!
That light is AWESOME!!
Thanks so much. Comparing it to large light fixtures and their price point always makes me love it even more! Thanks for reading!
Oh my goodness – this is gorgeous! You have done a fabulous job of taking this area from drab to fab. Love it!
Thank you so much, I absolutely love how it turned out. Truth be told, it is one of my favorite spots in the house now!
I love the gallery wall that you created in the stairwell! Can I ask where you found the clips for hanging the pictures? You have used them to hang the white frames and your wedding typography print.
Absolutetly, I got them from Crate and Barrel they were a little less than $5 a piece.
i am curious about the prints, they’re lovely did you draw all of them? i’ve been looking for architecture prints for a while but cannot find what i want.
I love architectural prints too, but had a hard time finding renderings of them. Sp I did have to sketch up my own!
Love what you have done, what is the grey paint color?
Thank you ! It is silver birch from Glidden.