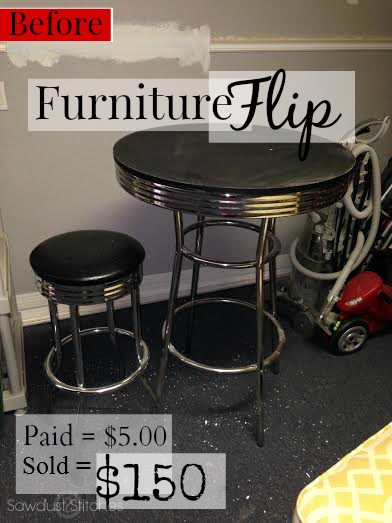
While perusing garage sales I stumbled upon this retro chair and table set. I actually didn’t hate the retro look, but I didn’t love it either. BUT for $5.00 I would figure something out. Well, time went by and it sat in my garage collecting dust. I didn’t really have any place I wanted to put it in my house… One afternoon I decided to clean out the garage, so I started listing things on Craigslist. Then I had an idea, if I was just going to sell it, why not try and fix it up. I didn’t have much to lose, right !?
Supplies Used
- 1×4’s
- Wood Glue
- Sand Paper
- Minwax Stain
- Polyurethane
- Steel Wool
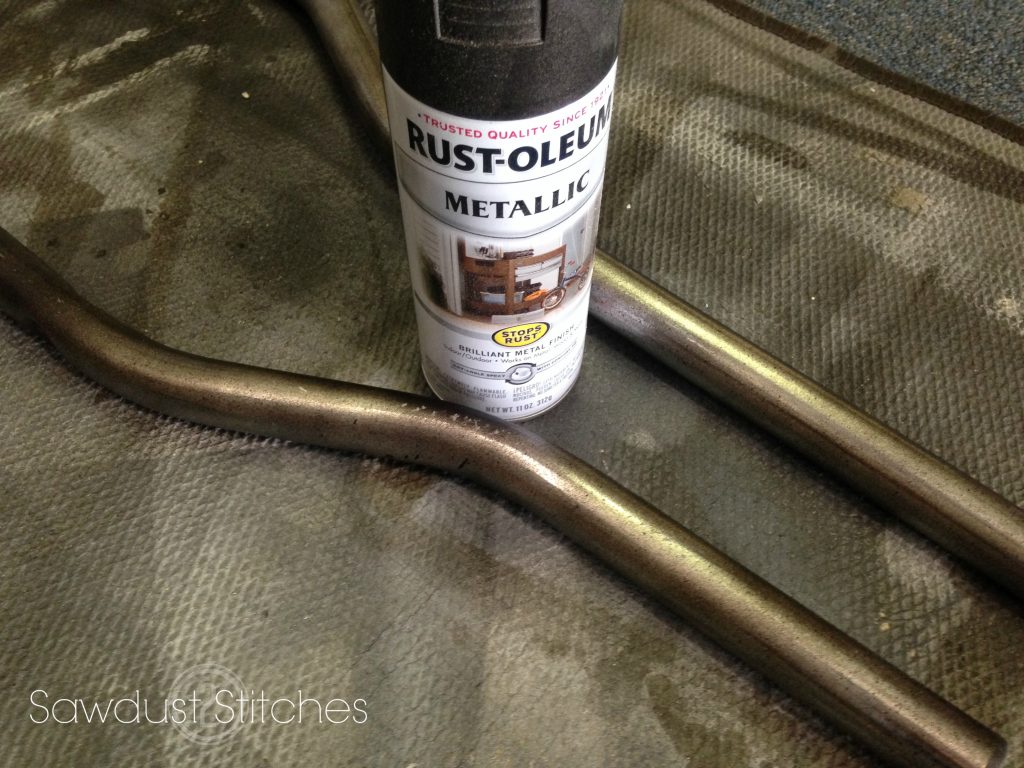
- Metallic Spray Paint
Tools Suggested
- Mitre Saw
- Jigsaw
- Sander
- Clamps
- Allen Wrench
- Drill with Phillips bit
I started by taking the entire set apart. ( Mine required an allen wrench, and a phillips screwdriver.)
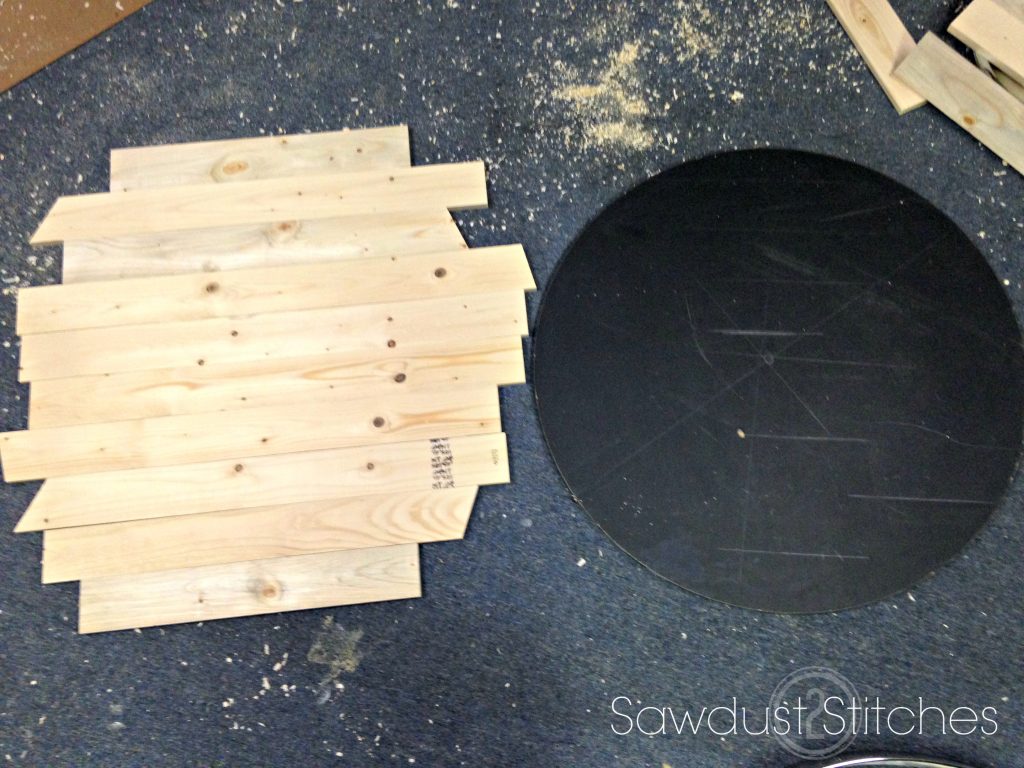
Once I had everything taken apart, I cut enough 1×4’s to match the table tops, dimensions. (Repeated likewise for the stool seats.)
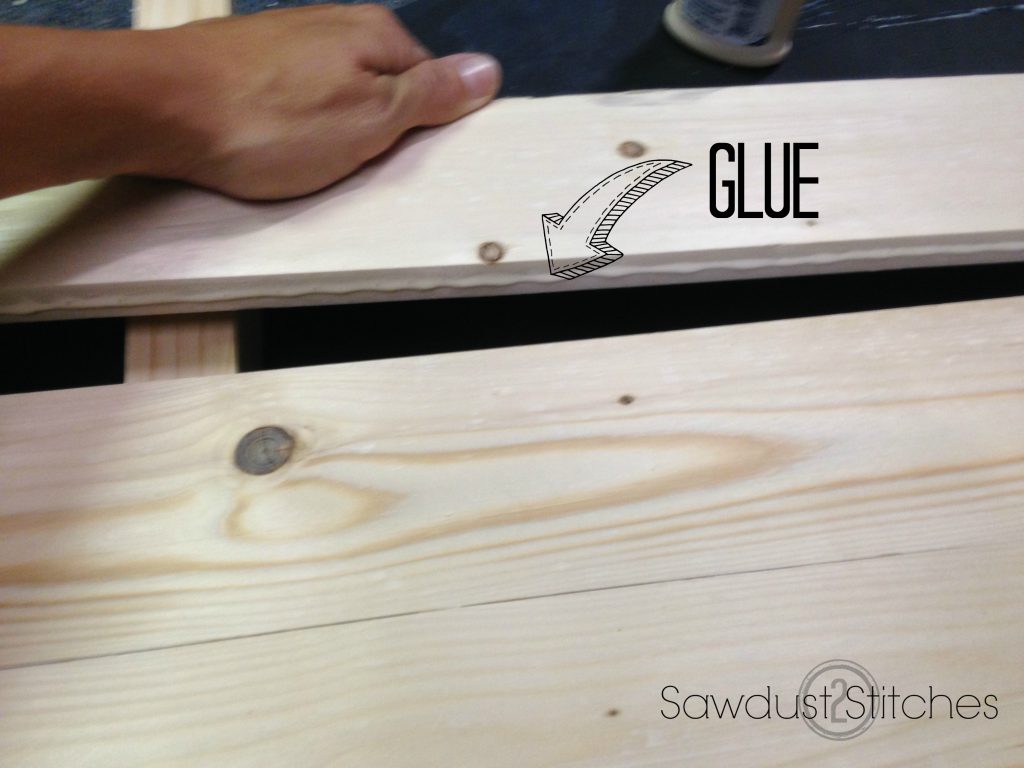
After I had all the wood cut, I proceeded to glue the pieces together. (Repeat for Seats)
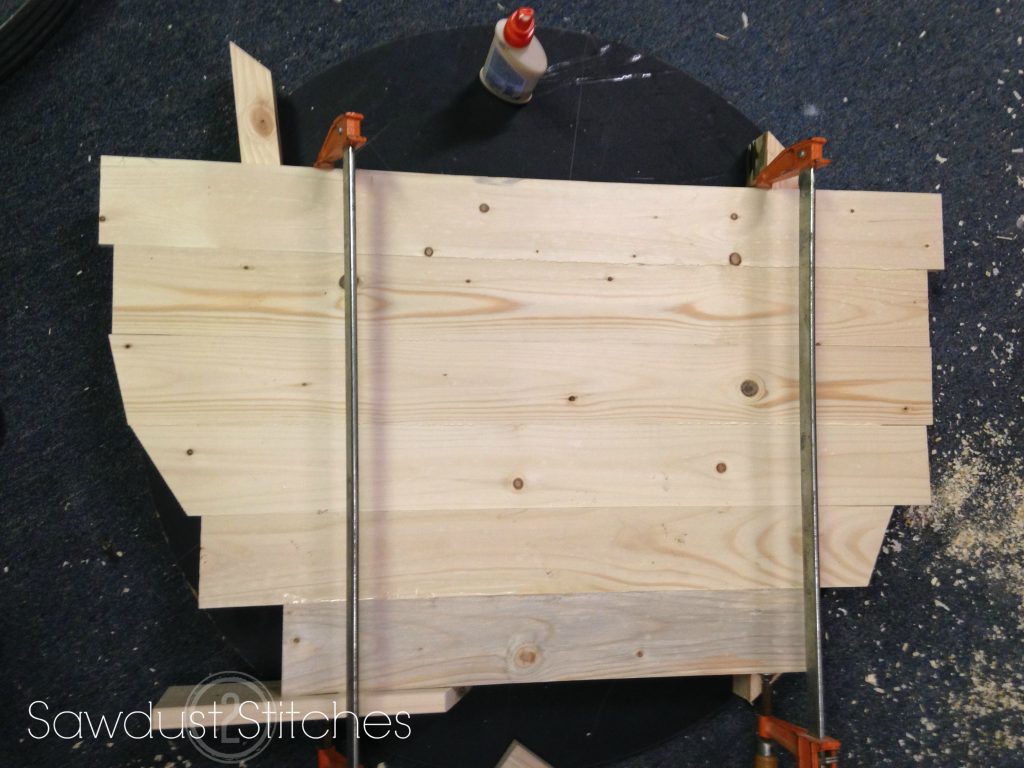
 While the glue dried I used clamps to hold the pieces snuggly together. (Repeat for Seats)
After the glue had completely dried I used the original table top to trace the dimensions on the newly made wood slab. (Repeat for Seats)
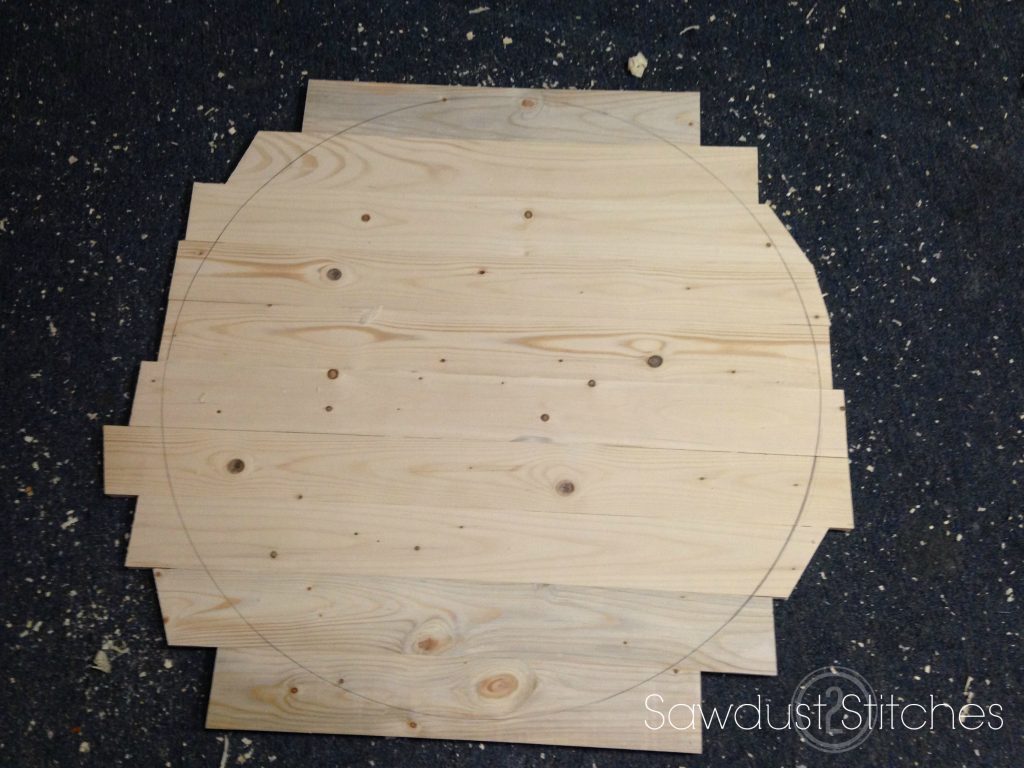
Using a jigsaw I cut out traced circle. (Repeat on Seats)

As hard as I tried to make this a flawless circle, it is riddled with imperfections. I used a sander to camouflage said mistakes. Also, there where small ridges where the boards met, by sanding the entire surface and edges it eliminated most of the problem spots. (Repeat on Seats)
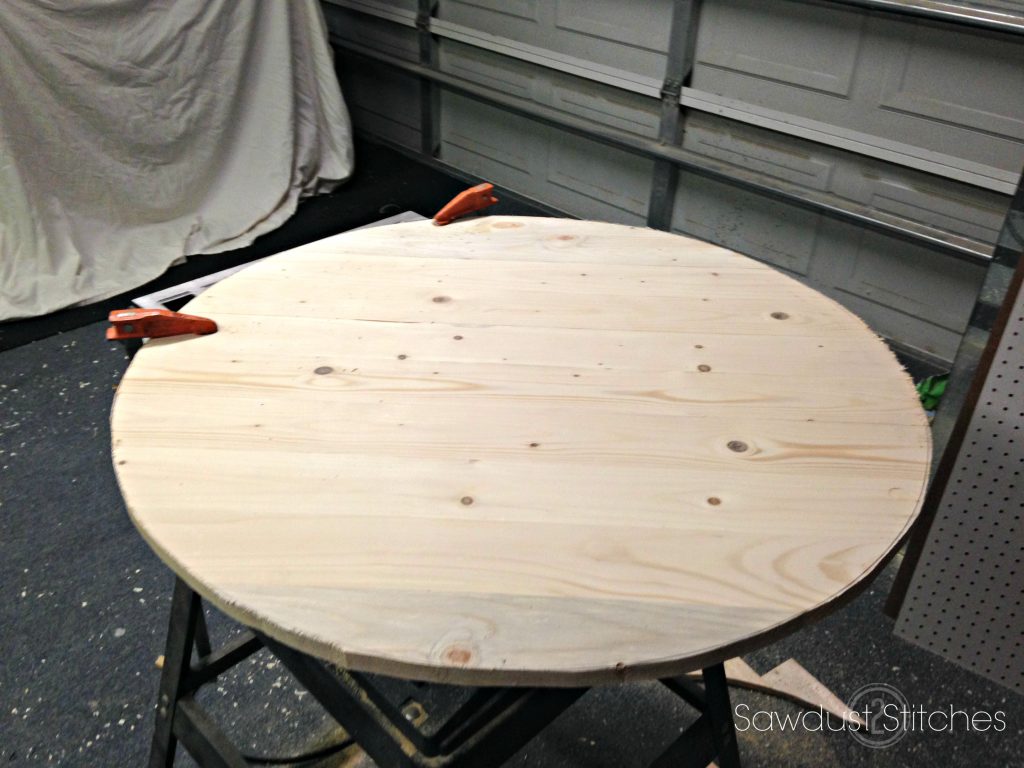
After creating a smooth surface with a sander I proceeded to stain. (Repeat for Seats)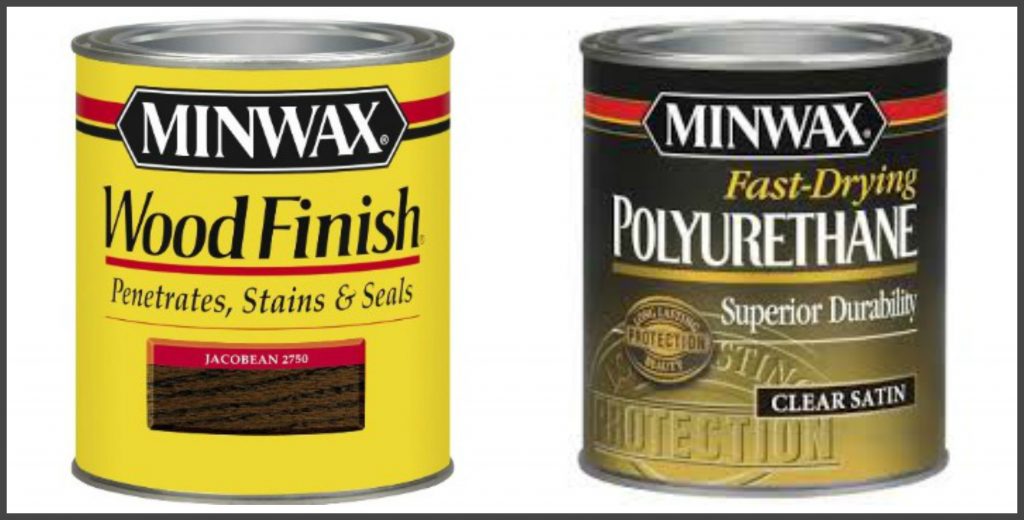
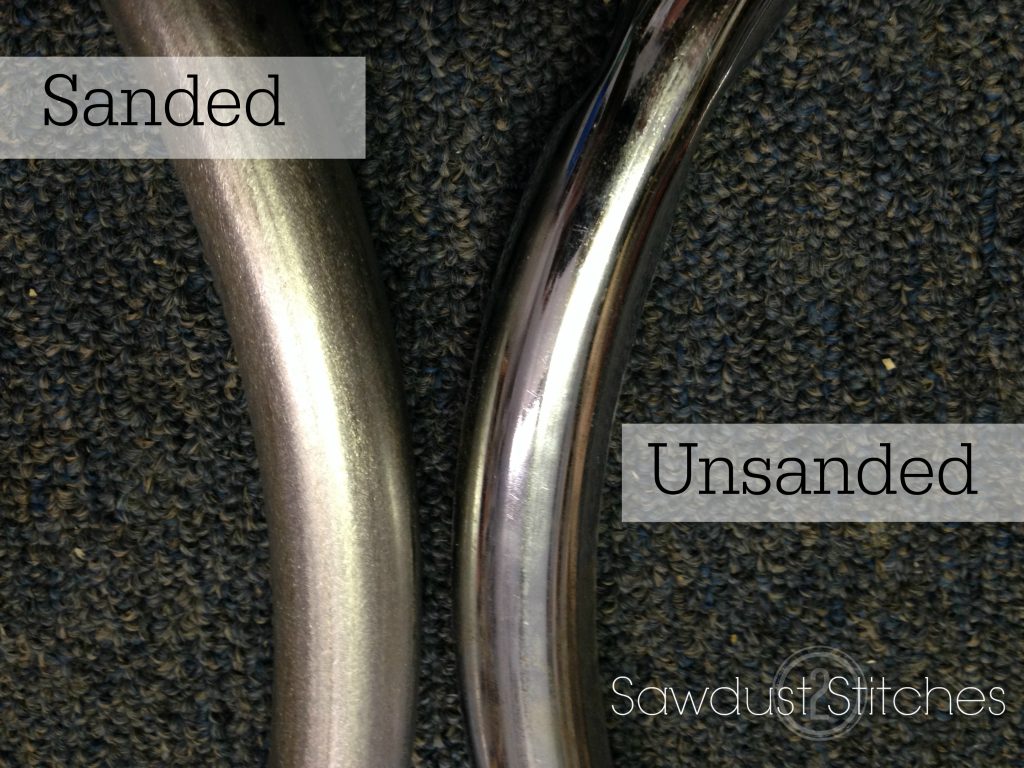
Next part of this project was aging metal. To do this I used sander! Sanding a round surface was rather tedious work, but it created the look I was trying to achieve. (Make sure you wear proper safety glasses. )
Once the metal is sanded, it is prepped for spray paint. I DID NOT coat the metal. I just lightly dusted them with a metallic spray paint. After the paint dried, I used steel wool and rubbed down all of the metal. It gave it an old look and I was able to eliminate any areas that look uneven or blotchy.
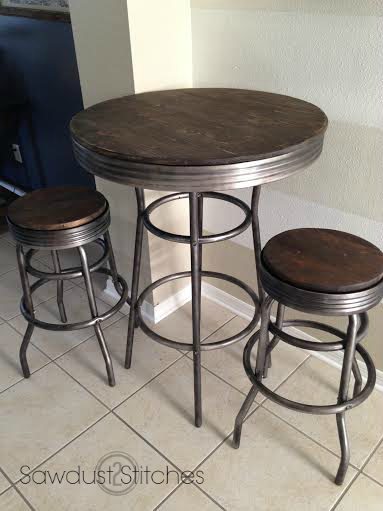
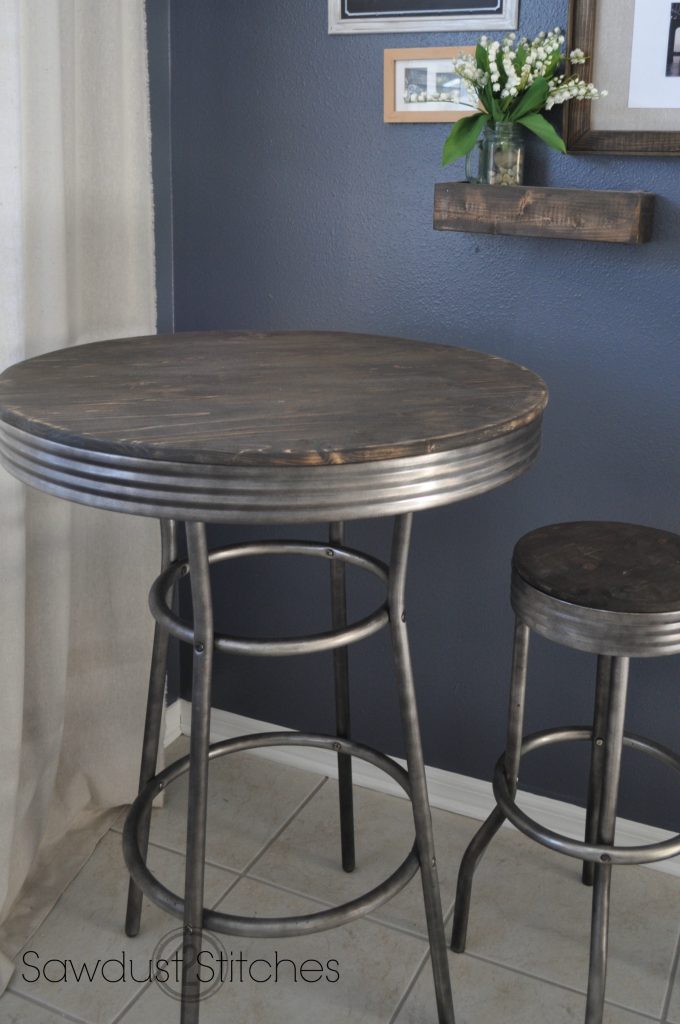
 All that was left was to reassemble it again!
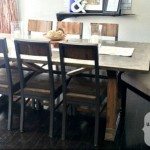
Ta-Da!
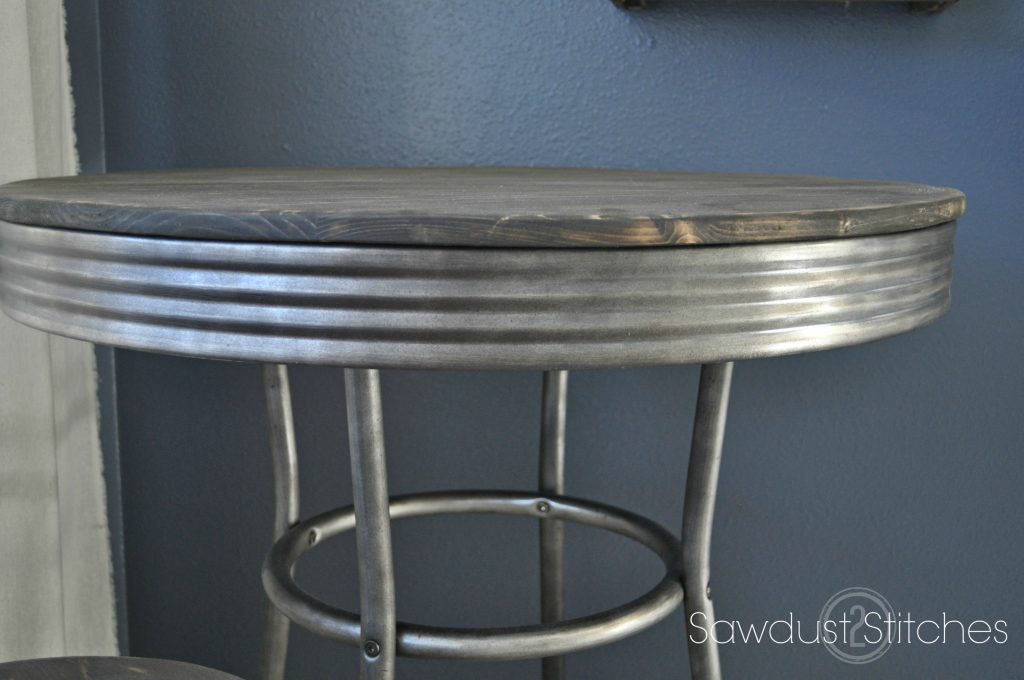
Close up.
Let’s break it down:
Table and Chair- $5.00
1×4’s – $6.00
wood glue- $0 (on hand)
stain and poly – $0 (on hand)
Spray Paint- $0 ( on hand)
Total Invested $11.00
SOLD $150.00 !
Profit $139! BOOYAH
Thanks for reading!
Corey


Totally freakin’ amazing! I LOVE the after. I love a mix of rustic industrial anyway so this is right up my alley and that’s a heck of a profit! Nice job! 🙂
I LOVE it too! Industrial meets rustic is hands down my favorite style right now! Thanks so much for reading!
Love this, what a great transformation! What did you use to adhere the tops to the table/chairs? Did you remove the old table tops or just put the wood right over the top of the old ones?
Ashley, Sorry I had to skim over that part. Every table/chair is bound to be different. What I would suggest is pay attention on how you disassemble the original. You are making and exact duplicate of the top, just put it back on in the same way. Which bring me to your other question. I did remove the original top completely. Hopefully that helps! Good luck!
Awesome job! Who would have thought it would look so amazing!
Haha I was a little worried about it’s outcome too! Haha