This post is sponsored and does contain affiliate links*
Hey all! Thanks for sticking with me on this crazy little makeover journey, and hey if you are just joining us, WELCOME! As most of you know I have been working on this project around the clock. I have teamed up with the great folks at DAP and many of their awesome products to make this project possible. If you haven’t already checked out the initial “R.V. Paint Makeover” then I suggest you start there and work your way towards the “R.V. Bathroom Makeover”, then you are pretty much caught up! Today I am sharing how I took a gutted R.V., and then built my own custom furniture to outfit it.
Camper Sofa
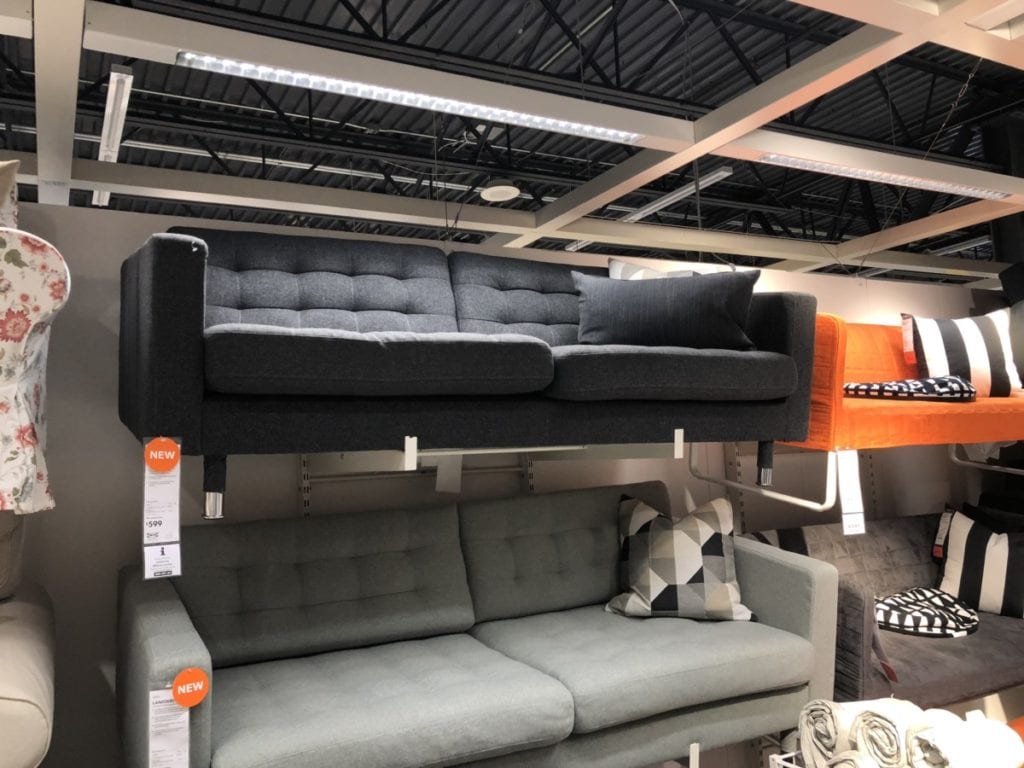
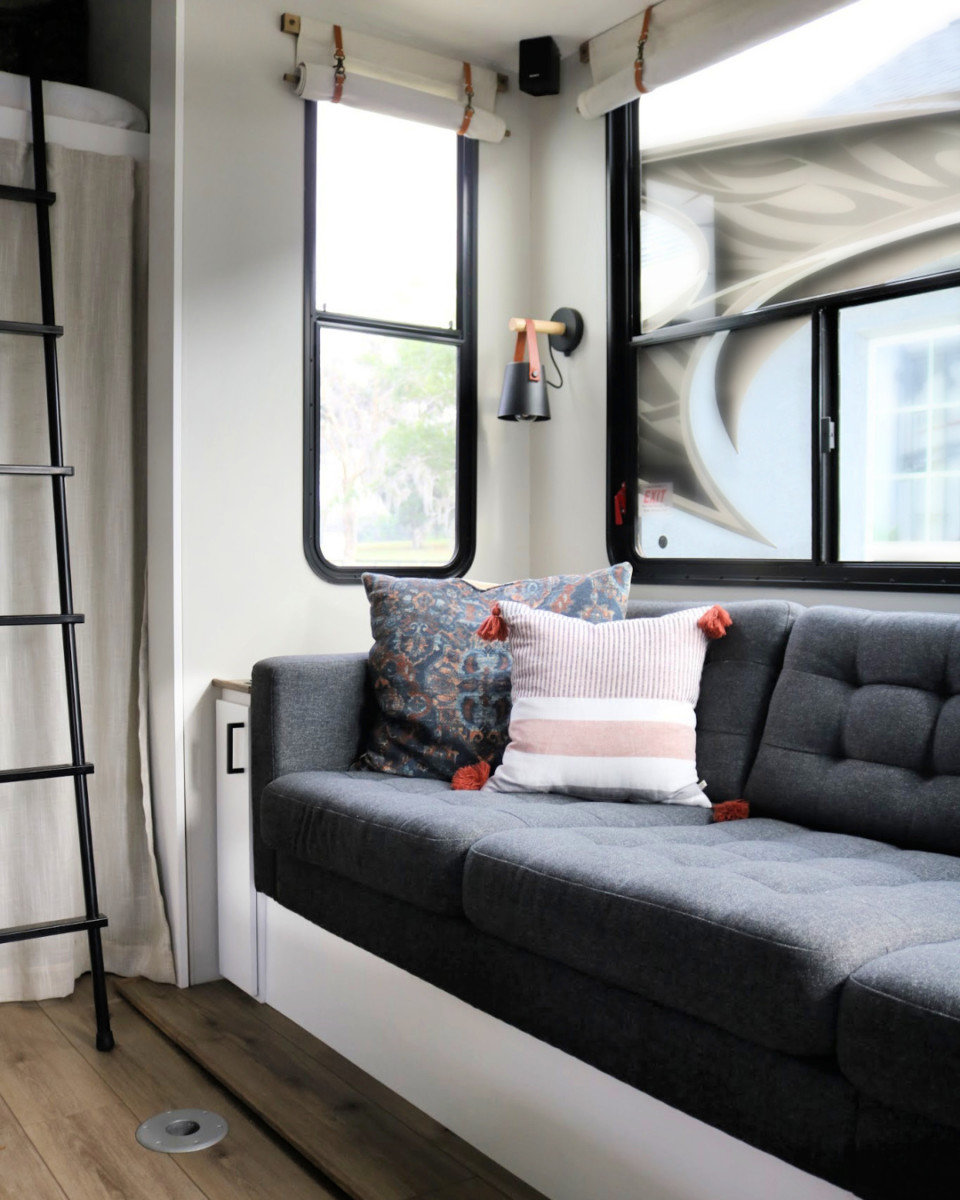
When we gutted the camper I had originally planned on reupholstering the original couch myself. Well, if you have been reading along you know that those plans quickly changed. ( I don’t know how on earth the “gentleman” that sold us the camper masked the smell while we checked it out, but I HAVE got to find out what he used, because it smelled just fine. By the next day our gag reflexes were kicking in when we walked anywhere near it was then the idea of keeping the original sofa went out the window.) So the couch went to the dump and I went to IKEA. I needed something as light as possible, somewhat small in size, and if possible budget friendly. IKEA by nature seems to accommodate all of those requirements. I am happy to report I did end up finding this couch that would more or less fit the bill. There was one other sofa (Karlstad), similar in size and was cheaper but I loved the dark color of the “Landskrona“.
 Instead of just putting this couch in a place and somehow anchoring , I decided to take a more labor intensive route that I hoped would be worth the work! (Spoiler Alert: It was!) I wanted to make this look like a built-inland not like an after-thought. To do that I built it up so that it would appear to be on a platform. By doing this it would still be lightweight and create plenty of space for storage underneath!
 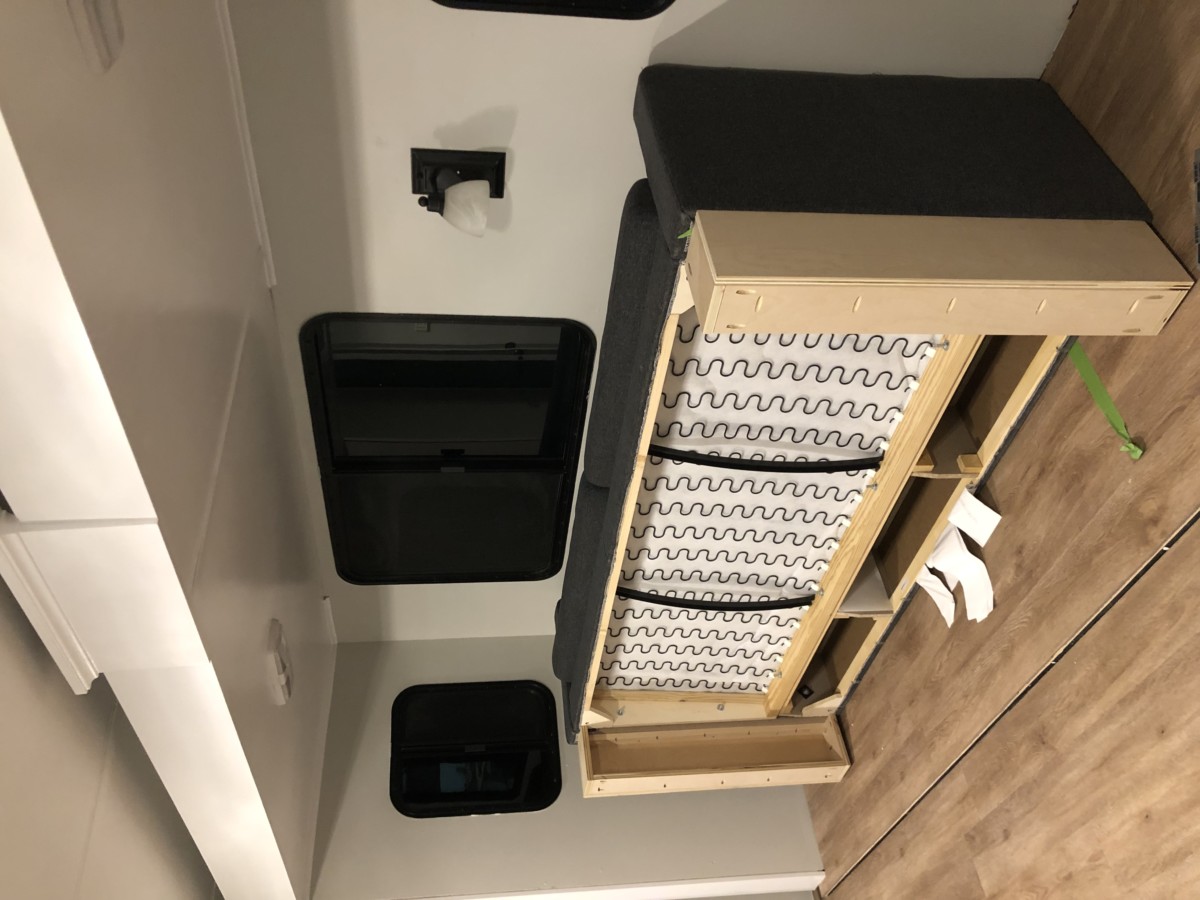 I built very simple legs out of 3/4″ plywood. Again, the goal here is to just elevate it without adding too much weight. This option was perfection. It fit plenty of storage, and should we ever choose to, it would accommodate another twin size foam mattress. NICE! So I have my platform, and it is functional, but now I want to make it look like it was a built-in.
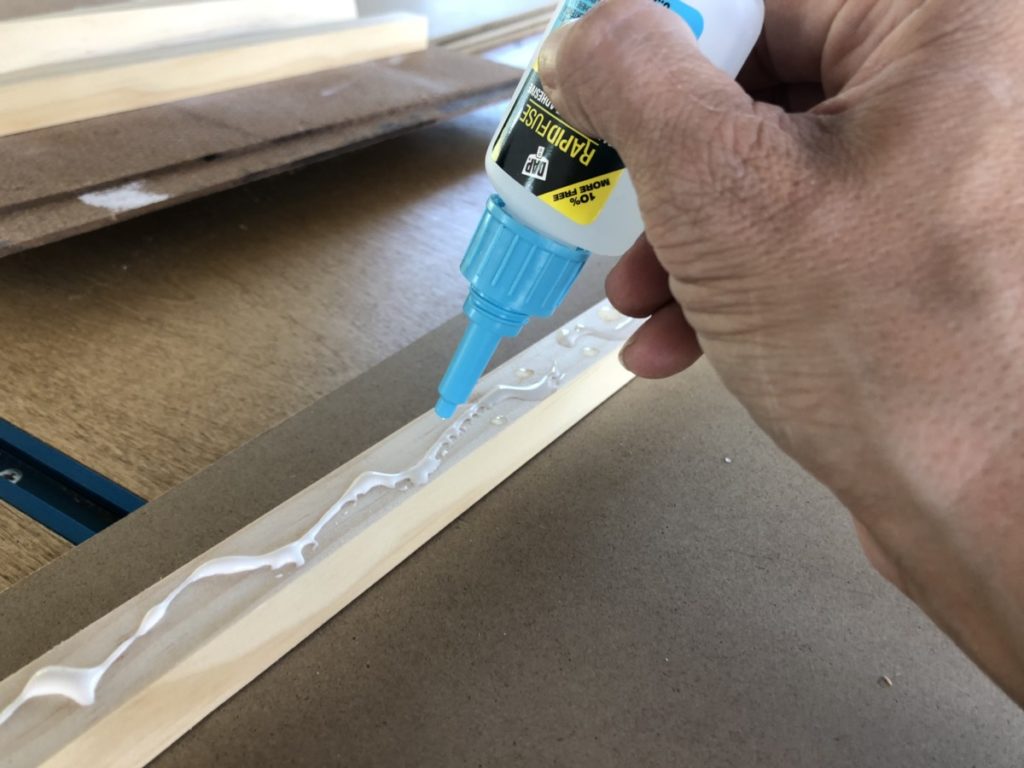
 I was racking my brain trying to figure out a super impressive way to make this work. I had considered hinges and glide and many other contraptions, but then my inner voice of reason chimed in. “It doesn’t always have to be time consuming to be effective!” So, I just ripped a piece of paneling to fit, and attached a small board that would serve as a stabilizer to the panel. This was such a simple fix and yet SO effective. I just used some Rapid Fuse and it was done in 20 mins, start to finish!
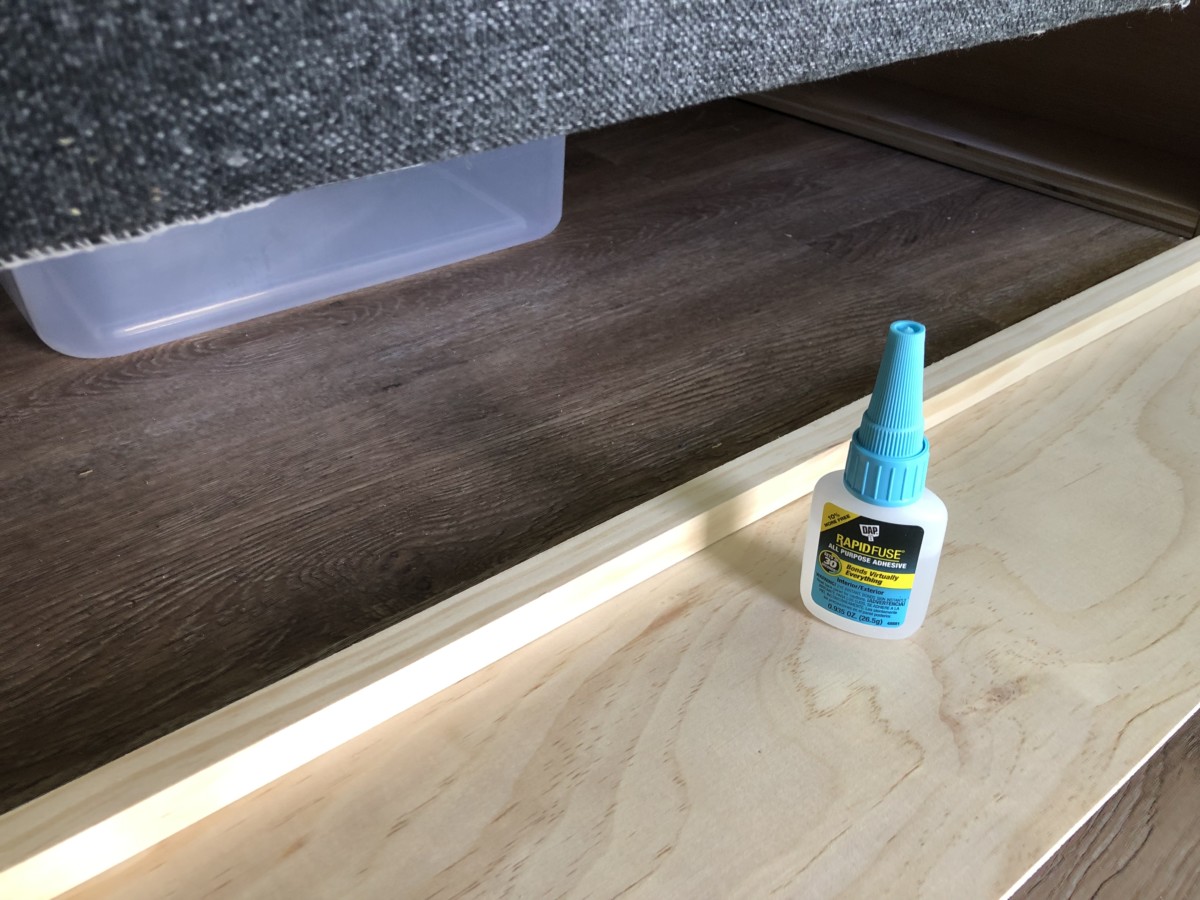
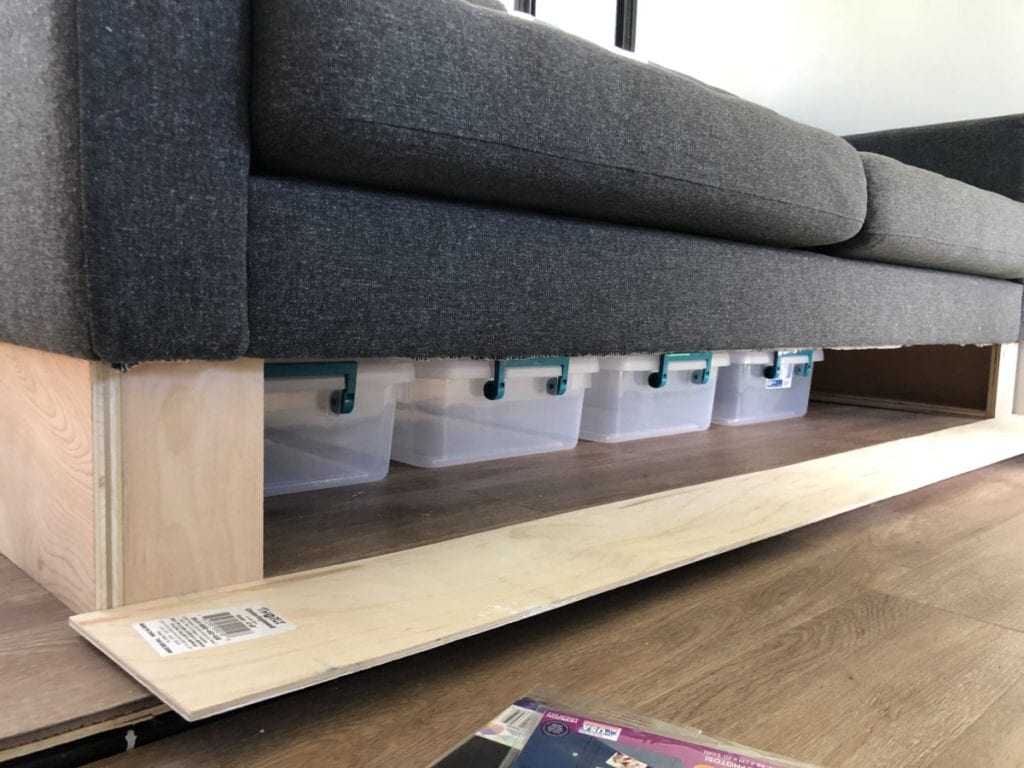
The last thing I needed to factor in, was how to keep it in place. Again, my brain went straight to different mechanisms that I could use to make this work, but again I rested to my “simple is best” (in this case). I found some magnets in the craft section and used Rapid Fuse to glue them to the back of my cover panel and also to the support/legs of my sofa. Easy peasy! 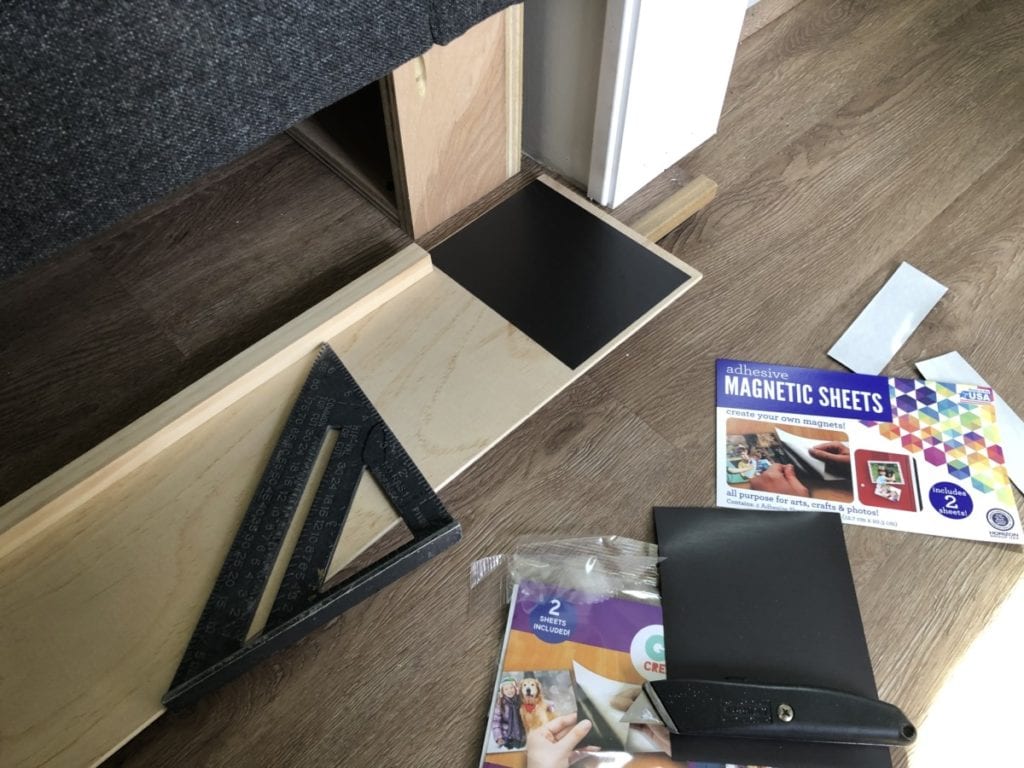 All of that storage makes my heart happy. It will make for easy loading and unloading, and of course it will stay a bit more organized!
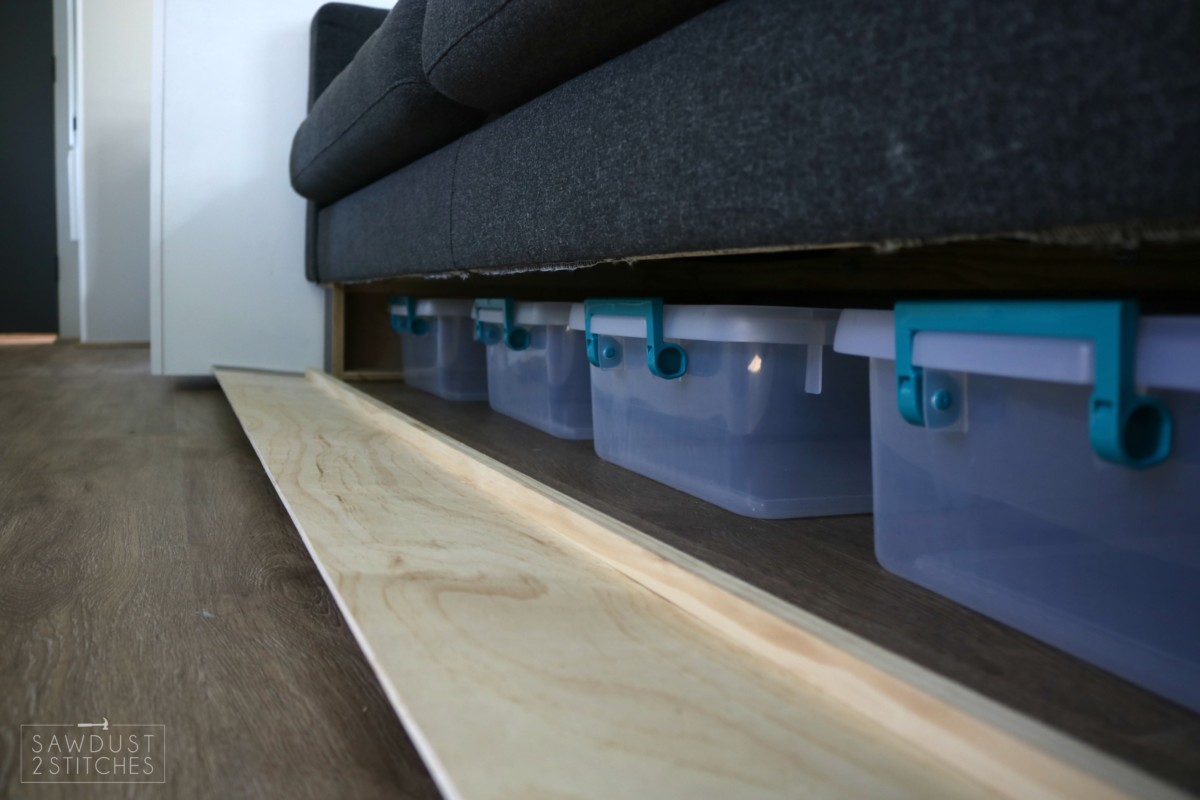
Camper Dinette/ Benches
Next on the agenda, was the part that had me scratching my head. I needed to replace the dinette set. Again, the original upholstery had to go, so I was starting at ground zero. Once I had found the couch I was going to use in the camper I started searching high and low for a fabric that would work for the dinette set. I was having a hard time getting excited about any of it, because… I have a secret. I may indeed be titled “Sawdust 2 STITCHES” but I truly hate sewing. I can do it, but I really, really prefer not. So I dragged my feet for a while. Then one day I was considering some options and I had a “light bulb” moment. What about an ottoman for the seating ?! Once the idea was stuck in my head it started to snowball. I ended up finding a few different options on Amazon. I ordered two different styles that I thought would work, and it was a miracle one of the styles was nearly a perfect match! So those ones I kept, the others were sent back.
So, I put them in the camper and basked in the fact that they matched so well. But the more I looked at them, the more they bothered me. I had done so much work to make this camper look amazing, and here I was about to just toss in some seating. That simply isn’t me at all!? Who even was I?! So, in true Corey fashion I started playing around with a more complicated idea. What if I were to use the upholstered lid, and create something a little more custom!? Have you ever wondered where my tagline “where we can’t leave well-enough alone”? Well, now you know.  So I began breaking down my new ottomans and using them for parts. The base I knew I could build easily… it was the fabric and the upholstered hinged storage lid that I really wanted to utilize.
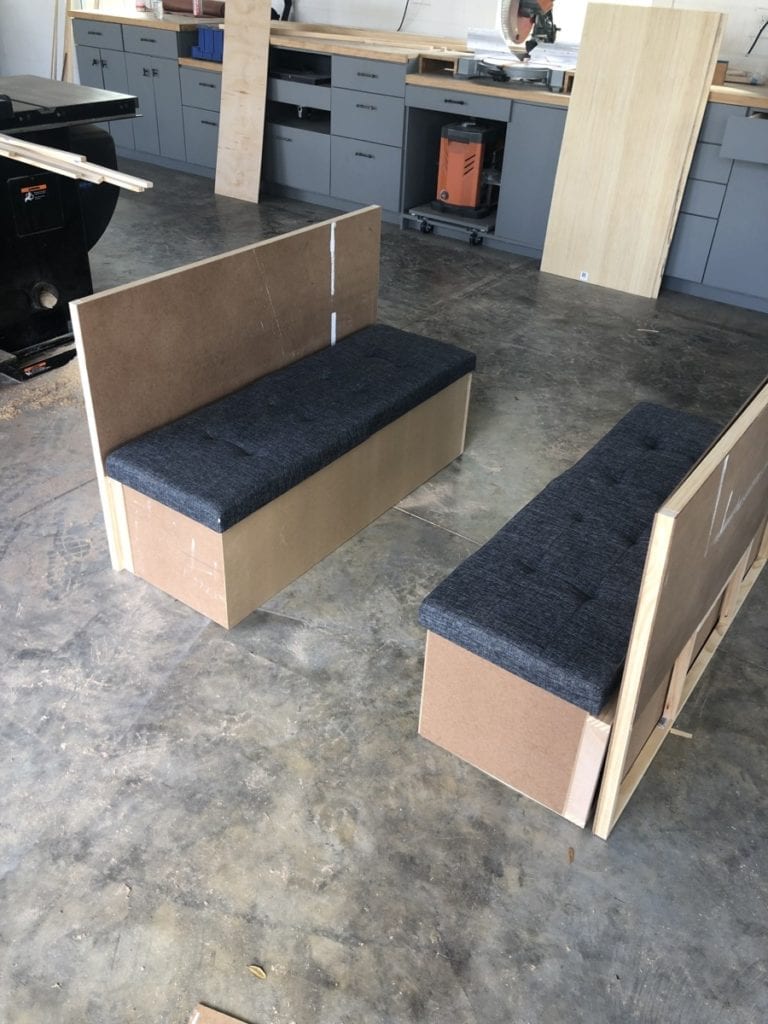
 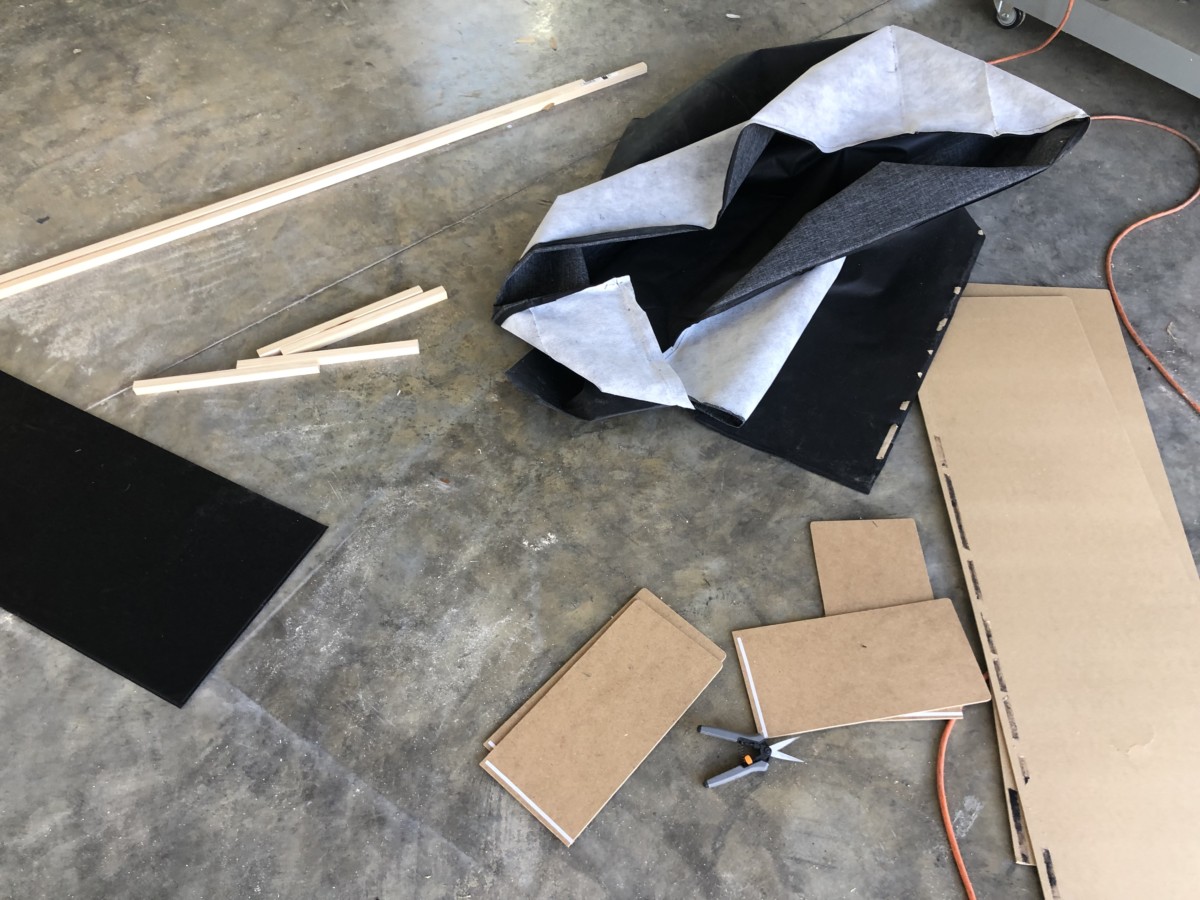 I even reused the boards that made up the base again! The only thing that changed is that I needed to build an internal bone structure for the the boxes. Where as before the ottoman relied on the fabric to hold it together. Yet again I was faced with the challenge of creating a sturdy yet super light weight piece of furniture. As a “builder” I find I tend to “overbuild” everything. So creating a bench using paneling and 1″x 1″ boards gave me slight heart palpitations. If you want to see more about the process, you can see my InstaStories here.
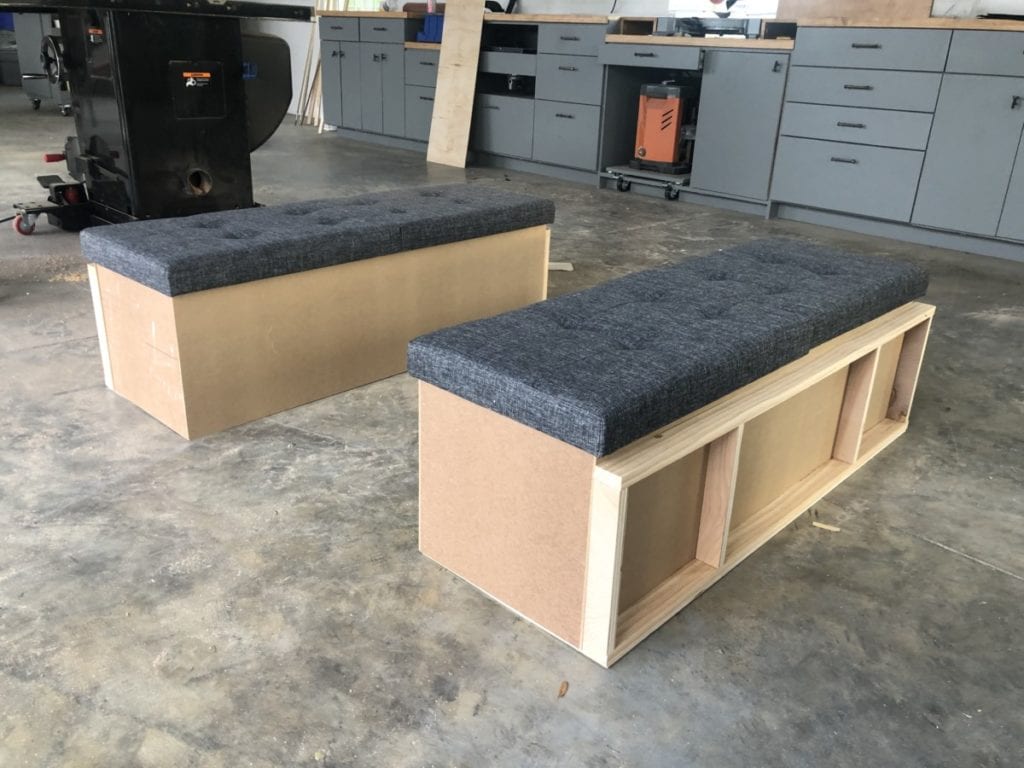 Seeing as I was building this matchstick style, I wanted to give it as much strength without adding a lot of weight. In order to do that, I upped my adhesives game. I used both Rapid Fuse and DAP Wood Glue before fastening the structure together. Can I just tell you how pleasantly surprised I was at how sturdy these little benches are!?
 Once the bases were built I moved on to the back supports. Again, I needed to keep this LIGHT, so I had to get a little creative. I used 1″x 1″ boards to make a skeleton (With a few strategically placed 1″x3″ boards so that I could attach my upholstered back (keep reading). Using my glue up trick, I was able to make a very STURDY and light weight frame that I would be able to attach paneling to.
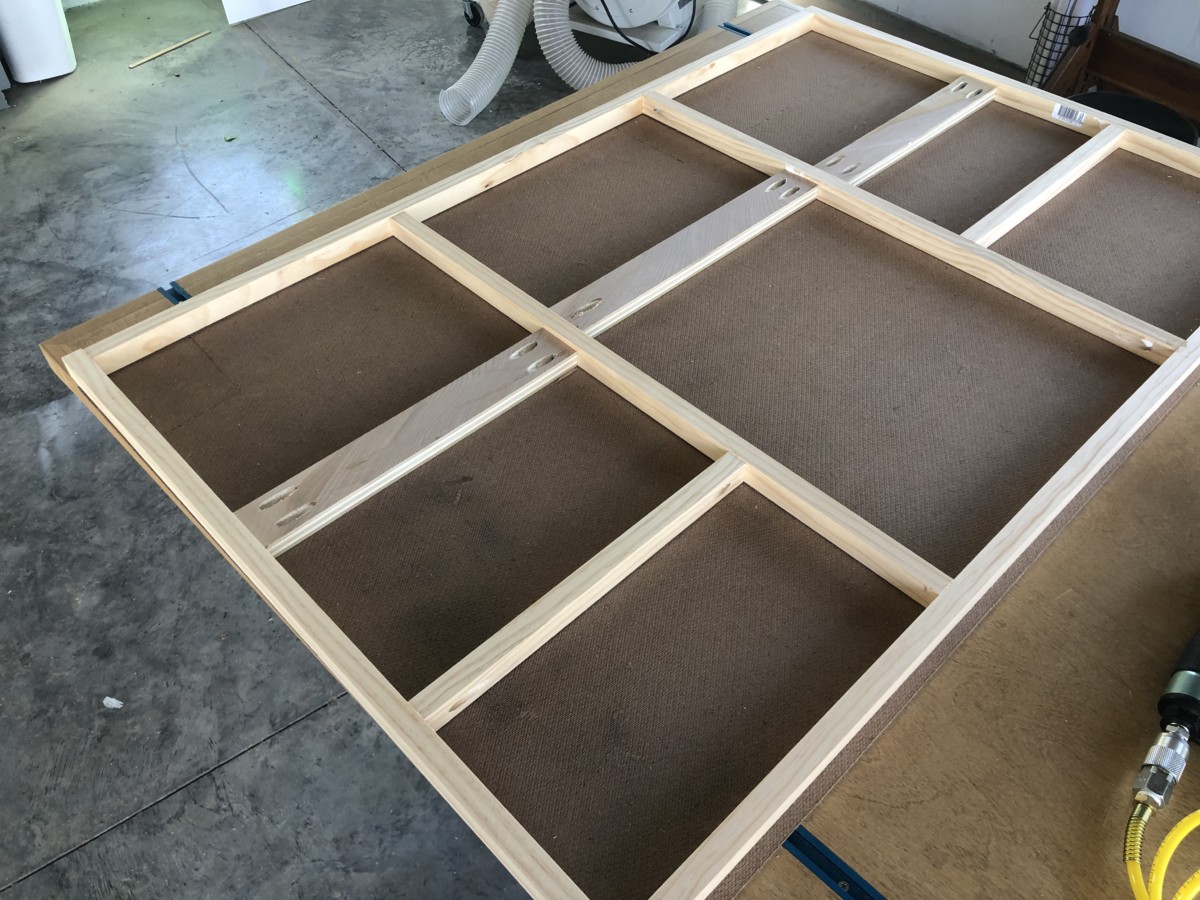
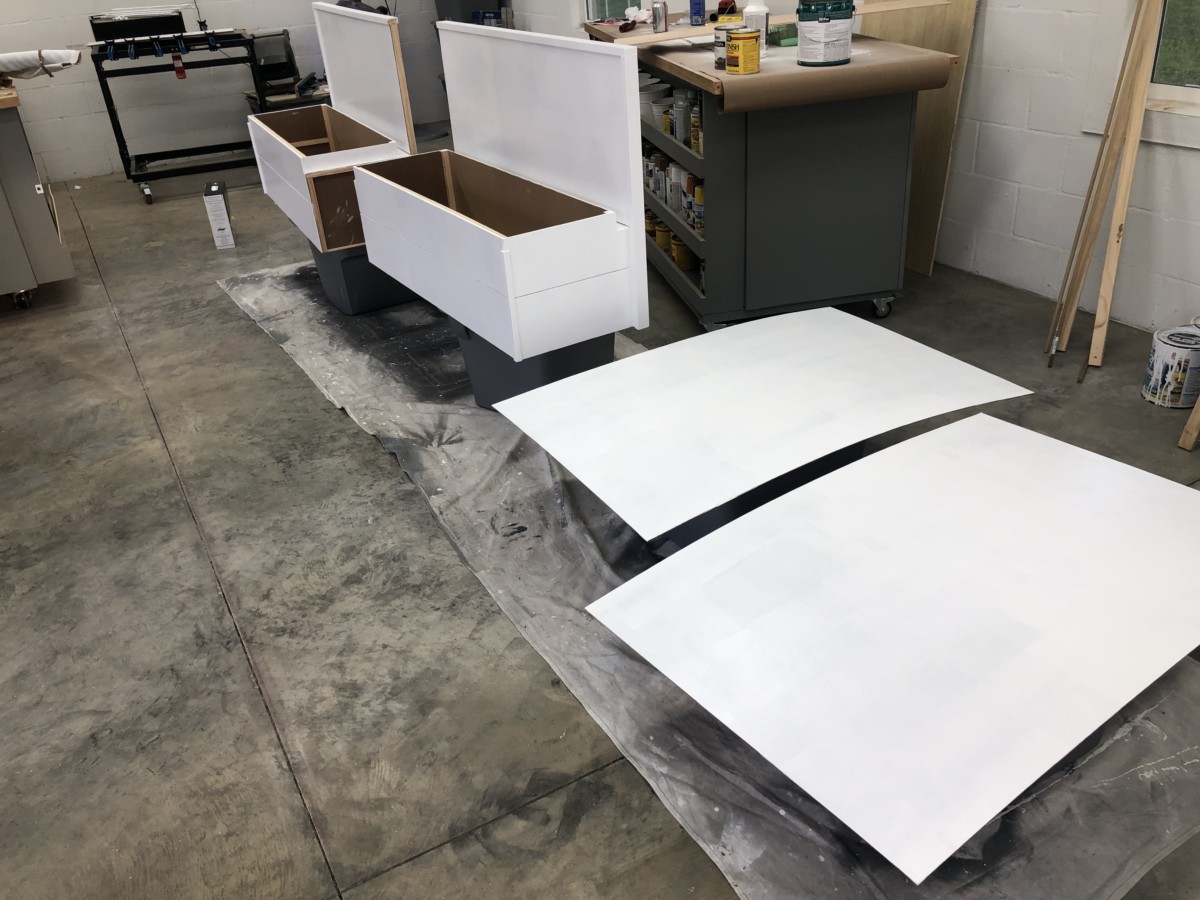
 Once the backs were attached I moved on to the aesthetic’s of this project. I wanted this to look built-in. So, I decided to tie in the look I created in the master bedroom of the camper. (You can see all the details here) I wanted to carry the Faux Shiplap from the front room, and though the living area and dining area. Also, by adding shiplap to the benches it would also give it a little more structural strength without adding a significant amount of weight.
When adding shiplap I DO like to use adhesive. From past projects I have found that DAP DYNAGRIP works great! (If you want to see a more detailed tutorial of my process to shiplap you can read all about it here.) 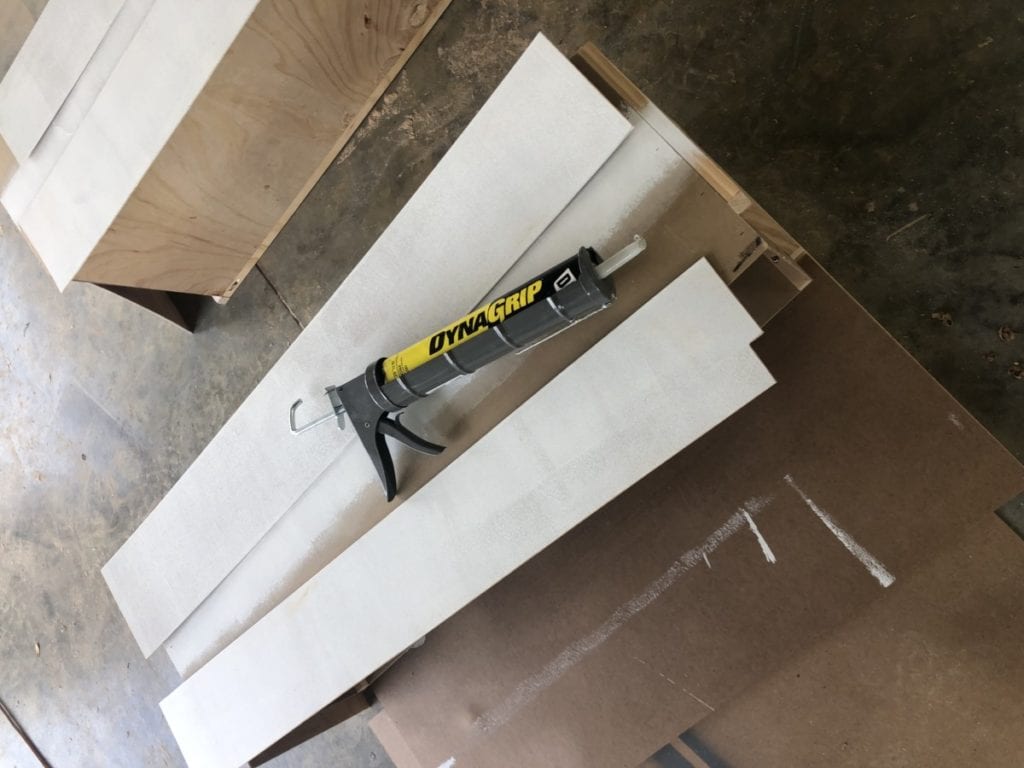 Once all the shiplap was in place I needed to complete the look by trimming it out. I SWEAR it is in these last few detail oriented steps that projects truly start to look professional! I always like to trim the corner of pieces and then I follow up with a thin bead of caulk. Once the piece is painted it creates a flawless look! I am telling you, caulk is the Magic Eraser of the DIY world. I like to use Alex Fast Dry, it has a great finish, is easy to work with and of course you can’t beat a 20 minute dry time!
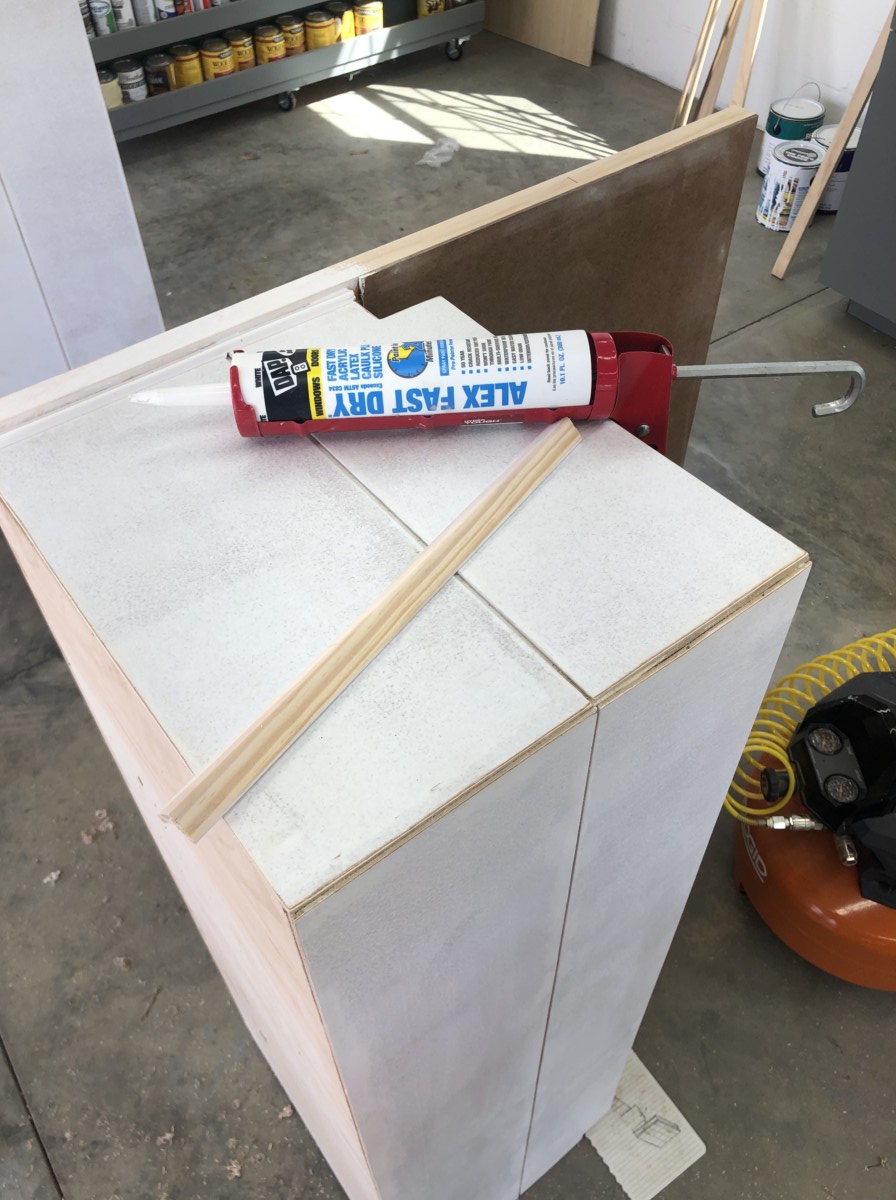
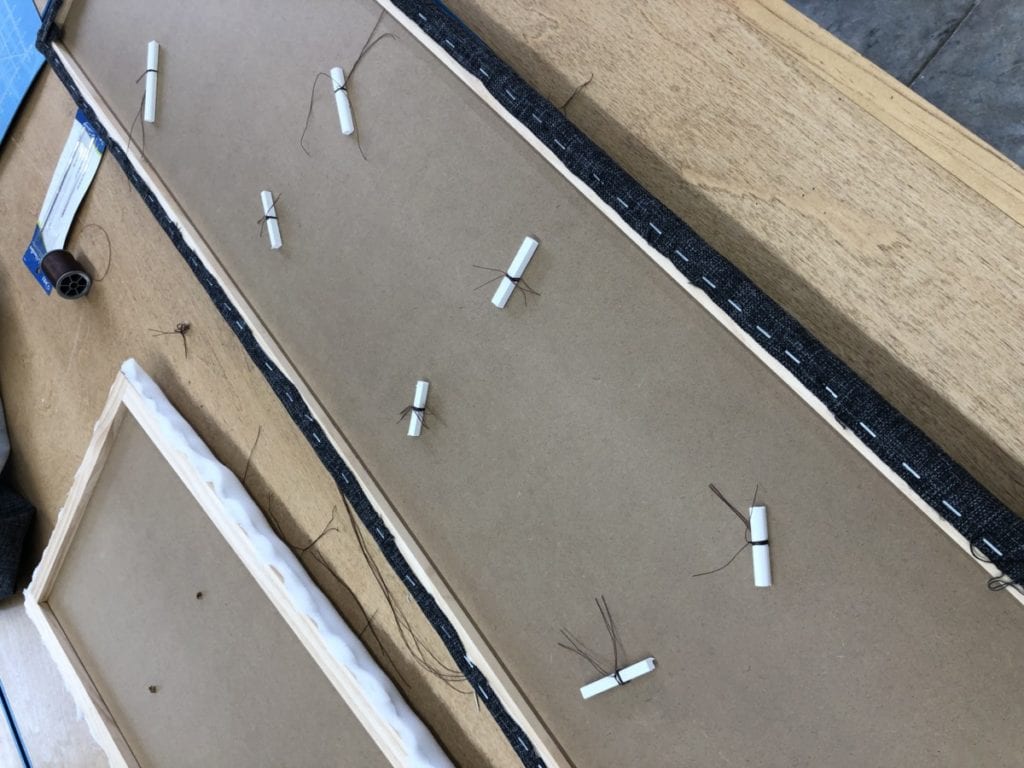
Next I needed to add some sort of back padding. Remember that extra pice of fabric I tore off the base of my ottoman? Well this is where that fabric will come into play. Using the ottoman seat (pictured left) as a template I mapped out “tufts” ( the small indent of the fabric) onto a piece of paneling.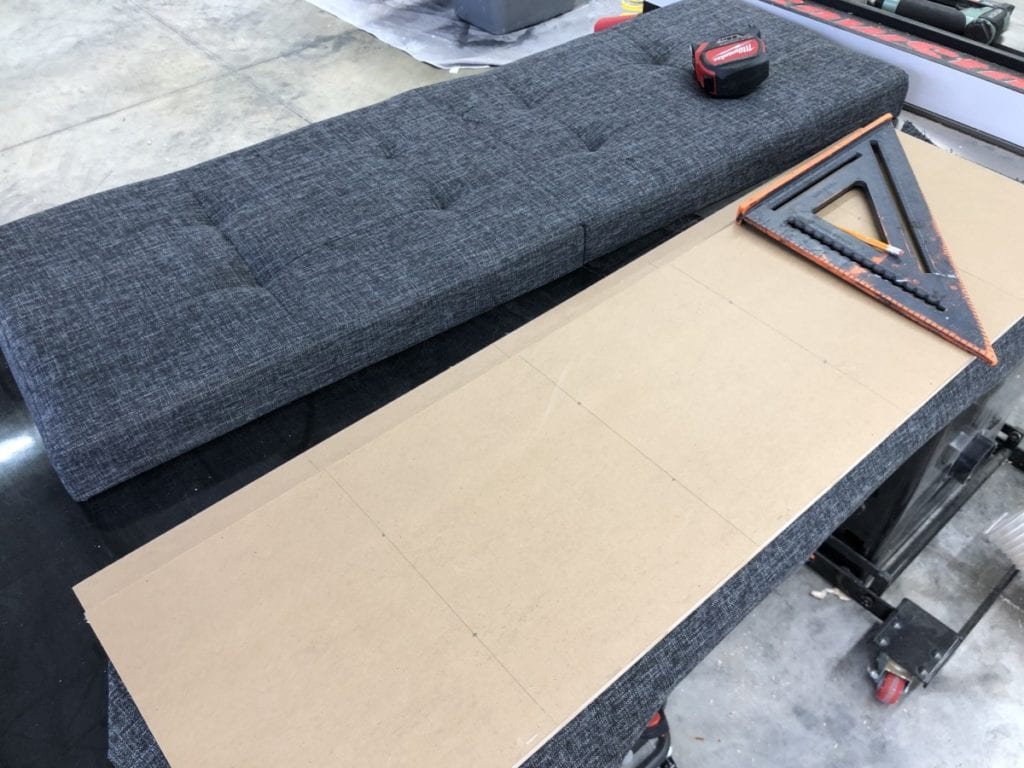 I then using a drill bit to create small holes where I wanted to create tufts.
 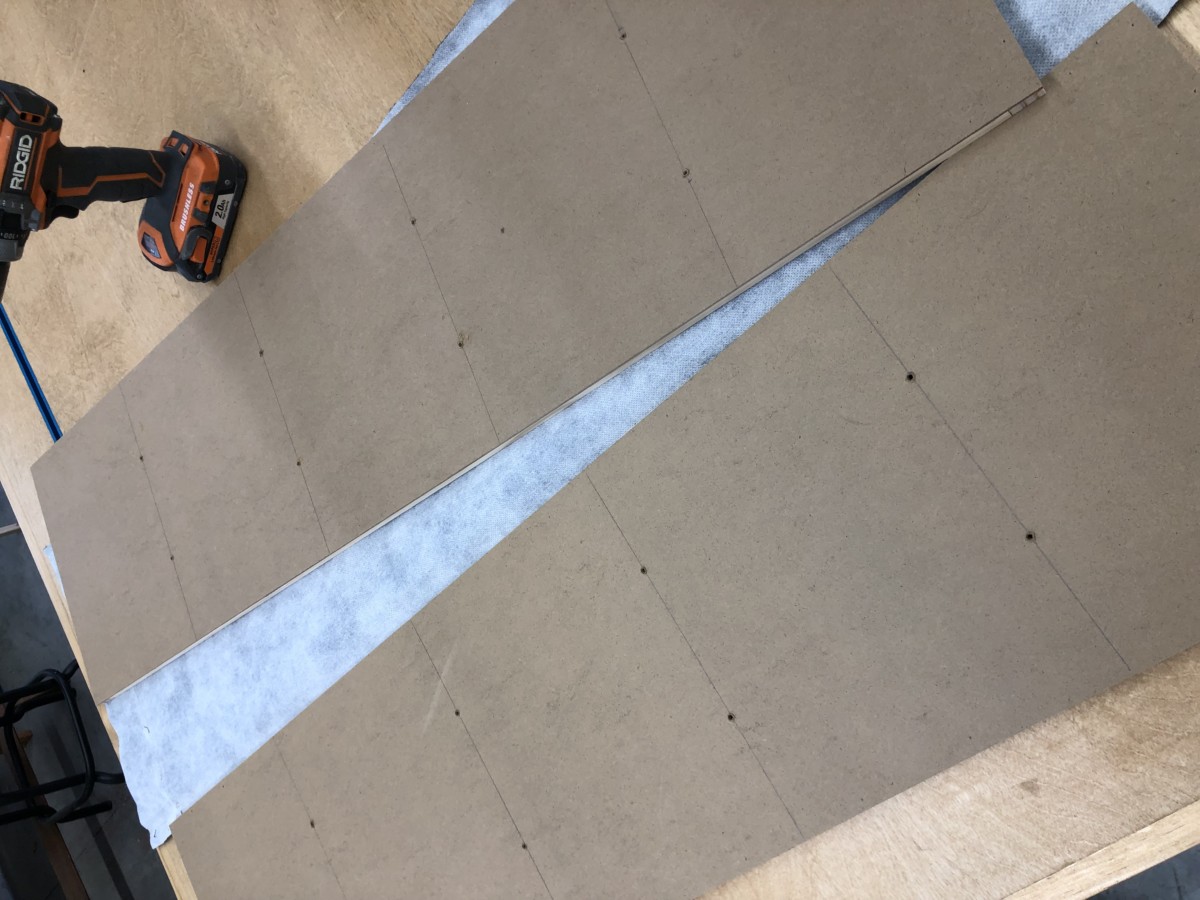 I then added foam to the front side of the support/panel. I have found that the cheapest way to do this is to purchase an inexpensive foam mattress topper! I picked mine up for around $9.00 at Walmart! I had enough to do both back supports with plenty to spare. I then pulled my extra fabric from the base of the ottoman tightly around the framed panel and stapled it in place. Now, you could easily leave the back support as is, but I wanted to add the tufts so that it would match the seat. To do that I used and upholstery needle and did a few stitches through the pre-drilled holes in the back. I used a small piece of wood to hold the stitch taught. If you watch my InstaStories I go into a little more detail concerning the process.
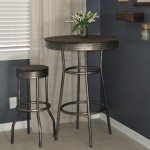
 Camper Table
 Camper Table
 Now that the dining area benches were completed I moved my sights towards the table.
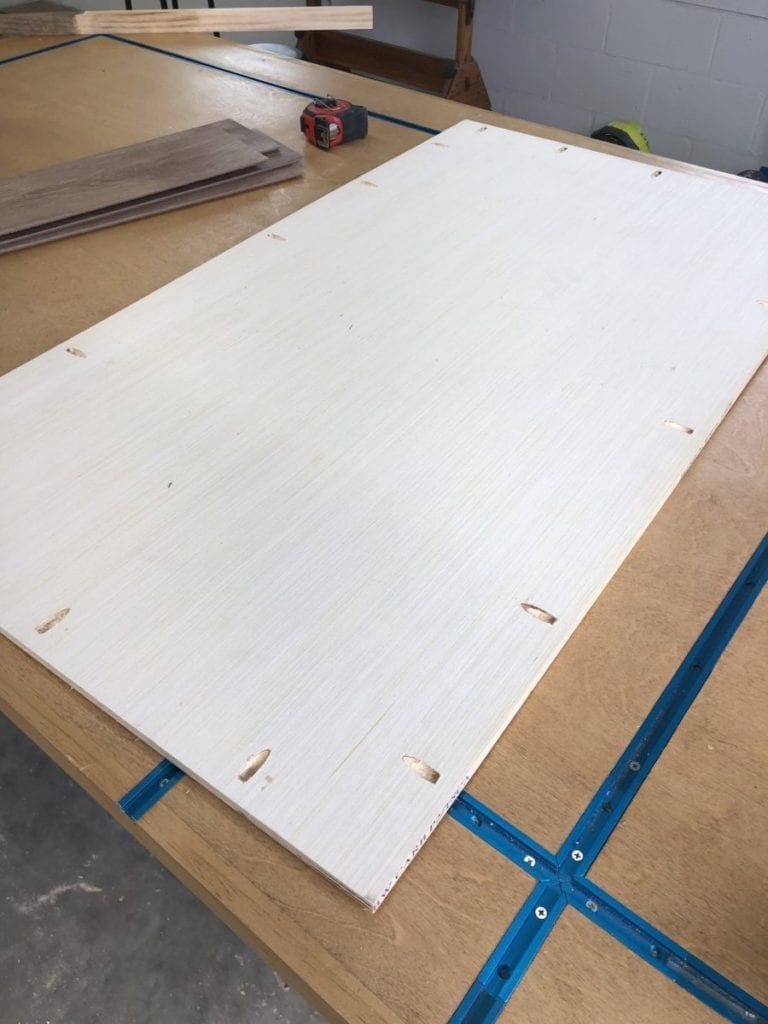
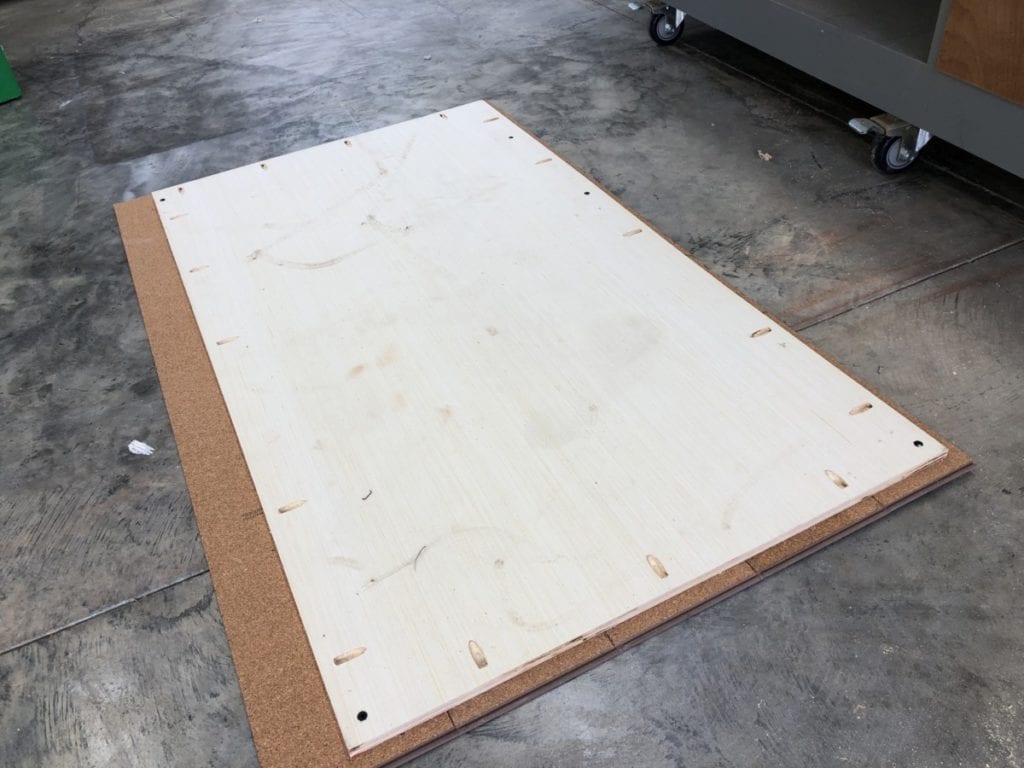
If you recall in my last post regarding the camper, I gave the nightstands in the camper bedroom a little facelift. I ended up using extra floor boards as the table top, and it worked great! So I decided to execute the same idea on a little bit bigger scale, I would use flooring on my dinette table top. To do that all I needed to do was determine my desired over all dimension and then subtract 1.5″. This 1.5″ would allow me to band the edges with a 1″x 2″ board. I used a 1/2″ board as my table base. Once I had it cut to the aforementioned dimensions I drilled pocket holes around the bottom side of the perimeter. (This will allow me to attach the edge band later.)
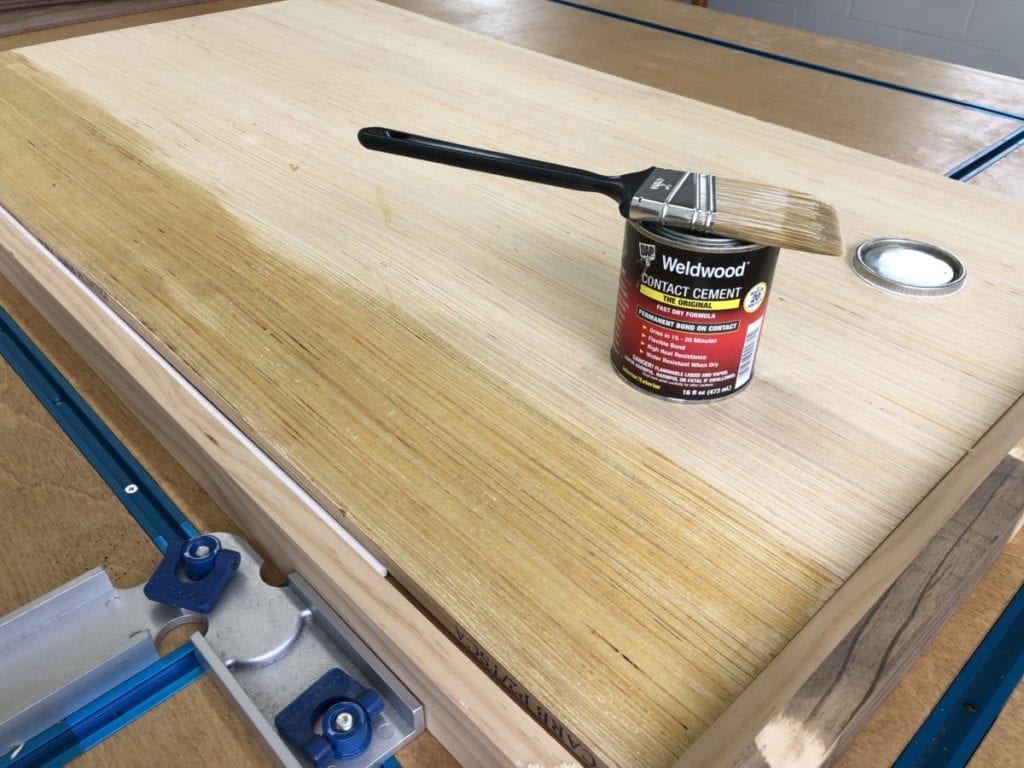
 Next is the easy part, making this simple piece of plywood look like a custom table! I simply glued the flooring to the board. Yup, it’s that easy! Using a paint brush I I brushed on a even coast of DAP Weldwood Contact Cement over the area that I would be placing my first board/flooring.
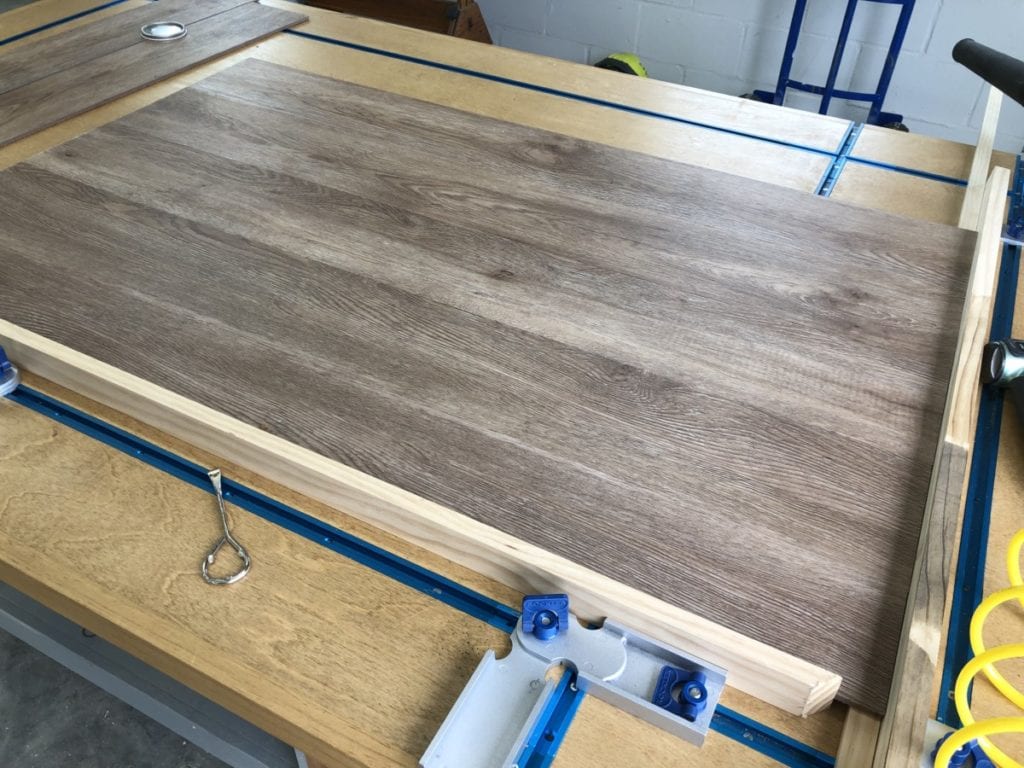
 Once the initial piece of flooring/board was in place I proceeded to paint on more of the Weldwood, and then added my second piece of flooring as if I were laying it on the floor. The flooring type I chose was click and lock and it is also waterproof so it would work great for the table top.
 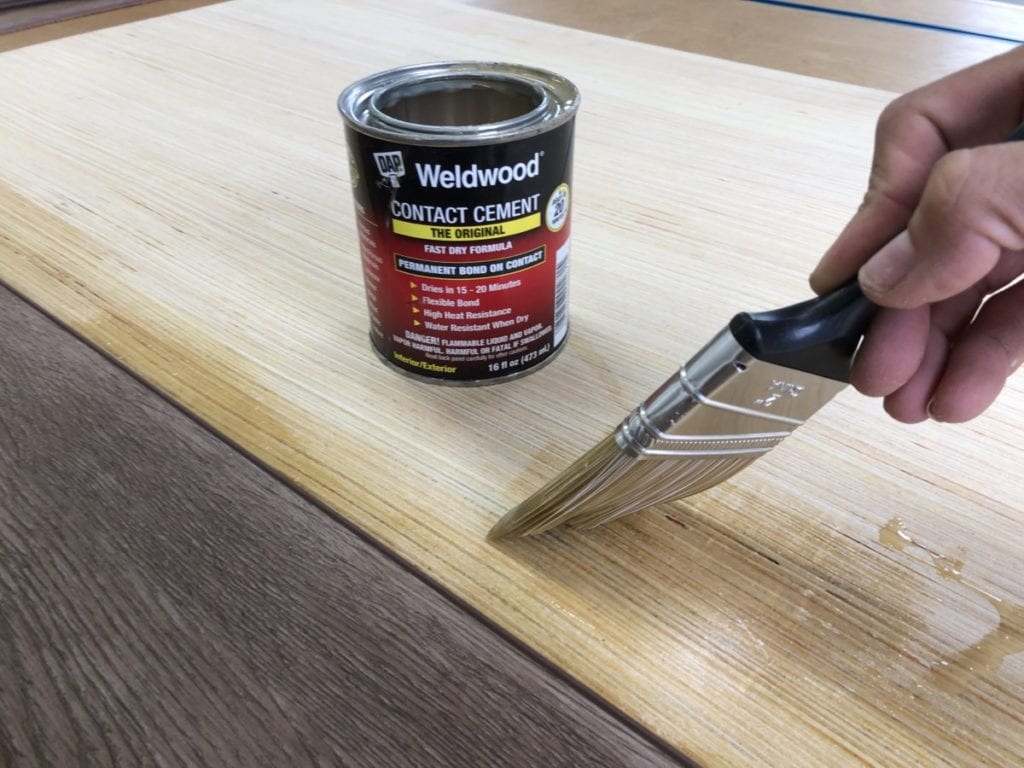 Continue repeating the steps until your entire table surface is covered.
 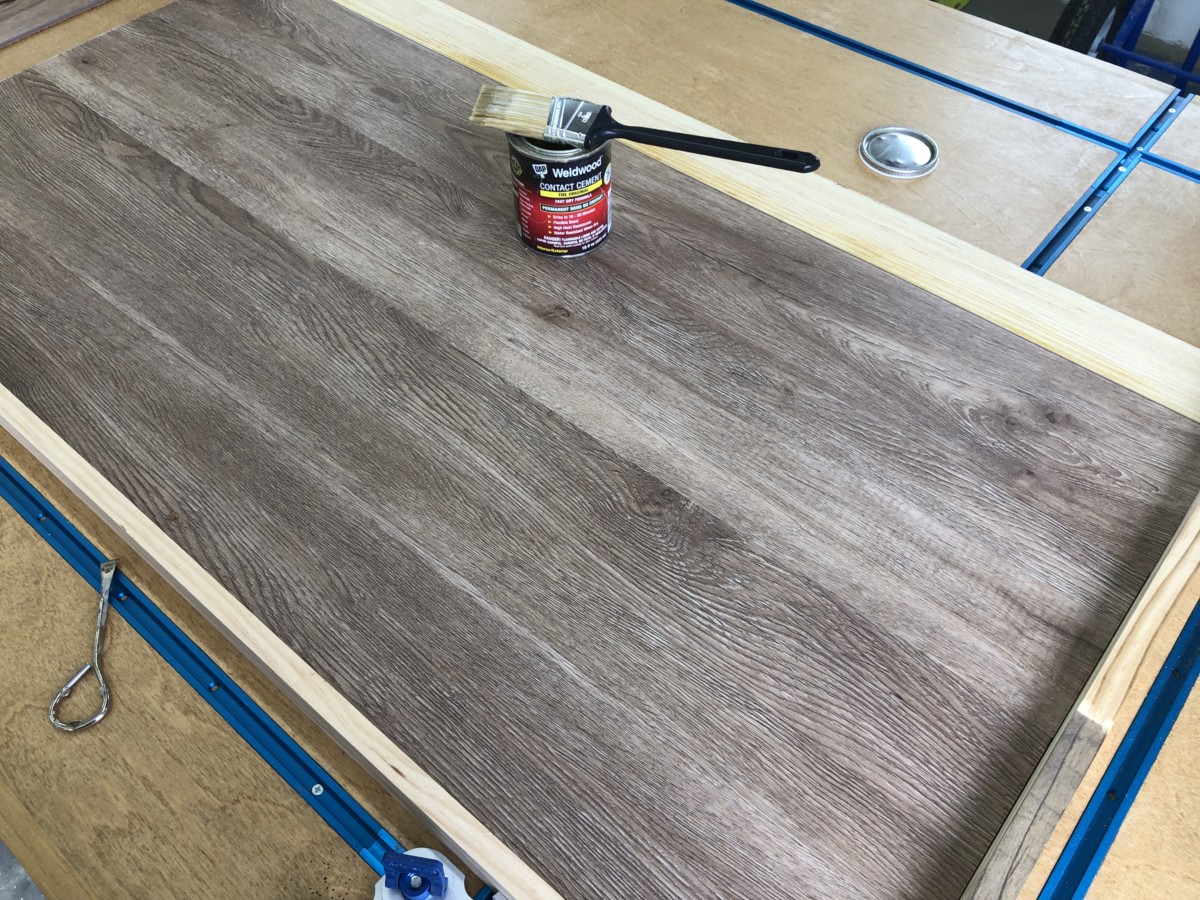 I purposefully made sure to have flooring overhang on both sides so that I could trim down all the sides and it would be flush with my plywood board.
 I just used my tablesaw to cut off any excess board and it gave me a nice flush edge.
 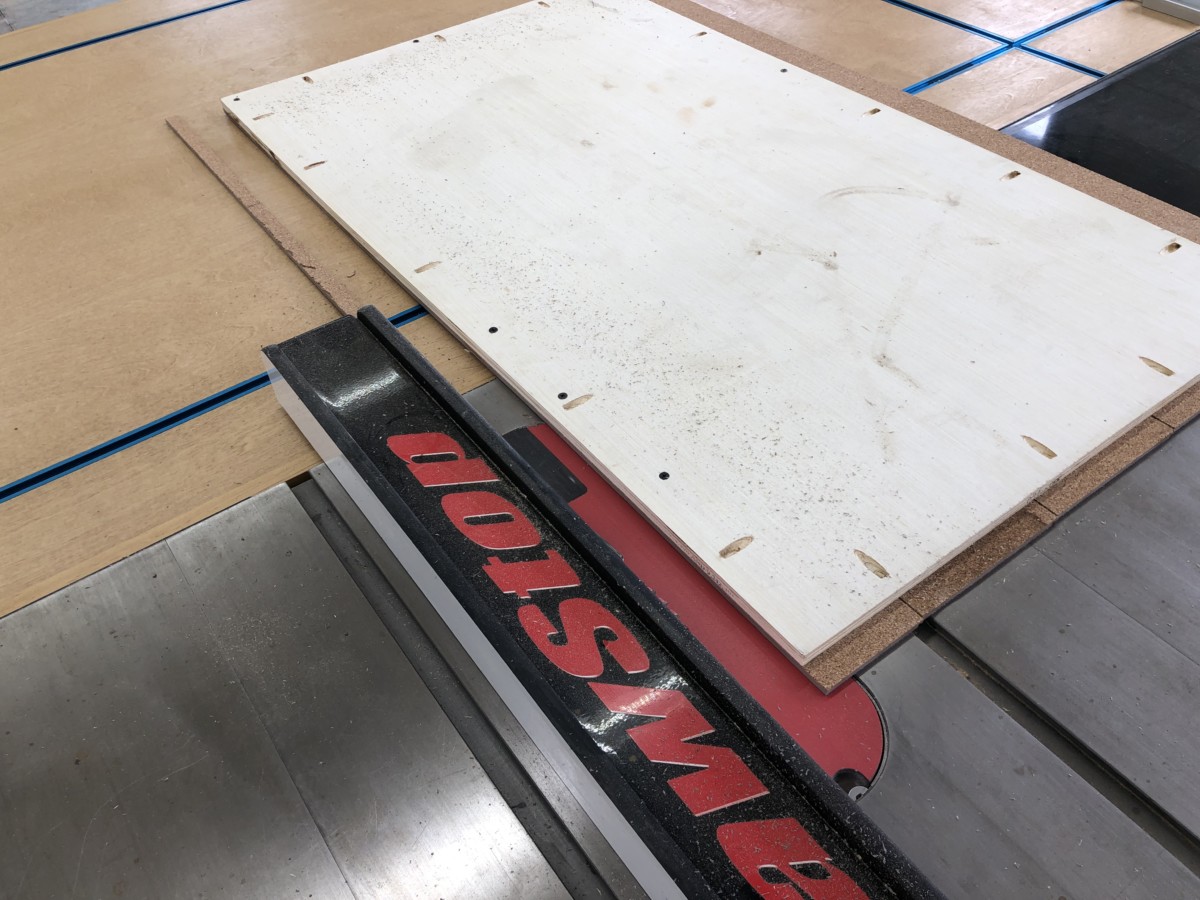 I then banded it with a 1″x 2″ board. After playing around with some layered stains I was able to get a color that closely matched the table top. I then proceeded to stained all my 1″x 2″ boards and allowed them to dry.
 Once they were dry I attached them around the perimeter of the table using DAP Wood Glue and the pocket holes I drilled earlier. This will not only give it a finished edge but also give the table top some support and rigidity.
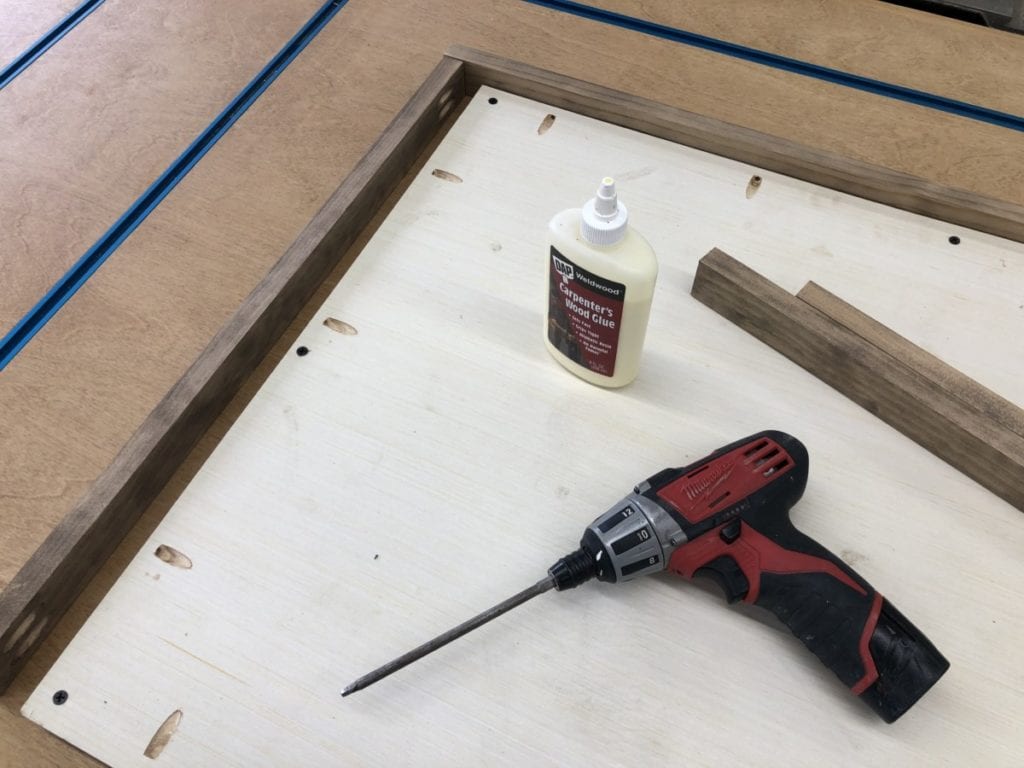
Now that the table top was complete I was able to move on to the legs/support. The tricky thing about working in a camper is that you cannot necessarily rely on the wall to support any weight. So I had to get creative with the leg situation. My goal was to have as little under the table (as far as supports) so that we wouldn’t constantly be kicking or hitting them when we were sitting at the table. So I created a table leg that would attach to the wall, but all the weight of the table top would be resting on the floor. 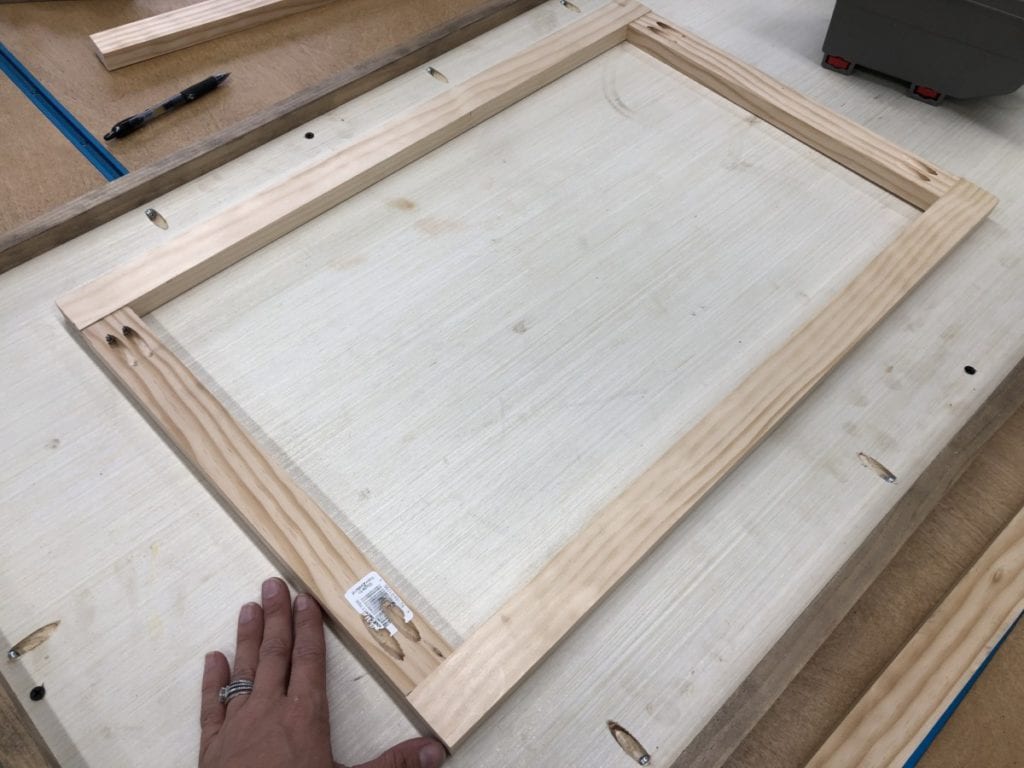 I attached the leg/support directly to the wall. Again, you cannot really rely on the camper wall holding weight independently, but with a handful of screws I felt confident that it would easily keep the leg securely fixed to the wall. I designed the support so that the lip (the 1″x 2″ board I banded the edge of the table with) would sit on the inside of the the top of the wall support. It worked perfectly! All the weight of table rested on the floor, and the wall mounted support was low profile and very sturdy! WINNING!
 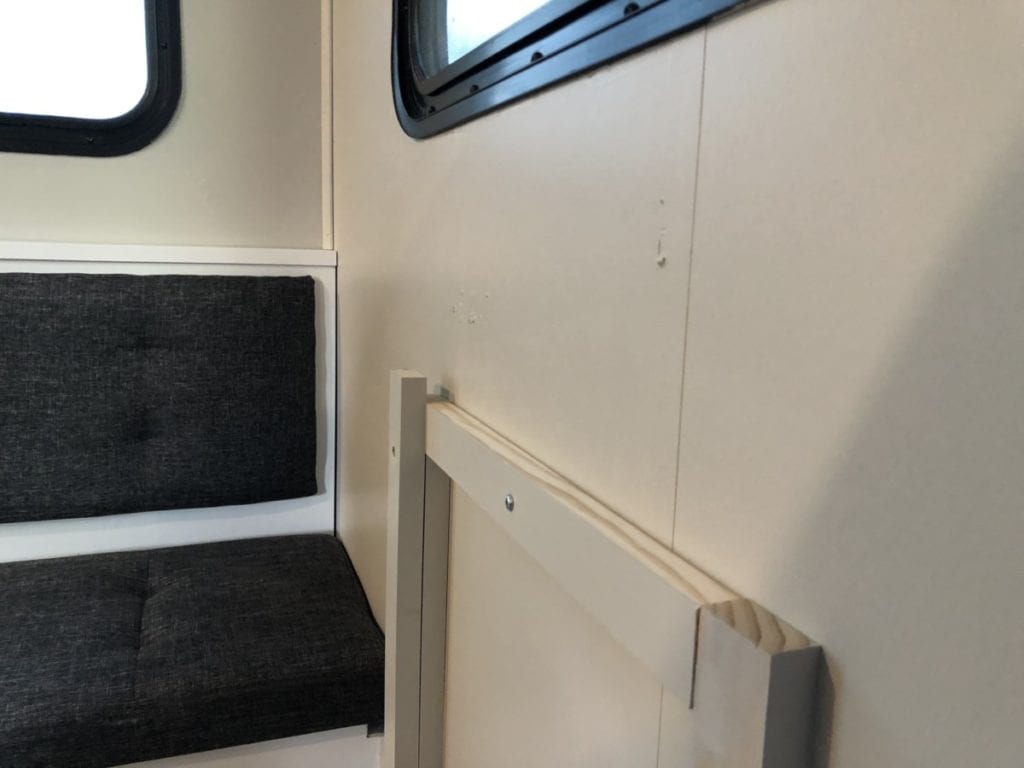 As awesome as my wall mount support was, I would still need at least one other point of support. I just added a very simple straight leg using a plate made to fit said leg. Just screw the plate in place and then screw in the leg to the plate. The one word of advise I would give… I did add a pokethole to the base/backside of my leg. Once I had the table in place and the leg of the table centered I secured the table leg to the floor via the pocket hole. It worked great and the table is completely secure even if someone were to kick the table leg.
 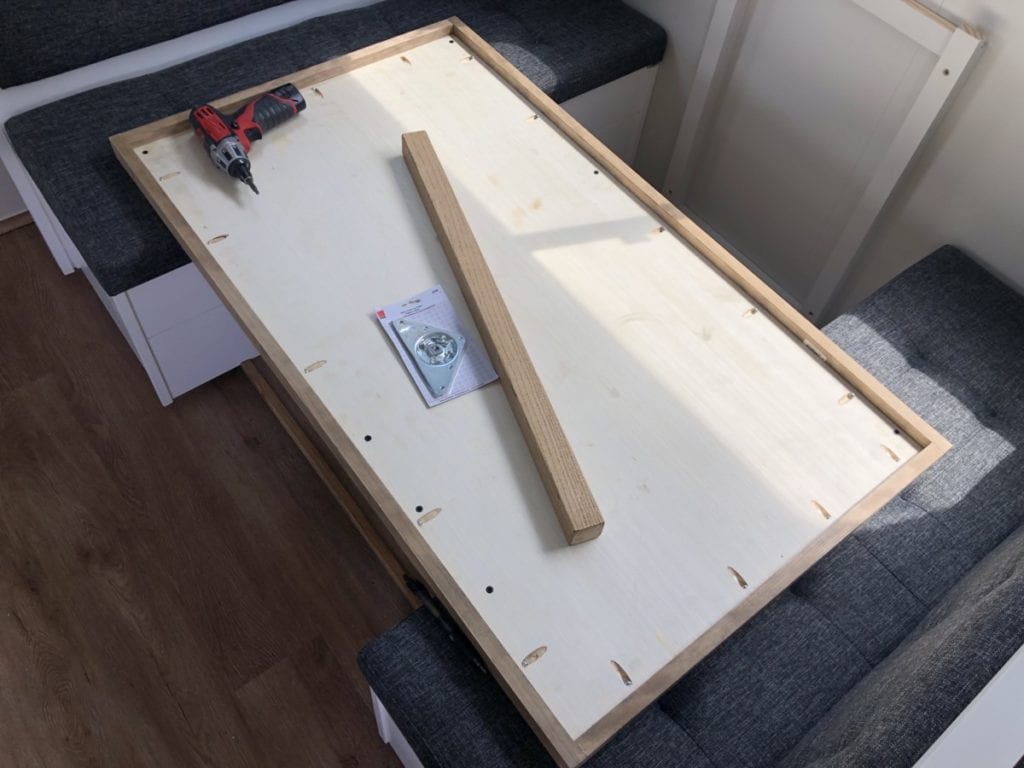 Isn’t it a beauty!? This table cleans up perfectly, can take a beating and matches everything PERFECTLY!
 When you couple a gorgeous cost effective table, with awesome storage seating, I’d say you have a pretty dang awesome dinette set!?
  So let’s take a real quick look at what we originally started with, shall we?
 Now look how far it has come !?
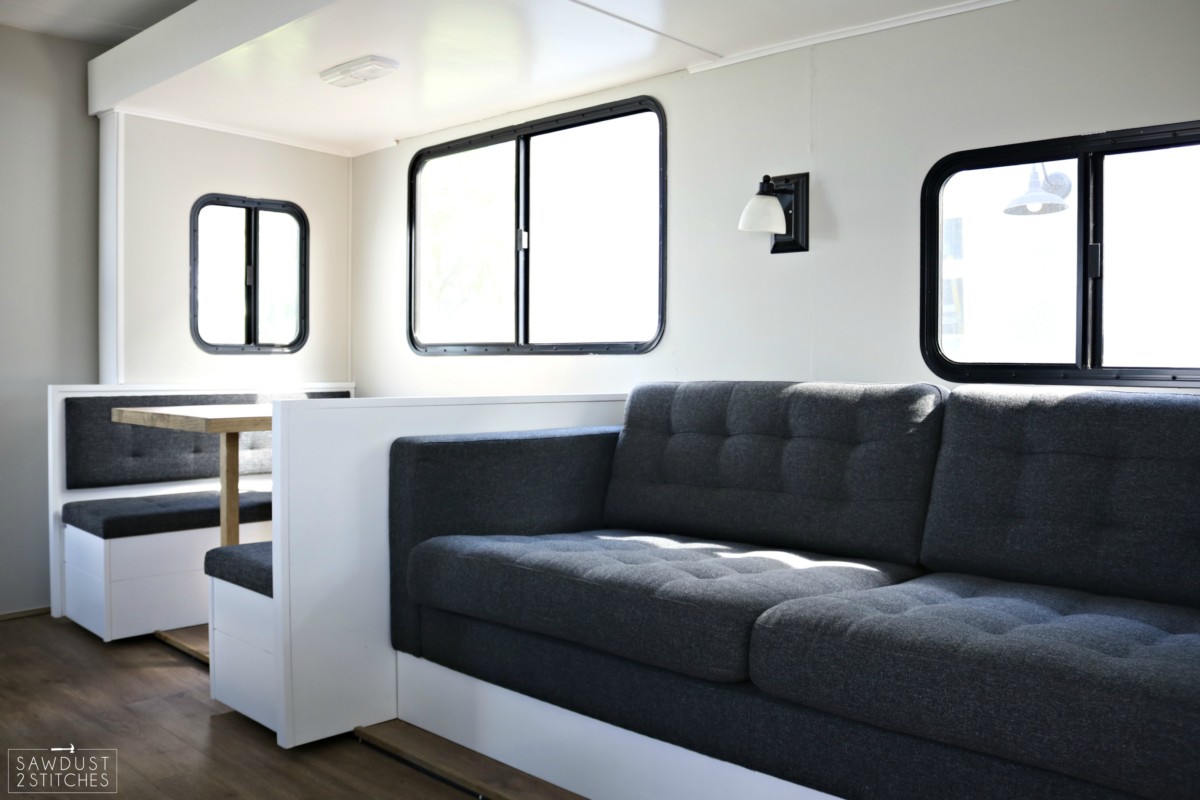
Amazing right?! But guess what!? I still have a few tricks up my sleeve and still need to add some finishing touches so stay tuned for the reveal coming soon!
Thanks so much for reading along.
Take Luck,
Corey
 Copyright secured by Digiprove © 2019


Corey!!! You are brilliant! I love what you’ve done! Thanks for such detailed tutorials too! Have a blessed day! <3
Wow! Looks incredible!
Wow. This is absolutely incredible work!
Fantastic work! This is such a fun project to follow. I can’t seem to find your post about the master bedroom portion. I’m looking forward to reading that, too!