This post does contains affiliate links and is paid for in part by Frogtape partners.
Alright, who here has an outdated R.V. or Toy hauler that needs a makeover? Well, you are in the right place. Let’s dive right in, shall we?
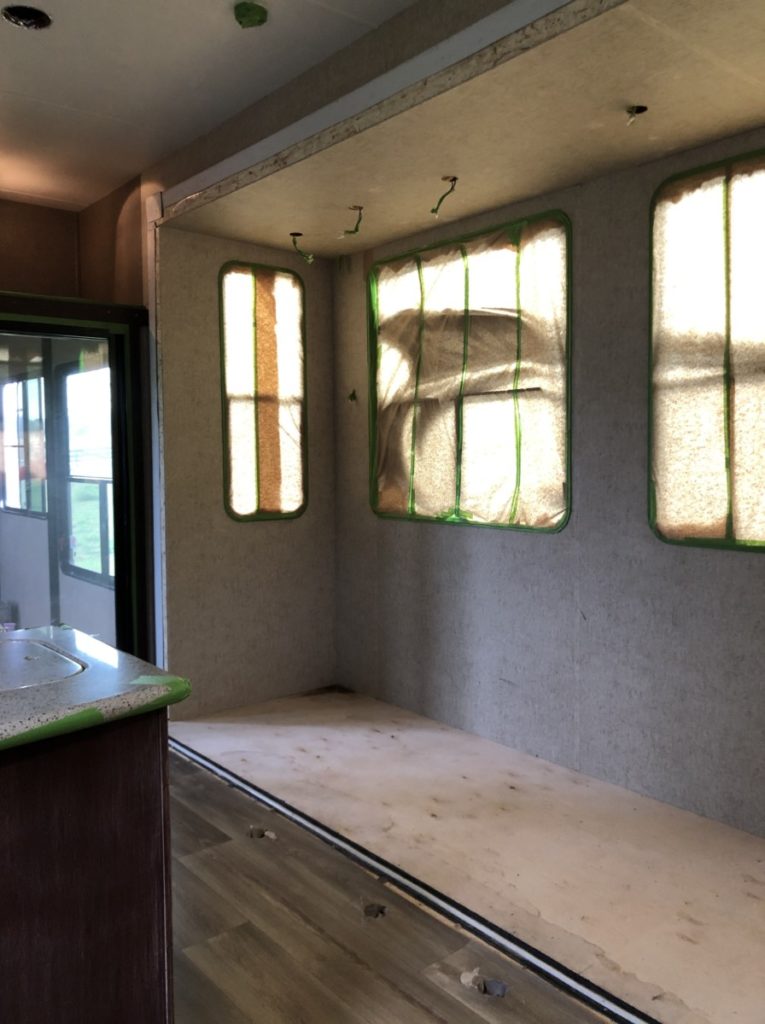
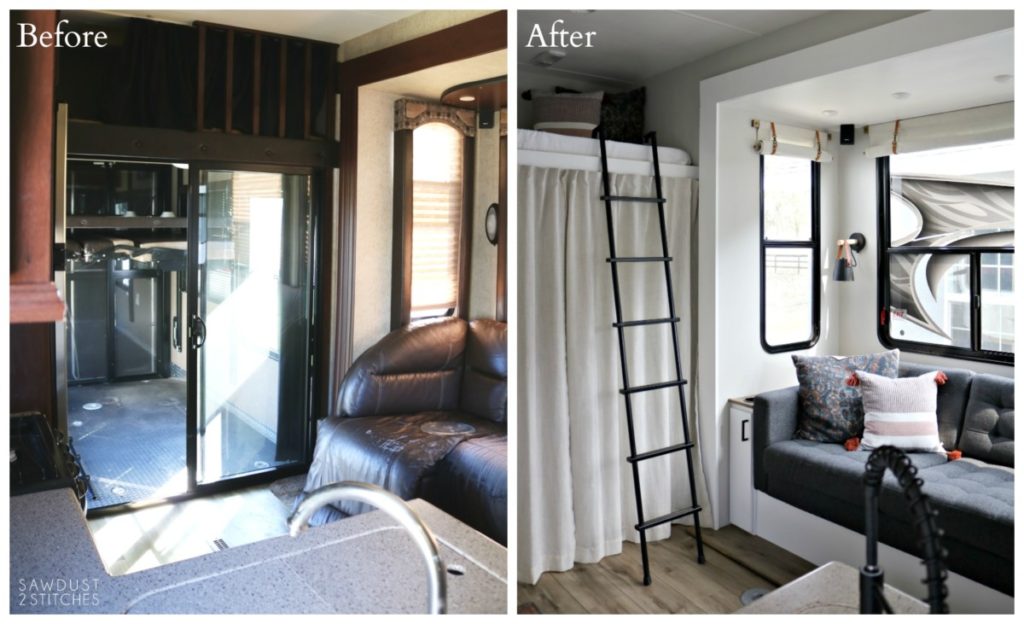
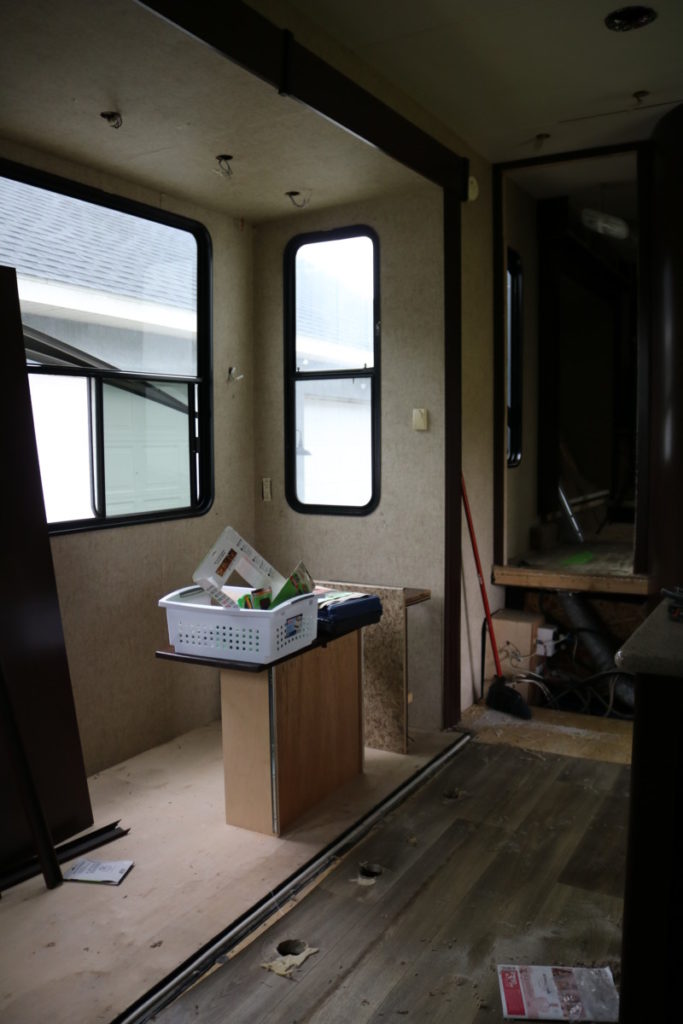
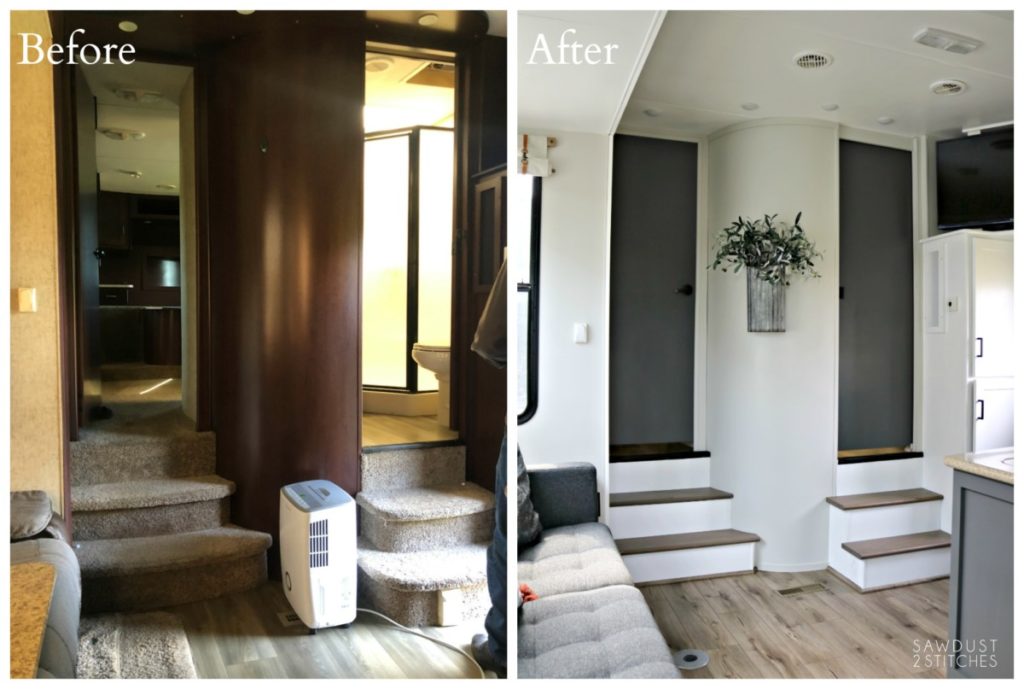
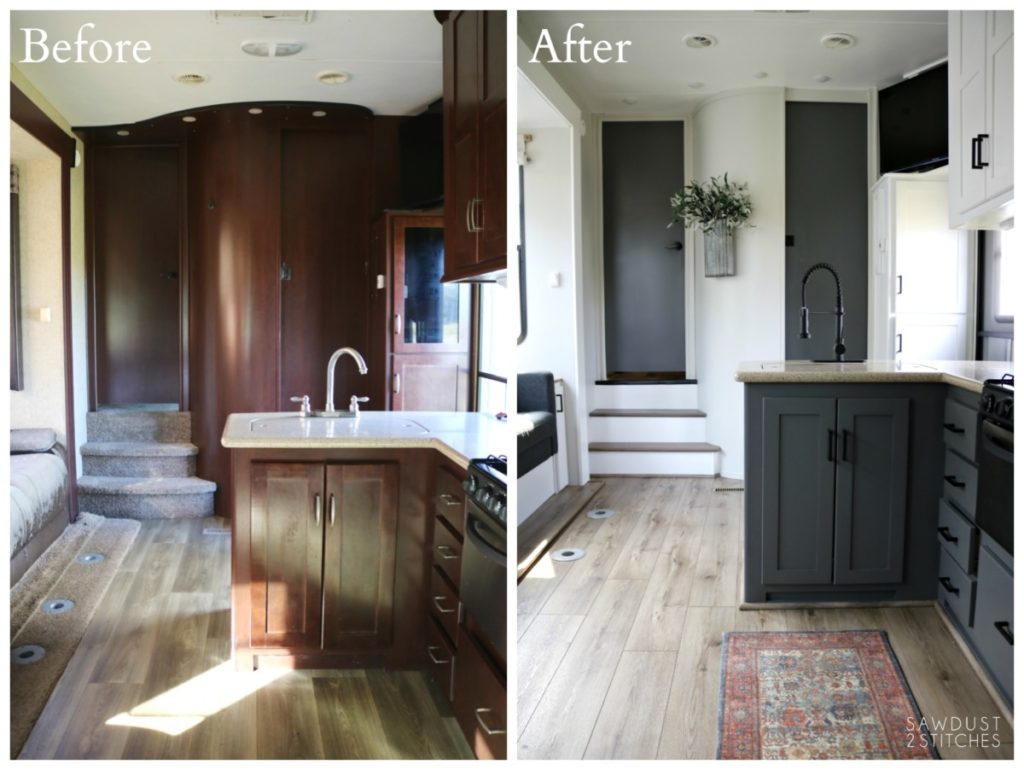
Phase 1: Gutting the R.V.
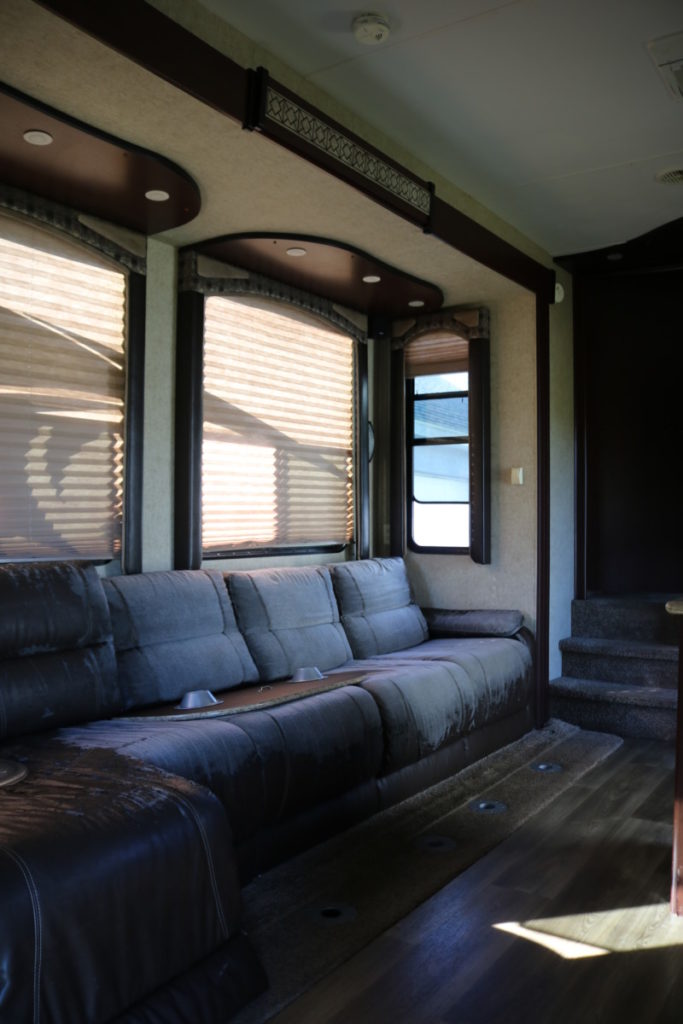
Oh how I wish I could transport you into this image. Let me paint you a picture. Imagine you have 3 full grown dogs and the concept of brushing or cutting their hair is a foreign concept. Then one day you decide to sell said kennel R.V. and you realize the smell might be a deterrent. What to do? OBVIOUSLY you buy three economy size boxes of moth balls and hide them in all the nooks, crannies and vent ducts in order to mask the smell.
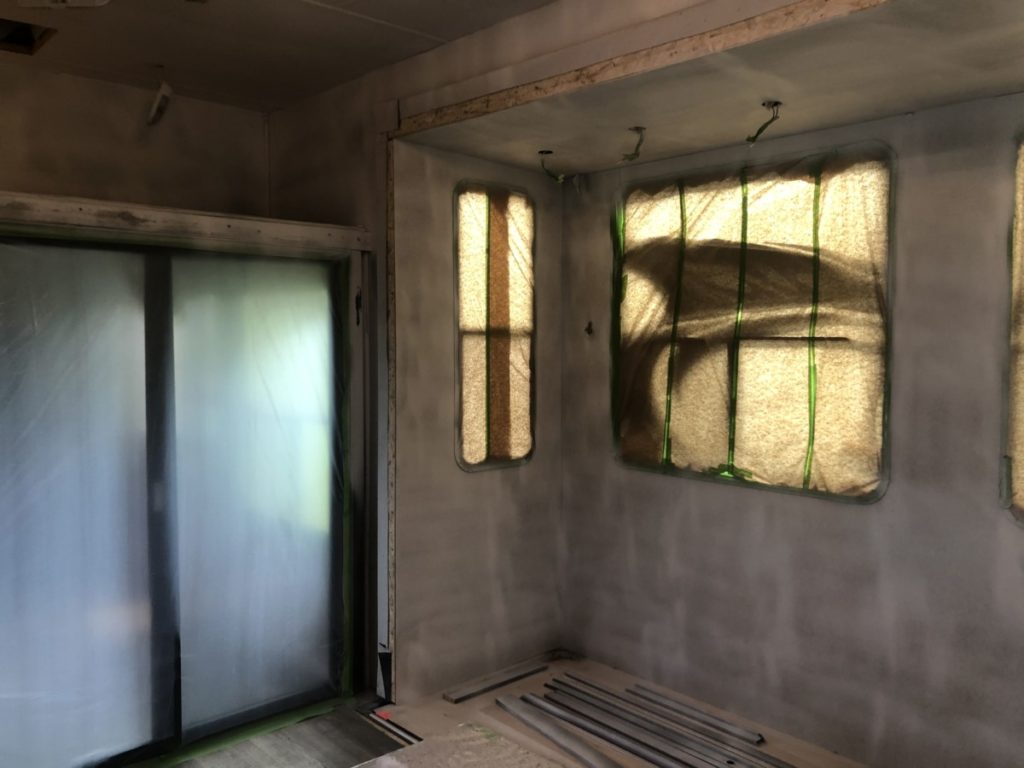
Phase 2: Prepping
Is that picture coming in clear? Well, go ahead and add at least 3 more dogs possibly a cat, Florida heat and you get a pretty good sense of the smell. All of this to say, while the before images aren’t BAD, this makeover was necessary despite the appearance of its condition.
Phase 2: Priming
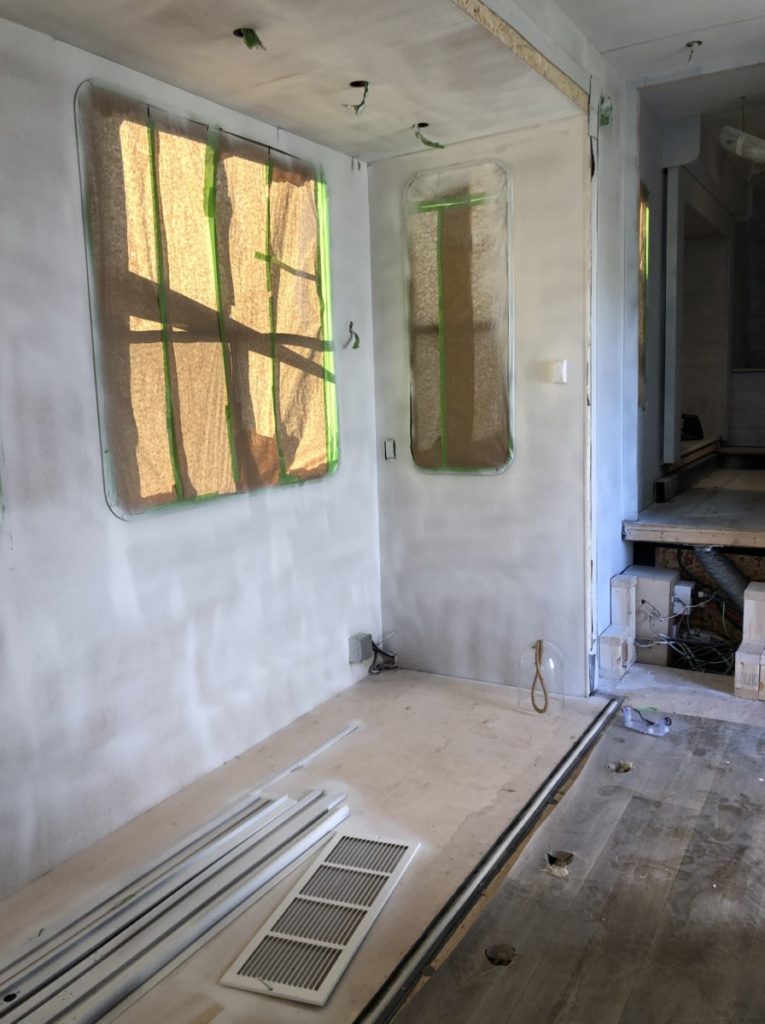
Everything needed to go. Anything that could not receive a fresh coat of odor blocking paint was removed. ( If you are interested in the painting process you can get all the details for spraying here, and hand rolling here.) But for the sake of showing the makeover progression let me give you a general overview. I gutted this sucker! This time around I decided to use the “Fuji, Semi-Pro Sprayer” in order to paint. Before starting I removed EVERYTHING and taped EVERYTHING off using Frogtape.
Phase 3: Painting
As I said, I have all the details for my paint process (including the best primer EVER) available here. It is amazing the difference that simply priming the walls made. Everything looked so much bigger and brighter!
Once all the walls were primed and painted, it looked like it was a brand new Toy Hauler that was still in the assembly process. The walls looked, so modern and brand-spankin’ new.
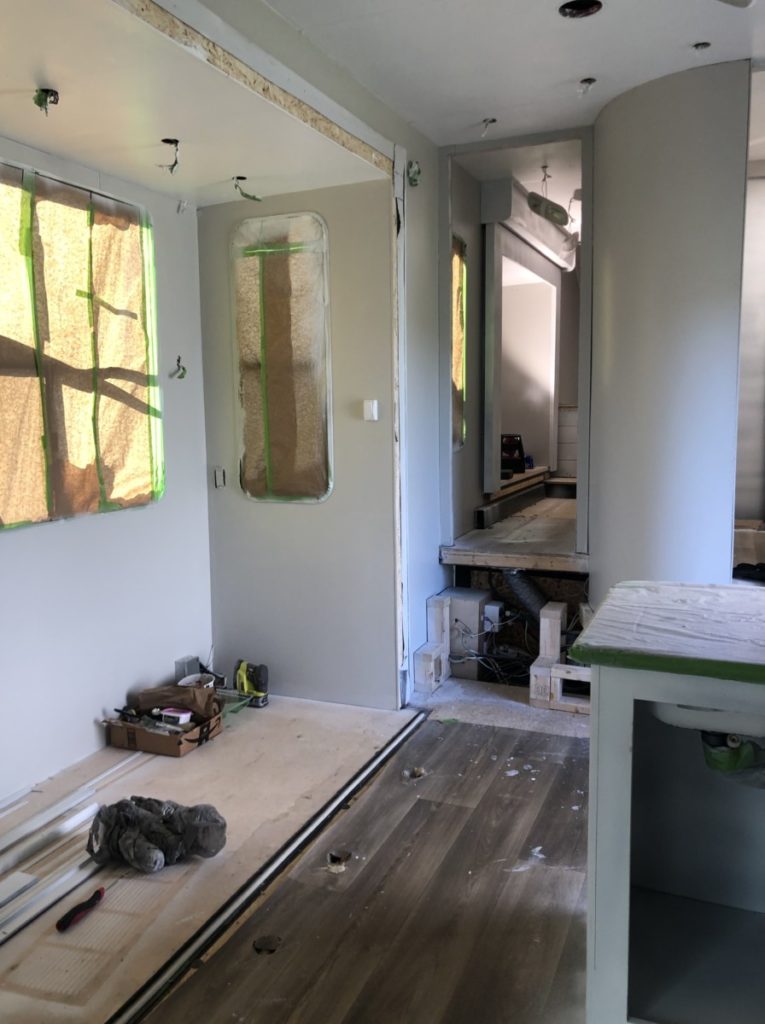
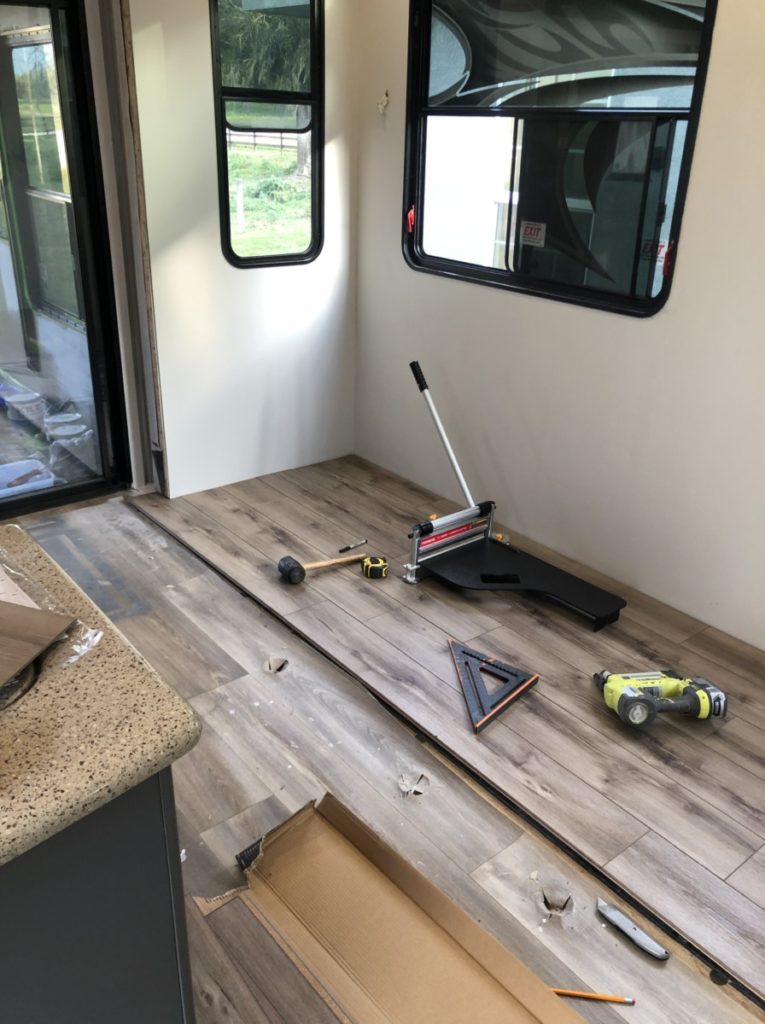
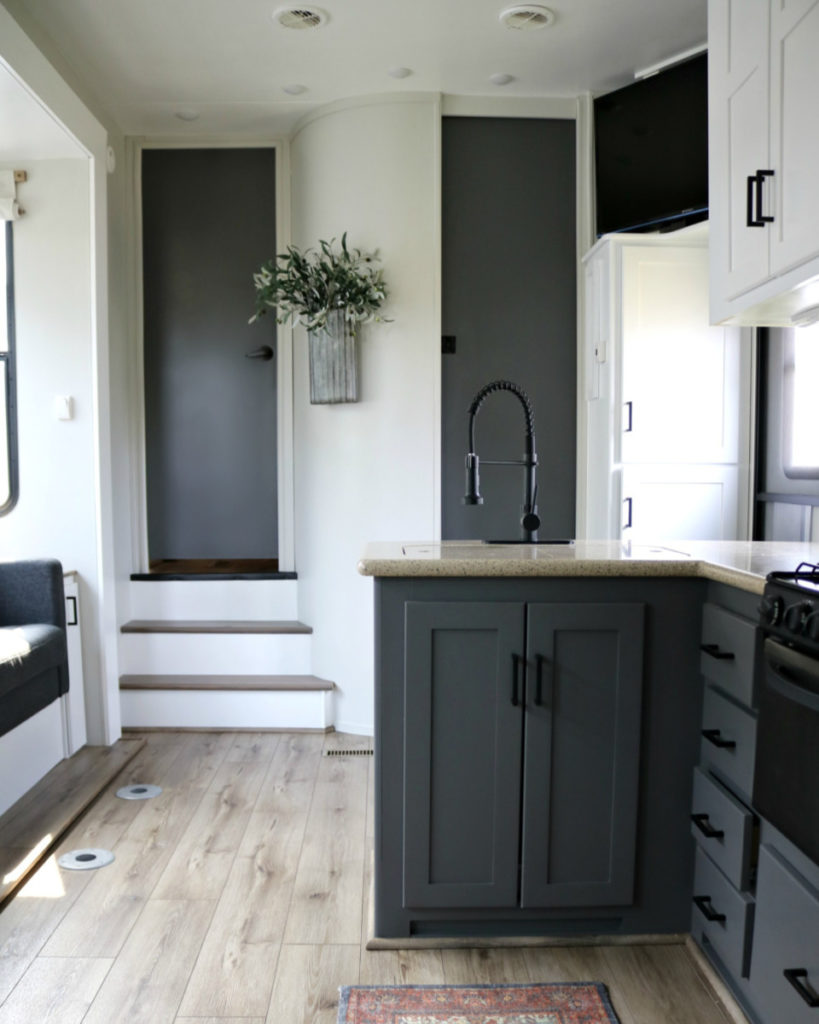
While the original linoleum was in fairly good condition there was a little snag. There was carpet in about 70% of the camper that needed to be removed. I knew that matching the linoleum exactly would be nearly impossible so instead I replaced the flooring throughout using NuCore cork back flooring in the color “Morel”.
Phase 4: Flooring
Phase 5: Replacing Furniture
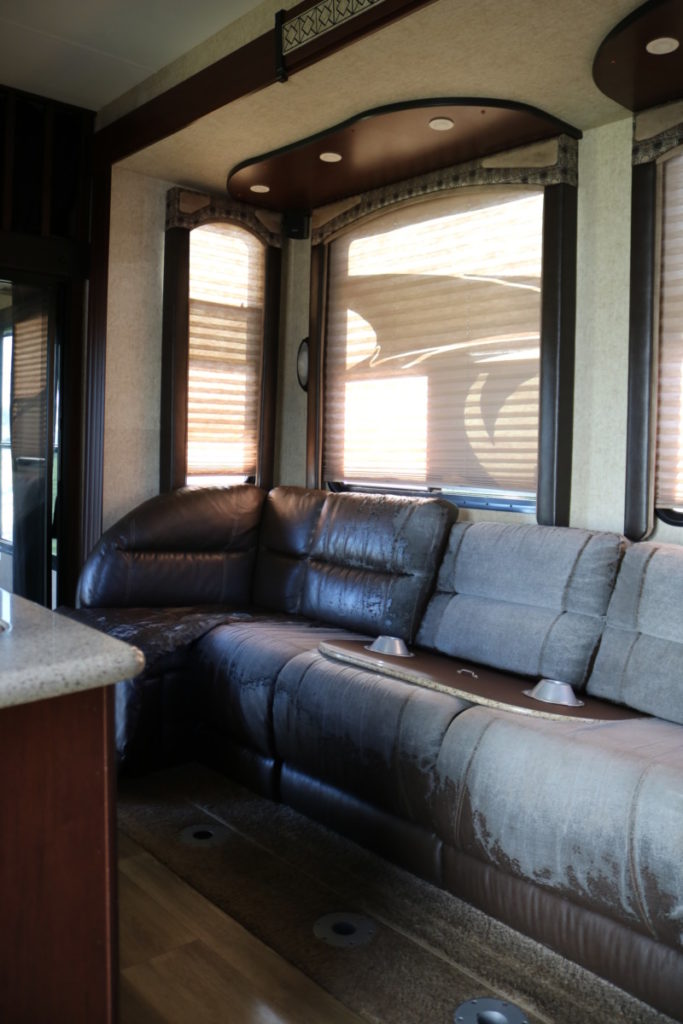
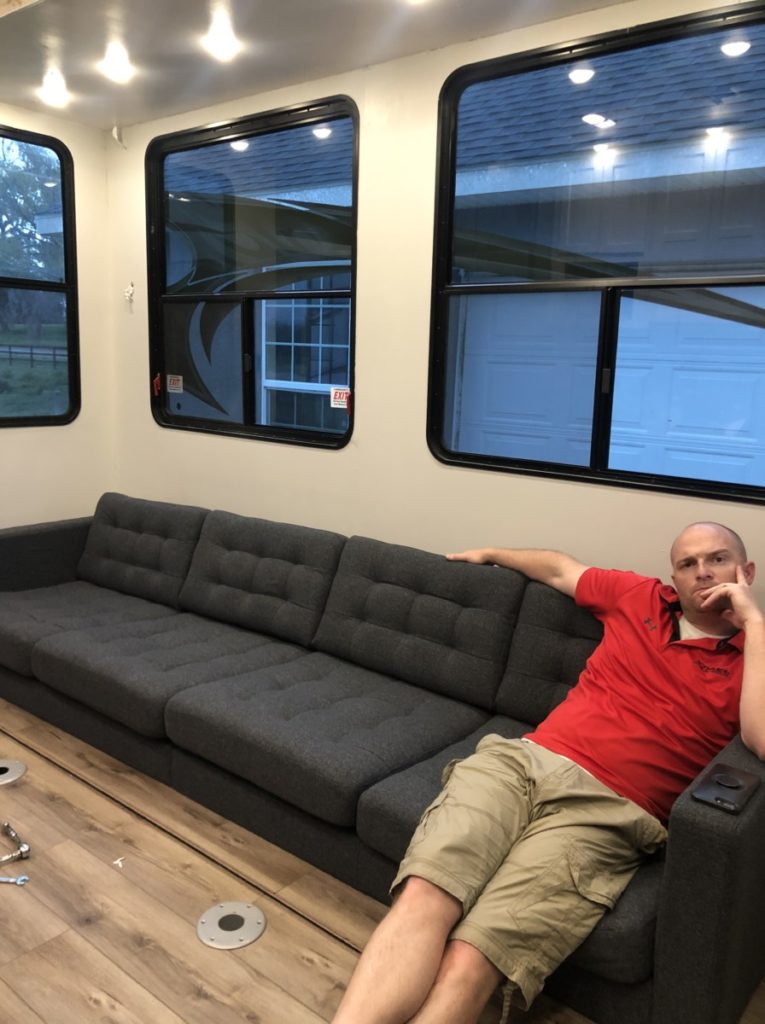
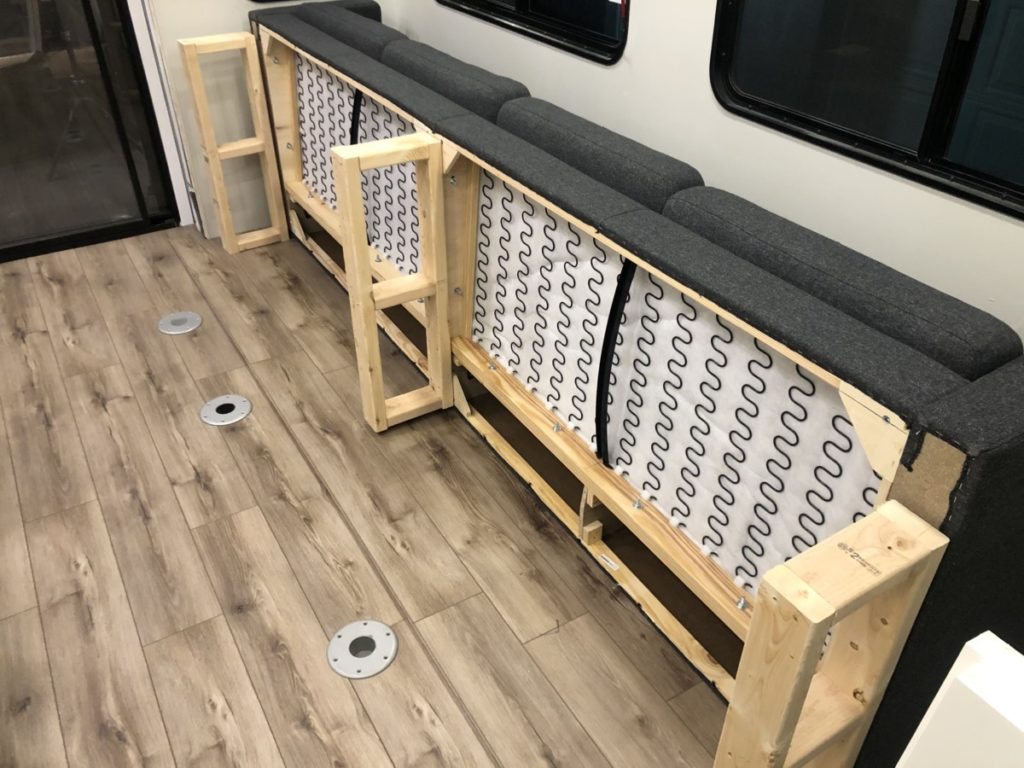
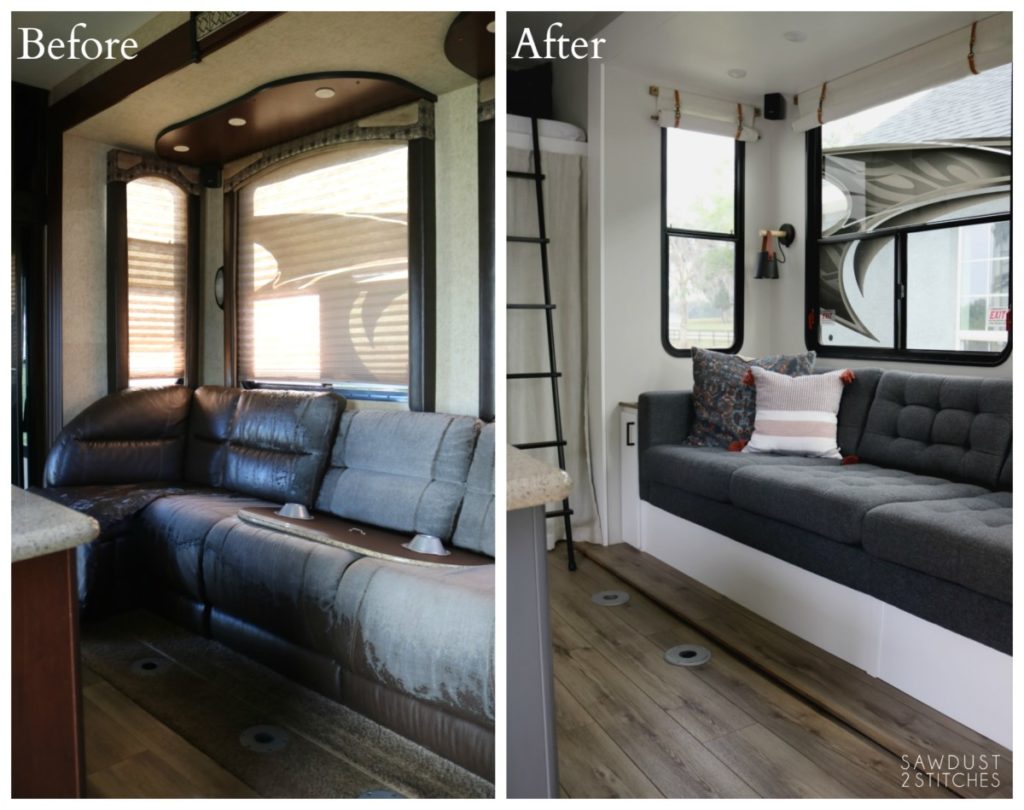
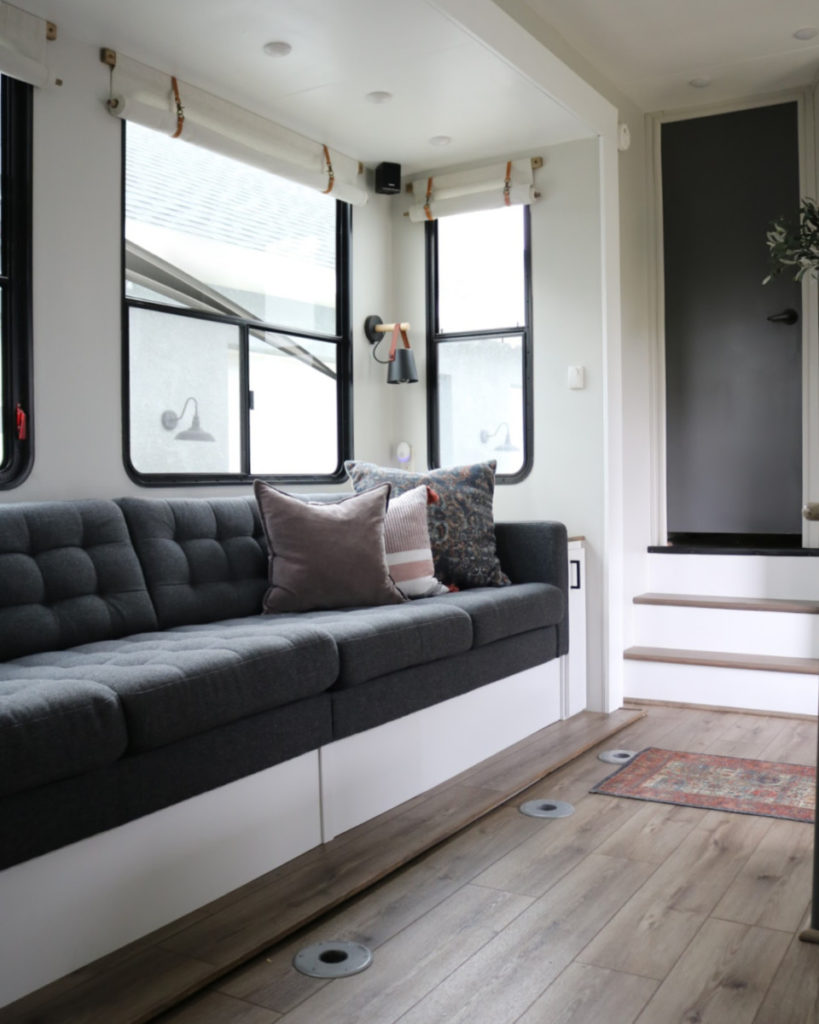
The next hurdle in the living area was creating seating. The original sofa was beyond repair and would need to be completely replaced. I used the Ikea MORABO sofa in my last R.V. Makeover and loved it! The only snag in this situation is I needed a MUCH larger sofa. In this toy hauler, the dining area is actually in a back room/garage. Where as in the last camper I was working with a smaller space and trying to accommodate a dinette set. In this one I needed one very long sofa… and I had an idea.
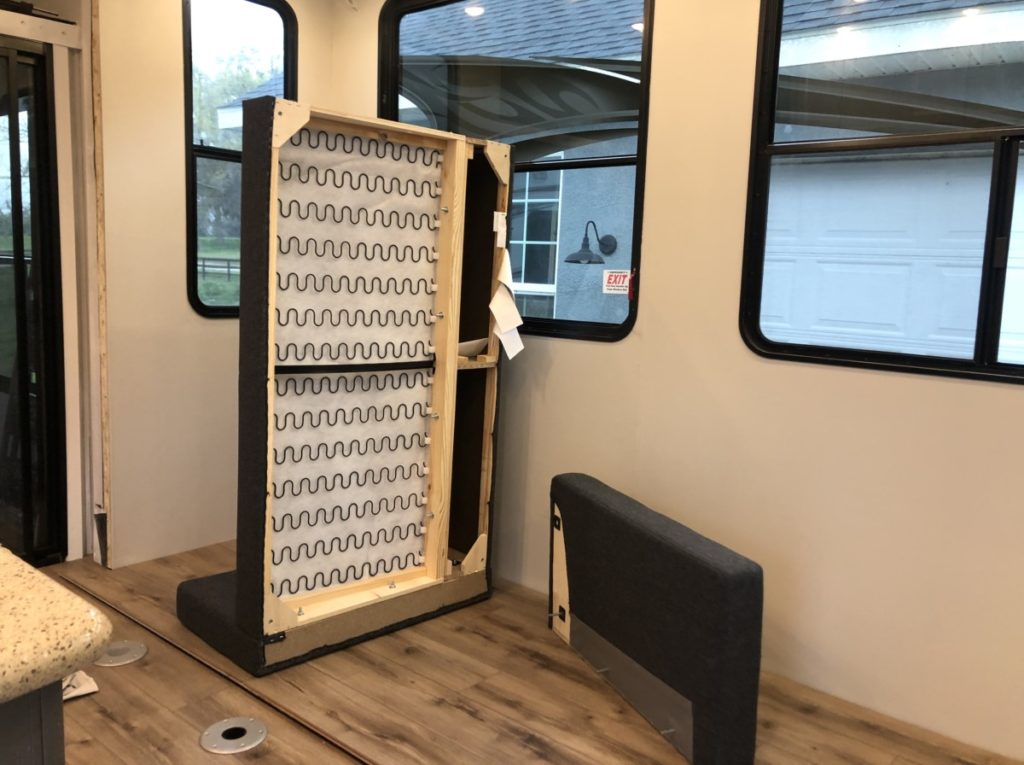
“Why not just use TWO love seats and bolt them together?”, and that is just what I did! I purchased two love seats and removed the inside arms and bolted them together. It was so simple and it took all of 5 minutes to do.
After that I built a frame for them to sit on and small side tables to fill the space difference. (You can see all the details on this process, on my Instagram Stories here.)
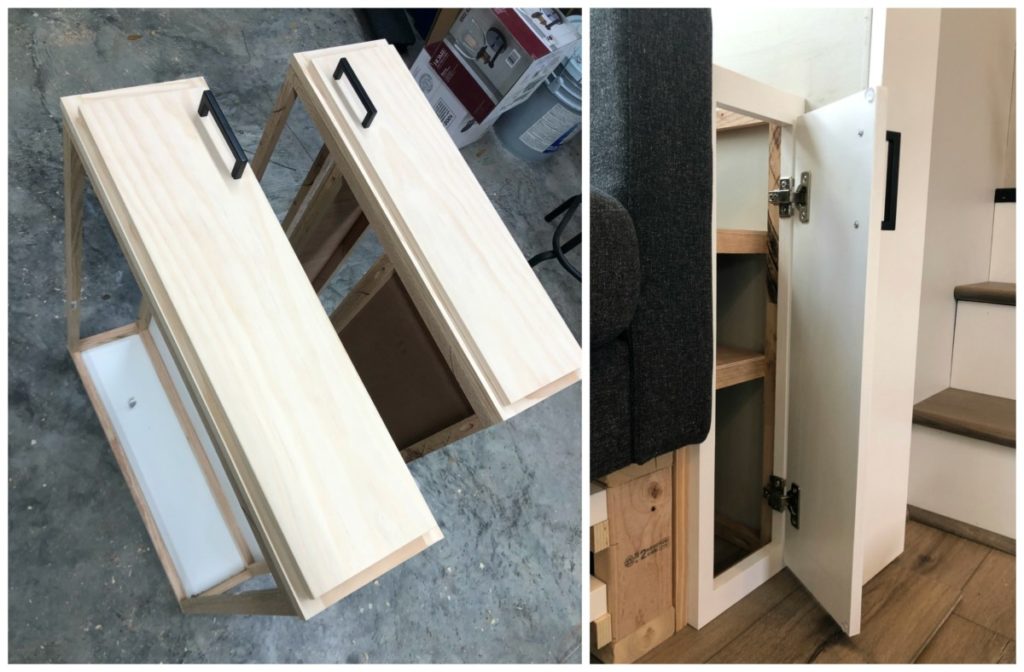
Phase 6: Adding Practical Character
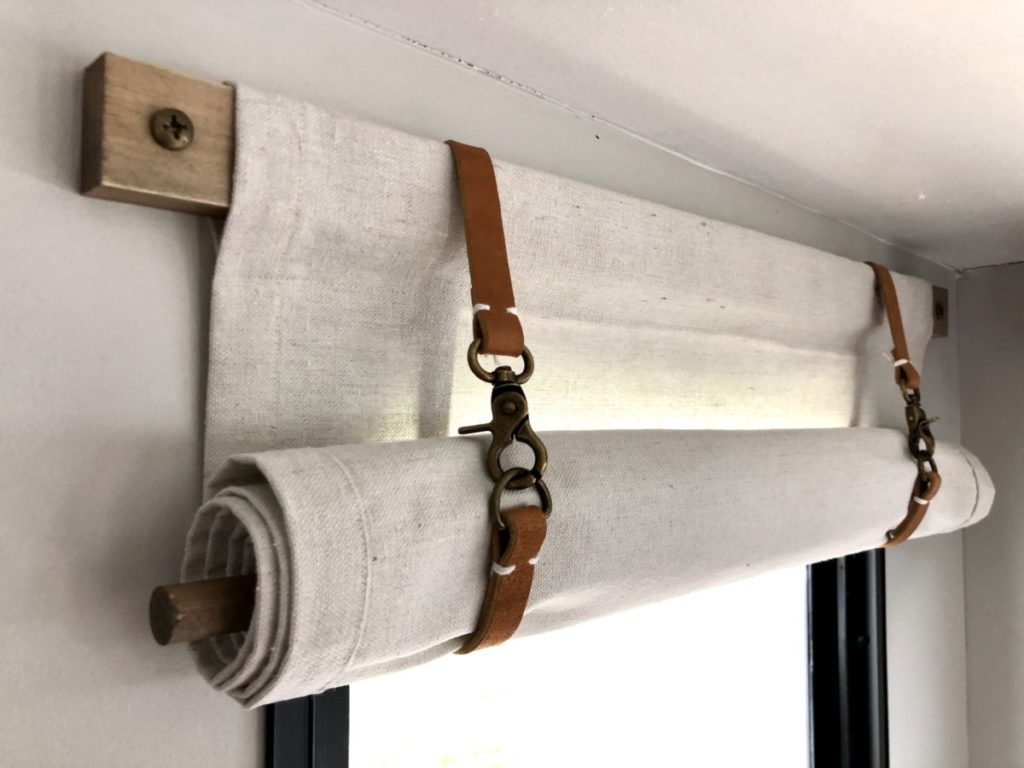
The last thing to complete the space was to add light sconces and curtains! The sconces are just standard light fixtures that I converted to R.V. standards by simply switching the light bulb! ( You can get the fixture here, and the light bulb here.) If you want any details about any of these project make sure you check out all of my Instagram Stories, where they are all saved to my highlights.

After the last R.V. makeover I have received a ton of requests for a curtain tutorial, so this time around I am happy to oblige! You can check out all the details here.
So here it is, the living area of the newly renovated toy hauler!
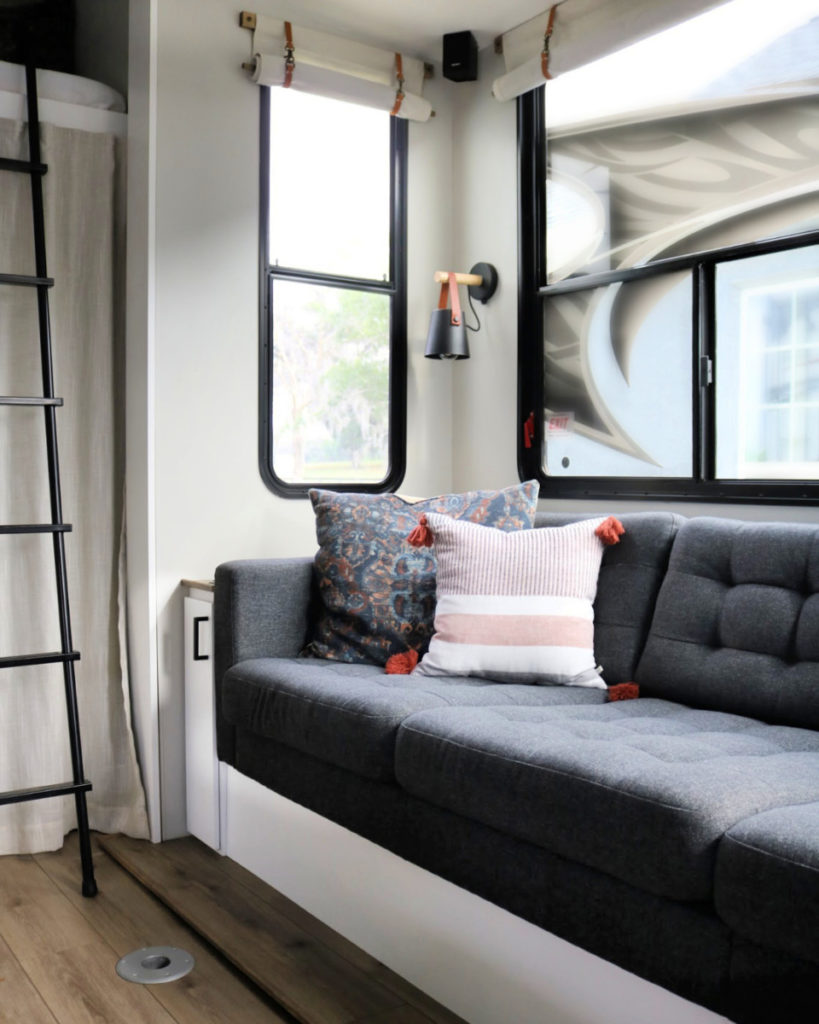
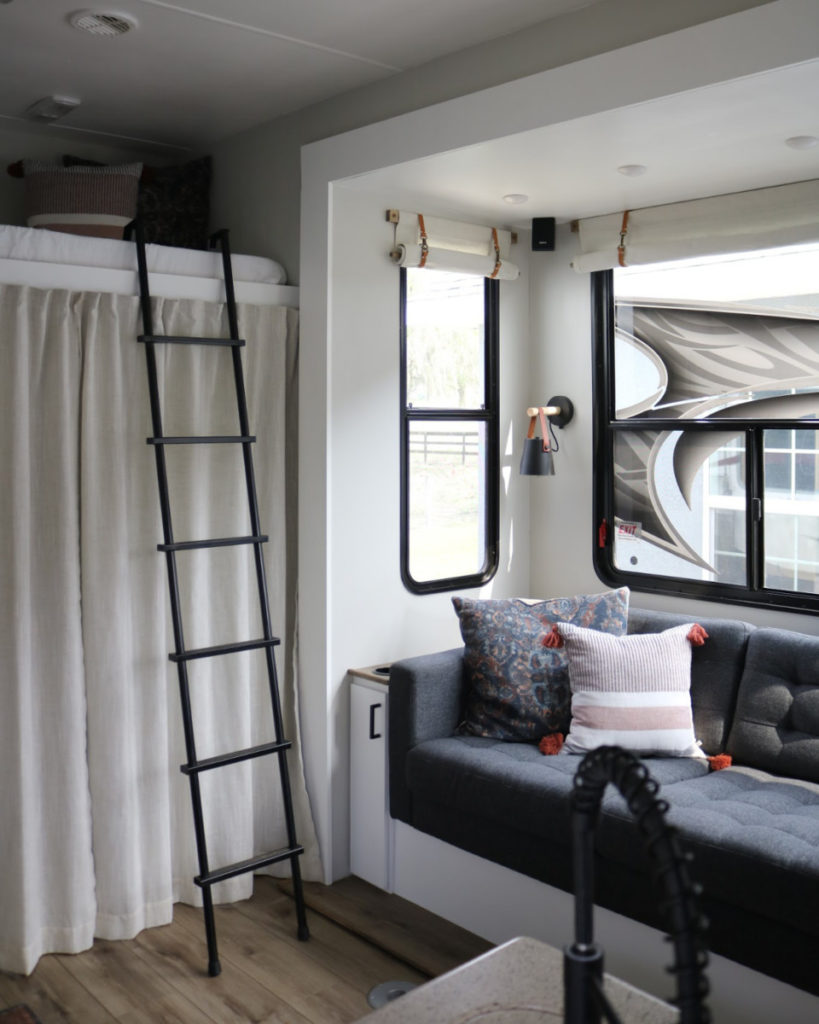
Let’s see that from another angle!
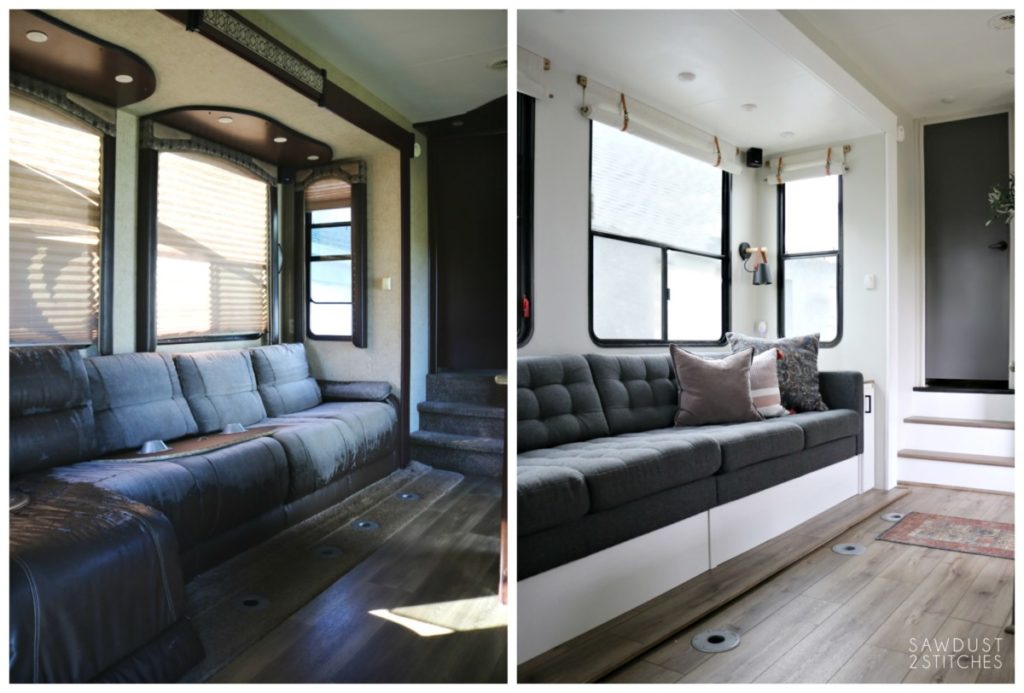
There you have it folks, the R.V./ Toy Hauler living area/sofa makeover! When we decided to tackle this Toy Hauler and sell our first camper I may have cried, but as this project is coming together I am so glad we did! This project is surpassing all my expectations and I am so excited to finish up the rest of this project! Check back soon for the dining room, bathroom, and master bedroom reveals!
Sources
- Frogtape
- Flooring- By-NuCore, Color- “Morel”
- Sofa- By Ikea, “MORABO” Loveseat (x2)
- Black and Leather Wall Sconce- Amazon
- 12 volt Light Bulbs- Amazon
- Wall Color- Sherwin Williams, “Repose Gray” lightened 50%
- Cabinet/Door Color- Sherwin Williams, ” Peppercorn”
- Flooring Cutter-
- Rug/Runner- T.J. Maxx
- Door Pulls- Square Matte Black Drawer pulls
- Sink Faucet- Matte Black Pull-down Faucet
- Throw Pillows- Last Season Target
If you are looking for more R.V. inspiration make sure you check out the rest of the Toy Hauler, and our first camper makeover. You can find all the links below.
- R.V. Makeover Painting with a roller
- R.V. Bathroom Makeover
- R.V. Sofa and Dinette Makeover
- R.V. Makeover Reveal
- R.V. Curtain Tutorial
- Kitchen- Toy Hauler
- Living Area- Toy Hauler (Coming Soon)
- Master Bedroom- Toy Hauler (Coming Soon)
- Bathroom- Toy Hauler (Coming Soon)
- Dining/Garage- Toy Hauler (Coming Soon)


LOVE these RV remodels you have done! Wondering if you could tell us what make/model your Toy Hauler is? Thanks for sharing & all the AMAZING inspiration!
I love this makeover, we are currently in the market, what toy hauler is this? I love the layout of yours but haven’t found one close.