• Blog
  • About
  • Press
  • Privacy

Let’s be social!

  • Skip to primary navigation
  • Skip to main content
  • Skip to primary sidebar
  • Skip to footer
Sawdust 2 Stitches

Sawdust 2 Stitches

  • Tutorials
    • Around the House
    • Organization
    • Wall Decor
    • Sewing
  • Makeovers
    • R.V.
    • Room Makeover
    • Furniture Makeover
    • Decor Makeover
  • Build Plans
    • Small Builds
    • Wall Decor
    • Dresser
    • Tables
    • Seating
    • Shelving
    • Hidden Compartment
  • Seasonal
    • Summer
    • Spring
    • Fall
    • Winter
  • Home Tours
    • First Home
    • Current Home
    • 70’s Ranch Home
  • Workshop

Router Table Station/Solution

August 30, 2015

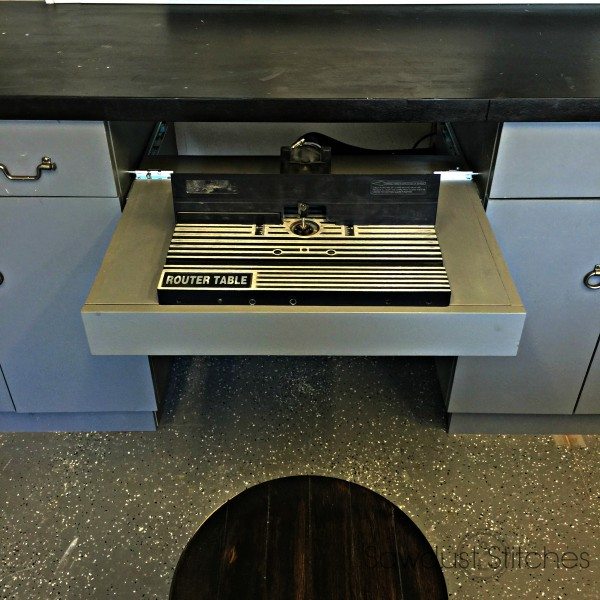
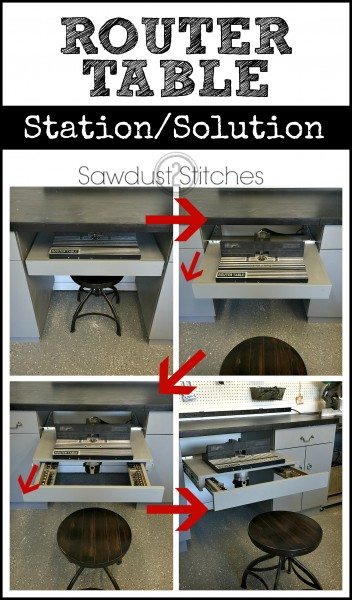
This is awesome! A pull out router table that locks in place, with plenty of bit storage! www.sawdust2stitches.com  So if you have read more than one of my posts, you have probably  gathered that I am an organization enthusiast. I like everything to have a place, and I love it when everything is in it’s place.  Well, the past few months I have been busy customizing my workshop . I am getting so close! One of the last projects that I needed to take on was a place for my router table.  I wanted it to be easily accessible, but let’s be honest it is not my most used tool, so I also didn’t want it taking up valuable work space.   This was my solution…

 Now let me preface this is not build plans.  I figure the odds of anybody having this exact space as mine was slim to none.  Instead I will be breaking down step-by-step how I did it.

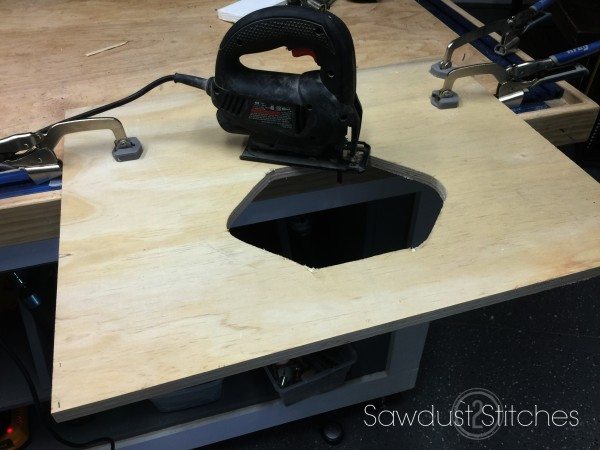
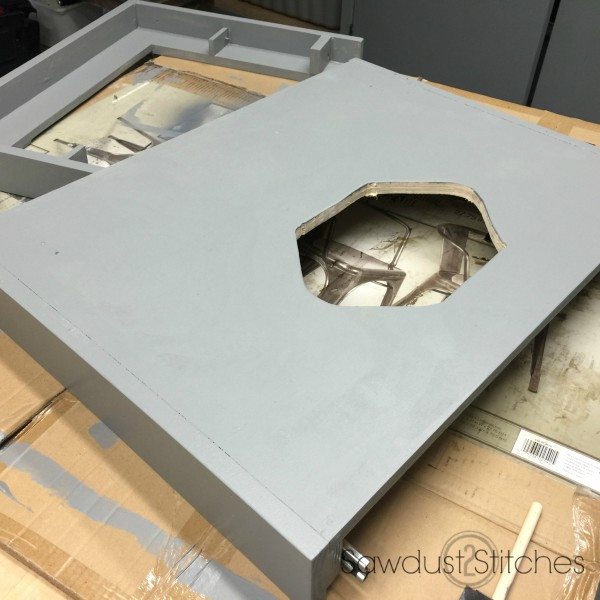
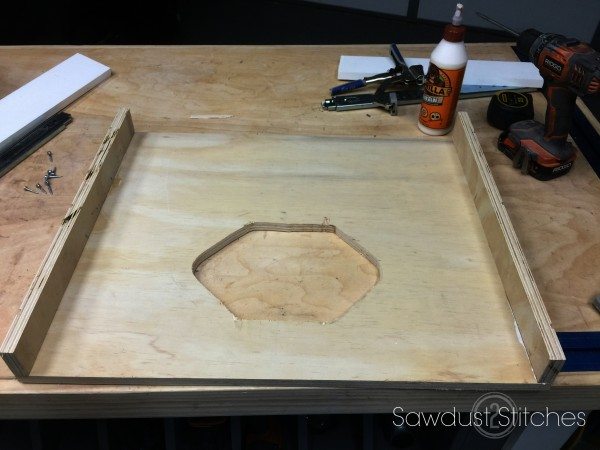
 Here is where I started.  I cut a piece of 3/4″ plywood down to fit within my allotted space.  I then cut out a hole  that would accommodate my router.

  Router Table Station www.sawdust2stitches.com

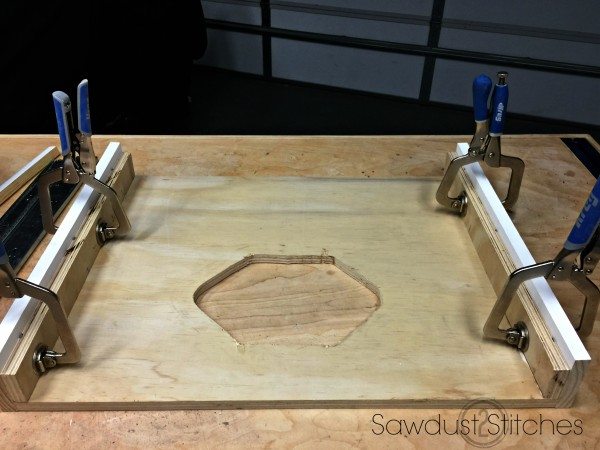
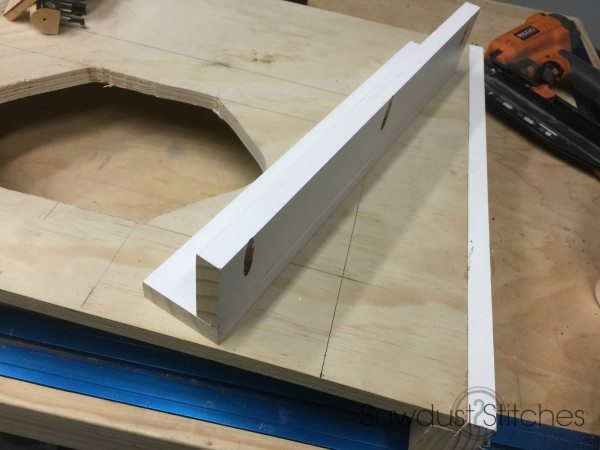
 I then made supports for the bottom of the shelf, using cut offs of my plywood. (Approximately the dimensions of a 1×3″)

Router Table Station 2 www.sawdust2stitches.com

pull out router table www.sawdust2stitches.com

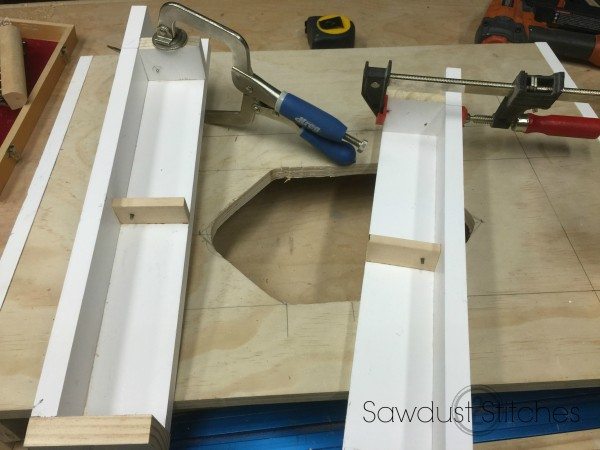
Once the top of the table was assembled, I began to the tray that will serve as the pull-out drawer.

IMG_6728 ss

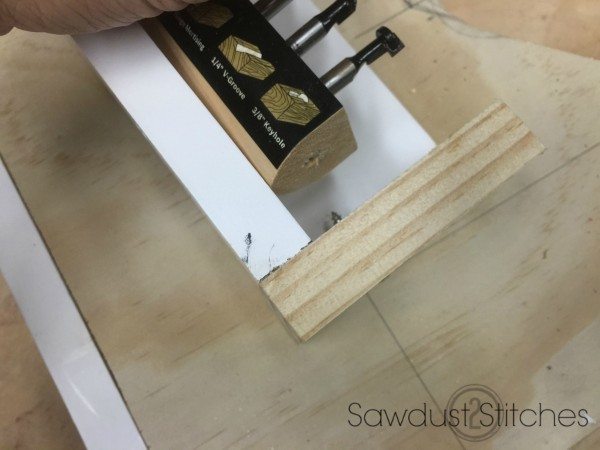
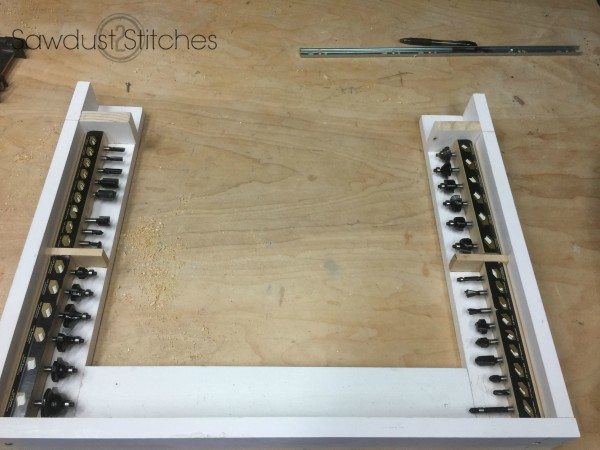
 I had this tray of router bits, and I loved the way the rows flipped up to make them easily accessible. I wanted to use the same concept in the drawers.  Well instead of duplicating  it, I  dissembled and adjusted it to fit in my drawer.
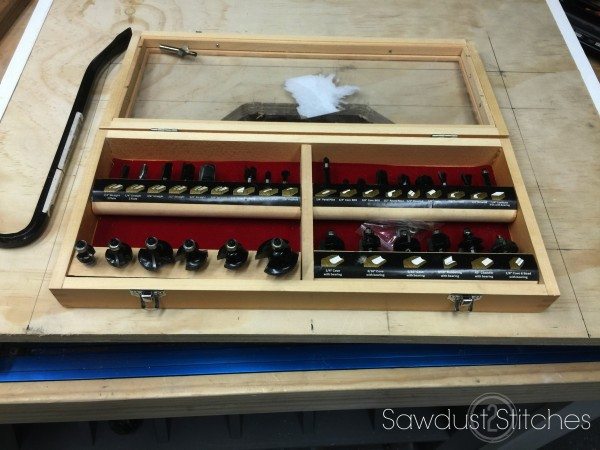
IMG_6727 ss  IMG_6730 ss

  I just put a screw in partially through the drawer.  (I did this on both sides of my bit trays. ) The screws serve as pivot points, allowing them to rotate up, and lay back down.

IMG_6729 ss

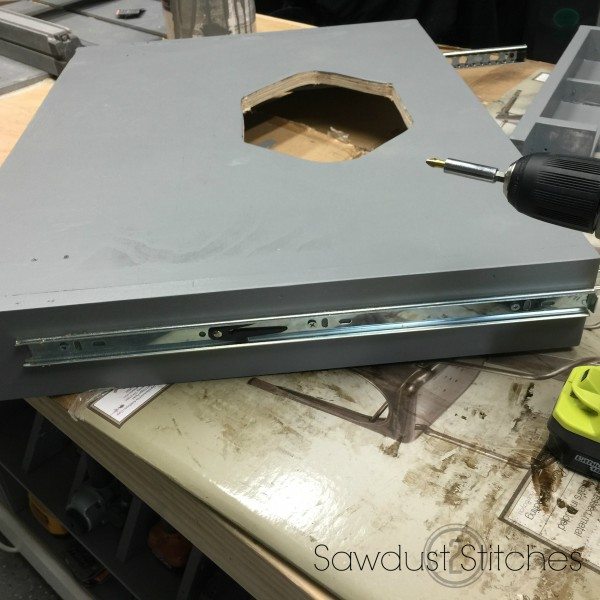
 Next  I needed to add drawer glides for the inner drawer.  I knew full well I needed really strong full extension ball bearing glides.  “D. Lawless” carries 75lb. and 100lb. glides.  They are the best price point I have found. IMG_6733 ss   Once the drawer glides were installed, the drawer was ready. IMG_6736 ss
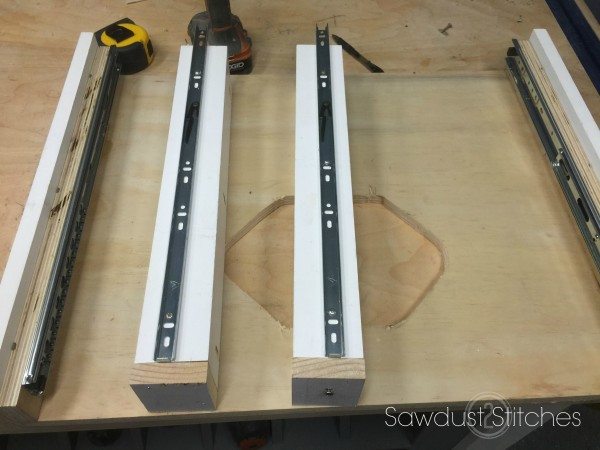
 I saved all my finish work for last… honestly, because I had no idea how it was going to pan out.  So I didn’t want to do touch up work all along the way.  I painted all the components the same color as the cabinets.  (You can see how I made my shop cabinets here.)

IMG_6846 ss

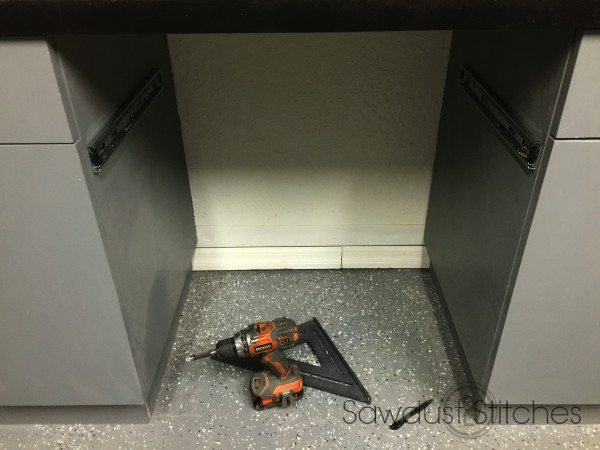
To install the  station, I needed to add  100 lb. drawer glides, to the outside of the station. IMG_6847ss

IMG_6725 ss

 Another issue that needed to be addressed was the need for it to be stable and lock in place.  I went for a very basic approach, that worked better than I had hoped.  I installed the lock hardware on the tray.
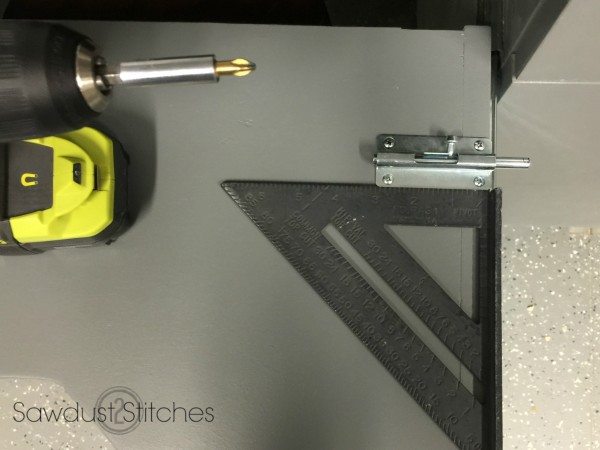
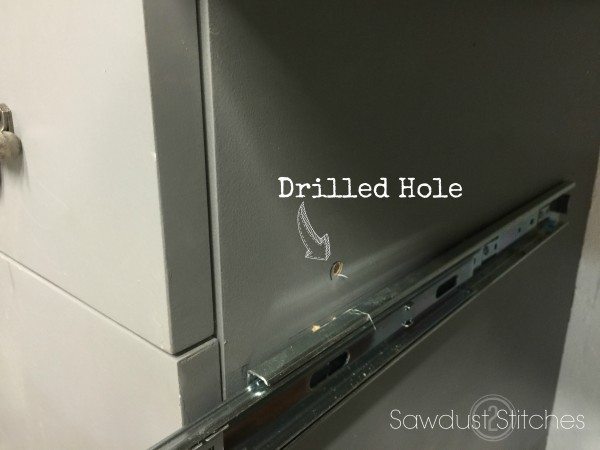
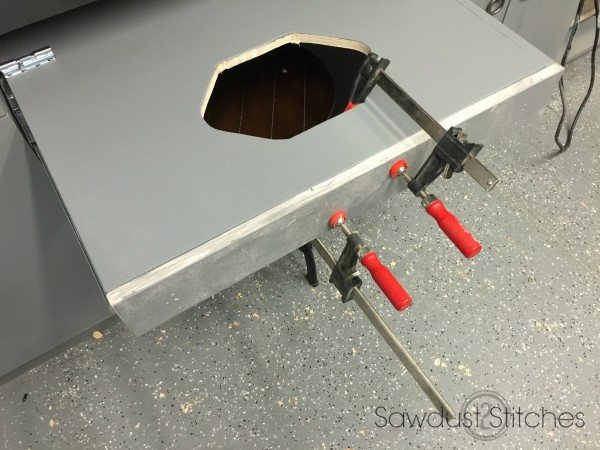
IMG_6848 ss   I then drilled a hole into the side of the cabinets.   This is where the  cam on the lock will be inserted. IMG_6774 ss  Once the station and the drawer were installed, I added the drawer front. (Just remember to only attach the drawer front to the inner drawer front:)IMG_6850 ss

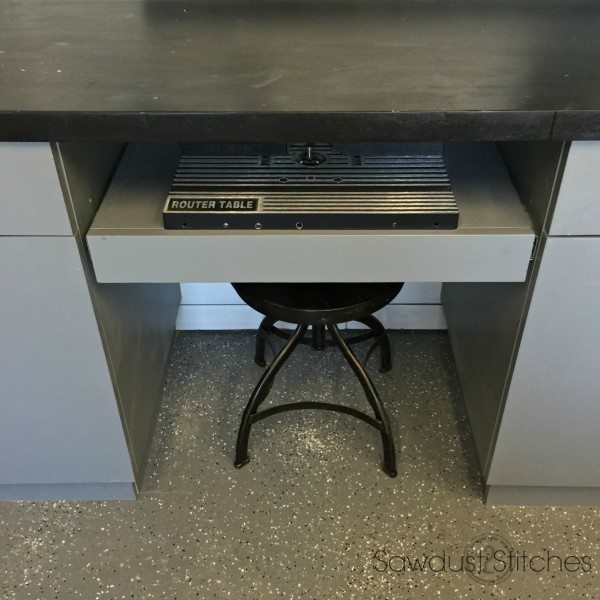
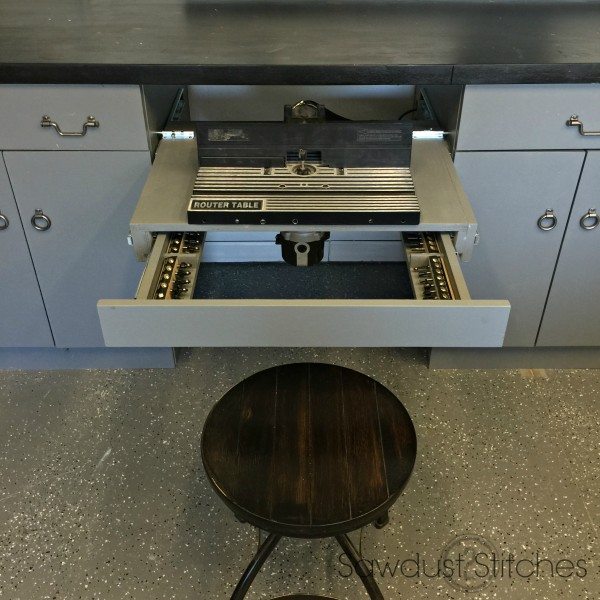
  There you have it!   A router table that is easily accessible, yet not in the way.  The perfect solution. 2015-08-25 11.56.45 ss

 Pulls out, and locks in place. 2015-08-25 11.55.42 ss

With extending drawer containing all accessories and bits needed!
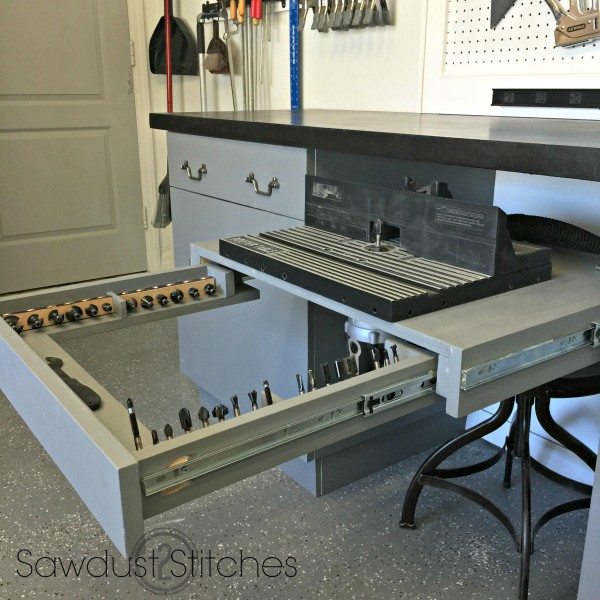
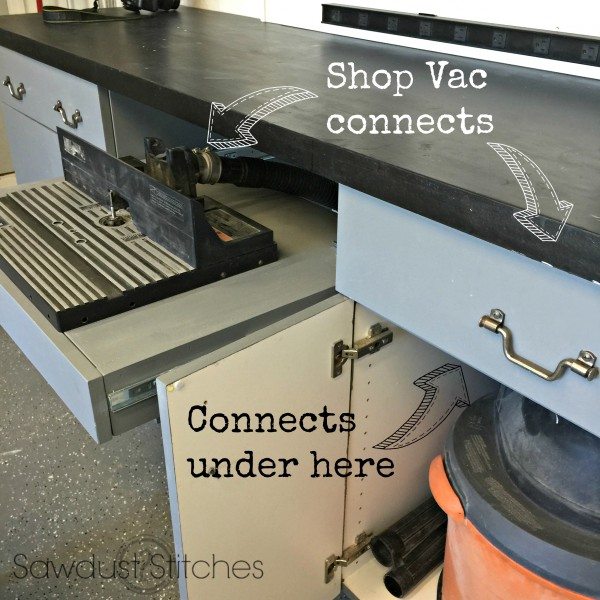
Hide away router station www.sawduat2stitches.com Last thing it needed ?  A dust and debris collection system. I parked my  shop vac in the next cabinet over.  I used a hole saw and ran the hose through the side of the cabinet and into the back of the router table. It is pretty much perfect.  I love it.

2015-08-25 11.56.19 ss

Isn’t she a beaut !?

2015-08-25 11.55.24 ss

That is all there is to it!  Thanks for tuning in, and take luck,

 Corey

Follow my blog with Bloglovin

Digiprove sealCopyright secured by Digiprove © 2015
More from my site

  • Chair RepurposedChair Repurposed
  • Kids Bench/TableKids Bench/Table
  • DIY Sconce Into A Lamp Using Philips Hue Dimmer KitDIY Sconce Into A Lamp Using Philips Hue Dimmer Kit
  • Tiered Planter BoxesTiered Planter Boxes
  • Whole House Color SchemeWhole House Color Scheme
  • Laundry Room Makeover with ElectroluxLaundry Room Makeover with Electrolux

in Organization, Tutorials, Uncategorized

Reader Interactions

you may also like
Shelf Under Cabinets
Raised Kitchen Cabinet Makeover
Back of Door Spice Rack
Pool Patio Design

Comments

  1. Alexis says

    August 31, 2015 at 3:41 pm

    Wow, that’s really a clever idea.
    I’ve only got as far as worktops and shelves in my workshop, lol.

    • coreydecker@gmail.com says

      August 31, 2015 at 9:04 pm

      As of a few weeks ago that is how far I was too! Haha.

  2. Mindi says

    September 11, 2015 at 12:37 am

    Sooo love this Corey!! You are amazing!!!!

  3. coreydecker@gmail.com says

    September 23, 2015 at 3:58 pm

    Haha, I have a horrible fixation with hidden storage! 🙂

  4. Ruben says

    September 29, 2015 at 7:51 pm

    Hey there excellent blog! Does running a blog like
    this take a lot of work? I’ve no knowledge of programming
    but I was hoping to start my own blog in the near future.

    Anyway, should you have any recommendations or techniques
    for new blog owners please share. I understand this is off subject nevertheless I simply had to ask.
    Thanks!

    • coreydecker@gmail.com says

      October 1, 2015 at 8:43 pm

      Haha, I feel like this could be a novel. haha. I am not going to lie it takes some work! If you are looking to start, I would suggest investing in wordpress, and get yourself a host. It will be a bit of an investment, but if you are looking to do this long term, than it’s worth it.

Primary Sidebar

  • Facebook
  • Instagram
  • Pinterest
  • Twitter
  • YouTube
IMG_9167 (1).jpg fd

Popular Projects

  • How to: Faux Brick Wall
  • Cheap White Curtains
  • Ikea Cubbies into a Rustic Apothecary
  • Cabinet Transformed Into A Kitchen Island
  • R.V. Makeover
  • How to: R.V. Curtains
DIY & Design

Meet Corey

Hi everyone, my name is Corey, and I have a problem. I can’t leave well enough alone… The best therapy usually involves a variety of power tools. So, in the few “spare” moments I am not entertaining my two beautiful, rambunctious, boys, I can typically be found hunched over a sewing machine and/or covered in sawdust. All in the efforts to create a perfect balance of aesthetics and practicality in our home.
read more

Join our mailing list!

DIY & design ideas - right in your inbox!

Top Hits!

  • How to: Faux Brick Wall
  • Cheap White Curtains
  • Ikea Cubbies into a Rustic Apothecary

Featured

Shelf Under Cabinets

Categories

  • 70's Ranch Home
  • Around the House
  • Build Plans
  • Crafts
  • Current Home
  • Decor Makeovers
  • Dresser
  • Exterior
  • Fall
  • First Home
  • Furniture Makeover
  • Hidden Compartment
  • Kitchen
  • Lighting
  • Makovers
  • Master Closet
  • Organization
  • R.V.
  • Room Makeovers
  • Seasonal
  • Seating
  • Sewing
  • Shelving
  • Small Builds
  • Smart Home
  • Spring
  • Summer
  • Tables
  • Tablescape
  • Tutorials
  • Uncategorized
  • Wall Art
  • Wall Decor
  • Winter
  • Workshop

Footer

Contact Me: Corey@Sawdust2Stitches.com

Latest ‘Grams

Follow on Instagram
2020 © Your Blog Name
theme by soleilflare
Enter your name and email and get the weekly newsletter... it's FREE!
Your information will *never* be shared or sold to a 3rd party.