• Blog
  • About
  • Press
  • Privacy

Let’s be social!

  • Skip to primary navigation
  • Skip to main content
  • Skip to primary sidebar
  • Skip to footer
Sawdust 2 Stitches

Sawdust 2 Stitches

  • Tutorials
    • Around the House
    • Organization
    • Wall Decor
    • Sewing
  • Makeovers
    • R.V.
    • Room Makeover
    • Furniture Makeover
    • Decor Makeover
  • Build Plans
    • Small Builds
    • Wall Decor
    • Dresser
    • Tables
    • Seating
    • Shelving
    • Hidden Compartment
  • Seasonal
    • Summer
    • Spring
    • Fall
    • Winter
  • Home Tours
    • First Home
    • Current Home
    • 70’s Ranch Home
  • Workshop

How to Build: Large Floor/Leaner Mirror

November 14, 2019

Disclosure: Some of the links provided  are affiliate links. By purchasing through these links it supports this site and helps keep content free. You can read more about how we do this with no extra cost to you.

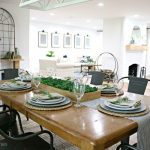
 I recently have been on a kick to “lighten up” the house.  It started innocently enough in the dining room. It then spread to the kitchen, and now the creep has entered the living room.  It was a beautiful space, but I was ready to change things up! 

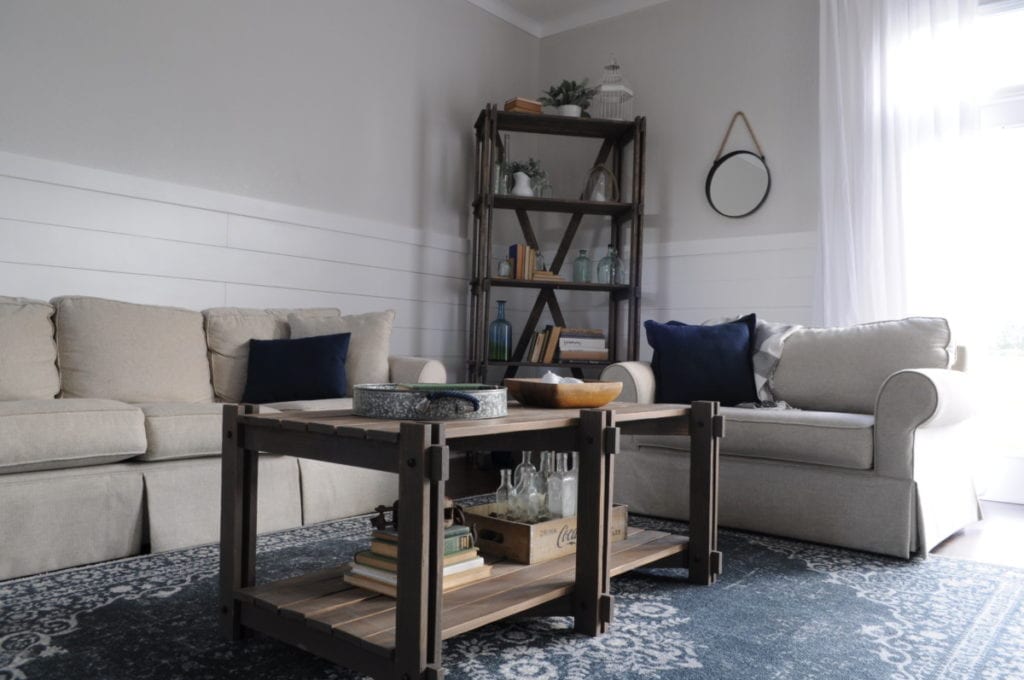
 As a starting point, I decided to take out the darker Rustic Coffee Table and Book Shelf that. I built a few years ago.  I replaced the coffee table with something lighter,  but the space felt empty. It needed SOMETHING… 

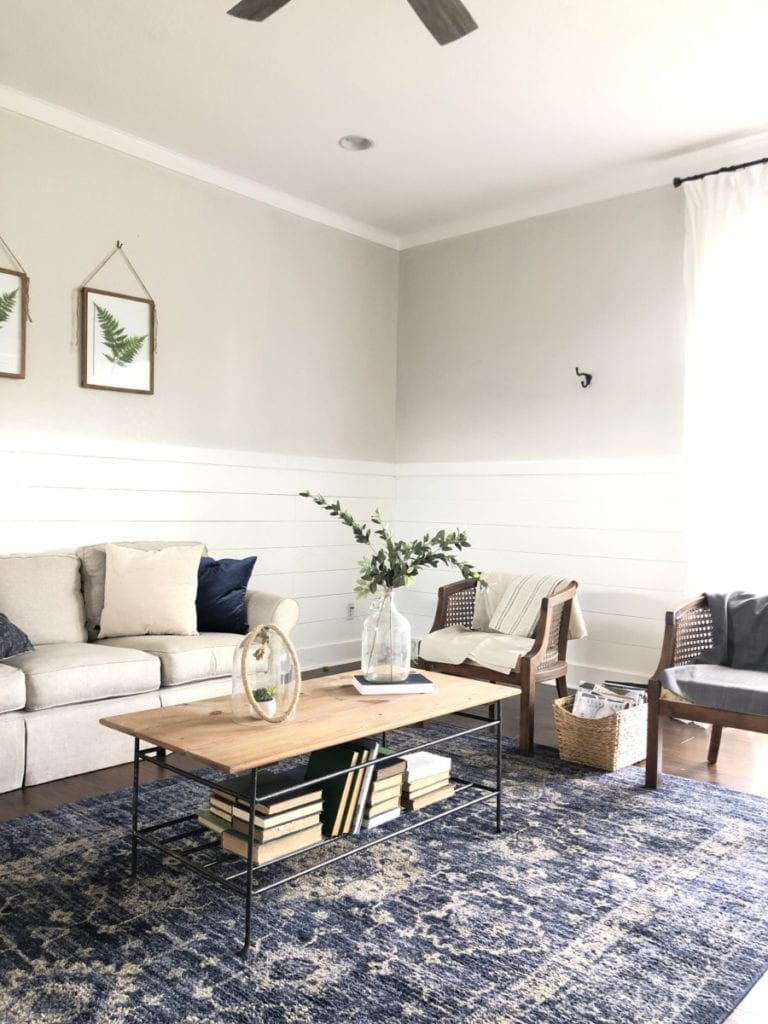
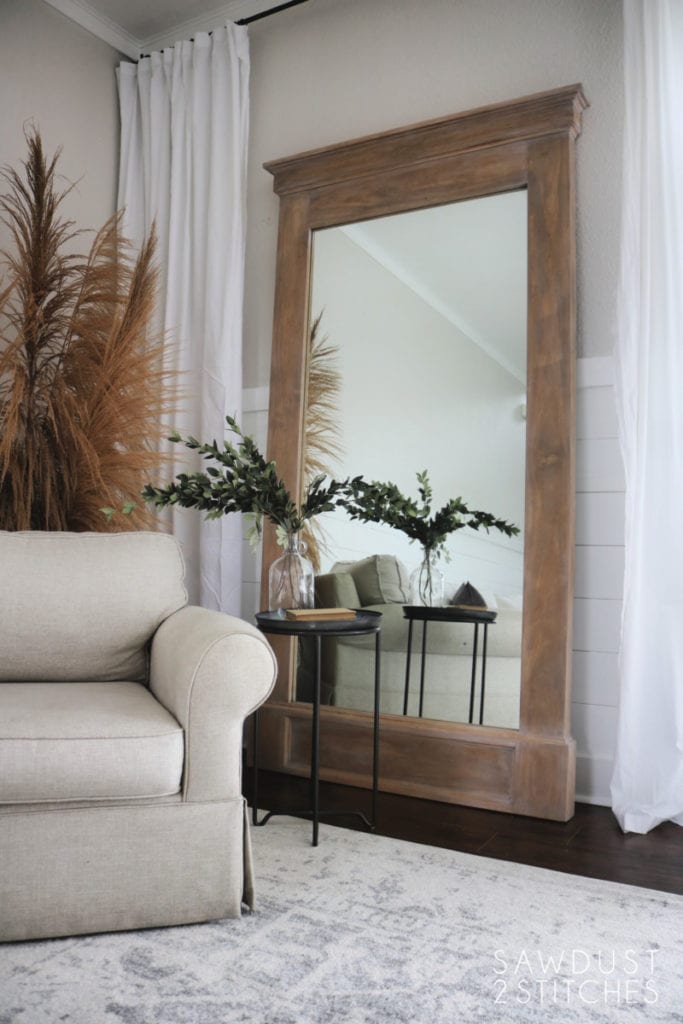
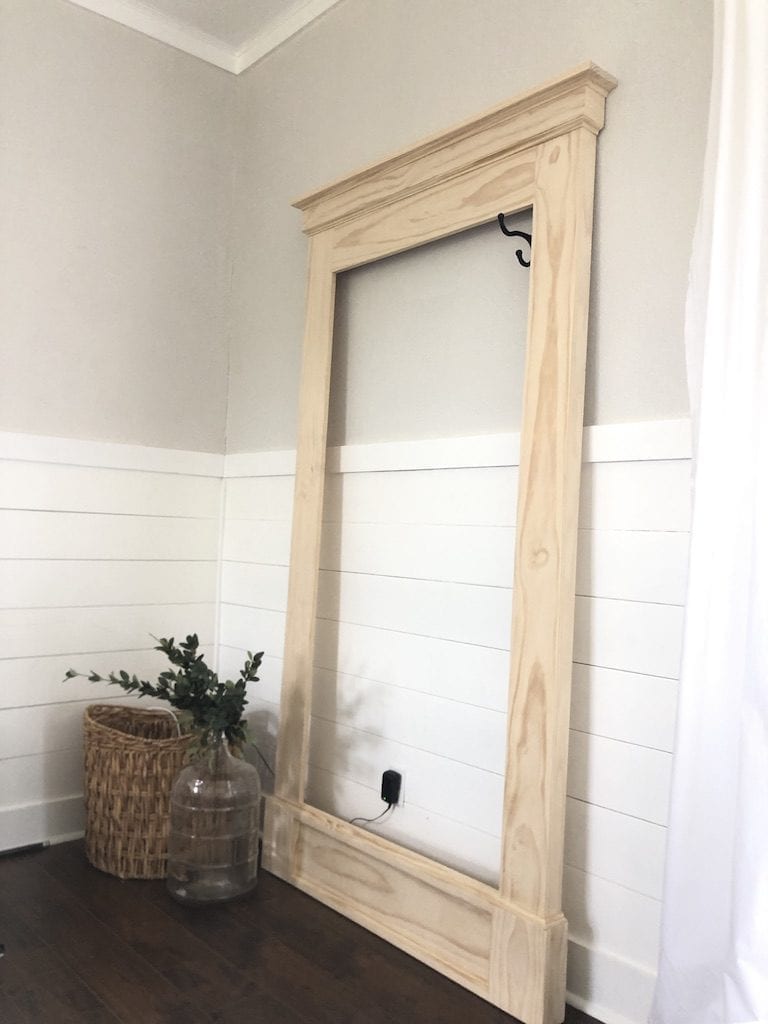
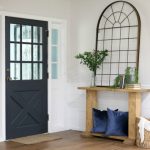
 I didn’t want to add anything too intrusive that would close in the space again. After some thought I decided a HUGE mirror would be just the ticket. I needed a HUGE Restoration Hardware style statement mirror. 

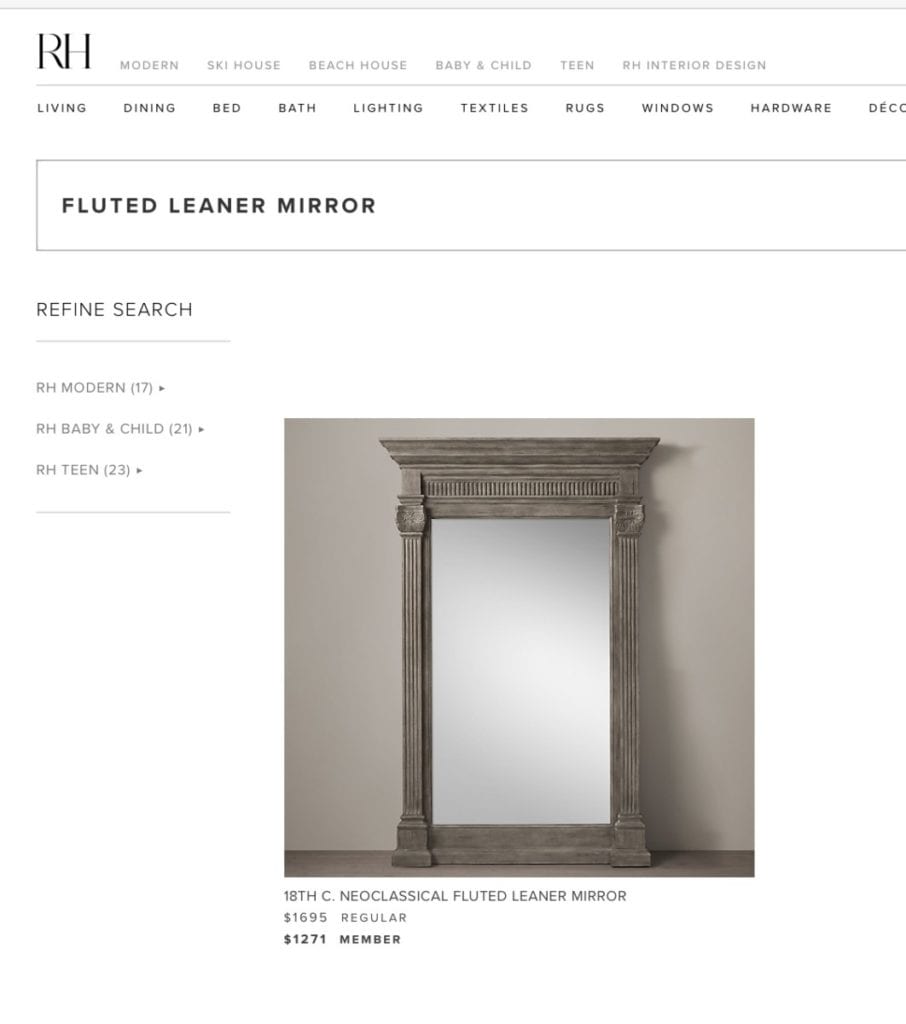
However, the price tag on the Restoration Hardware Mirror,  left little to be desired… “Who needs them anyways!?”  Am I right ?  I figured it would be so much more satisfying to build my own, and then I would be able to share the process with you lovely people.  I am proud to be able to to team up with the great folks over at DAP. (It is by working with partners like DAP that I am able to continue to provide content to you!)

Well, after one quick perusal of Craigslist I found a FREE vanity mirror from a bathroom makeover. SCORE!  The one I used for this build was a 42″ x 72″.   These build plans could easily be modified to fit other size mirrors with a little math. 

Full Build Plans Here!

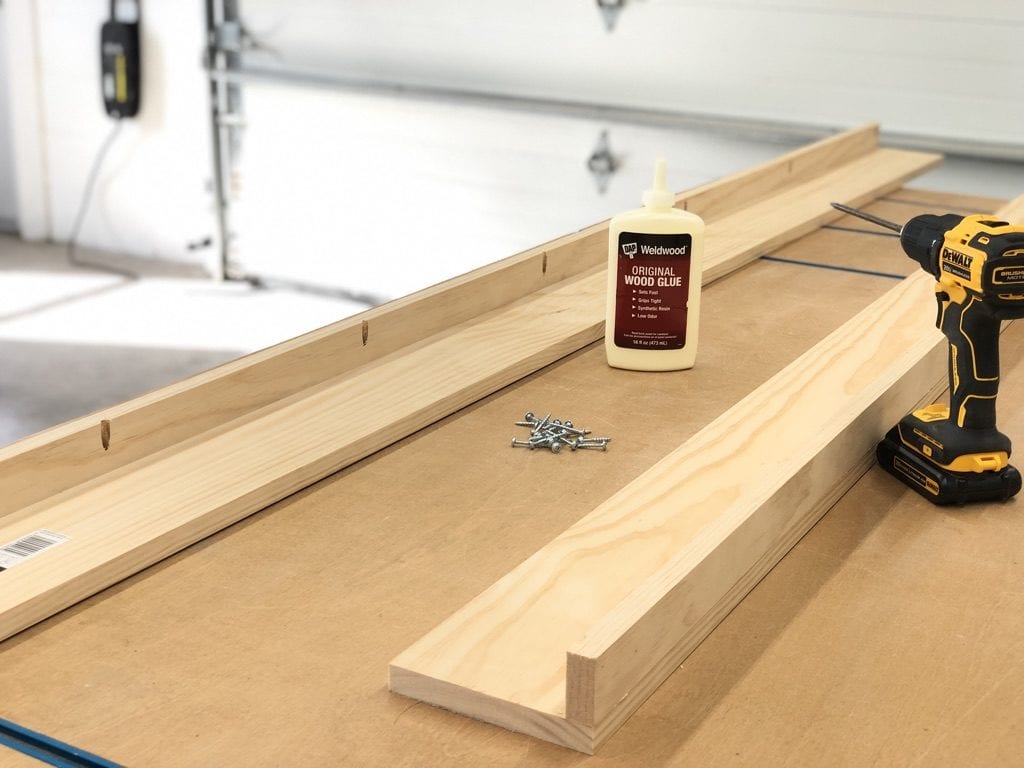
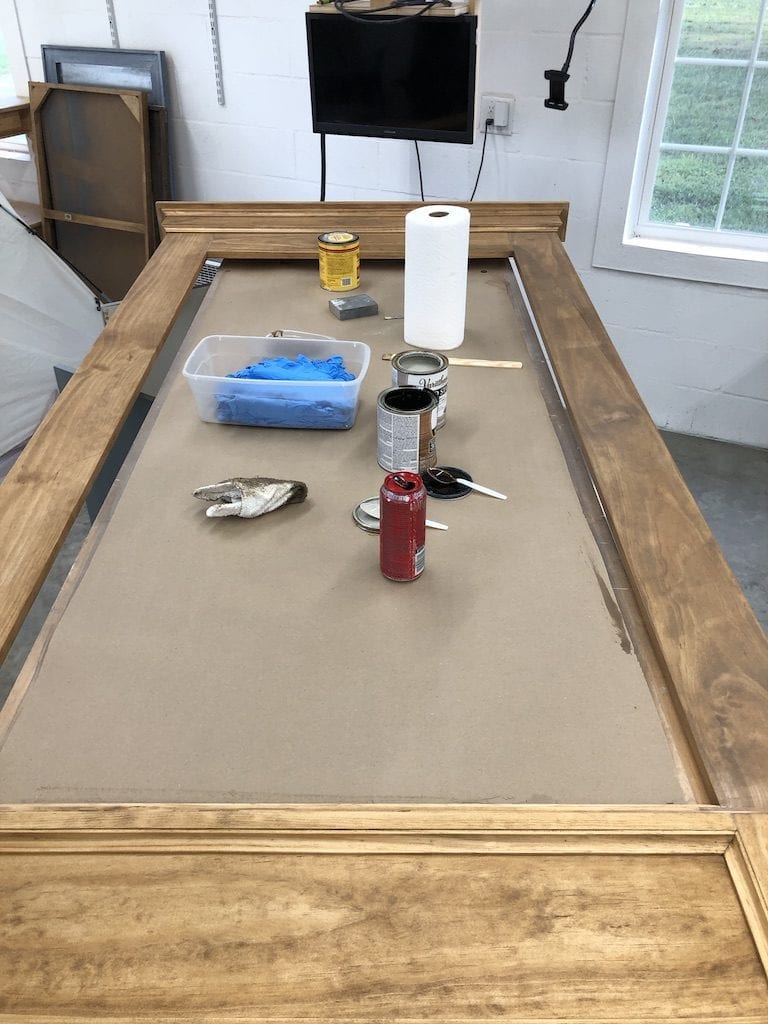
Lets’s get started! I first assembled the sides. When building this,  I knew I was going to need to take extra precautions to make sure that this frame would be solidly built and  fully support the HEAVY mirror.  I used DAP Wood Glue on all of my joints, and reinforced all of the weight bearing joints with Kreg Screws. 

If you would like to have FULL build plans, they ARE available at the bottom of the page. 

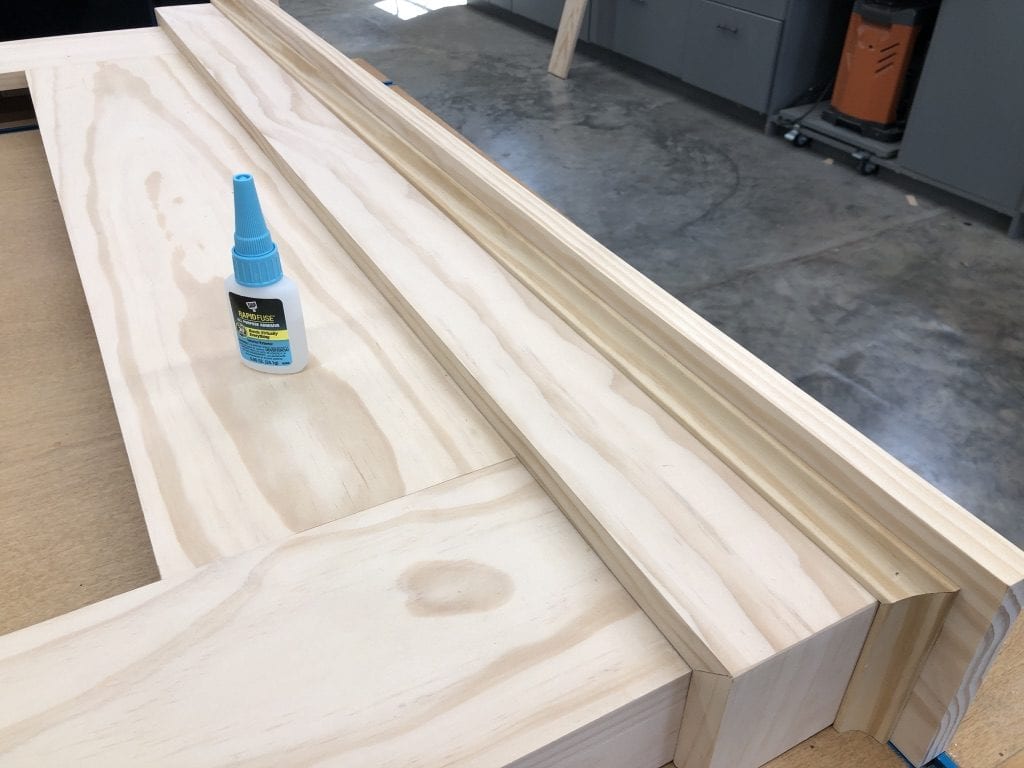
When applying the trim Rapid Fuse by DAP is ALWAYS my right-hand man.   I was able to quickly and seamlessly apply all of the cove molding without and crazy clamping strategies.  Just a few dabs and the cove molding was set! 

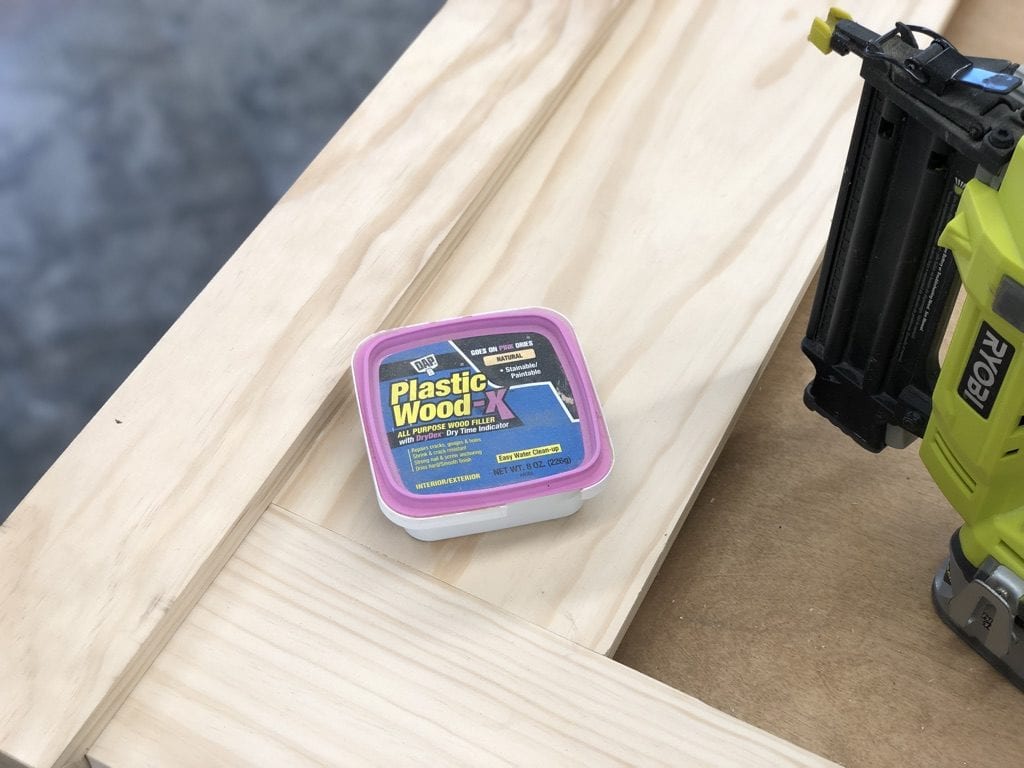
Once all the trim is installed, I was ready to prep for it’s finish.   For starters I used Plastic Wood by DAP.  I add just a small amount of this to each nail hole.  It  dries quickly, doesn’t shrink , and is stain-able.  It is perfect for woodworking projects. 

Once the wood filler was completely dry I completely sanded the entire mirror frame.  I used an orbital first, and then finished up with a “finish sander”. 

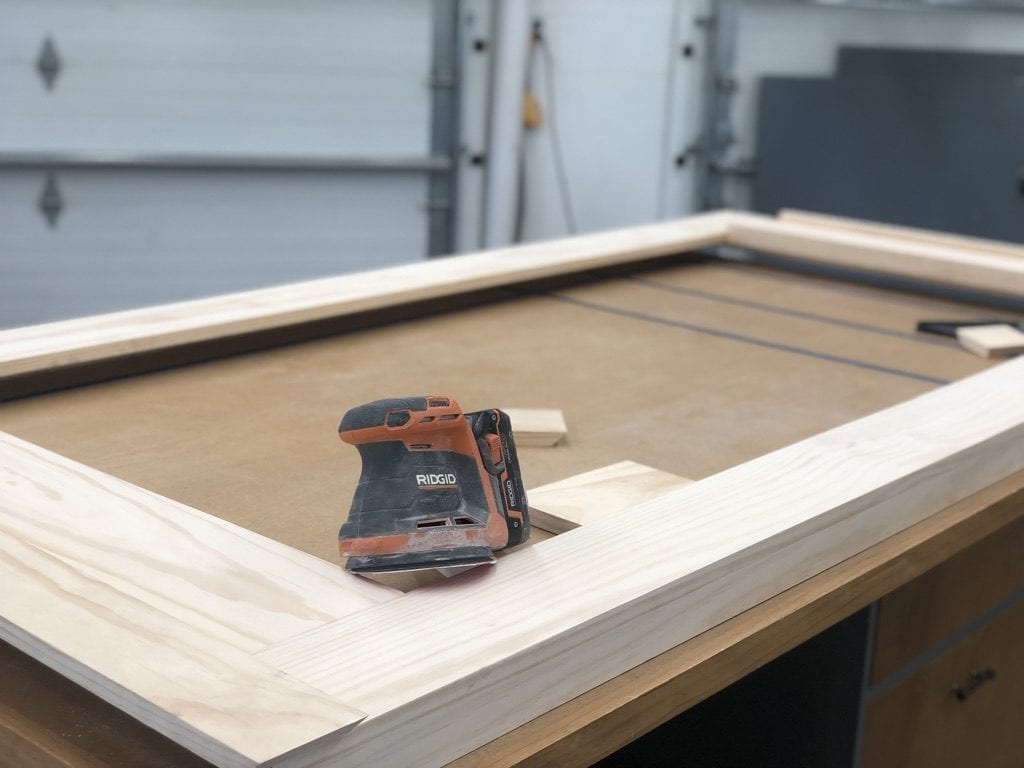
 There she is!  Isn’t she a beaut.  She is all filled, and sanded and ready for stain! 

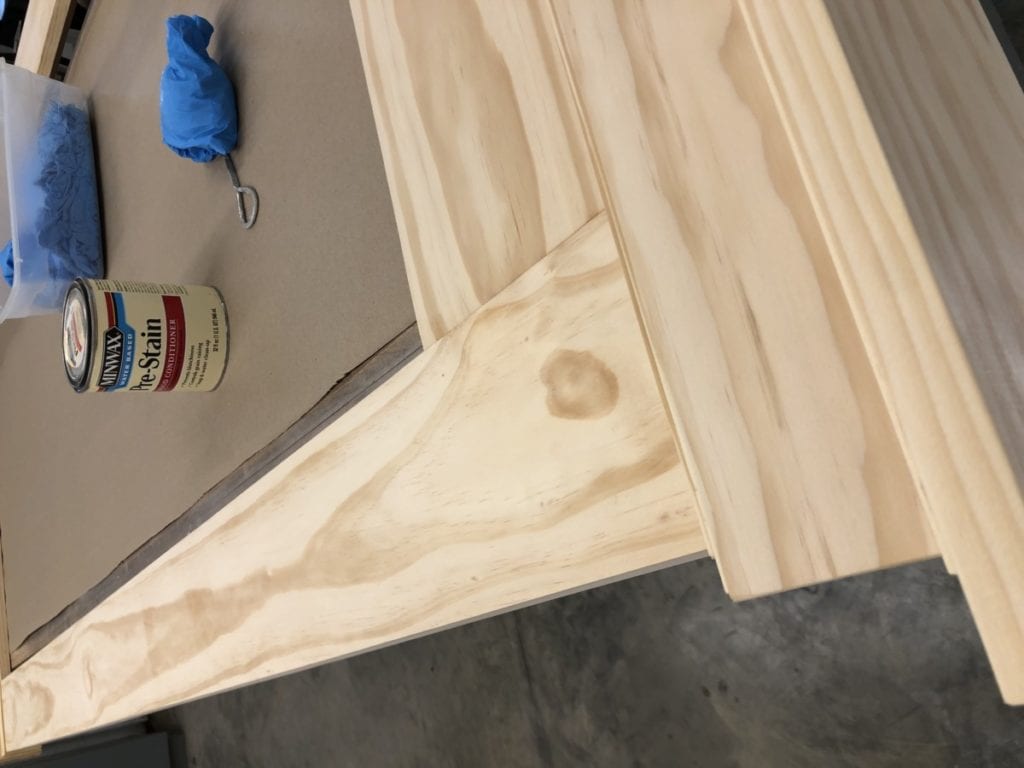
Before I begin staining, I like to start with “Pre-Stain”.  “Pre-Stain” is a wood conditioner.    Using a wood conditioner can help eliminate splotchy stain finish and helps the stain penetrate at an even rate. (Less stripes and splotch.)  I hands down recommend using this on soft woods like Pine. 

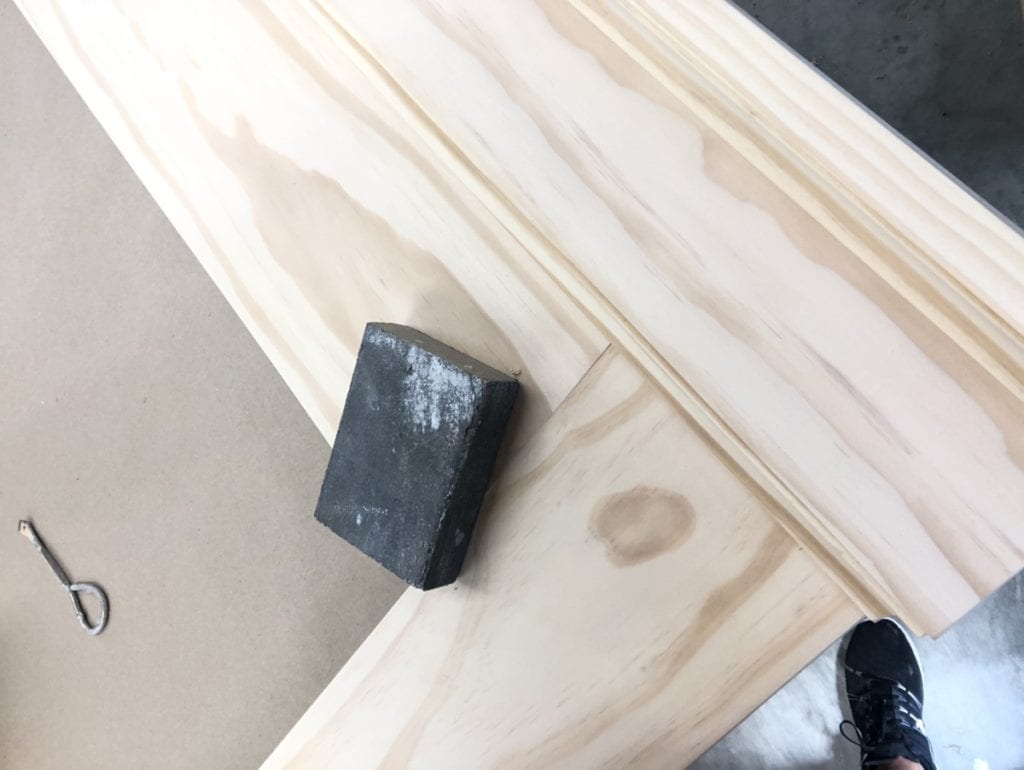
Once the wood conditioner has completely dried, I like to go over the entire piece with a fine sanding sponge.  This will eliminate any “raised grain” that can occur when conditioning wood.  Once it is smooth I run over the entire thing with a lightly damp cloth and then allow it to completely dry before moving on. 

NOW we are ready to start the staining process, and yes it is a PROCESS!  I began with a light coat of “Golden Oak” by Minwax.  I did not let this sit on the wood very long.  I applied it and then immediately wiped it off.  I did not want to have this be a very dark finish. 

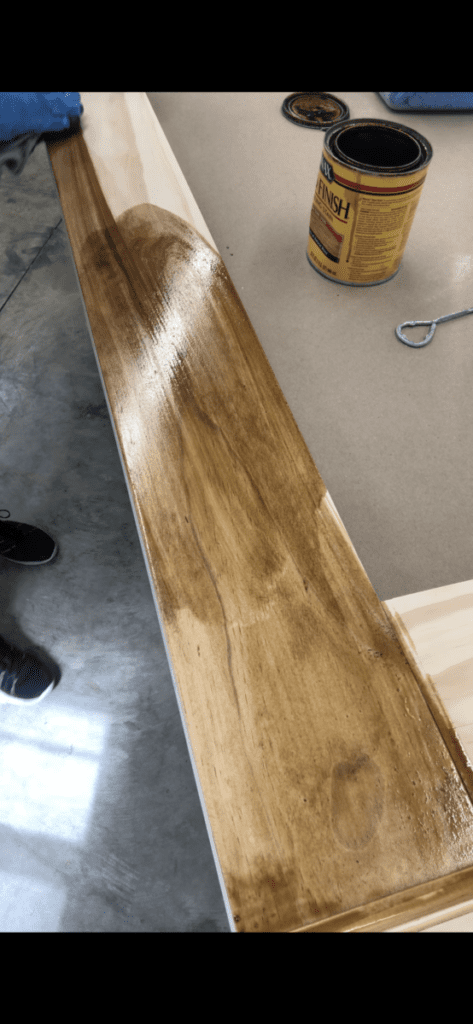
Once the “Golden Oak” had completely dried, I prepped the next layer of stain.   Minwax stain typically. is more of a wood penetrating stain.  It seeps into the wood.   I have found that Varathane Stain is a little more opaque and sits a little more at surface level. Both are great and I use them both for different projects. In this case I wanted to layer over the Minwax Golden Oak.   The Golden Oak would serve as my base color.  After some trial and error I found that mixing together Varathane “Golden Oak” and Sunbleached”, I had the perfect color for this project.   It was a 50/50 mix. 

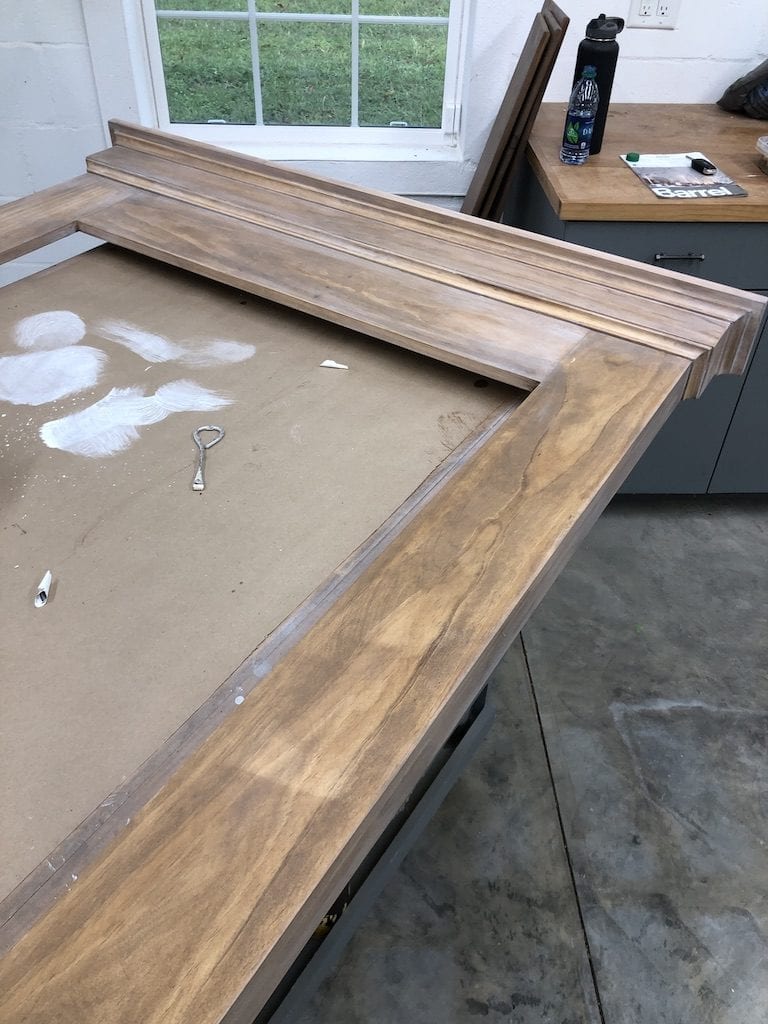
In the image below I have applied the 50/50 mixture to the right hand side.  It just gives it a little depth of color that I was not able to achieve in just one color of stain. 

 As if two layers were not enough… Seriously,  I cannot leave well enough alone. I decided to really complicate matters and use a white wash stain to finish up the look. 

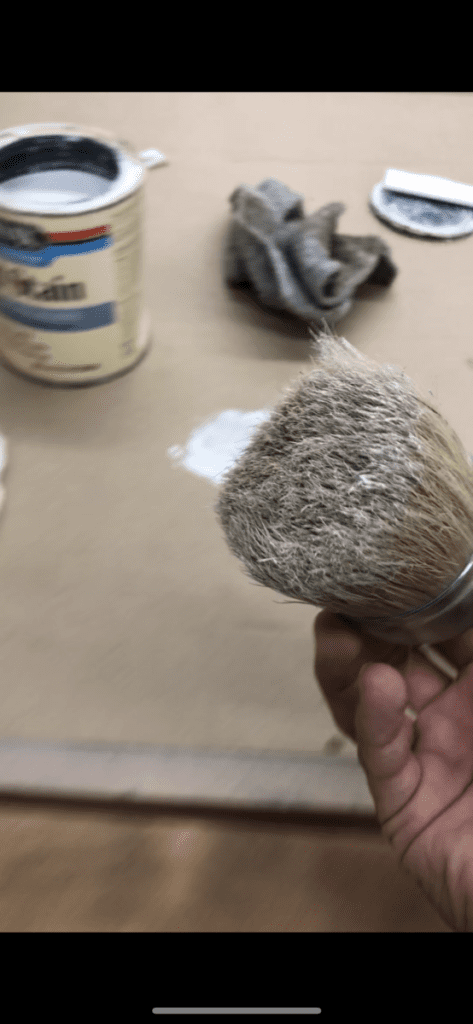
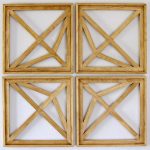
 For this step I used MinWax White Wash Pickling Stain.   I used a dry brush technique. (Use a stiff bristled brush, and add dab the brush into a very small amount of paint/stain.  Then wipe the brush off on  a cloth or paper towel,  removing a majority of the paint/stain.  Then brush it onto the intended surface.  It creates a streaky look, and that is the look I am going for.  I then used a cloth and wiped over the surface.  This blended it slightly, while still giving it a some visual texture.)  below you can see where I have used this technique on the top and far left board.  It gives it a little bit of depth and I love it! 

Once the mirror was dry, it was ready for the finishing touch.  The mirror!   The mirror will rest on a board installed across the bottom of the mirror frame.  The only thing left to do is to install back supports. 

Building a Leaner Mirror

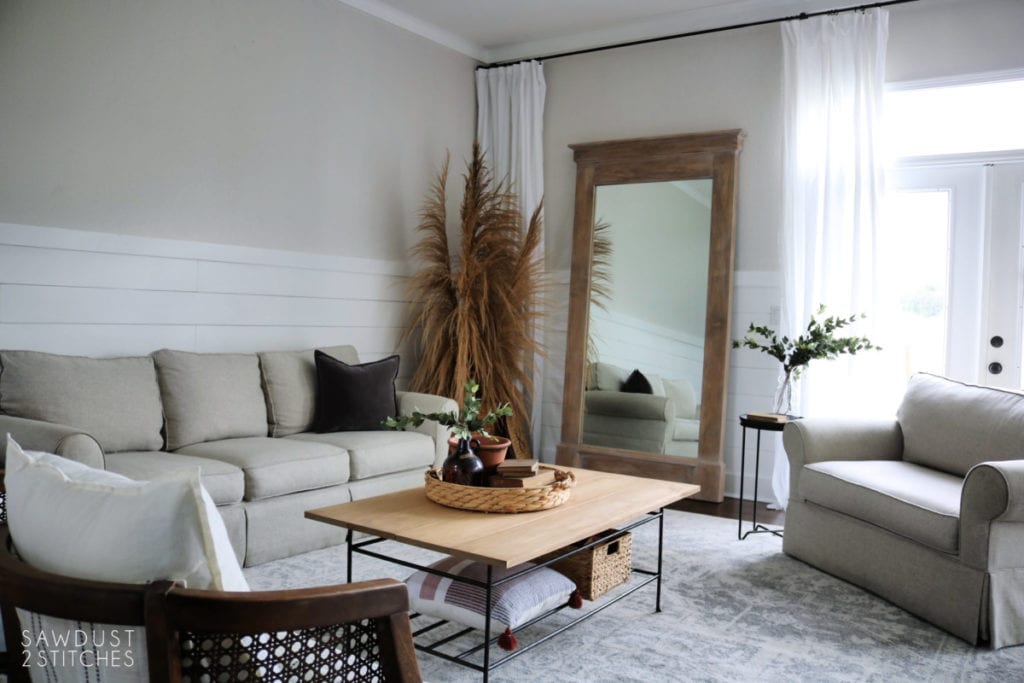
 It really is a very beautiful and very heavy piece!  I would highly suggest securing this to the floor and/or the wall. That’s it you are done!

 I am so pleased with how this project turned out. It perfectly fills the space without making it feel claustrophobic.  It still feels light and airy and I love it. 

Full Build Plans Here!

Full Build Plans Here!

More from my site

  • Toy Hauler/R.V. Makeover SofaToy Hauler/R.V. Makeover Sofa
  • Fall Home TourFall Home Tour
  • Under the Stairs Playhouse/FirestationUnder the Stairs Playhouse/Firestation
  • Home Gym Makeover Part: 2Home Gym Makeover Part: 2
  • Board and Batten in the StairwellBoard and Batten in the Stairwell
  • Craft CabinetCraft Cabinet

in Build Plans, Small Builds, Tutorials, Uncategorized, Wall Decor

Reader Interactions

you may also like
Lazy Susan Charcuterie Board
Moody Board and Batten Guest Room
DIY Rejuvenation Light Fixture
Convert a Cabinet Into a Built-In Armoire

Comments

  1. Tracey says

    November 18, 2019 at 2:30 am

    ThIs is fantastic! We have two large mirrors left over from bathroom remodels. I know what we’re going to do with at least one of them now. LOL. How did you secur the mirror in your living room?

Trackbacks

  1. Floor Mirror – Free Woodworking Plan.com says:
    February 12, 2020 at 5:00 am

    […] just for bedrooms anymore, floor mirrors are perfect for bouncing light around in a room. Build this floor mirror using the free […]

Primary Sidebar

  • Facebook
  • Instagram
  • Pinterest
  • Twitter
  • YouTube
IMG_9167 (1).jpg fd

Popular Projects

  • How to: Faux Brick Wall
  • Cheap White Curtains
  • Ikea Cubbies into a Rustic Apothecary
  • Cabinet Transformed Into A Kitchen Island
  • Workshop Assembly Table
  • The BEST Beach Blanket ever!
DIY & Design

Meet Corey

Hi everyone, my name is Corey, and I have a problem. I can’t leave well enough alone… The best therapy usually involves a variety of power tools. So, in the few “spare” moments I am not entertaining my two beautiful, rambunctious, boys, I can typically be found hunched over a sewing machine and/or covered in sawdust. All in the efforts to create a perfect balance of aesthetics and practicality in our home.
read more

Join our mailing list!

DIY & design ideas - right in your inbox!

Top Hits!

  • How to: Faux Brick Wall
  • Cheap White Curtains
  • Ikea Cubbies into a Rustic Apothecary

Featured

Lazy Susan Charcuterie Board

Categories

  • 70's Ranch Home
  • Around the House
  • Build Plans
  • Crafts
  • Current Home
  • Decor Makeovers
  • Dresser
  • Exterior
  • Fall
  • First Home
  • Furniture Makeover
  • Hidden Compartment
  • Kitchen
  • Lighting
  • Makovers
  • Master Closet
  • Organization
  • R.V.
  • Room Makeovers
  • Seasonal
  • Seating
  • Sewing
  • Shelving
  • Small Builds
  • Smart Home
  • Spring
  • Summer
  • Tables
  • Tablescape
  • Tutorials
  • Uncategorized
  • Wall Art
  • Wall Decor
  • Winter
  • Workshop

Footer

Contact Me: Corey@Sawdust2Stitches.com

Latest ‘Grams

Happy Holidays to all my DIY loving friends! I’ Happy Holidays to all my DIY loving friends! 
I’m going to put down the tools so I can hang with my crew. 
Merry Christmas from our family to yours! I look forward to sharing so many great projects in 2021, stay tuned! @ashleynavarrophotography
LAST MINUTE DIY GIFT IDEA!!! This Holiday Season m LAST MINUTE DIY GIFT IDEA!!!
This Holiday Season might be a little different from those we’ve seen in the in past. With many folks looking to keep costs and stress low, they are turning to a more sentimental approach to holiday gifting. 
 Handmade gifts are a great way to personalize gift giving this year. I made this serving tray/lazy susan for a friend and I know she will love it! If you want more easy-to-make, handmade gift ideas The Home Depot has many other great tutorials.

@homedepot #HomeDepotPartner #THDxHoliday #THDxDIYWorkshops
2020… it’s been a weird one. I suspect Christm 2020… it’s been a weird one. I suspect Christmas will be a little different too, but that doesn’t need to be a bad thing!  This is the perfect time to branch out and DIY your Holiday gift lists. Take this serving tray/lazy susan for example.  It was such a simple and facts option if you are gifting in a pinch!  The Home Depot has fun DIY gift ideas that your friends and family will love. Check out the link in my bio for more handmade gift ideas. 
@homedepot#HomeDepotPartner #THDxHoliday #THDxDIYWorkshops
This post is sponsored by Kilz but the content and This post is sponsored by Kilz but the content and opinions expressed here are my own.

I leaned in heavily to the dark moody feel for the guest bedroom makeover and I love it! The dark sienna  hue, coupled with my @kilzbrand #accentwallchallenge is absolutely stunning. (If I do say so myself.)
I have a room tour, wall tutorial and source links on the site today. #linkinprofile #sponsored #everyprojectisworthit
@Kilzbrand presented me their #accentwallchallenge @Kilzbrand presented me their #accentwallchallenge, and you know how much I love a good challenge!
If I am being completely honest, I feel like I rocked this challenge. It is absolutely insane how a single wall can change the entire feel of a room. 

On the site I have a full tutorial on how you too can create this look and all the fun details about my choice of color from the Magnolia Home by Joanna Gaines® paint line & the KILZ 3® Premium Primer
#sponsored #kilz #GuestRoomMakeover #AccentWallChallenge #EveryProjectIsWorthIt
Am I the only one who tackles unnecessary projects Am I the only one who tackles unnecessary projects before entertaining guests? As I was preparing the guest room for the Holidays I had an epiphany. I had a vision of what this room could be, and I just cannot let it go - this room needs an accent wall!

I am teaming up with the great folks over at @kilzbrand to create the perfect accent wall, with a gorgeous color from the Magnolia Home by Joanna Gaines® paint line & KILZ 3® Premium Primer. Stay tuned because this accent wall is going to be gorgeous. I just need to pick my accent color. What do you guys think, clay or sage?  #sponsored #kilz #GuestRoomMakeover #AccentWallChallenge #EveryProjectIsWorthIt
Follow on Instagram
2020 © Your Blog Name
theme by soleilflare
Enter your name and email and get the weekly newsletter... it's FREE!
Your information will *never* be shared or sold to a 3rd party.