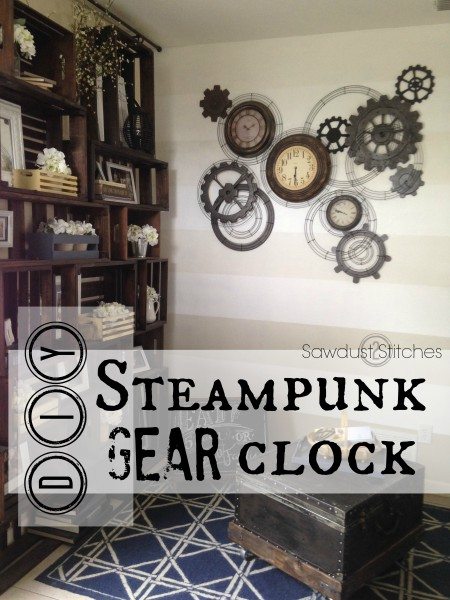
 Materials Used:
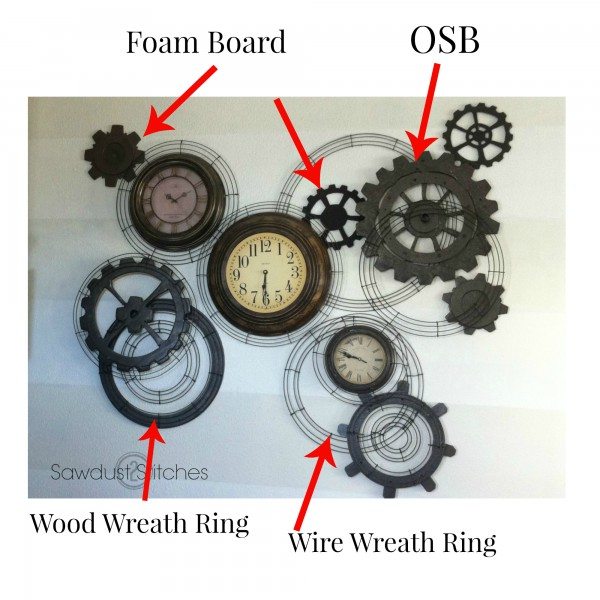
- Foam sheets
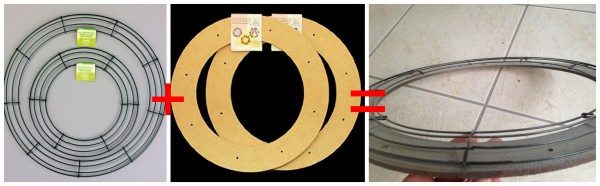
- Wire Wreath Forms
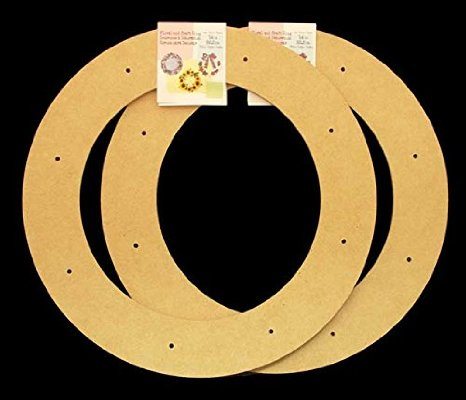
- Wooden Wreath Circle
- Old Clock(s)
- Textured Spray Paint
Tools Suggested:
- Exacto Knife
- Hot Glue Gun
- Jigsaw
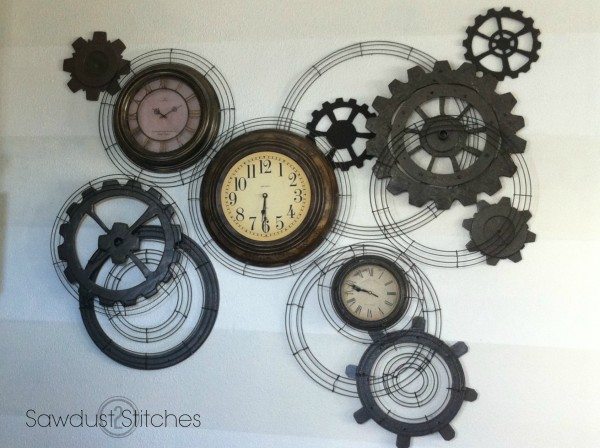
I used a ton of wire wreath rings to make the clock. These rings come in lots of different sizes, which was PERFECT, I needed to give the clock some diversity. These worked perfectly. 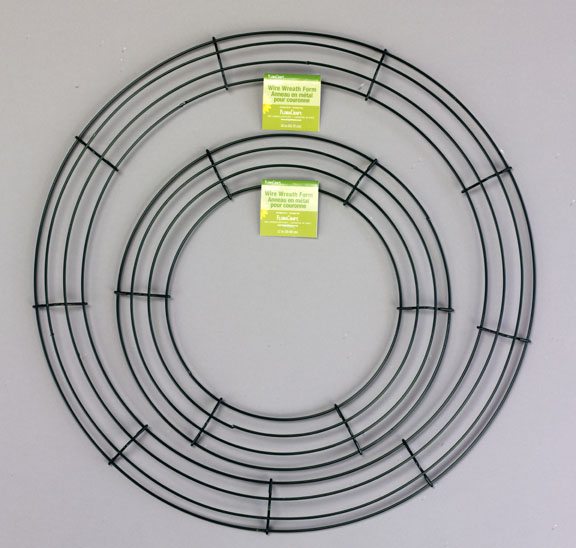
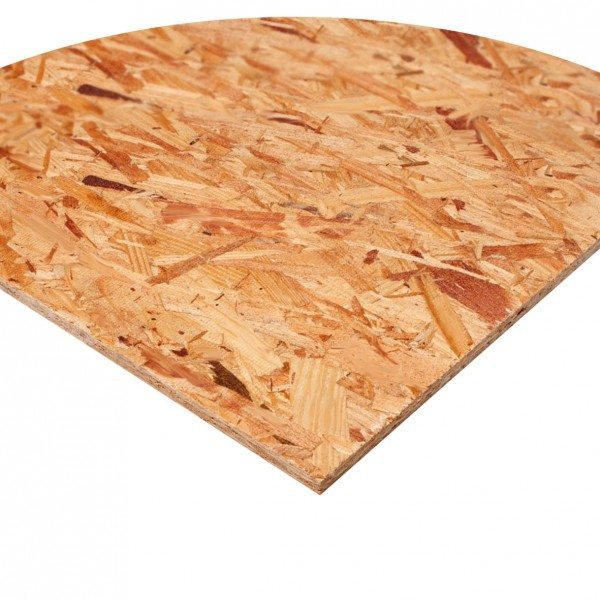
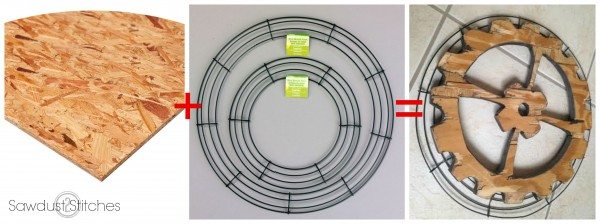
If you aren’t afraid of a little shop work, consider adding some wooden gears to the mix. I used a piece of OSB and drew out a “gear”, then used a jigsaw to cut them out. It worked out great, BUT it was a little bit of work.
If the task of cutting out OSB with a jigsaw is a little daunting, consider using craft foam. It is easy to cut, and work with. I simply drew the design directly onto the craft foam, and then used and exacto knife to cut it out.

Then of course don’t forget the clocks! I used all sorts of them. It did not matter if they matched, because I would ultimately be spray painting all the components of the clock.
I ultimately decided the trick to making this look work was layering! I just started overlapping, and layering all of the different components. For example, below you will see that I layered a wooden wreath with a wire form on top, and then hot glued them together.
Same principle here, I cut out a gear out of osb, and then layered a wire wreath ring behind it.
Basically, keep layering until it looks full!
Last but not least, SPRAY PAINTING! I used a textured metallic spray paint by Rust-O-Leum. Worked like a charm. 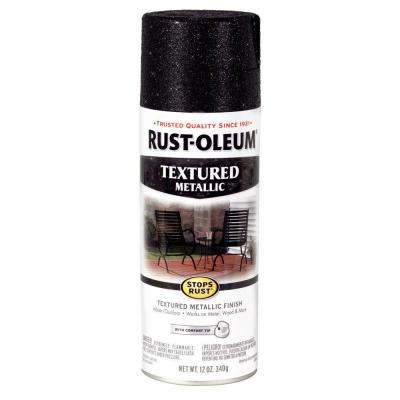
Seriously, the paint is what makes all the difference. It can take a random group of items, and make them look… 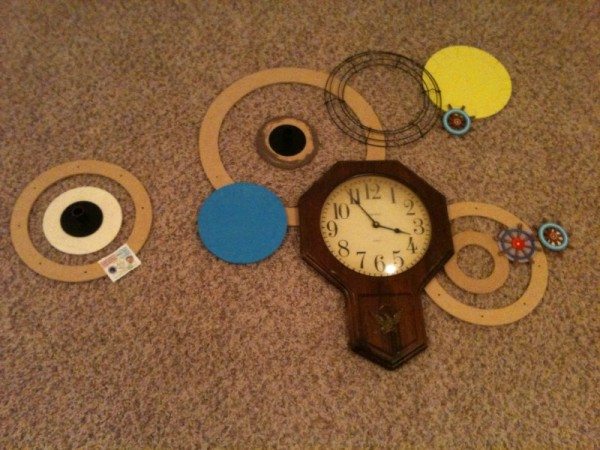 …like a work of art.


There are no words. Stunning is all I can get out…hope that’s okay. 🙂
That is perfect! Thank you so much.
One of my all time favorites! Love it!
This is now officially my favorite clock. I’ll be making one asap. Thanks!
You are very welcome! I would love to see pictures when you do!
This is amazing! The wreath forms are just perfect for this. I love it!
You have a very cleaver brain Corey! How do you come up with this cool stuff!? Love it!
Thanks lady! I know you can relate to the concept of your brain never shutting down!
I love this! Hoping to utilize my son’s help in his shop class to make the OSB gears. Did you free hand the gears, or did you use a stencil of some sort? Thanks!
I traced a circle and then just free handed the OSB. It was just a little it of math, and a straight edge. Nothing too tricky, good luck, and I ‘d love to see it if you end up doing it!
Thanks for reading.