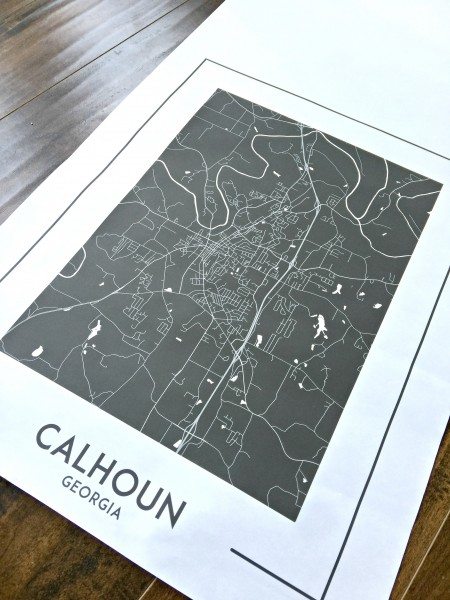
I am just going to say it. Wall art can be tricky! Finding the perfect piece to fit with your room, fit your budget, and fit your style can be near impossible! That is when you bust a move and DIY my friend. I had a general idea of the look I wanted to create, I envisioned subway style art, but I didn’t want a stark white and black contrast. I wanted a vintage map wall art vibe, but I STILL didn’t want it to be so dark that it darkened the room.

So I found this great Etsy store: Minimal Map Designs . This shop sells printable maps online. You can purchase custom PDF maps that you print off at your local print shop. So for a couple of bucks a piece, you get a custom piece of art! Booyah! Now how to turn it into Vintage Map Wall Art!
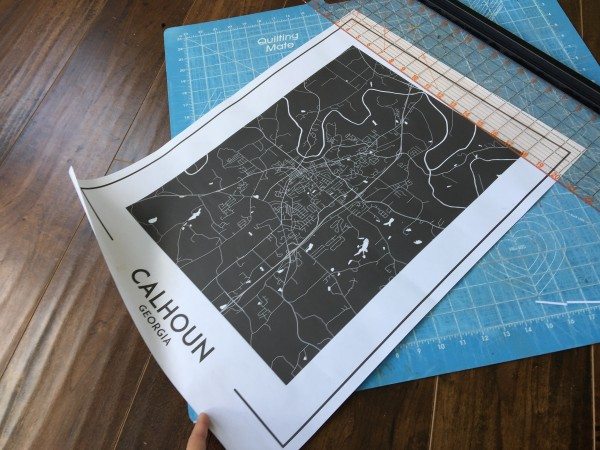
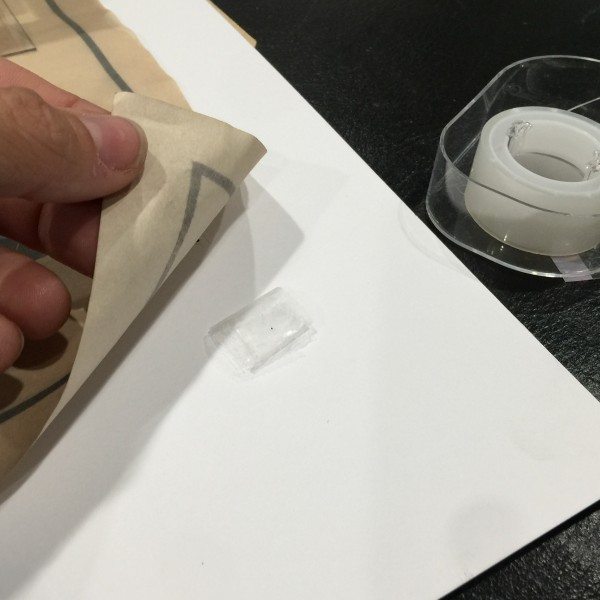
I printed them at our local Staples as “Blueprint” size print. The size of the actual paper was a little big, so I needed to trim down some of the edges. I used a straight edge and a rotary cutter. I ended up giving the map a 3/4″ border.
 Once all the edges were trimmed I was ready to age my paper! I used about 8 English Breakfast tea packets and 4ish cups of hot water. You don’t need a lot of the tea solution, just enough to coat the print with. I used a large plastic tub to dip dye it in. It only needs a few seconds in the tea, and then gently pull it out of the solution.
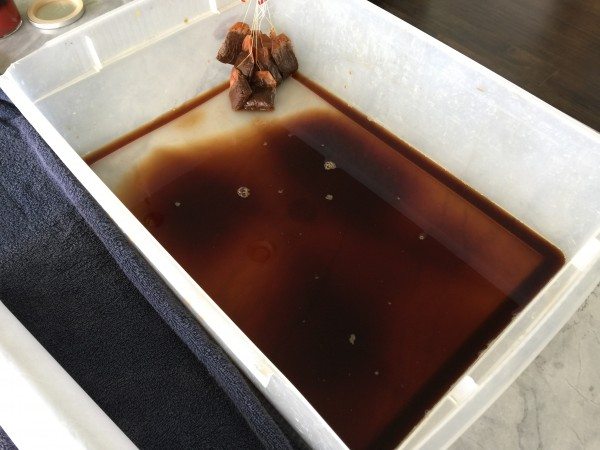
As soon as you pull the print from the tea, place it on a dry towel. I am not going to lie, these papers will be delicate so be careful! Once it is completely dried I repeated the process again. This is not necessary, but I wanted to deepen the color. After two baths in the tea solution it had a perfect vintage patina! 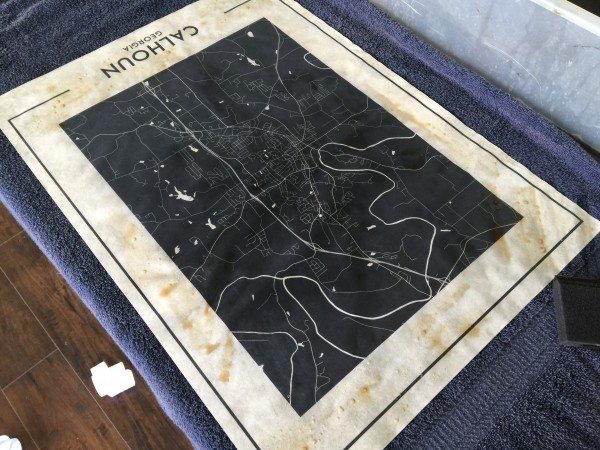
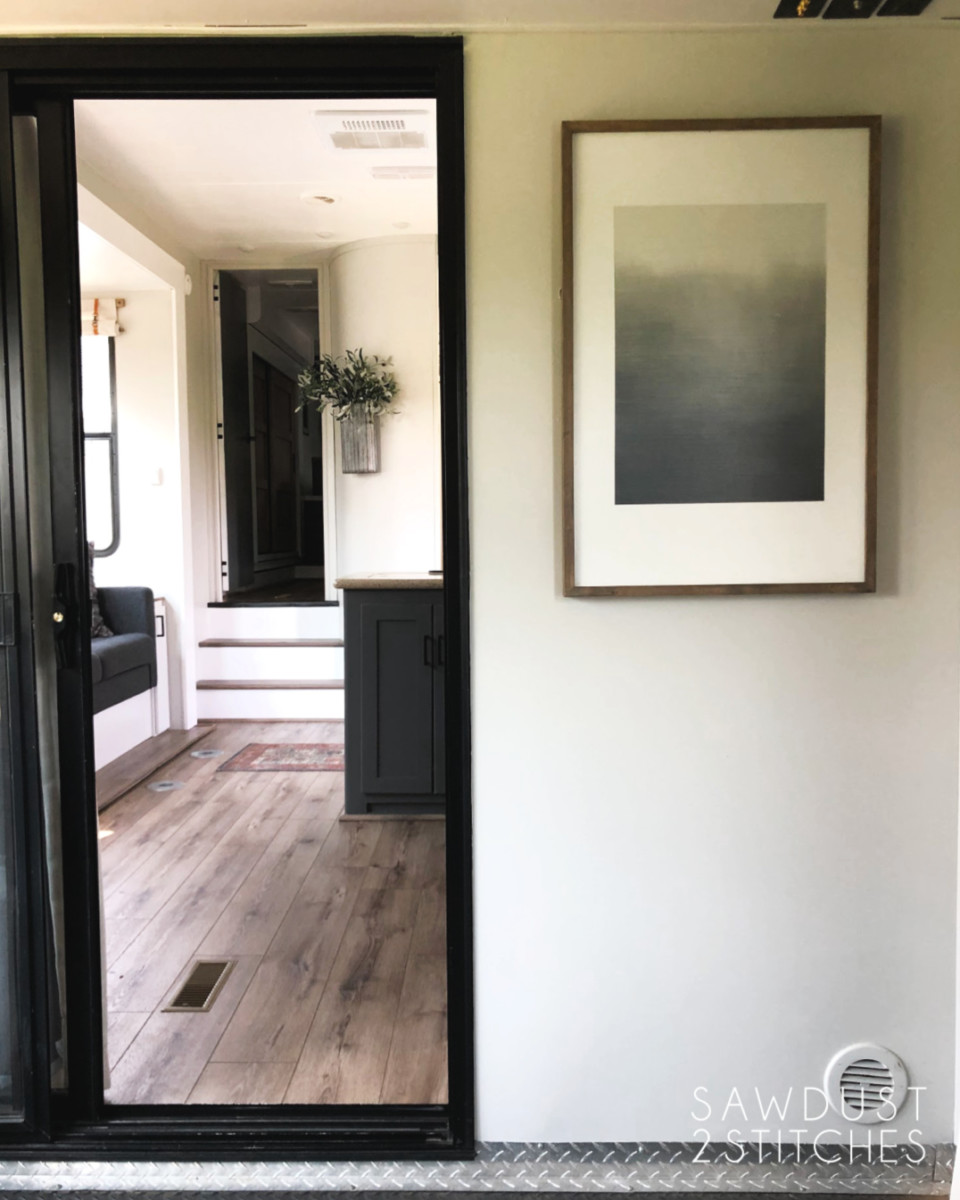
Vintage Map Wall Art – IKEA Framing
I then put it in a very cheap IKEA frame! You can get these big frames for only $14.99..
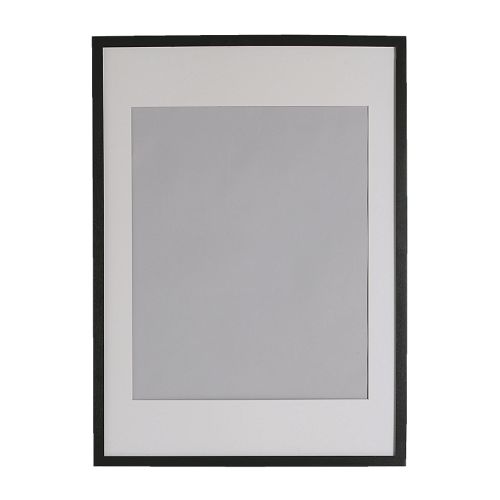
The one odd thing about the size of these prints is that they ARE NOT standard U.S. size prints. So instead of placing the print behind the matte, I placed it on top. Voila! Worked perfectly.
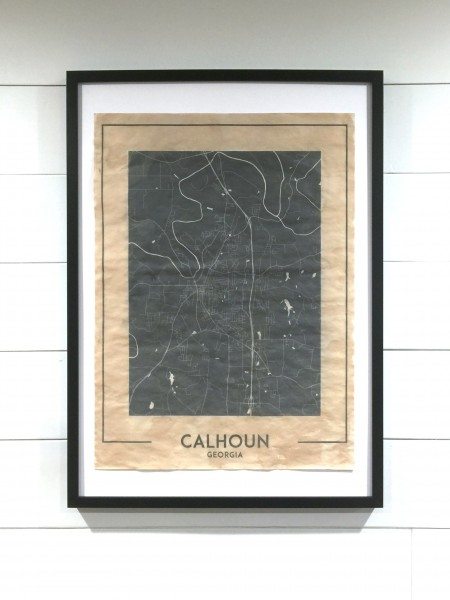
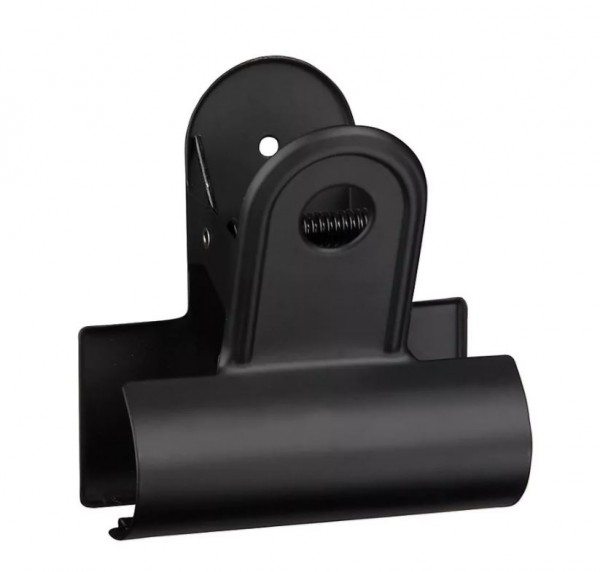
For the perfect finishing touch I used these awesome clip from Crate and Barrel.
 I am SO thrilled with the way these pieces of art came out! But I am not half as excited about these as I am the room they are in ! Stay tuned, the whole room reveal is coming and it is going to be EPIC!

Thanks for reading and TAKE LUCK!
Corey


How did you hang the frames? I love IKEA’s framed but find them impossible to hang safely on the wall.
Agreed! That is why I used a crate and barrel clips! But I normally just hang it precariously on a nail. :/
I love this! Can you tell me what size of digital maps you ordered and what size the frames were? Is this a poster size frame? Thanks! Love all your beautiful work!