Materials Used:
- 1×6″ (x1 @ 6′)
- 1×3″ (x2 @8′)
- 1×8″ (x1 @6′)
- 1×2″ (x1 @ 8′)
- 1/2″ x 3 1/2 ” Board ( I found this in the trim section, they were only 1/2″ thick, or you can use a planer)
- Paneling 1/4″ (2’x4′ sheet)
- Cup Hooks (x 10)
- Mirror ( 20″ x 15 3/4″) I found that Lowes will cut this size mirror for about $12.00
- Full Extension Ball Bearing drawer Glides 16″
- (3) 2″ drawer pulls
- (3) Coat Hooks
- Wood Glue
Tools Suggested:
- Kreg Pocket Hole Jig
- Table saw
- Finish Nailer
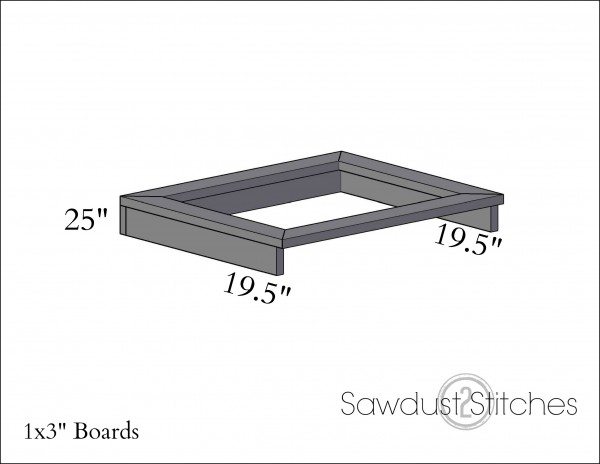
Making the Frame-
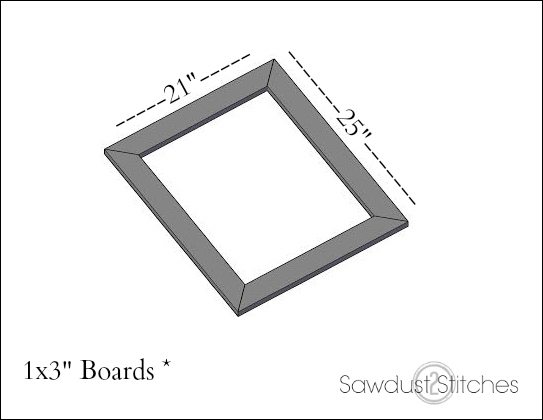
1×3″-
- 21 ” long point to long point with 45 degree angles (x2)
- 25″ long point to long point with 45 degree angles (x2)
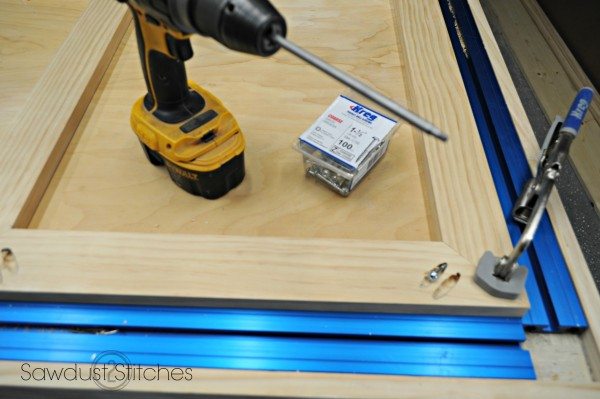
- Using a Kreg Jig , drill pocket holes in order to create a 90 angle.
- Repeat on all four corners, in order to create the rectangle frame.
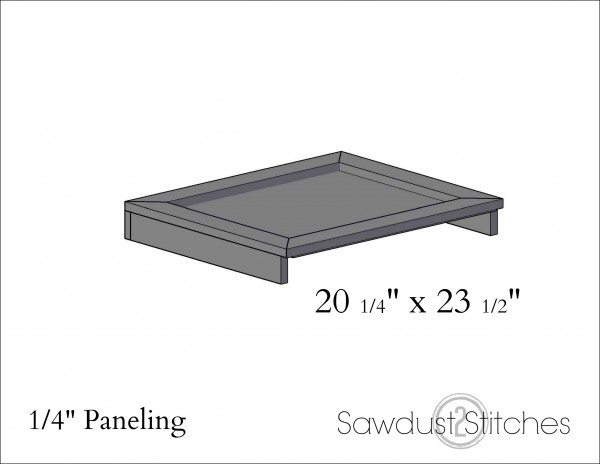
The Back of the Framed Mirror-
1×3″-
- 19.5″ (x2)
- 25″ (x1)
Paneling (1/4″)-
- 20 1/4″ x 23 1/2″
Using a Kreg Jig make pocket holes to:
- Join the 2 joints.
- Attach the frame to the back.
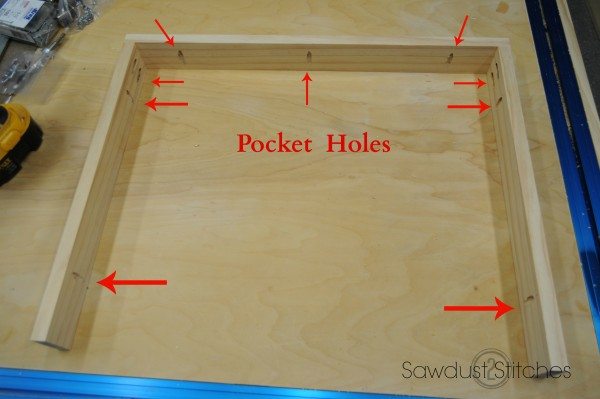
Using wood glue, secure the 20 1/4″ x 23 1/2″ paneling behind the frame opening.
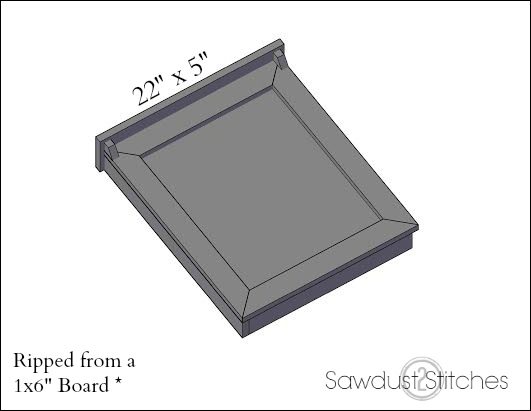
Top Piece-
1×6″ Board ( You will need to rip this down)
- 22″x 5″
Using wood glue place the board centered on top of the unit. Then reinforce with 1″ wood screws. I wold suggest using a counter sink drill bit and pre-drill.
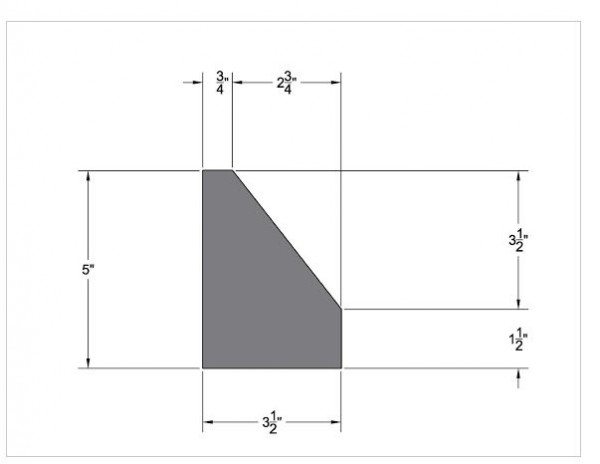
Corbel-
Use a 1×2″ board to make the corbel. Then attach at the top corners of the mirror. 
Base-

1×8″ ( You will need to rip this down)
- 22″ x 7 1/4″ (x2)
- 5″ x 7 1/4″ (x2)
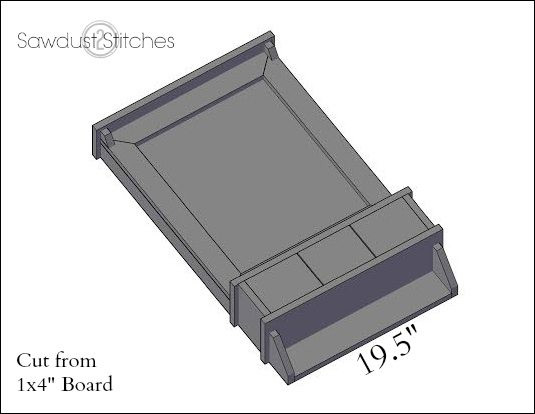
Drawer-
1×6″ ( You will need to rip this down)
- 19 1/4 x 4 3×4″ (x2)
1×4″ Board
- 5 1/2″ ( x2)
Paneling
- 6x 18 1/2″
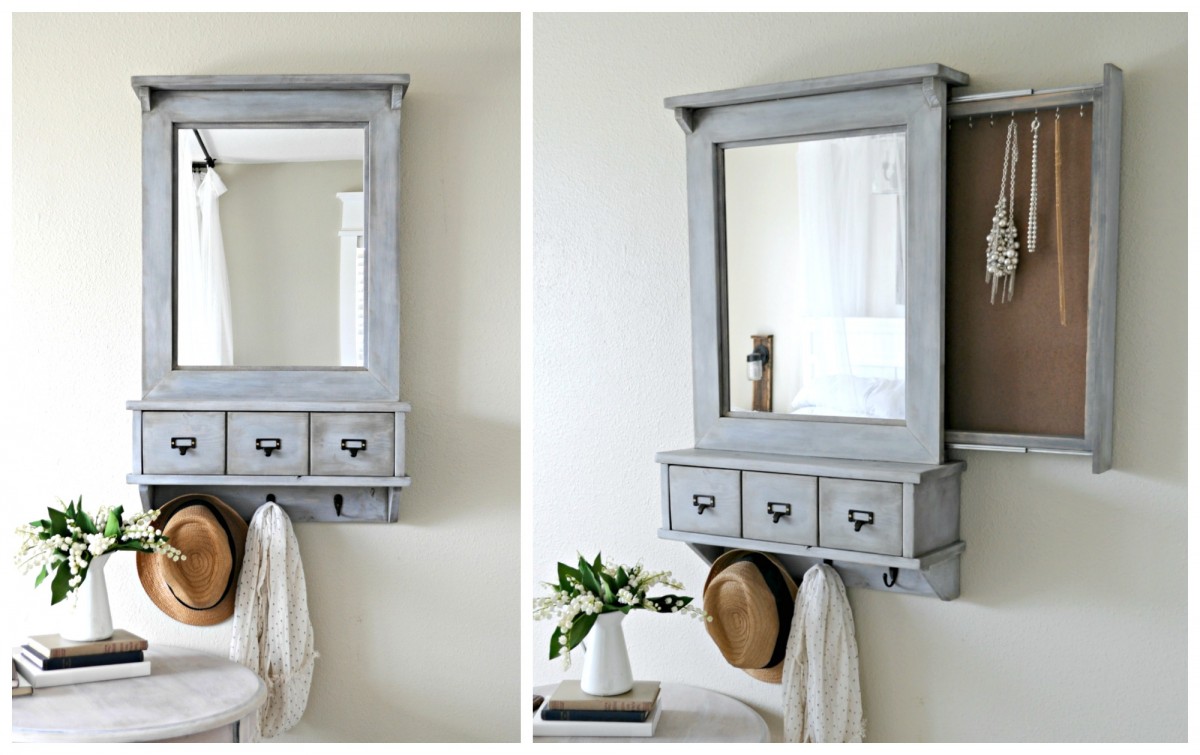
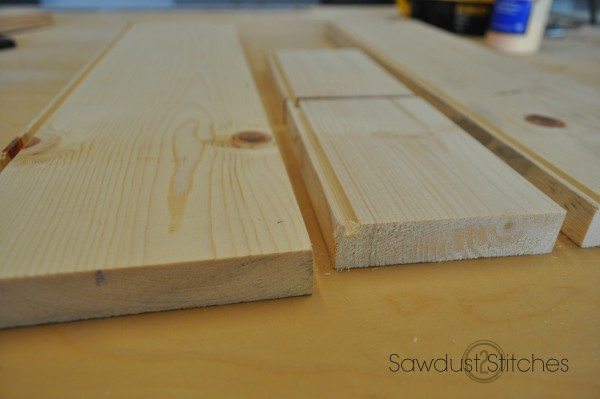
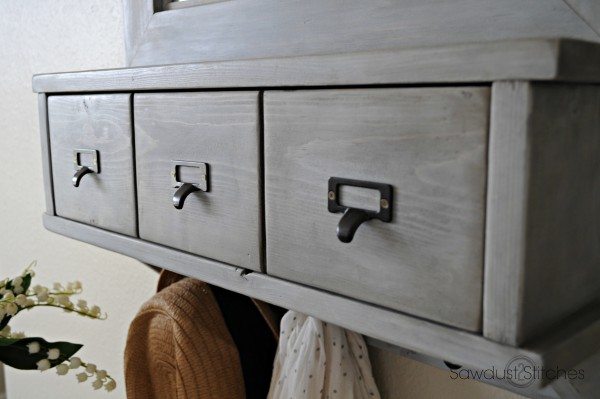
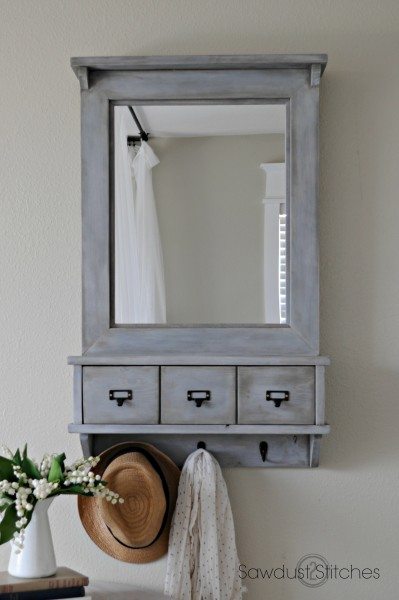
 In order to create the appearance of 3 individual drawers, I made cuts in one of the 19 1/4″ boards. To enhance that card catalog look I used small 2″ label pulls.
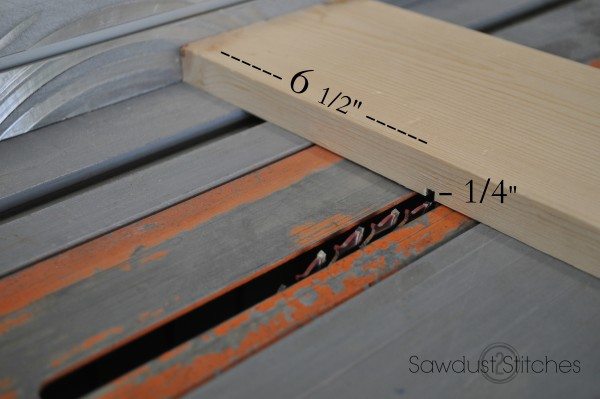 When making the drawer using either a table saw or a router and cut a 1/4″ deep groove, approximately 1/2″ from the bottom edge. (See image below.)
 Using a Kreg Jig I attached the sides to the front of the drawer.
 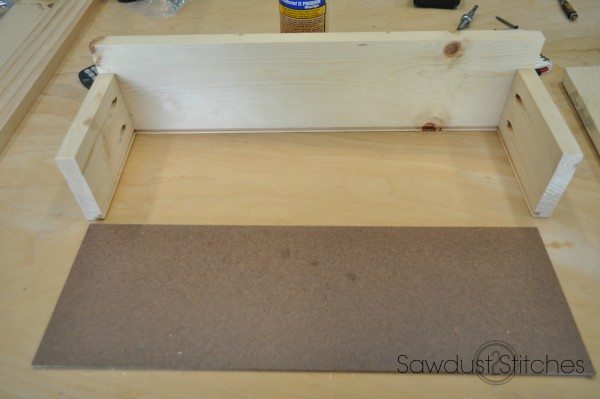 Add a small bead of glue to the cut out groove of the boards. Then slide the paneling into the grooves.
 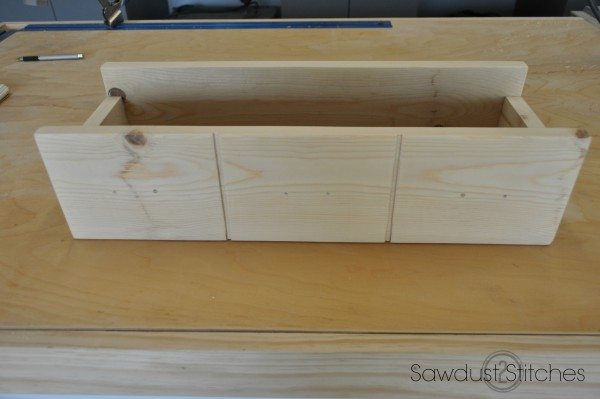 Then attach back with glue and reinforce with a nailer.
Hook Base-
1×4″ Board-
- 19 1/2″
- 5″ (x2) (These will be made into the corbels,see dimensions below.)
 I attached the the corbels to the base board using pocket holes, and then fastened it to the base of the jewelry case.
( You can fill the holes with Kreg Jig Wood Plugs.)
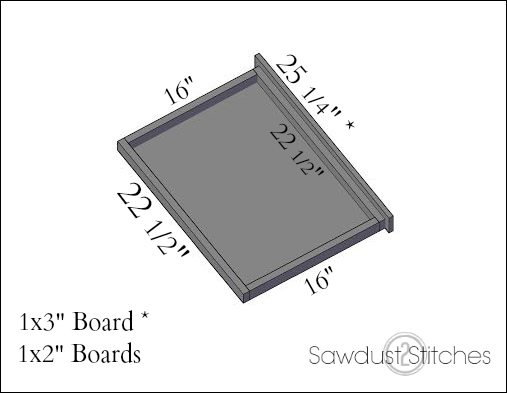
Drawer Insert-
1×2″ Boards
- 22 1/2″ (x2)
- 16″ (x2)
Paneling 1/4″
- 22′ x 17 1/4″
Construct the fame using the 1 x 2″ boards. (Hold off on attaching the 1×3″ board until after you have installed the drawer glide.
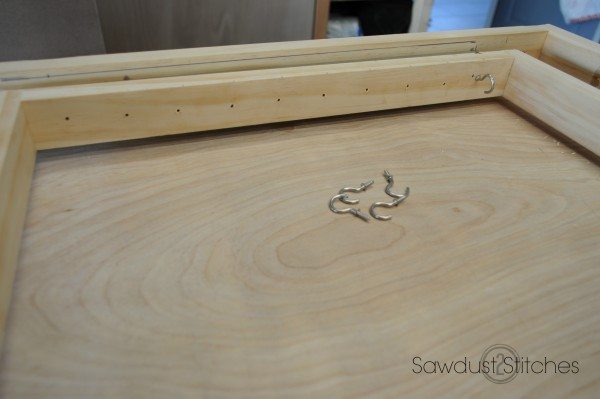
At this point I would pre-drill the locations for your cup hooks.
 Nearly there! One of the last steps is adding the drawer glides.
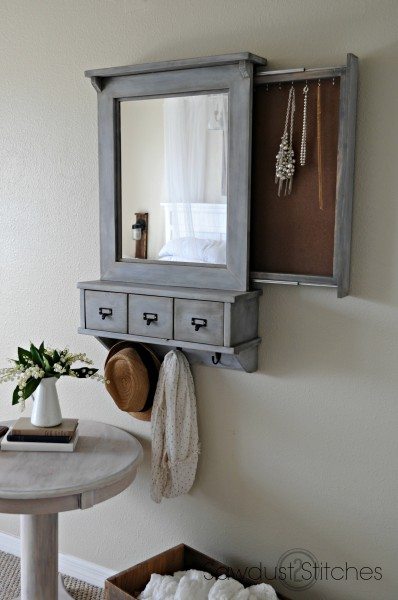
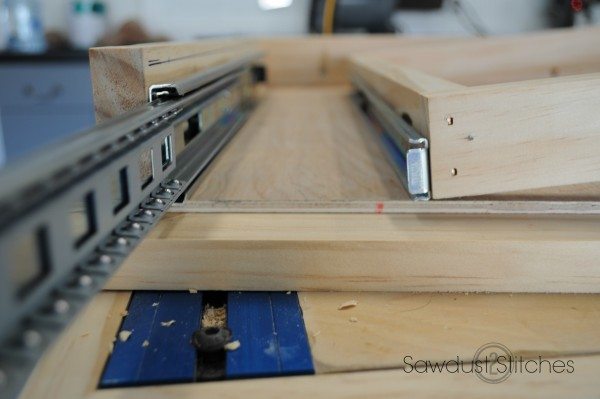 Once you have your drawer glide installed, then add the 1×3″ trim board. (Remember this is only 1/2″ as opposed to standard boards that are typically 3/4″ thick. We need that ext 1/4″ allowance so that we can use a magnetic touch latch. This will allow the opening to stay inconspicuous, while still allowing easy access.
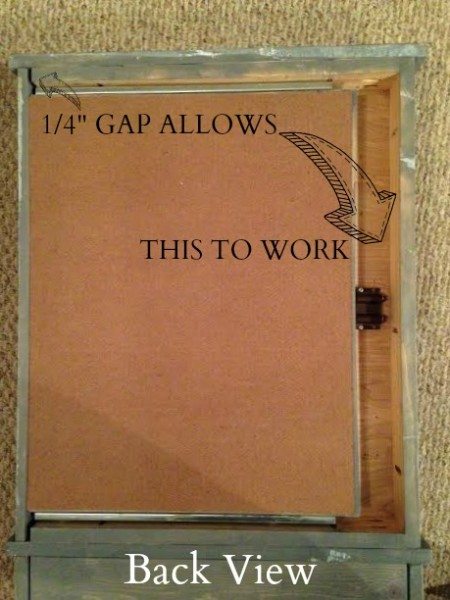
The Finish-
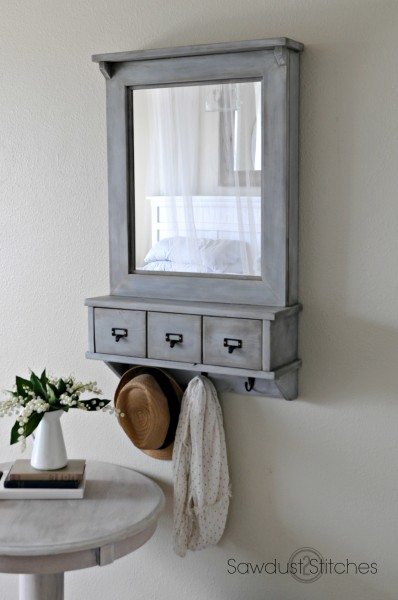
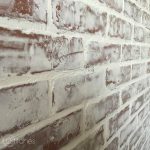
I used “Weathered Gray” from Minwax, I then used a small amount of Minwax Jacobean to darken the edges and crevices. I then white washed the entire unit two times. Both times wiping away any excess with a rag. Once dried completely I used a finishing wax.
The Hardware –
After the finish has completely dried, it’s time to add the last of the hardware and the mirror. To place the mirror, I smoothed an ample amount of Liquid Nails on to the panel sitting with in the frame. Gently set the mirror in place and allow to dry.
I decided to add trim to the interior rim of mirror, so it would hide the edges and create a nice finished look. (If you own a router, then you can easily route out the interior lip of the 1×3″ boards to hide these edges as well. I was simply trying to make this tutorial more accessible to more readers. )
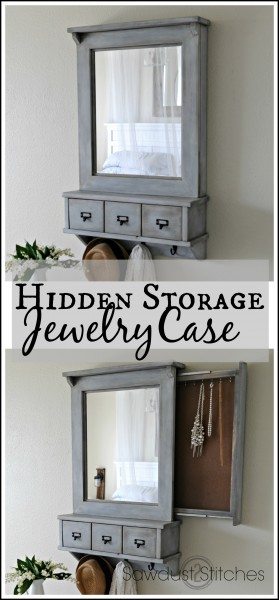
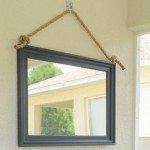
Now, slap on the hooks and pulls! I always love adding the finishing touches! Only thing left to consider is how to install it on a wall. I opted for this: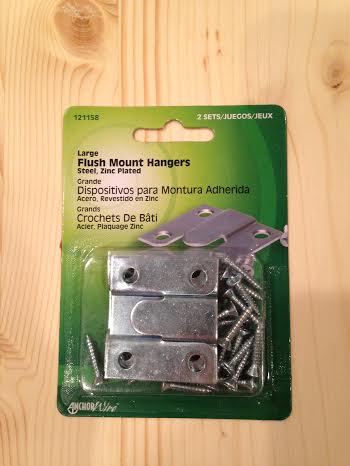
Now, hang er’ up and enjoy! 

 Copyright secured by Digiprove © 2015


would love to win this my birthday is on mothers’!
thank you for a chance to win!
GENIUS! You are so creative my friend!
Thanks so much, I am such a sucker for secret compartments.
SO SO BEAUTIFUL! Love it!!
Thanks Woman, did you enter to win ? That would be so much easier than packaging this beast up!
I do wish you would have a PDF version of your plans for downloading. You have good ideas but hard to utilize.
love this idea and need a better mirror for the bathroom. This is just beautiful.
Thank you for a chance to win!
Thanks for taking the time to enter!
Love all creative ideas. This jewelry is the best yet
Janie Hales
Beautiful piece.
Thanks so much Lisa!
I would love to win this.What a treasure! I’ve subscribed to your newslettwr today.
Thank you for subscribing, and sorry you didn’t win. I will try and do more giveaways!
Awesome idea, whether it’s used for jewelry or something else, the secret compartment would be a beautiful way to keep something out of sight of “intruders”.. Whether children or spying eyes.
EXACTLY I am a big fan of hidden compartments!
this is way cute! Great job!
thanks so much Lori!
Hi Corey, just got home from a trip and found this beautiful piece waiting for me. I’m so excited, and once again I am amazed at your craftsmanship. Thank you so much!