Supplies Used:
- A whole bunch of FREE crap
- Elbow Grease
- Lots of of Work
- Clearance Hardware from Lowes
Ok, I am speaking to all of my skilled craftsmen out there, please just ignore the following post. Seriously, stop reading. The following post will make you cringe.
BUT to all of my DIYer, makeover addicts, and frugal finders, you are gonna love this! I am going to show you, how I took a whole bunch of free Craigslist crap and turned it into an awesome workspace.
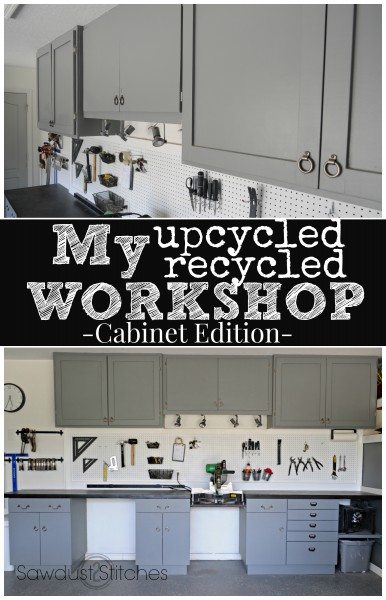
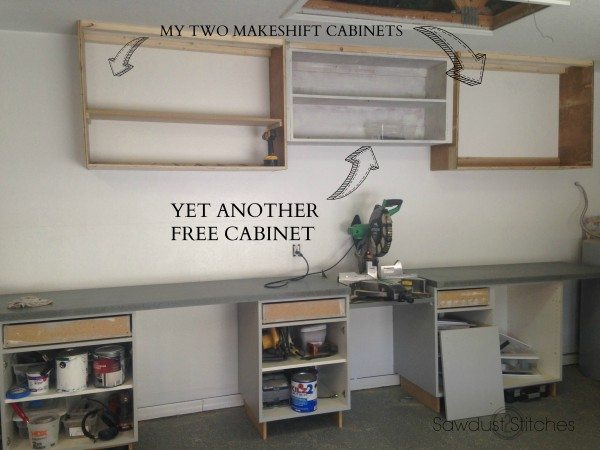
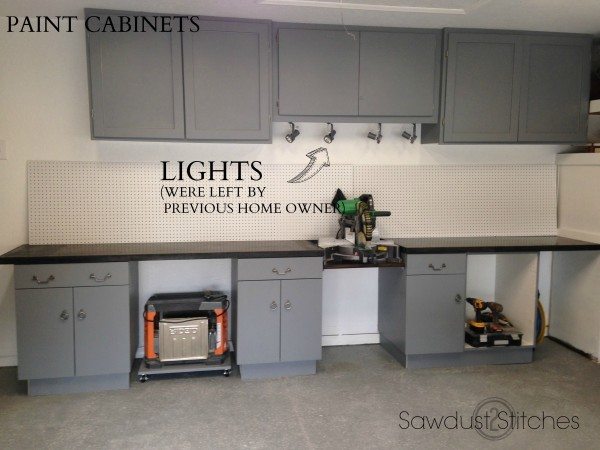
It all started with these cabinets. These were originally from a High School renovation. There were three left and I was able to snag them for free! I sanded them down, primed them, and then installed them.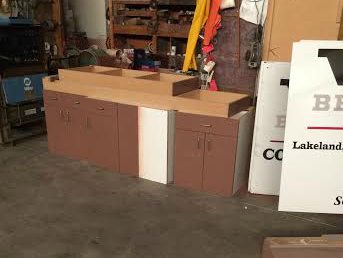
The next question was what to use for counter tops… the cabinets from the high school, did have a counter top, BUT I wanted to space out the cabinets to allow for more storage, so the original counter top would be far too small.
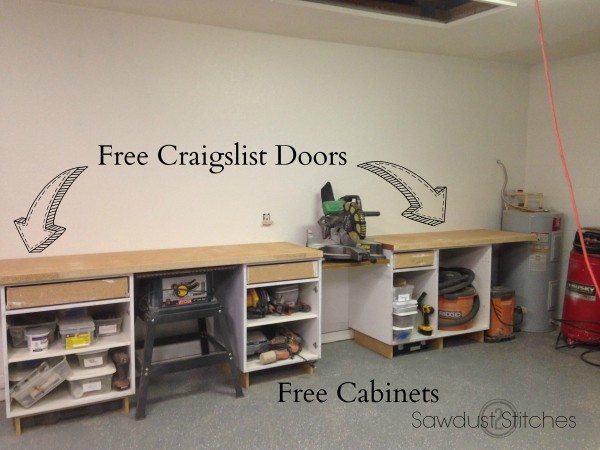
Well my Husband was scrolling through the “free” section of Craigslist, and came upon two FREE “all wood doors”. So he was my hero and went and snagged those from the curb. Which was no easy feat, those beasts are HEAVY, which is probably why the owner assumed they were all wood… They weren’t. They were solid core, meaning they aren’t hollow, but they were not solid wood. Which presented some problems, but stay tuned I will be showing you how I turned them into awesome counter tops.
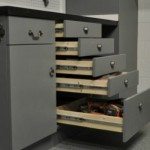
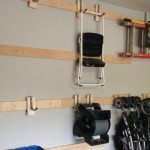
Next, I needed to create some overhead storage. Over the past few months my husband acquired quite a collection of solid wood furniture for me. He found them by simply perusing the “Free” section of Craigslist. After moving all of these pieces from place to place while trying to organize the garage, I decided to sacrifice all my spare wood and potential projects towards the greater good of the garage. I tore them all apart and ripped them down to make my cabinets.
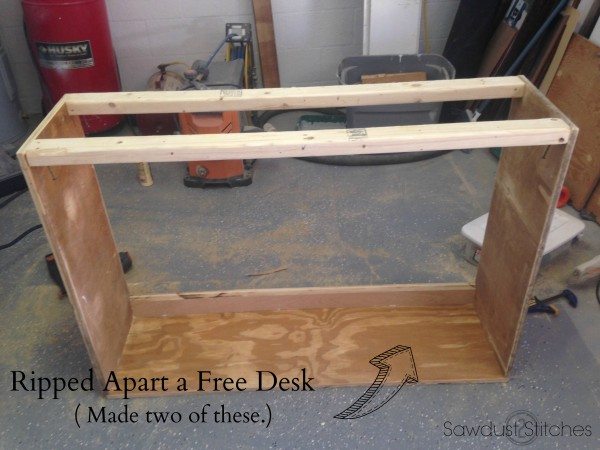 Like I said, all pro wood workers, look away. I am butchering these cabinets.
BUT guess what they are in my garage, they are going to take some abuse and are FREE.
Mic Drop.
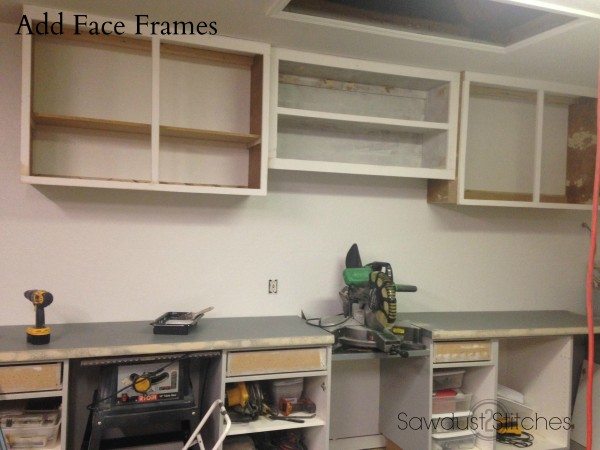
 After a little bit of playing around with sizes, I came up with this configuration. I kept one of the cabinets in the original dimensions ( the center one) and then installed the two side cabinets.
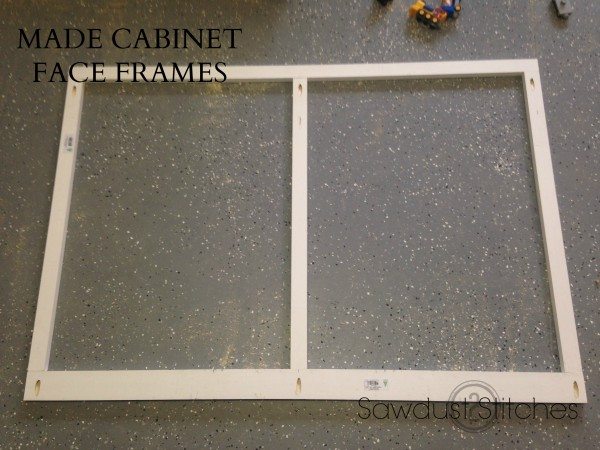 I then used 1×2’s and 1×3’s to make face frames for the cabinets.
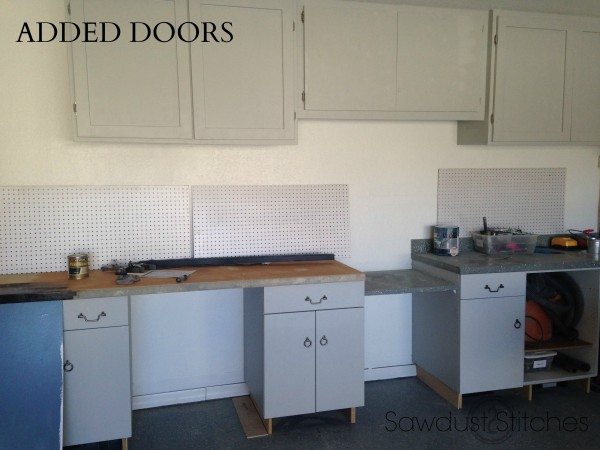
The only part of the project I really spent money on was making the cabinet doors. I made a simple shaker style cabinet door. I apparently got a little ahead of myself and did not document the process.
BUT, Jill from “The Rozy Home” did great post at Remodelaholic showing “How to Make a Shaker Cabinet Door”.
 After deliberating over the cabinet color I settled on a dark gray. I am not going to lie, I changed some of the cabinets 3 times! After my frustrating trial runs, I realized I really wanted them to match the floor. So that is exactly what I did. I had leftover paint from refinishing the floor, and so that is what I used! Ha.

Last thing they needed was hardware. A few months ago, I was at Lowes and stumbled upon this hardware… all on CLEARANCE! they were selling the small pulls for like $.49! The large ones for $.97! I bought every single one, and I am so glad I did. I have used them everywhere and had just enough to put them on my garage cabinets!
So there you have it, my nearly free modge podge garage cabinets. There is a lot more to the garage renovation, but that will need to wait for another day.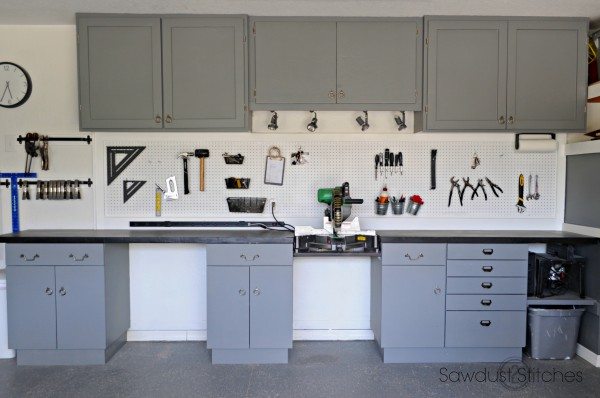
The moral of the story: If you are hesitant to start an overhaul because of the price, then start hitting up the “free” section of Craigslist. It WILL be a lot more work, but it is A LOT cheaper!
Take Luck,
Corey
 Copyright secured by Digiprove © 2015


Corey,
When you said later….on the countertops, did you mean later as in a few weeks, or will it be the next blog. I have been thinking about using solid core doors to make an add-on for my table saw so am interested in what you did, and any problems you might have encountered, if any, with the solid core doors.
Nice job on the cabinets.
I am hoping with in a week. I will shoot you an email now .
Corey, What’s your solution for all the sawdust coming from your saw?
hmm…the free section never looks as good for me as when you do it! Amazing work! Can’t wait for the rest of the workshop!
Thanks Regina! Just be ready to shove your husband out the door when something pops up! … You are like really pretty…
Corey,
What a fantastic attitude, work ethic and uncanny ability you have for making the most out of seemingly nothing.
I find it wonderful to see a woman achieving and creating items that most males would be envious of.
Keep up the great work. You are an inspiration the both sexes. (pardon my French…lol)
Bob from Down Under.
Bob, You totally made my day! Thank you for taking the time to comment. This is my favorite kind of feedback!
Great job! I’ve been recently hitting the free on craigs..great deals. How did u learn to do woodworking? I’m a newbie and was thinking about taking a class. My hubs is not handy in that department either lol.
Thanks so much Bonnie, I had an advantage and grew up working with tools ( my Dad was a contractor). Instead of starting with a project, start by learning one tool at a time. Once you learn what they can do and are comfortable using them it is a lot less overwhelming going out on your own. Good luck!