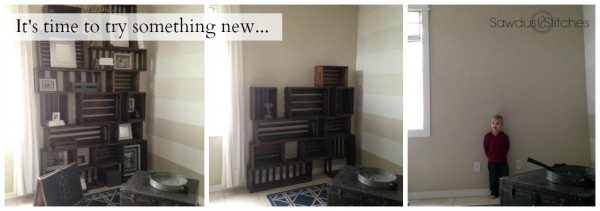
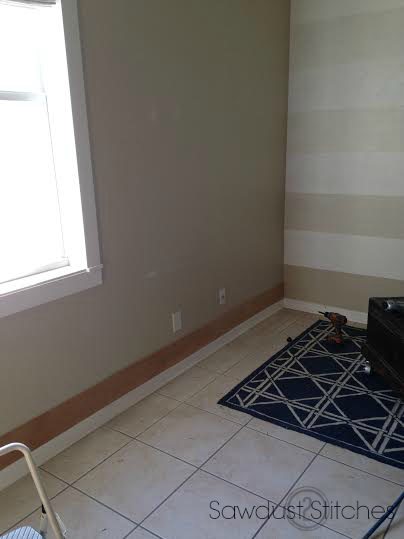
From time to time I would go into our front sitting room (seen below) and would try and figure out what was “off” I liked the room but never liked spending much time in it. I have always been a minimalist, so this room was always too busy for me, to the point that it was unsettling. It also felt a little cave-like. I kept dreaming of an open floor plan with a bright airy feeling and faux shiplap walls.
One typical Tuesday morning I was driving home from school drop-off and made a split second decision and turned left towards Home Depot… and this is a documentation of what occurred in the next 48 hours…
I walked straight to the paneling section in the lumber isle and started comparing board widths, finishes etc. I ultimately decided on a 7/32″ plywood. After some calculating I guesstimated I would need 6 sheets.
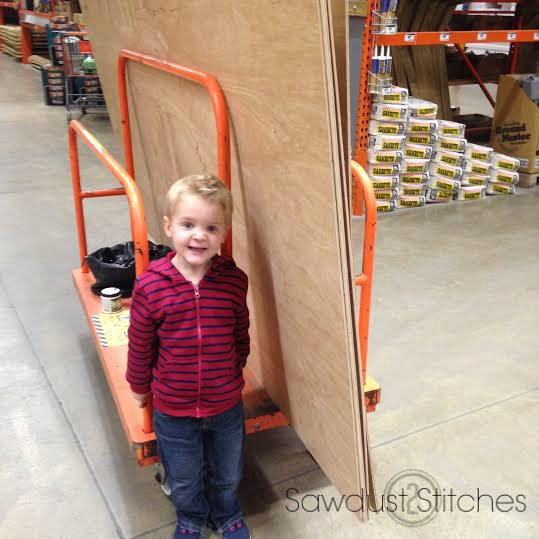 My sidekick helped me locate a nice gentleman that could do me a HUGE favor. I needed all the panels cut down into 6″ planks. He was AWESOME and was happy to oblige.
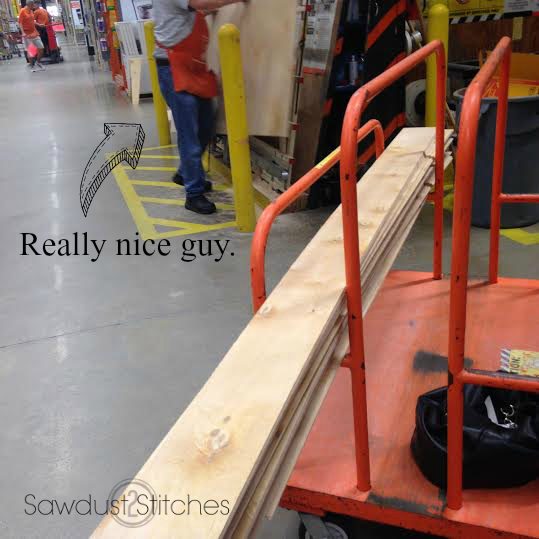
After our impromptu trip to Home Depot, this is what the rest of our day looked like…
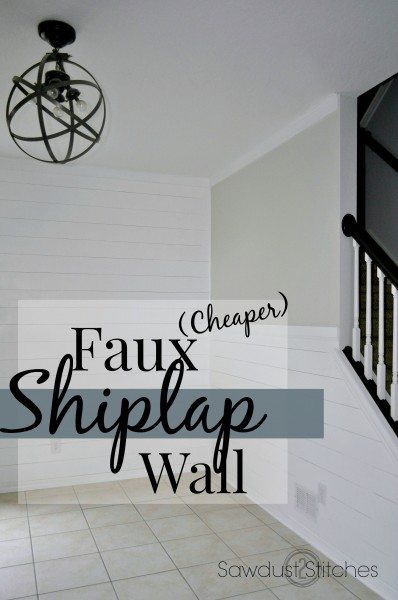
Faux Shiplap Walls – Fast & Easy Install
Within 25 minutes the front room looked a little like this…
Here is what I did. I started by sanding the edges of the planks. I applied these planks to the wall using an 16 gauge nailer. Worked like a charm.
Faux Shiplap Walls – Spacing for Outlets
I cut all the pieces to fit. Making sure to cut out spaces for the outlet placement.
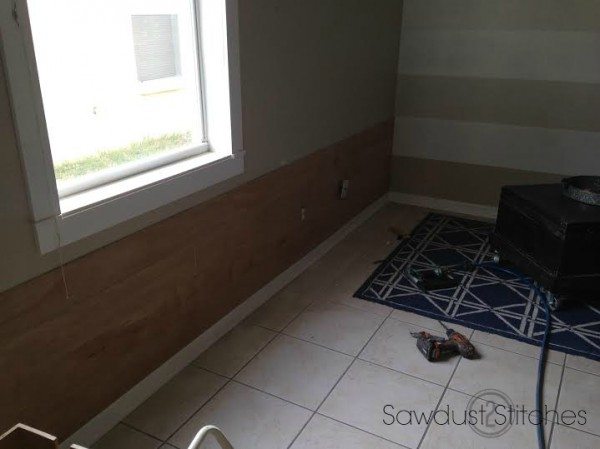 I made sure to stagger the board seams so that it didn’t create a predictable visible pattern.
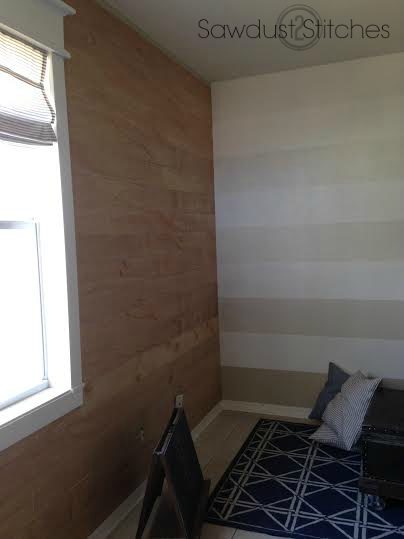
Faux Shiplap Walls – Nail Holes
At this point, I used nail hole filler on all the nail holes. After the filler dried, I smoothed out the nail filler patches with a fine sandpaper.
So NOW it’s time to prime! This was a rather time-consuming process. I didn’t want the cracks to be filled with paint, so in between coats I would used a box cutter blade to prevent the gap from filling. 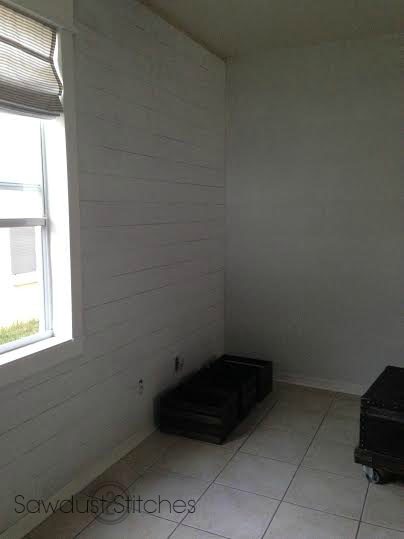 In retrospect, I wished I had primed the edges before fastening to the wall.
 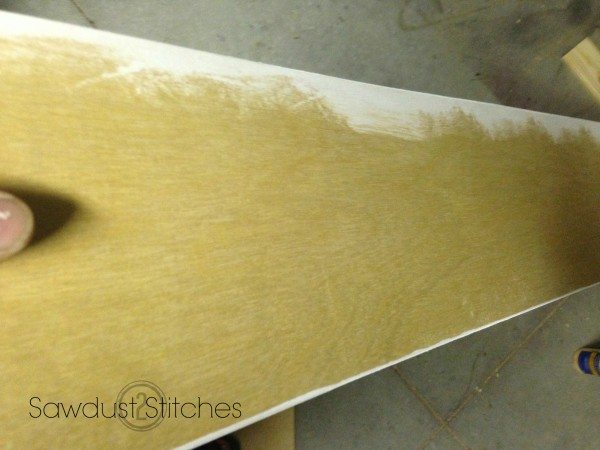 Which is what I did, on the adjacent wall. ( No, it was not apart of the original plan.) 😉
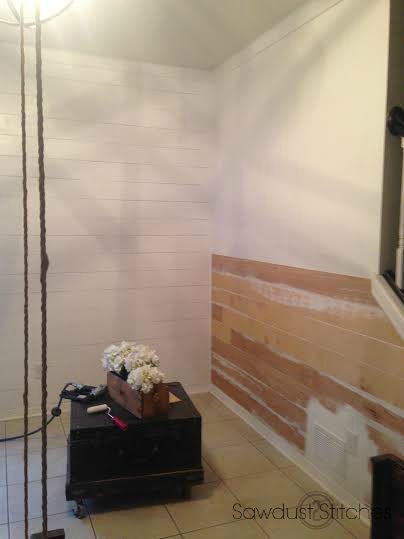
Faux Shiplap Walls – Top Coat
For the topcoat, I used Behr Ultra Pure White. I used a piece of trim on the edges in order to hide the end edges. I followed up with caulk, it creates a very finished look! Look how pretty! 

 I know that to some this may not be an improvement, but I really like it!
 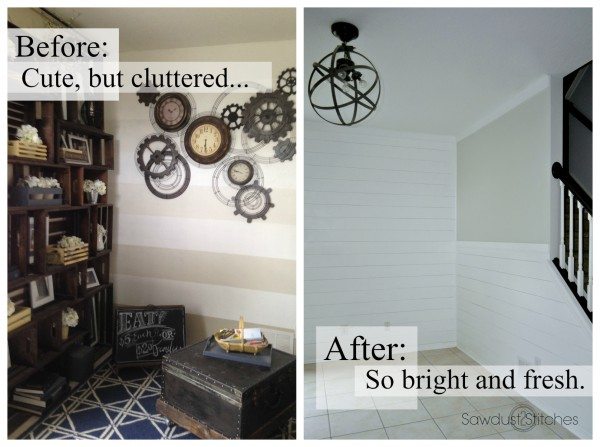 I still have a lot of plans for this room, so stay tuned. It’s gonna be good!
Corey
 Copyright secured by Digiprove © 2015


I love the crate wall, but I sure can see that it is busy. The “Steampunk” art on the other wall is nice, but also busy. Like what you did, I’d hate that striped wall, but that’s me. You can ship me the crates any time! LOL!
AGREED! I liked all of the components individually, and unfortunately it was the catch all space for any decor I wasn’t sure what to do with! It’s so much more welcoming now! Ha, I did sell of a majority of the crates, loved em, but it was time for them to go.
It looks great! I may steal this for the kiddos playroom. I keep going back and forth on what to do down there.
I love this idea I think I will try this in my grandson’s room. Love you website!!!
Thank you so much, and thanks for taking the time to say so!
This is my first time reading your blog and I LOVE it. Not many bloggers can use power tools and sew, which has never made sense to me. I love that you can do both! (I have a whole shop full of power tools and own two sewing machines.) I’m really looking forward to seeing more of what you do!
Thanks Erin, I am with you, if you can use a sewing machine, and aren’t afraid of power tools, there isn’t much you can’t do! Thanks for reading~ !
Hi. I am doing it! Home Depot here I come. Are you happy with the paint color?
Are you referencing the “greige” or the white ? Either way I love both of them!
Okay, that’s it. You’ve convinced me. I’m definitely going to do this in our foyer. It was really cute before but so clean and crisp now! Love it even more. 🙂 How much did all the wood cost?
Hey lady, I love it too, it is a new favorite. I did a fairly large wall an the partial accent wall. I think I used 5 sheets at $10 a piece ? I think the powder room is next! 🙂
How did you gap the boards and did you use a stud finder to make sure of good grip? Also did you use flat, eggshell or gloss for topcoat? Probably would use primer paint in one for less work (smile). How wide was the trim piece used and did you also trim out the corner where walls meet?
I love your idea, perfect when you want a casual environment. I am going to use in kitchen as well as ceilings, so affordable and thank you for assisting me with my conundrum of dealing with my ceilings. I used bead board on my kitchen ceiling, tongue and groove and such work this should be much easier.
Thanks again, love, love, love your idea.
For the gaps, I actually used a painters straight edge. I used a semi-gloss, it did have a primer in it, but even with it. I still prefer to use a primer. I can usually plan on two coats, especially with raw wood. It is cheaper to do one coat with primer I find. But with most projects you are right. Paint and primer are a good way to go. I did use a small piece of quarter round where the boards meet. I agree it is perfect for a casual environment, and I love the airy feel it creates. Thanks for reading.
Oh how I wish I could convince my hubs to do shiplap! It looks great! Thanks for sharing!
Erin
Haha, you can always do what I do, “Surprise hun! Look what I did today!”
haha.
when you say you painted the edges but did not want to paint the crack I’m confused if you painted the edges when you put the boards on the wall than isn’t the crack painted? I love how it turned out
Lori, Sorry for the confusion, I wanted the edges of the board painted, but if you put on too much paint, it will fill the crack. I still wanted there is to be a visible crack. Hopefully that helps ? Thanks for reading!
What is the width that you cut your boards? I have been so undecided between the shiplap and beadboard, then I seen your post and made up my mind. Love it!!!
Mine are just shy of 6″ wide. Good luck!
I wonder how this would be as a backsplash. I was heading towards white subway times, but now…hmmm
Looks great! What color paint is on the wall above the planks?
It is “Silver Birch By: Glidden! Thanks for reading
Oooh! I’ve been trying to come up with a way to do a faux shiplap wall and this is it! Love the look; you are right, it’s much nicer now that it’s bright and open.