This post is sponsored by The Home Depot.
Do you ever have a great idea. An idea that will simplify your life, but it requires a little bit of work to get there? I feel like this is a fairly normal feeling. (However, I normally compound that complication/work factor by x100.) Recently my inspiration was the new Philips Hue Dimmer Light Kit. After playing around with them, I had a “light bulb moment” and knew exactly how I could best utilize them.
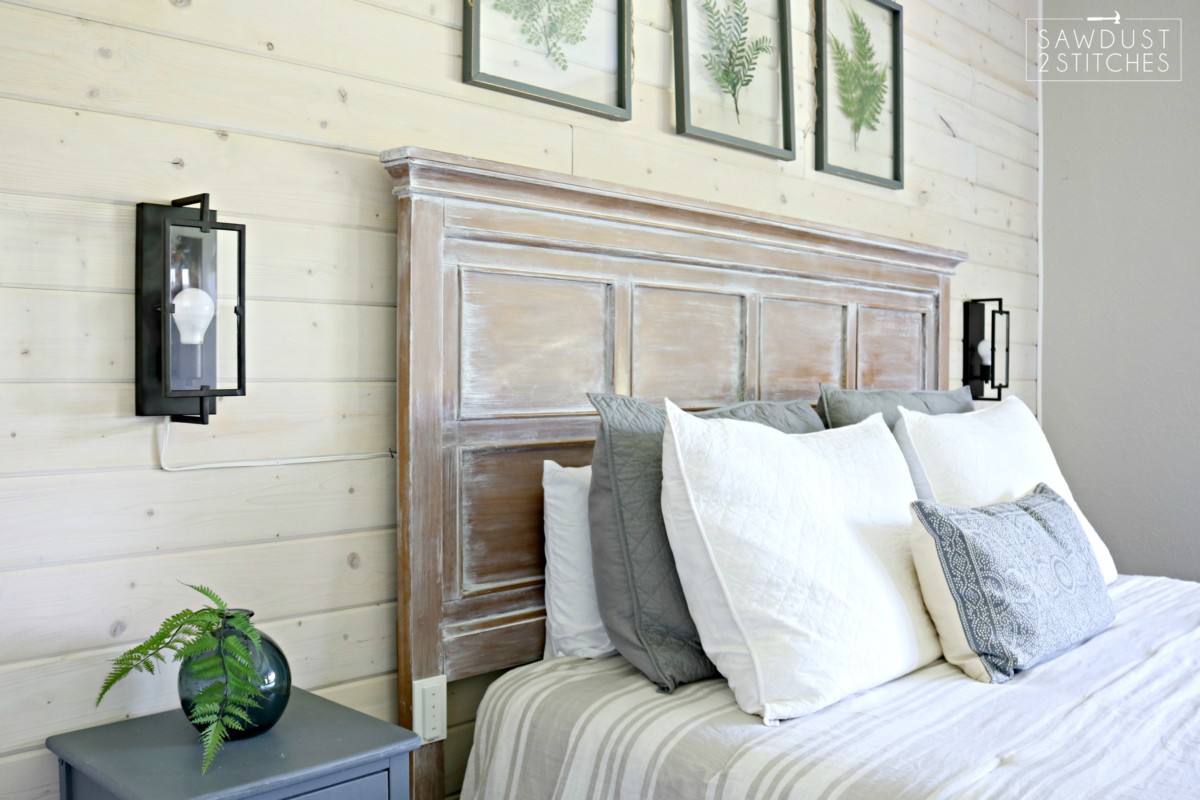
You see, I have these awesome “Industrial Style Sconces“ that I found on www.homedepot.com. They are awesome, but I didn’t have any places in my home that was hardwired for sconces. What’s a girl to do? (This is one of those moments, where I complicate the process a little, but the end result is worth it.) Well today I am teaming up with The Home Depot and Philips Hue Lighting to show you just how you can fix this little problem. Phillips Hue has some seriously innovative products, and today I am going to be showcasing one of their most affordable products , I am going to be utilizing one of their smart lights that simplify my life! So read along as I show you how to convert a sconce into a plug-in lamp and also share the greatest hack for lamp lighting.
Tools Suggested:
- Wire stripper/Cutter
- Screw Driver (optional)
- Drill
Supplies Used:
- Philips Hue Dimmer Kit
-
Hue White A19 LED 60W Equivalent Dimmable Smart Wireless Bulb
- Cordelia Lighting Interior Sconces
- Extension Cords (x1 per light fixture. Make sure they are long enough to reach intended outlet.)
 Alright, let’s get this lighting party started! Begin by cutting the female end off of a small extension cord using wire cutters.
 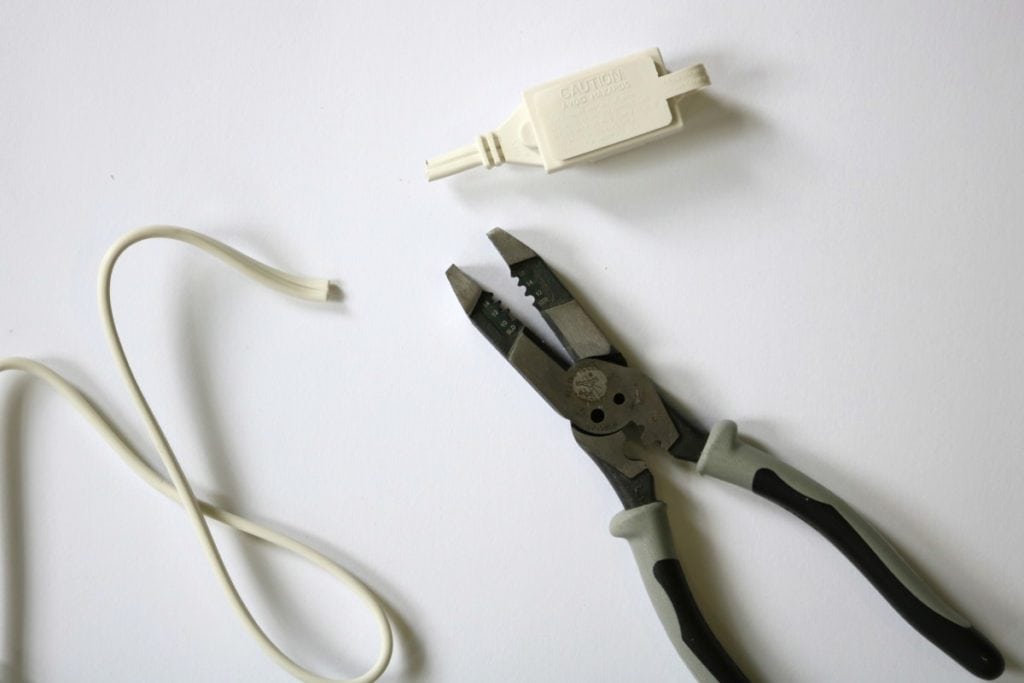 Then pull on both of the wires ( the cord consists of two wires that are connected together by the plastic casing). Once the two wires are separated strip the last 1/2″ of the wire casing using wire strippers.
 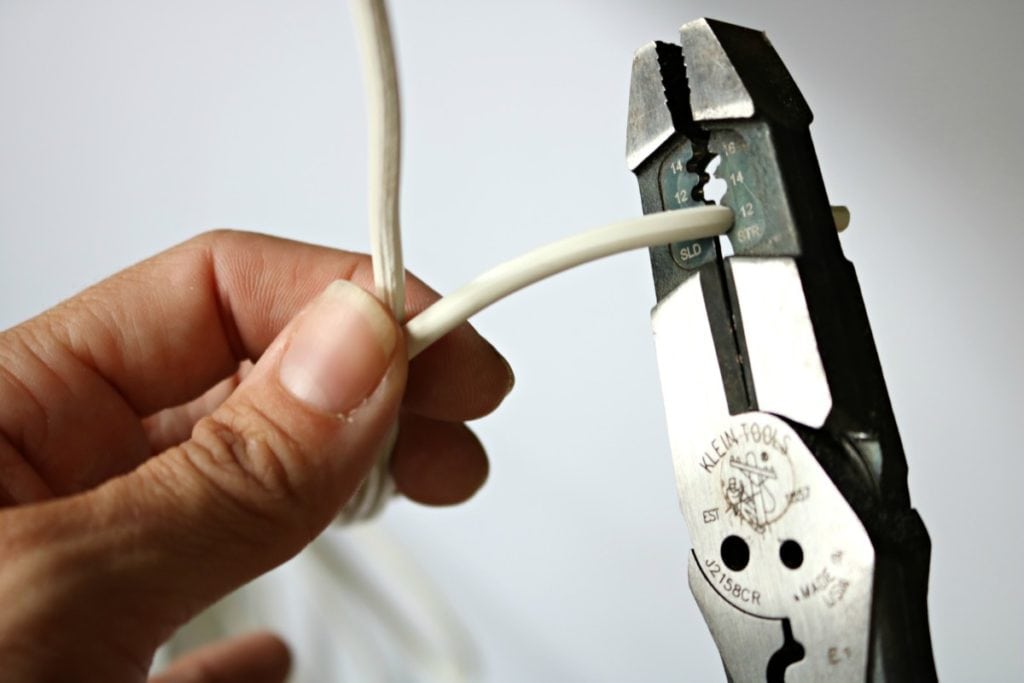 Next wee need to identify which wire is which. In most cases one wire is black and the other white. However sometimes when a wire is exposed (like with a hanging chandelier, or an extension cord) the wire will be one solid color. HOWEVER, normally one of the wires has a smooth casing and the other has a ribbed texture.
 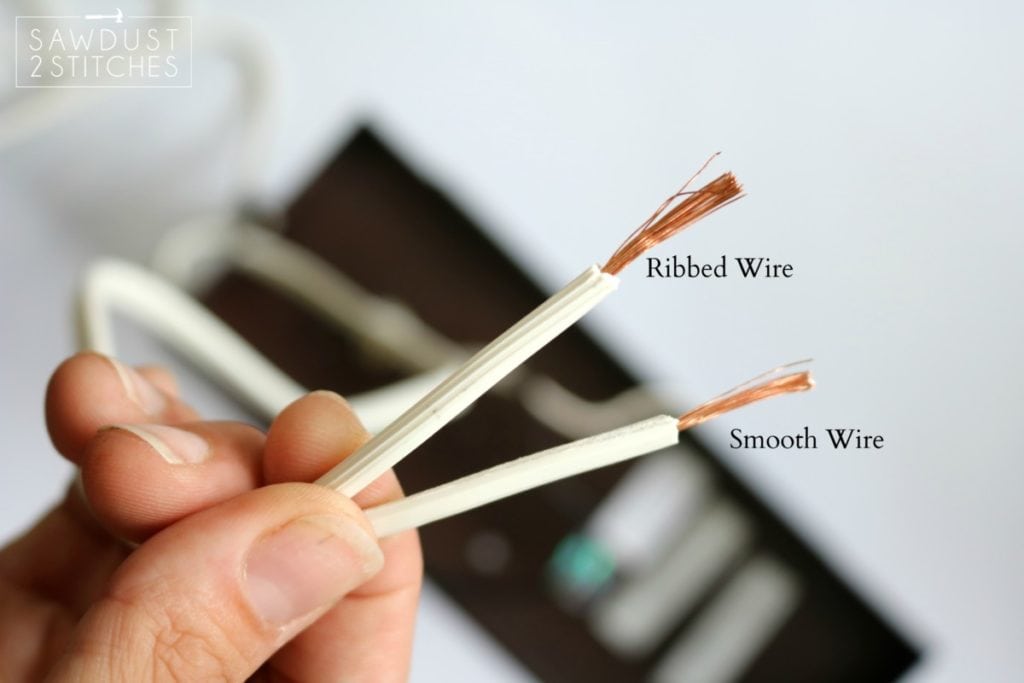 For this project I was using a wall sconce that can be purchased at The Home Depot. Because it was meant to be a wall sconce there is no place for a cord to run. So I needed to fix that little problem. It was a quick fix, using a drill bit I drilled a small hole in the bottom of my lamp. It does not need to be large, just big enough to run your decapitated extension cord through.
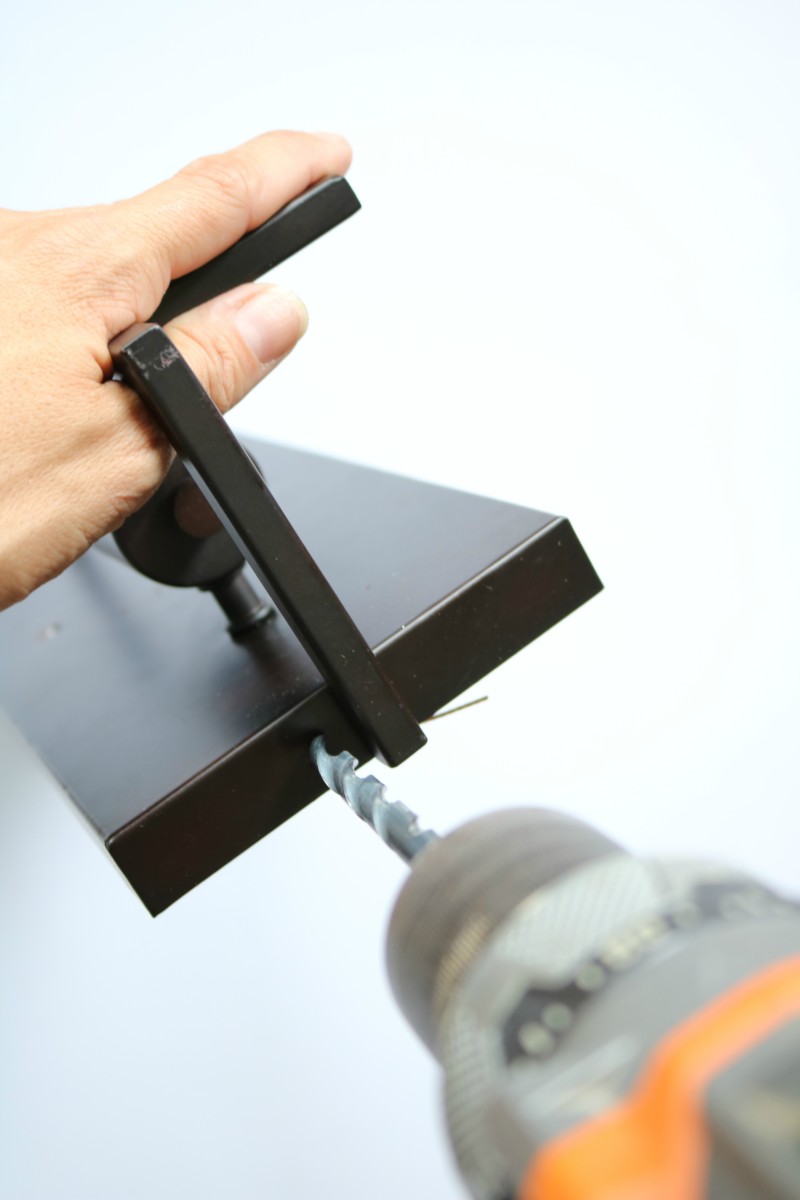
 Once the hole is drilled, feed your wire through it.
 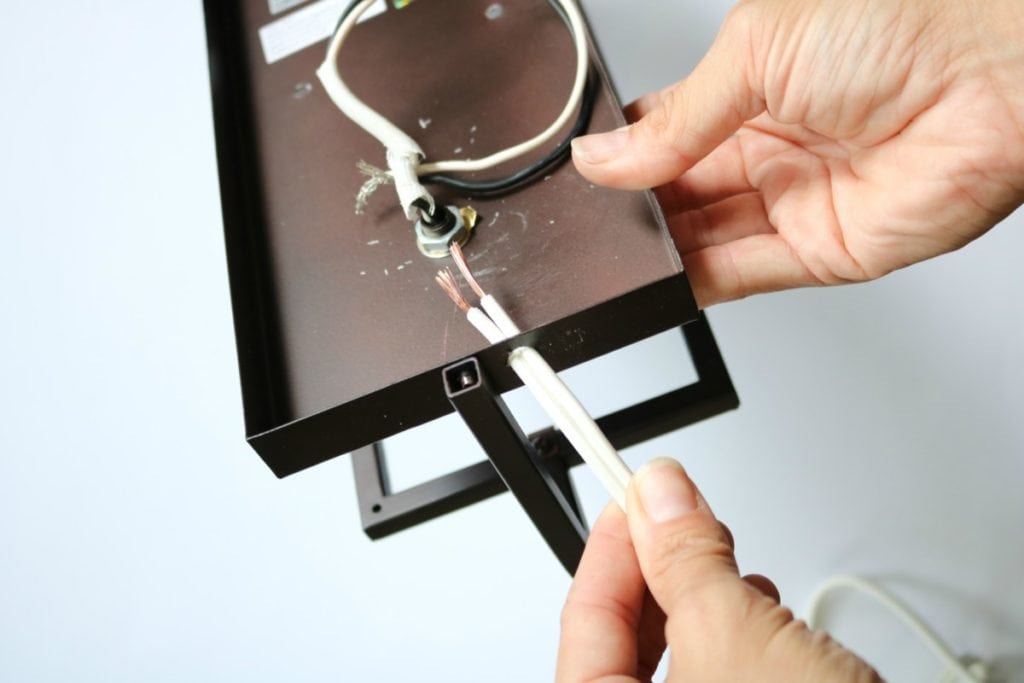 Here is the part that I think makes people’s heart race. There is no need to breath into a paper bag people! You go this! Lamps are very simple. They have two wires and that is it! Like we discussed earlier, a lot of the times if you are hard wiring a light fixture all the cords will be black and white and you just match colors. However in this example, we do not have the color coded option. Instead you are going to wire it, ribbed to white, and smooth to black. I just find it easier to remember “Ribbed White”. the rest falls into place.
 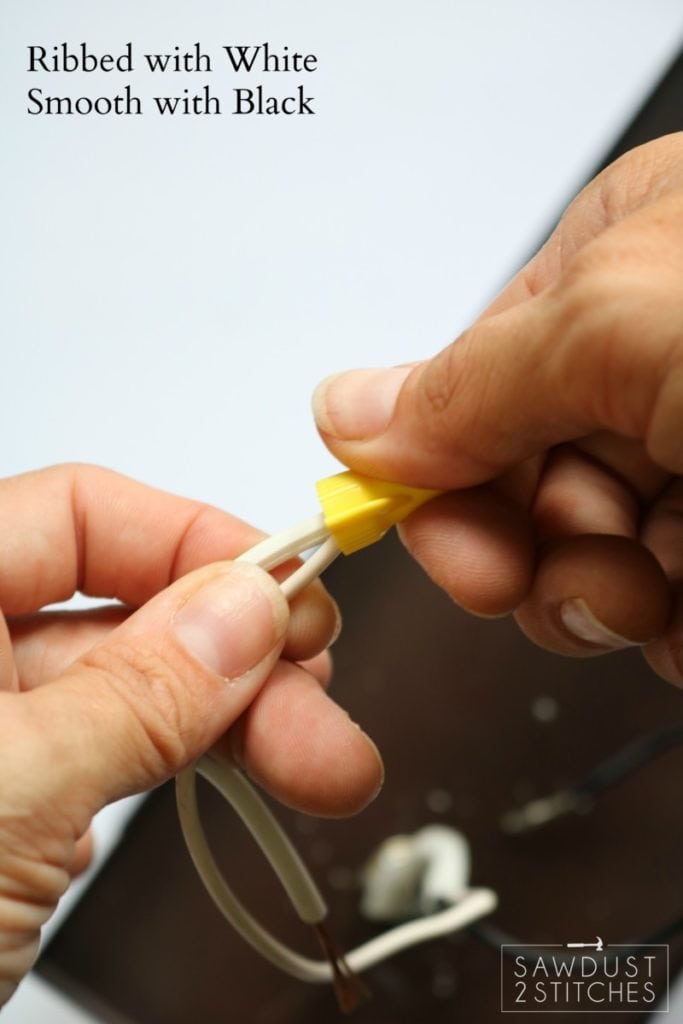 You simple twist the ends of your white and ribbed wires together and then add a wing nut. (These will more than likely come in your sconce light packaging.) The wing nut is threaded on the inside. You just twist it in place. If it is installed properly, you should be able to tug on the wingnut and it will not come loose. If it is loose, just try again.
Repeat this same process with the black wire and the smooth wire. 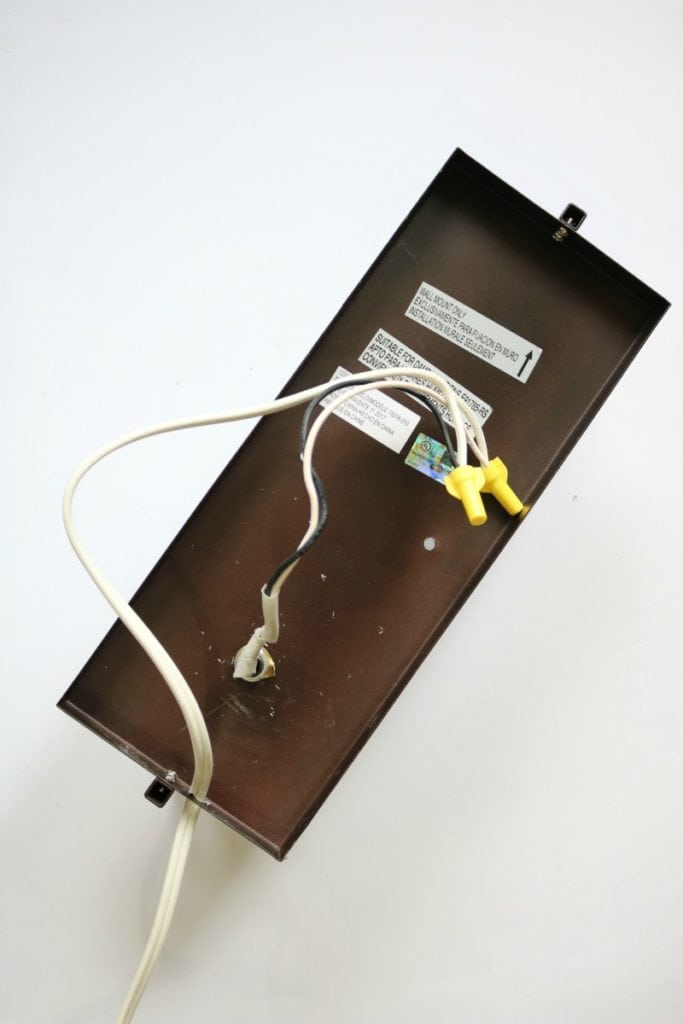
Then just follow the instructions that came with your wall sconce. (Ignoring the wiring steps obviously.) They only difference will be that you are probably attaching the bracket to a plain wall, and not over a light junction box. All sconce kits will vary in their application process, just follow the mounting directions that came with your kit. 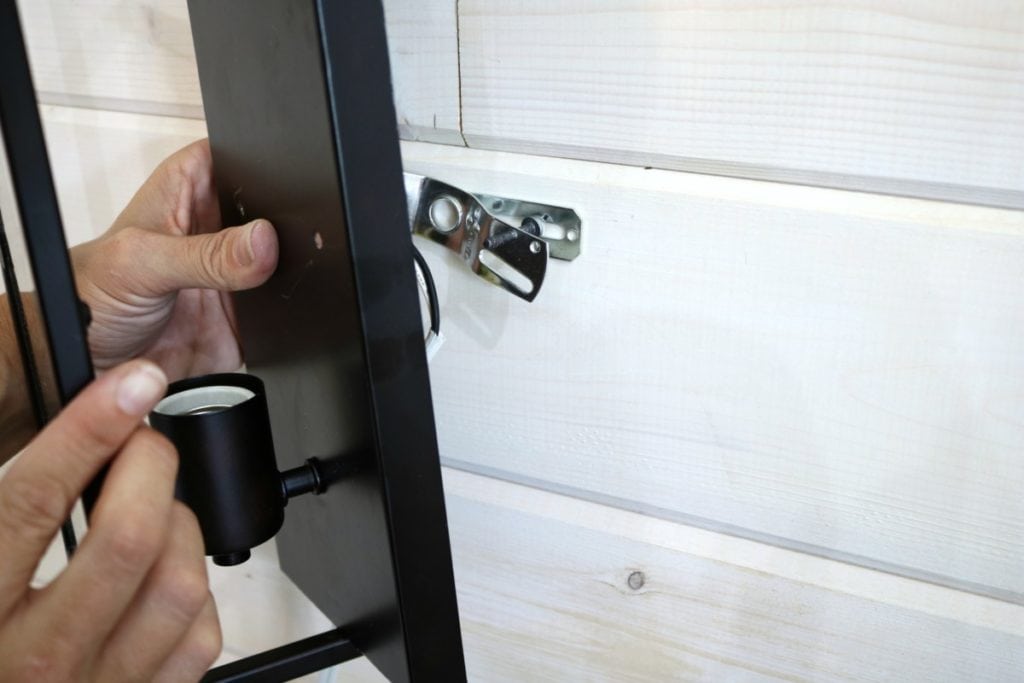 Alright, that wasn’t so bad now was it ? Now is the easy part!
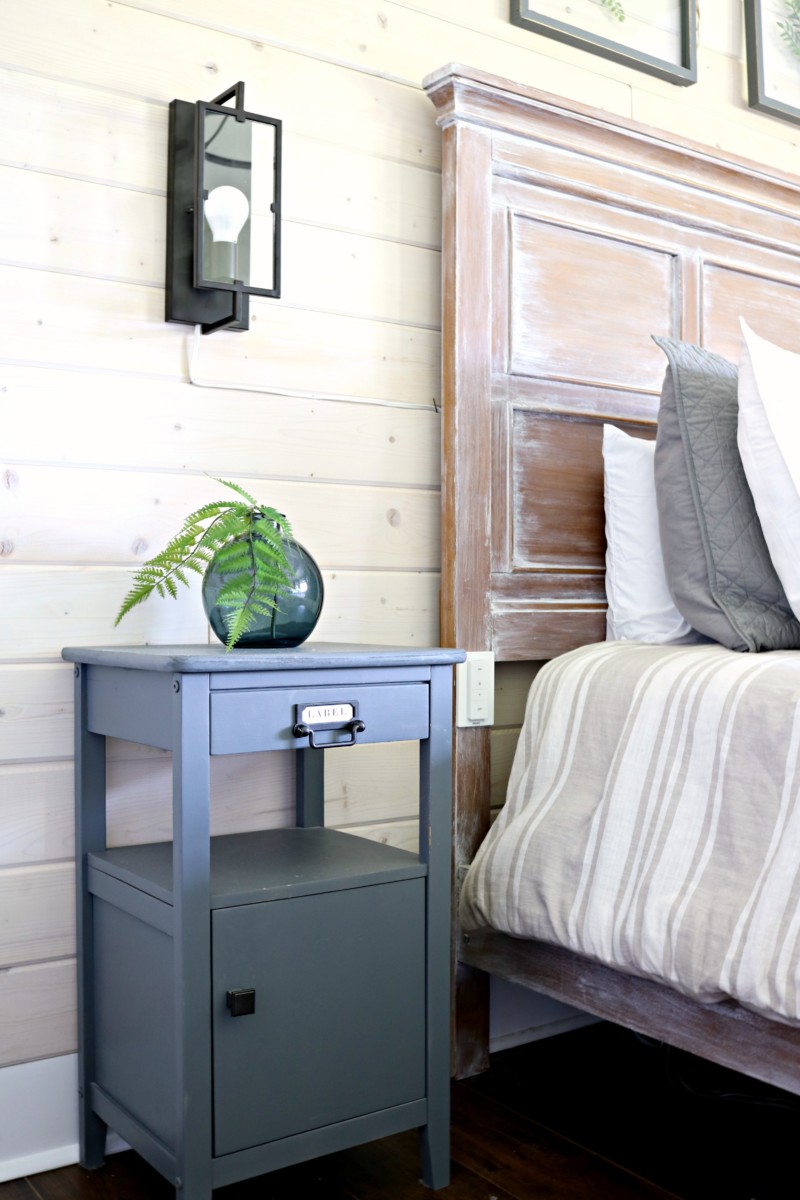
One of the trickier parts of a sconce turned lamp, is easily accessing the power. Because it is now a lamp, you will need to plug it/un-plug it every time you use your new light. What’s a girl to do!? Well I have a simple, relatively cheap, and bonus cool points way to do this! Phillips Hue recently released the Philips Hue Wireless Dimmer Kit. It contains everything you need to get started! For this project I needed just one kit and because I wanted one for both nightstand I purchased an additional light bulb for the second sconce/light.
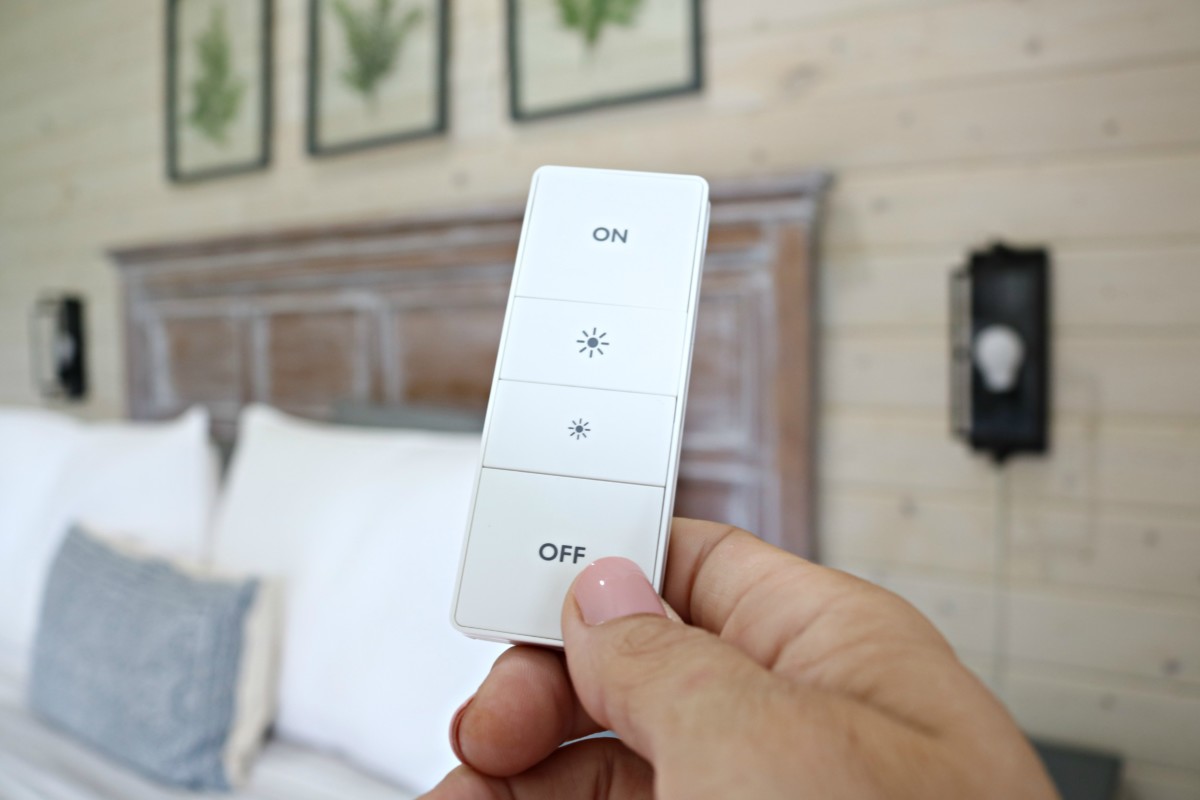
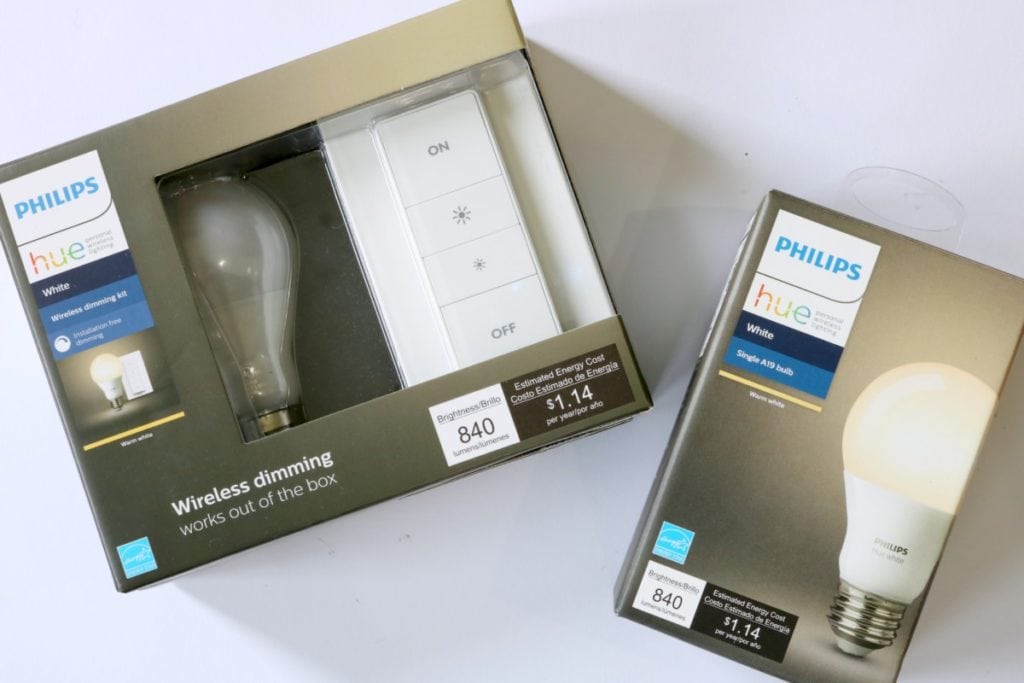 The package comes with a “switch” and a bulb. The switch actually can sit in a magnetic holster so it can be mounted to the wall, or you can take it wherever is convenient for you.
 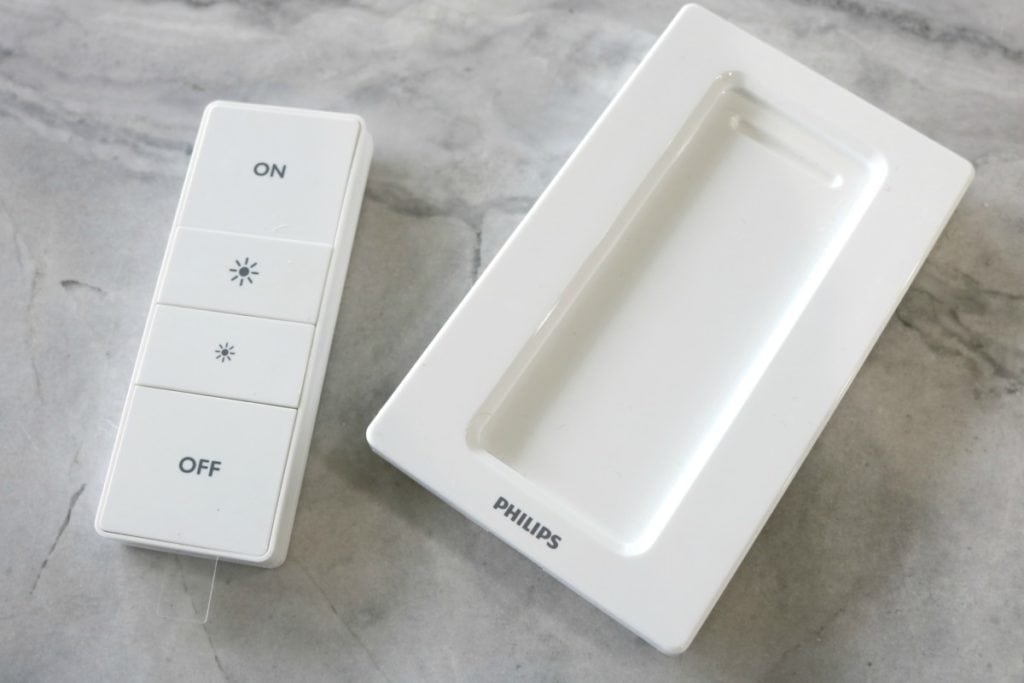 The installation for this light is ridiculously easy! So much so that I thought I was missing something! The mounting plate can come apart for options when mounting. It comes apart easily so that you can access screw holes should you decided to mount it via screws. But for this tutorial I want to show you how user friendly this is!
 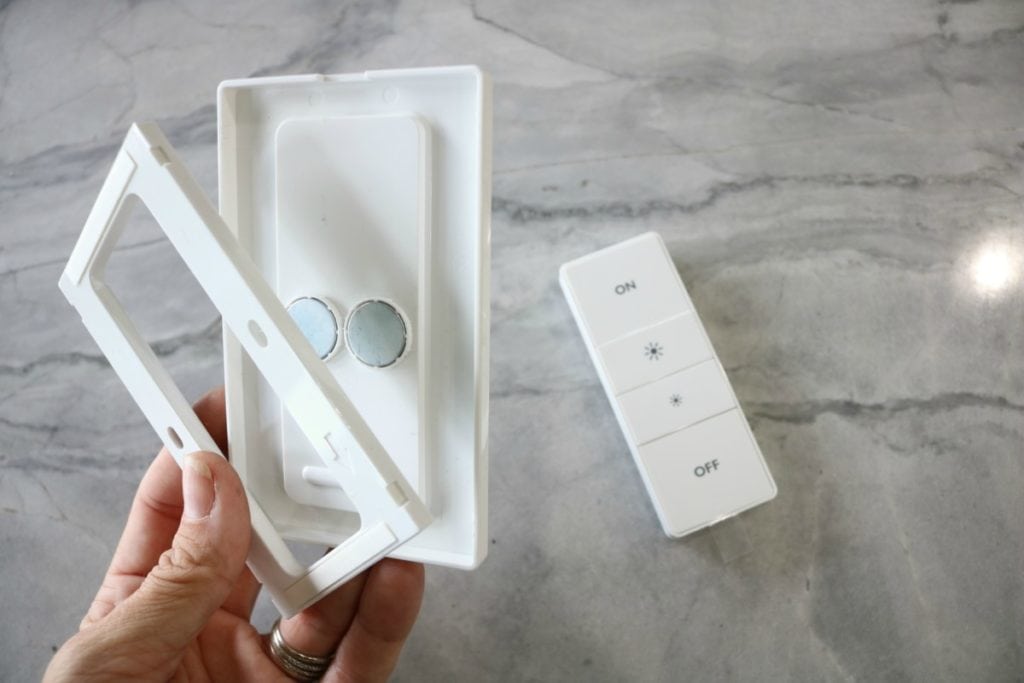 If you decide to forgo using screws, it comes with some STRONG double stick tape on the backside. All you need to do is remove the adhesive barrier strip.
 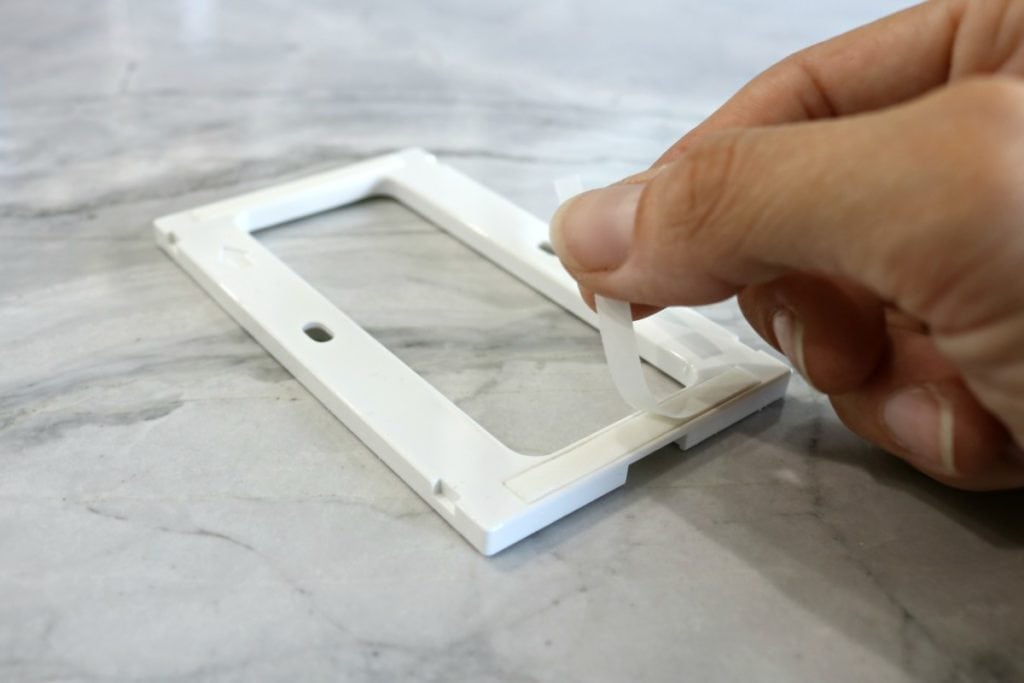 Then press in place… ANYWHERE! I am telling you, it is that easy! You don’t have to wire a single thing! Just press-n-go! (Again, if you wanted to attach using screws, you can do that easily anywhere as well. Once you have the plate positioned where you want it, just attached your face plate/cover to the installed base.
 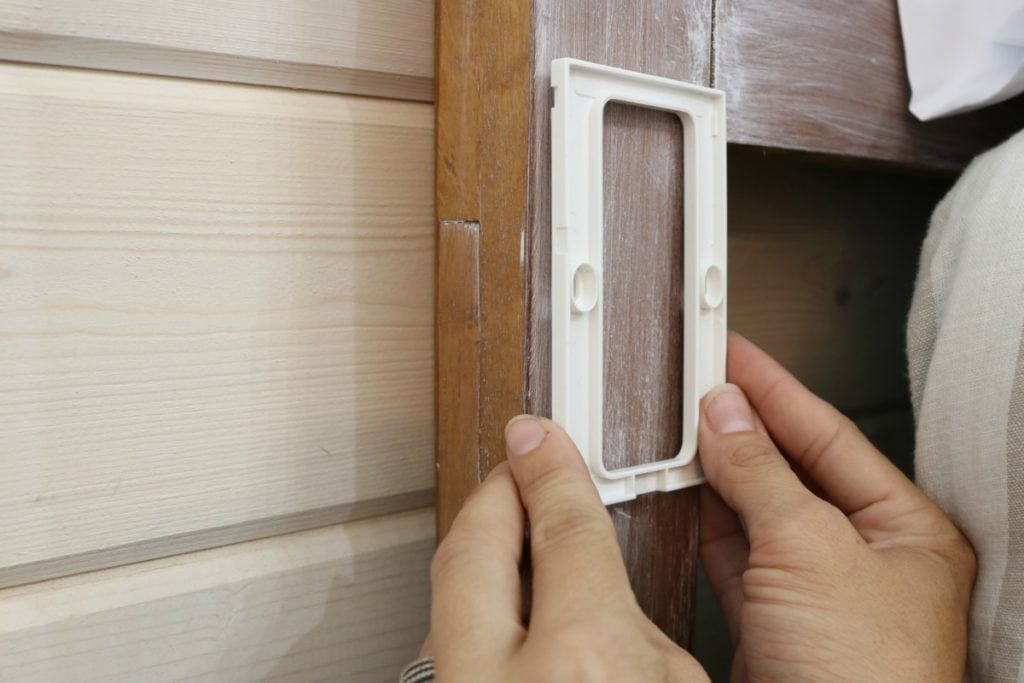 After the plate is in place, remove the clear battery strip and you can place the remote in the wall mounted cradle. In this case I attached it in a tucked away post on my headboard because these will be powering both mine, and my husbands nightstand lamps.
 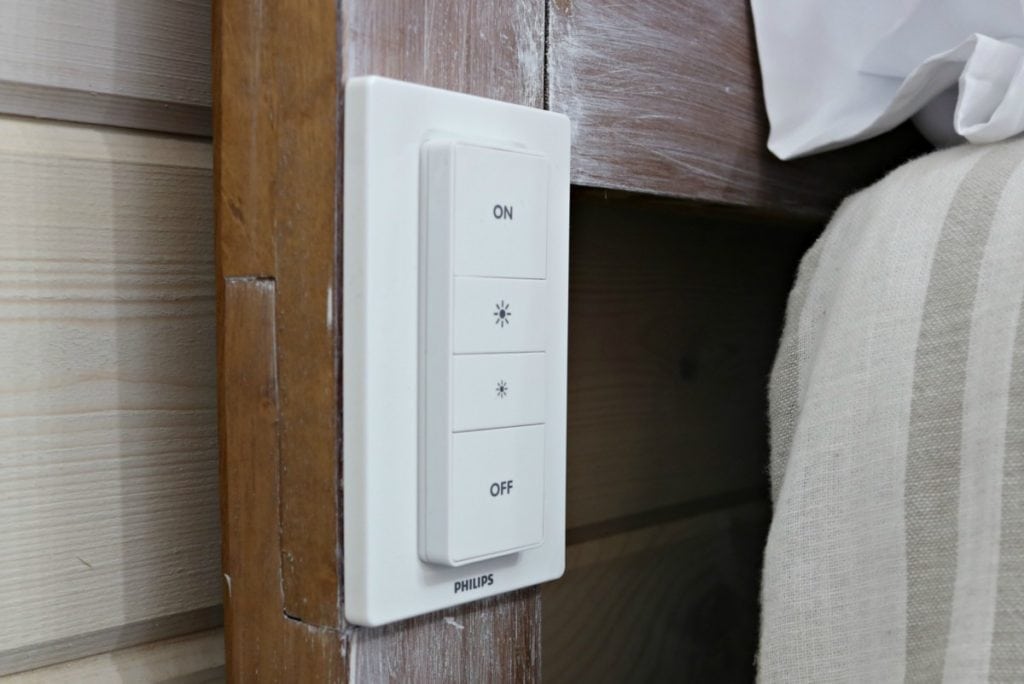 Then you screw in your light bulb…
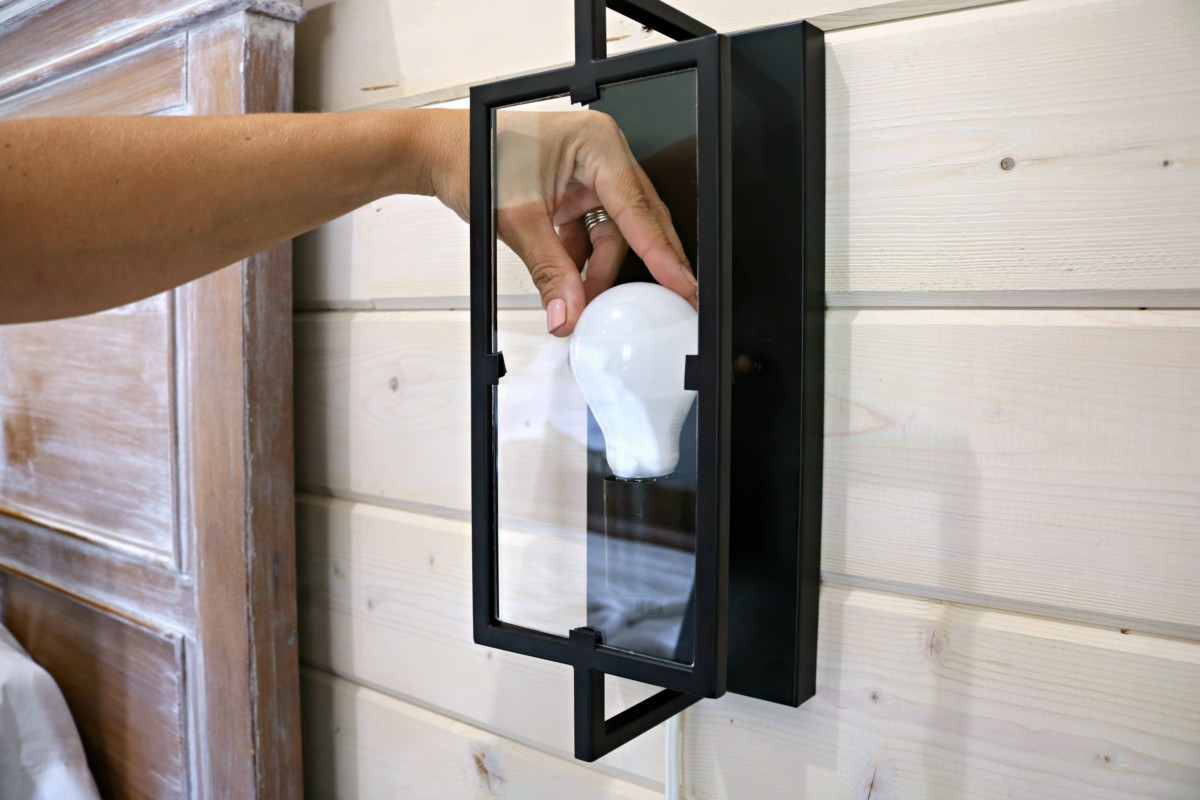
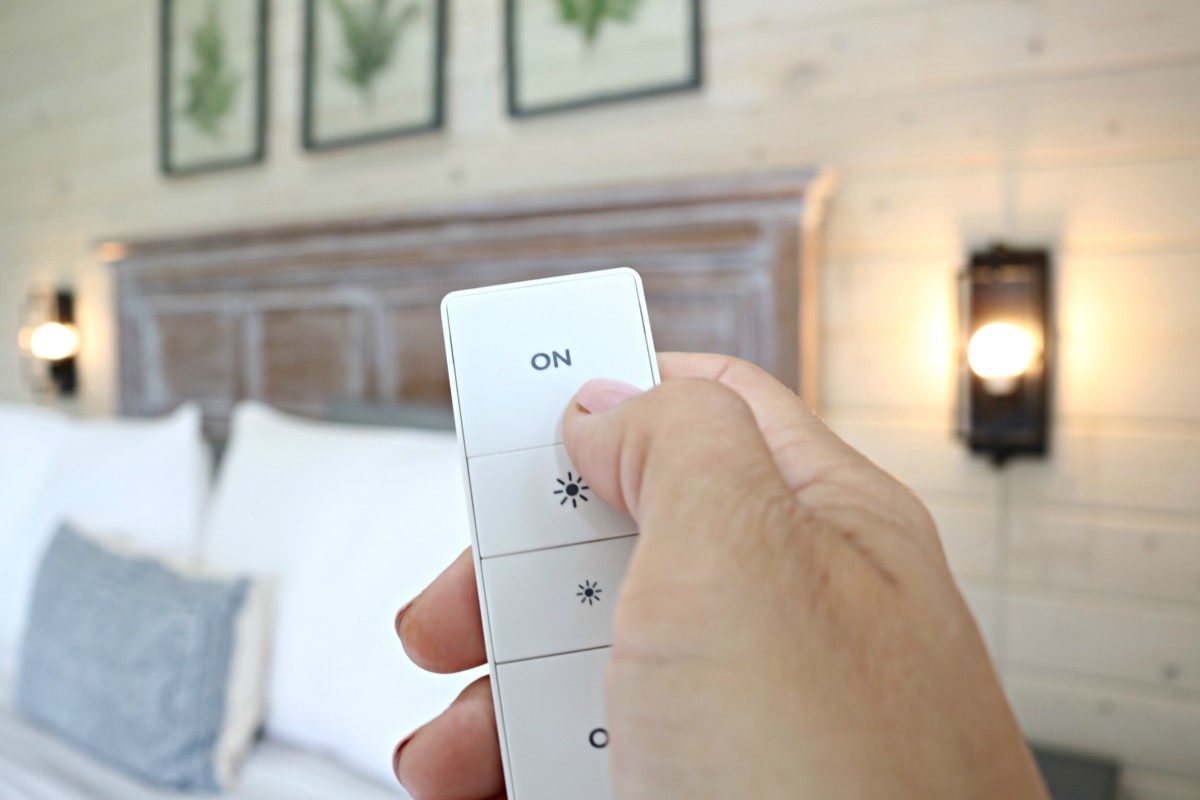
That’s it. Just plug in your lamp and start using your remote immediately! The only exception, is if you are using multiple light bulbs. The additionally purchased ones will not light up initially…
Again, the process to make it work is baffling-ly easy! Just stand close to the light you desire to program. Hold the “on” button for 10 sec… It will immediately start working. You can repeat this process with up to 10 lights!
Just when you thought it couldn’t get any cooler… another game changer… they are dimm-able! No additional programming required. Just push the dimmer switch and create the perfect atmosphere in seconds! How amazing is that !?
 Alright folks, that’s a wrap on this project! I feel like this could be a great application for lighting over/in kids bunk beds or in poorly lit closets! You can bring some essential lighting, or even create some great ambiance in just a few minutes!
Thanks so much to my sponsors, and to you for reading along!
Take Luck,
Corey
*I acknowledge that The Home Depot is partnering with me to participate in the Smart Campaign promotional program. As a part of the Program, I am receiving compensation in the form of products and services, for the purpose of promoting The Home Depot. All expressed opinions and experiences are my own words. My post complies with the Word Of Mouth Marketing Association (WOMMA) Ethics Code and applicable Federal Trade Commission guidelines.
 Copyright secured by Digiprove © 2018


It looks really nice! Great work!