Oh my friends. This project… this project has been a long time in the making. We moved into our current home almost 2.5 years ago. When we were looking to move one of our biggest requirements was that it either A.) had a 3 car garage, or B.) had enough land that we could build a detached shop. Well,we fell in love with our house, but it didn’t have the shop space I needed. So we saved up enough money to pay for the materials to build my shop. About a year ago we finally broke ground on my shop. It was a labor of love. We poured all our spare time into the building of it. Once we got the “ok” from all the final inspections is when I really started to get excited.
Ask anyone who knows me well. I have been geeking out over this shop long before we ever started it. I always said “it is going to be the prettiest shop you have ever seen!”. Well I challenged myself and I was definitely accepting that challenge. I set out to combine 3 things I adore in life, organization, woodworking, and making things beautiful and functional.
In order to meet all those parameters I teamed up with my good friends at Rockler. They were able to help me bring my vision to life. Even if you have never built a cabinet in your life, they have all sorts of jigs and goodies that will make the process painless! So without further ado, let me show you what Rockler, and I have created!
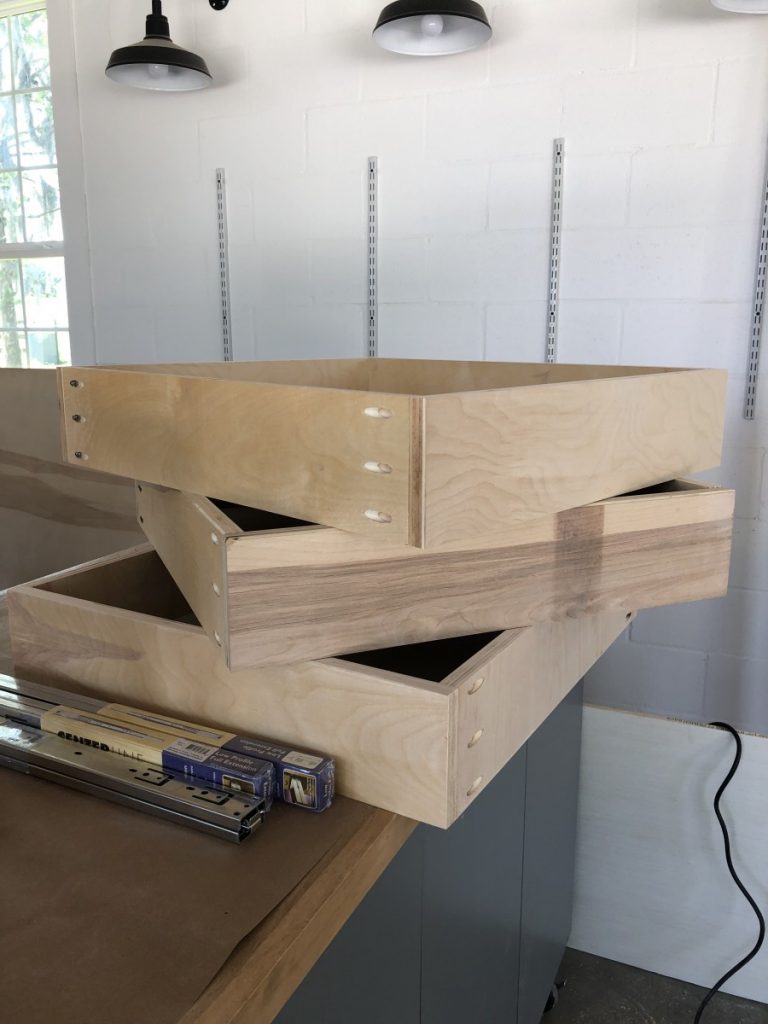
If you are a bit hesitant to start making cabinets, consider this. It’s just a box! Seriously, the carcass of most cabinets is just a box. That’s it. It’s often the doors, hardware, and hinges that make potential DIYer’s clam up. That’s were Rockler can help! 
When organizing, and building cabinets I love to have a ton of drawer space! Again, drawers are just more boxes… boxes with glides.
 I am not going to lie, drawer glides use to terrify me. I could spend an hour measuring and leveling and my drawer would still sit all wonky. That is where jigs can save you hours, if not days of frustration. It will hold your glides perfectly distanced, and level so you can install them. ( I used these glides (and love them) and you can get the “Drawer Slide Jig” here.
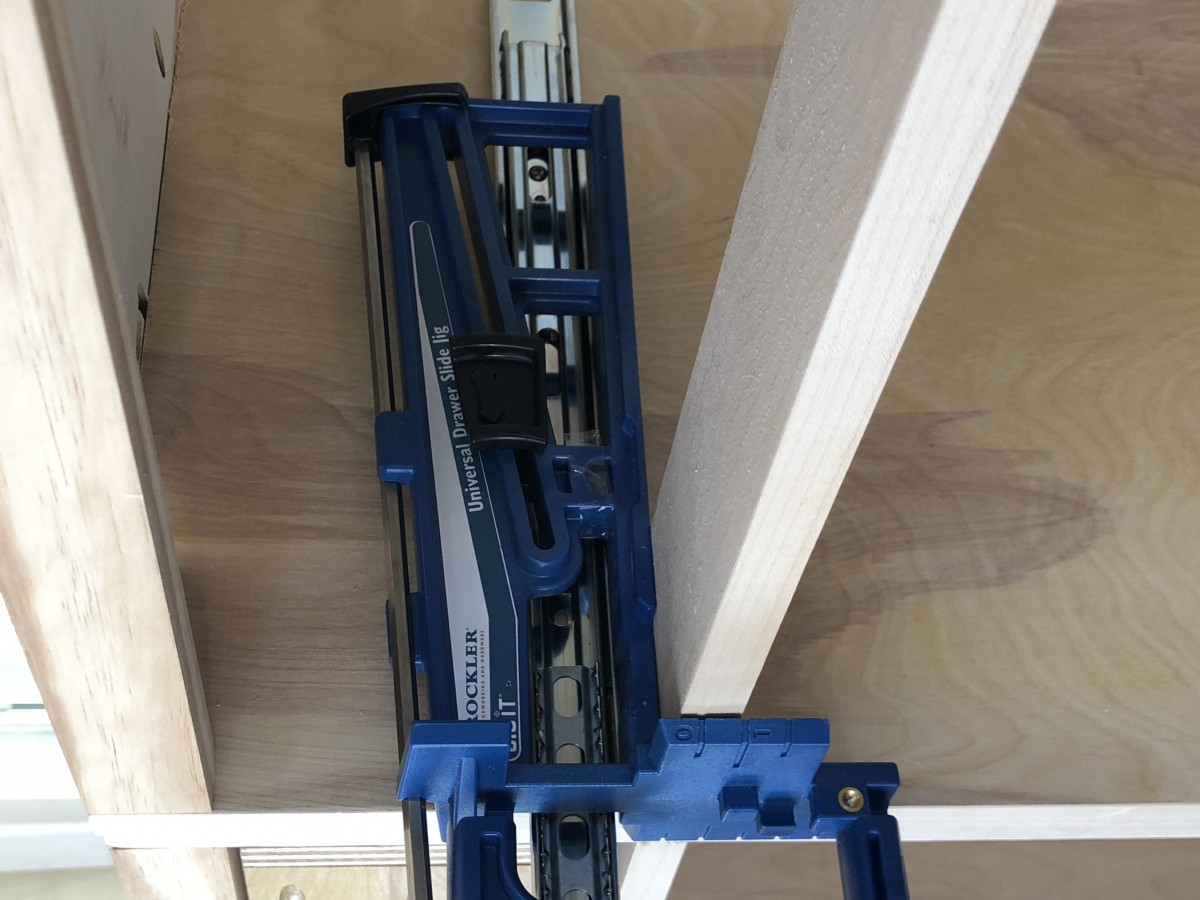
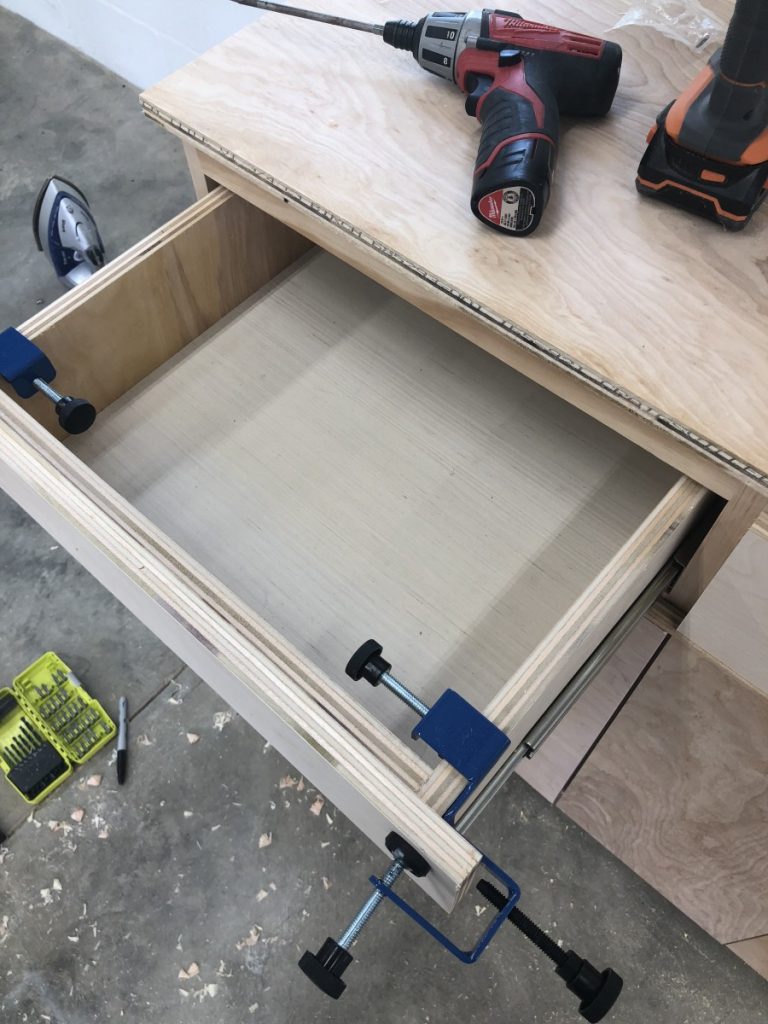
Alright, so that eliminates drawers. What’s next? Drawer front? Again, nothing to get bent out of shape over. In my case I used a piece of plywood and then banded the edges. Then with the use of these awesome “Drawer Front Clamps”, I installed them using screws from the interior of the drawer.
 Next up, the dreaded hinge. ( I’m serious, I should not openly admit this but I use to absolutely SUCK at installing hinges. My doors sat all sorts of wonky, and I was constantly shimming and filling holes like it was going out of style.) After a few years I finally started to get the knack of it, but there is an easier way to install them. You guessed it jigs.
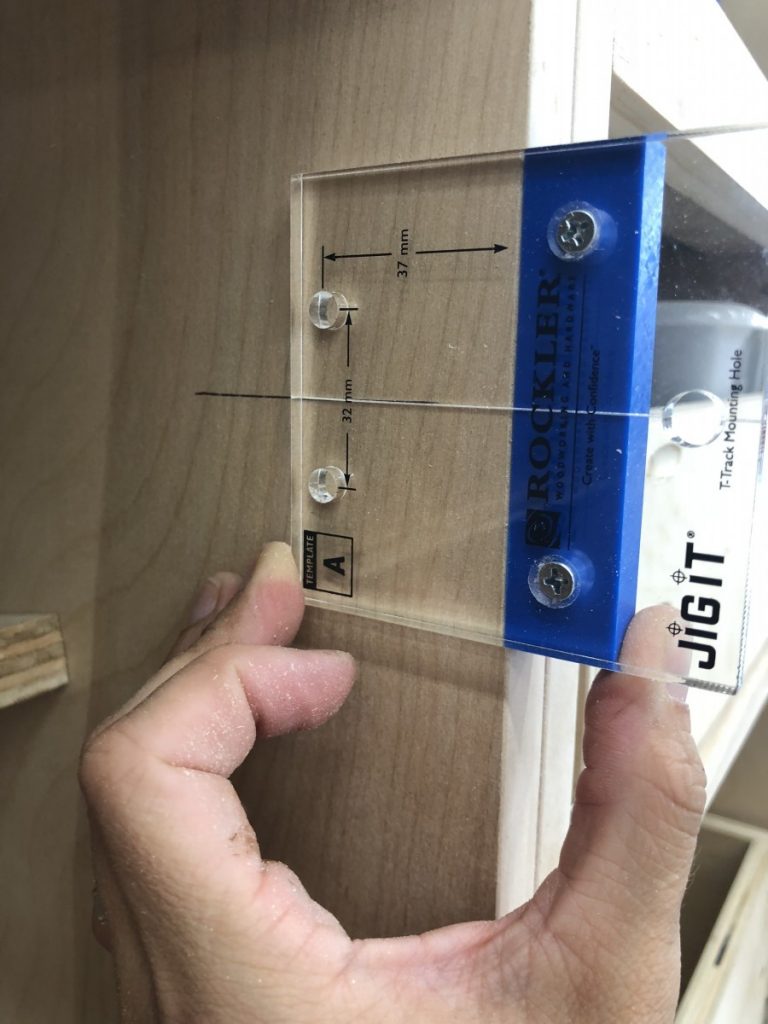
I have used a couple of different jigs for drilling the cupholds. (Kreg being another great one!) But, Rockler has something that is amazing for when you are doing a series of cabinets. (Rockler Concealed Hinge Jig) This jig allows you to set both cuphold measurements and lock them in place so you can repeat drill all of the holes for all the cabinet doors! No measuring and marking each cuphold individually. Brilliant!
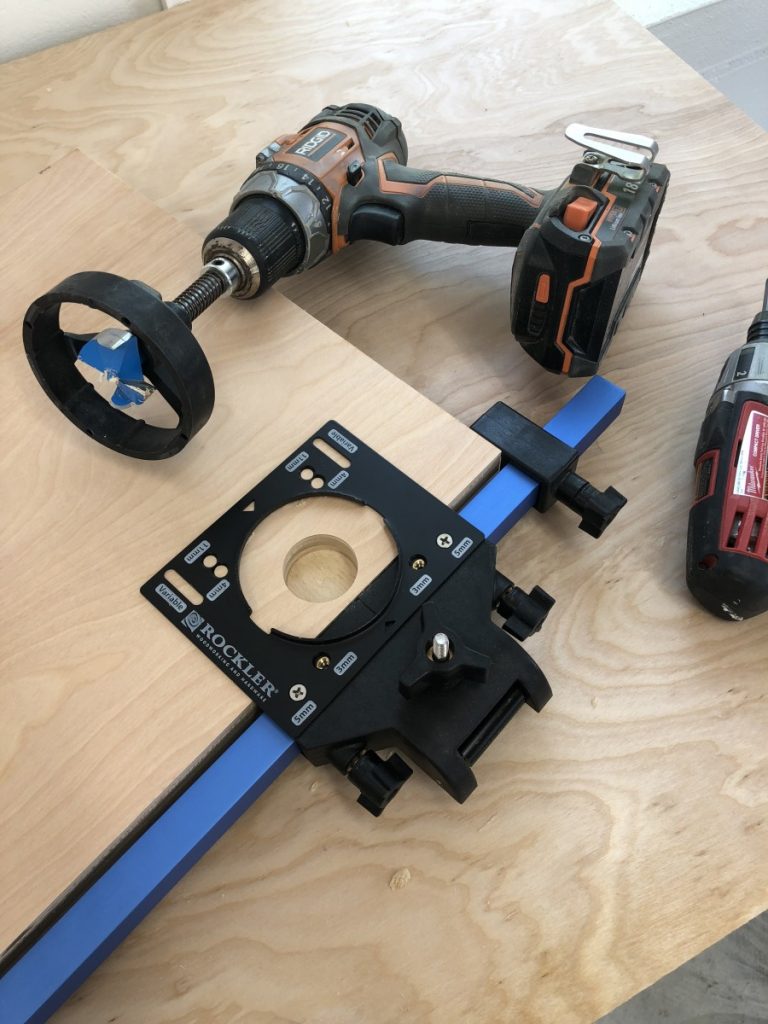
Once all the cupholds are drilled you simply transfer the center measurement for your door and mark them on the interior of your cabinets. Normally for this step you are required to make exact measurements to ensure everything lines up… Well that’s were another jig can help!
 Okay, see that wasn’t so hard!? Let the jigs do all the thinking. Once you have the basics of cabinet making down, you can start evolving the process. You can start to customize cabinets to fit not only your sizes but also your needs, and that is exactly what I did! Check out some of the cool things you can do once you dive into the world of cabinets!
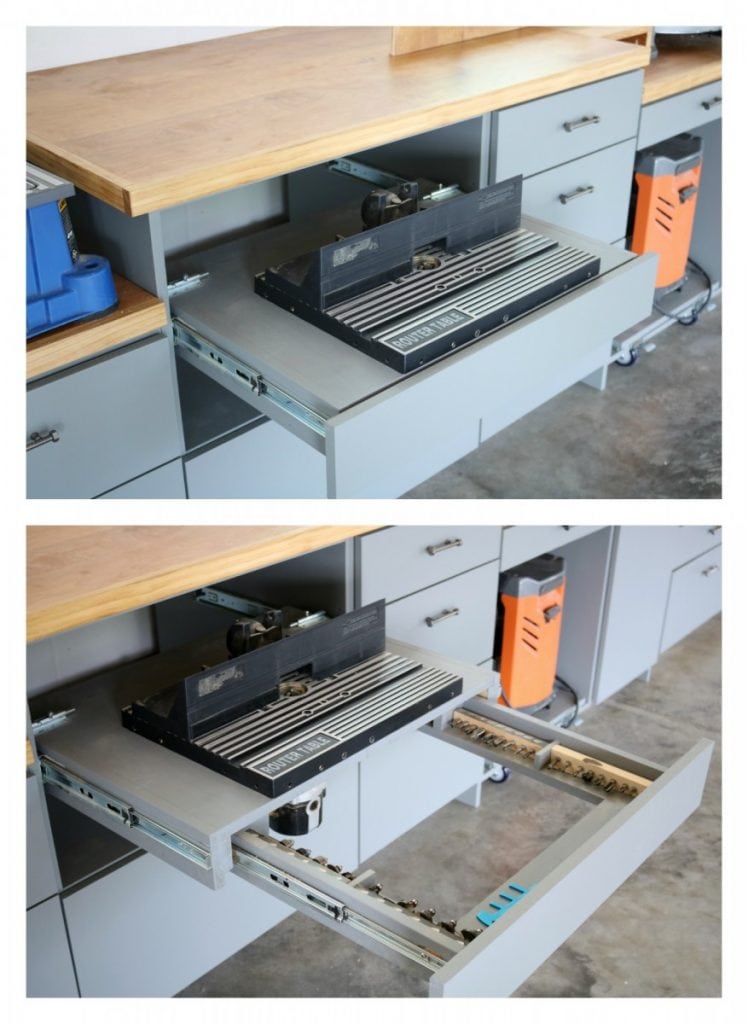
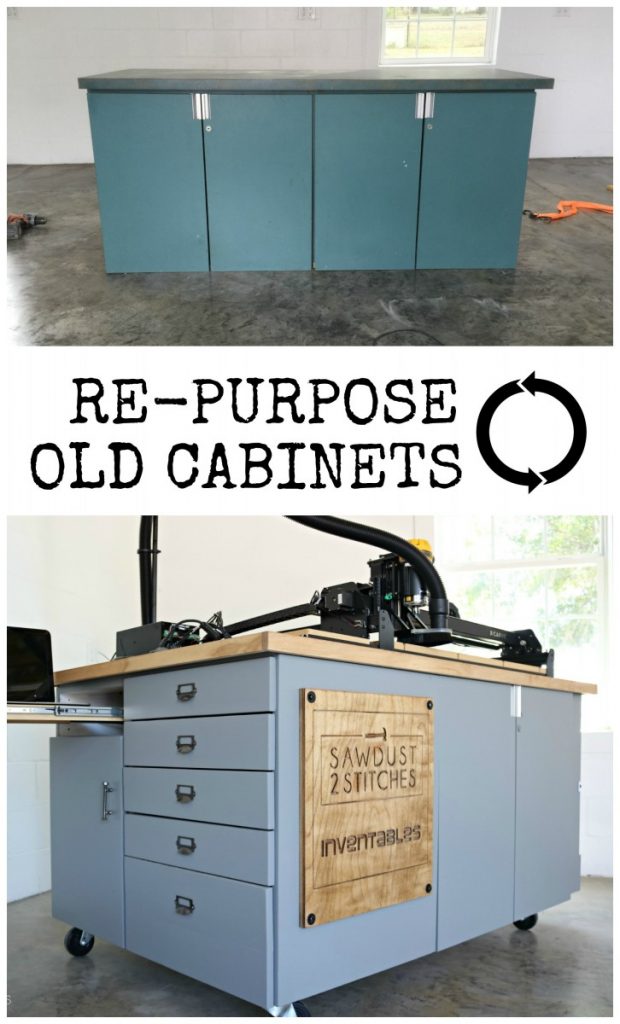
Check out this cabinet I built specifically for my router table! Again, if you really think about it , it is just boxes and drawer glides! I just customized the drawers to hold a router table.
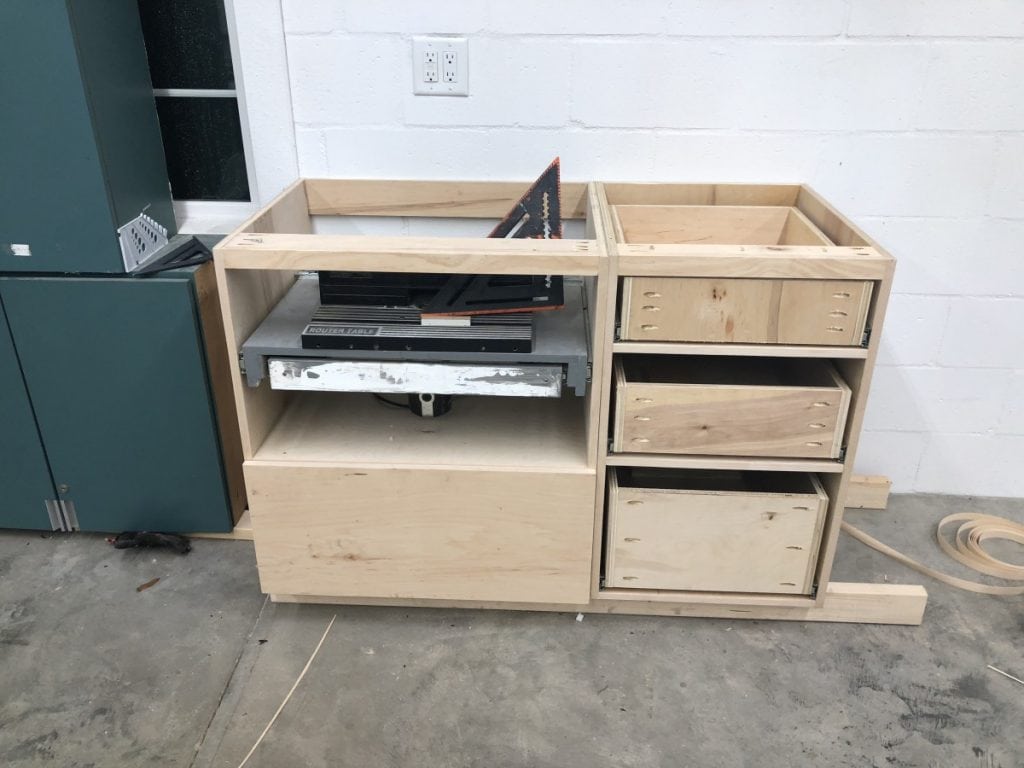
What about this beauty ?Again, it is just a box that I added “Heavy-Duty Drawer Glides” and teamed them up with some awesome “Locking Castors” and an added a platform. This unit will serve as a miter station, and will house my planer. It will easily keep it stowed, but still be easily accessible for use, plus OF course it is super stable thanks to the glides and the locking castors.
The last thing I had to figure out was the counter top. I had already used a PureBond plywood method on my other workstations and it worked great. So why mess with a good thing? The one tricky part was making a counter top that was longer than 8′. So I simply spliced it together. I then “banded” the edges with premium pine 1×2″ boards. This would give it the appearance of a heftier top, and would also give it some rigidity. 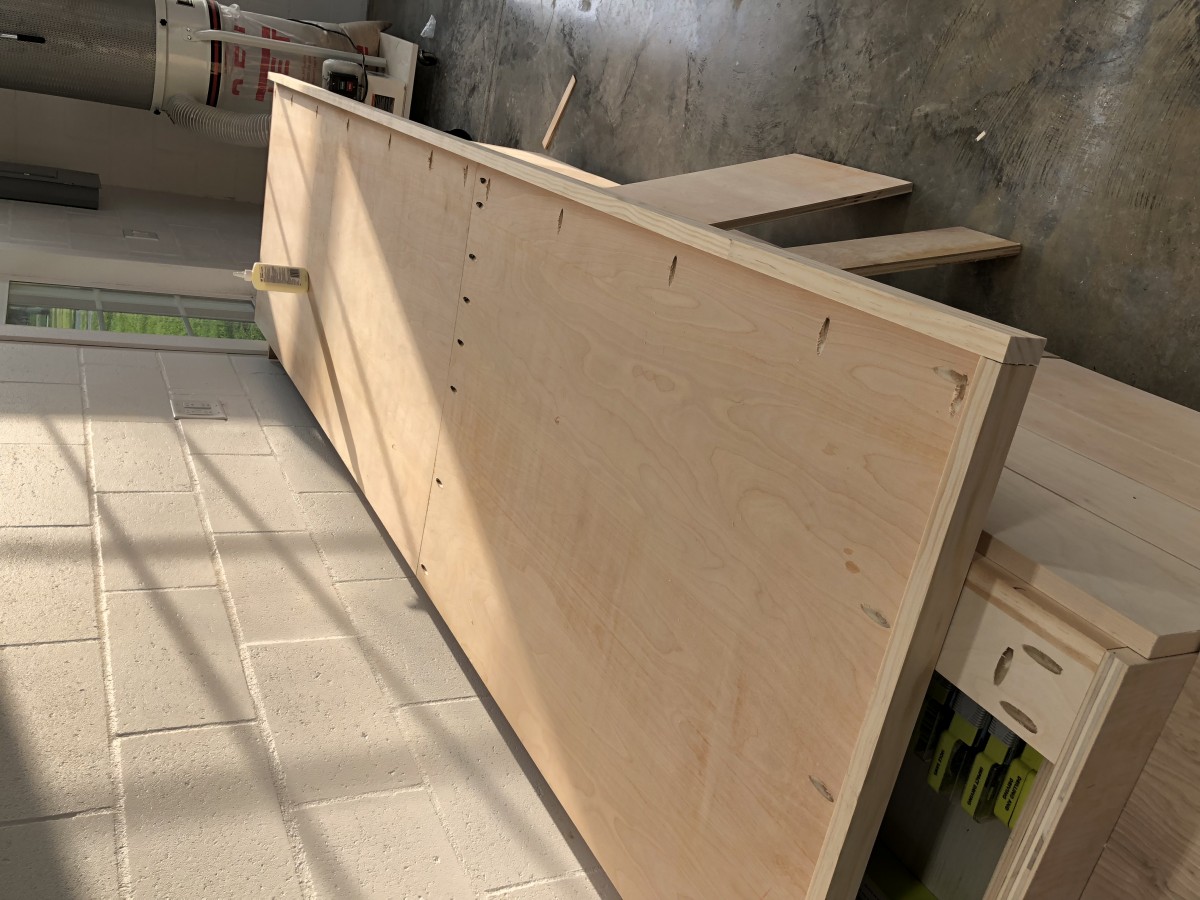
Once those were in place it was looking gorgeous! For any of you wondering. I used approximately 12 sheets of Purebond plywood. They have excellent cabinet grade 3/4″ plywood in Birch that is a dream to work with. It is stain-able, which is another reason I selected it for the counter stops.

While these cabinets were absolutely gorgeous in their raw wood state, I had a vision, and I couldn’t let it go. Instead I decided to paint the bases and stain the top! (Bases: “Cityscape” by Sherwin Williams/ Countertop: “Golden Oak” by Minwax) 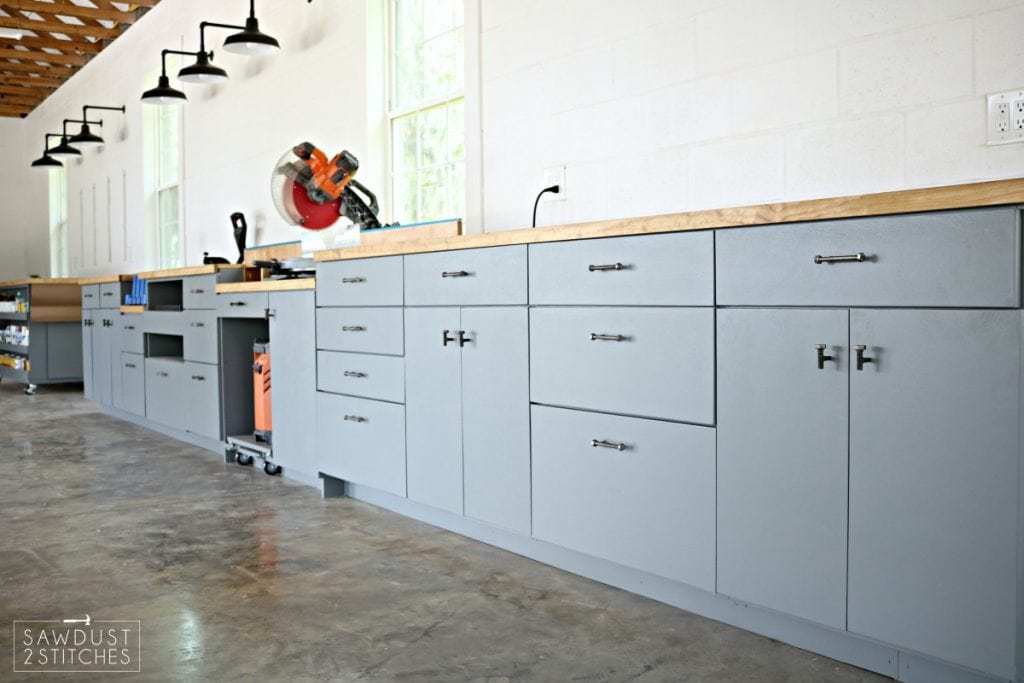
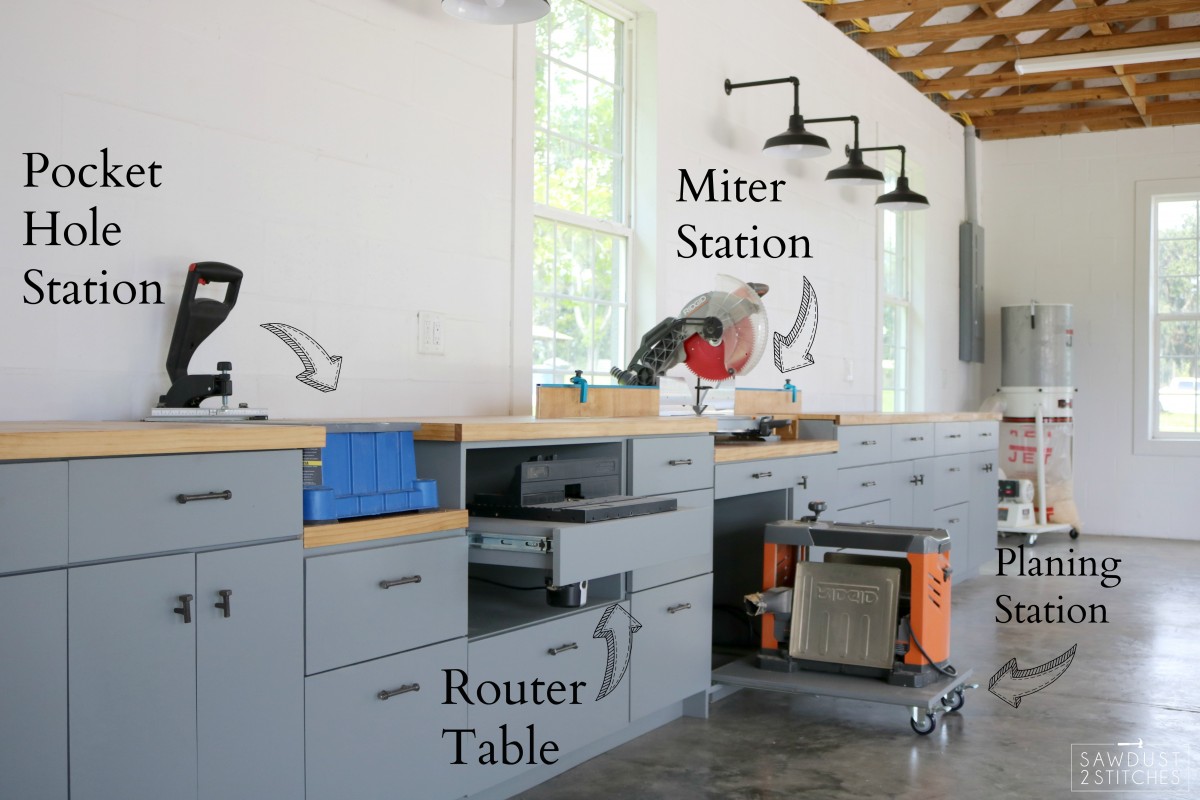
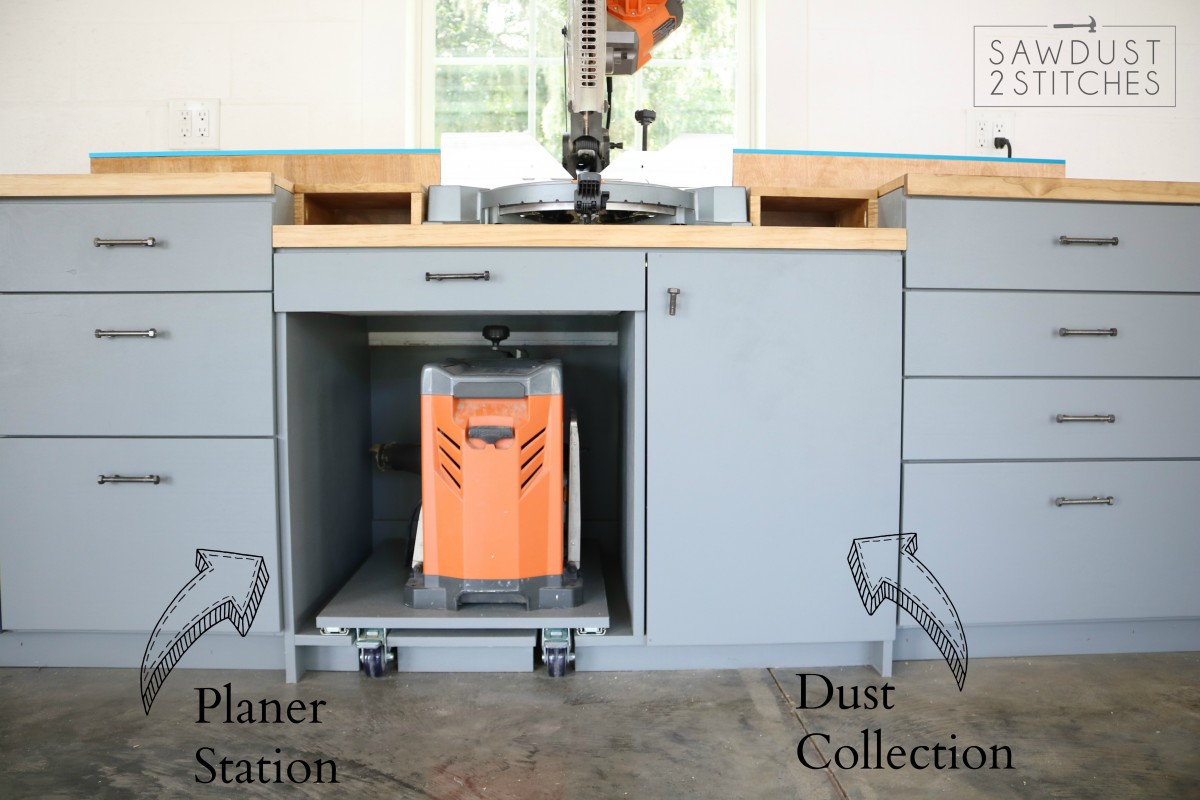
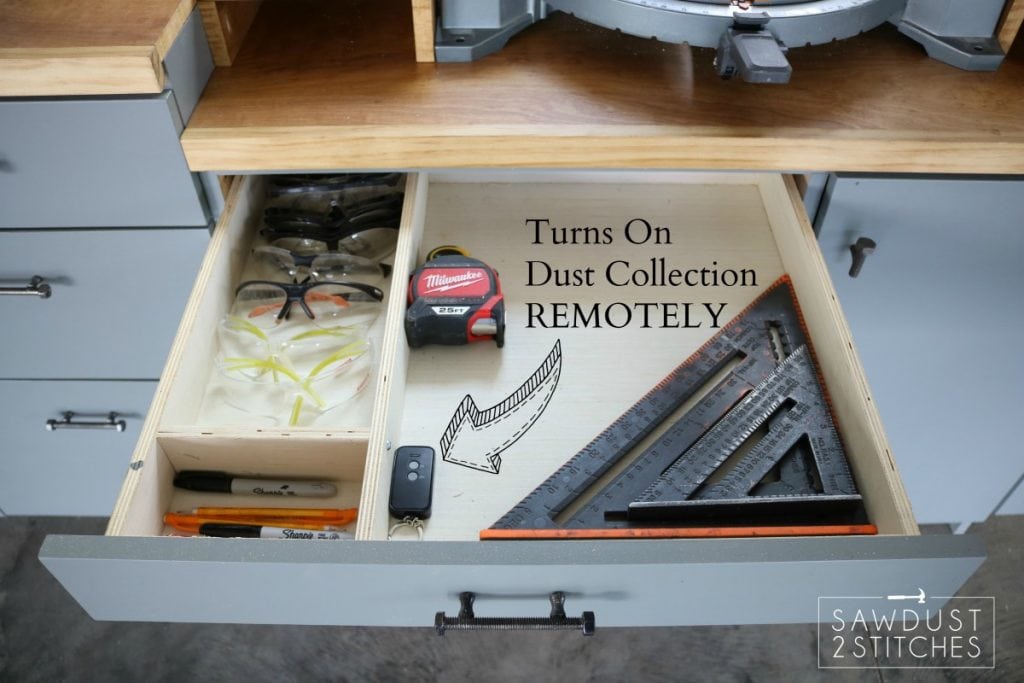
 Oh ,oh, oh! I almost forgot! I also built a really small drawer directly below my miter saw to house all my safety gear… but it also manages my dust collection system! I have a dust collection system that runs behind all my cabinets and hooks up to various tools. Well, instead of walking all the way to the other side of the shop to turn the dust collection off and on, I simply hooked it up to a christmas light remote! Simple, but brilliant, right !?
 Ok, so I have shown you some of my favorite customized features, but I didn’t just stop there. Even the smallest detail had my full attention. Check out the hardware ! I was able to find both the pulls and knobs from Hobby Lobby.
 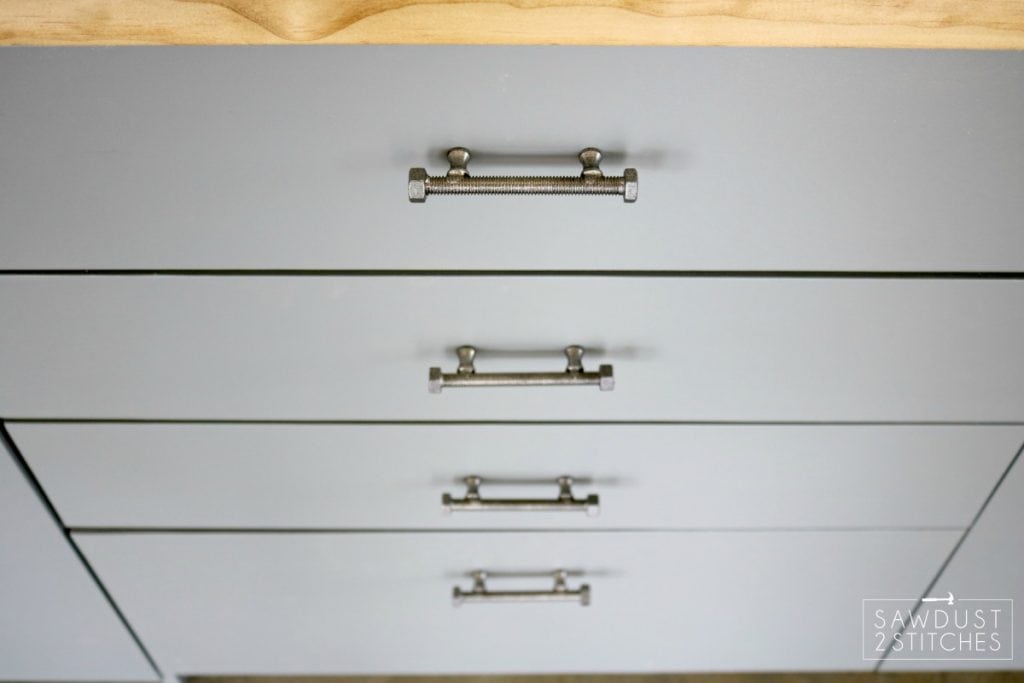 Ok, just a few more, just because it is so dang pretty!
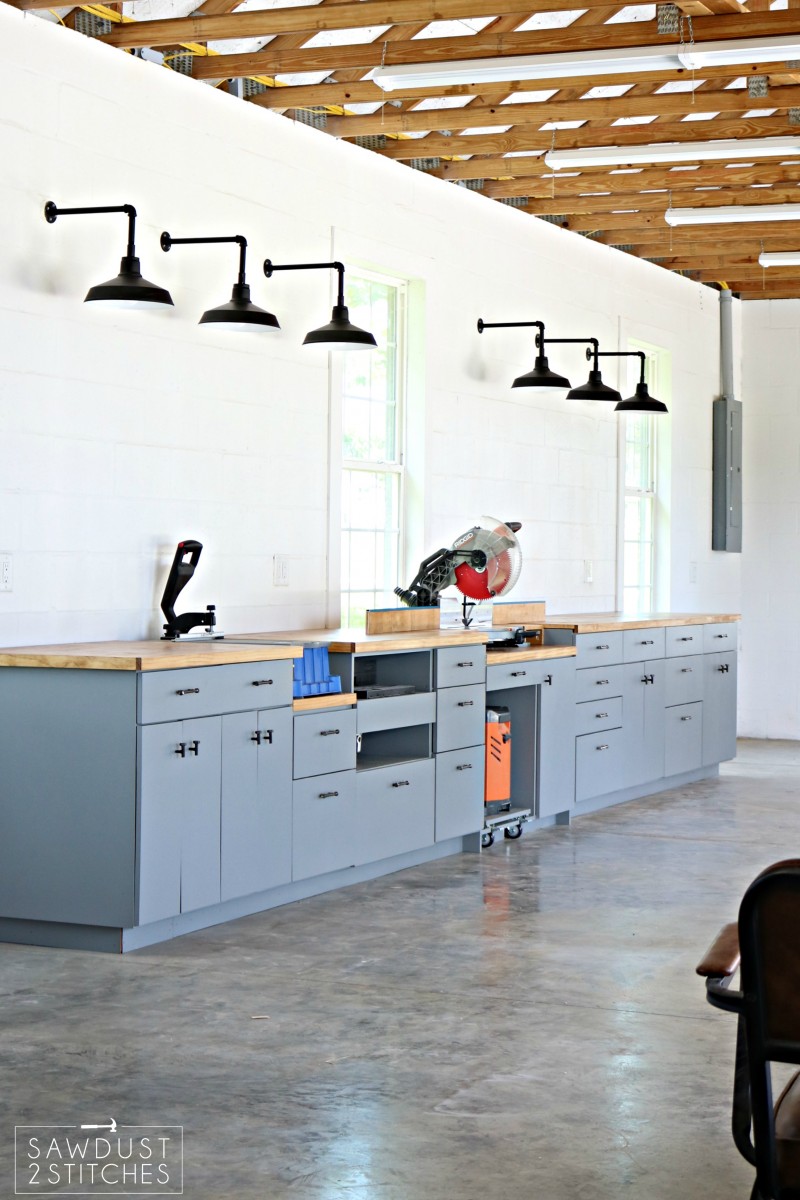
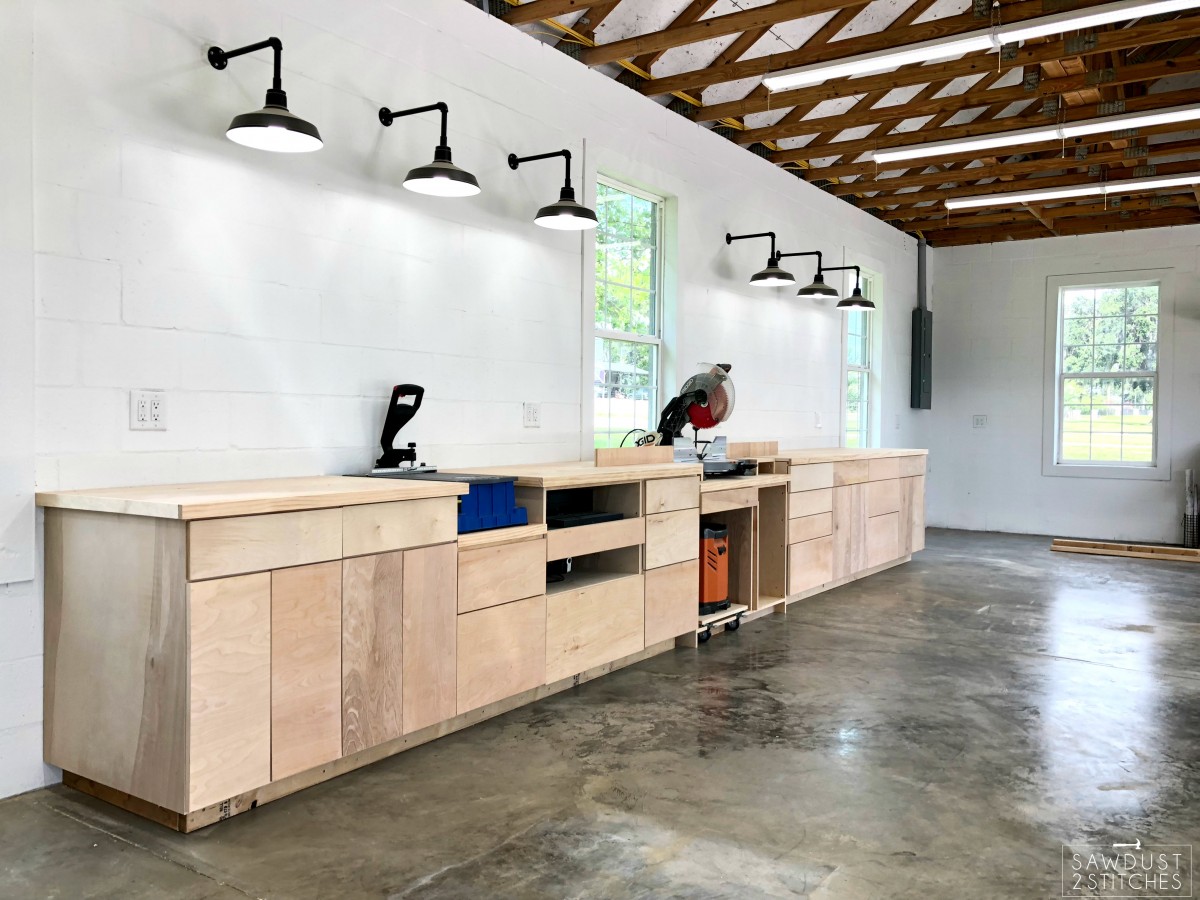
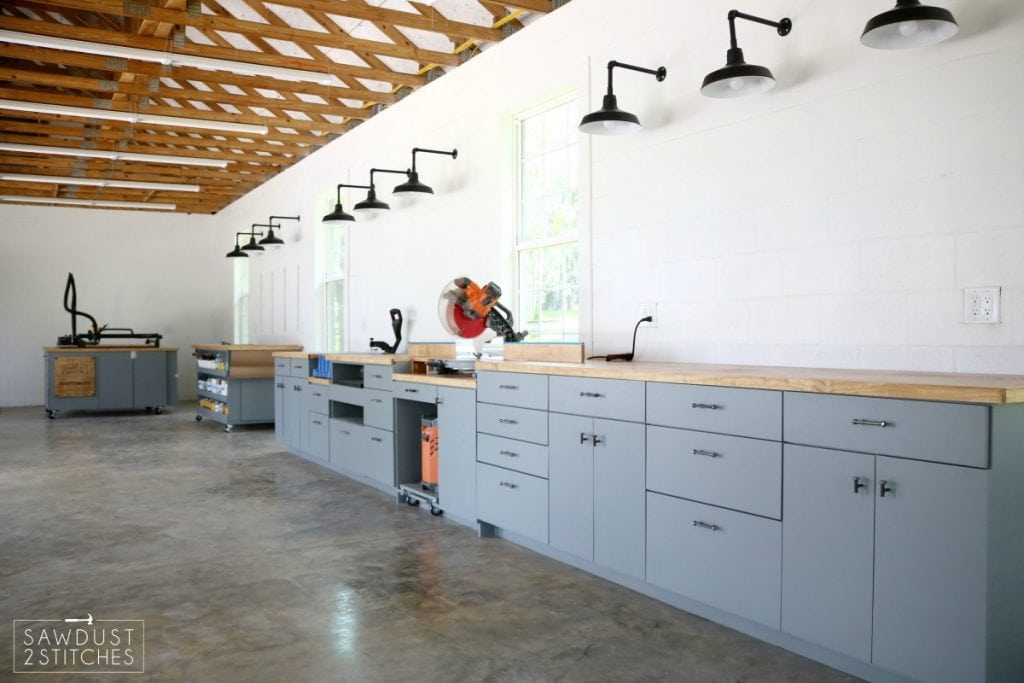 Well what do you think? I don’t know about you, but I truly feel like it is the prettiest shop ever!
If you love this build you might be interested in some of the other shop organization projects I have created… check it out.
![]()
Alright, well that’s a wrap, but stay tuned because I have big plans! Next up? Assembly table/outfeed table and it is going to be phenomenal!
Take Luck,
Corey
 Copyright secured by Digiprove © 2018


Corey! I am so in love with every angle detail of your shop space! That router storage? Genius. Ugh. Obsessed!
Haha, thanks so much Sam! I have been dreaming and planning this shop for years! I am just so glad it all came together!
Awesome work.
I like how clean and tidy it came out. Thanks for showing the rawness first though.
How’s the router table for stability on drawer slides? I was meaning to do the same but was worried about vibrations.
Zero problems. I used a heavy duty glide, and made sure the lock was precisely placed. No vibrations! Thanks so much for following along!
Love it all! Great job!
Holy Cow! I think my family would never see me again if I had this workshop. Some people dream of beautiful houses, I dream of this workshop!!!
Awesome work and that table with the paper roll is the bomb!!! You are one lucky and talented woman!
Love it. Just curious—what did you use on your garage floor? Is it an epoxy, or stained? I’m doing a similar project in my garage, and need a good floor protection for the cement to keep stains away, etc.
It is actually just a clear sealant. It just was a happy accident and turned out looking like an intentional acid wash stain!