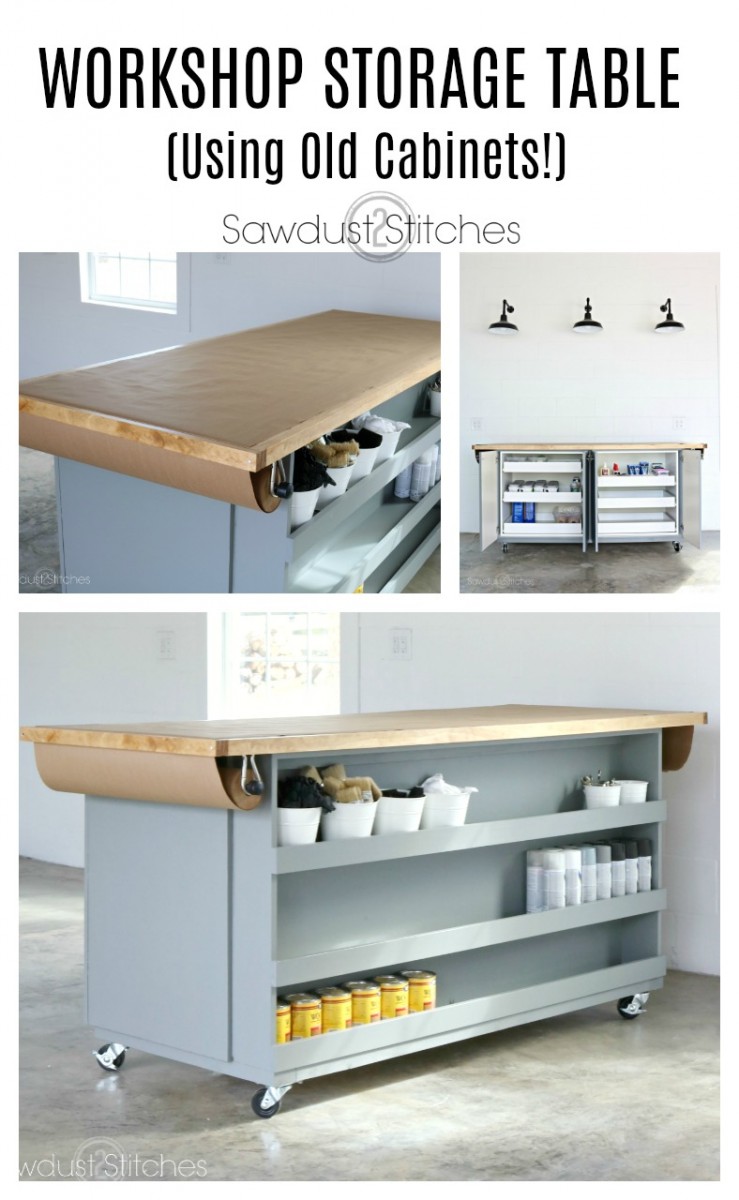
Workshop Paint Assembly Table – This post is sponsored by DAP*
Hey all! As most of you know the last 8 months my husband and I have been building my workshop. Now that the entire structure is complete (You can see the gorgeous interior here.) I have been working around trying to get this shop up and running smoothly.
So here is the deal. I have accumulated a lot of mismatched cabinets over the years. They all went into my previous work spaces, and they were great at keeping me close to something resembling organized. However, now that I have a lot more workshop, I have decided to build a whole wall of custom cabinets. (Stay tuned for those!) Regardless, I felt like a complete monster tossing all my old cabinets, so I decided to do what I do best. UPCYCLE! Today I am happy to join forces with the great team at DAP and I am going to you show how I used two thrift store cabinets and turn it into a highly functional, (not to mention straight up PRETTY) workshop assembly table.
Workshop Paint Assembly Table – Humble Beginnings
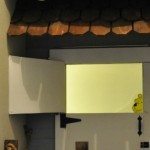
Like I said, it all started with two $15 cabinets that I purchased a few years ago at a local Habitat for Humanity store front. I bought these because they had pull out storage (not visible in the image below) and they were cheap and in decent shape. I just needed to hide all the clutter and these fit the bill.
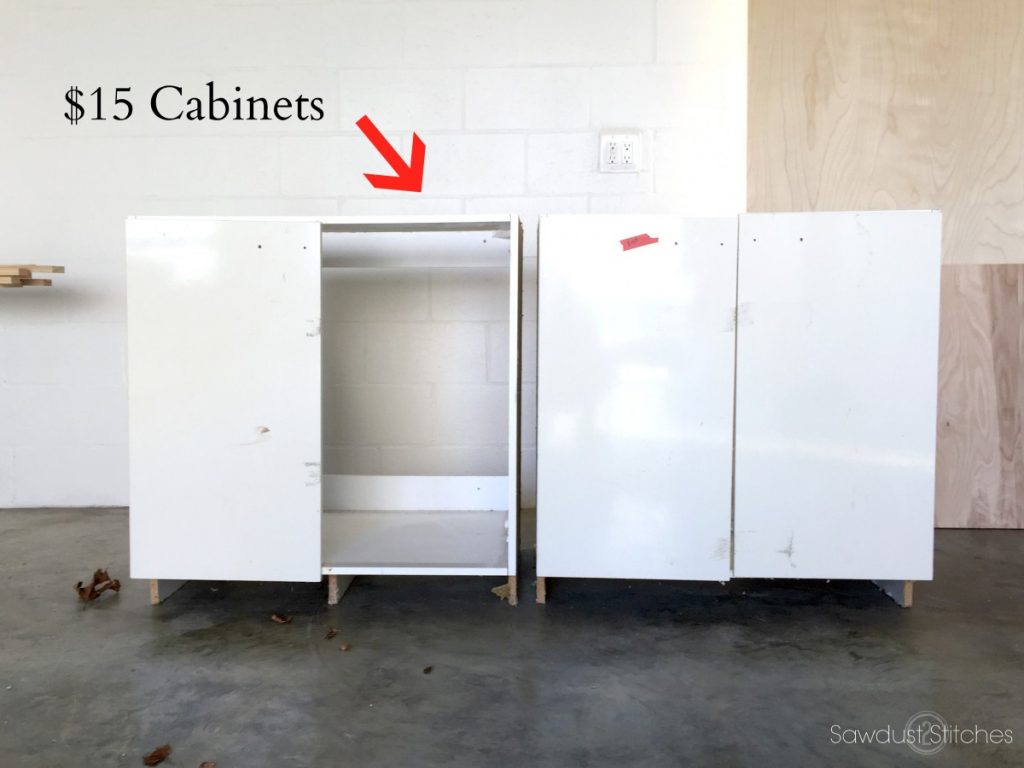 So instead of using them as traditional wall cabinets, I thought a little outside the box. I instead attached them together, to create an island of sorts. I just put them side by side and using screws secured them to each other.
 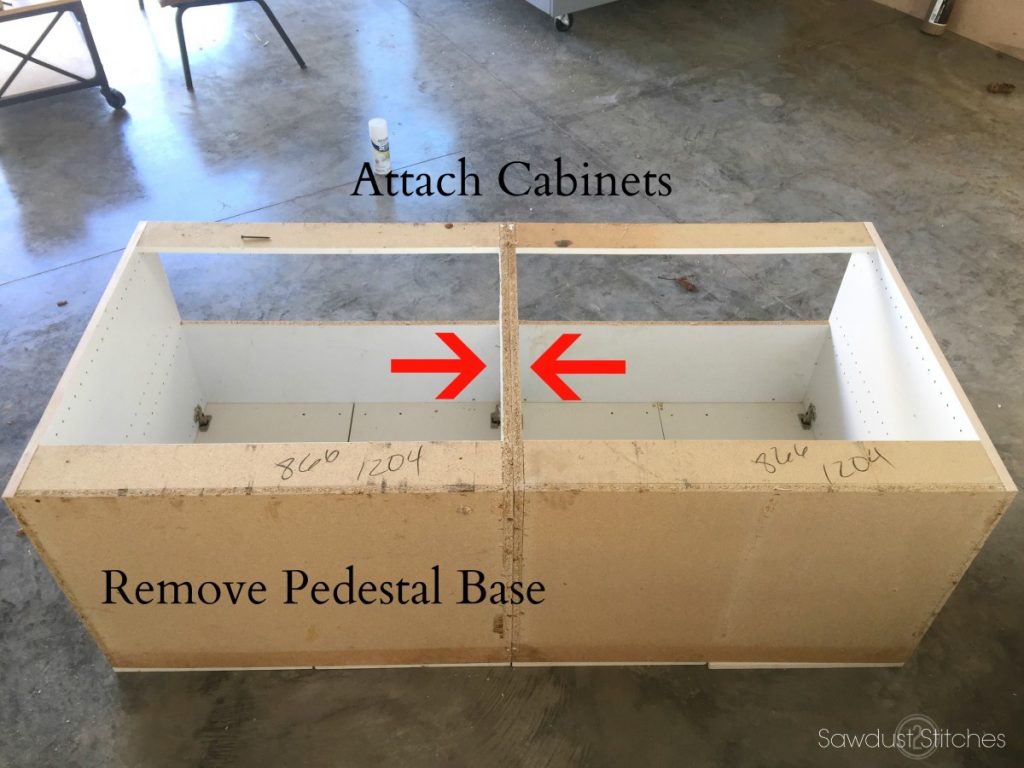 The cabinets by themselves will be a lot of great storage, but I wanted to kick it up a notch. From the beginning I was planning on using this as a painting/finishing station. So instead of just slapping on a piece of paneling to hide the ugly back of the cabinets, I built a quick shelf that would serve as the backside of the cabinet. WHHHATTT? Mind blown right?
Workshop Paint Assembly Table – Adding Shelves
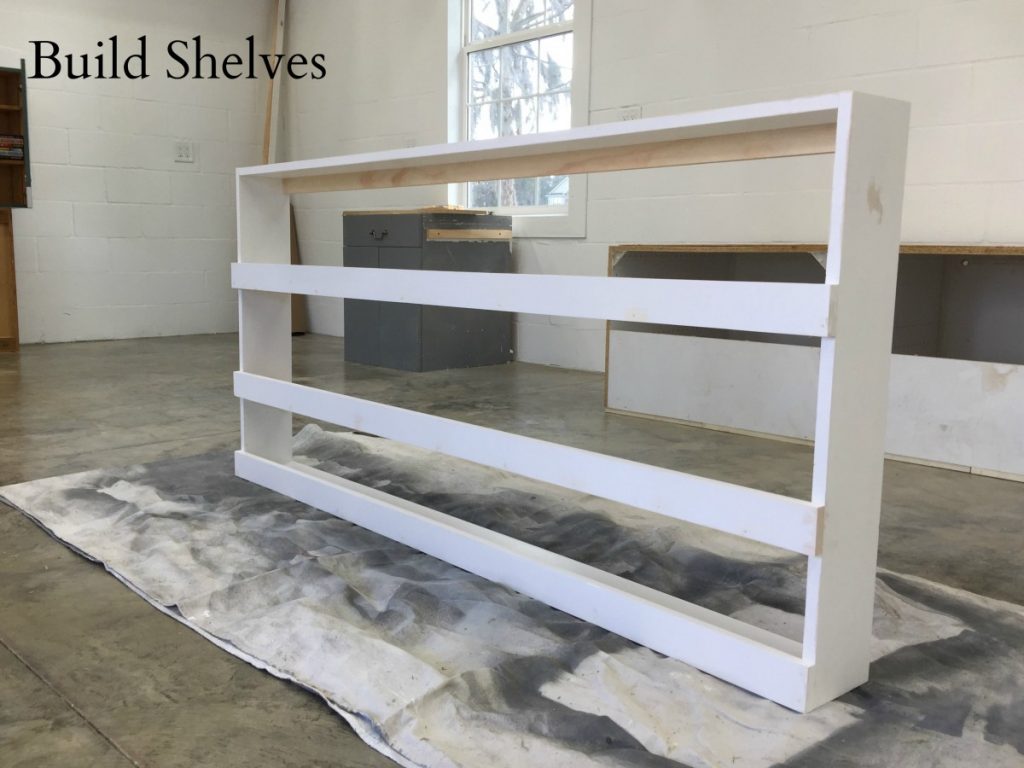
Like, I said I still needed to add a piece of paneling to the backside of the cabinets, to instead I just glued it using DAP Wood Glue, and simply applied it to the back of the newly constructed shelves and lay paneling on top. I tack mine in place with a finish nailer to hold it while the glue cures. ( I painted my shelves in advance so I wouldn’t have to paint in all the small corners.) 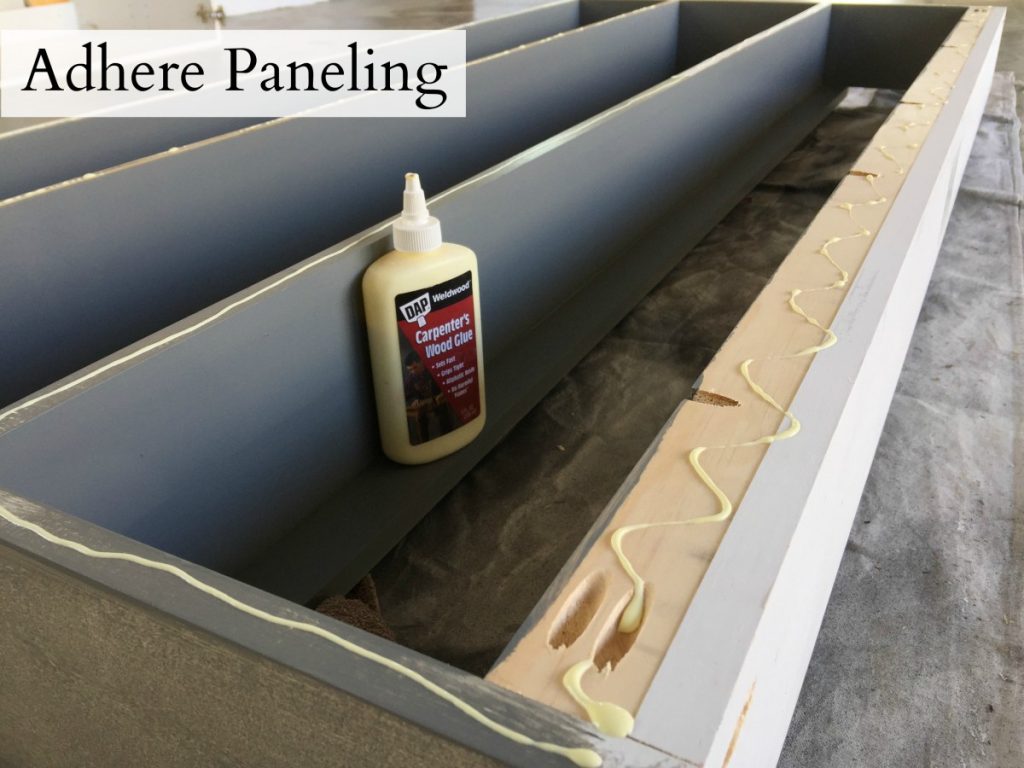 Okay, now we are going to beef this baby up! I wanted this to be on castors so that I could wheel it around my shop. In order to do that I needed a really solid base. I made a basic frame out of 2×3 boards. This will also serve as a lip/pedestal for the shelf to sit on. So that the shelves and cabinets are sitting back to back with good support.
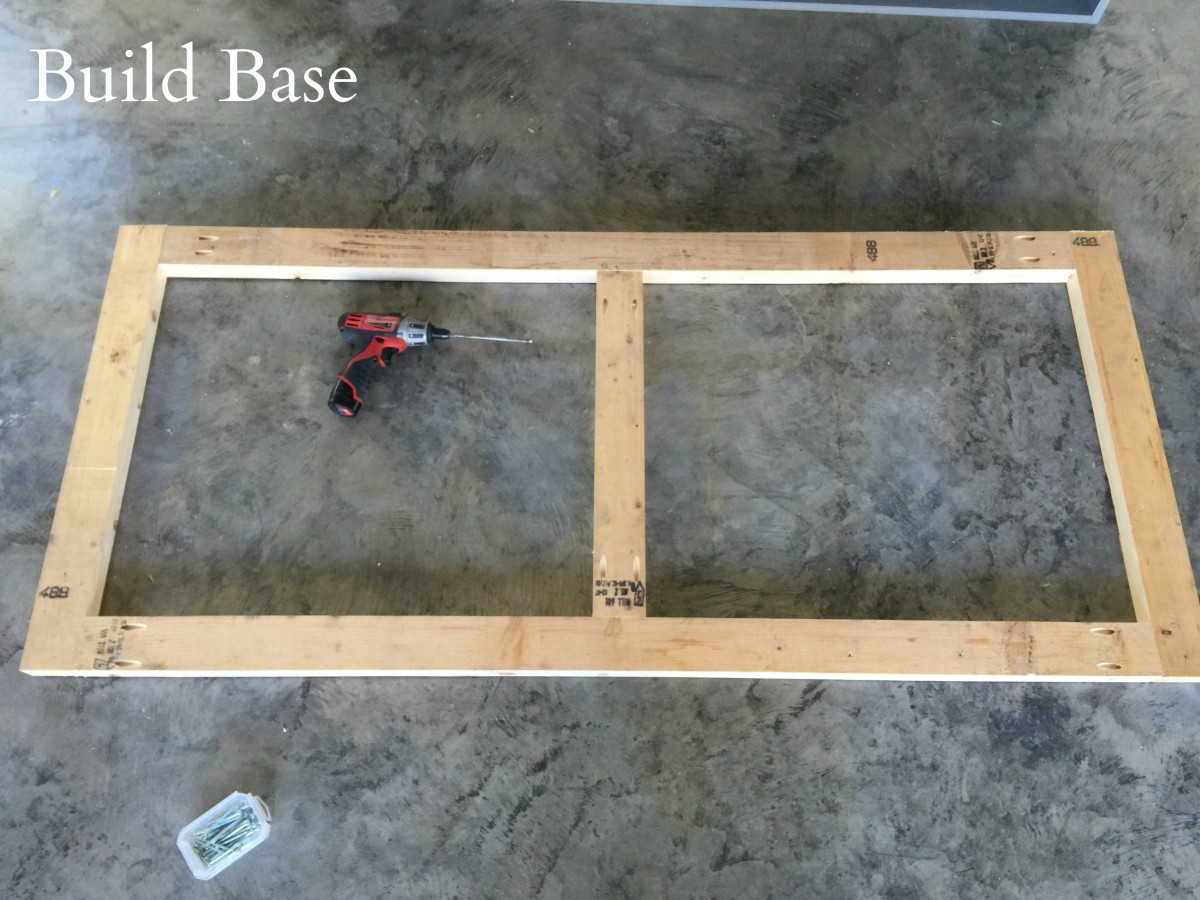
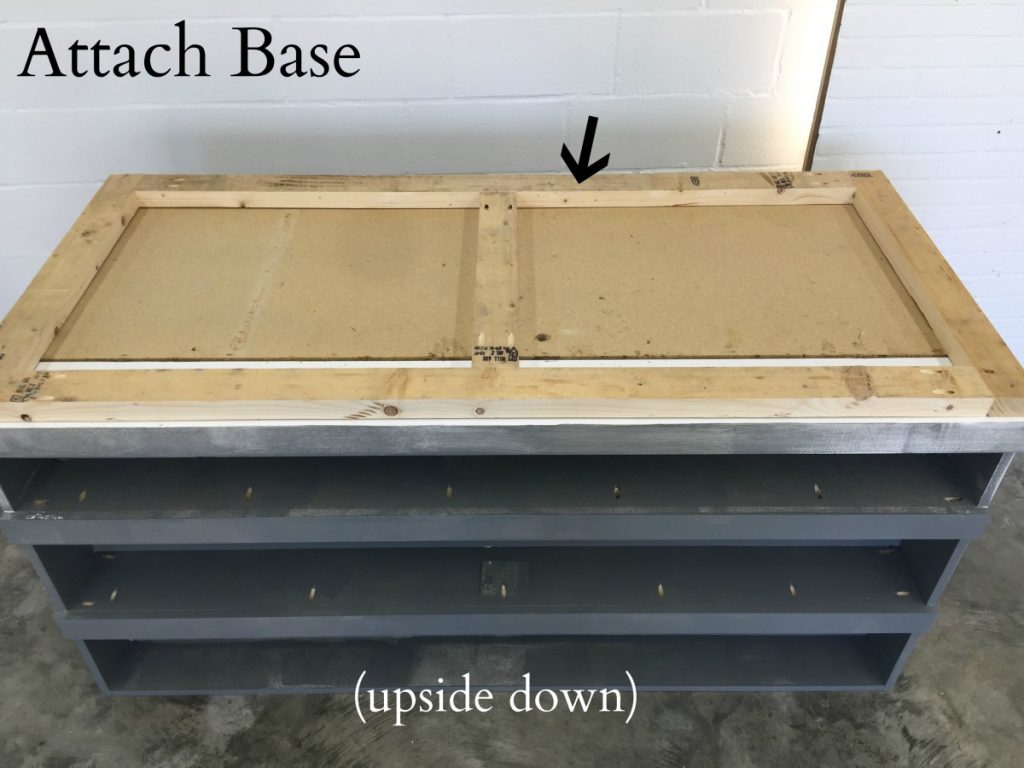
Workshop Paint Assembly Table – It’s All About That Base
Once the base was completed I attached it to the underside of my cabinets. It is at this point I put my cabinets and the newly made shelves together. I screwed the 2×3 base to the bottom of the cabinets, as well as the new shelves. Once it was all secured, I then screwed the shelf to the cabinet. From the way my cabinets are made, it seemed like it needed base support in order to properly work.
Workshop Paint Assembly Table – The Castors
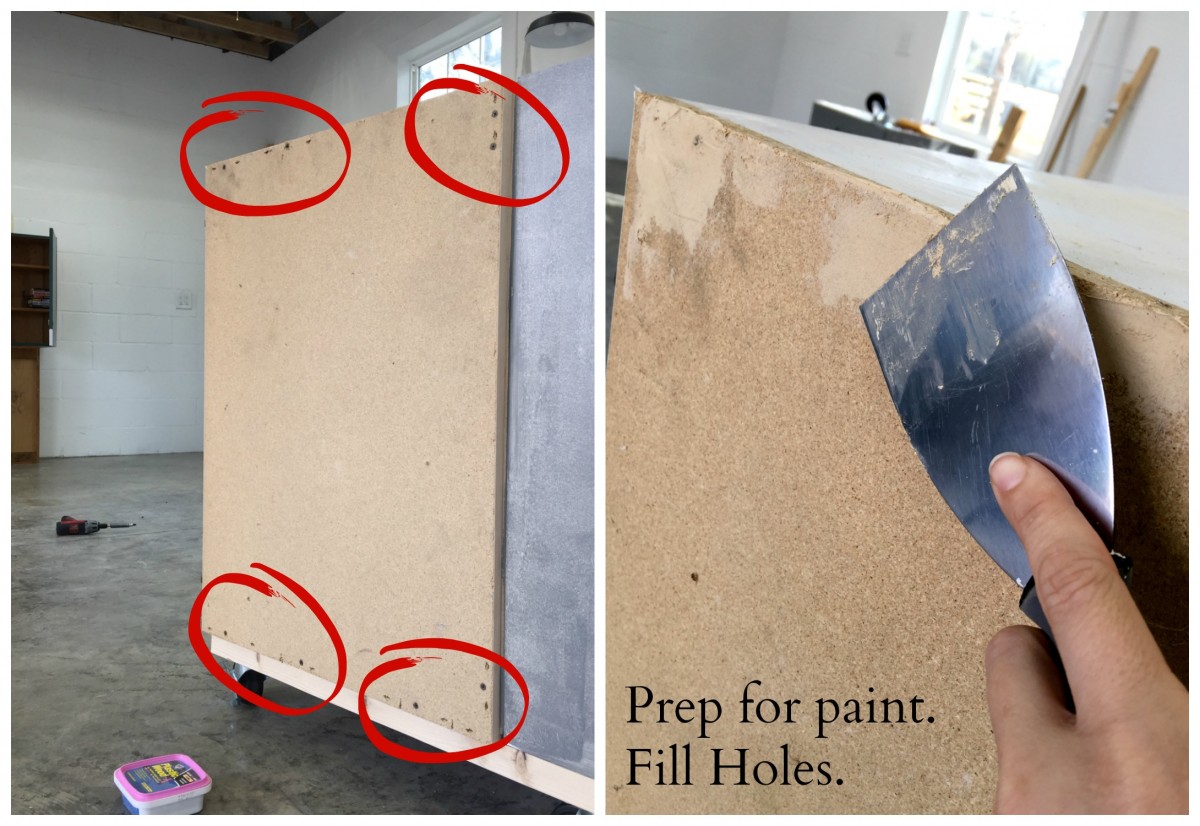
Next up castors! I purchased mine at Home Depot. I used two swivel and two swivel with a locking option. I put the locking castors in opposite corners so that I could keep the island still if needed, but still mobile. 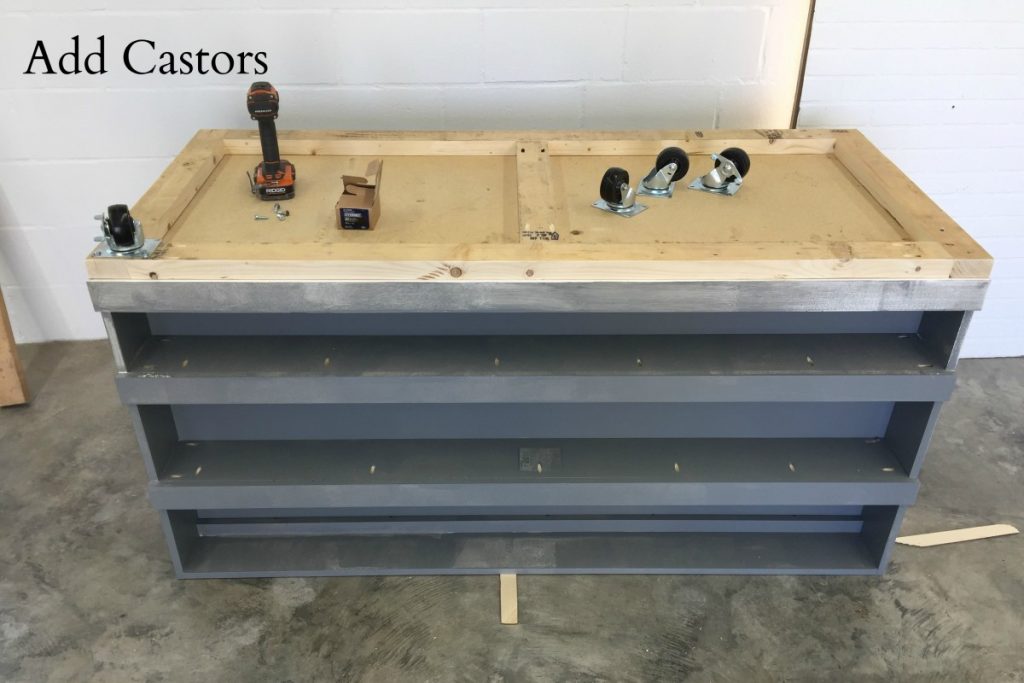 Alright, now here comes my artistic side. I wanted this thing to be pretty and functional, so I needed to make this unit look like ONE unit, not just a hodge podge of discarded items. That is where all my DAP products come into play! It is essentially my base layer of makeup. And BOY did these cabinets need it. I started by filling all the screw holes from their previous installation. For this I found that DAP Plastic Wood worked best. Once dried, I went over it with a sander, and the sides were a nice clean canvas for my paint.
Workshop Paint Assembly Table – Paint The Doors
The last thing that needed to be prepped for paint was the doors. I had found some AWESOME hardware I wanted to use, and they did not jive with the current hole positions. So, easy fix. I grabbed my Plastic Wood, filled the holes ! After it dried, I smoothed it out with a sander. VOILA! What holes?
 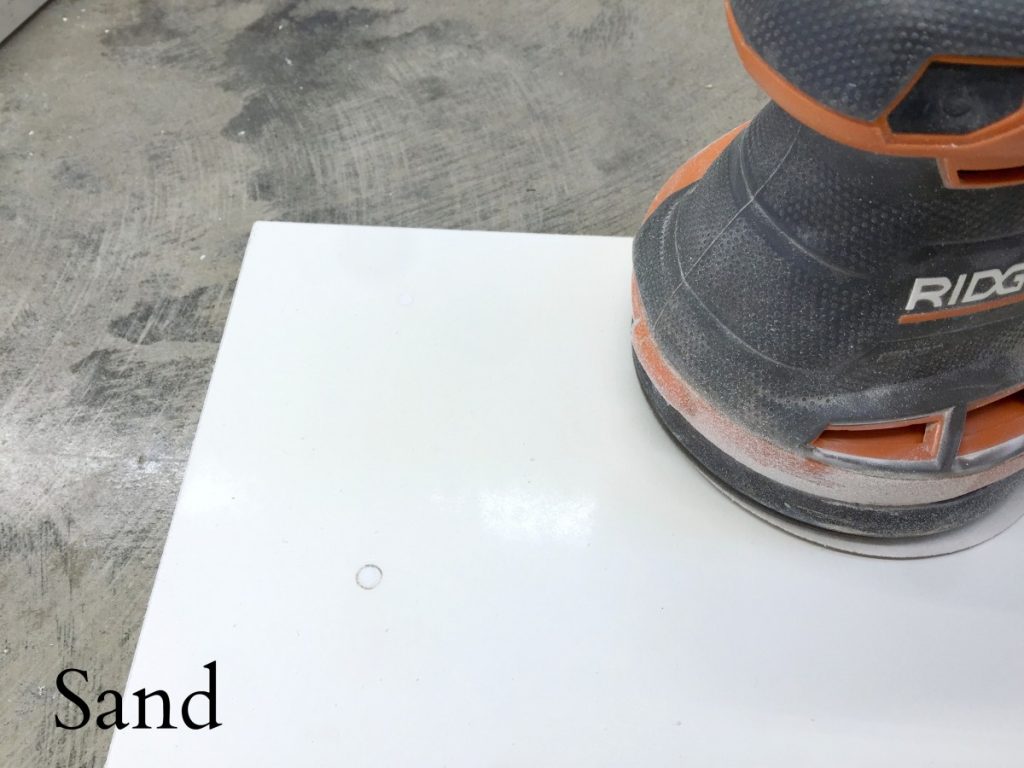 While I had the sander out, I made sure to give all my cabinets a good sanding. When painting laminate you want to make sure all the surfaces are sanded enough to create a dull finish. The small scuffs will allow the paint to properly adhere.
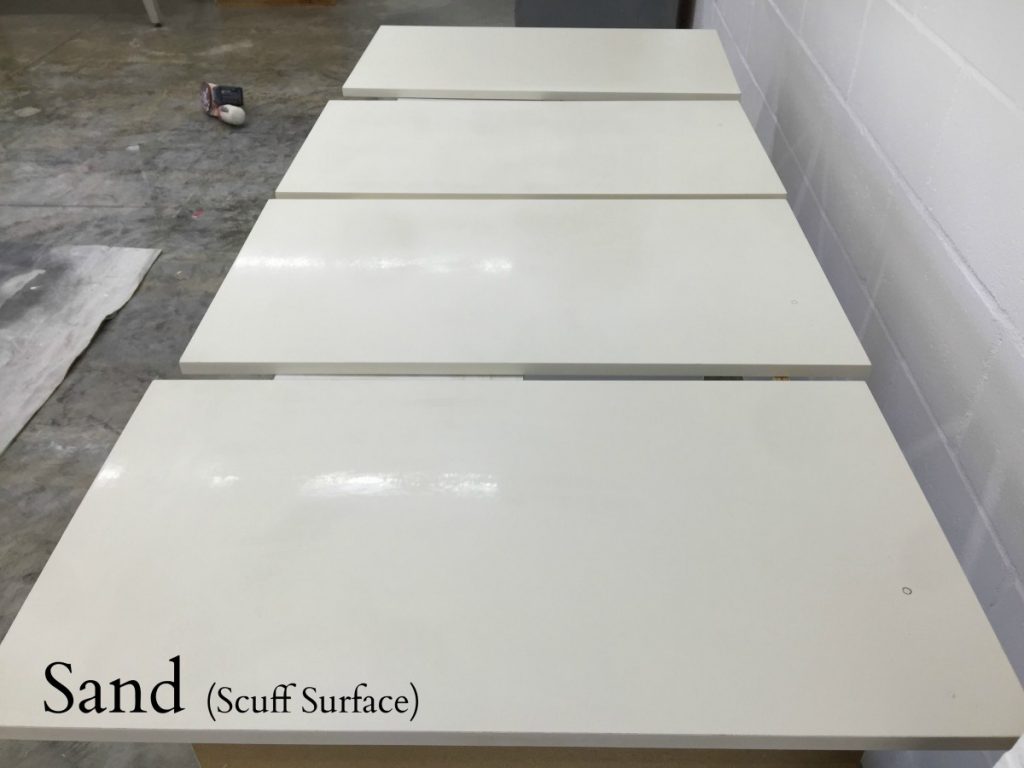
Workshop Paint Assembly Table – Painting W/ Primers
There is a lot of controversy over paint w/primers vs. priming then painting. I like to live on the wild side, so I used Sherwin Williams paint with primer and have zero complaints! If you are wondering I used “Cityscape”, I just happened to have a few gallons left from when I painted our home’s exterior. (You can read all about it here.) 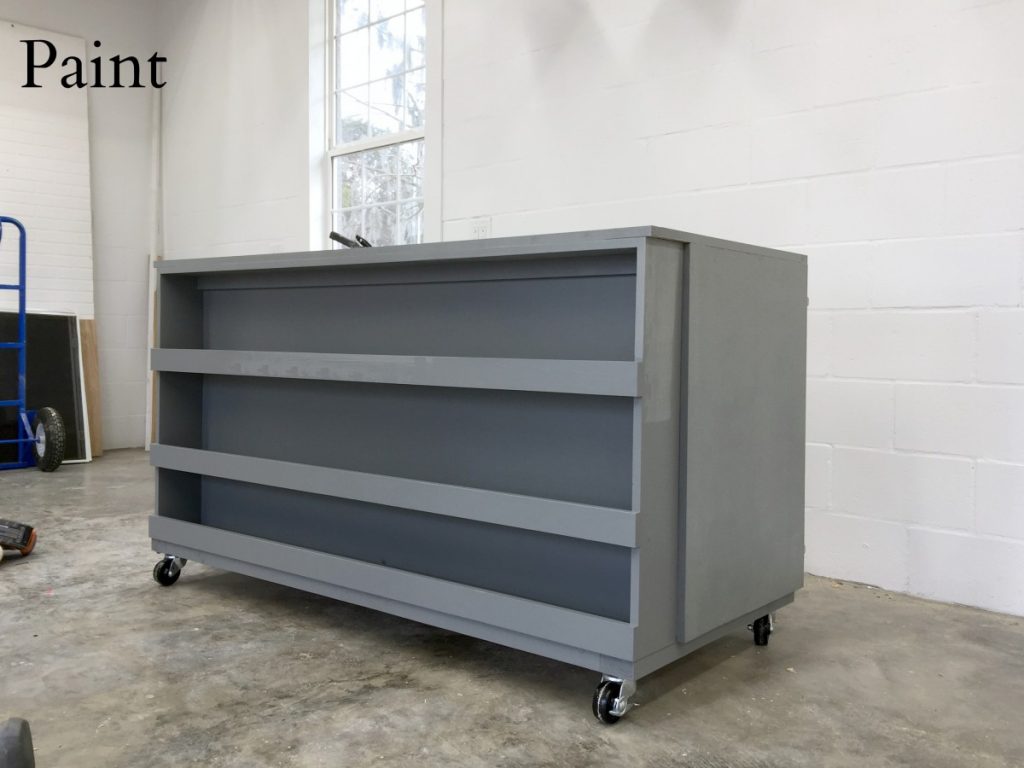 Once the base was painted I was read to move onto the counter top. Before I could add a counter top I needed to build up the top 3/4″. Reason being… I wanted to add a banding around the edge of my counter slab and if I did not build it up, my cabinet doors would have not been able to open. I digress, I built up the top using 1×2 boards. These will support my plywood counter.
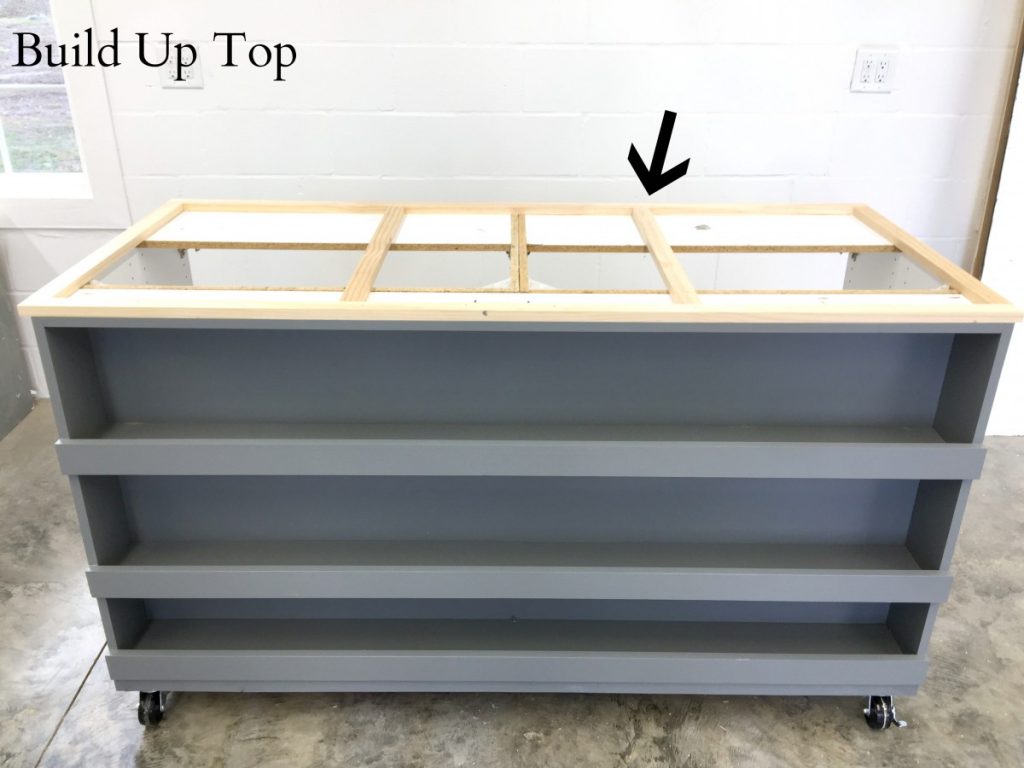
Workshop Paint Assembly Table – The Countertop
In order to make a beautiful counter top I used a piece of PUREBOND 3/4″ plywood. They are beautiful pieces that a stain quality and would be a gorgeous feature to my island.  As I stated before I wanted to add a band/edging to my counter, so on the underside I used a Kreg Pocket jig and drilled out pocket holes around the perimeter.
 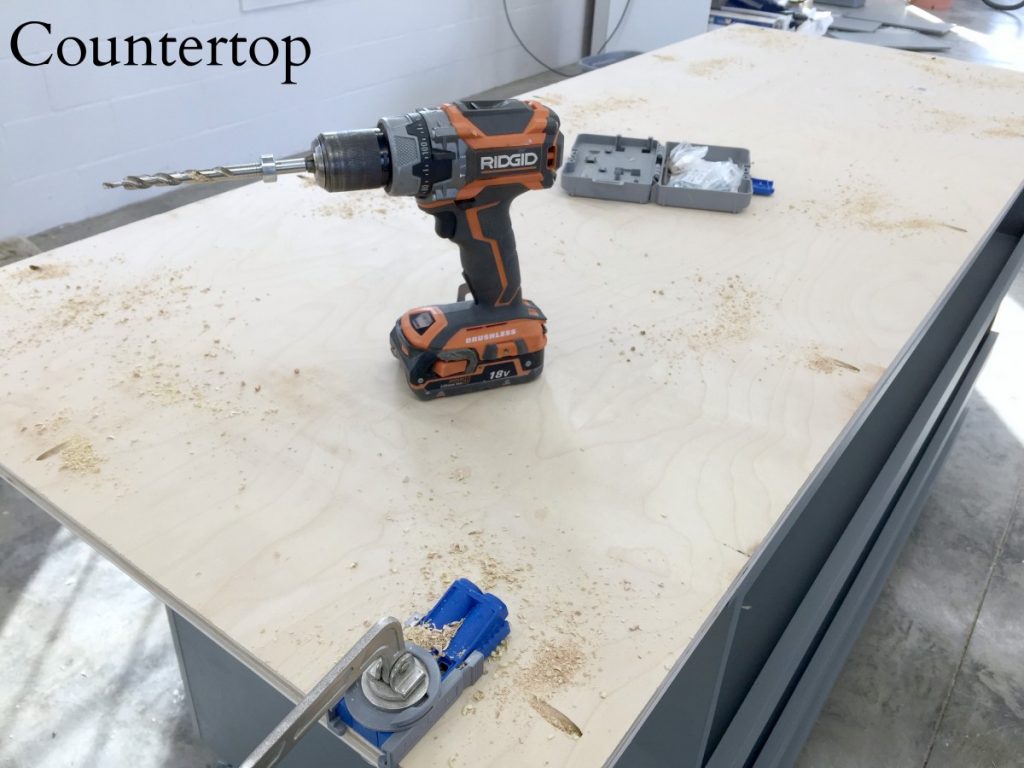 Next up? The edging. I simply measured the edges and cut to fit and used a basic butt joint. Before attaching a applied a small amount of wood glue to ensure a snug fit.
 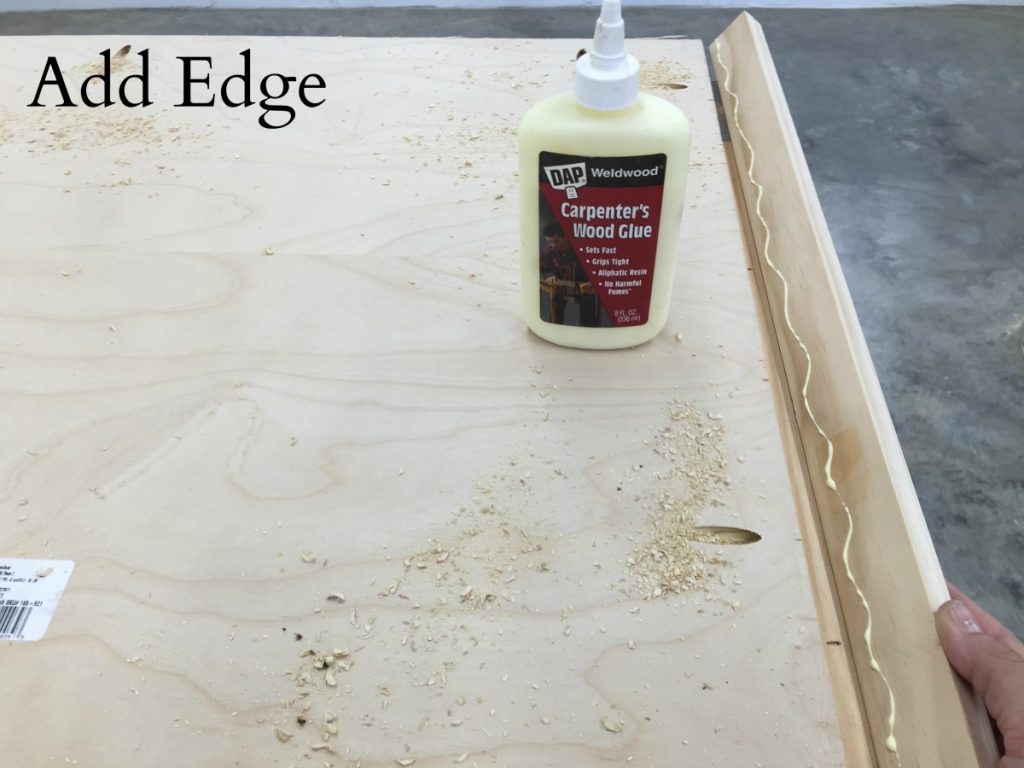 Now… before I flip this sucker over and install, I started to get creative. I wanted to add a rool of paper to the under side of my workstation that I could use much like a table at a Dr’s office. I wanted to be able to pull up a new sheet when I was working with paint and stain, and then rip it off when I was finished. SO, I needed a way to hand said roll of paper. Well, I went to my drawer of random hardware and THIS is the Macgyver solution I came up with, carabiners, screws and multiple washers. I there a better way to do this ? Probably, but this is what I had on hand and it worked for me!
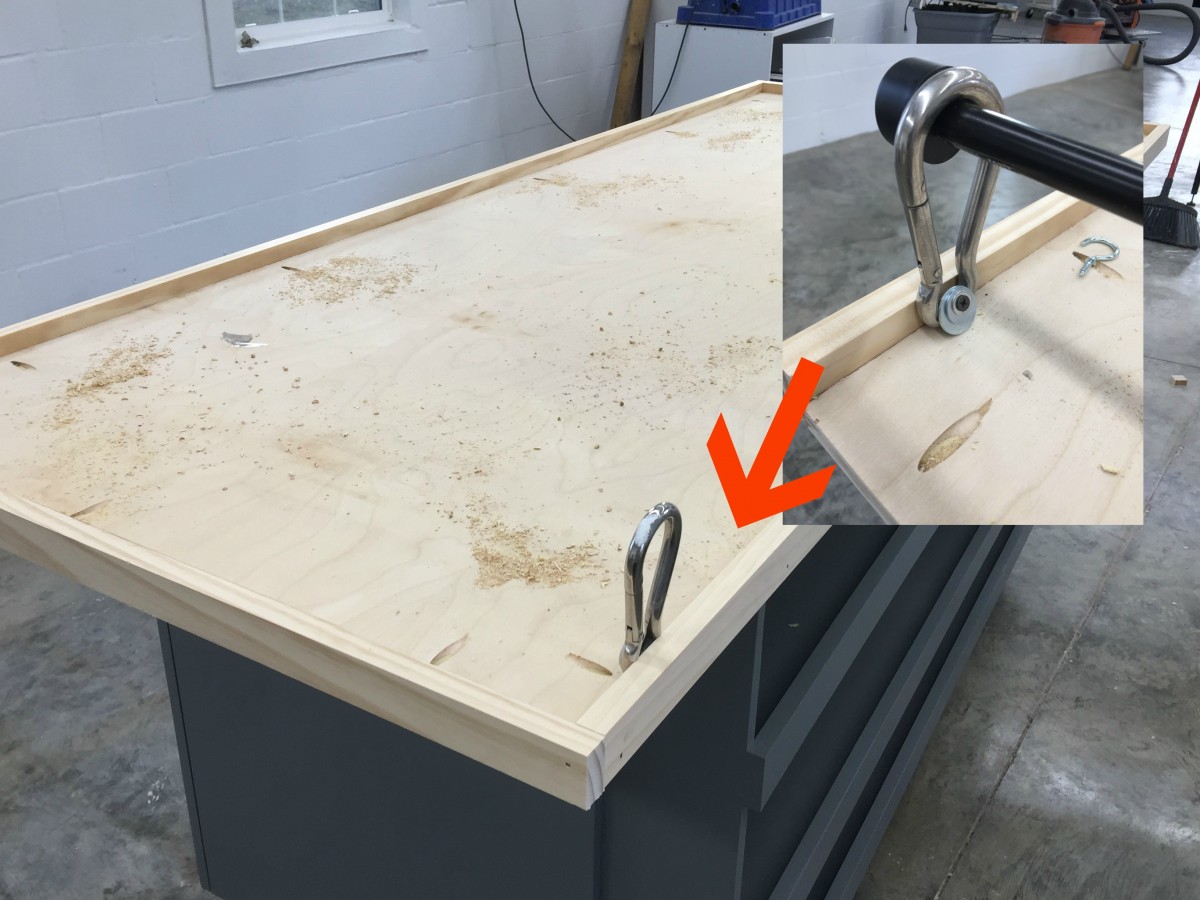
Alright, now I was ready to flip it over and secure it in place… to do that I fastened it from the inside of the cabinets. (You guys, it took me an extra three minutes to try and figure out how to word that without making it sound dirty.) #winning 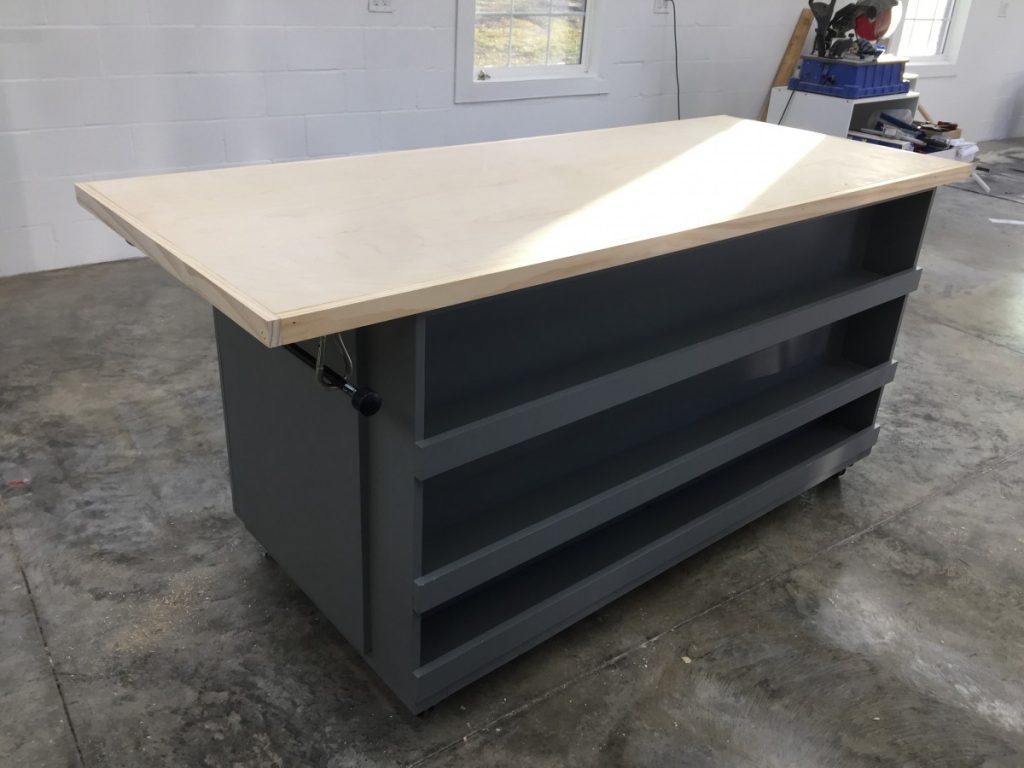
Workshop Paint Assembly Table – Paper Holder
Alright we are in the HOME STRETCH ! Last thing it needed was to somehow create a way to feed the paper up and hold the paper in place. In order to do that I used two (one for each end) 1×2″ boards, cut to the width of the counter. I was going to need to attach them via screw at the very edge of the board, so I pre-drilled and countersank each end. 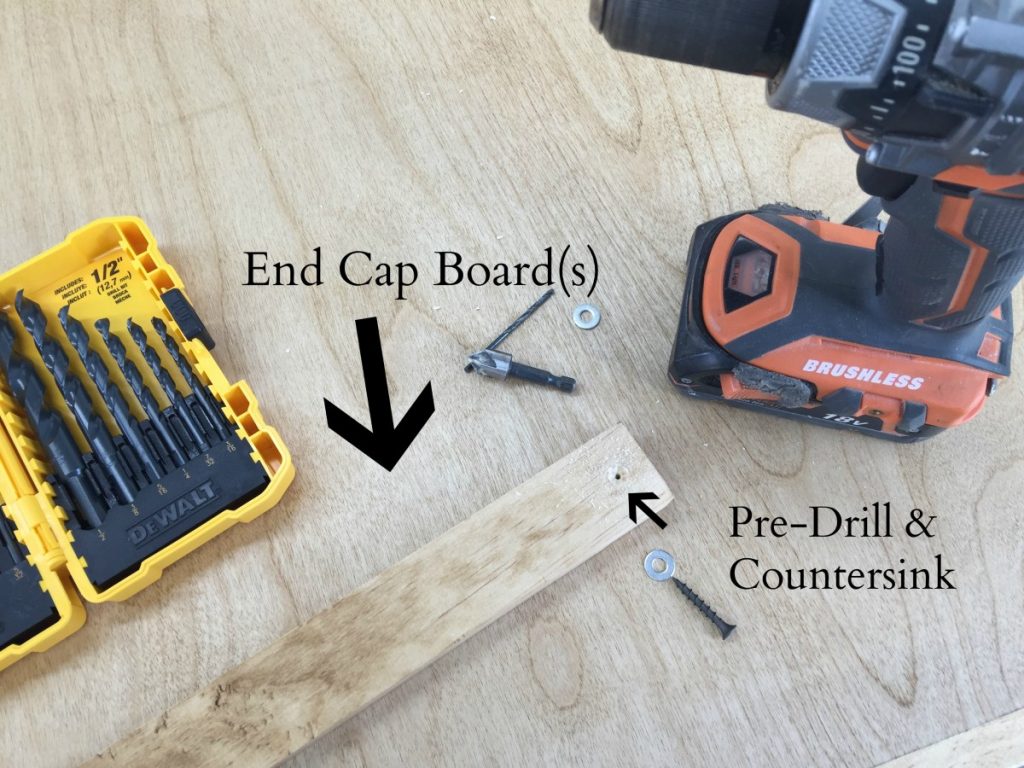 Then using a small washer as a spacer I drove the screw through the end cap board and through the washer and into the actual counter top edge. This washer would give me the gap I needed to feed my paper through. I did this on BOTH ends. The result? Nothing short of magical! I clean work space!
 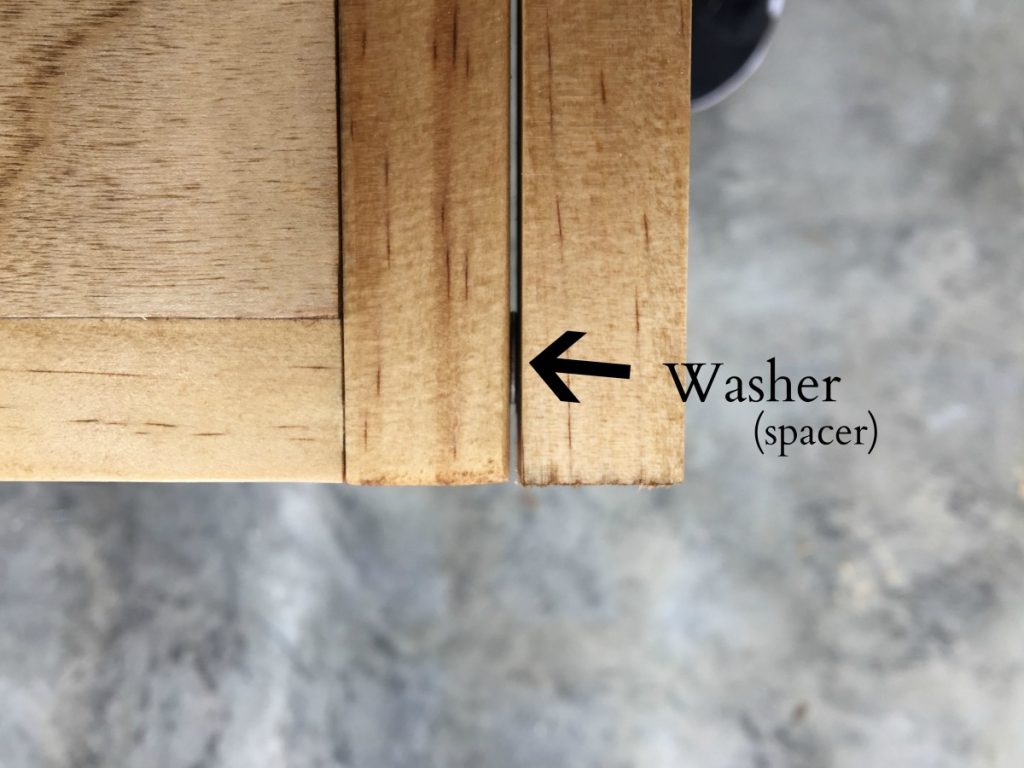 Last thing I needed to do was ad my roll of paper. So instead of building my entire table to fit my paper roll, I simply cut my paper to fit my table. #genius
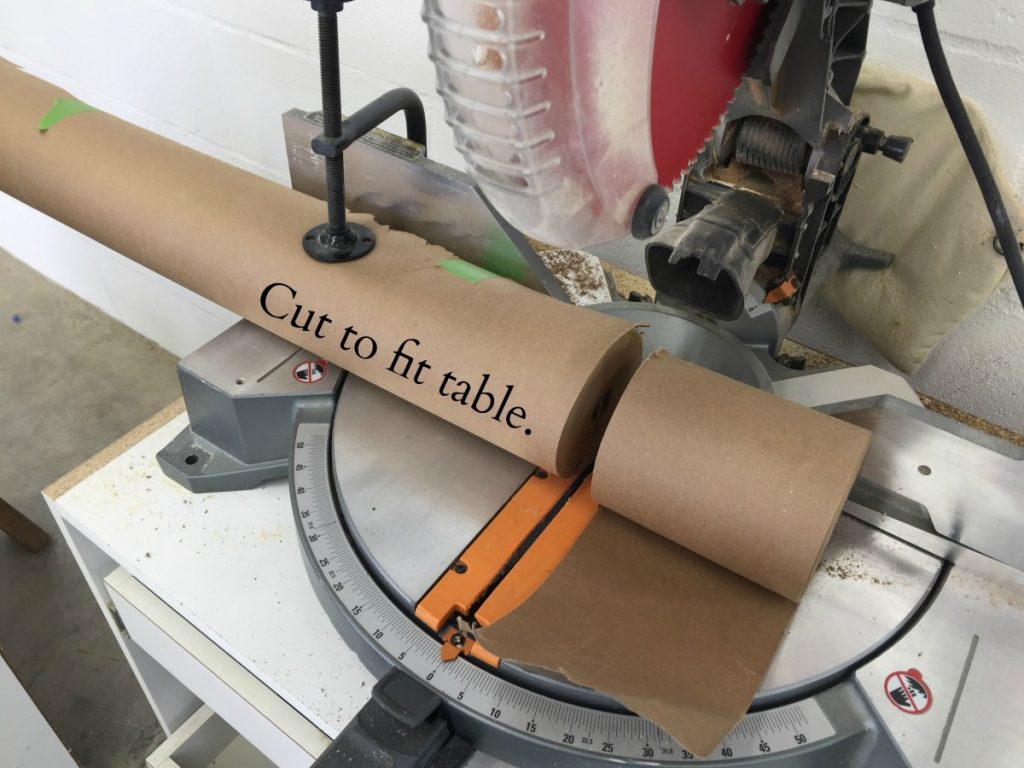 Now just install that sucker!
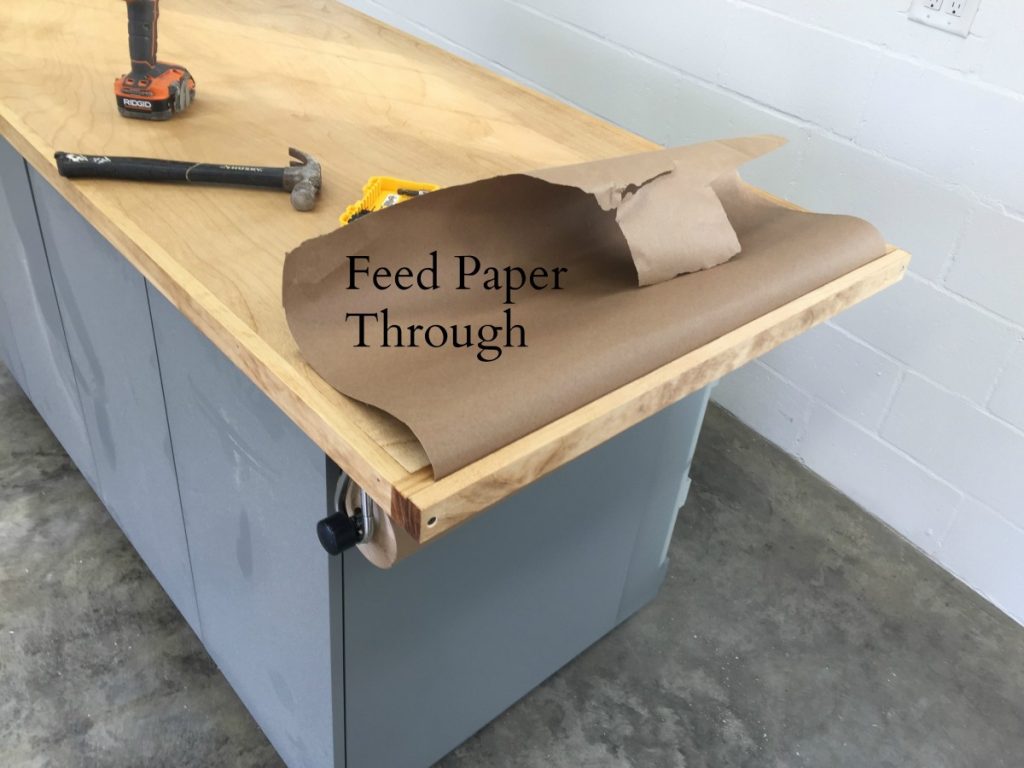 I then fed the paper back down the other end. Nice crisp, clean work space.
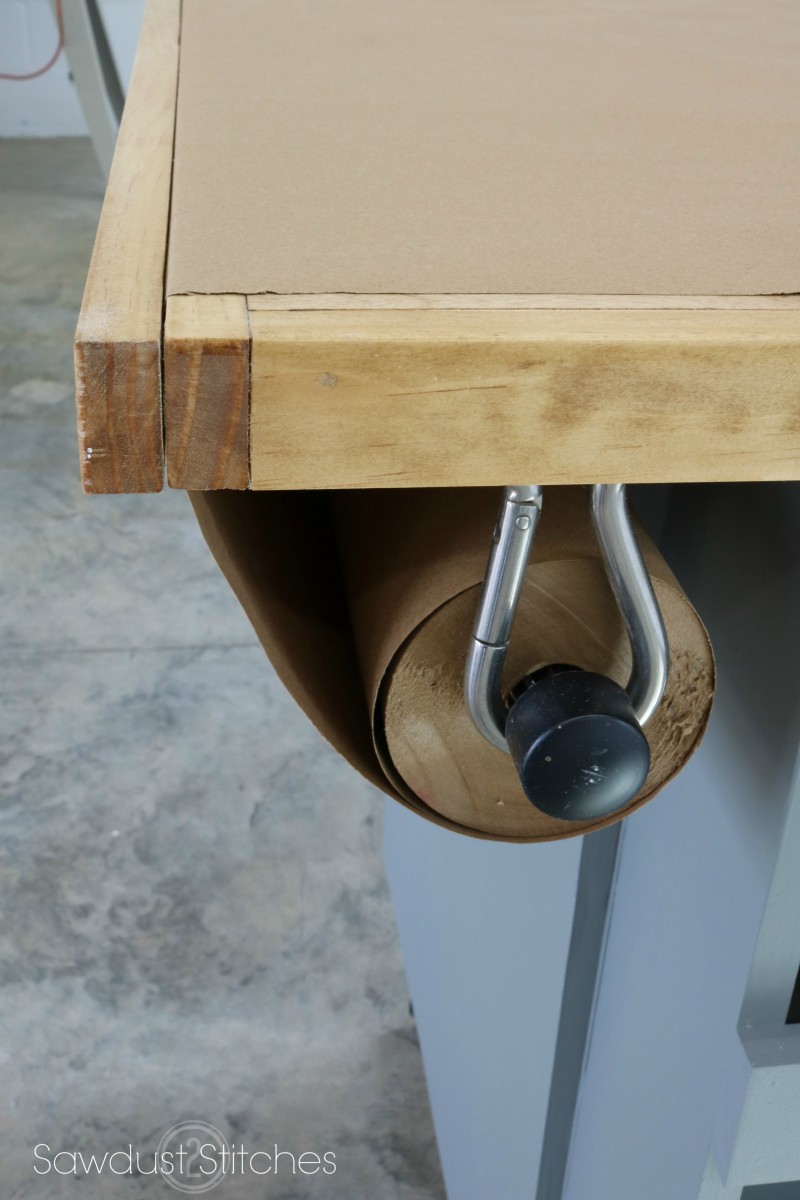
There you have it! Isn’t she a BEAUT !? 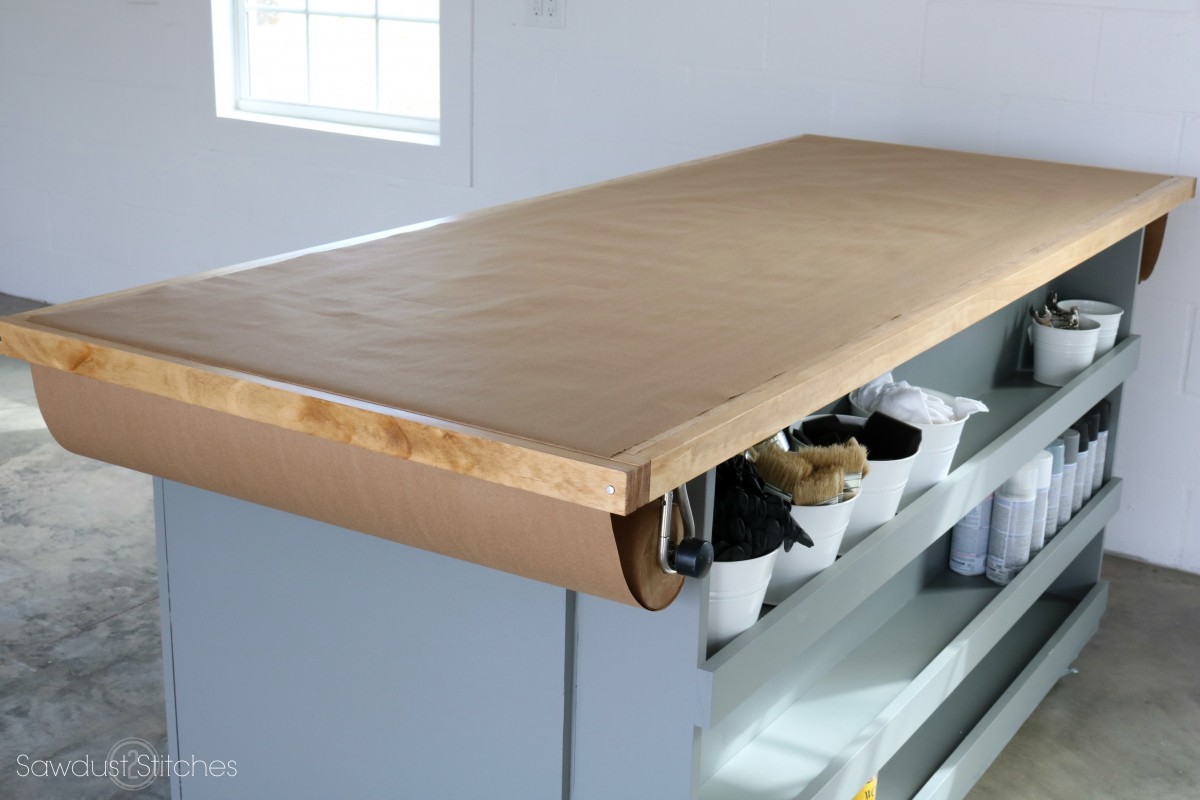
Look at how much it can store! It just makes my heart happy. 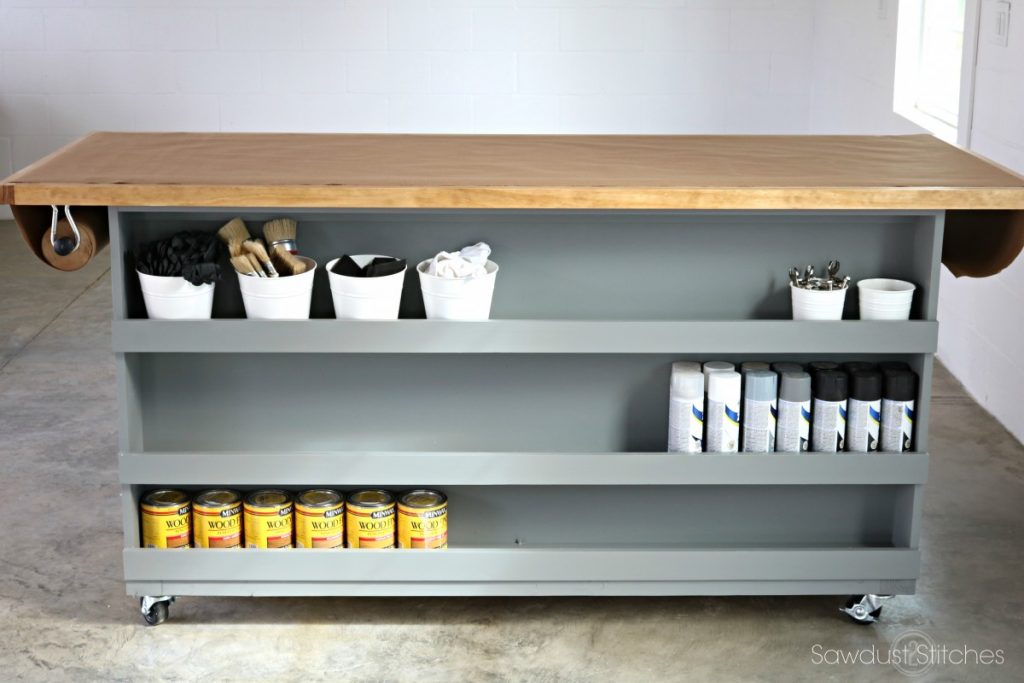 There is that hardware I was telling you about. How perfect are they?!
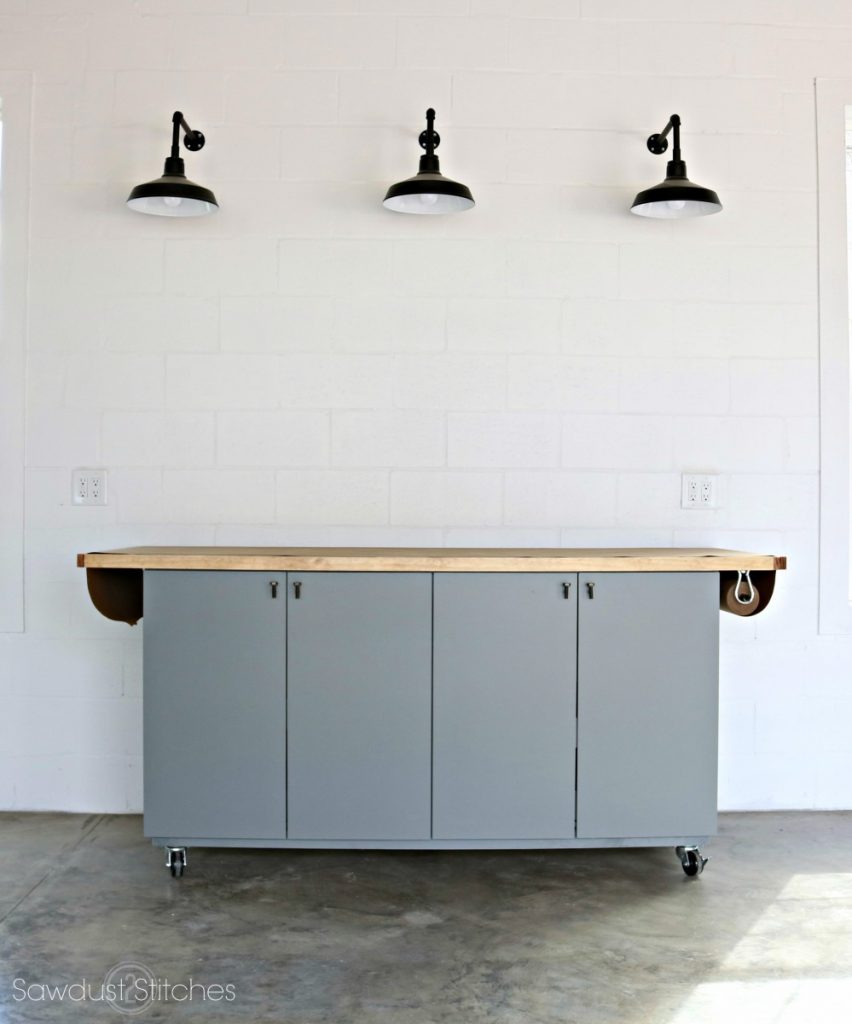 Plus, PLENTY of easily accessible storage. I call that a win!
 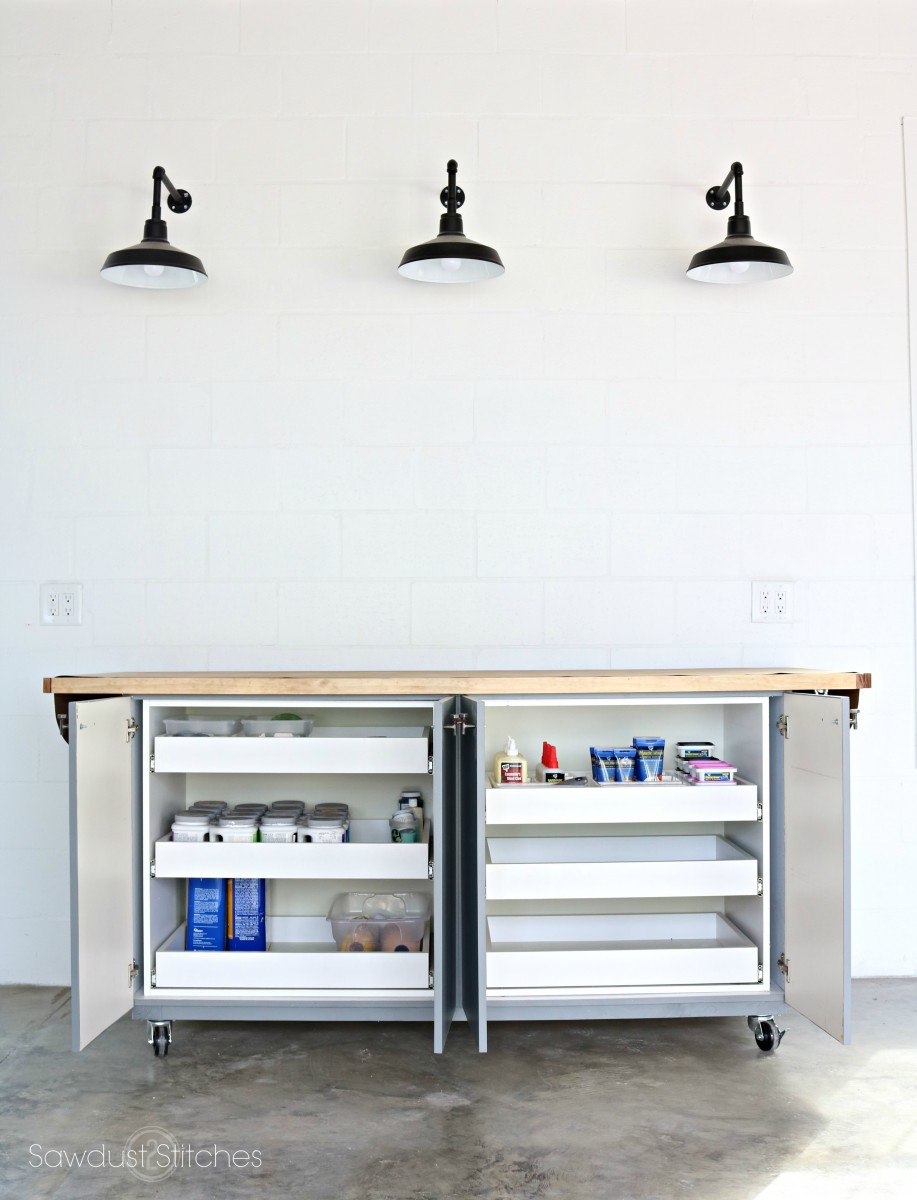 That about wraps this build up! Thanks for following along.
If you want to see even more builds and behind the scenes follow me here:
Youtube
 Copyright secured by Digiprove © 2018


Your work table is so useful – storage and work space. Paper roll – great idea as well as easy access and removal of used piece. Pinning of course !
Joy
Beautiful! Love the color, function and the installation of the paper roll is positively brilliant! Way to go!!! I’m saving this for when I have the room to create and use such a table. Absolutely inspiring, thank you!
I’ve been wanting to add a paper roll to my work table for so long. The MacGyver solution looks like it worked out great. I’ll have to dig around my hardware drawer or scrap pile and see what I can come up with.
Oh WOW. This is just AMAZING. I always expect to be awed by your work, but this tops everything else… probably because I’m designing MY work island right now. : ) I’m so glad it’s too cold to woodwork here, or I might already have made mine! Now I get to add is some SUPER COOL stuff I never would have thought of. Your paper system is WONDERFUL!!! I HAVE to use that! Thanks a ton!
Corey, I love your new work space! It is so fun when getting ready to do a project is not a project in itself.
This simplifies the whole process, cuts down on time, takes the drudgery out and puts the fun back into creating.
Nice one!