Hey all! As promised I am back with more details on my recent kitchen remodel. When I first started designing the kitchen I had a pretty clear idea what I wanted. I wanted nice tall cabinets, and crisp clean lines, but the focal point of the kitchen was going to be the island. My dreams were big, and they definitely included an Apron Sink!
 Apron Sink Install!
 Apron Sink Install!
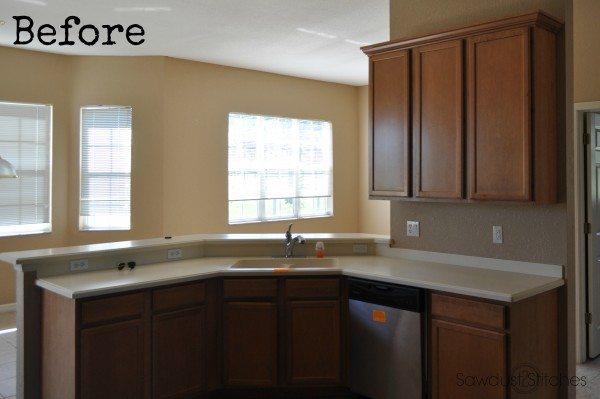
So before we get started I would like to say a big thank you to the great folks over at MOEN for teaming up with me on this project! It is through great companies like Moen and affiliate links that I can continue to provide all these tutorials at zero additional cost to my readers! So a big thank you to them! (More info. available here.)

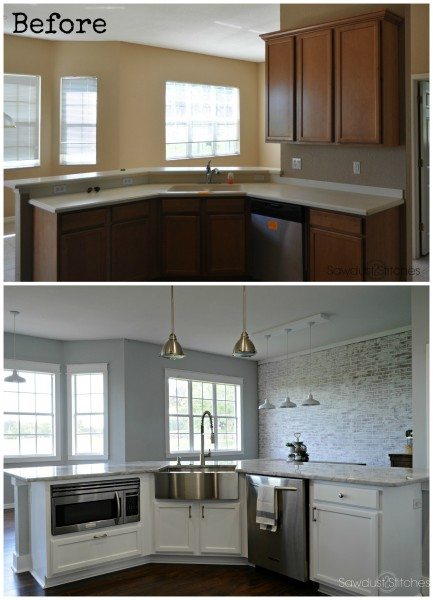
In order to create a large island, I would need to take down (the stupid waste of space wall… seriously it wasn’t even load bearing!?), and (most importantly) install an apron sink.. So let the demo begin! I am not going to lie, there WAS something oddly satisfying about taking a sledge hammer to a counter top.
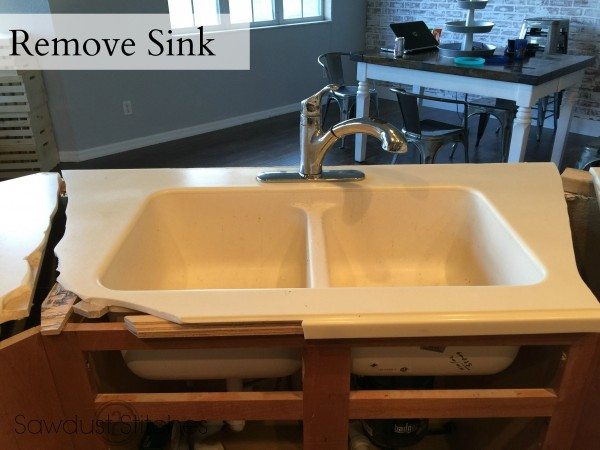
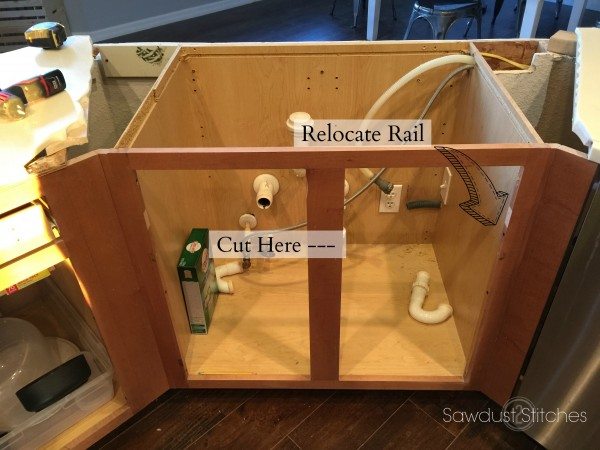
Once the sink was removed I was ready to prep for the apron sink installation. I began by removing the “rails” (the horizontal 1″x 2″ boards). In a lot of cases face frames are constructed using pocket holes, so it was just a matter unscrewing the pocket hole screws and removing the rails. Easy Peasy. I kept these handy because I knew I would need them later. 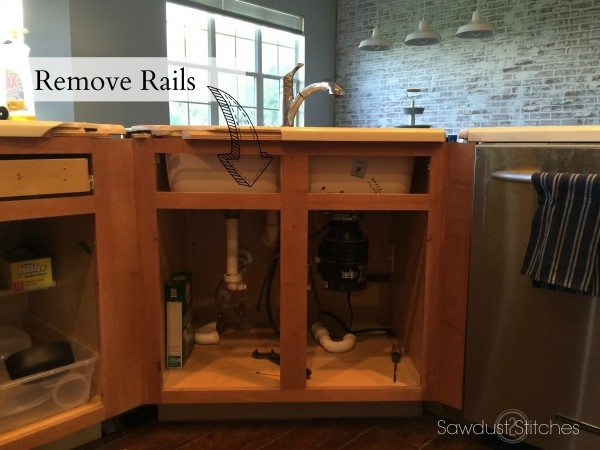
Next I needed to remove the upper support bar. Before I removed the top rail I used a circular saw to cut down the center stile (vertical center board). Once the stile was cut down to the appropriate height, (this measurement will vary by sink, manufacturer, etc.)
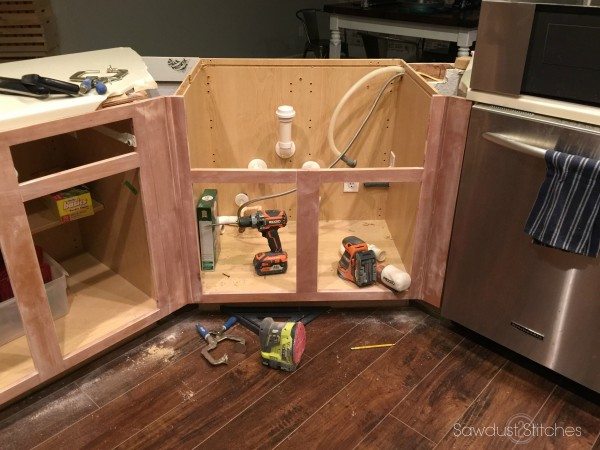
I then used my two smaller rails that I removed earlier. These were the rails that already had been pocket hole drilled. I then measured to make sure I was installing the rails level. Then clamped the rails in place and using 1 1/4″ pocket screws secured the rails in place.
Next I needed to build an internal support system that would hold the sink up. I chose the Moen 1800 Series Apron Front Sink. This is a heavy under mount sink (meaning it mounts under the counter top, as opposed to resting on top of the counters.)
These can be made any number of ways but the most important thing is the there is a 1/8″ gap between the top of your support and the top of your cabinet.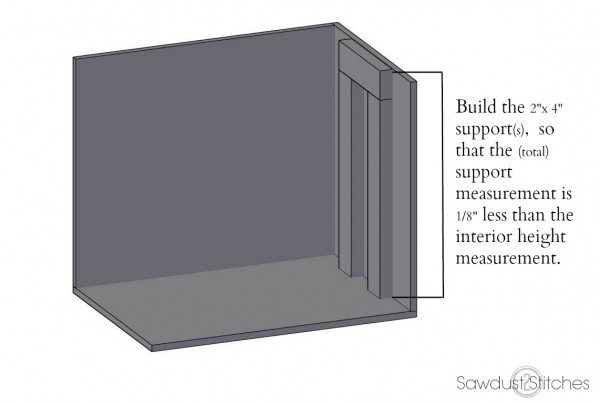
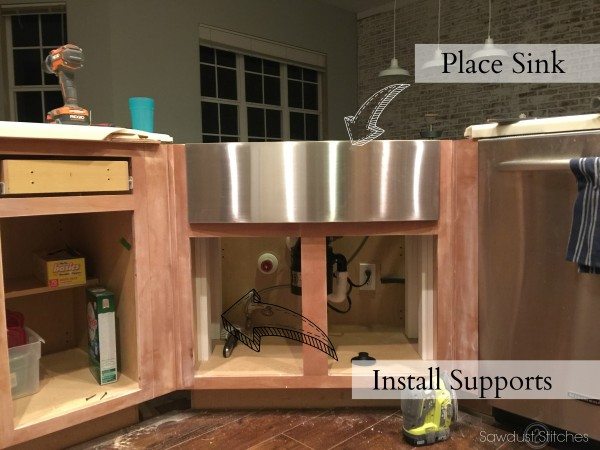
Before I dropped my apron sink in place I did apply some silicone caulk, so that once the sink was in place, it would not wiggle.
Next came the counter tops!

As much as it kills me to pay someone else to work on my house, fabricating and installing counter tops simply is not in my repertoire. Which is why 95% of the budget went to the professionals. (Breathe into a paper bag.)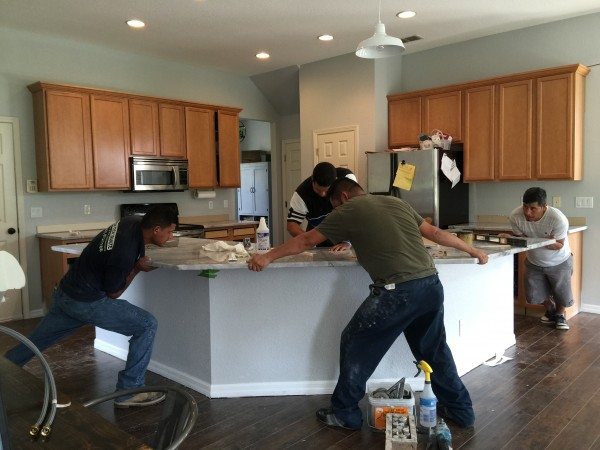
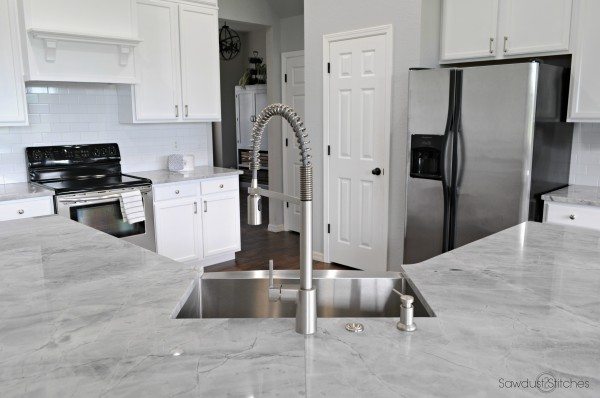
As much as it pained me to hand over the cash it was totally worth it! The installers were great and they drilled the holes where the faucet, soap dispenser and garbage disposal button would go. YES, you heard right. Garbage disposal button! There is no requirement that says the switch to the disposal has to be an ugly light switch. This little button is air actuated, so there is no risk of electrocuting yourself! Bonus: They come in lots of finishes to fit any kitchen style! You can see the whole selection here: Moen Air Switch Button

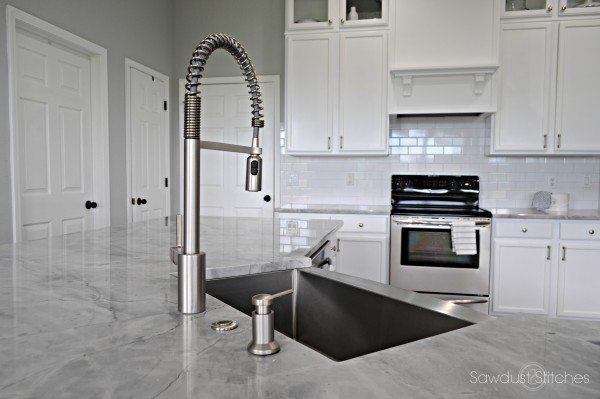
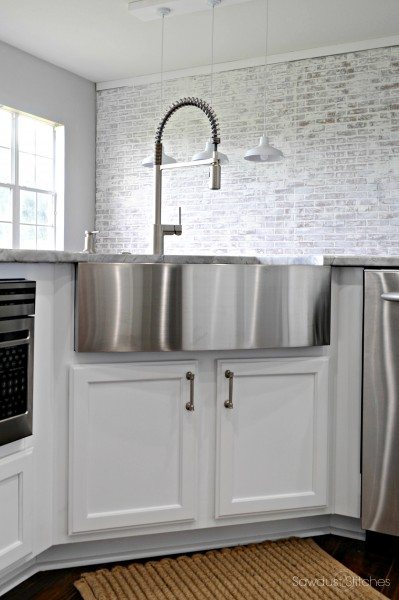
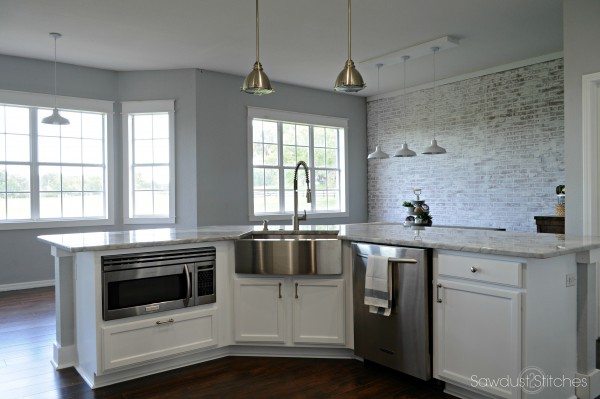
Like I said before, I wanted the island to be the focal point, with a huge emphasis on the sink. The sink was going to be front and center and I wanted it to make a statement. When brainstorming the design concept for the kitchen I kept coming back to the idea of a high arch faucet. When I saw the Moen Align Spot Resist Stainless Pull-Down Faucet I was in love. Wham, Bam, thank you mam, in love. I coupled it the Moen Modern Soap Dispenser. This combination is perfection. I don’t know if you could ever qualify a sink as “sexy”, but I say you can, and this is it!

 Seriously, look at that sink!? Is it not one of the prettiest sinks you have ever seen? I love that it is a slight twist on a time proven classic. I used this sink and faucet as inspiration for the rest of the kitchen.
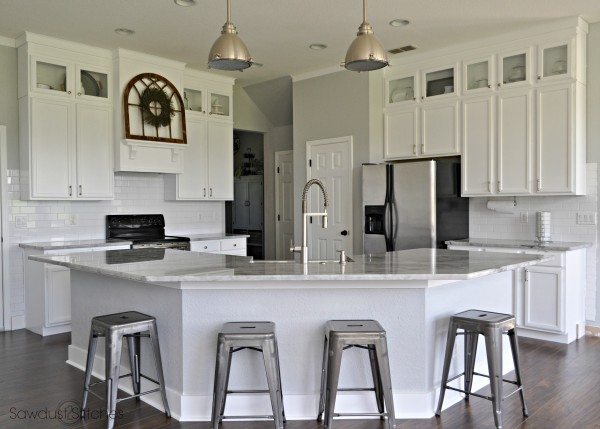
 I am not going to lie, I think that the outcome is phenomenal!
If you are interested in the rest of the kitchen makeover you can click on any of the links below to read more about this space!
Faux Brick Wall
Flooring
Kitchen Makeover
Again, big thanks to Moen and their partnership, and thank YOU for stopping by and reading!
Take Luck,
Corey
 Copyright secured by Digiprove © 2016


Corey, this is a HUGE difference of beauty and functionality. Truly wonderful. I hear you on breathing into the paper bag. lol
The faucet is my dream faucet. 🙂
Please tell me how you refill the soap dispenser? 🙂
I love your sink, it is exactly what I want. You have done an incredible job in your kitchen, and I love it.
Did you build the upper cabinets? Or did you purchase them? I love them!!
I built the upper ones! Just extended and add trim. 🙂 Hey friend.