Hey All! A few years ago when we were considering moving, one of the pre-requisites for any future home was a 3-car garage. I needed to have a little more elbow room for building, and it would be nice to have a little space for an actual garage. Well, as fate would have it, we fell in love with a home that was perfect for us, EXCEPT it did not have a a 3-car garage. Regardless, the heart wants what the heart wants, and we went forward with the purchase of the home; with plans to rectify the shop situation. We decided to wait a year or two and save up some money and build me a detached shop. WELL all our hard work is paying off and I am glad to report that two years after our move we are now on the tail end of building the shop!!!
It is through great companies like HomeRight and affiliate links that I can continue to provide all these tutorials at zero additional cost to my readers! So a big thank you to them! (More info. available here.)
![]()
We planned this beauty so that it would look like a detached garage, and wouldn’t take away from our home. We drew it up so that it would match the architecture of our home and I think we nailed it!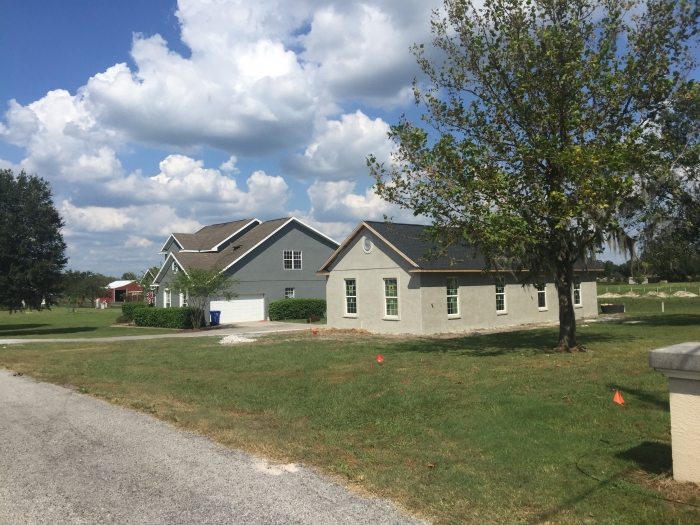
The INSIDE is the part I am most excited to show you though. I had big plans and dreams for this space. I not only wanted it to be a highly functional work space, I wanted it to have the aesthetics of a studio. I had my work cut out for me and it included preparing long before we started building.
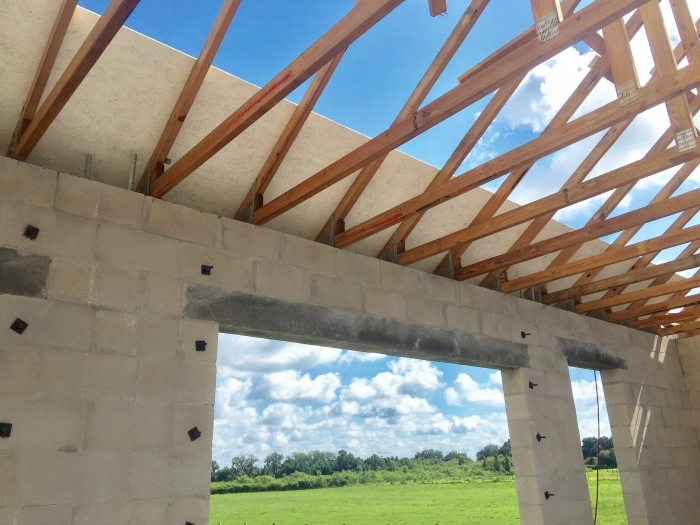
I got the crazy idea of leaving the trusses exposed… but not only did I want them exposed, I wanted them stained! (Of course I did.) So, before we flew our trusses, I stained them while they were accessible from the ground.
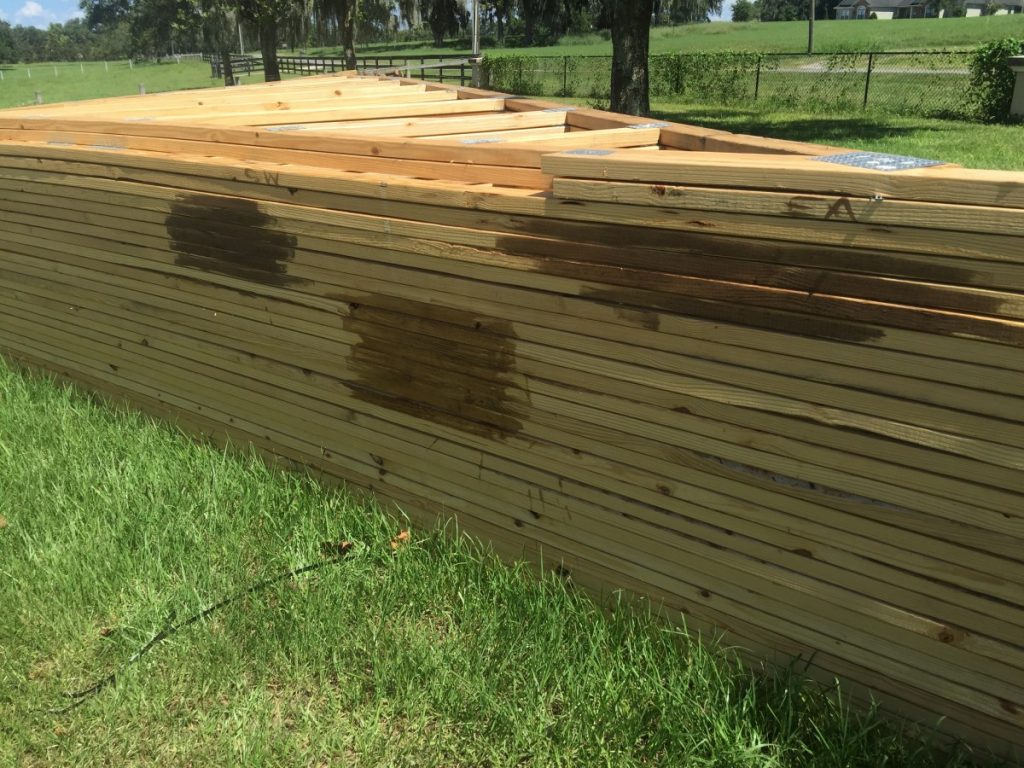 Before I started staining I tried out a few different color options. I ultimately decided on “Golden Oak” by Minwax.
 I honestly thought that is was going to take an eternity, but it was actually quite painless. I simply loaded up my HomeRight Super Finish Max Extra
 ![]() and started spraying! My husband and I had a system down pat after the first few. I would spray and he would run a rag over them to remove any excess stain. We would then stand them up against a tree. We had them all done in about 2 hrs. Not too shabby, when I was expecting this to be a full weekend project.
and started spraying! My husband and I had a system down pat after the first few. I would spray and he would run a rag over them to remove any excess stain. We would then stand them up against a tree. We had them all done in about 2 hrs. Not too shabby, when I was expecting this to be a full weekend project. 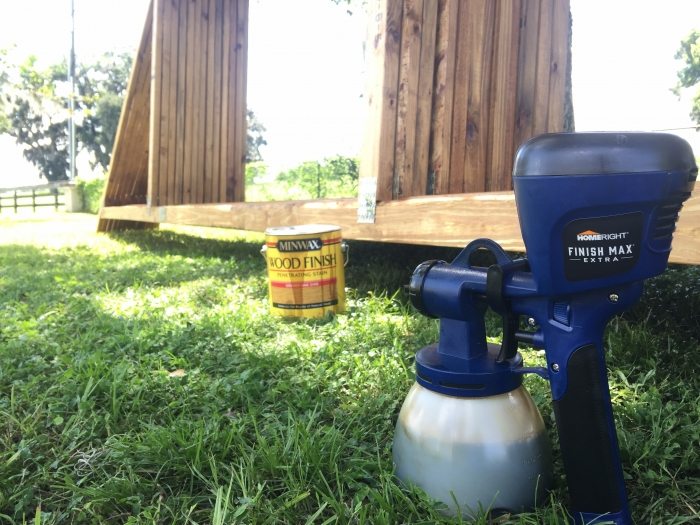 Once all the trusses were stained it was time to paint the sheathing. That’s right! I wanted the boards behind the stained trusses to be white. I wanted to achieve a nice contrast, also the white boards would help lighten the shop. So what’s a girl to do ?
Let me just say, I think the neighbors thought we were crazy. But my husband and I laid out 52 sheets of OSB in the side yard… It kept reminding me of the larger than life playing cards from Alice in Wonderland… RIGHT!??! I so badly wanted to paint come clubs on a few, but alas I was strong and resisted. 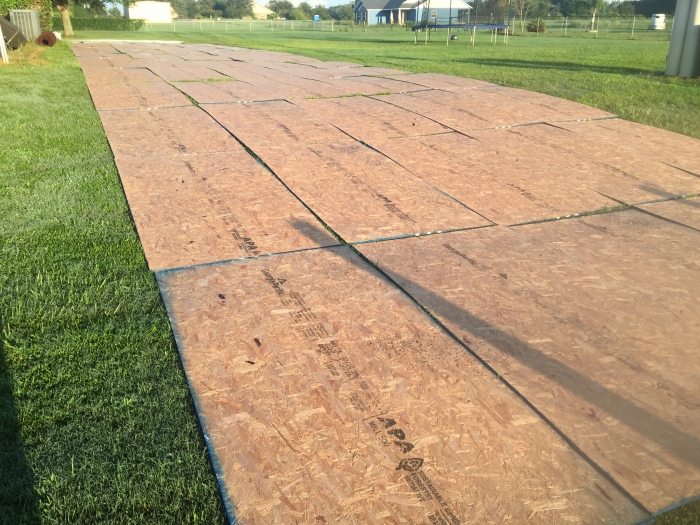 I digress… I then pulled out my trusty HomeRight Power-Flo Pro. (You may recall we used this to paint the exterior of our home earlier this year.)
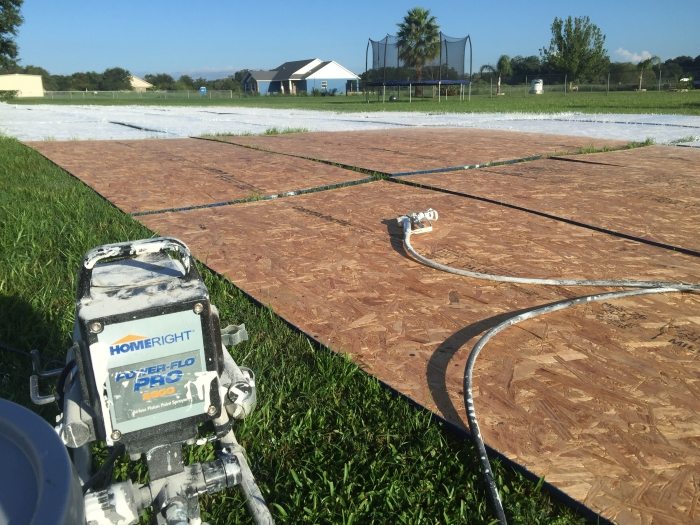
I rigged it to my dolley so that I could easily move the sprayer and the 5 gallon bucked of paint with it. (I am smart like that.) It took no time at all! I ended up doing a primer coat, and then flat top coat. ( I needed it to dry FAST so that I could re-stack it once I was done.) 
Seriously, this thing made short order of the sheets.
Seeing the first few sheets go up made me giddy! That contrast is the stuff dreams are made of…well my dreams anyways.
 Doesn’t that repetition just make your heart skip a beat ?!
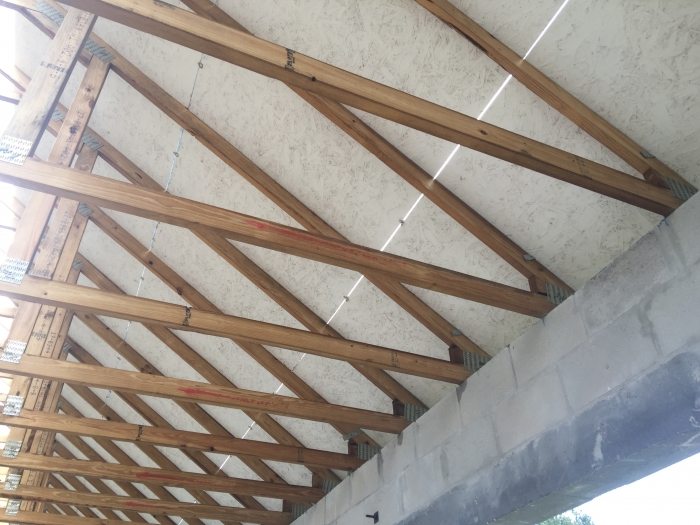
Ok, now that the ceiling was covered, it was time to tackle the interior. Again, I hooked up my trusty Power-Flo Pro and got busy! 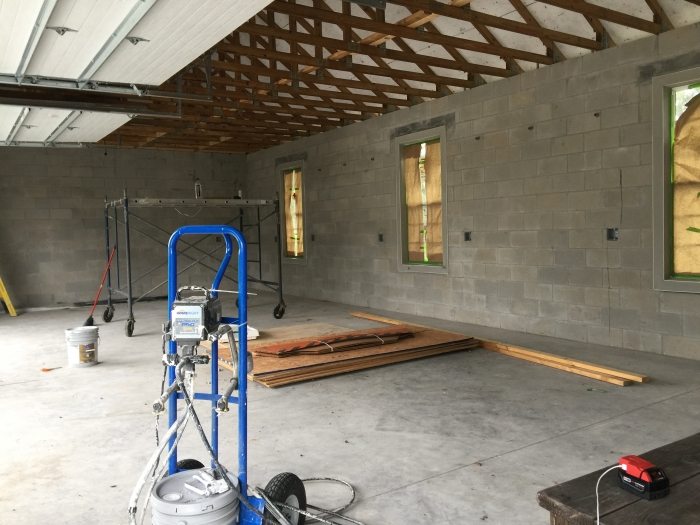 I first had to “prime” the cinder block first using something called “block filler”. It does just what it claims, it fills all the pores on the block making it easier to top coat. My husband and I have team work down to an art when it comes to painting with this thing. We had it done in a few hours and top coated the next day!
  So, without further ado. I give you my workshop!!!!
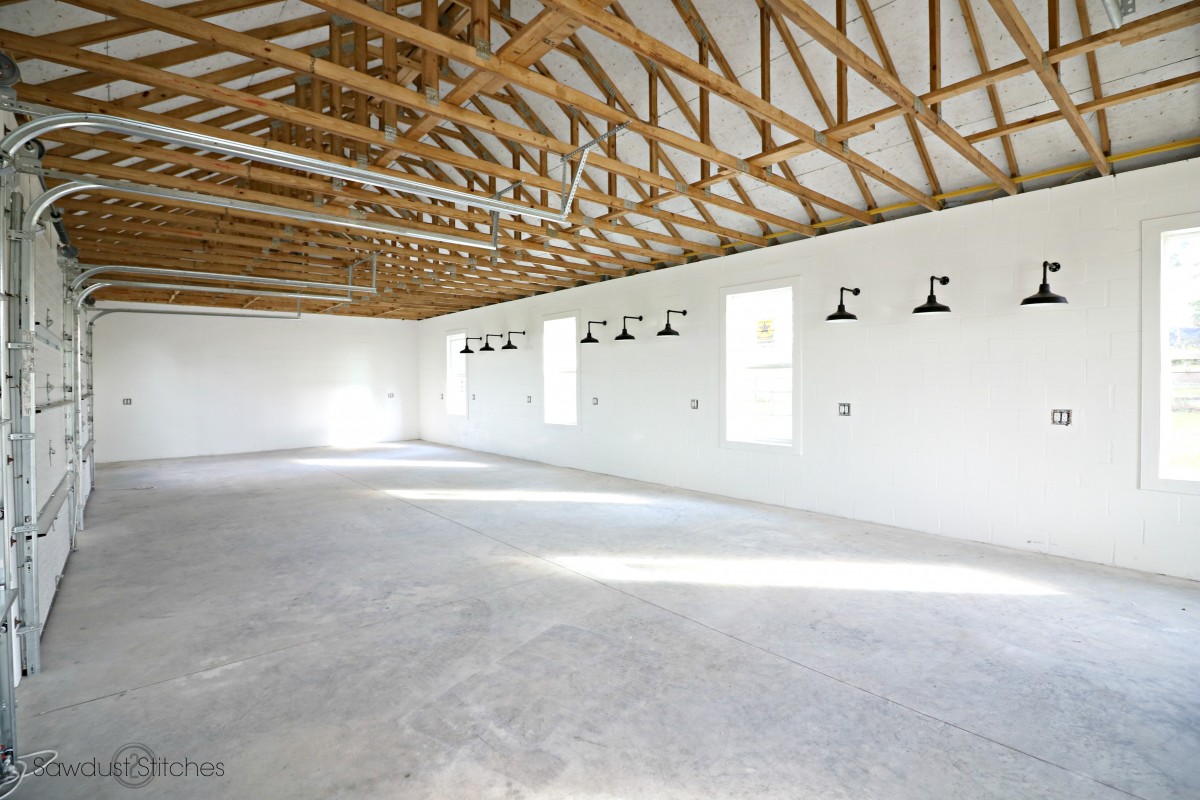 Isn’t it gorgeous!?!
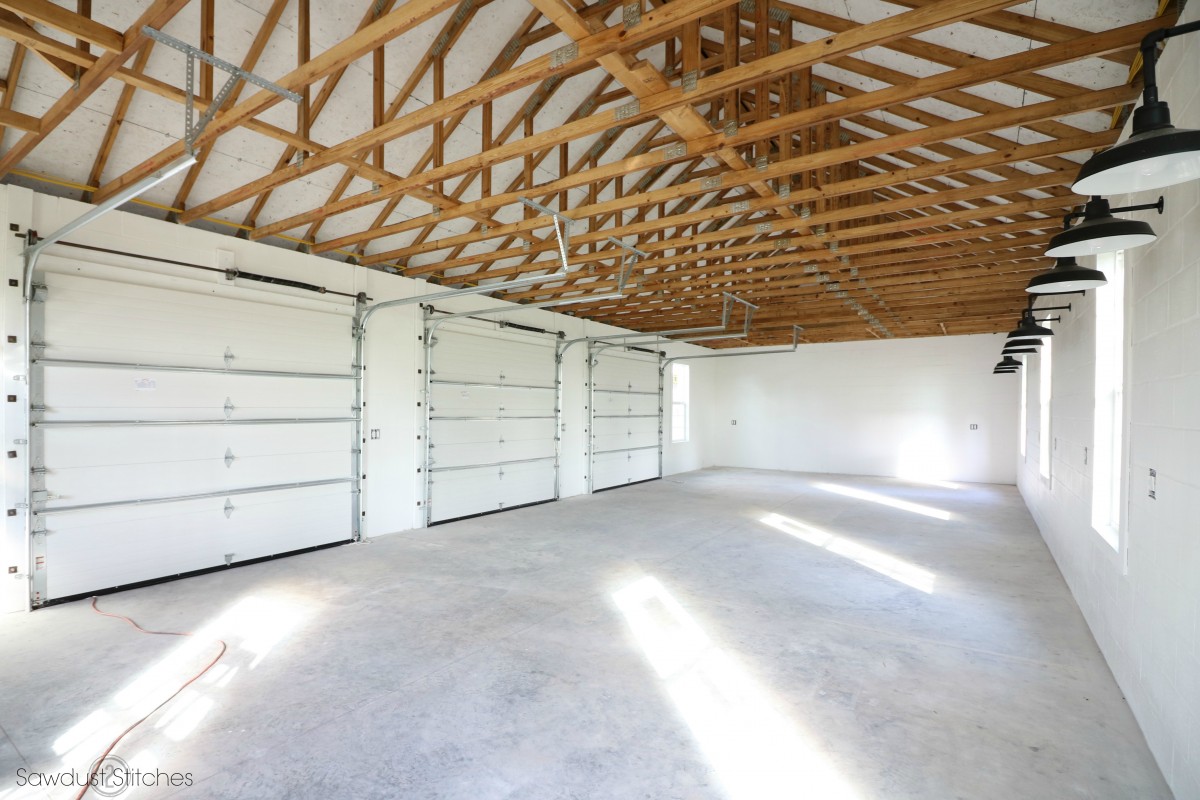 Would you believe I made all the lights out of industrial pipe and lights I got in the clearance section at Home Depot? Well believe it,because I totally did.
 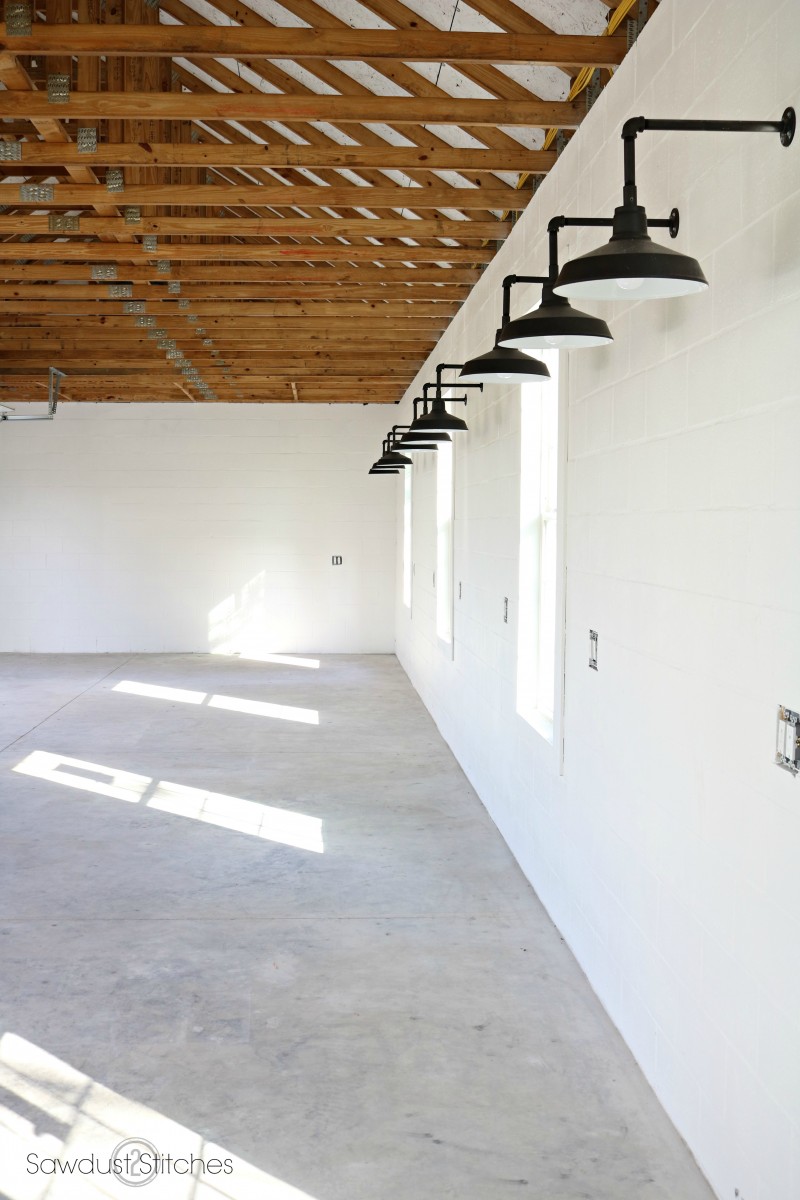 It was exactly the look I was trying to achieve, and it didn’t take half as long as I had anticipated! Having the right tools for the job makes life a hell of a lot easier!
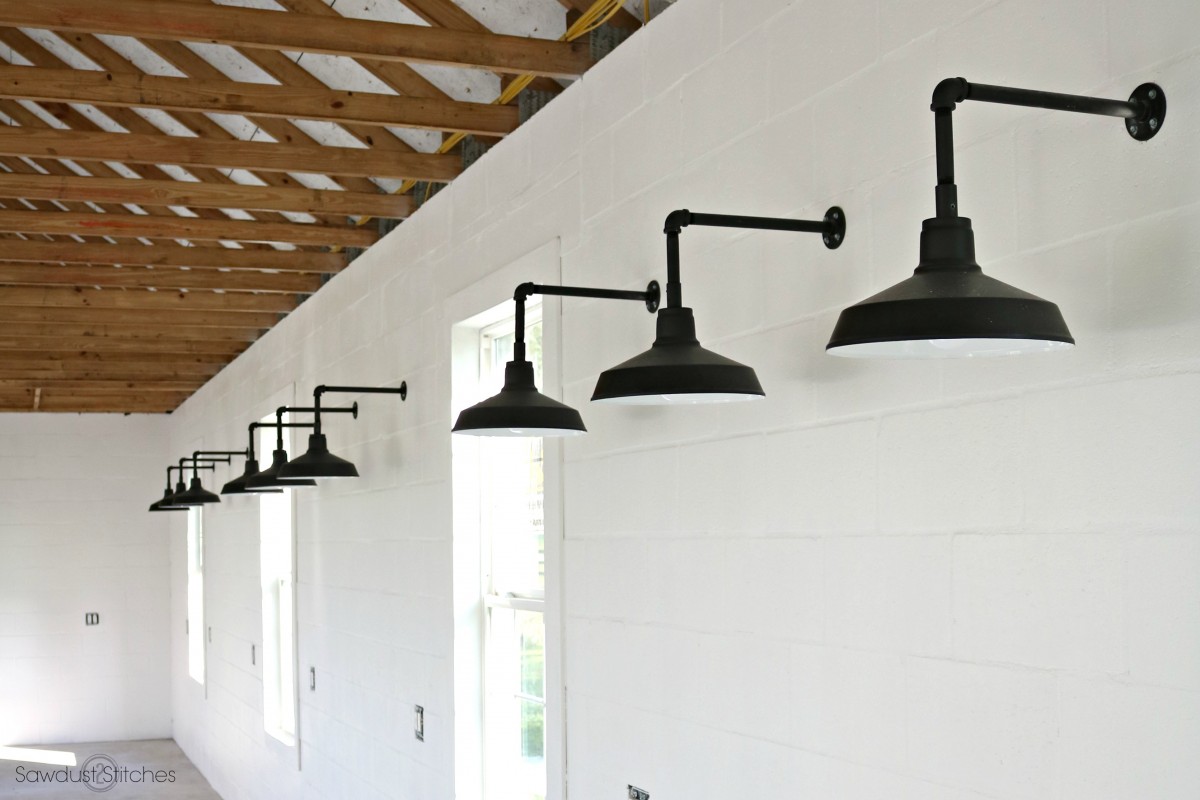 I still have plans to put down a floor coating that will deepen and enhance the look of the concrete, but for now, I am going to sit back and enjoy this view.
 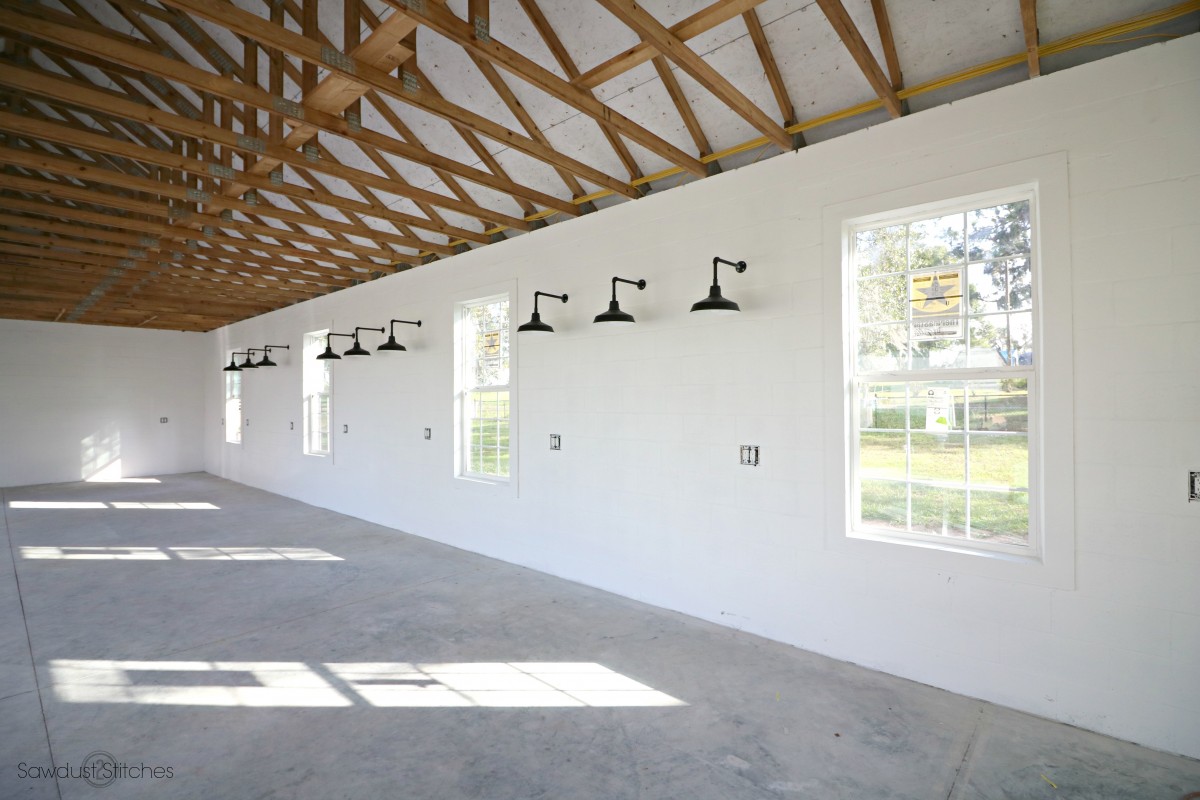 Thanks so much for reading!
Take Luck,
Corey
 Copyright secured by Digiprove © 2017


Absolutely gorgeous. Any chance you could do a tutorial of those fantastic lights that you made. They are my favourite part. many thanks
Water or Oil based? Did you wear a respirator mask?
Water based. Of course