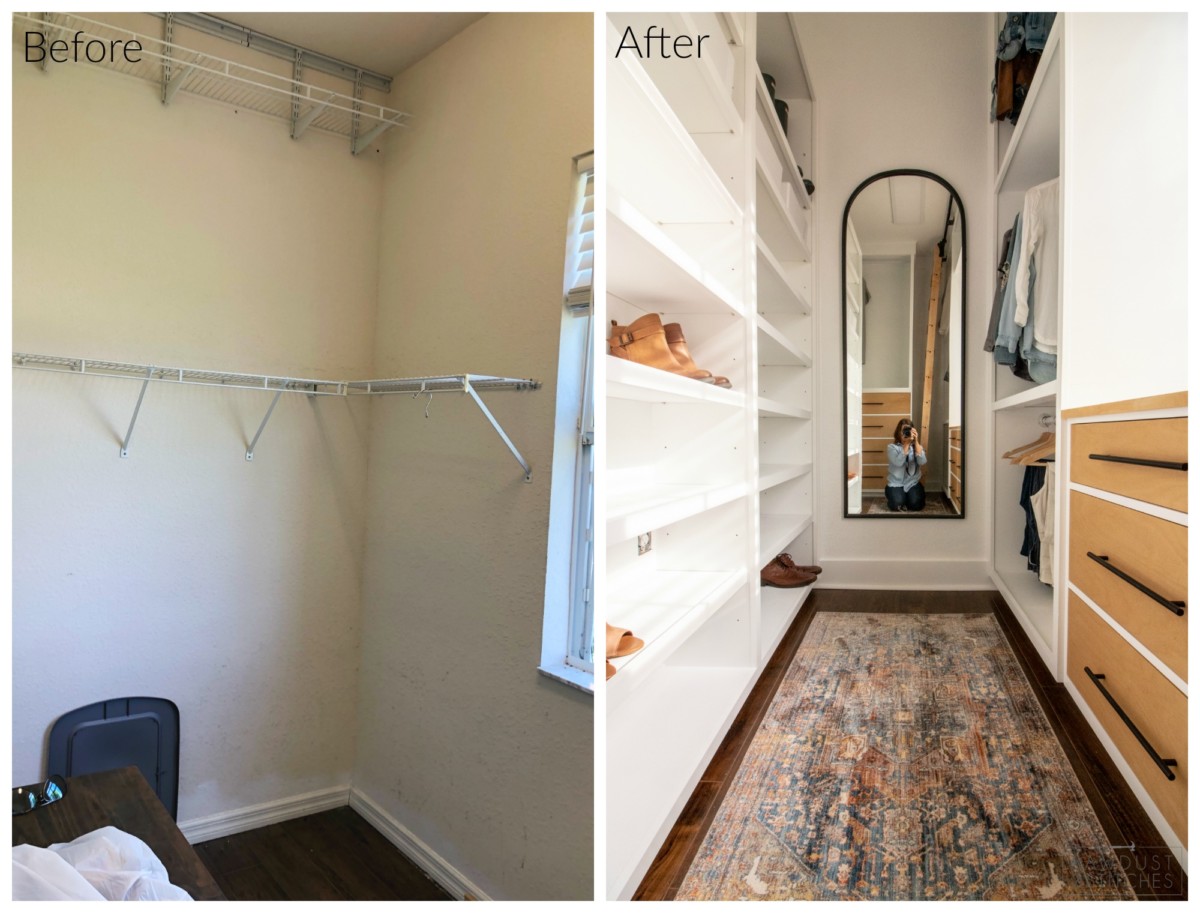
This project is in my top 3 favorite projects I have ever completed. I am not going to lie, I sometimes just go and sit in my closet and bask in it’s awesomeness. Truth be told I am not a fashion addict, but you better believe I am completely obsessed with organization. If you have been following along you are well aware, that my master closet was just “meh”. It came with builder grade wire shelving, and in my opinion it DID NOT maximize the space in the room. So, in true Corey fashion I simply could not “leave well enough alone”. I teamed up with the great folks at DAP gave it the facelift it deserved.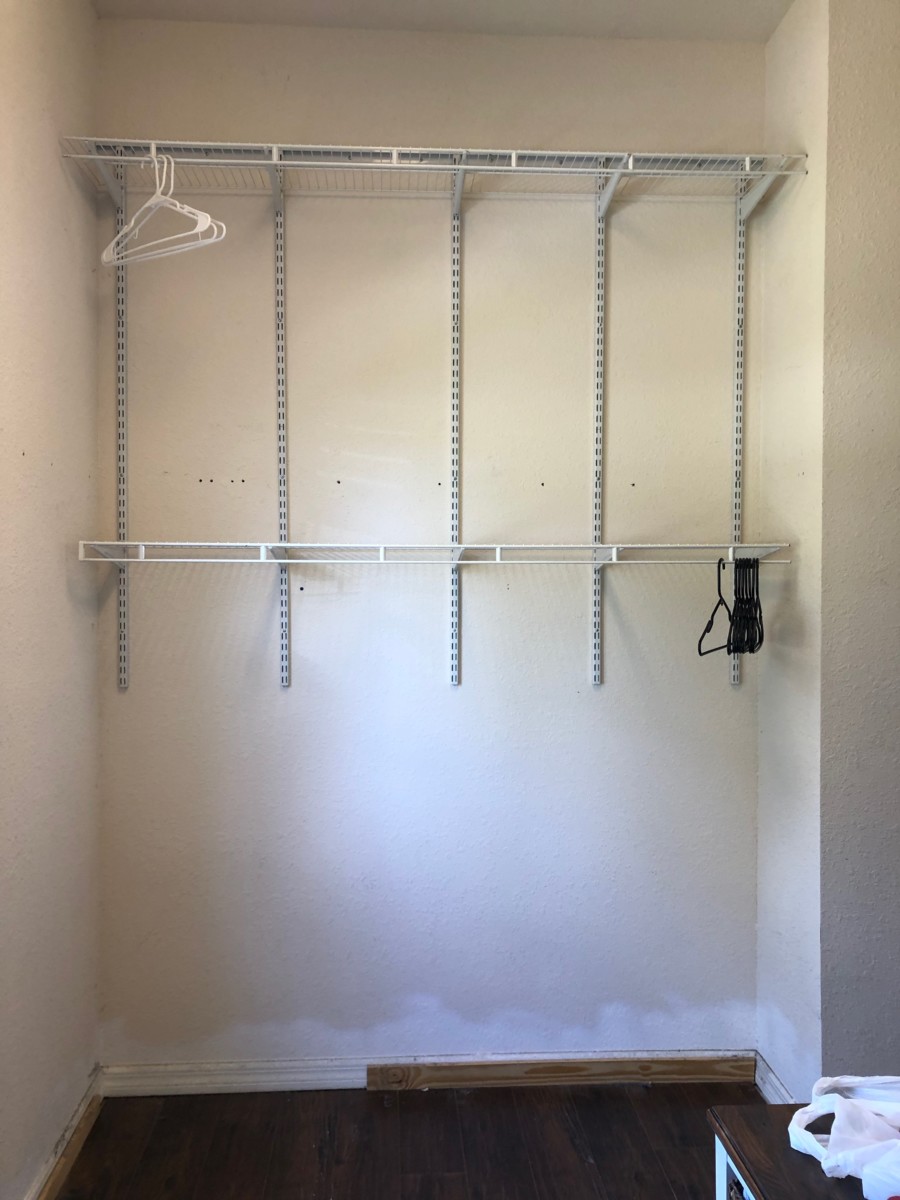
Now, if you are just joining us, make sure you check these other tutorials detailing the process of this makeover!
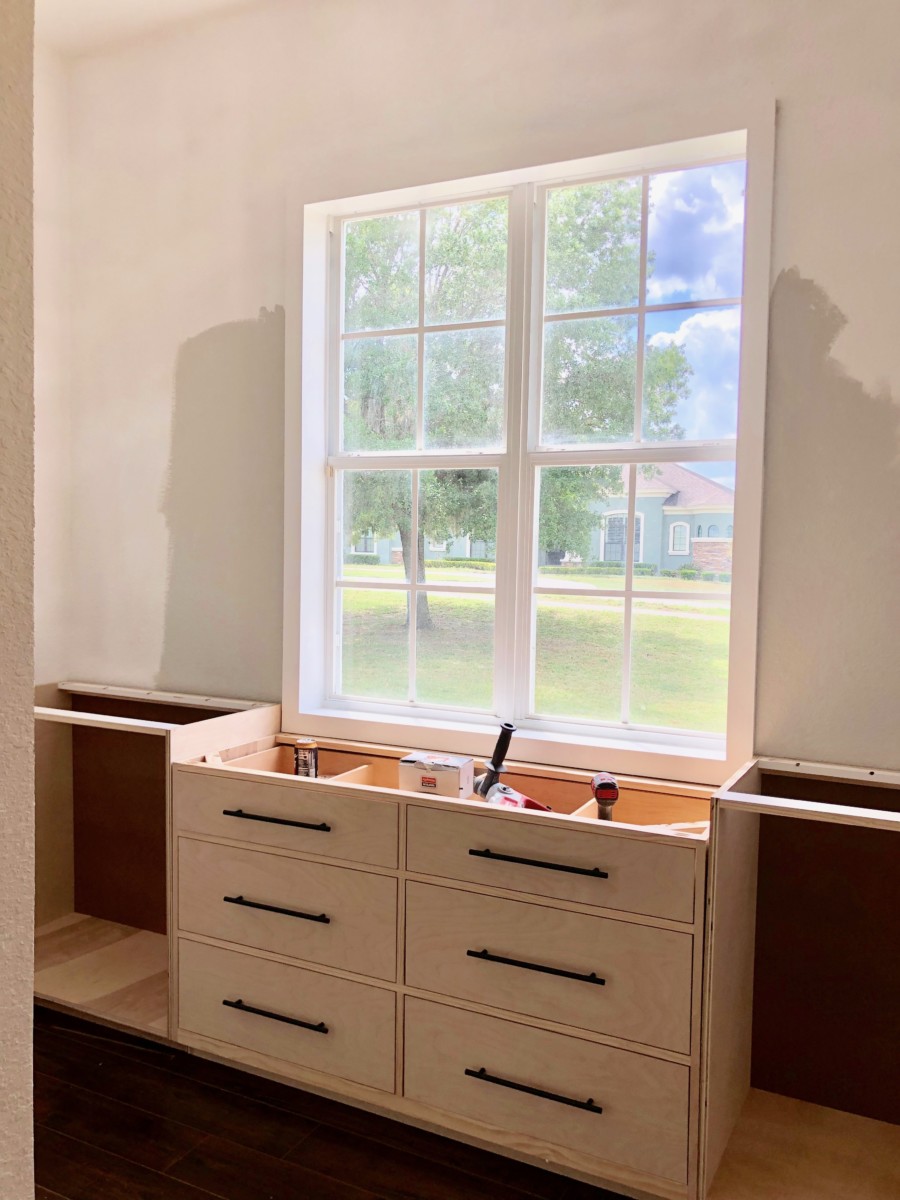
- How to Case a Window
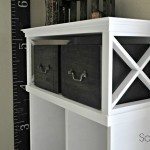
- How to Build a Built-in Dresser
- Horizontal Dresser Build Plans (Coming Soon)
- Tall Dresser w/Laundry Hampers (Coming Soon)
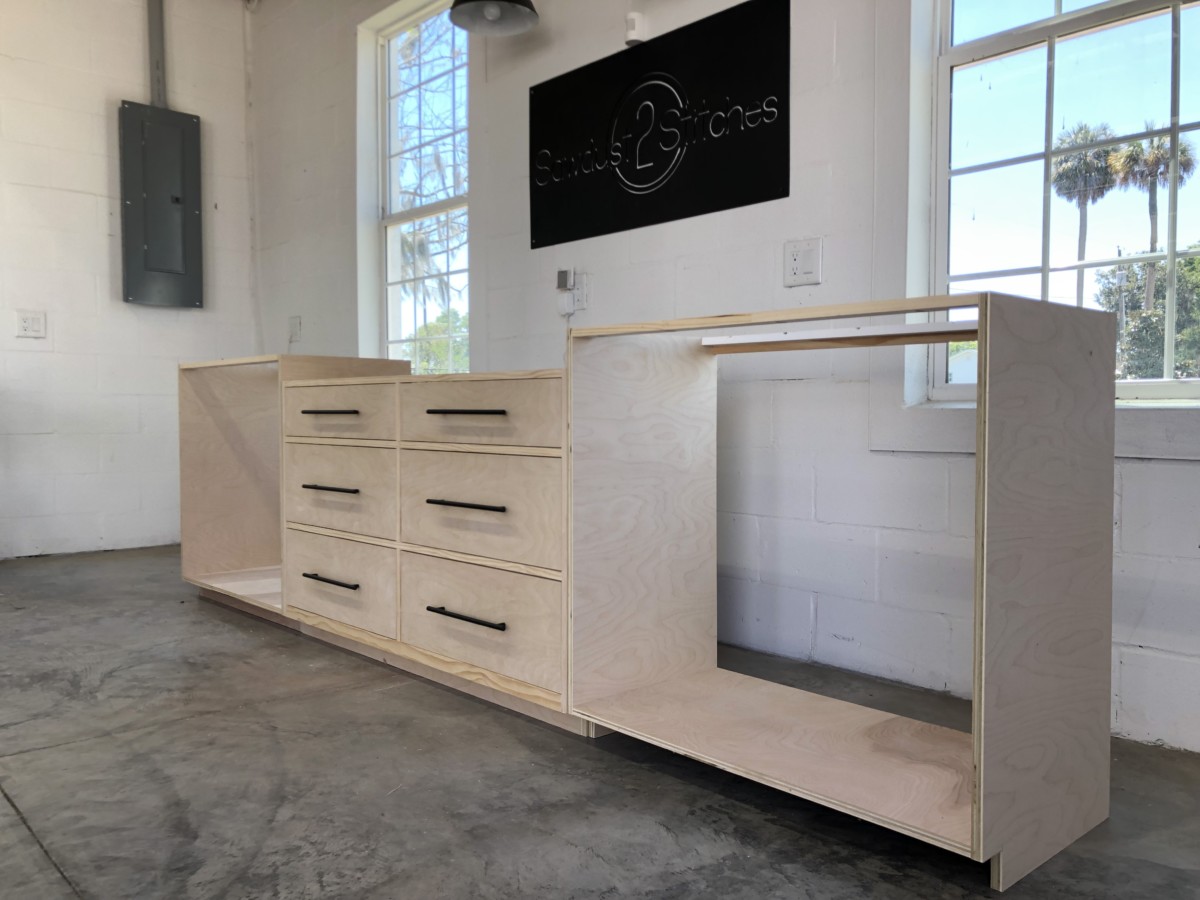
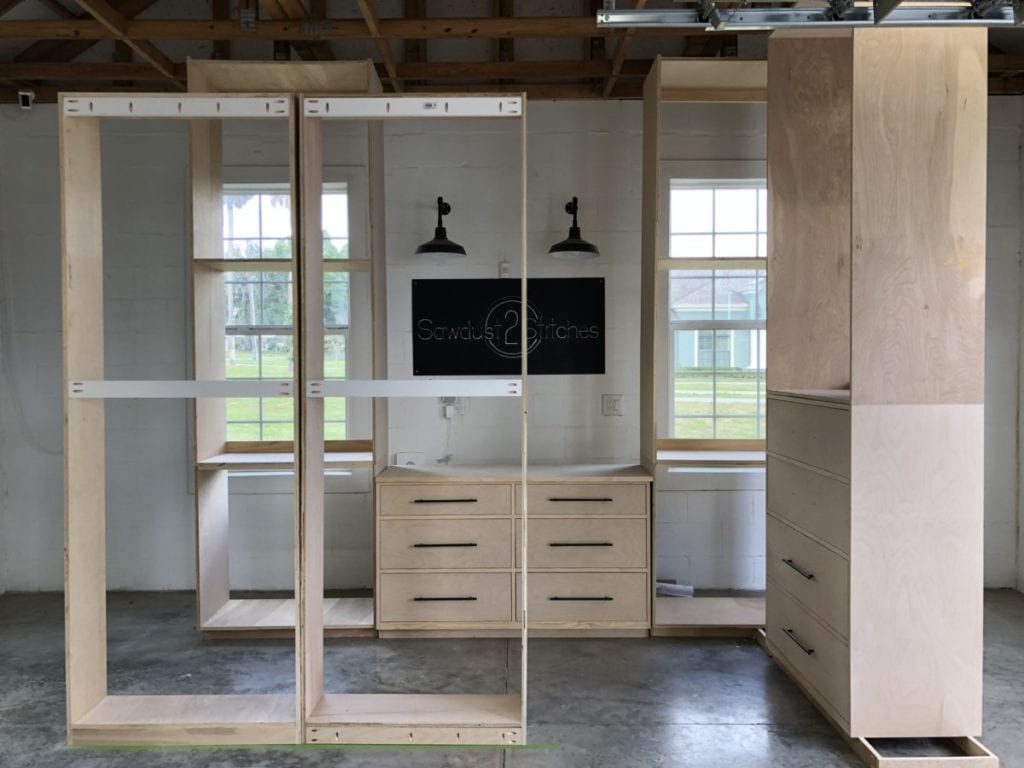
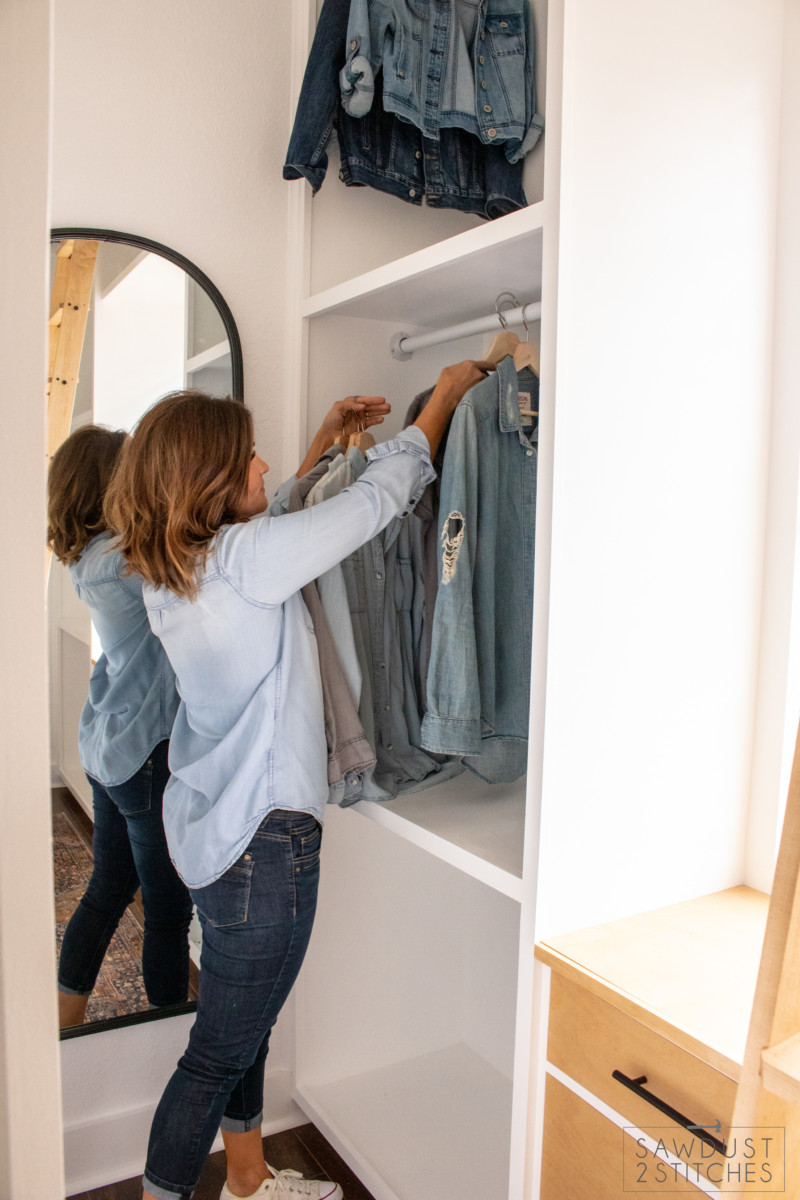
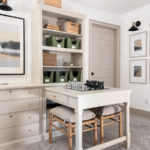
Well without further ado, let’s dive into the last leg of the master closet renovations. After the dressers were built and the window was cased I was left with my favorite part. The BUILT-INS! When orchestrating this closet I designed 95% of this units to be stand alone, so that I could build them in my shop and then just bring them inside when it was time to install. (It makes for a lot less walking.) So once main focal point was built (dresser), I began working on the remaining wardrobe style units. 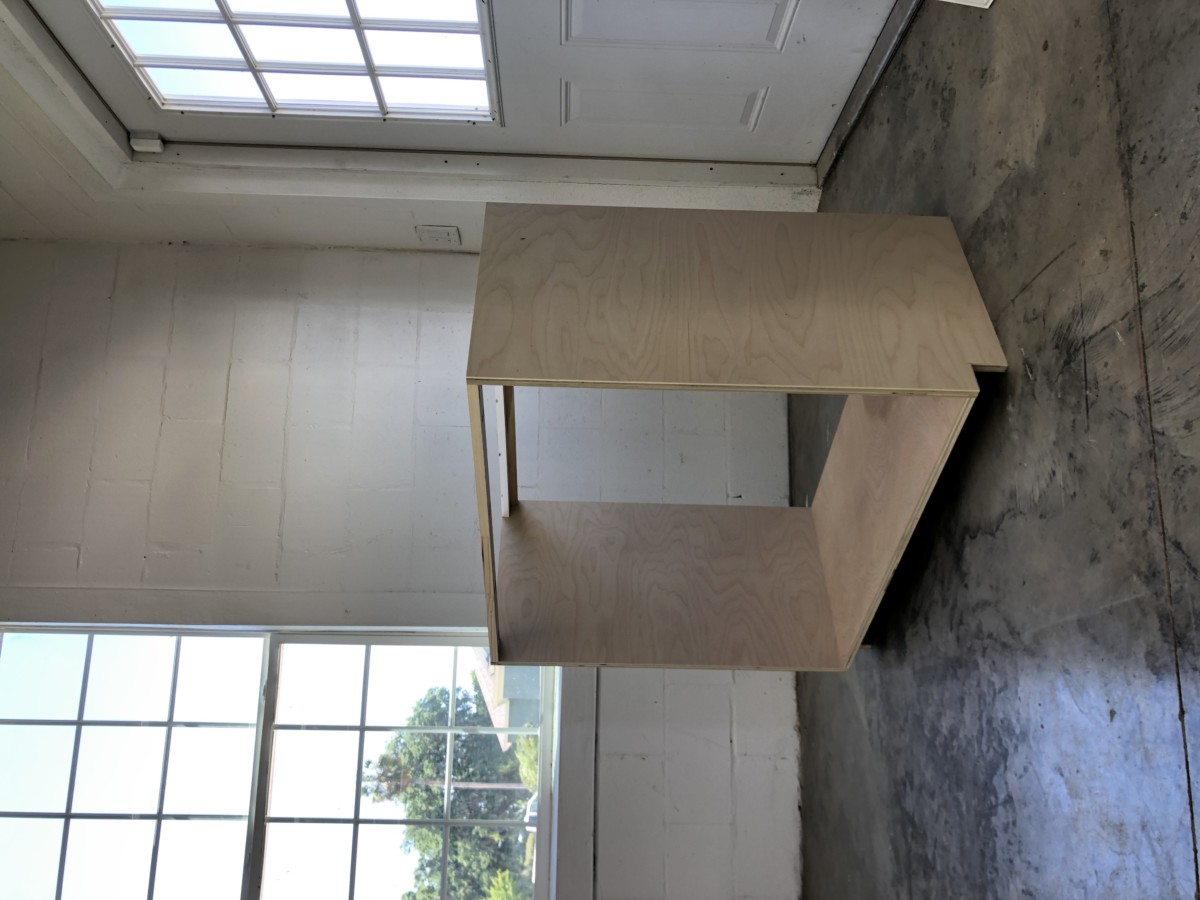
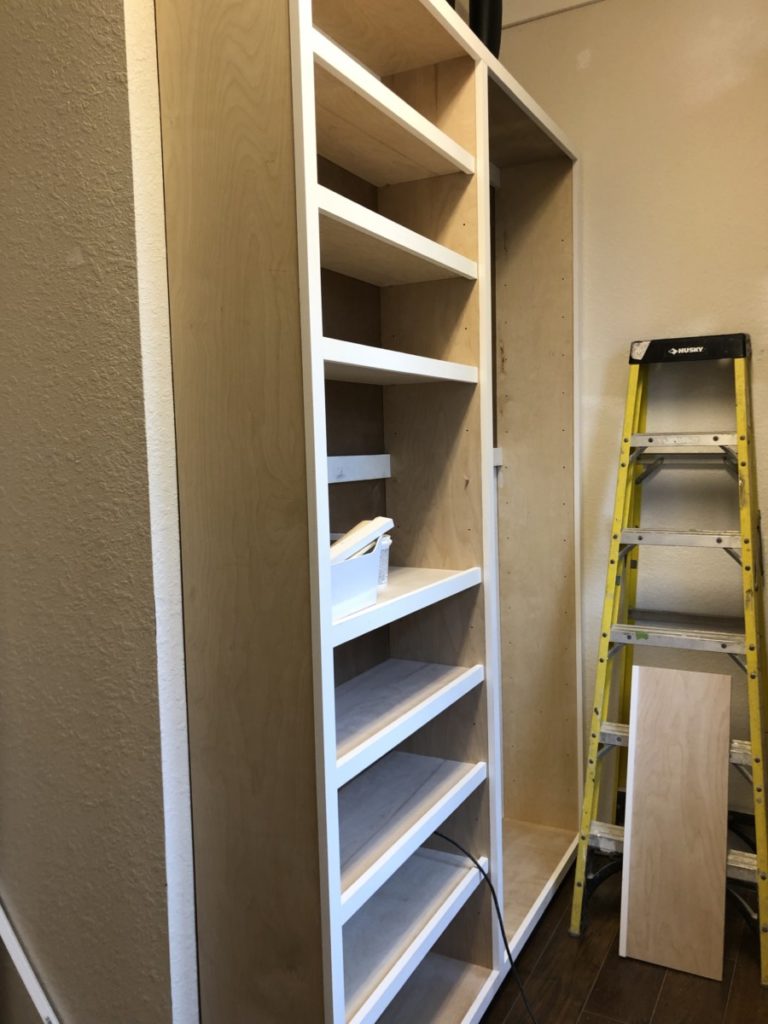
Building a wardrobe is essentially building a cabinet carcass. In fact if you are a little timid to build your first dresser or cabinet then building and open style cabinet (Like a closet wardrobe) would be a GREAT place to start! It essentially only consists of solid sides, and base, and then typically it will have rails that support the top and the back. It really is that simple! Deep breaths, cabinets are just boxes. You can choose to notch out the base to serve as a toe kick or you can also take another route and just layout a platform that all the cabinets will sit onto. I actually use both methods depending on the situation. (I won’t be giving build plans for these wardrobes, simply because the odds of someone needing these specific dimensions are minuscule at best.)
 Time for more boxes.
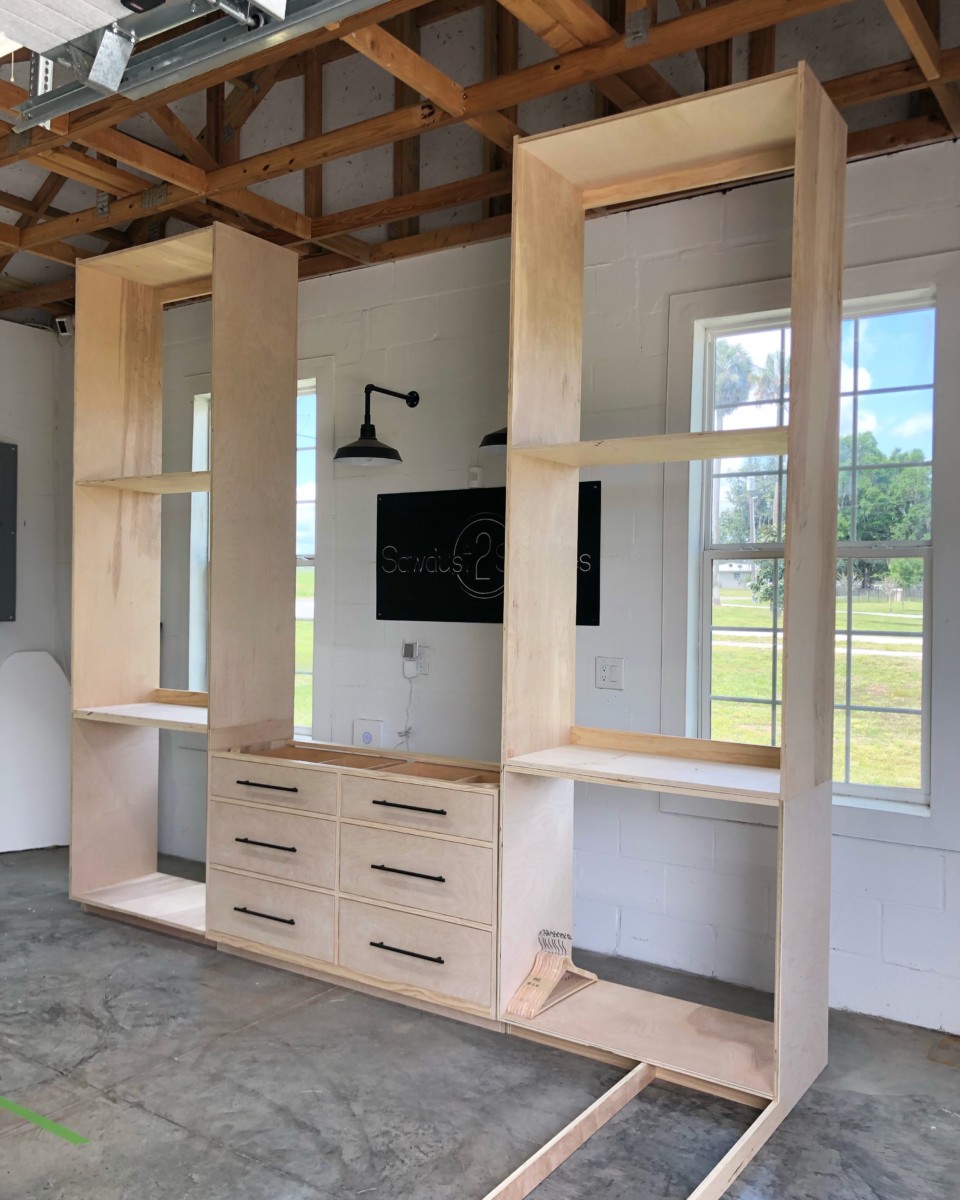
So as I was building these units I started to doubt my own measurements. Everything looked so HUGE. So, if you struggle visualizing or want a reference of size here is a tip for you: FrogTape Painters tape! I took measurements of the closet and mapped out an outline on the floor of my shop using tape. It gave me a really great visual when I was configuring dimensions for all the shelves. Once I had my space mapped out a little better I proceeded full steam ahead!
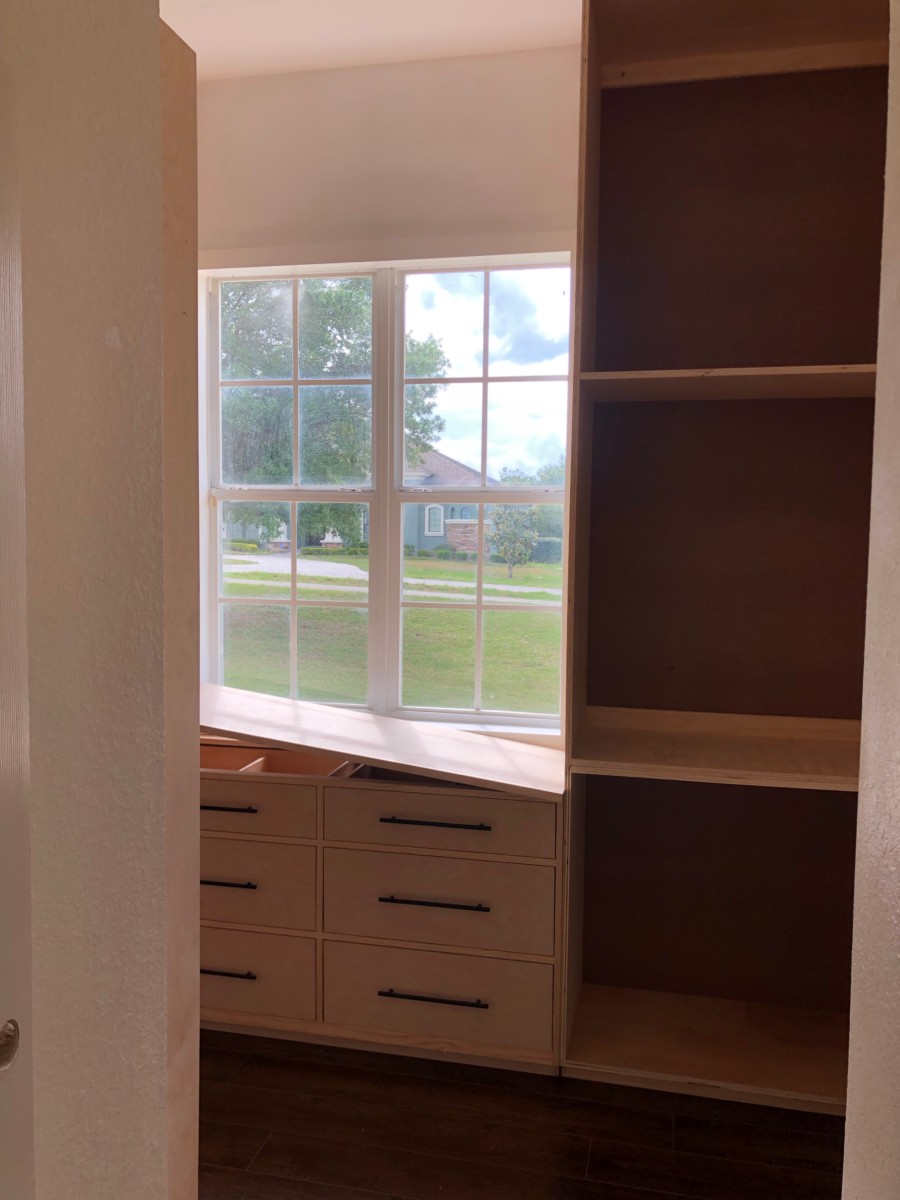
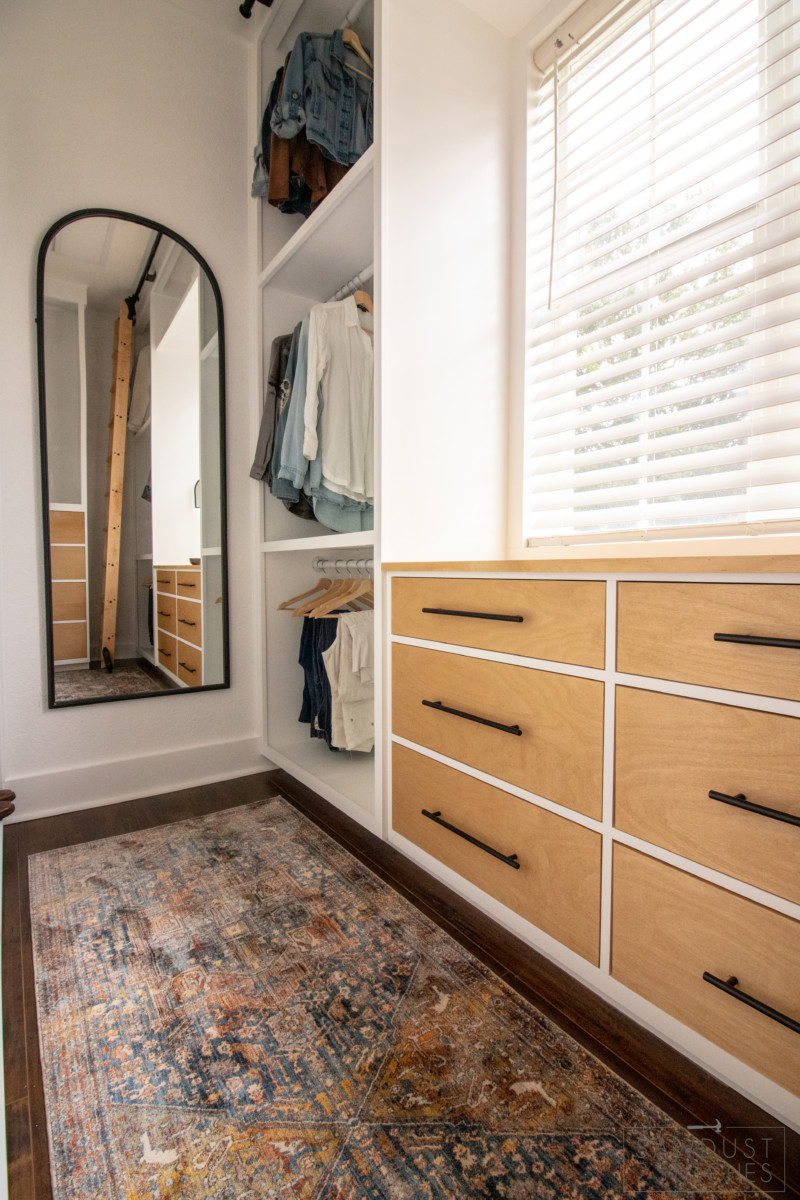
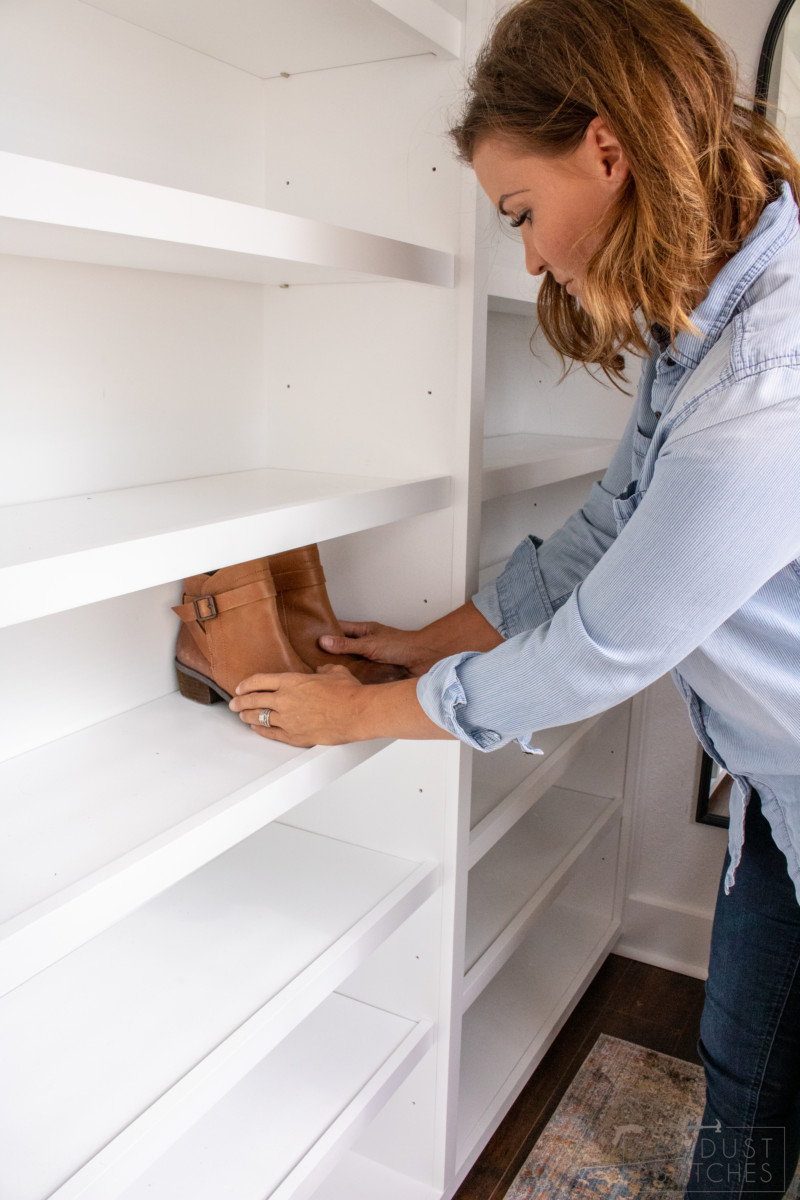
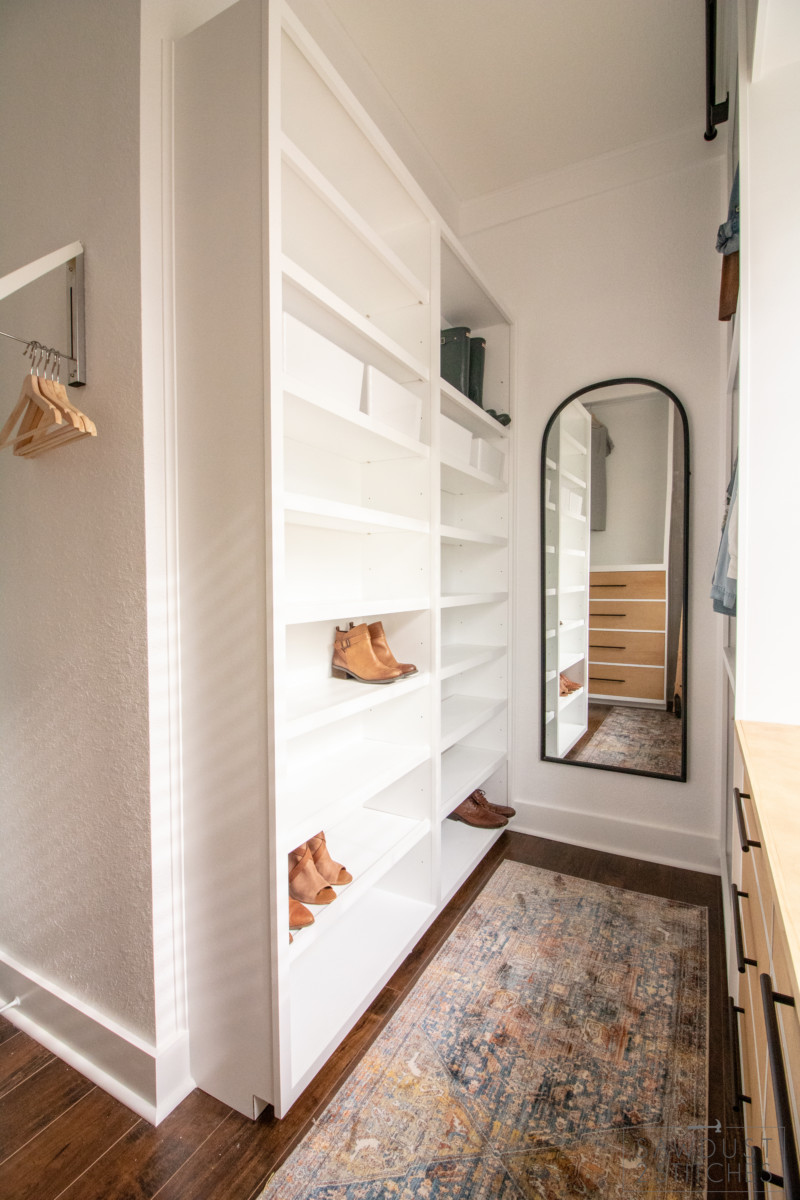
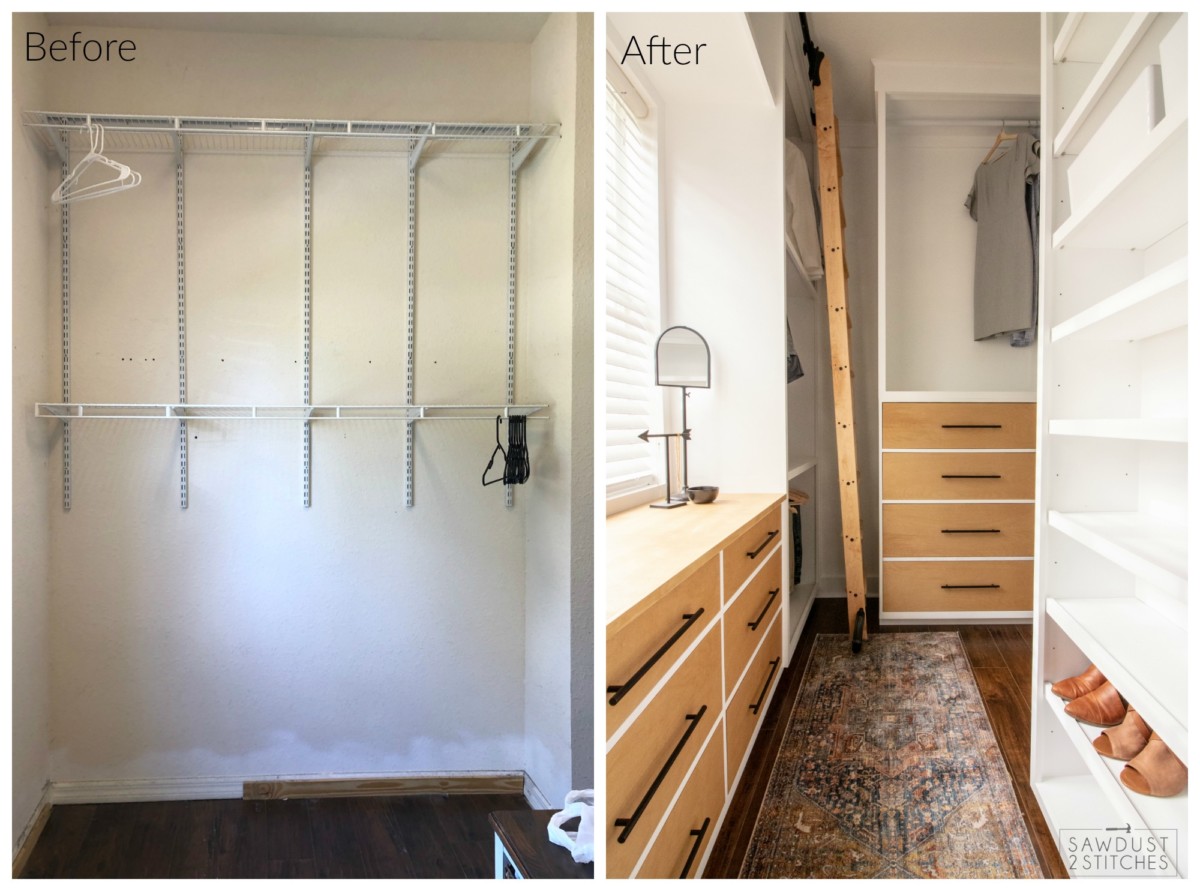
 I ended up building another dresser that would also act as our laundry hamper. (Build Plans Coming Soon.) I also added three more large wardrobe units. I created a very long wardrobe that I stacked on top of my second dresser. Also, after laying out the space with tape I realized I did in fact have space for some shallow shelves. Far too shallow for any clothing, but perfect for shoes!
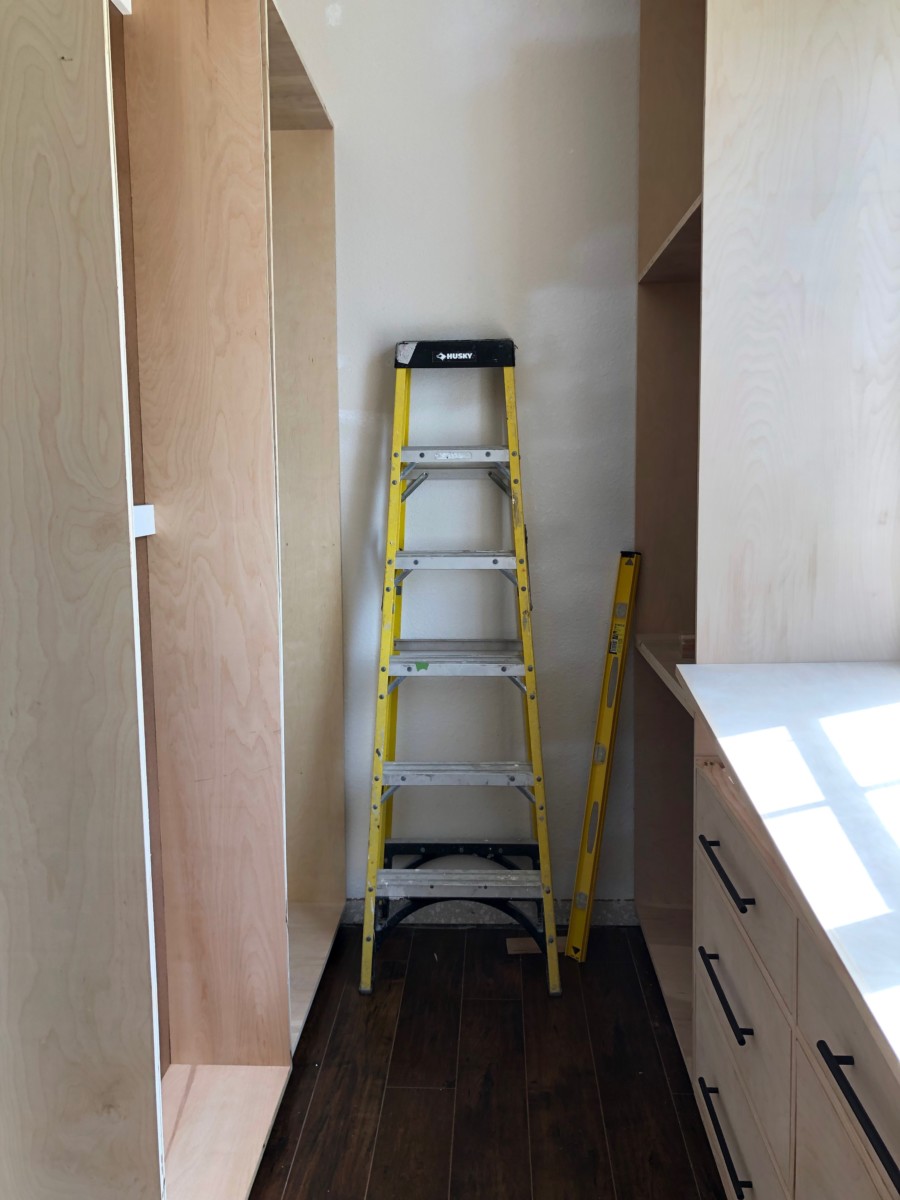
Once everything was built I was ready to move this party inside! I actually carried all the units to the back porch without backing on them. Once I had them closer to the final destination I attached a thin piece of 1/4″ paneling to the back. (Made it a little less awkward to carry.)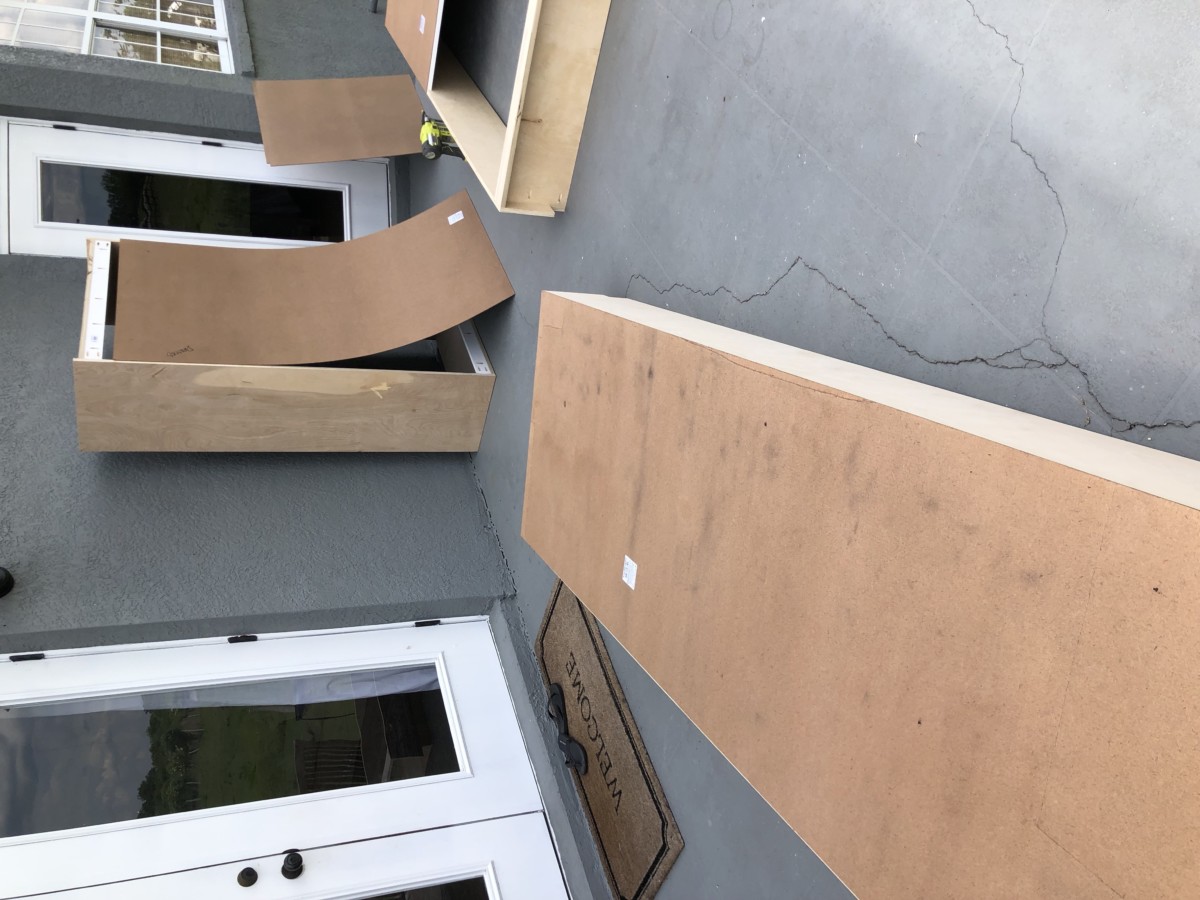
Once all the backs were in place, it was go time! For the most part the pieces all went in without a hitch. Every once in a while I would need to shim a piece here and there, but overall it fit like a glove!
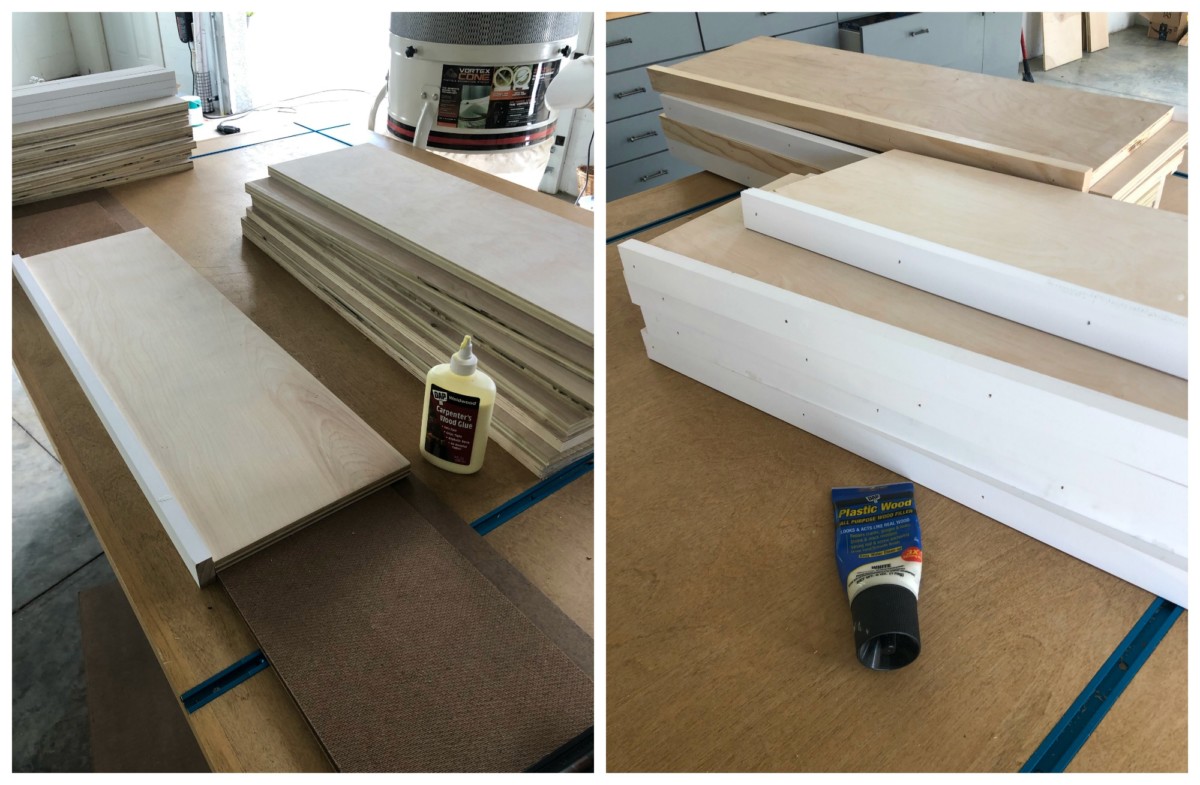
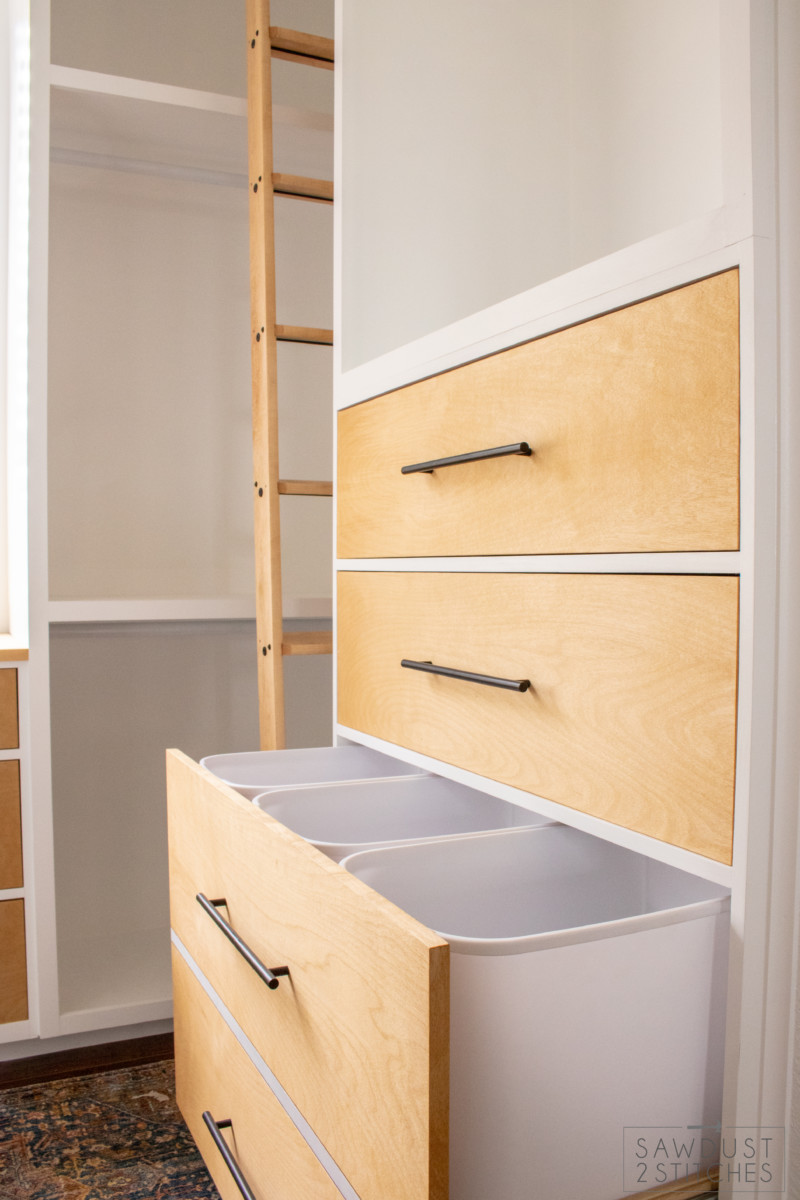
Once all the units were installed I did use some beefy bolts to secure all the units to the walls and then I used 1 1/4″ screws to secure the units to each other. These suckers aren’t going anywhere! Next on the docket ? Making the shelves. This was a simple process. I made all the shelving cabinets with adjustable shelf pins. So to mae the shelves all I needed to do was cut the 3/4″ ply wood to size and add a piece of 1″x2″ to serve as a lip. I just attached the lip using DAP wood glue, then tacked them in place using a 16 ga. nailer. Then I just filled the nail holes using DAP Plastic Wood, sanded, and wiped down and they were ready for paint!
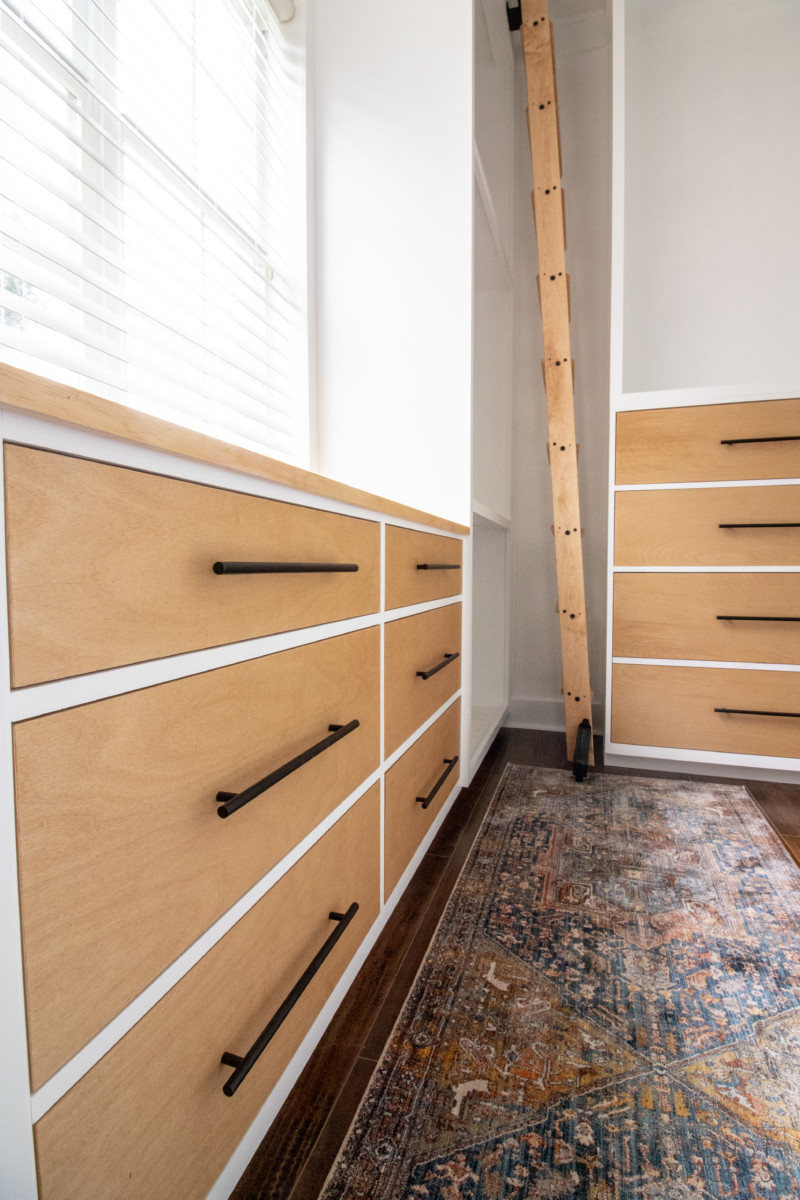
 After the shelves were complete I finished up working on the face frames for all the units. This is such a rewarding part. You really start to see everything come together, and you are able to hide a lot of discrepancies; however it still isn’t perfect, yet…
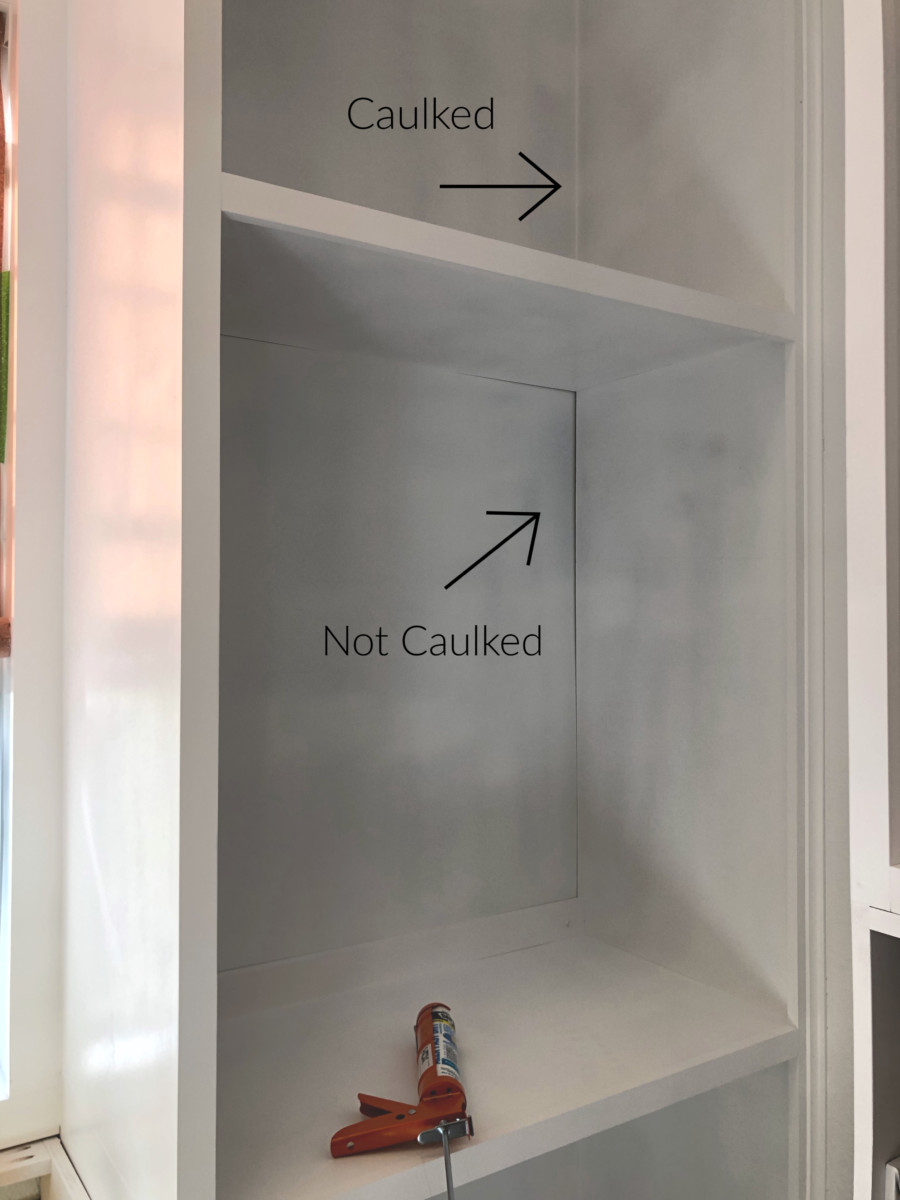
 Once all the trim work is finished is the time to bring in my “magic eraser’ for trim work, caulk! Even the worst of gaps can melt away when DAP caulk is utilized properly. If you are interested to see more about where and how I used it make sure you check out my Instagram Stories here. OR if you are interested in learning on how to trim out a room and use caulk, use my tutorial here.
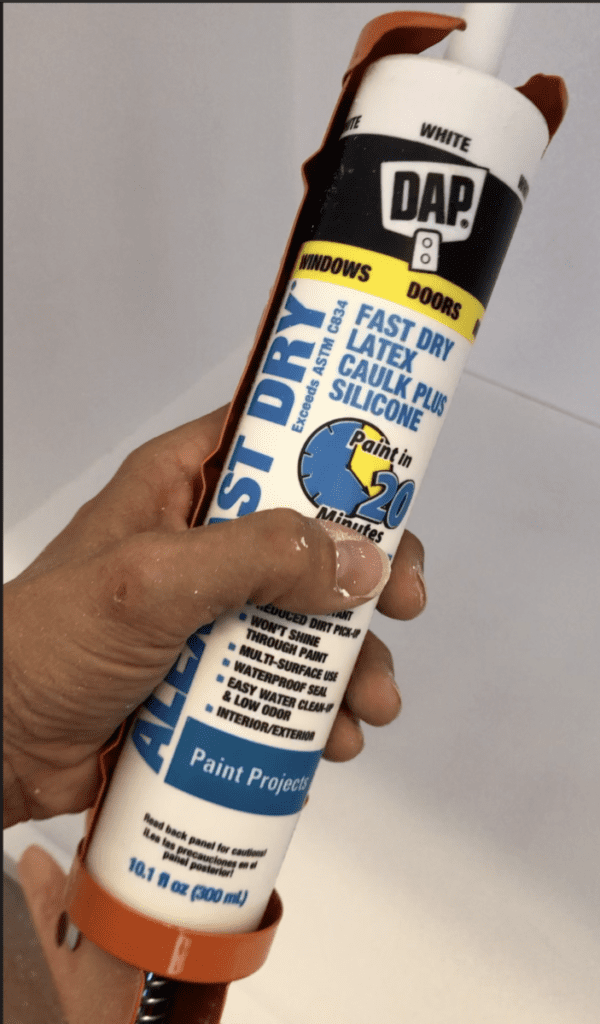
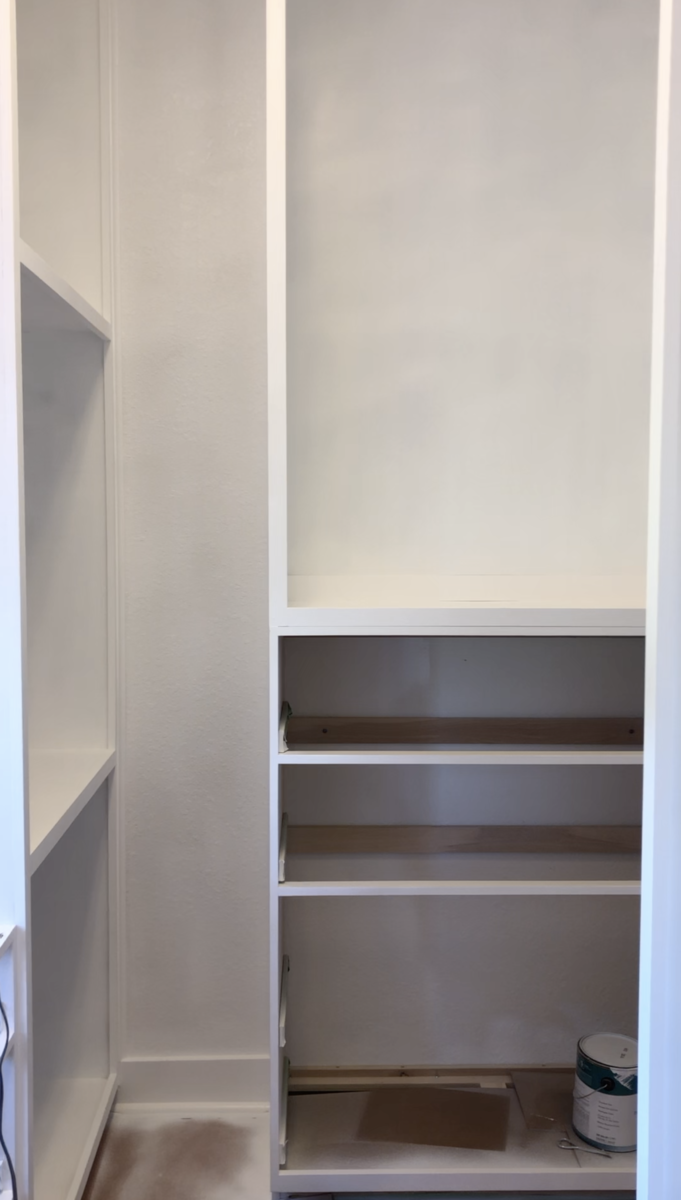
Once my first pass at caulk was done, I prepped the area for paint. I used Frogtape to tape off any surface that would not be painted. In this case that was very little. I only needed to cover the floor and the window panes. The rest I intended to spray, ceiling and all! Once the first coat of paint was on, it was more than obvious what joints I missed. But it clearly also reinforces my prior statement, “DAP caulk is like a magic eraser for trim work”.
 After I made a second pass with my Caulk gun, I like to prep all my surfaces before coating again. To prep the surface like to go over all the painted surfaces with a sanding sponge and wipe down. This simple steps helps ensure a smooth finish. You can read more about the process here.
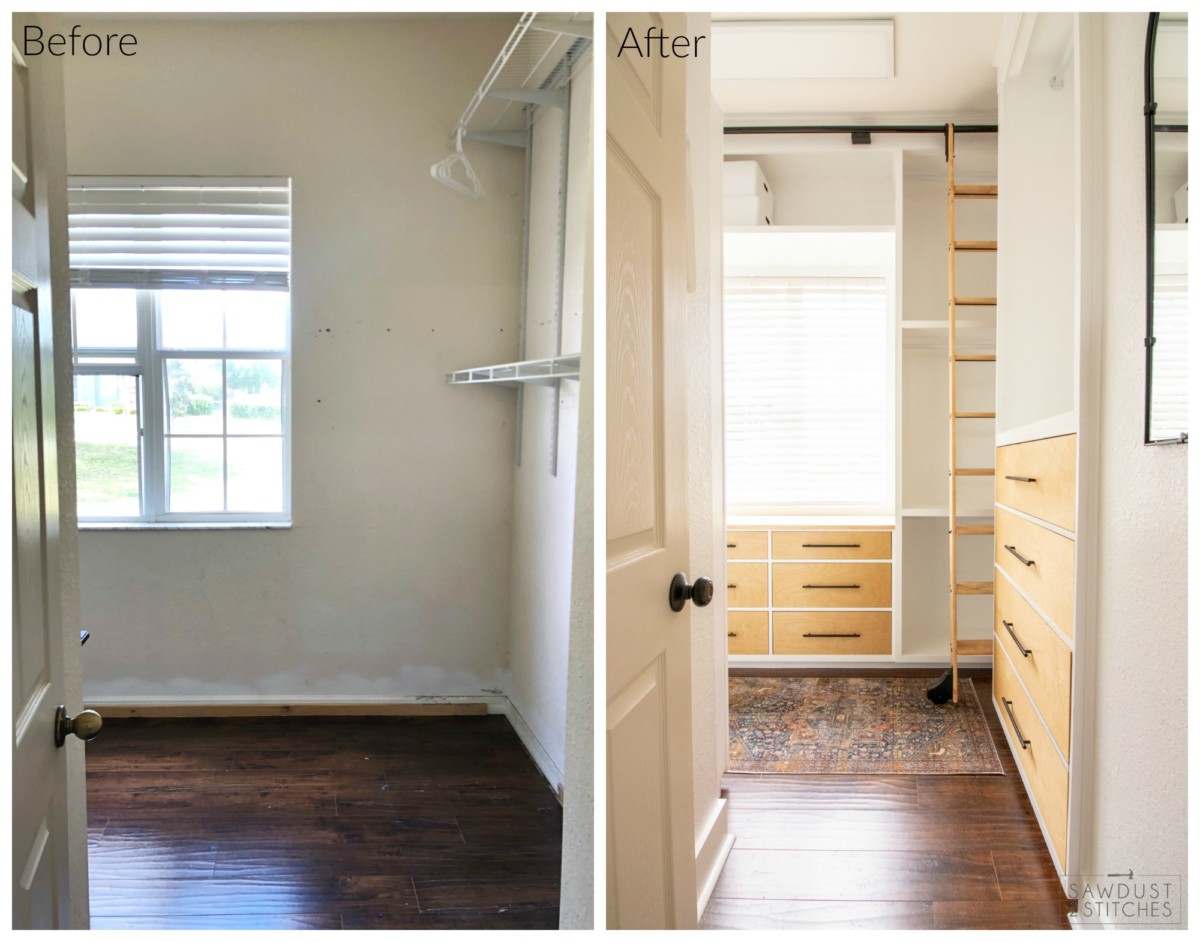
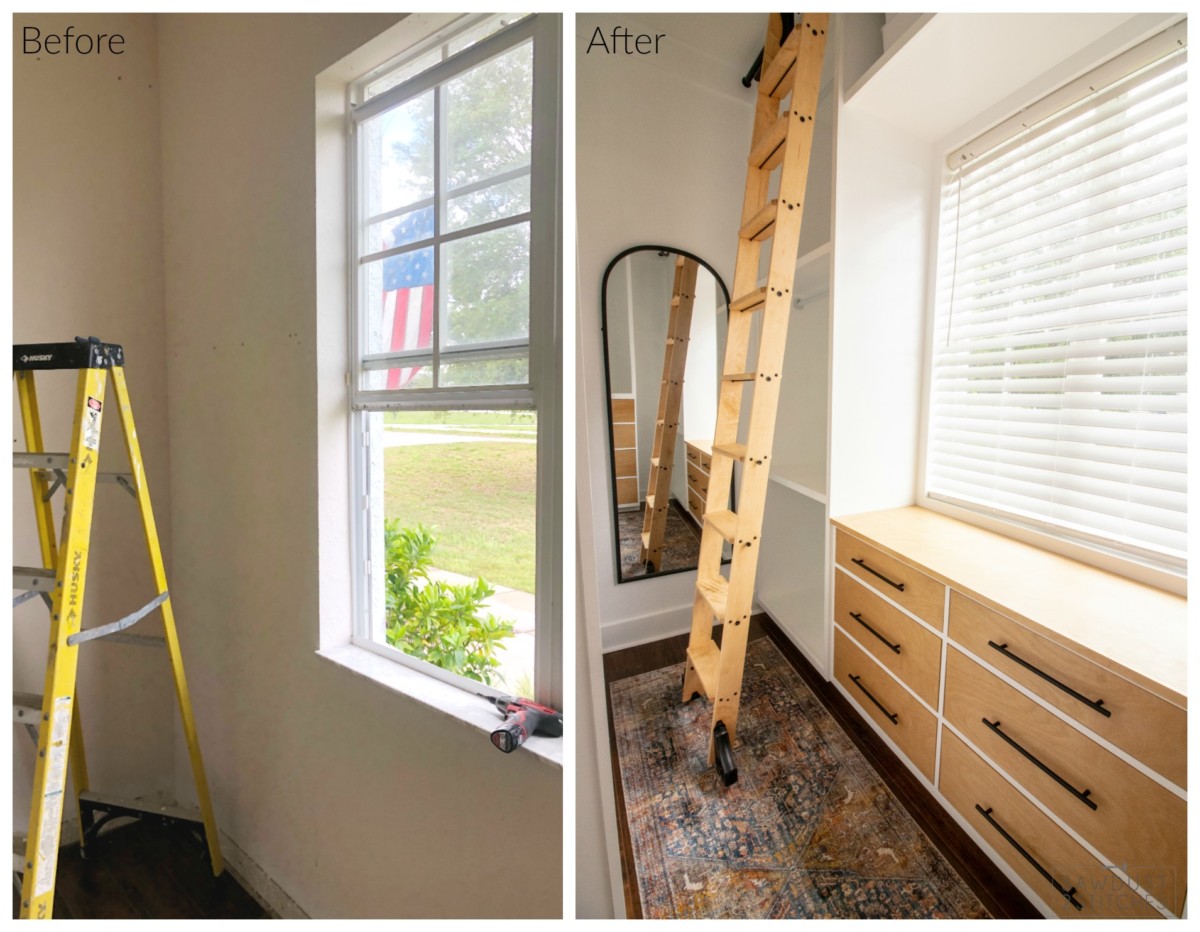
 The painting was the last thing that needed to happen before I could begin installing all the hardware… and honestly the hardware was one of the most exciting parts! You see, when I first the master closet when we were walking the house with the realtor, I kept thinking man those are tall ceilings. They would be so perfect for a “Beauty and the Beast” library ladder. Well fast forward three years, and I am finally installing my rolling ladder. I actually designed the entire closet layout with a rolling ladder in mind. The rolling ladder would allow me to reach all my upper cabinets, plus they are just straight up cool!
After looking online, I found that Rockler Woodworking had one that was just the ticket! You can get all the details here.
It was basically a kit that you fill in the questionnaire and it tells you what all you will need for you specific space.

Once the ladder was installed I was pretty much done… which pretty much bring us to the reveal . So are you ready to see the grand reveal!?!?! Heck yeah, you are. So without further ado.

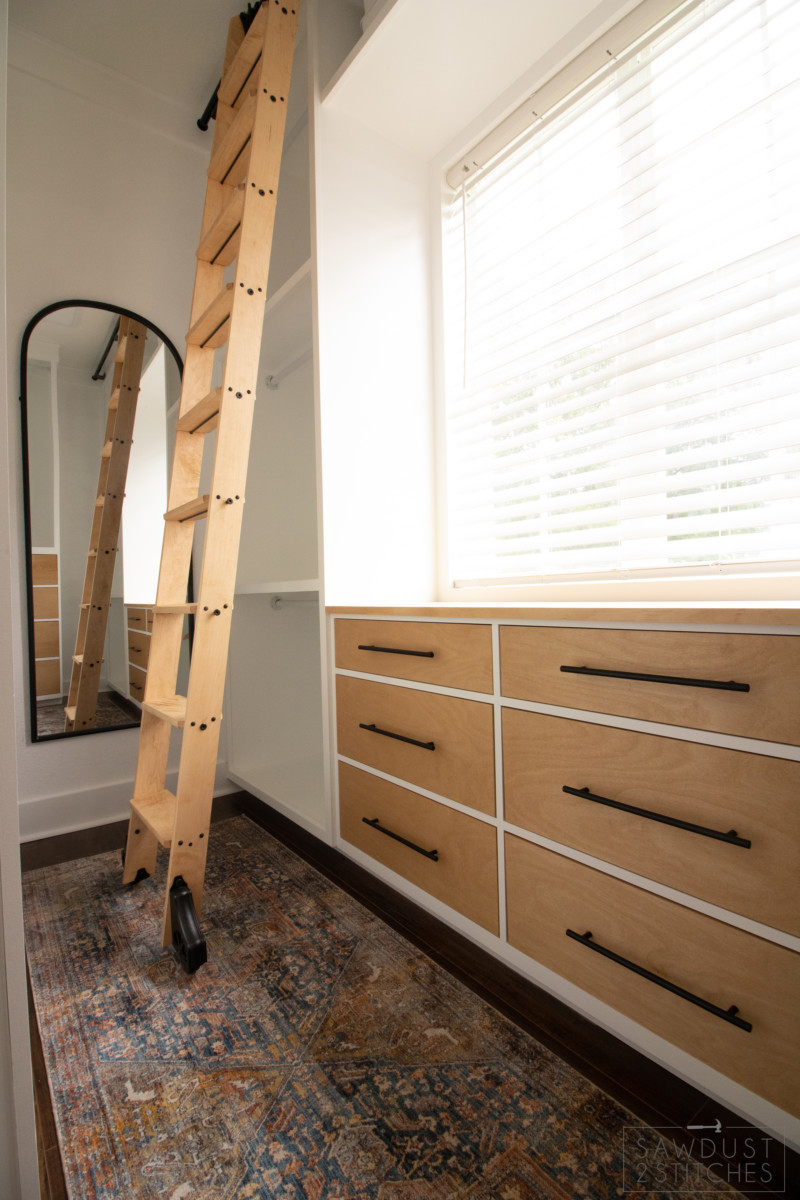
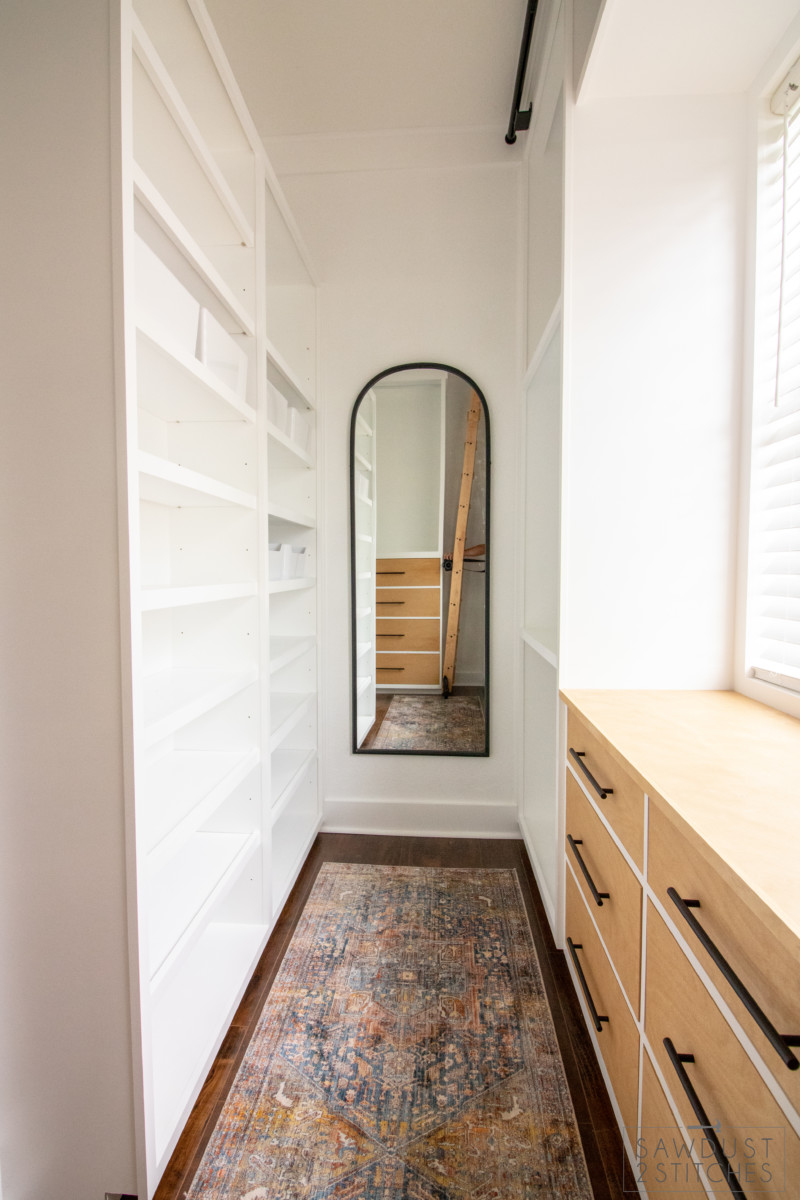


 Well there you have it folks! My completely transformed master closet! I am already loving the optimal level of organization this build encourages. Now that this space is done, it has me rethinking every single closet in my home. I’m thinking my walk-in pantry could use a little help… we will see. Until next time.
Take Luck,
Corey


Looks great! Where is the mirror from?
It is from Magnolia Market. I bought it from a local vendor.
I love this. We don’t have room in our closet for this, however I want to do built-ins on either side of the window in our bedroom.
Continue your great work!! You are an inspiration
Thank you so much!