*This “How to : Exterior Door Makeover/Repair ” is sponsored by DAP and includes affiliate links. *
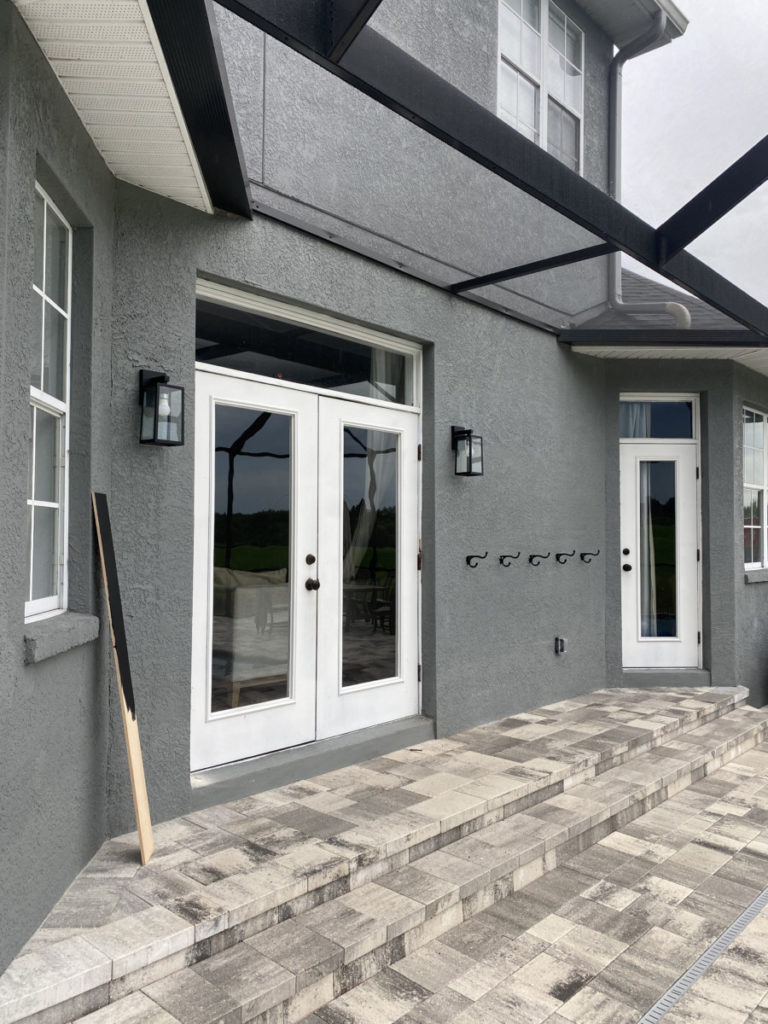
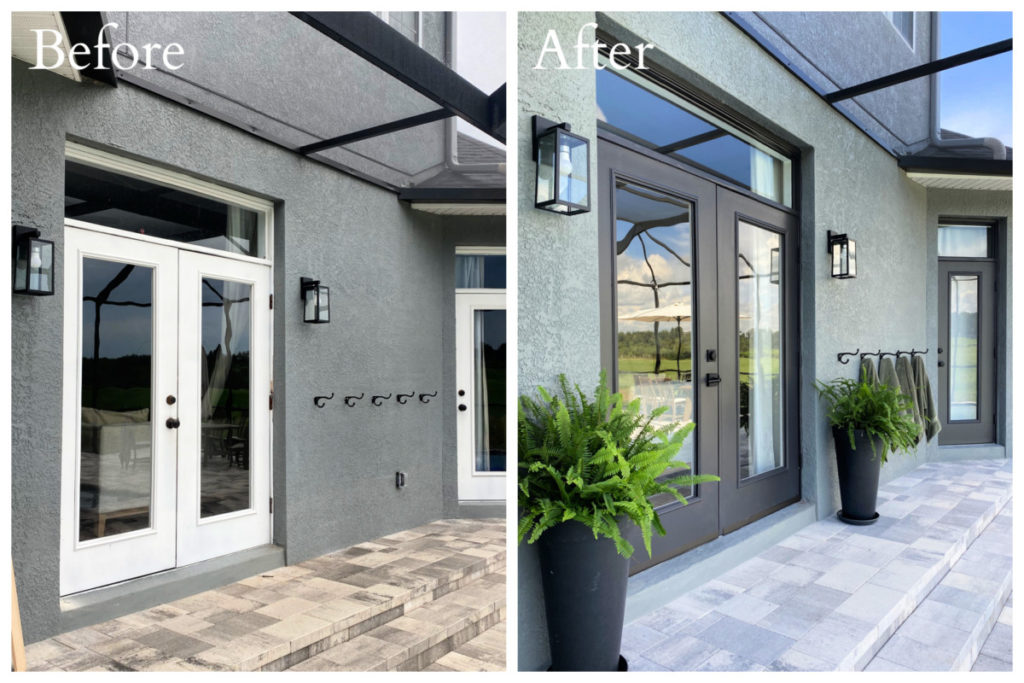
While working on my back patio makeover I made the executive decision that our poor back door needed some lovin’. Time has not been kind to these double doors. They take a brunt of the sun and rain without any protection from our crazy Florida weather. As a result there is a considerable amount of water damage due to poor weather proofing. Let’s fix that! In order to do that I teamed up with the great folks at DAP and I used the following tools and materials:
| Tools Suggested: | Materials Used: |
| Caulk Removal Tool | DAP Plastic Wood All Purpose Wood Filler |
| Nailer ( If Necessary) | DAP Dynaflex Ultra in Clear |
| Sand Paper | DAP Dynaflex Ultra in Black |
| Caulk Gun | DAP RapidFuse All Purpose |
| Utility Blade Scraper | Exterior Paint /New Door Hardware |
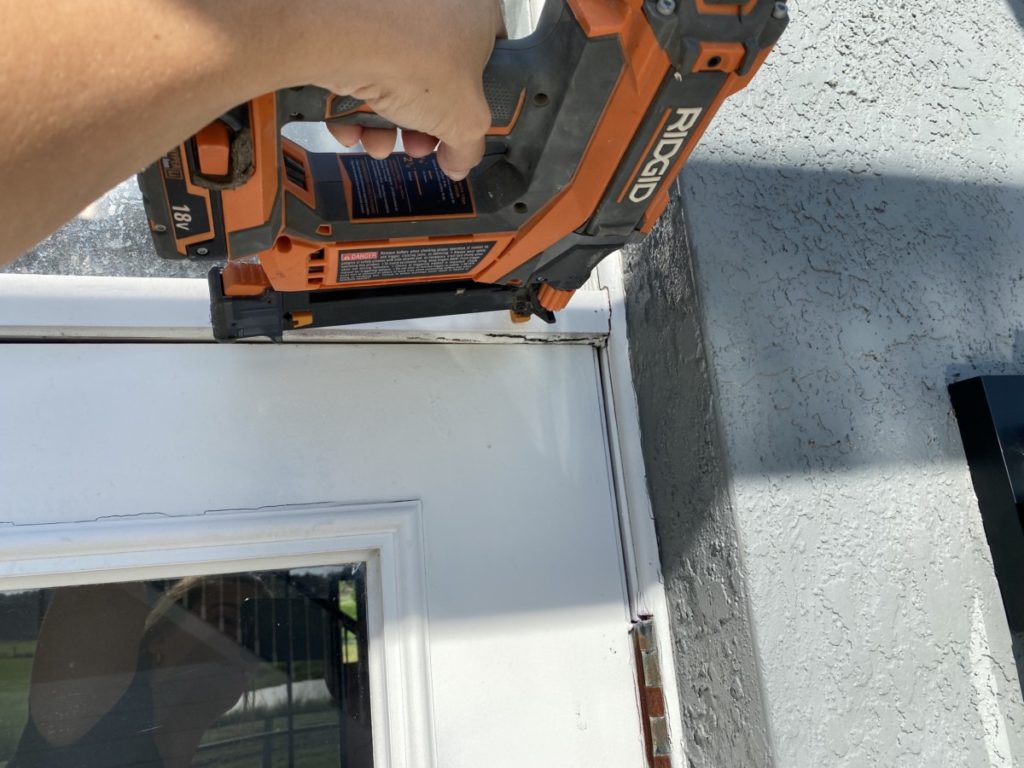
Repair Door
Before I can even think about painting, there are some repairs that need to be made. In my case I had some trim boards that were loose and that were creating unsightly and damaging cracks. I used an 18 gauge nailer to secure them.
After nailing the loose trim, I needed to fill the holes caused by the nails. To do this I used. DAP Plastic Wood All Purpose Wood Filler. This is very important step. If nail holes are not properly filled and then painted with and exterior paint they will allow water in and cause more water damage.
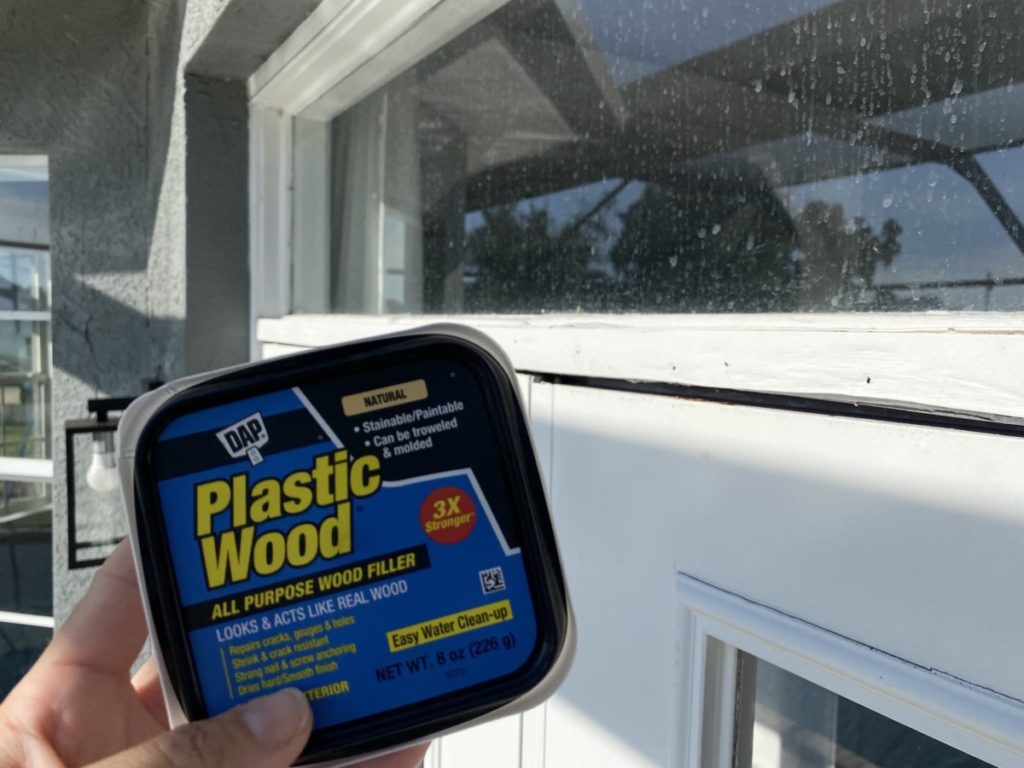
Filling holes is a simple and straightforward process. I use my finger and dab a very small amount and suppress it into the void. Then let it dry! Later in the process I will be sanding the door in preparation for paint, at that point I will sand the excess filler down.
Remove Old Caulk
We are getting close to prepping for paint, however… because we are repairing weather damage we need to add a few extra steps. We will need to re-seal and caulk the door frame and seams, before we can do that we need to remove the old stuff!
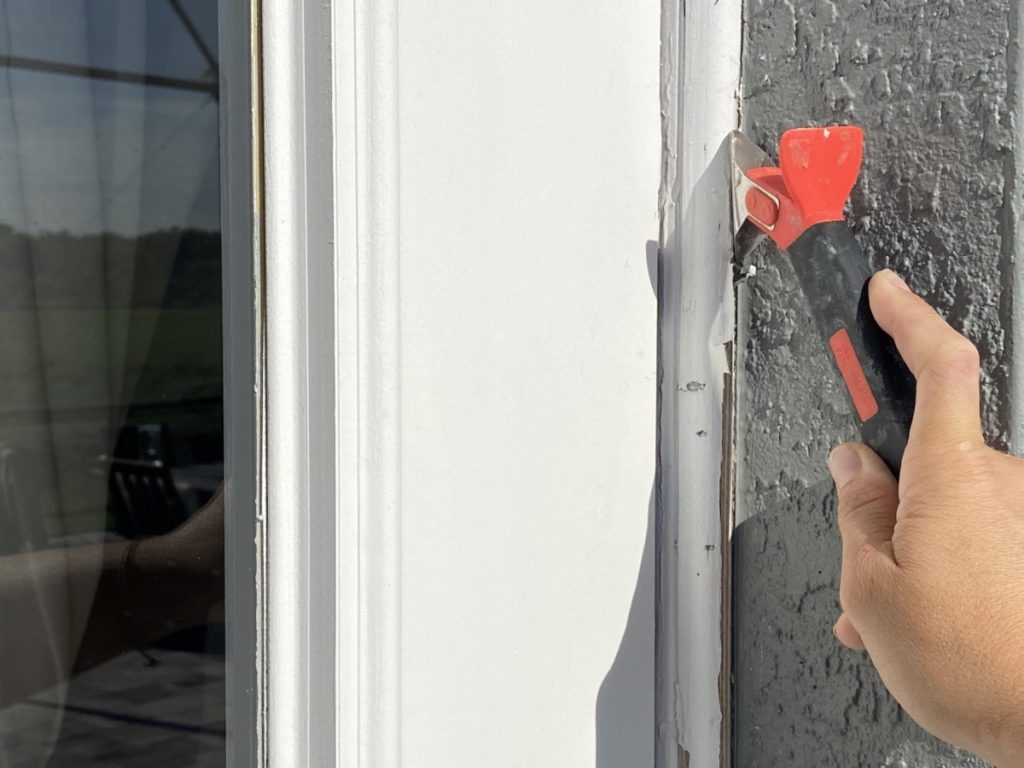
When removing old caulk, I prefer to use a Caulk Removal Tool. It has a hollowed-out tip that allows for fast and easy calk removal.
Prep for Paint
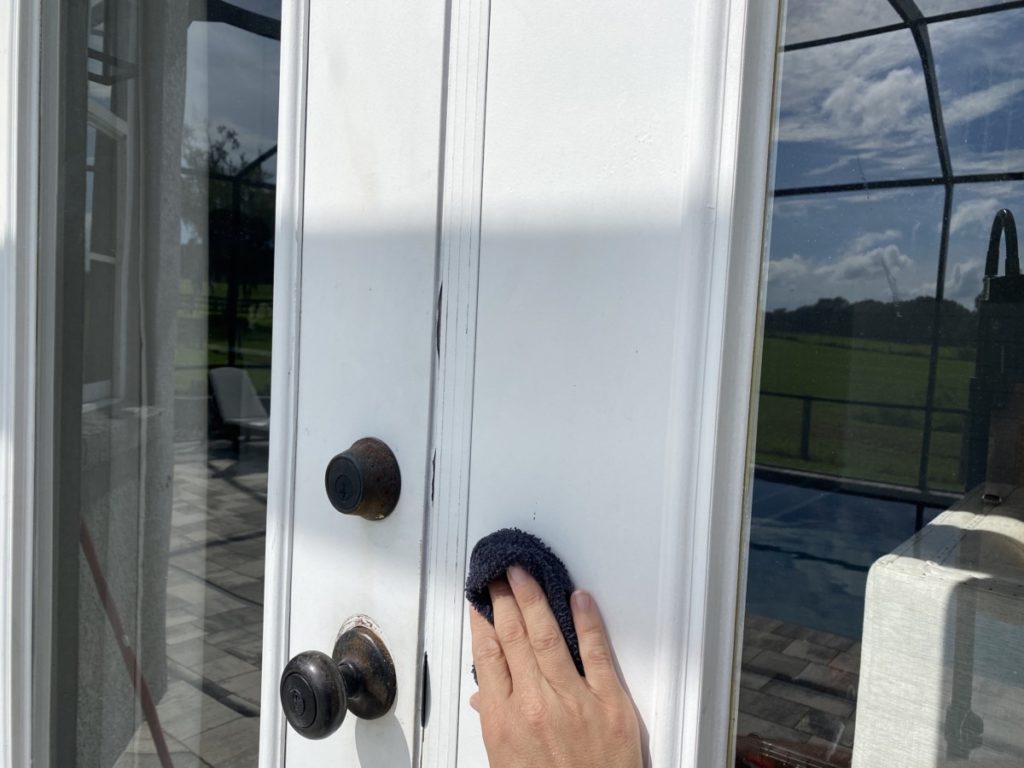
After all the caulk is removed, it is time to move on to paint prep. While many paints claim stick without prep, I ALWAYS recommend taking 5 extra minutes to scuff up surfaces before painting. The goal is NOT to remove paint, but to simply scuff up and glossy surfaces. This will give your paint/ primer something to stick to and prevent future peeling.
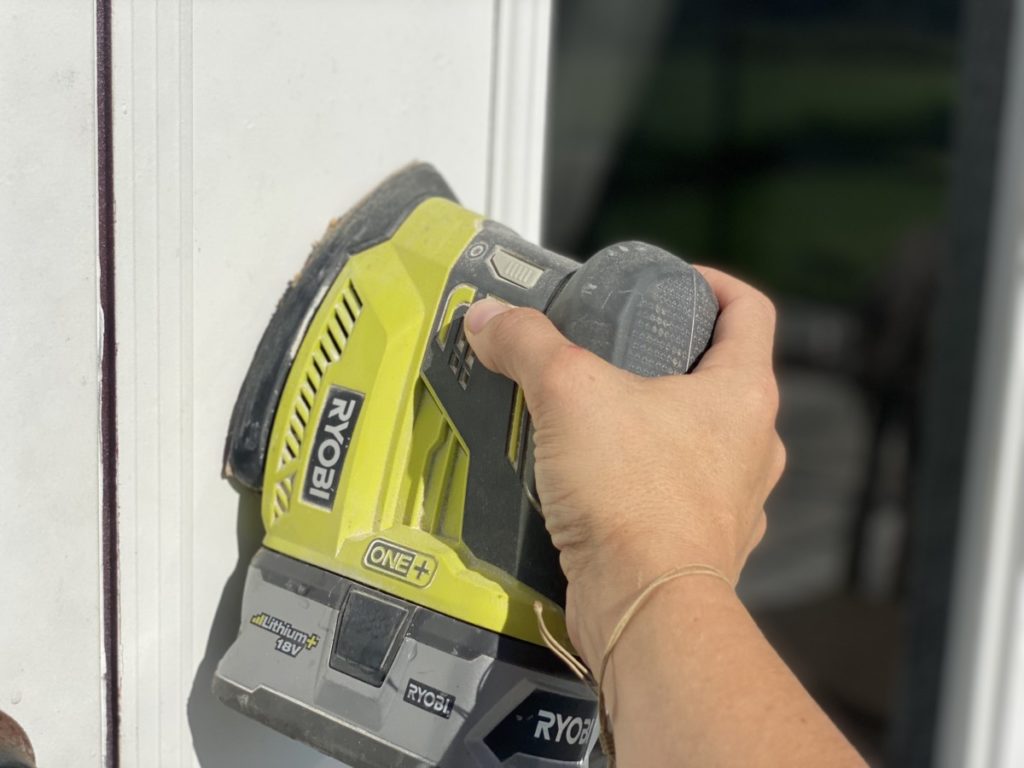
I used a palm sander for the large flat sections and a Sponge Sander for the trim work. The entire process took less than 5 minutes! After sanding I used a damp cloth to remove any debris and clean the surface in preparation for paint.
Caulk and Seal Exterior Door
This next step is CRUCIAL, because this is an exterior door that is exposed to the elements it needs extra protection. All of the seams and joints need to be sealed with a GOOD caulk. My go-to for outdoor projects is DAP Dynaflex Ultra in Clear. This caulk is perfect for all window, door, siding, and trim projects. It is 100% waterproof, and of course paintable! Which is perfect for this project!
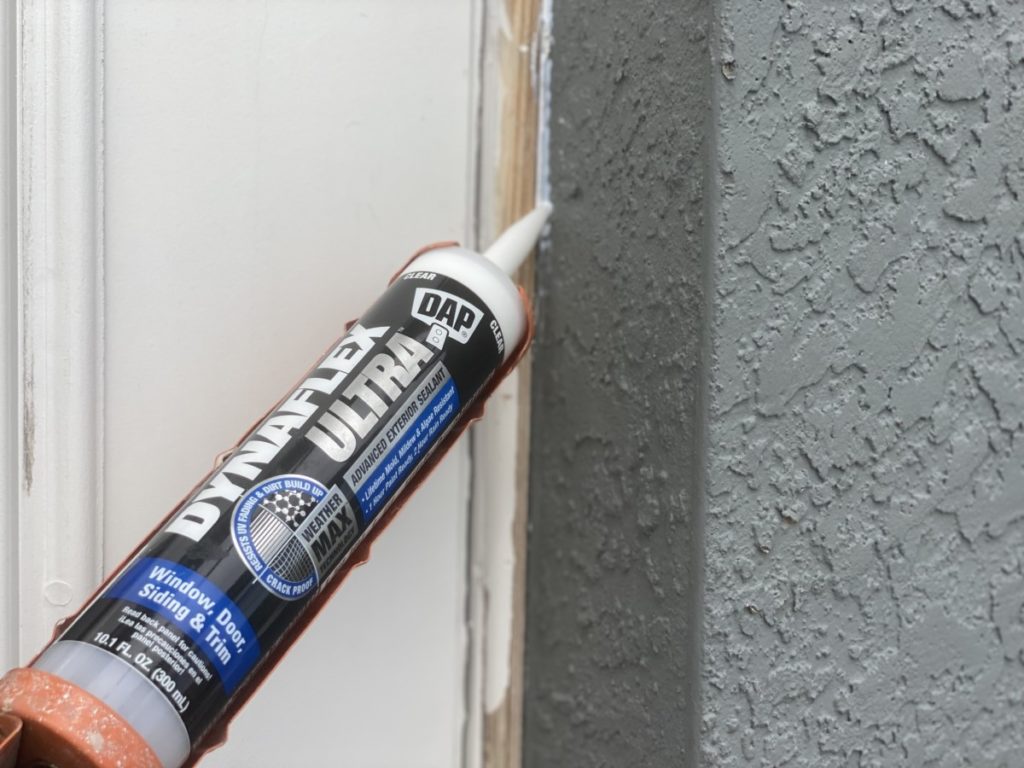
I took extra care to caulk ALL the joints and seams on this project, I want to prevent any future water damage. DAP Dynaflex Ultra in Clear will do just that.
Paint Exterior Door
DAP Dynaflex Ultra in Clear is paint ready in just one hour! About the time I finished caulking and gathered all my paint supplies I was good to go. When painting an exterior project, always select an outdoor paint. Not all paints are created equal. You will need something that is fade resistant and will stand up to the elements.
When painting doors, I tend to start by painting the interior door jamb. Reason being? I have come to realize that it is my least favorite part and therefor sometimes just skip it…. haha, this is a toxic trait of mine. Notice that mine is red? Ha-ha, that is from the original owners! I painted the noticeable outside and lost patience to paint the interior; for that reason, I paint the jamb first, it keeps me committed to being thorough! 🙂
*Jamb= The technical term for the interior frame of the door.
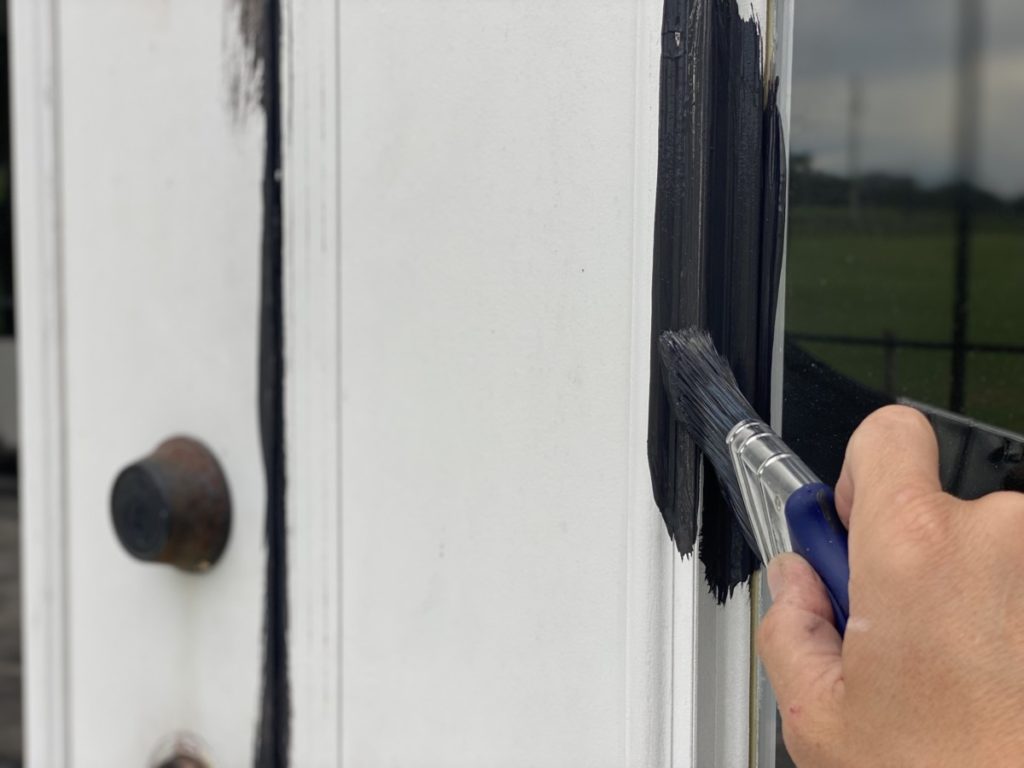
After the jamb is painted I then paint the exterior. In MOST cases I tape off my lines, however in this case I decided not to. Reason being? I live in Florida and the humidity is crazy right now and tape was not wanting to stay put… also, I like using the paint scraping method!
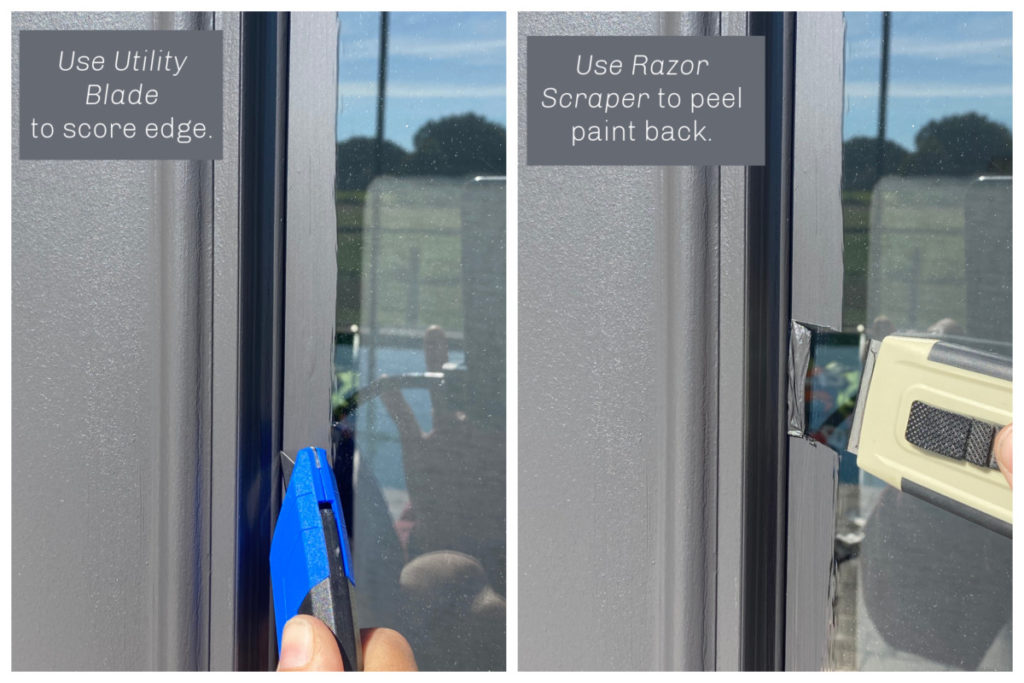
What is the “paint scraping method”? Glad you asked. When painting a piece of trim that is against glass I simply paint the entire seam and allow the paint to go onto the glass. Once the paint has completely dried I score the joint with a Utility Blade and then use a Scraper Razor to clean up the excess paint. It works great!
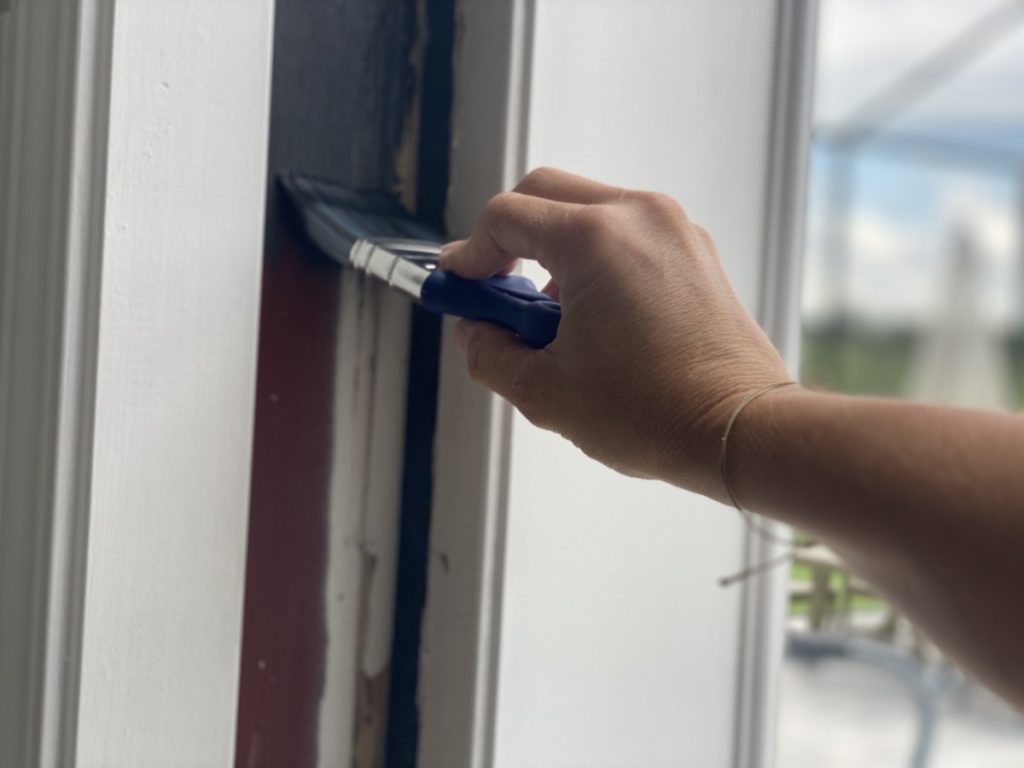
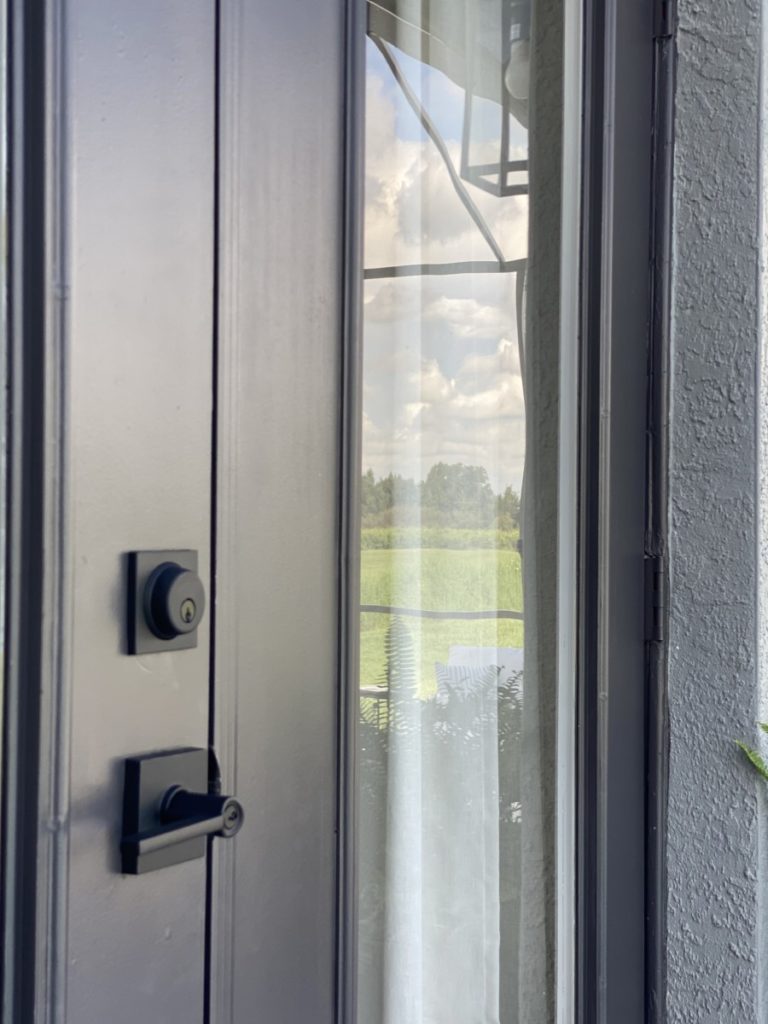
Caulk Glass on Exterior Door
My doors have glass panels, sometimes these are called “Lites”. Over the years of baking in the sun the caulk/adhesive that sealed the trim to the panel was non-existent. I wanted to create a nice crisp caulk line and protect this joint as well.
Yes, I could have used the DAP Dynaflex Ultra in Clear and then painted the seam… BUT I can get a very narrow crisp line using the following method.
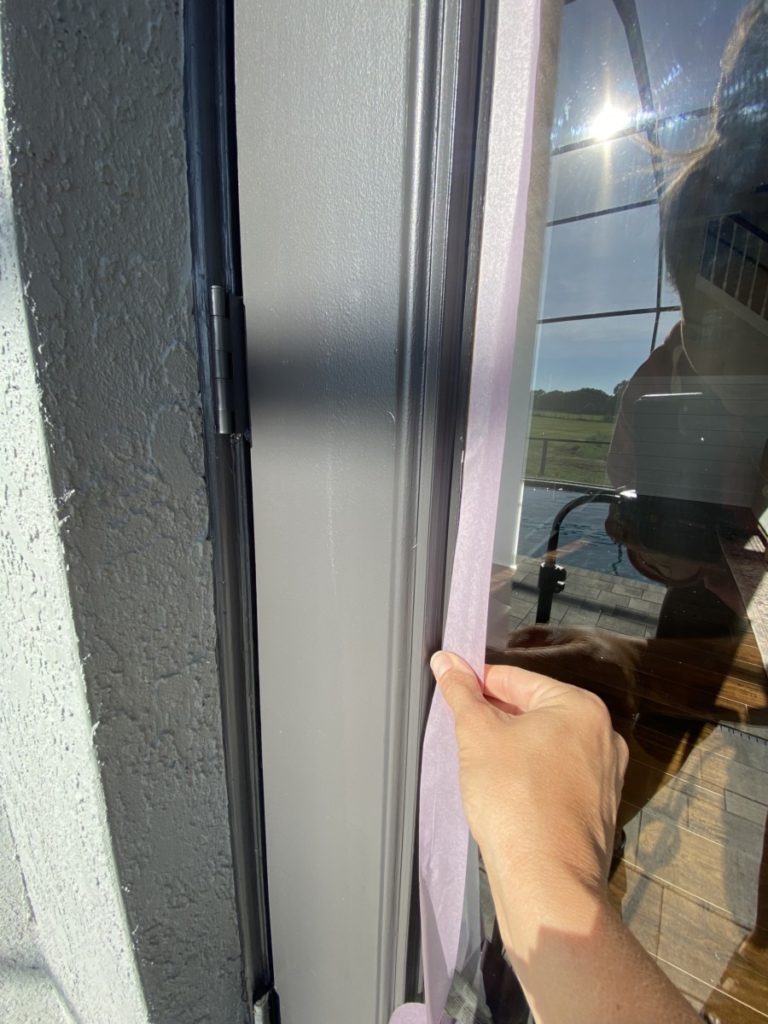
I first taped off the window using a painters tape. I place the tape very close to the trim. (Remember that everything that you do on the outside of the window, will be visible on the inside. Thus the desire for tight crisp lines.)
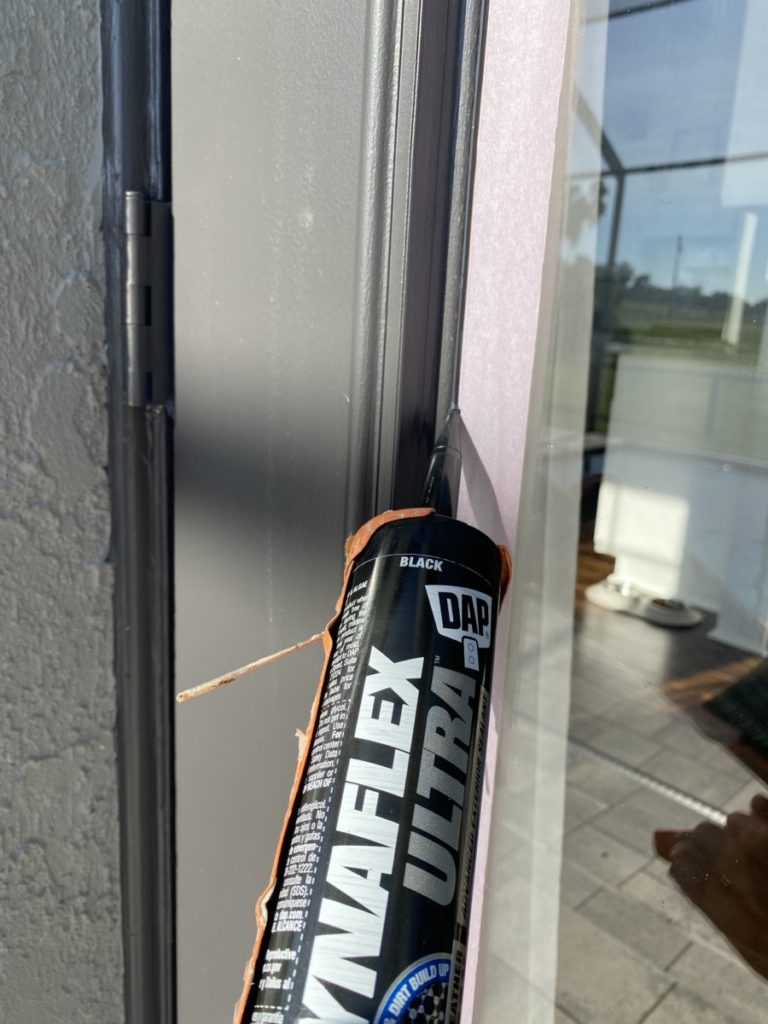
After taping I ran a small bead of DAP Dynaflex Ultra in Black along the joint. Using a baby wipe or a wet finger smooth out the bead of caulk. IMMEDIATELY after soothing, remove the tape. If you wait, you risk the caulk drying to the tape and tearing up the caulk.
Because my doors are nearly black the DAP Dynaflex Ultra in Black works perfectly and creates crisp line that protects the joint and blends flawlessly with my door without needing paint!
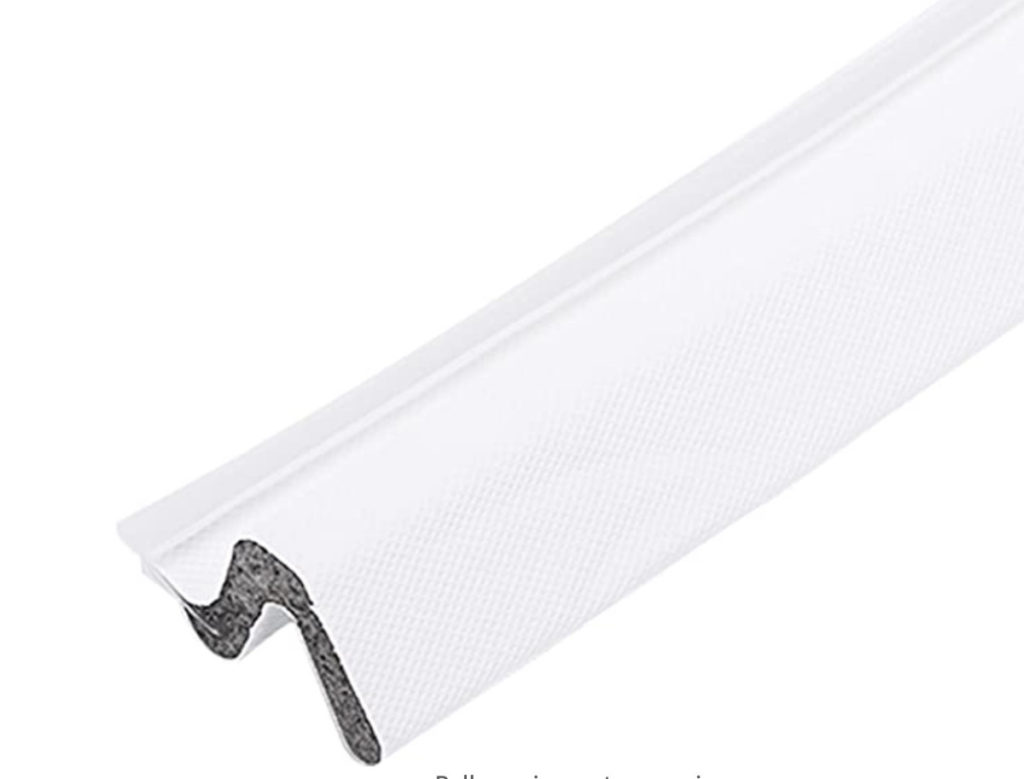
Replace Weather Stripping on Exterior Door
One of the primary reasons I was repairing this door is due to water damage. At this point I had already removed all the existing caulk and replaced with a high quality DAP Dynaflex Ultra. This will mitigate future water damage. However, caulk is not intended to seal the gap between the door and the door jamb. To seal the gap I used Door Kerf Weather Strips.
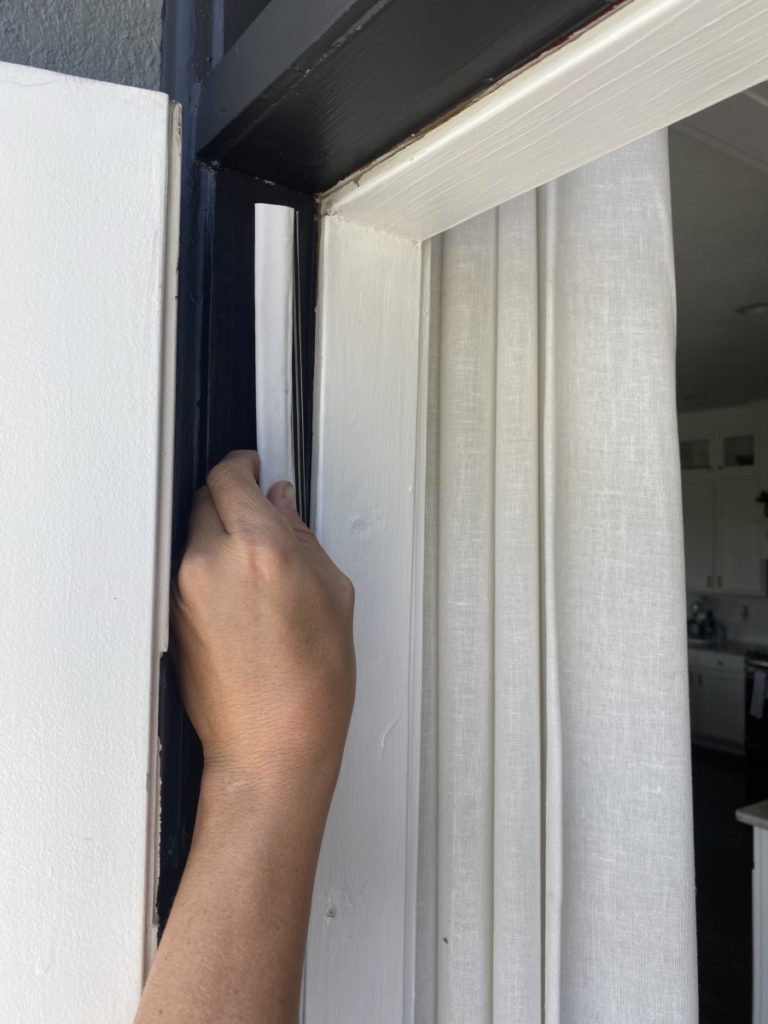
The best way to help prevent water issues is to replace the kerf weather strip. This particular type of weather stripping is easy to replace. Simply pull firmly on the existing strip and the tongue will pop out of the groove. Replacing the strip, is just as simple. Simply push the tongue into place, and cut to fit. This style can be cut with common scissors.
*Please note, not all doors have the same style pf weather stripping, a quick way to check is just give your existing strips a quick tug and see if the strip pulls loose.
Replace Door Hardware
My door hardware had definitely seen better days, and actually the source of a water leak! I am telling you, these poor doors were a complete and utter mess! I purchased the Schlage Latitude Matte Black Deadbolt Set. Follow the included instructions for a quick and easy install.

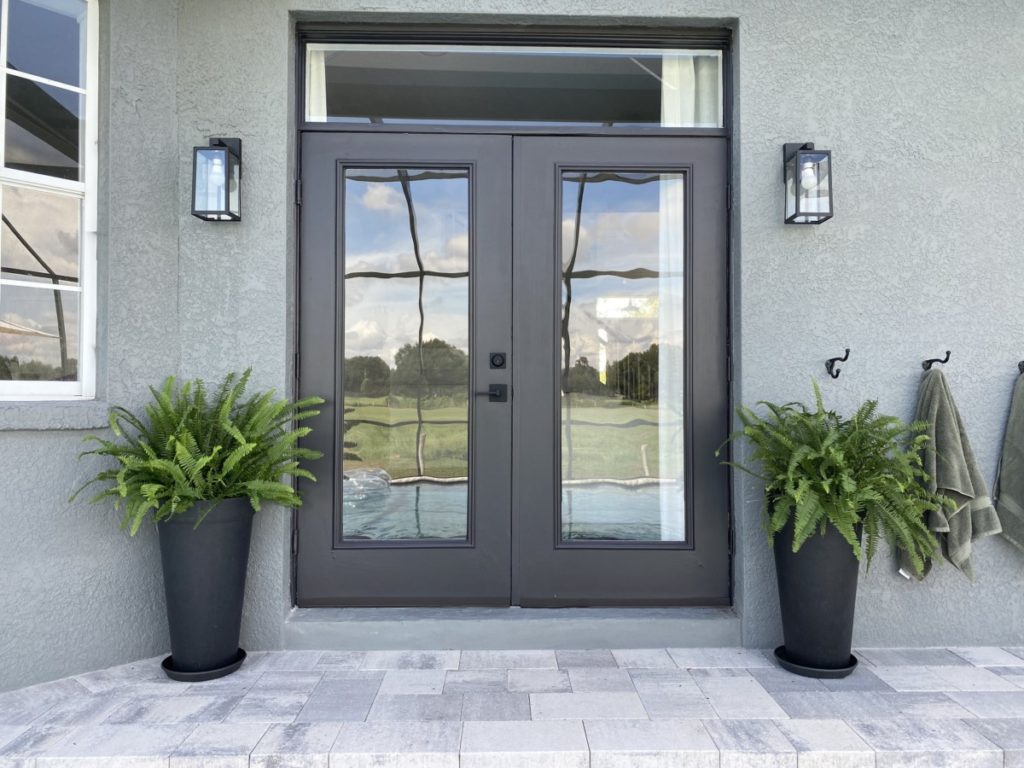
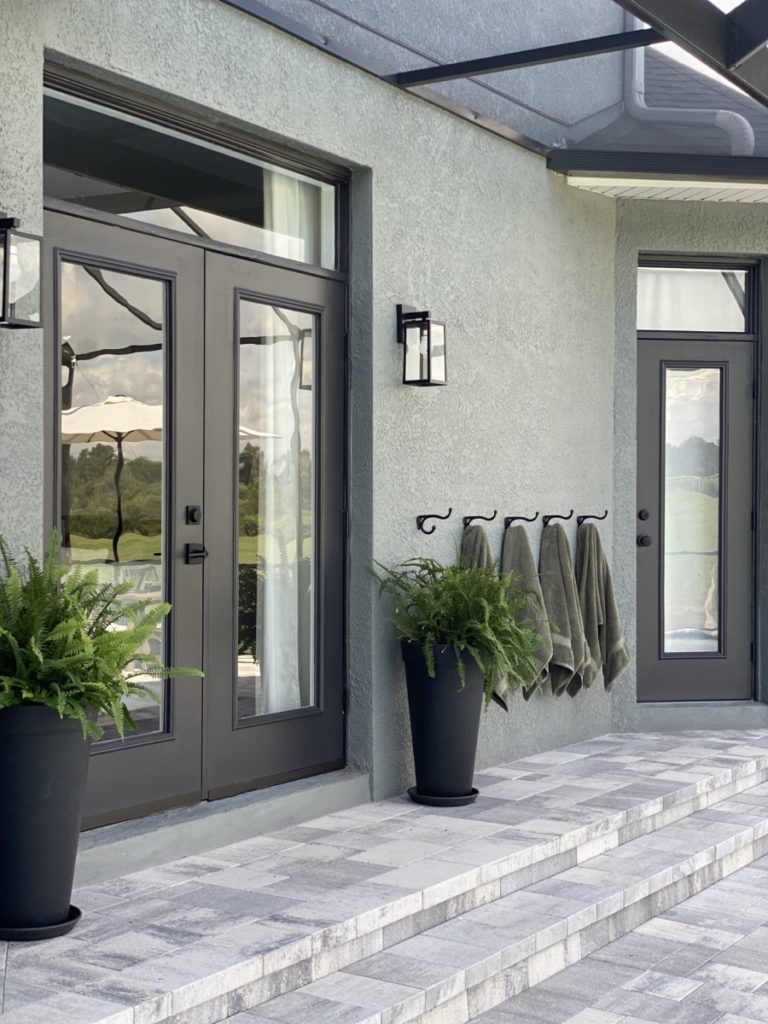
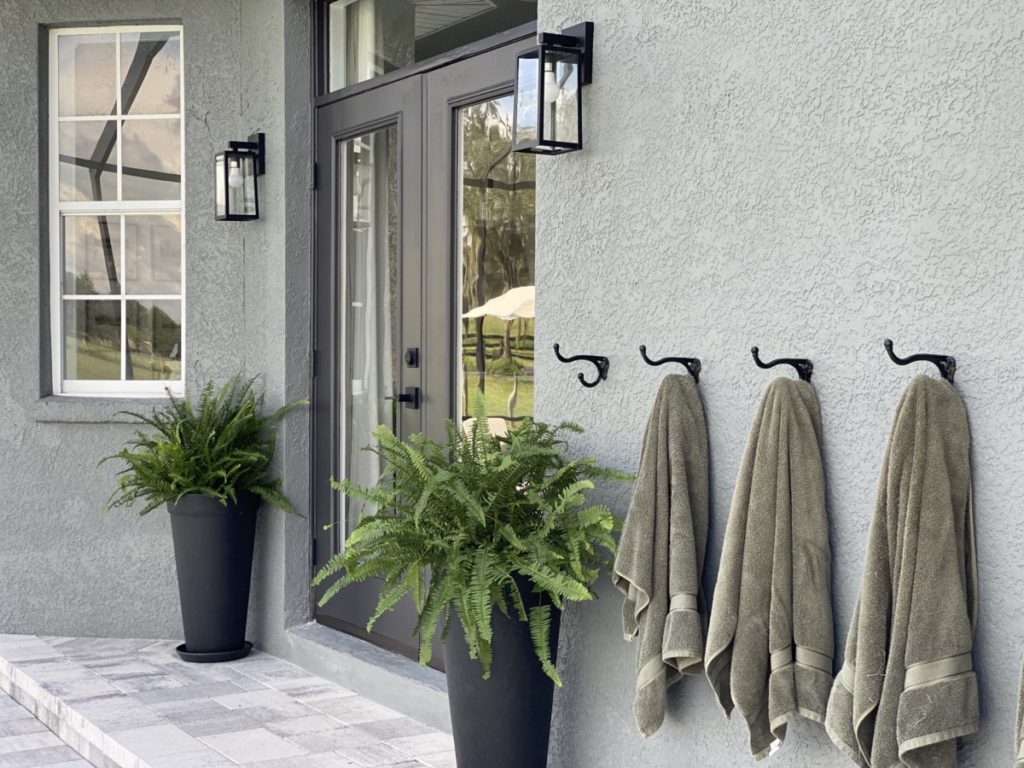
Phew, these doors have been on my list for years and unfortunately putting them on the back burner was a huge mistake. Even if you don’t have time to repaint and swap hardware, caulk and sealing doors is a great way to prevent damage and protect your home! Obviously, I took it a few steps in this Exterior Door Makeover and I am IN LOVE with the end result. Make sure you check out the rest of my patio to see how it completes the space.
Thanks for following along.
Take Luck,
Corey
Sources:
Exterior Sconce Lights: Amazon
Deadbolt Door Hardware: Lowes
Paint: Sherwin Williams “Porpoise”/”Caviar” 40/60 mix
Towels: Amazon
Hooks: Hobby Lobby 2022