This post is sponsored by The Home Depot.
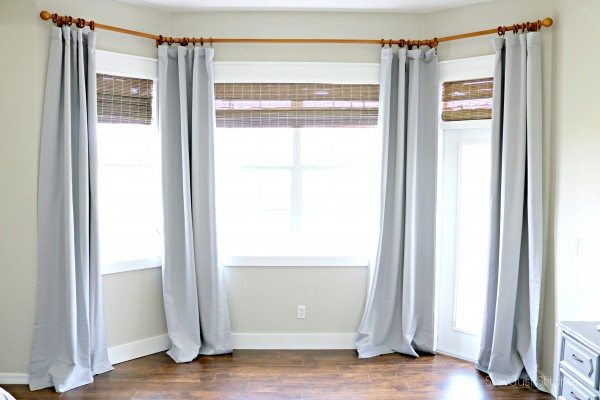
Hey all! I am back and I am teaming up with the great folks over at The Home Depot! Today we are talking about curtains and curtain rods, and man am I glad! My master bedroom has been seriously neglected and needed some lovin’. My bedroom bay window was lack luster at best, and in the morning… whoa, was it BRIGHT in there! On the 2 days a year I get to sleep in, I want to be able to actually sleep in, THAT and practicality was a factor. There have been a number of occasions I have had to duck and run across the room because I left my attire in the laundry room. So on several sensible fronts, it was time to add window treatments.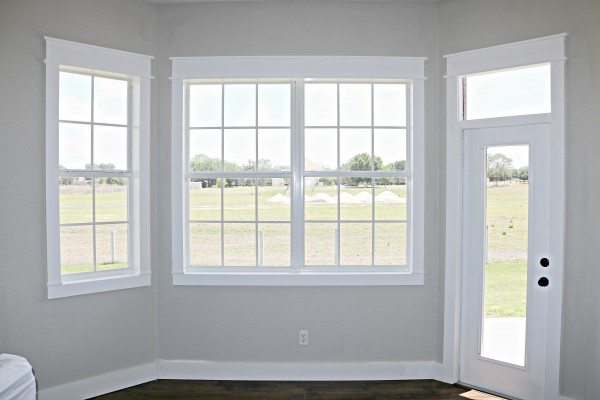
So after spending some time playing with different design concepts, I figured out what I wanted. First requirement, I wanted hardware that would accommodate a bay window! I have never liked the congested look of three individual curtain rods. I definitely wanted a continuous feel, something that flowed. I also wanted to incorporate different wood tones, possibly by mixing and matching curtain rods and blinds. I also really, really wanted it to be DARK when I drew the curtains, but I still wanted it to look light and airy when they were open… Impossible you say ? Well challenge accepted!
So I hopped on HomeDepot.com and started searching their assortment. HOLY GOODNESS! Did you know that HomeDepot.com has a TON of home decor items?! And I don’t just mean a handful, I mean thousands of items!? That’s right, from curtains to couches they have it all! So finding the items that fit my strict bill was a breeze! Honestly, the hardest part was sorting through ALL of their options!
Ultimately, I decided on these beauties for my hardware!

They are from the Martha Stewart Living line at The Home Depot. They had them in several colors, but the “Heritage Oak” collection just spoke to me! I was originally leaning towards white, but this rich oak color was just everything I never knew I always wanted! The thing that really sold me on this collection was that it could be adapted for use in bay windows! (Heavenly “AHHHHHHH”)
So for my bay window hardware I ordered :
(2) Martha Stewart Wood Corner Connector
(1 ) set of Martha Stewart Wood Ball Finial
(2) Martha Stewart 8″ 1- 3/8″ Wood Curtain Rod (I was able to cut one in half to cover the two smaller side windows)
(3) sets of Martha Stewart Wood Brackets
(4) sets of Martha Stewart Wood Clip Rings
Well enough lolly-gagging, let’s get these puppies installed! The process is fairly straight forward, but if you are anything like me a picture is so much more effective when learning something new. So here we go!
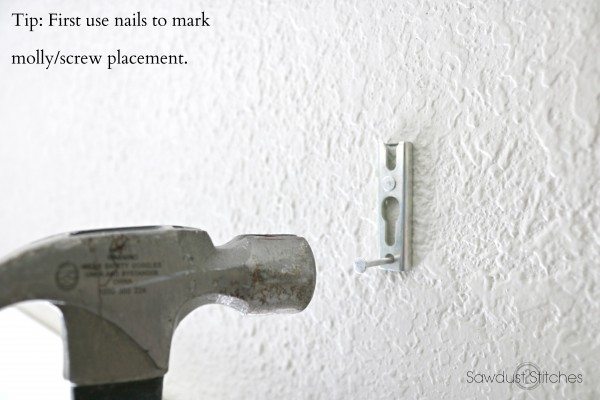
First things first, time to install the brackets. Once of the things I LOVED about these brackets is that the fasteners were completely hidden! The come with easy to use mounting plates. Simply loosen the screws on the backside of the brackets JUST ENOUGH for the mounting plate (the silver piece with what looks like a keyhole).

Next mark where you will be installing the brackets. First thing you will need to do is determine the length of your curtains. For example, the Exclusive Fabrics & Furnishings Fog Grey Blackout Curtains I selected were 108″ long, so I measured 108″ from the floor and marked that height. (I knew once I hung my curtains on the curtain rings it would make the curtains hang a little long so that they would pool ever so slightly on the floor, which is a look I LOVE.) I then took a piece of cardstock, and transferred the height mark onto the paper while resting the edge of the paper on the top of the casing/window, so that I could then take that marked paper to the other window edges and they would all the same height. I also marked the distance from the window I wanted my brackets placed, so that again, it would all be uniform on each window… with me so far?! Promise that is really the most complicated part. 
Once all your bracket placements are marked you are ready to install. So, I took the mounting bracket (If you recall we removed it from the back of the wooden bracket in the first step.) I line up the top of the bracket with my line, then I mark where the screw placement. The best way I have found to accurately place these is by actually tacking them to the wall with small nails.
 Because the brackets are tacked in with small nails, you should be able to pull it loose from the wall fairly easily.
 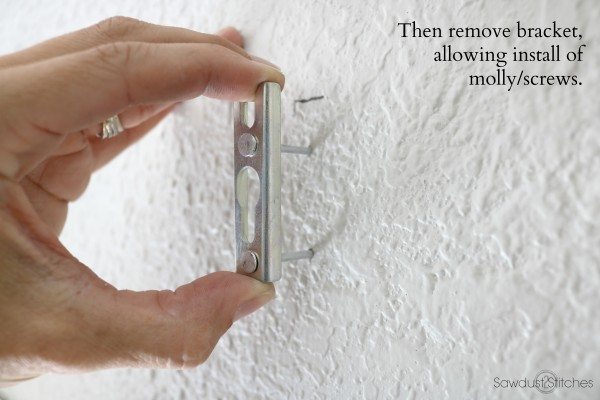 The reason I love the nail hole placement, is that it also serves as a starter hole for your mollies! Wait, back up , in case you are really new to DIY “mollies” are little plastic screw/tornado looking do-dads. They help when securing something directly into JUST drywall. (If you are lucky enough to have the stars align and have studs behind your brackets placement, then kuddos to you ! Roll with it!) However, you are with the 95% who aren’t that lucky you will need to utilize the plastic “mollies” that come with your bracket set. Seeing as we have already “pre-drilled” for the mollie, we will simply screw the mollies in much like you would a screw. I would just do so slowly. The type of mollies that came with this kit are high quality and easy to use without them bending! Love them. Repeat this on both holes.
  Then we are ready to add the bracket, using the screws that came with the kit we will secure the bracket with the “U” cutout facing up.
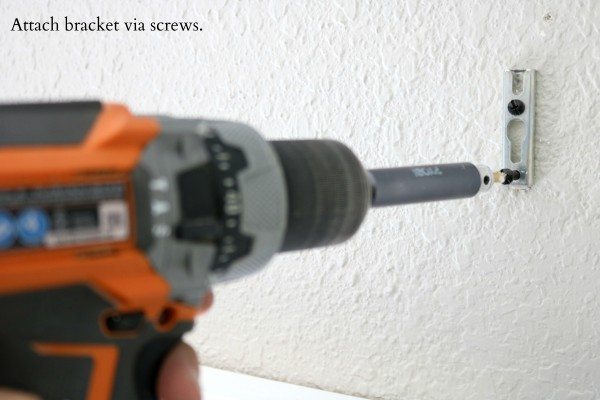
Remember how I said you didn’t want to back out the screws on the back of the brackets too much? This is why. You will be sliding them on top of the brackets, and those screws will be holding the brackets in place. If you find that the bracket hangs a little sloppy or too far off the wall, give the screws a little tighten, and it should fix the problem. 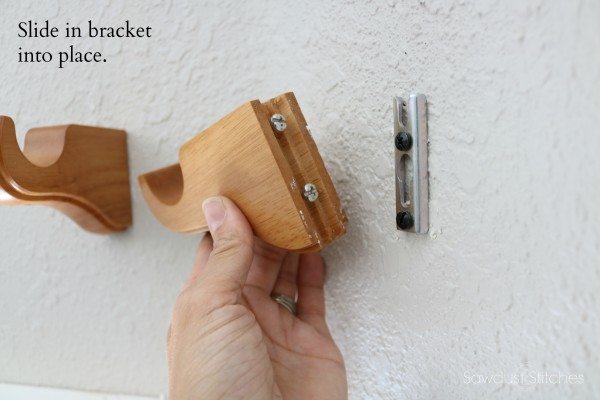
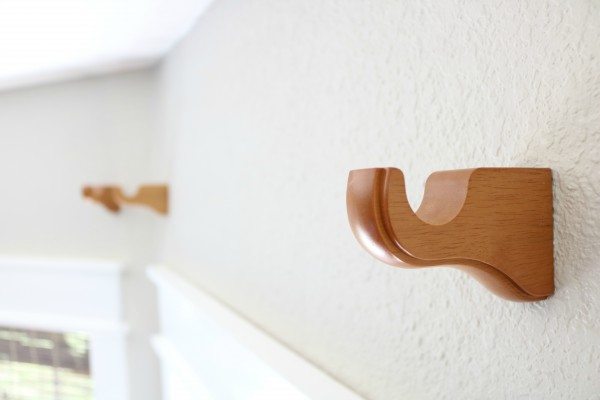
Now, when it comes to adding the rods, I first cut my side poles, and attached the corner connectors to the ends of those rods. ( I actually cut them a little long so that I could alter them once I had my center rod dialed in.) The reason I cut the side poles first was so that I would be able to get an exact measurement before I cut my center rod. I measured from the INSIDE of the corner bracket to the inside of the opposing side corner bracket. Because, the pole fits into the corner bracket, it allows for a little bit of leniency. 
Like I said before I LOVE this Martha Stewart collection, the are very easy to customize. Simply cut to your desired length! Don’t have a miter saw? You could easily use a handsaw if you needed to!
Once all your rods are cut and placed, you can fasten the rods to the connector to the rod using the pre-drilled holes and provided screws.
Alright, next we are ready for the curtains! Did you know The Home Depot has quite the extensive selection of curtains?! Well they do, after perusing their online selection I picked out some GORGEOUS “Fog Gray Blackout Curtains“. I don’t think I can adequately put into words how LIFE changing these curtains are… actually they have totally stunted how much I accomplish in a day… So, between us? I get my kids on the bus at 6:30 a.m…do you even know how long a mom can sleep if the house is completely silent, and the room is completely dark… I’ll tell you the answer. It’s A LOT. I kid, I kid, kind of. I only do it every once in a while, but when I do, it is GLORIOUS! I digress. 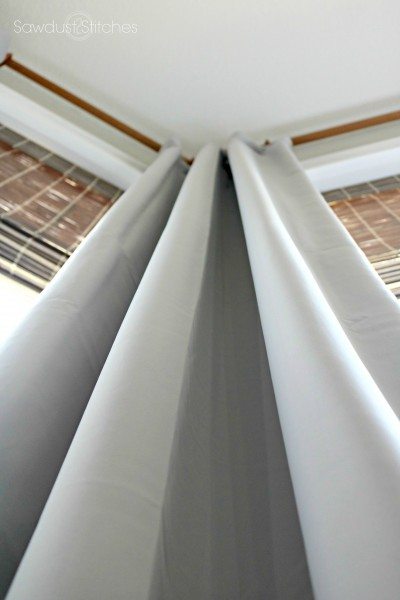
Okay, I only needed one pack of rings per curtain panel. (The panels come in sets.) Just clip them on and then string them on your rods. These curtain rings will even fit over the rod connectors, which is awesome!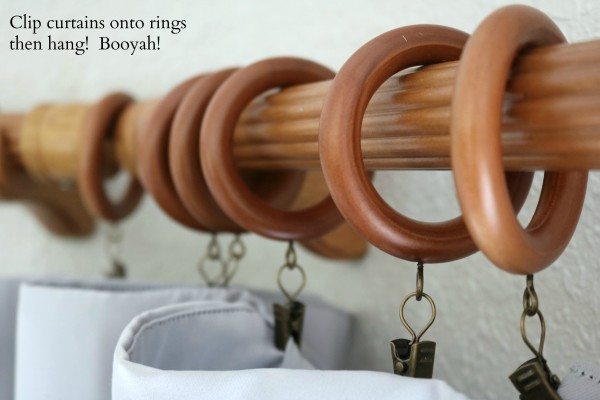
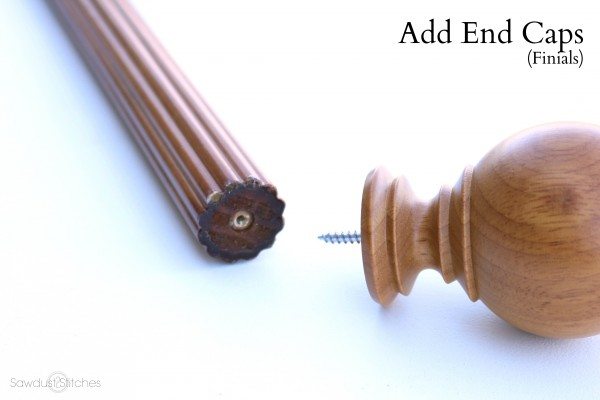
Once the curtains are on you can add your end caps. Just screw them in place and you are done!
The curtain and hardware combo are top notch by themselves, but I wanted to achieve a layered look, so I added some Flatweave Bamboo Roman Shades ! I picked a “Driftwood” color, it totally tied the whole ensemble together! If you are looking for something a little different they come in a ton of different colors (check out some of them here)! The greatest part? You can actually input your window dimensions online and they will ship them to your house pre-cut to your window size, no additional charge! Nice, huh ? They are so simple to install! Just drill in a few of the provided screws into a bracket and you are done! 
 So, what do you think? Did I accomplish my goals?
- Continuous Rod ? Check.
- Incorporate multiple wood tones? Check.
- Room darkening while still light and airy ? Check.
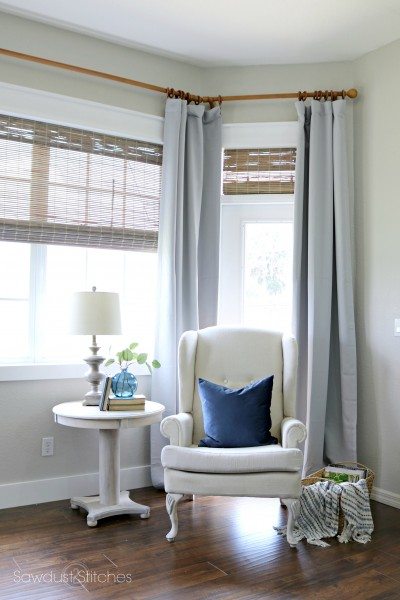
I’d say that this little mini-makeover is a total win, and makes my master bedroom feel like my own little sanctuary. Thanks for reading along, and a big thank you for The Home Depot for their continued support. It is through sponsors like them that I can continue to bring you free tutorials.
Take Luck,
Corey
*The Home Depot provided me with product and compensation. The opinions I have shared about the products are my own.*
 Copyright secured by Digiprove © 2017


Beautiful job. I have a bay like this too and it needs some love. Thanks for the inspiration.
Thank you for an excellent tutorial on this process for a bay window – I have a future with a bay window in it! This will really help me a lot. Didn’t even know this type of thing existed!! PINNED!!