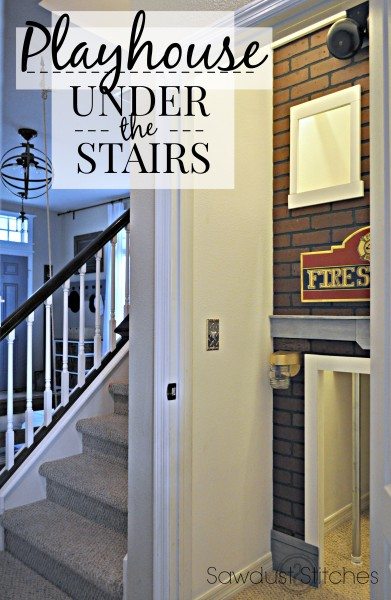
You may recall a post I wrote a while back documenting the transformation of our under the stairs closet into a “Fort” . 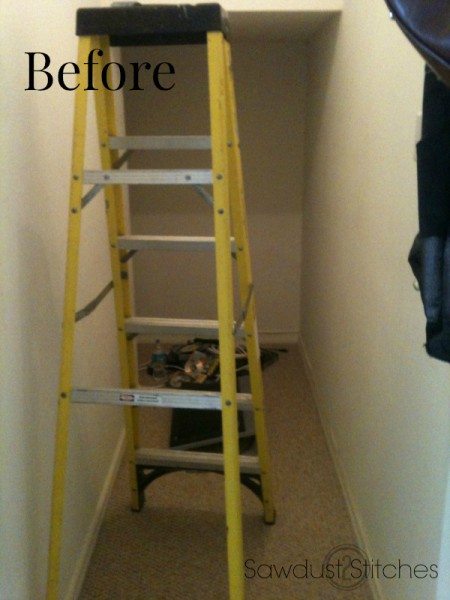 It has been a few years, and my kids have grown up a bit. The oldest is now five and the youngest is three, and both have a small obsession with all things fire fighters. So, for Christmas this year I decided to give their under the stairs fort a makeover. IT WAS A HIT! They love it, and you can read a little bit about the process below. Enjoy!
The Exterior

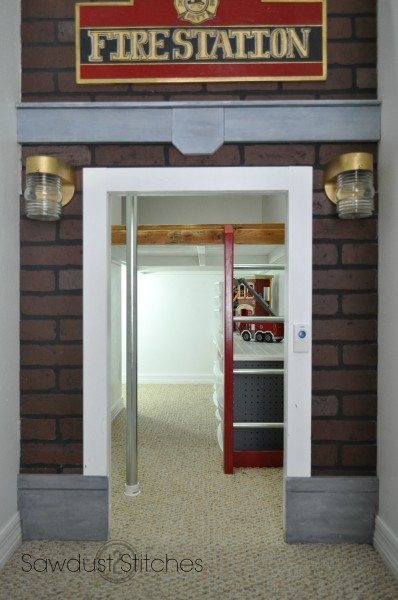
I ended up using a paneling that was made to look like brick. I purchased this 4×8′ sheet for roughly $25. It saved me a whole lot of work, and was fairly sturdy! I cut out a custom sign using a jigsaw, and painted the sign by hand. I think it turned out adorable. 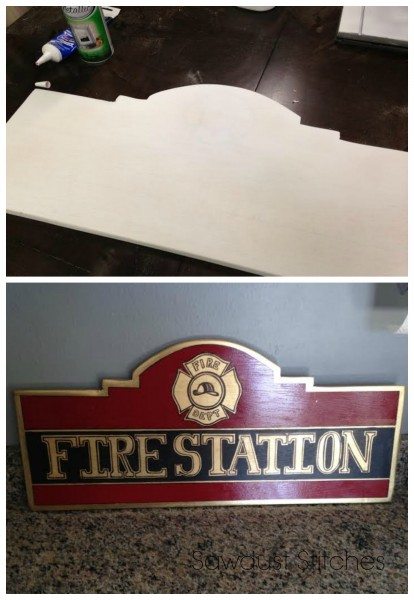 I ended up adding trim that I painted to look like concrete accents. I also figured it needed some windows, so I trimmed those out as well. Love it.
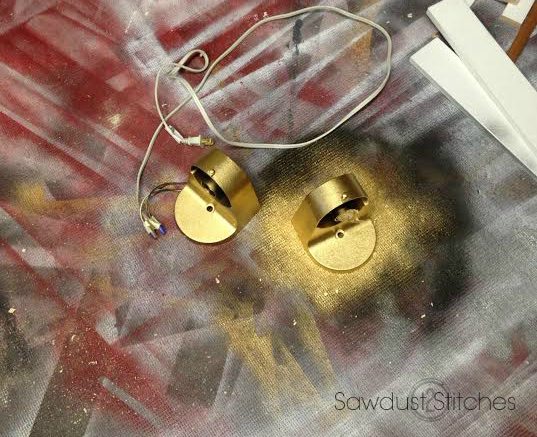
 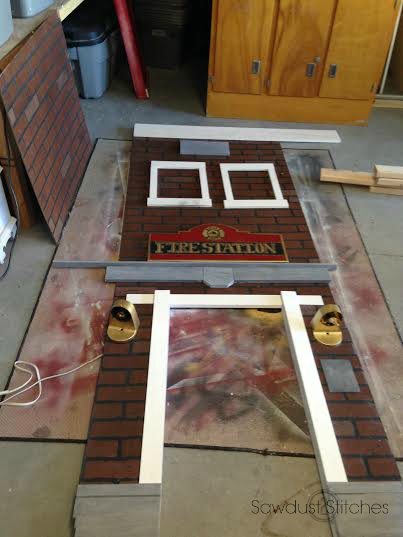 I added two lanterns, that I purchased for $5,oo a piece and then spray painted gold. I decided to not make these fully functioning lights. (Live wires, and toddlers didn’t seem like the best combination.)
Top Floor
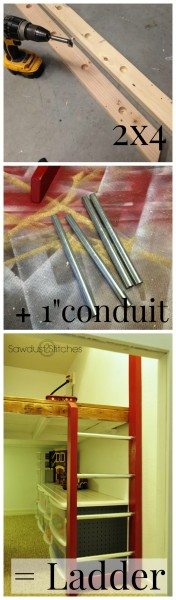
In order to access the top floor I thought a red ladder was more than appropriate, PLUS it was super easy and CHEAP option. All the materials only cost $7!?
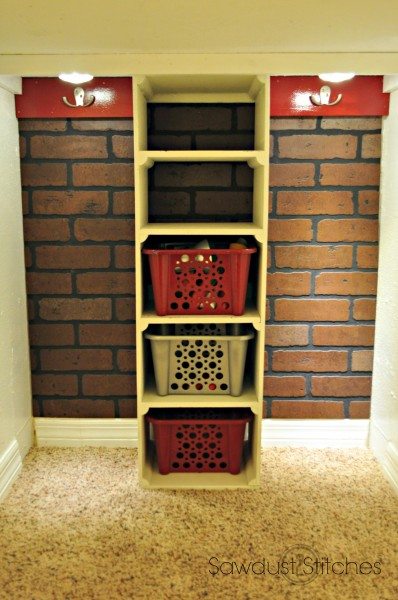
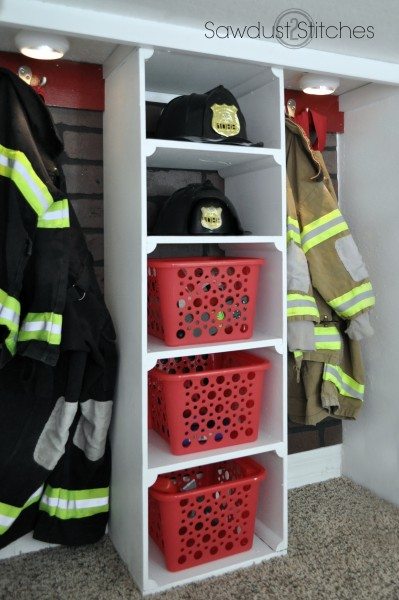
 I think my favorite part of the entire Fire Station is the upstairs “locker”. Truth be told, I didn’t really know what I was doing with this area until the day before Christmas. (Talk about a last minute gift.)
 I had originally planned on just sticking to hooks on the wall for their costumes. But then I I got an idea… uh-oh. I decided they needed a place for their helmets, AND their firefighter accessories… (Basically it will never ever be good enough.)
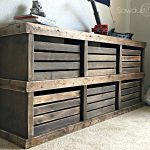
So, I whipped up this shelving unit with scraps I had in the garage. I cut two long pieces of 3/4″ ply wood and then glued and tacked in place support brackets. After which I added the shelves. It was a fairly simple build. All that was left was to sand, prime, and paint! 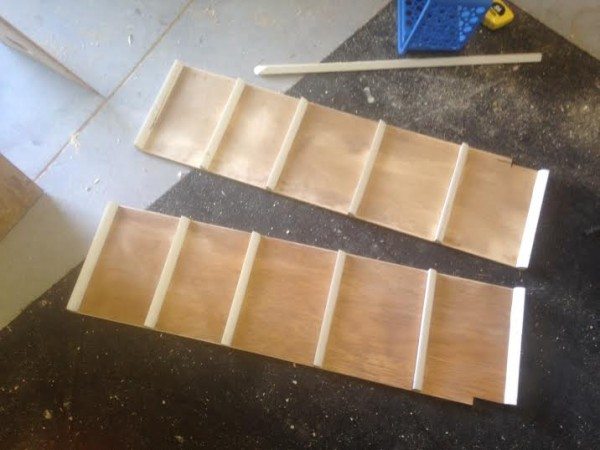 I used some left over paneling on the back wall, and then added the hooks, and mounted the shelf. ( To ensure it would be secure.) The last finishing touches were the baskets and the lights! I got the baskets from the Dollar Tree and spray painted them to match, and used battery operated push lights for the lighting. It turned out better than I had ever hoped!
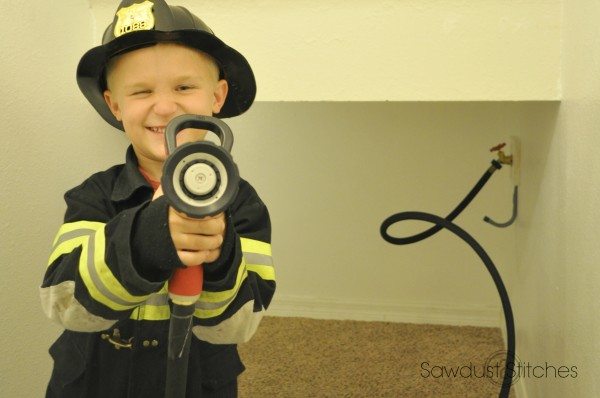
My Husband ran to Home Depot to grab a few odds and ends, and came home with an awesome idea! He hooked up a water spicket, hose, and nozzle for the kids to play with! They love it, they pretend to put out fires for hours on end!
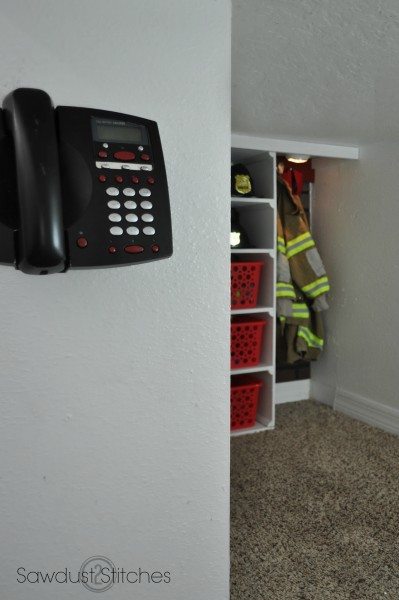
Last thing it needed was a phone! When my kids are playing ” Fire Fighters”, they inevitably receive a call about a “fire emergency!”. For $2.00 I picked up an old phone from the thrift store and spray painted it to match.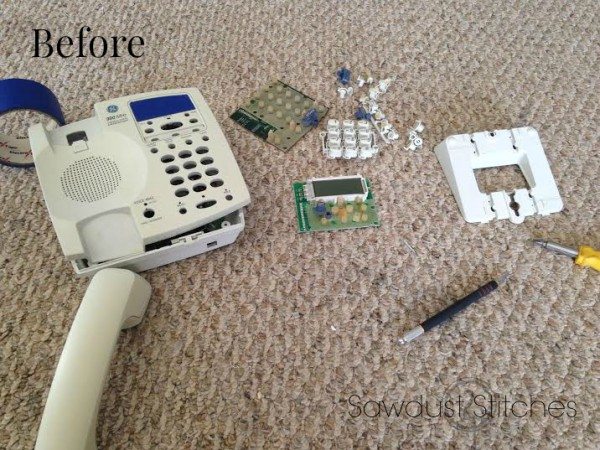
The Bottom Floor
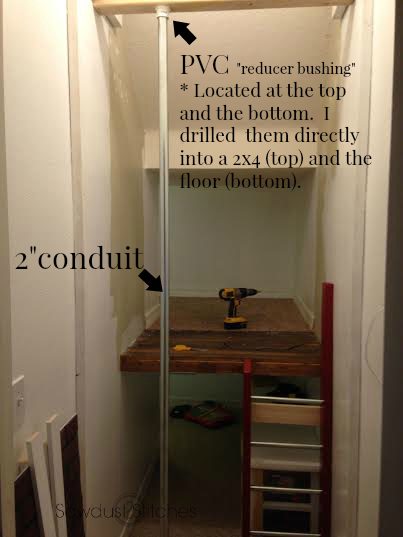
The ladder was a great way to get up, but coming down ? You simply CANNOT have a fire station without a pole. For the pole I used a piece of 2″ conduit. It worked perfectly, and for only $8, you can’t beat that!
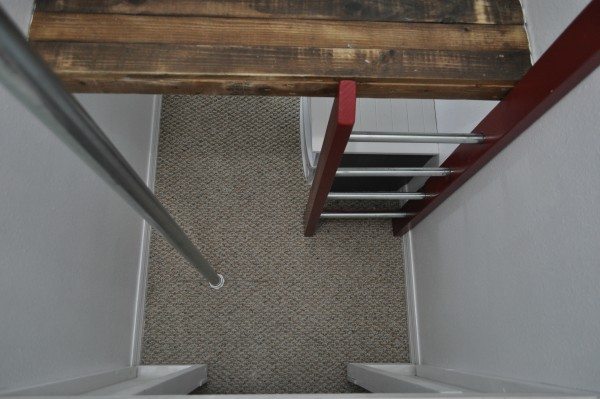
This is the view from looking from the exterior window down.
I took out some of the existing bins and added some playing space. The white table top you see below was actually a scratch and dent Ikea cupboard door for $5. Booyah. Now they have a cute play area, as well as a place to store their larger toys. Perfection.
The bottom floor previously had a tool bench built into the wall. The kids never really got into it. They played with it occasionally, but it was never a BIG hit. In all seriousness they have logged more play hours with the “fire truck” in the last 24 hours , than they ever did with the tool bench in the last 2 years.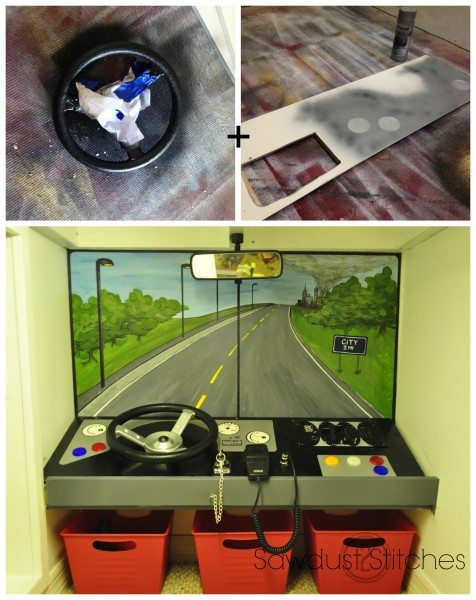
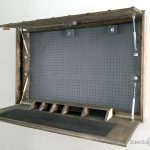
In order to convert the “tool bench” into a fire truck dash board, I used a play ground steering wheel, (that I painted to look more realistic). Added some buttons and knob, and finished it off with an old CB radio and rear view mirror! All it needed was a quick mural painting and it was good to go. 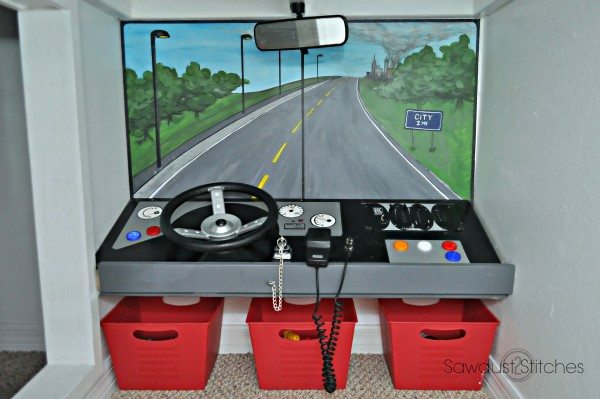
The last area to undergo renovations was the “hidden room”, originally the room did not exist. When my husband and I were originally making “the fort” we discovered some unused space. So naturally we knocked down the wall, added some drywall and carpet, and increased the kids square footage. Naturally. 
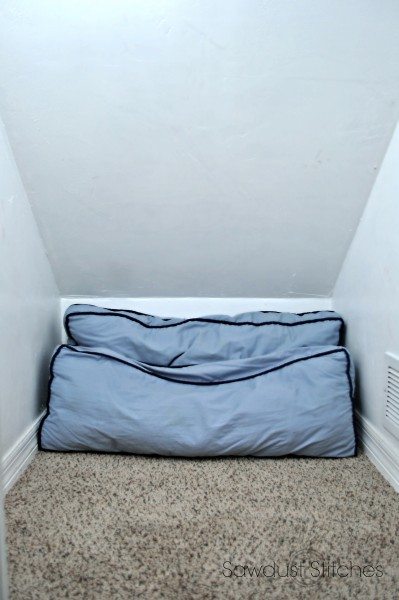
During the “fort” era, it had been a “ball pit” with a mini-basketball hoop, and various ball activities. They loved this room for a long time, but as they got older it did not get as much use.The room had a dramatic slope to the ceiling ( remember we are under the stairs), so it made it hard to use the space for play, and toy storage. BUT it made for a perfect TV room! I simply mounted the tv above the entry so that the kids could lay down and watch a movie, and I didn’t need to worry about the tv getting knocked over. Win.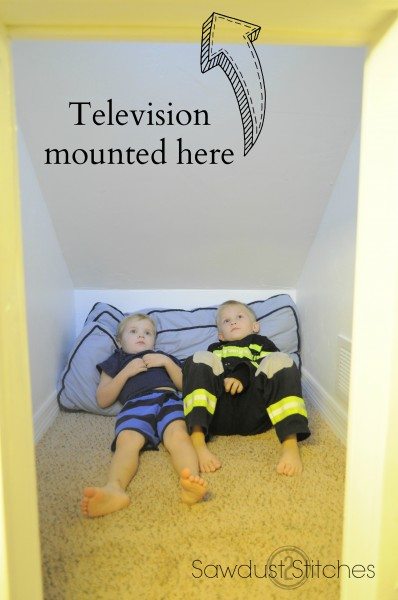
All in all I can say the closet, turned fort, turned fire station was a complete success!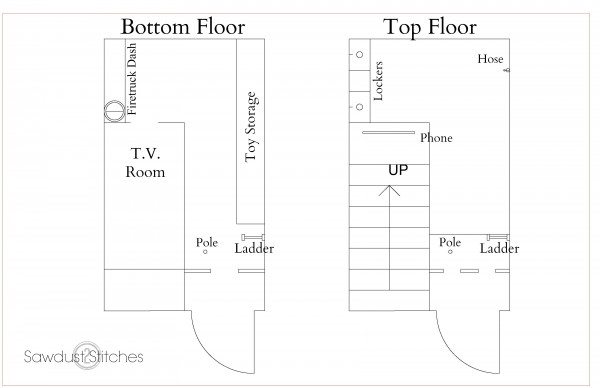
Thanks for reading and Happy Holidays!
Corey
 Copyright secured by Digiprove © 2015


amazing what you can do under the stairs! Super awesome mom! Super awesome Christmas!
Corey this is beyond awesome! Love all of the details. So much fun.
Thanks Amy! Your cordless drill station is currently on my to-do list . Thanks for stopping in.
Just an idea, how about using a battery operated LED lights for the lanterns? You could Velcro it to the top. Great post, gives some good ideas for my boys! Thanks for sharing.
Wendy, I like the way you think! Thanks for reading and taking the time to comment!
So…I kind of want to live in this firehouse. Haha This is seriously THE CUTEST project I have EVER seen! You are so creative!
A definite perk of kids, I get to live vicariously through them! Thanks for stopping in Lauren, I am loving what I have been seeing of your site!
oh man is this awesome!! you guys did an amazing job 🙂
Amazing! I love it. What a great use of this space.
This is sooooo cute! Great idea and thanks for sharing at Think & Make Thursday!
Holy goodness this is AMAZING. I’m not even a child and I wish I could play in this all day! Thanks so much for sharing at Think and Make Thursday!
Thanks Erica, happy to share, and THANK YOU for hosting!
Thank you Dawn, always more than happy to help!
HOLY COW!! This is absolutely incredible Corey! It’s everything a child could dream of. It literally makes me all the more excited to start our family and get to make these fun experience for them. I really love how you two are using ALL the space in your house. I’ve always thought about that in big houses and you’ve made clear how possible that is. What a blessing to your boys (and hopefully a little more quiet time for you 😉 Love your stuff.
Cheers,
Karisa
Thanks Karisa! The boys absolutely love it! I love that all their toys stay contained, and on occasion a little bit of quiet time! Thanks for taking the time to stop by!
You have the luckiest kids on the planet! This is just amazing.
Thanks Tracy! Didn’t you just always want a secret fort when you were little !? Ok, I guess I still do.
OMG! What a simply fabulous play space! Your boys are so lucky and for sure will have lots of super fun memories here!
Thank so much! They do love spending time in there! I would have killed for something like that when I was younger!
This is AMAZING!!! I have 3 boys (and a girl) and I think they would have loved this when they were smaller (the youngest is 4.) What a fantastic way to use the space. You are so creatively crafty. Love it.
Thanks so much! I hate knowing they will grow out of this way too fast! Maybe one day I will get that space back for storage! It’s funny the things that make us happy as we get older! ha