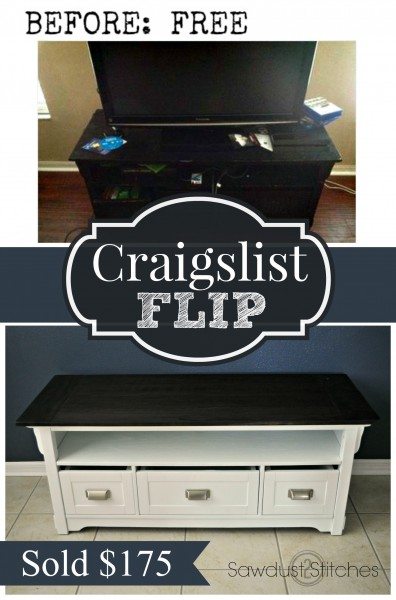
 My husband will occasionally scan through the “Free” section of craigslist, and every once in a while I receive a text message from him ” Think you can do something with this ?” Haha. This was one such project. The structural integrity was so-so, the finish was in pretty bad shape, but it had good lines! But for FREE!? You just can’t beat that!
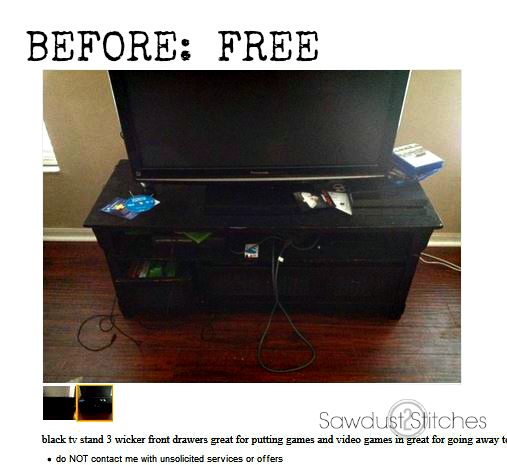
So Andrew (My Husband) brought it home, and I honestly didn’t touch it for a few days. I was not really sure if I wanted to completely change the entire thing, or go the easy route, and just refinish it. This time I opted for the easy easier route.
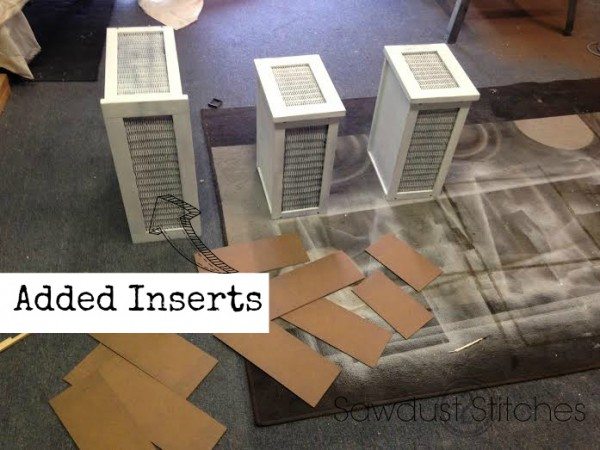
I was originally planning on simply painting all of the wicker drawers, but after a few coats, I realized it is NOT the look I was going for. So I re-grouped and decided to add paneling to the sides, and cover the wicker. I used construction glue, and caulked the edges to create a finished look. It worked like a charm. I then resumed priming the newly resurfaced bins.
 Next it was time to paintthe actual unit. It needed a new paint job, and some structural reinforcing. When I take on a project like this, I usually prefer to take the entire thing apart, and work on nice flat/open surfaces. Yes, it is more prep work, but it will save you time in the long run!
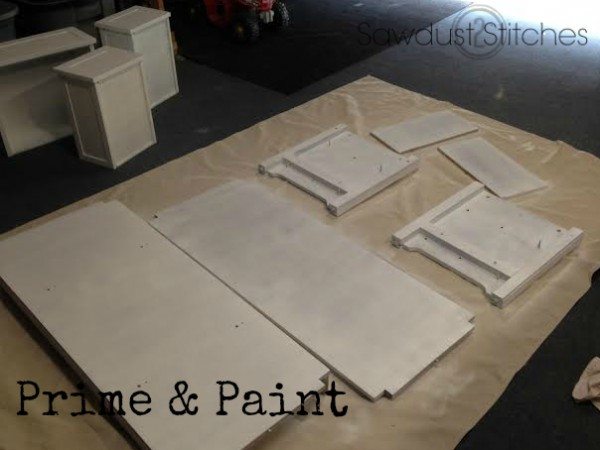
Once all of the paint dried, I re-attached all of the drawer-glides, and then reassembled. 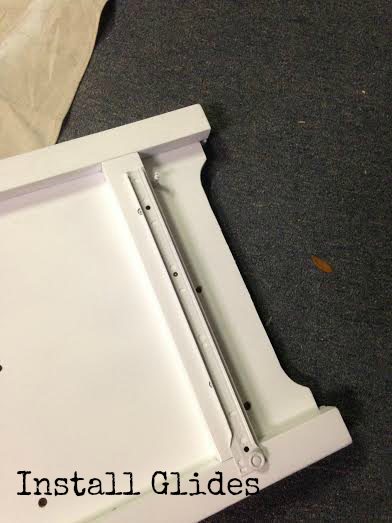
At this point the whole unit was white, and looked very dull. It needed some two-tone action! 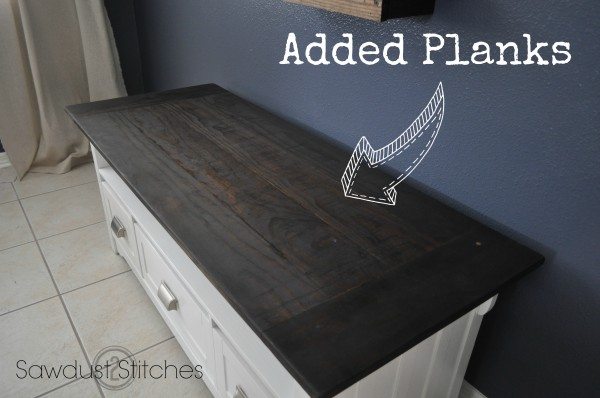
I opted for Minwax Jacobean Stain for the top, and followed up with a coat of Satin Polyurethane.
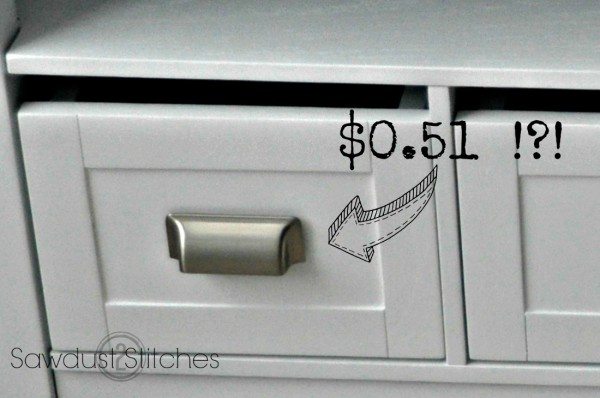 Last finishing touch ? It needed hardware. It originally didn’t have any pulls. I found these pulls at Lowes for $0.51! Yes, $0.51! They were discontinuing a few styles and I bought ALL of them!
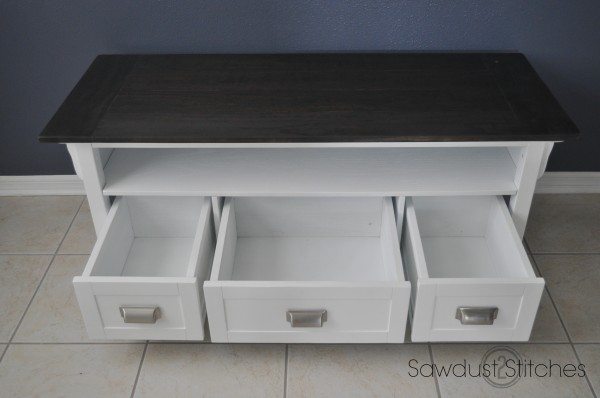
So let’s break it down..
- Media console: FREE
- Paneling: $5.00
- Paint/Primer: Had on Hand
- Pulls: $1.53
- 1×6’s: $8 (Crazy good deal in clearance section.)
Total: $14.53
Sold : $175.00
Profit: $160.47
I listed it on Craigslist and it sold within a day! All in all, I will call it a win!
Thanks for stopping by!
Corey
 Copyright secured by Digiprove © 2015


Girrrrrl you are AWESOME! Your furniture flips are always like none other. Love this one!
Thanks Lauren! I liked the way it turned out! And on a side note, I didn’t realize you are a Remodelaholic Contributor! That is awesome.
That is AAAAMMMAAAZZZINNGG! You are so creative!!!!
Thanks Jill !
WIN. And it looks like it came right out of PB! I need to be more ambitious with taking things apart before repainting. Would you take Ikea things apart too? I’m always worried it’ll break..
Good question, it always depends on how it is put together. If there is glue involved, I normally just leave it alone, especially if it is cheaper material. But if it is all screws, then go for it! It honestly makes life so much easier. Just always try and remember HOW you got it apart in the first place. 🙂
IM creating a dog feeder and got the idea for the colors from this ! It just flows nicely … Im just unsure on the size of the planks . I love this though! I want one now.
Thanks! I love this color too! I use it everywhere.