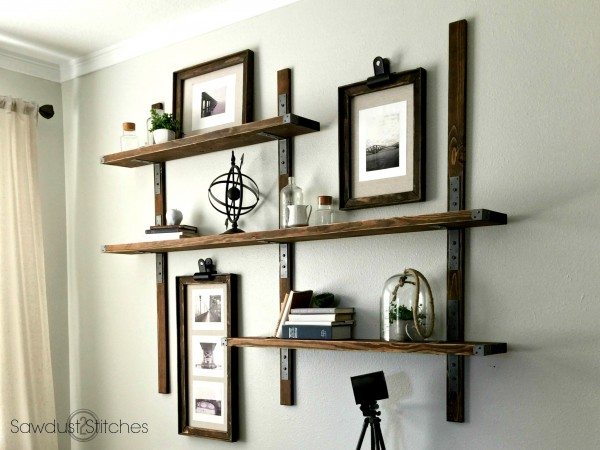
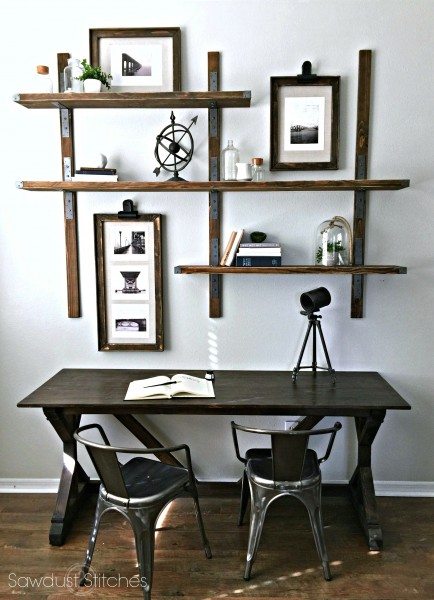
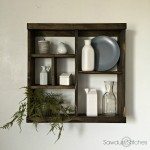
It is no secret that I am a big fan of the “Industrial” style furniture sensation. I love the bold look of metal mixed with softer wood tones. It is just a perfect match! So when I decided to give my office a face lift I decided to bring in metal textures to create that perfect “Industrial meets Farmhouse” look. With a little help from Simpson Strong-tie, I think I totally NAILED IT with these Industrial Style Shelves.
If you are not familiar with Simpson Strong-tie then you are in for a real treat! They have a large range of connectors and fasteners that can strengthen and add character to any build! Make sure you check out many other ideas like this at DIY Done Right

Supplies Used:
- (3)- 1″x 3″ boards
- (2)- 2″x 8″ boards
- (14) A-66 Simpson Strong-Tie 6″x 6″
- (6) A21Z Simpson Strong-Tie
- (49) 3/4″ Hex Head Screws (or you can use a finish washer and 3/4″ screws)
- (7) 3″ Hex Head Screws (or you can use a finish washer and 3/4″ screws)
- (24) 3/4″ button screws
- Spray Paint
- Steel Wool
- Stain
- Sandpaper
Tools Suggested:
- Miter Saw
- Drill
- Sander
- Level
- Tape Measure
- Square
- Pencil
- Safety Glasses
- Hearing Protection
Disclosure: Some of the links provided are affiliate links. By purchasing through these links it supports this site and helps keep content free. You can read more about how we do this with no extra cost to you.
Step 1. Prep Boards
Cut List:
(3) 1″x 3″ boards @ 58 1/2”
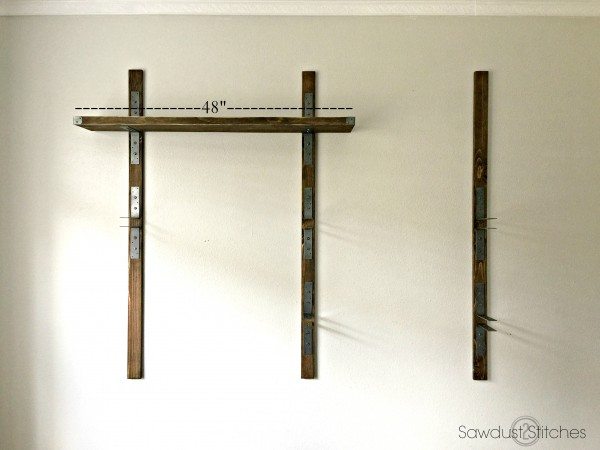
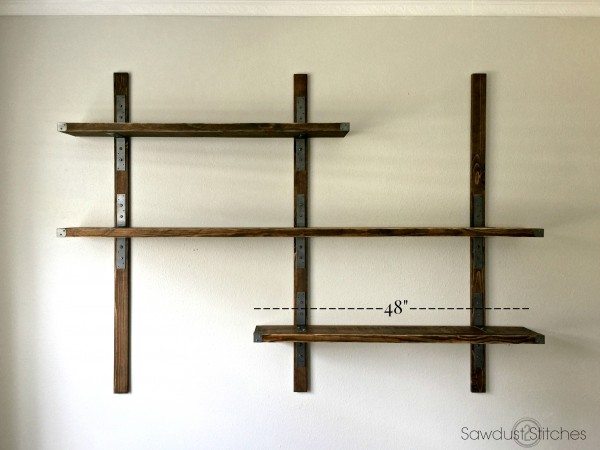
(2) 2″x 8″ boards @ 48″
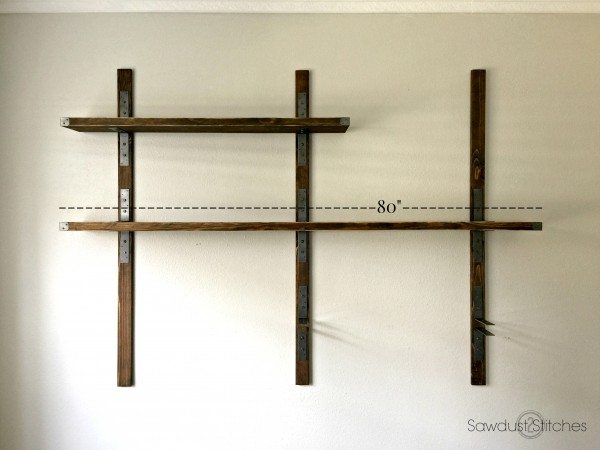
(1) 2″x 8″ boards @ 80″
Once cut, sand, and then finish with your preferred finish. I went with a “Dark Walnut”. Once it was completely dry I sanded down the edges a bit to give it a nice worn look.
Step 2. Paint Simpson Strong-tie connectors
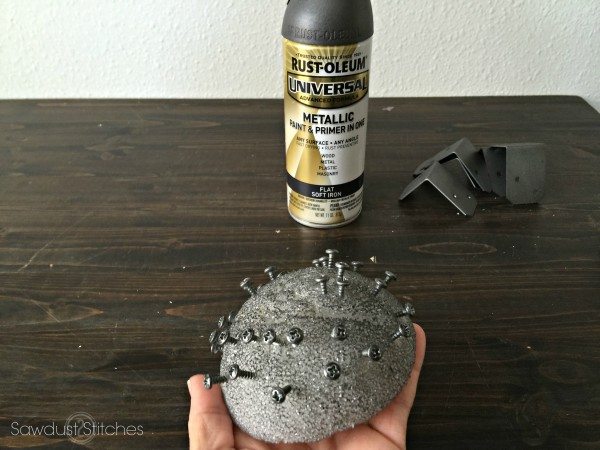
Next, we are ready to give our hardware a little character! I wanted them to make a statement, but I still needed them to blend with the rest of the space. I opted for Rustoleum “Flat Iron Black”. I spray painted all of my connectors and fasteners/screws all at once.

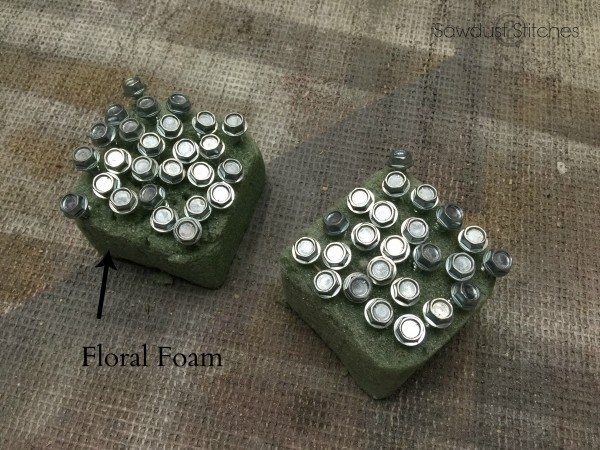
Here is a tip that I swear by; when painting screws, I like to enlist the help of craft/floral foam. Simply push the screws/fasteners into the foam and go to town with spray paint! No rotating, flipping or chasing runaway screws. It is a total game changer!
Step 3. Attach Angle Connectors
Begin by laying the 1″x 3″ boards next to each other. (Let’s pretend there are only 3 boards… I was planning on using 4 and then…plans changed alright ?!) Ok, so lay your 3 boards next to each other and use a contractors square to ensure they are all marked identically.
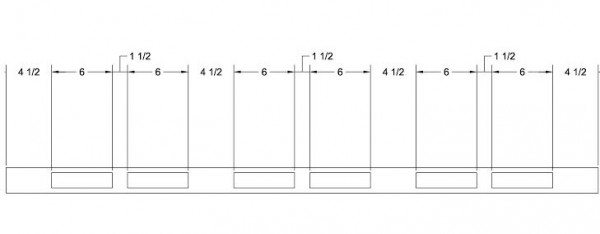
Using a hex head 3/4″ screw I attached the “A-66″ Simpson Strong-tie angle connectors to the 1″x 3″ boards. When attaching I did not fill some of the holes intended for screws. I left them blank so that I could use them to secure them through the 1″x 3” and into the wall. (Basically don’t put hex screws in the red “x” ones. Reference the diagram below.)
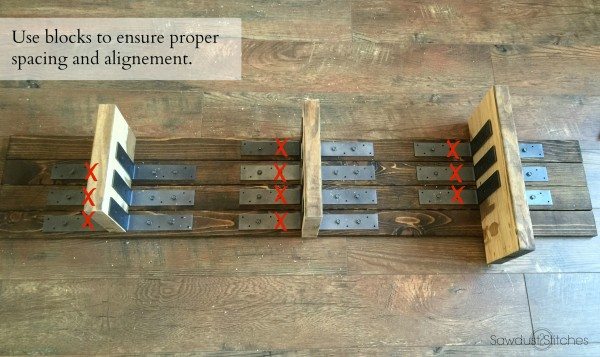
When installing I used a few pieces of cut off from my 2″x 8″ board to make sure:
1.) They all line up evenly, and
2.) That when I was ready to install the horizontal shelves they would fit! (If you have ever installed a joist hanger, you know what I am talking about:)
Step 4. Mount to Wall
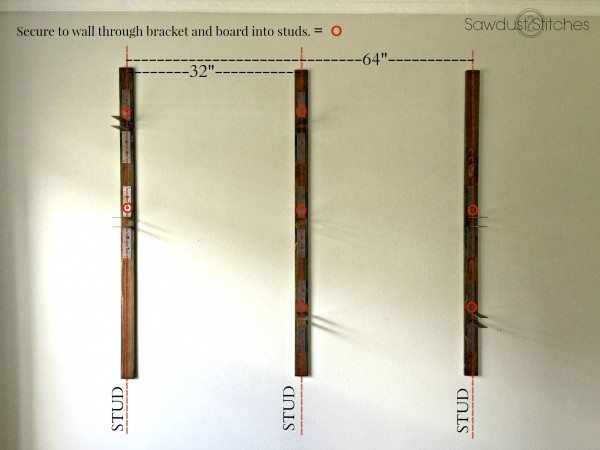
When mounting the 1″x 3″ boards to the wall, you want to make certain they are going into studs! Most standard walls have 16″ spaced studs. (Make sure you figure out your stud placement BEFORE planning your shelving configuration. Believe me I learned the hard way!)
Because my studs ARE 16″ from center to center, I chose to make my 1″x 3″ boards mounted 32″ apart. (16+16=32).
When attaching the 1″x 3″ boards to the wall I used 3″ hex head screws. (Although there are other options.) When installing make sure you have a level and tape measure hand to make sure you are installing them all level and uniformly!
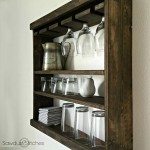
Now for the easy part, installing the horizontal ledges. I began with the top shelf first. I positioned in centered between the two wall mounts. Then using the 3/4″ hex screws I secured the brackets to the top and the bottom of the 2″x 8″ board/shelf.
Repeat the above step for the center shelf.
 For the last one… I am guessing you can make some fairly accurate assumptions…
In the event you truly are really lost, repeat the steps for the first two shelves. Bless your heart.
Step 5. Make it PRETTY!
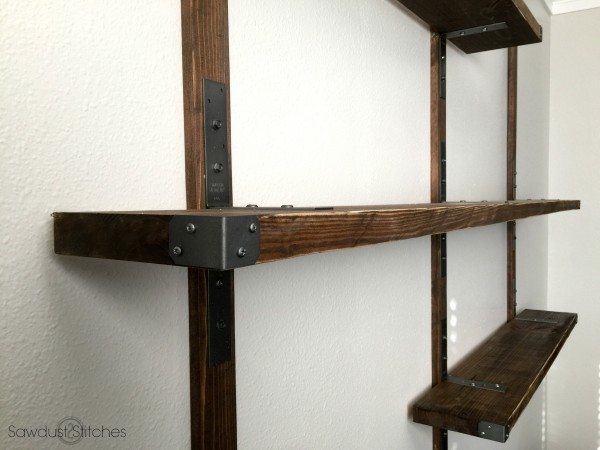
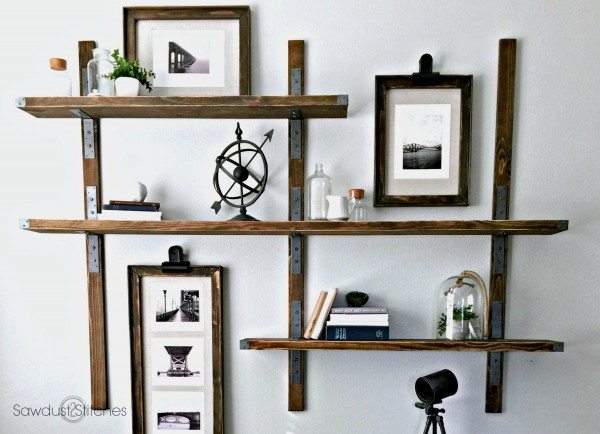
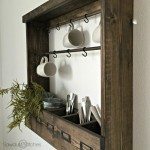
The last thing needed is the remaining Simpson Strong-tie angles. Using a small 3/4″ button screw I attached the angles to the end of all of the 2″x 8″ boards/shelves.

Just look at those corners, instant character!
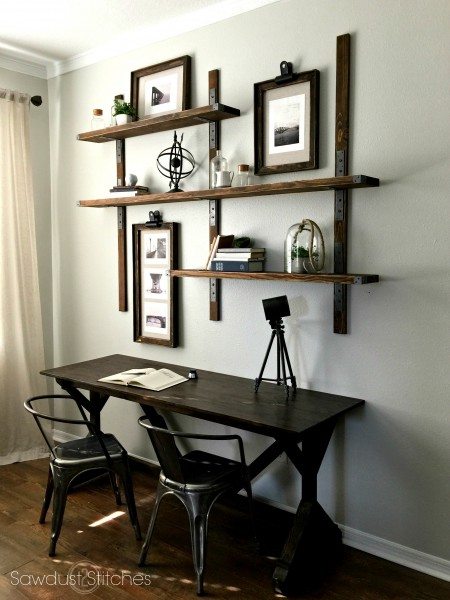
Well, there you have it folks, the perfect blend of industrial, farmhouse, form, and function for the win!
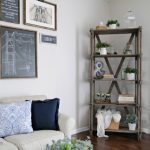
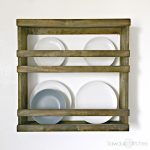
If you love the this look be sure to check out other really great project ideas that use Simpson Strong-Tie hardware at DIYDoneRight!
You can also find Simpson Strong-Tie on Facebook, Twitter, and Instagram!
For sneak peeks of my upcoming projects be sure to follow me on Facebook and Instagram. You can also, follow me on Pinterest to get tons of projects plans from all around the web!
Take Luck,
Corey
 Copyright secured by Digiprove © 2016


I LOVE these shelves! I might actually copy them for my husbands office, they are awesome.
I would absolutely LOVE it if you ended up doing it! His office already looks pretty dang amazing!
These are absolutely beautiful! I am completely with you in the farmhouse/industrial look. I may also have to steal this idea. 🙂
All my best,
Kelly