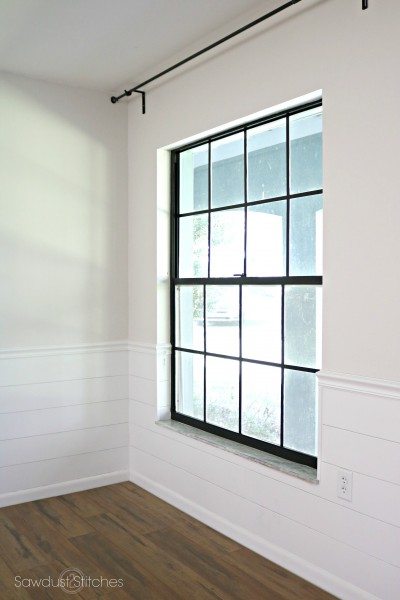
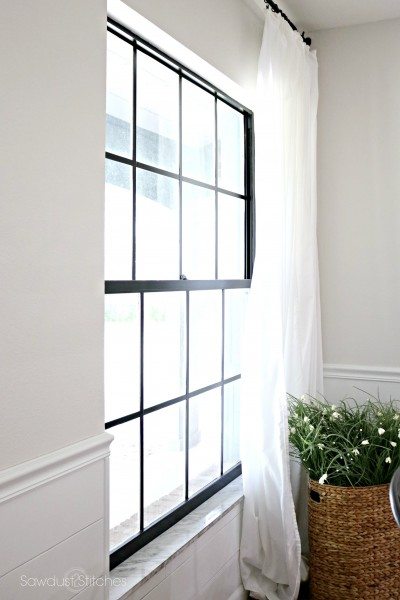
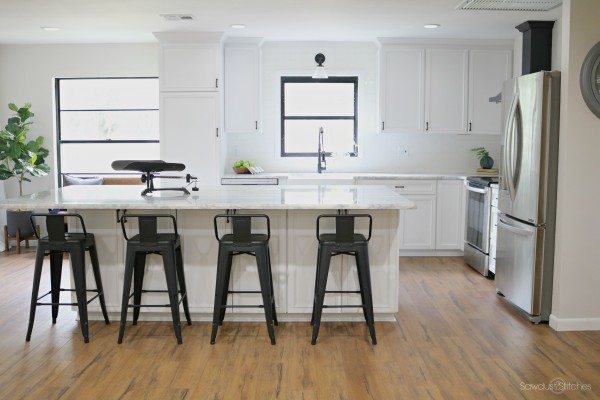
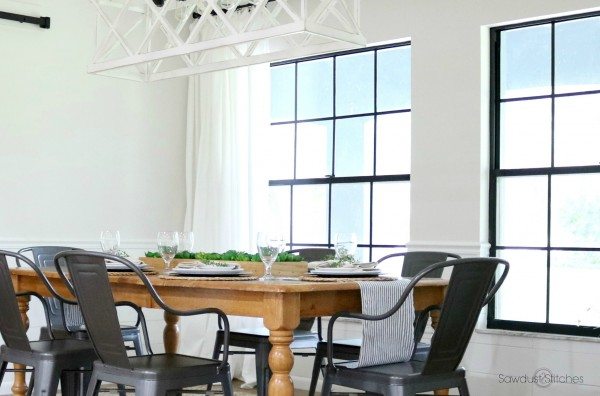
Hey All! I am back and we are closing in on yet another room reveal. The next room on the docket? The dining room! As most of you know we have been gutting a 70’s Ranch style home and giving it a fresh new look. Walls came down, new floors went in, and every square inch of this place is painted! We did everything as inexpensively as we could, but we were still stretching our budget thin, so there was NO WAY we were going to be able to add new windows to the wish list. The windows are an exposed aluminum window frames with exposed mullins. (That just means the grids were exposed on the interior of the house.) So what’s a girl to do? DIY of course. So today I am teaming up with the great folks over at Frogtape to bring you these awesome window updates and show how I painted black window panes! 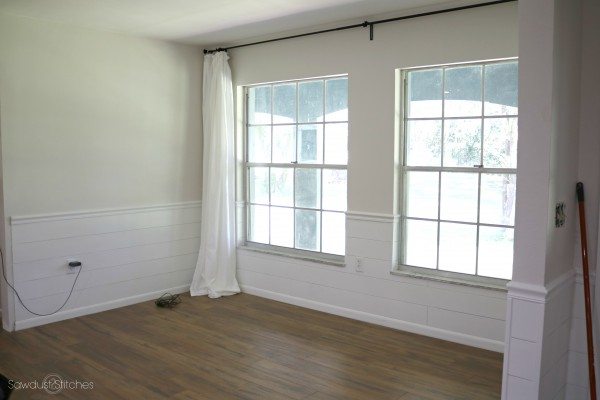 As you can see these windows weren’t horrible, but they definitely weren’t great. Originally, we just planned on covering them up with the curtains in hopes of making them less visible. However, as my design plans for this space slowly fell into place I realized this room NEEDED black window frames! (You may have noticed the Kitchen had black frames, which is where I experimented with this technique and we fell in LOVE with it!)
  So lets get to it!
Black Window Panes – Supplies I used:
- Foam Sanding Block
- Rag
- 1.5″ Frogtape
- Utility Knife
- Brown Painters Paper
- Scissors
- Tarp (Cover Surrounding Area)
- Satin Black Spray Paint (Paint and Primer Variety)
DISCLAIMER: Things to consider BEFORE you paint black window panes. Not all windows are made alike. These windows are unique in the fact that the metal grid was exposed on the outside, AND they were metal frames which made it ideal to paint. These windows are truly 70’s syle windows and we had very little to loose if this DIY went awry. So before you start painting your brand new windows take a beat and think it through. This MAY NOT be the DIY for you.
Step 1. Prep Surface
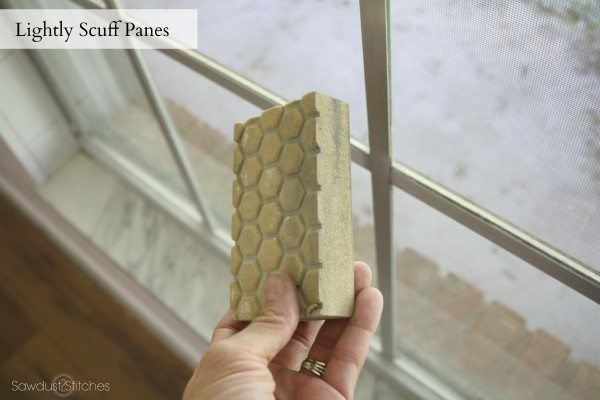
It’s true what they say, about 90% of the work is prep work and it was true for painting black window panes. But the good news is, that this is a fairly quick project and can be done in an afternoon (in good climate conditions). So the first step is scuffing up the grids and frames. I used a fine grit foam sanding sponge. The purpose of this step is not to sand off any sort of finish, it is merely to scuff up the surface so that the paint can properly adhere. After you scuff up all the surfaces receiving paint you will need to wipe down with a damp rag to remove any remaining dust and debris.
 Step 2. Tape it Up!
 Step 2. Tape it Up!
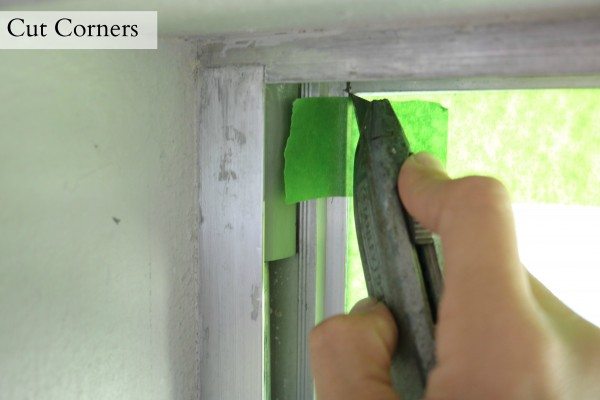
Alright, I started by taping all the grids individually. It’s an easy job, but a little mind numbing when you have a lot of grids, so turn up your kids Disney Radio and Jam out. The best advice I can give you to use a utility knife to cut in the corners and remove the excess tape.
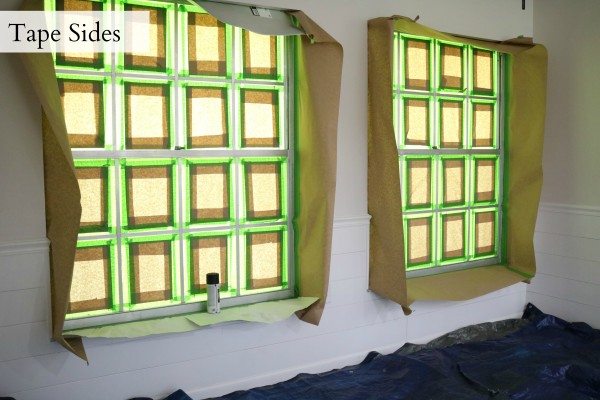
Alright, so this is the part that you need to take your time! Apply this stuff with precision. Reason? You are applying BLACK paint. If your lines aren’t straight it will be highly visible. (Granted if you do mess up a flat blade can easily remove over spray from glass.) Step 3. Cover Glass
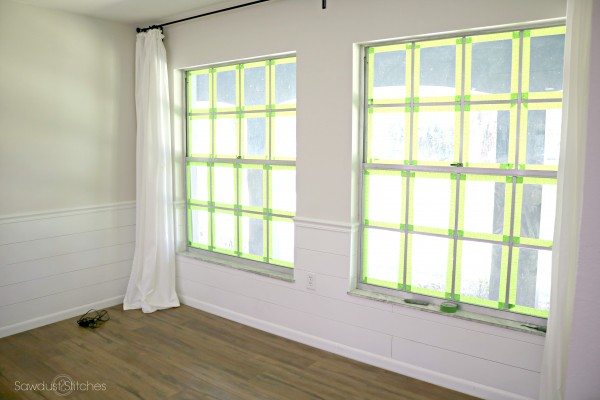 Step 3. Cover Glass
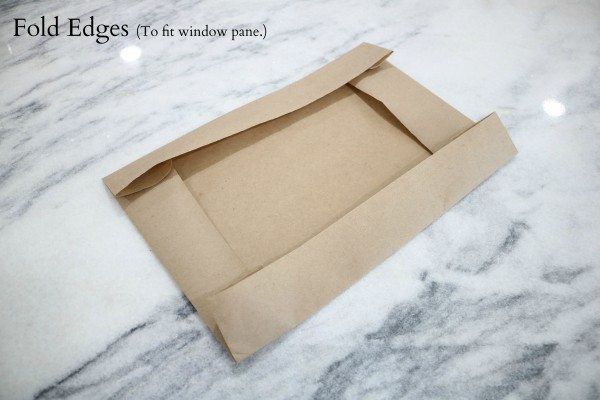
Ok, now that we have cut in the grids and frame with precision, it is now time to protect the glass. I used painters paper. I took general measurements, and cut all my paper. (This comes in rolls, so I just cut the general length needed and kept the width as is.)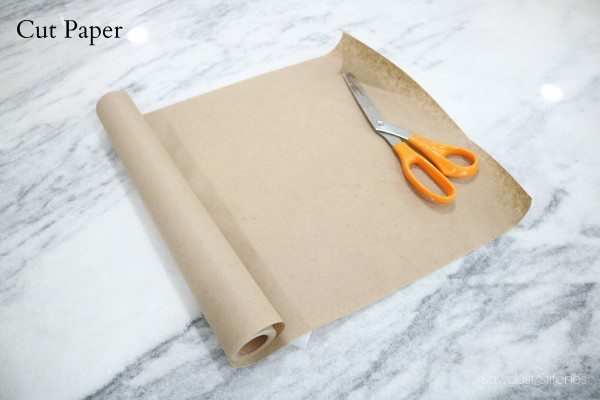 Remember when I said I just used general measurements? It’s because I ended up folding in my edges . I found it easier to just fold it to the required size. These do not need to be exact, you will have a lot of room for error with the tape around the edges.
Next I taped the edges before sticking the paper up. I know, I know! You might be thinking, “but COREY I already taped it!? I am using more tape than is completely necessary.” Yes, it’s true. If you have an incredible amount of patience you can do this with less tape, however I can assure you it is not more time efficient. I tried to tape the grids with with brown paper in tact and it was a lot more time consuming. Instead I did my precision application first with just my tape and THEN quickly slapped the taped paper on top and took no time at all! 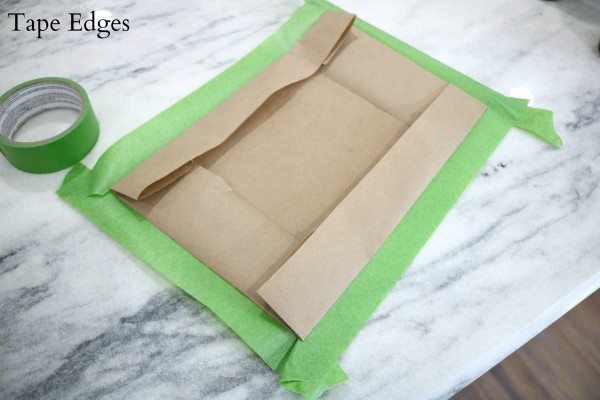
I was being thorough and I do not regret it! My darling husband (love that man) gave me grief but hey he can’t argue with my perfect results!  Step 4: Protect Area
Alright before you go gung ho. Keep in mind your surrounding area! We did this project before they moved all their furniture in, so we could be a little lax. In the event you are starting this project in a fully functioning home, make sure you protect the surrounding area! There will be airborne paint from the spray paint. Make sure you have proper plastic barriers up to block off the entire area if necessary.
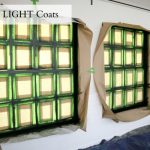
Step 5. Paint… Get er’ Done!
Don’t be nervous. The hard part is done! You have got this! Believe in yourself! Make good choices! Okay, that is all I’ve got by way of a pep talk. Anyways, the BEST way to get professional results with a spray paint is by doing multiple LIGHT coats. Do not feel like you need to cover this in one coat. Instead, lightly dust it, and then allow to dry before applying another coat. It requires a little more patience but it will be well worth it. Promise.
 Step 6. Remove Tape
 Step 6. Remove Tape
I don’t think this step requires a lot of explanation… Once it is dry you peel back a corner of the tape and then pull it off. Then repeat. That’s it!

Black Window Panes – Satisfaction
There are few things more gratifying than removing tape from a completed project. Promise, this one won’t disappoint. 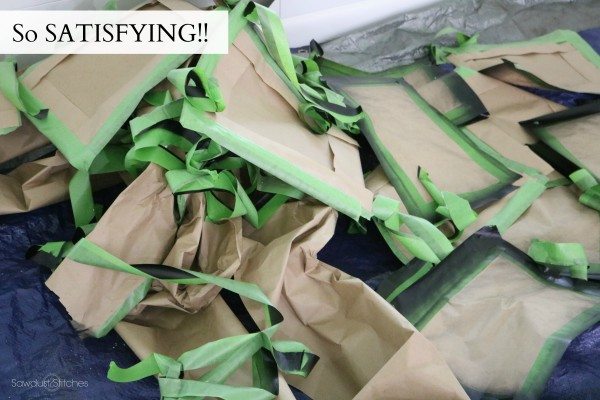 Ta-Da Beatiful Black Window Panes!!!!
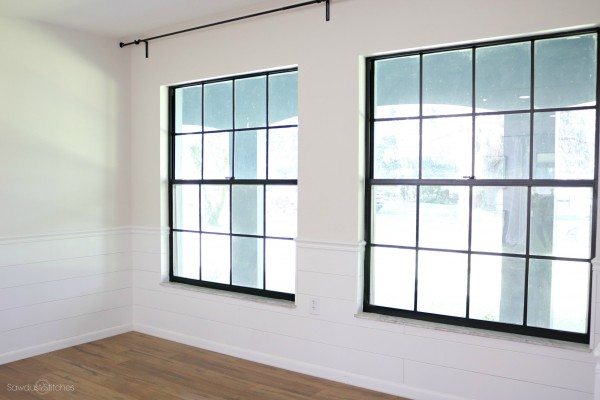
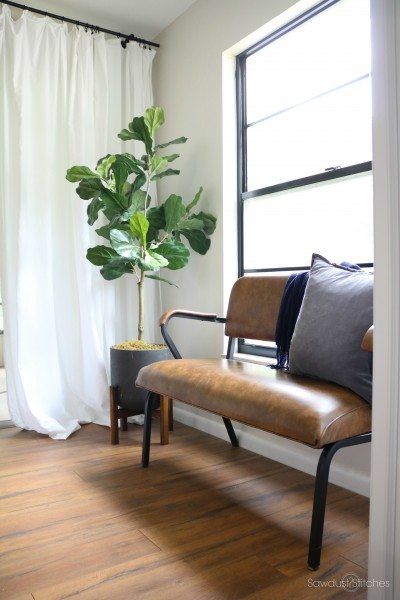
The windows in the kitchen even got a face lift!
Thanks for reading!
Take Luck,
Corey
Disclaimer: this room and project was sponsored by Frog Tape.
All opinions are my own.
Please see my disclosure page for more information.
 Copyright secured by Digiprove © 2017


Beautiful!!!!! I wish I had done this in my last house!!!! Perfection as always Corey!
Whoa! This turned out perfectly! I love the pop of black– so nicely done!! 🙂
We are in the midst of our fixer upper project. Huge old house previously converted into a group home. It’s like living in a 1970’s office. The doors are solid wood fire doors so we are adding moldings and painting them black. One down, 16 to go. I’ve been wondering if the window frames should be black like the doors or match the new white trim. No cool multi pane windows here, thanks for posting your kitchen window so I can get a visual.