This is sponsored by Home Depot.
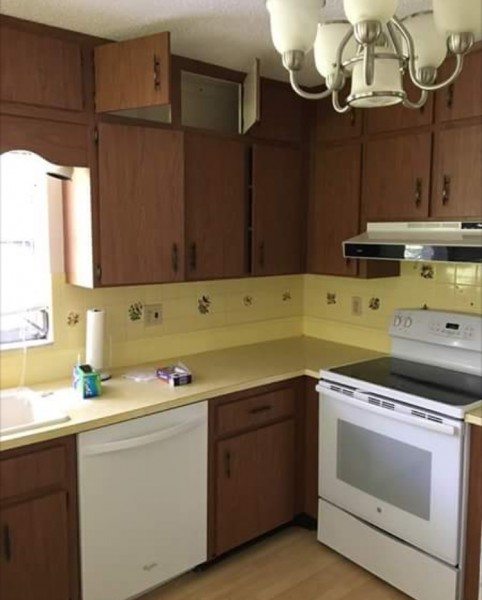
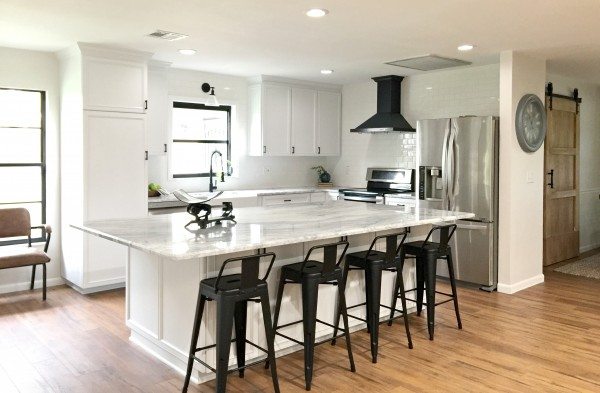
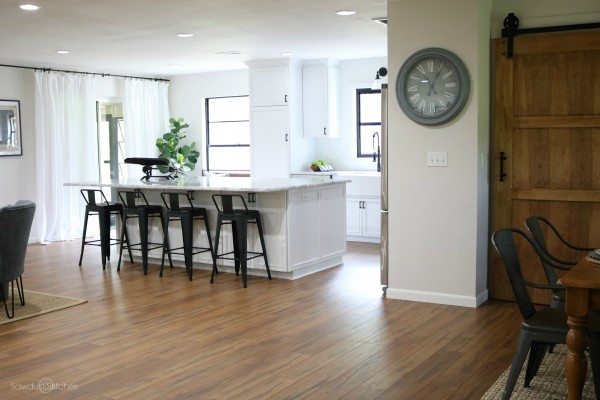
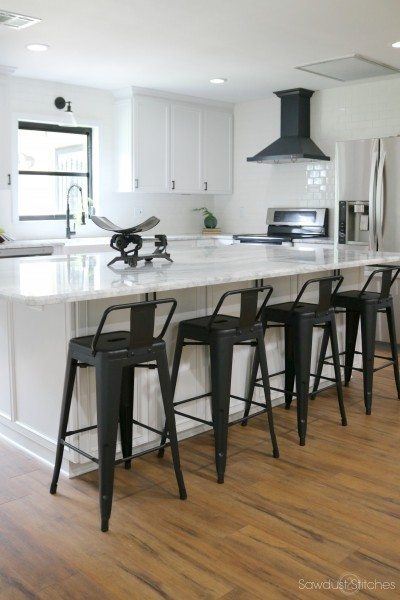
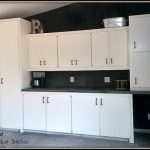
It’s finally time! It’s time for a room reveal from the 70’s Ranch, and it is a good one! We are starting out with the heart of the home. The kitchen. You guys, this thing was awesomely horrific! I mean check out these yellow counter tops, complete with yellow floral back splash. I wish I could say that the color scheme was the worst of it. The worst part was the layout. It was a really narrow galley style kitchen.
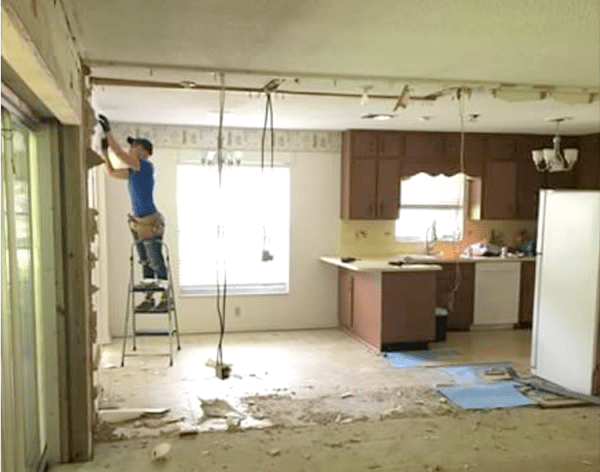
 One side of the galley was the appliances, the other was a long row of pantries. You could never accuse this kitchen of not having ample storage, but it was weird, borderline excessive. So DOWN came the random wall of pantries. You can get all the demo details here.
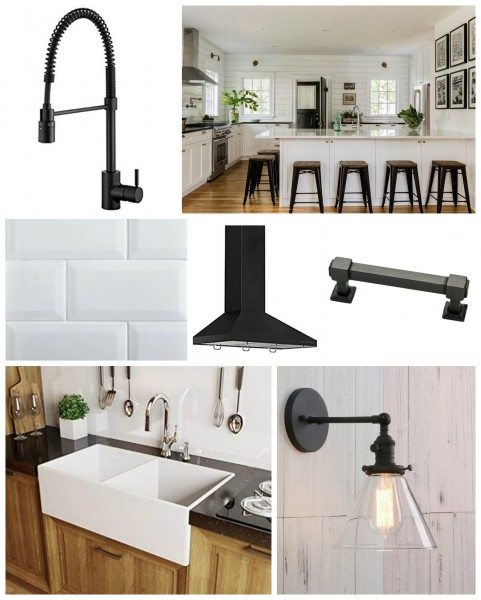
 If you have been following along with this remodel, you know that I created a GORGEOUS style board that would serve as our inspiration for this remodel. We envisioned a bright airy kitchen but wanted a pop of black for the accents. We fell in love with these handles from The Home Depot , and we hit the ground running from there.
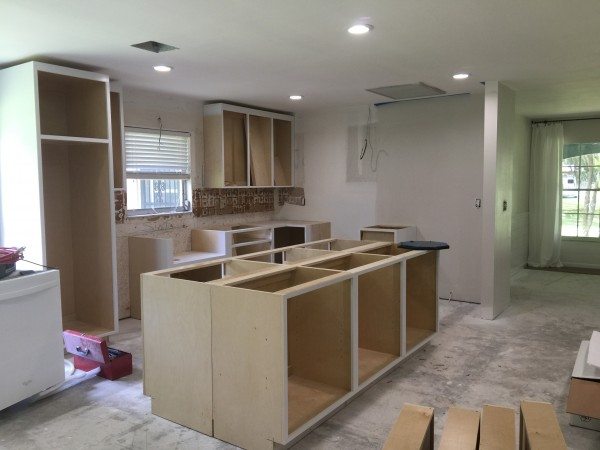
So let me show you a little bit of the process. See that huge hole in the ceiling, that is where the row of pantries was evicted from.  While I am all about DIY, we were on a serious time crunch to get this kitchen done, so they purchased their cabinets and had them installed. (Seriously, sometimes hiring someone to help out can be the difference from wanting to assault someone with a spackle knife, and wanting to remain a DIY blogger.)
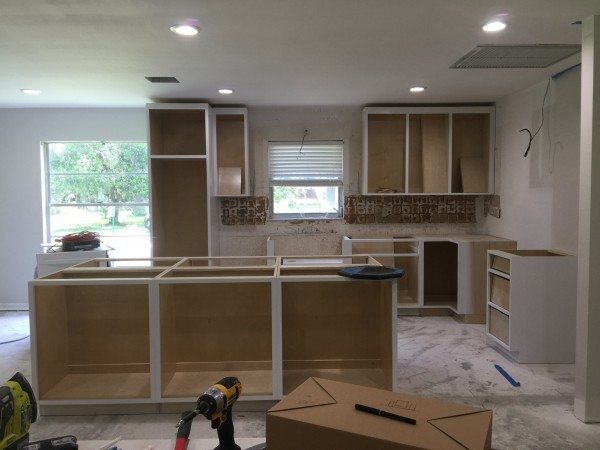 I am not going to lie, the layout of this kitchen makes me giddy, and the size of that island gives me serious house envy, and I LOVE my kitchen. (You can see mine here.)
 Once the counters were in place we got to work tiling the back-splash with white subway tile. (Jena (My friend/homeowner) got to learn first hand how to tile a back-splash, this was her first one and she tackled a lot of it without my supervision! It’s totally doable for a new DIY’er. At this point we had a very white kitchen! It had white cabinets, white sink, white back-splash, and light counters. Time to add some contrast! Next up installing our GORGEOUS hardware from the Home Depot.
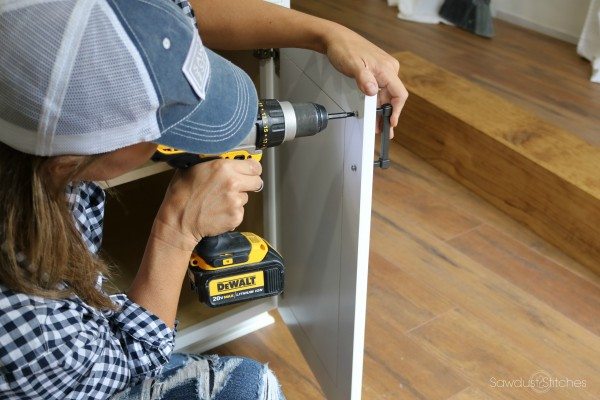
Again, this is another project any novice DIY’er can do , and it will can drastically change/improve any kitchen. So, here is how I install hardware…
 When it comes to installing hardware I am a hardcore fan of the Kreg Hardware Jig. You set the dimensions on it once, and then you just clamp in place.

Then using a drill and a 3/16″ drill bit you drill through the guide holes and through the cabinet door. No more hoping you are driving it in level and praying your spacing is perfect! 
Now it’s time for the rewarding part. Adding the hardware. I like to use a drill when screwing the bolt through the cabinet and into the back of the hardware. A.) I can be lazy B.) I am impatient.
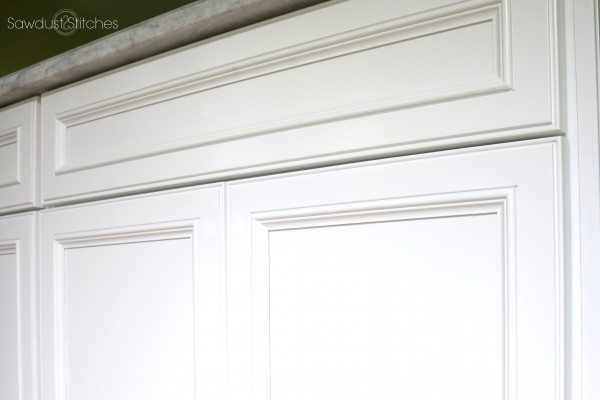
Look how GORGEOUS it is! These drawer pulls are from the “Liberty Classic Square Collection“. P.S. They also come in brushed nickel and really pretty modern brass !
 Seriously look at the kitchen without hardware. It’s pretty and all, BUT…
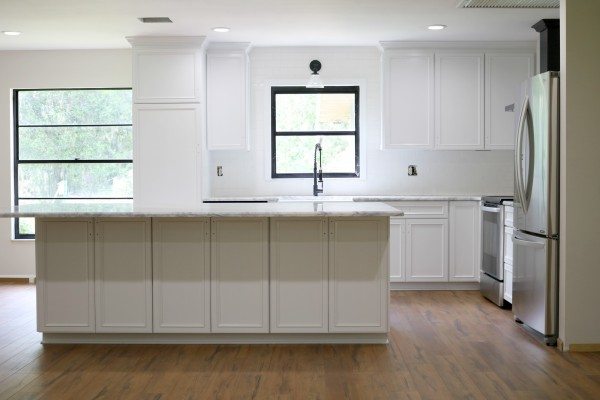
But look at it with the black pops everywhere! It makes my DIY lovin’ heart want to burst!
 I am in love with this kitchen!!!
 Even the little window nook has my heart!
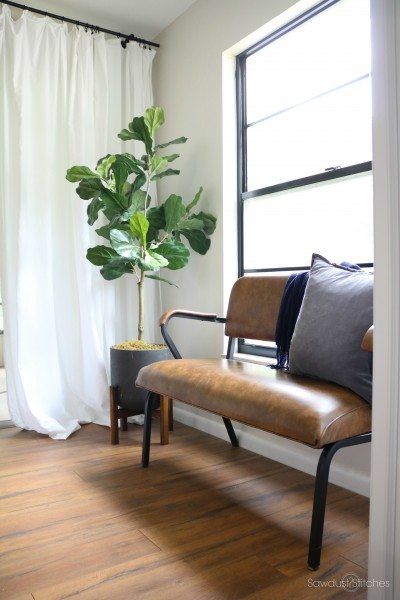
Alright, now you guys have gotten a little taste of what is yet to come with this house, so stay tuned, because we are just getting started!
Take Luck,
Corey
I acknowledge that The Home Depot is partnering with me to participate in this Beachwood Appearance Board Program (the “Program”). As a part of the Program, I am receiving compensation in the form of products and services, for the purpose of promoting The Home Depot. All expressed opinions and experiences are my own words. My post complies with the Word Of Mouth Marketing Association (WOMMA) Ethics Code and applicable Federal Trade Commission guidelines.
 Copyright secured by Digiprove © 2017


Words can not even express how Amazing that transformation is! What a gift you have to do such beautiful work ! We all want one of you ! ❤️❤️❤️
This turned out amazing!!!!!
Looks beautiful!!!
It turned out beautifully! Where can I get the gorg bench?!
I found it on craigslist for 15$ Just needed a little lovin. It is not affectionately referred to as the school bus bench.
Where did you get the stools from? Those are perfect!
Were the kitchen windows already black or did you paint them? 🙂
Painted them! I have a tutorial in the works. 🙂