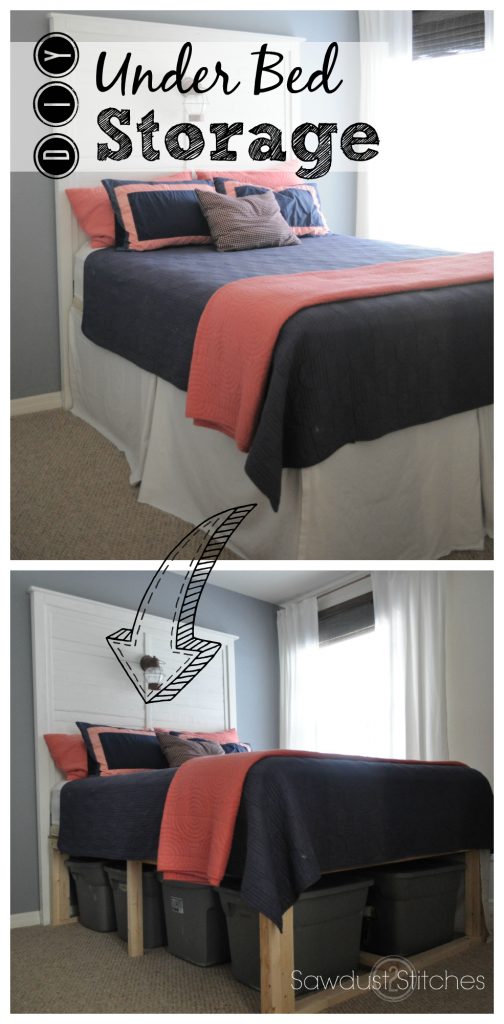
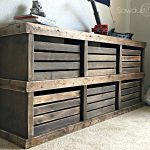
 Don’t get me wrong, I love our guest bedroom, and I love that when we have company they have a place of their own. BUT every time I walk in there, I cringe a little. The room gets used maybe 2 or 3 times a year? But yet, I am constantly moving totes around in our garage trying to create a little more space for my workshop. Well, I came up with a good compromise. Check it out.
( Yes, I know, I am eliminating the box spring, and it probably is there for a reason. But let’s be honest this is a guest bed, if we have guests that stay long enough to complain about poor back support, then they have probably been there too long anyways 🙂
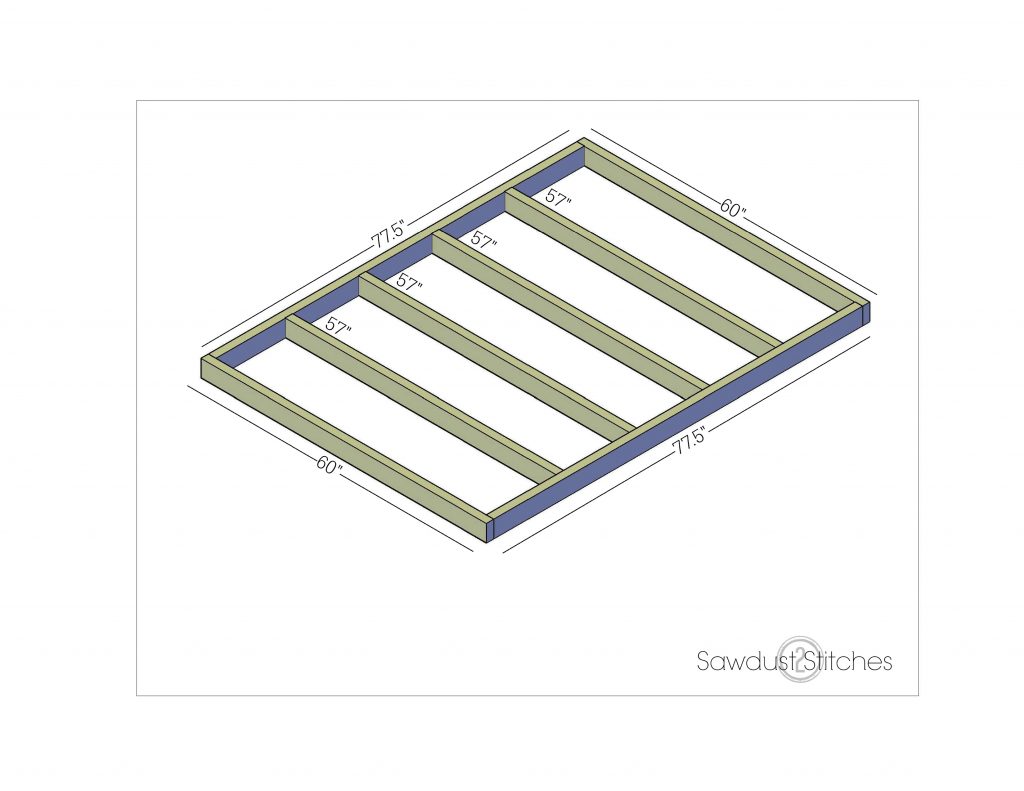
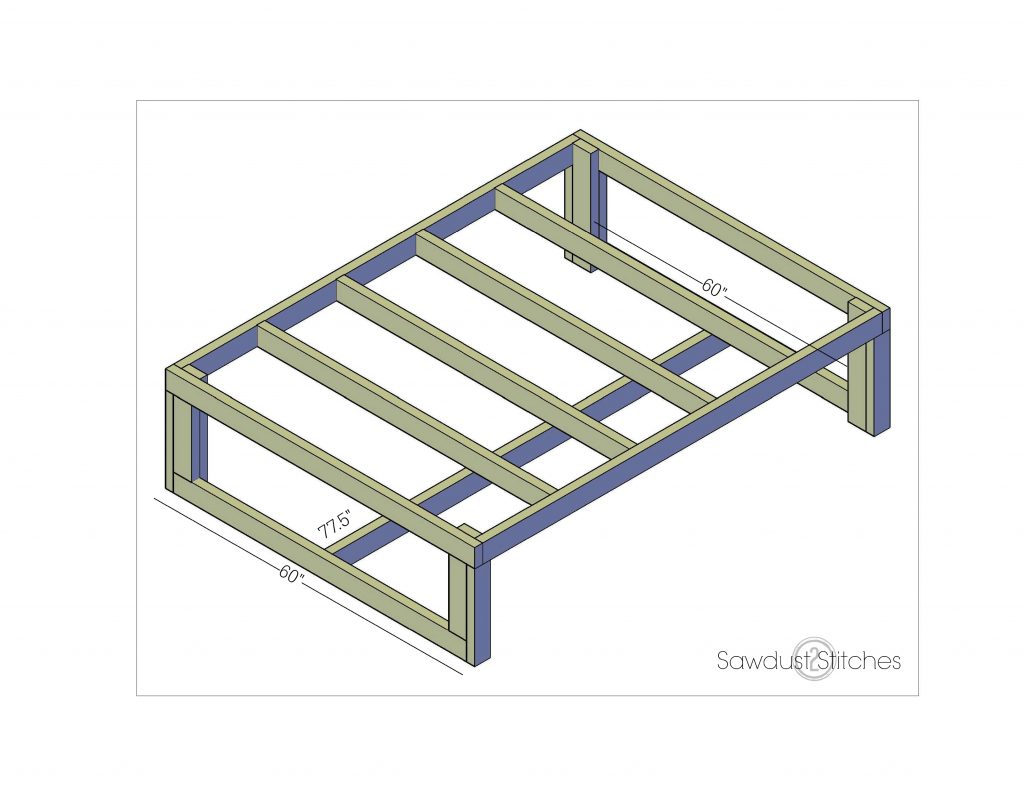
Cut List:
All 2×4’s
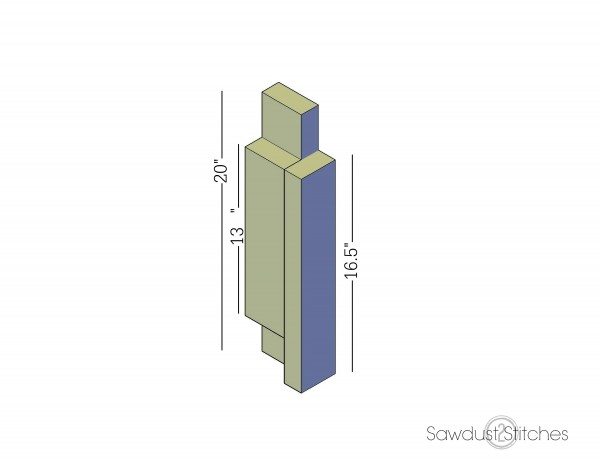
- 20″ x 4
- 16.5″ x 4
- 13″ x 4
- 77.5″ x 3
- 60″ x 2
- 57″ x 6
Tools Suggested:
- Miter Saw
- Drill
- Pre-drill bit
- Countersink Bit
- Tape Measure
- Eye Protection
- Table Saw
Materials Used
- (11 ) 2×4″ s
- (2 sheets) 1/2″ OSB or Plywood
- 2.5″ Screws
- 3.5″ Screws
- 1.5″ Screws
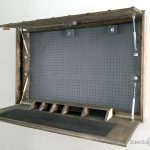
Step 1: Platform
Pre-drill, and counter sink all screws. Evenly space the 57″ supports. It is approximately 15.4″ centered.
Step 2: Legs
Pre-drill, and fasten with 2.5″ screws. Remember that these will need to be insets of two. One set mimicking the plans below, and the other set will mirror it. (See image for Step #3)
 Step 3: Attach Legs
Notice the 2 different legs. Pre-drill, and attach legs to frame with 2.5″ screws.
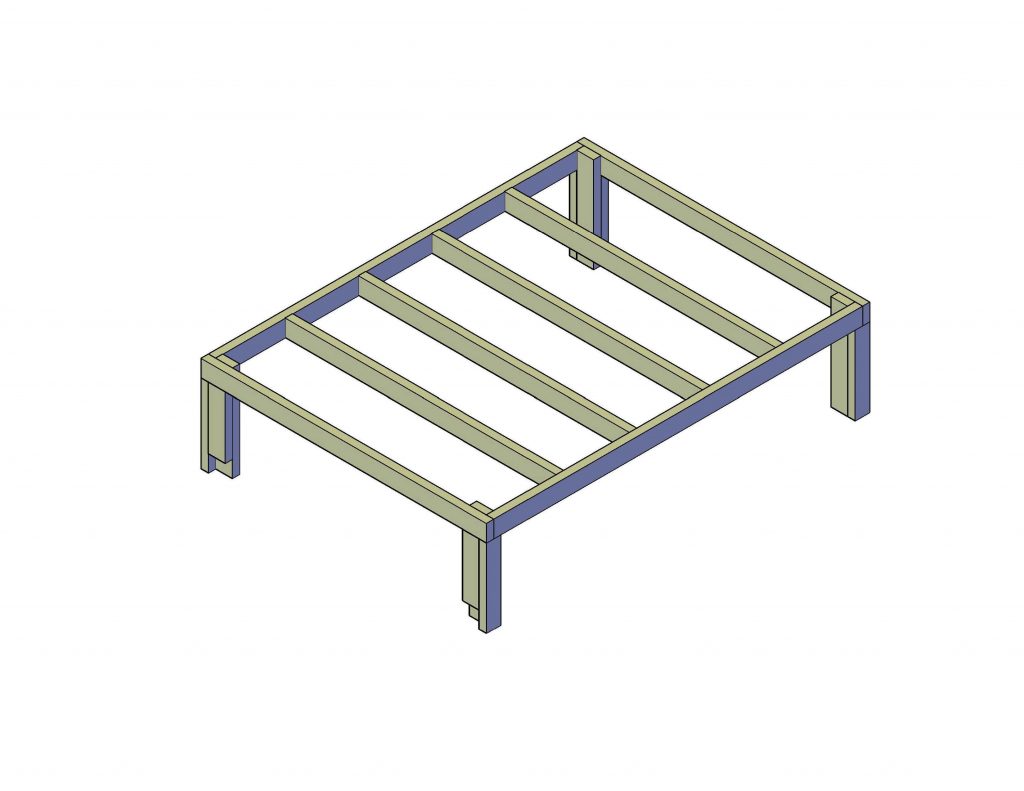
Step 4: Base
Pre-drill and fasten 60″ 2×4’s to the base of legs using 2.5″ screws. Repeat on other side. Lastly, install brace (77.5″). Center, and Pre-drill and secure with 3.5″ screws .
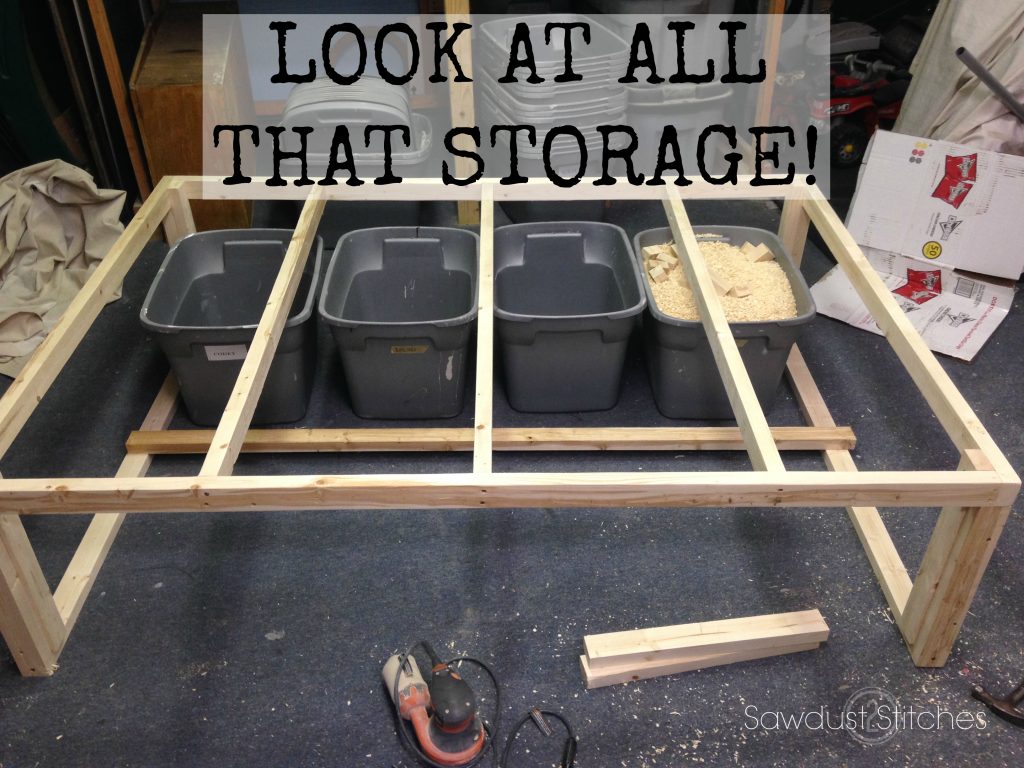
Step 5: Add OSB
The OSB will need to be cut to accommodate the 60″x 80.5″ platform. It will require 2 sheets of standard 4’x8′ 1/2″ plywood or OSB. Secure OSB or plywood using the 1.5″screws.
All done!
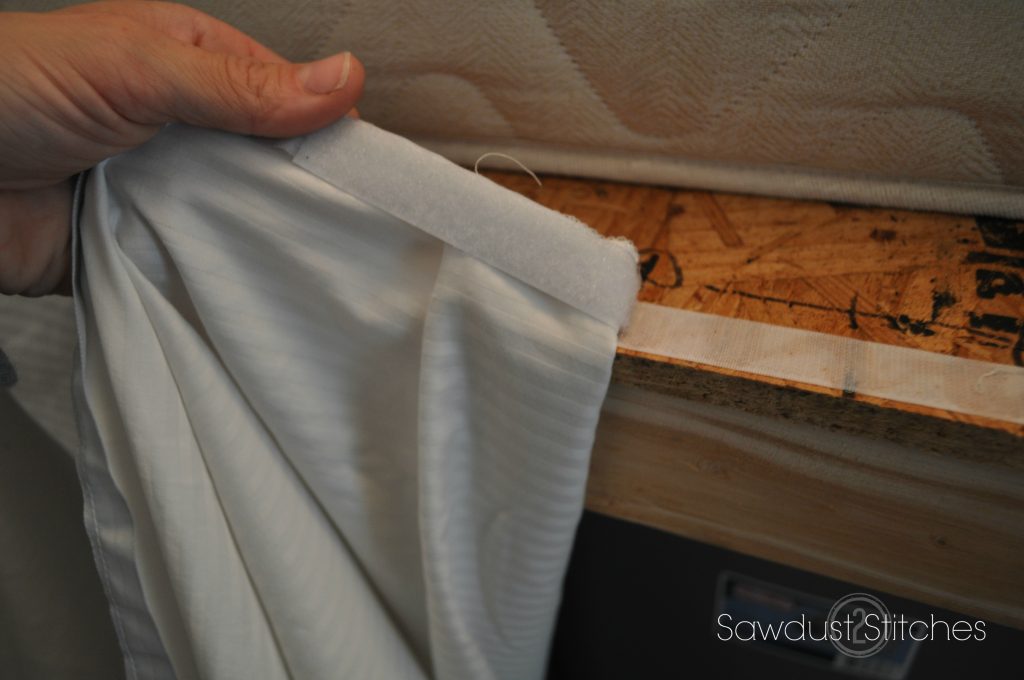
I ended up sewing a faux bed skirt in order to hide all the clutter. Basically, I finished/ hemmed the edges of 3 large fabric rectangles and sewed velcro to the top back edge, and then attached the reverse side of the velcro to the plywood using glue and industrial staples. It makes it easy to remove for when I need to access the storage, that and I hate bed skirts, they always are shifting. Problem solved!
Ta-da! Tons of storage with out giving up the guest room! Booyah.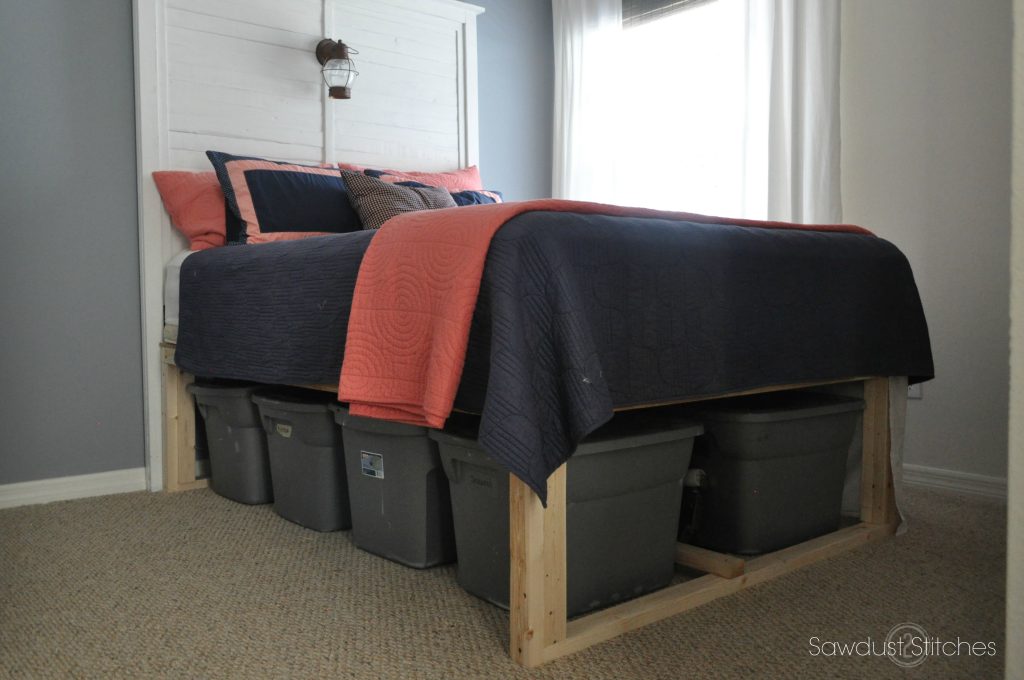
Take Luck,
Corey
 Copyright secured by Digiprove © 2017


Question: Shouldn’t the short piece on the legs be 13″ long to accommodate the 3.5″ width of the 2×4?
Whoa, nice catch. I put it on the cut list correctly but totally mislabeled it in the plan drawing! Good catch, it is 13″ thank you. will need to fix that !
All fixed. Thanks again.
Thanks for the great idea! Do you happen to have cut lists for other size mattresses? I know I can figure t out, but if you have them…. Thanks!
I’m sorry I don’t have them written down. I had thought about trying to different cut lists, but distinctly remember having the worst headache of my life that night 🙂 haha. So sorry.
For what size mattress is this plan for?
This is for a queen.
Do you remember what length 2×4’s you started with?
They were standard 8′ 2×4’s.