‘
Hey All, I hope everyone is recovered from the back-to-school mayhem. I feel like we are back in the swing of things, I have only walked out the door without school lunches twice… so obviously we are way on top of things here in the Sawdust 2 Stitches household. 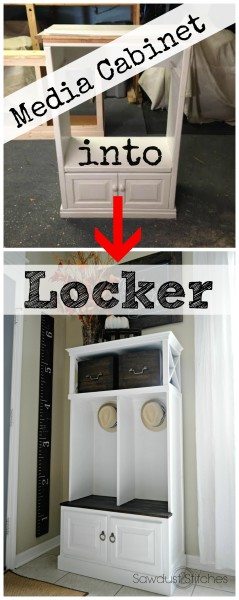
In the event you are like Me, and could use a little help keeping mornings less manic, then I might have a beautiful solution! Granted it won’t make the kids lunch or make sure they brush their teeth (both top and bottom), however it can keep the all the essentials organized!
About 17 seconds before we are suppose to be in the car, I am yelling to no child in-particular, “Do you have your shoes? Where is your book bag?”. Wouldn’t it be miraculous if there was a central location for all the essentials? What if I were to go a step further and say all organized, AND a beautiful addition to your home for a minimal cost !?! Say what ? Here is the tale of how I did just that.
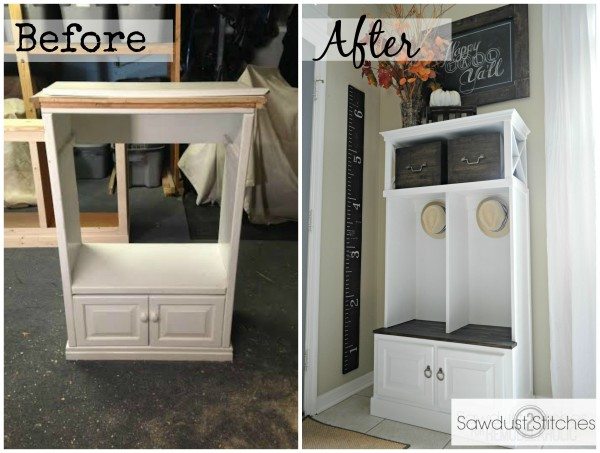
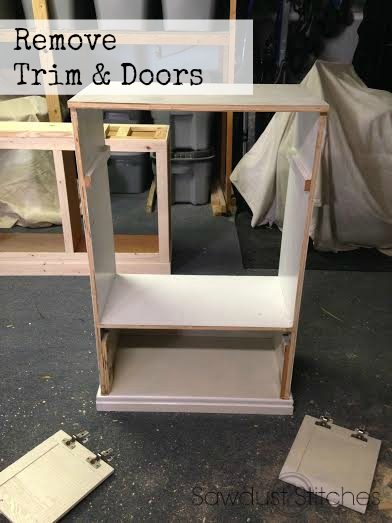
I am sure you have seen old TV cabinets similar to this before. It was in pretty rough condition and had several layers of thick paint. It was a bit of an eye sore, but it was solid wood, with some elbow grease I was sure it had potential. So I picked it up from a garage sale for $10. 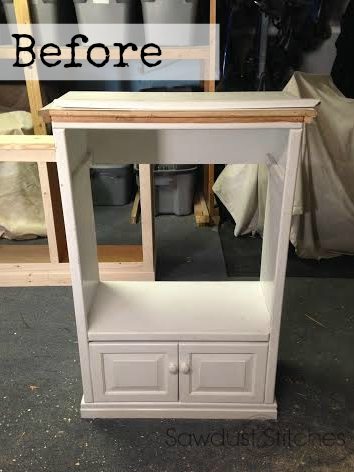 I wasn’t entirely certain what I was going to do with it, but I knew I needed to take off the decorative pieces. Regardless of the end goal, it would simplify sanding and painting.
 After trying to remove the many layers of sloppy paint, I decided it would be easier to just break down the whole piece and pull out the “big sander”. It was then that I started to really get a clear image of what I wanted this piece to look like.
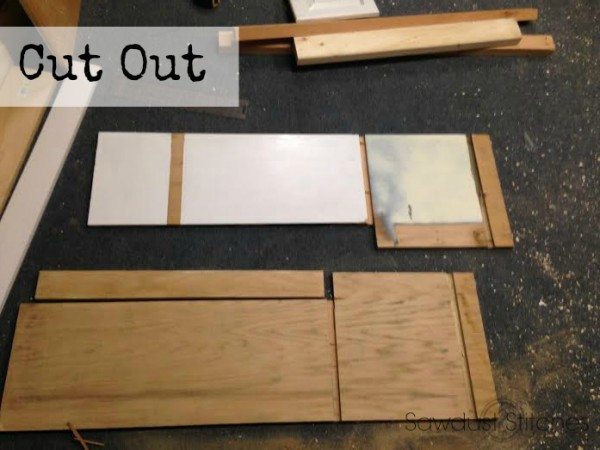
 I wanted there to be ledge that stuck out for seating. So I cut into the boards so that it would create a ledge.
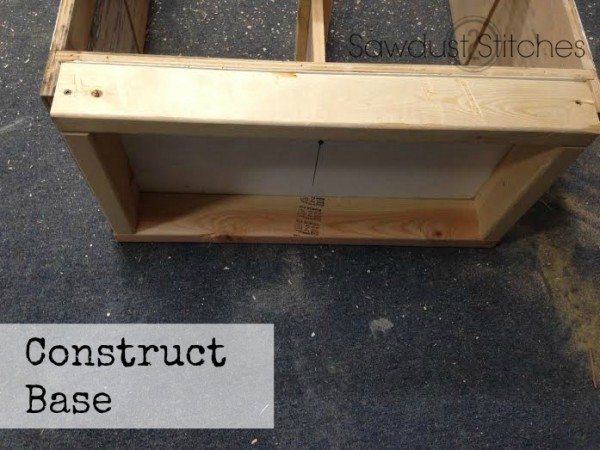
I then began to re-assemble the piece, only this time I added supports for where I would put my bench seating. 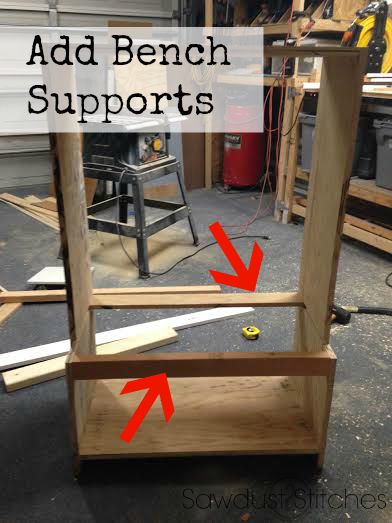 I also decided I wanted this piece to sit a little higher, and I wanted to give it visual weight on the base, so I beefed it up with some 2×3’s.
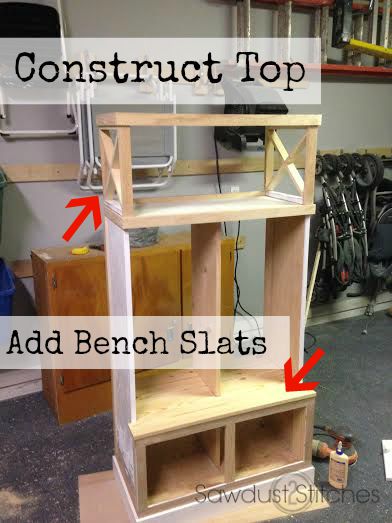
 Once the cabinet/locker was re-assembled and stabilized I started on the aesthetics. I added all sorts of trim and face frames to five it a nice finished look.
 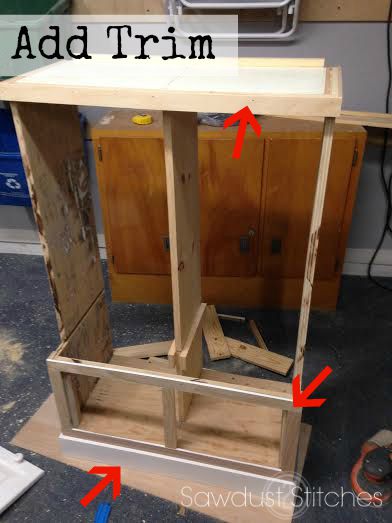 I knew I still wanted it to have more height, and I thought an “x” frame box was the perfect way to do just that! I then used 1×3″ boards to create the bench. It was a cheap and easy option that would add the rustic feel I was trying to create.
 It then needed some molding to really finish the piece, and a piece of thin paneling to close off the back.
 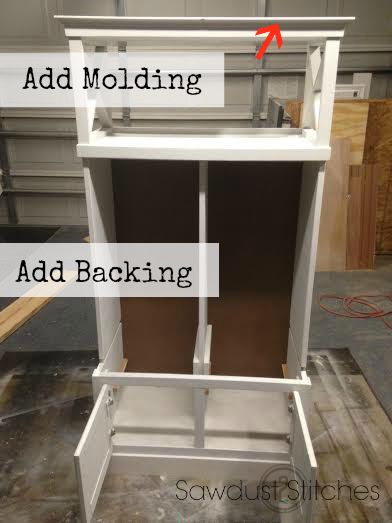 I made two customized crates that would fit in the top section of the locker. I did this for two reasons, I wanted it to have added storage, but I was also planning on staining the bench portion of the locker and wanted to carry the stain color elsewhere on the piece.
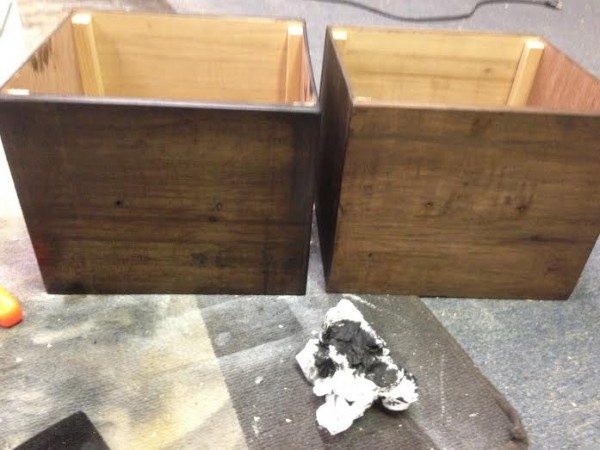
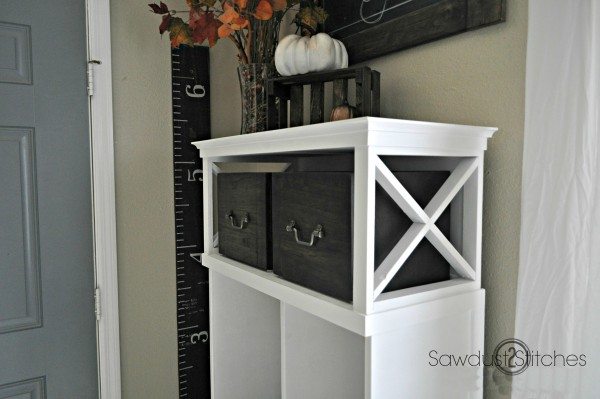
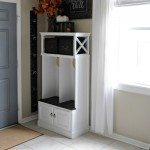
 All that was left to do was the finish work (prime, paint, and stain), and then re-installed the doors, and added hooks.
 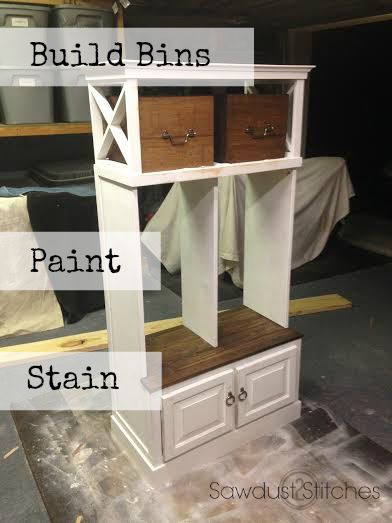 There you have it! A perfect combination of form and function! Booyah!
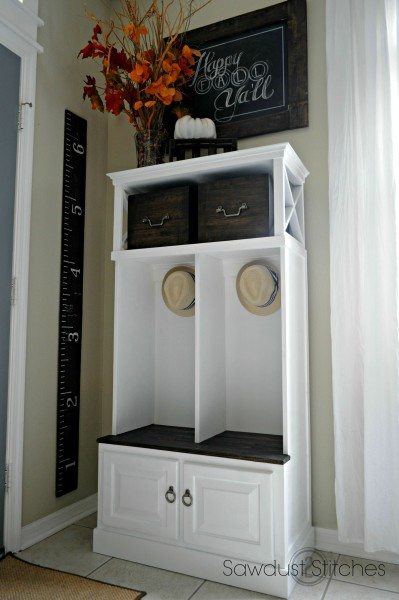
So do you have an old cabinet sitting around begging for a makeover ?
Take Luck,
Corey
 Copyright secured by Digiprove © 2015


Love it!
Awesome, as usual!
Corey, I adore your sense of adventure and style! This piece is a stunner! 🙂 Can you imagine what one of the furniture stores would sell this for? Or on Dot & Bo? CHA-CHING!! You made this so pretty AND useful. Thank you for the inspiration!!
Thank you soo much for taking the time to comment and read!
Good grief, if only you could send me a good dose of your creativity and skill… !!! I love it!
This is awesome! Would you be willing to share your paint colors for the wall & doors? I love the combo!!
Of course! It is Natural Linen by glidden and dark pewter by glidden.
Phenomenal. I wish I had your mad wood working skills and vision.