• Blog
  • About
  • Press
  • Privacy

Let’s be social!

  • Skip to primary navigation
  • Skip to main content
  • Skip to primary sidebar
  • Skip to footer
Sawdust 2 Stitches

Sawdust 2 Stitches

  • Tutorials
    • Around the House
    • Organization
    • Wall Decor
    • Sewing
  • Makeovers
    • R.V.
    • Room Makeover
    • Furniture Makeover
    • Decor Makeover
  • Build Plans
    • Small Builds
    • Wall Decor
    • Dresser
    • Tables
    • Seating
    • Shelving
    • Hidden Compartment
  • Seasonal
    • Summer
    • Spring
    • Fall
    • Winter
  • Home Tours
    • First Home
    • Current Home
    • 70’s Ranch Home
  • Workshop

Garage Sale Flip

January 13, 2015

garage sale flip Sawdust2stitches  2

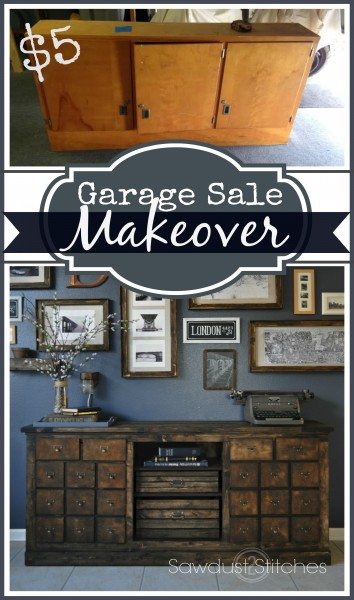
Picked  up this beauty  at a garage sale for $5.00 a  while back.  It wasn’t much to look at, but it was all wood, and a decent size and shape.  In all honesty I had no clue what I was going to do with it, but I couldn’t just pass it up!

After a few weeks of walking past it in my  garage,  I started getting some ideas, and I really wanted my garage space back! So I  jumped right in.

This is not really a tutorial per-Se ,  but you can follow along  and see the steps I took to get there. Garage sale Flip sawdust2stitches  13


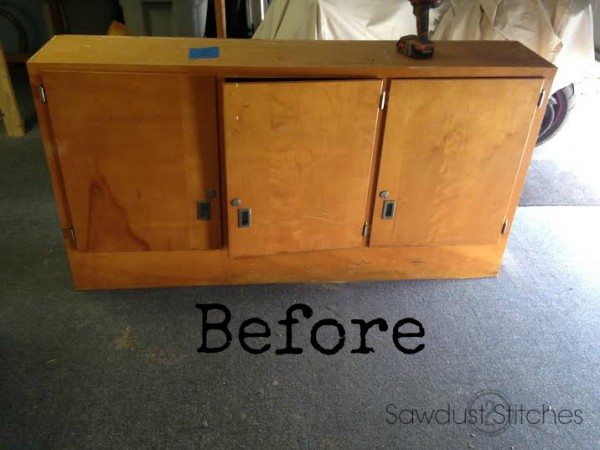
I started by dismantling the doors.

Garage Sale Flip #sawdust2stitches

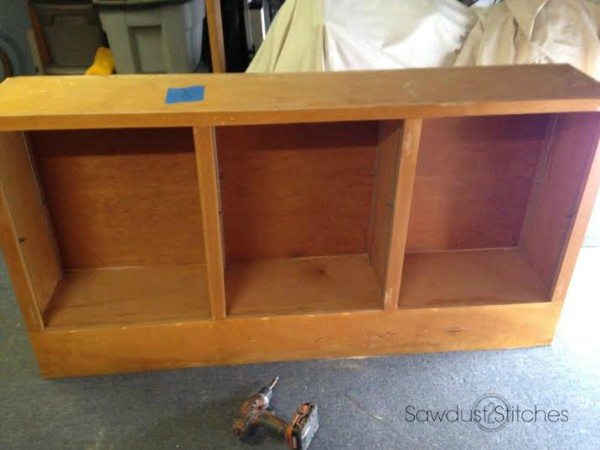
  I then removed all the hardware. ( There was metal shelving brackets.)Garage Sale Flip #sawdustust2stitches 2

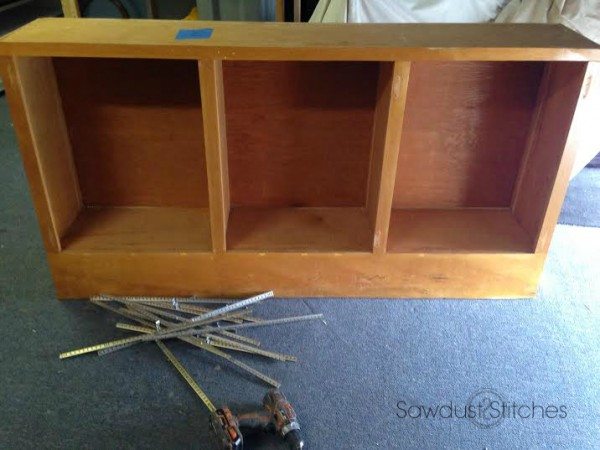
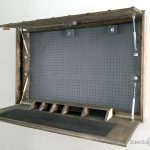
Next,  I removed the back panel, and then sanded down the entire unit.   Garage Sale Flip #sawdust2stitches 3       
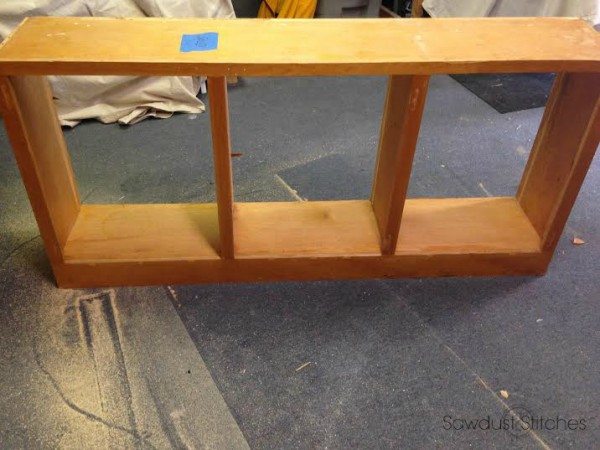
I beefed up the base and the top to give it more visual weight.  ( You can see more details about the basic premise here.) 

Garage sale Flip sawdust2stitches 4

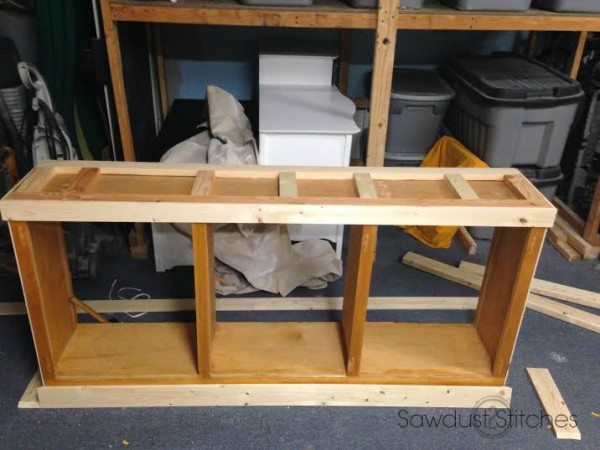
  I then  started  trimming out all the corners and edges. (Again,  you can see more details about this process, here.)

Garage sale Flip sawdust2stitches 1 

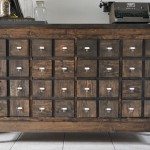
 Next step was the doors.  I opted to go with the “Apothecary Cabinet” style. Garage sale Flip sawdust2stitches  2 

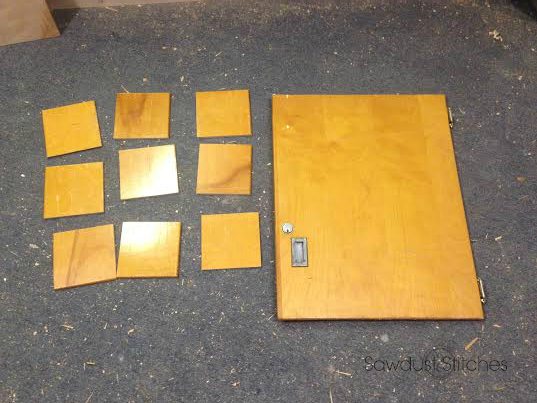
 They are  just  faux drawer fronts, made to look like functioning apothecary drawers. Garage sale flip 3 #sawdust2stitches 

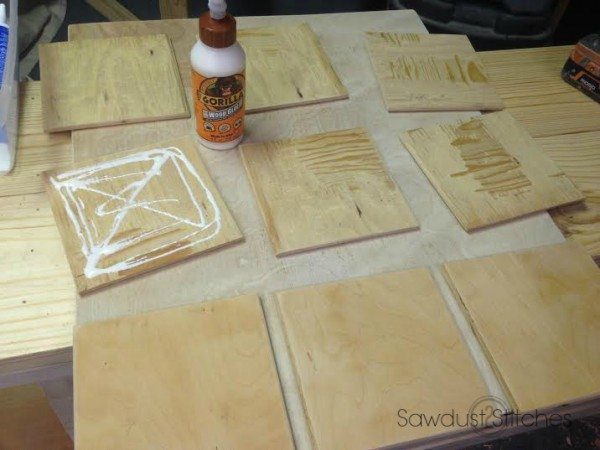
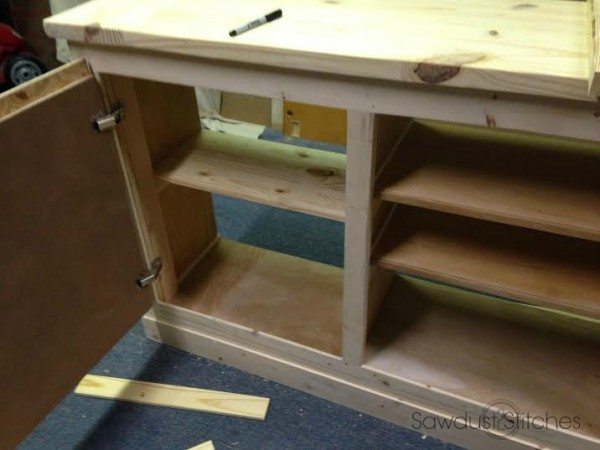
See look how pretty!  I used concealed hinges so that it would hide the fact that  they aren’t real drawers.  If you want more info on installing the doors you can see my
“Apothecary Cabinet” tutorial. Garage sale Flip sawdust2stitches  5

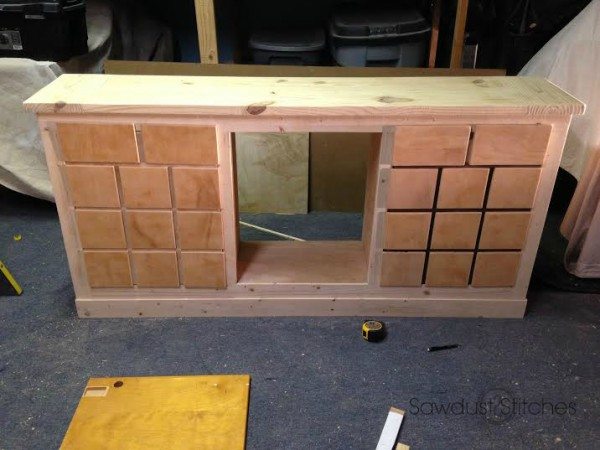
Instead of making the entire cabinet hidden, I  decided to add some exposed shelving.    Garage sale Flip sawdust2stitches  6

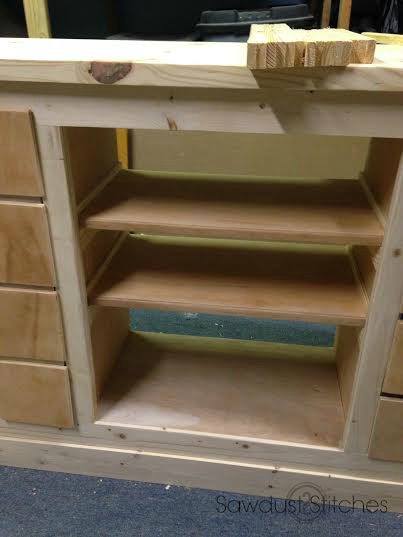
  I also added interior shelving , for practicality purposes.

garage sale flip 7 sawdust2stitches

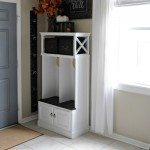
Now it’s time for the finishing touches.  I stained it Jacobean by Minwax, and then added pulls that  I found at Michaels!  Nice, right ! ? Garage Sale Flip  pulls sawdust2stitches

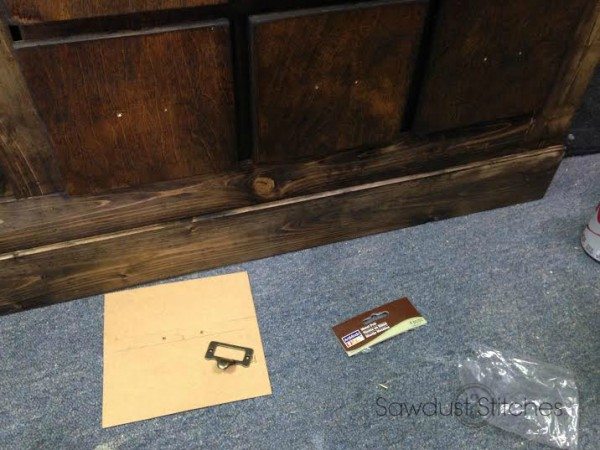
 I decided it needed a few last finishing touches.  It needed crates!  Just a couple of 1×2’s,  1×3’s  and handles! Voila, custom made crates.
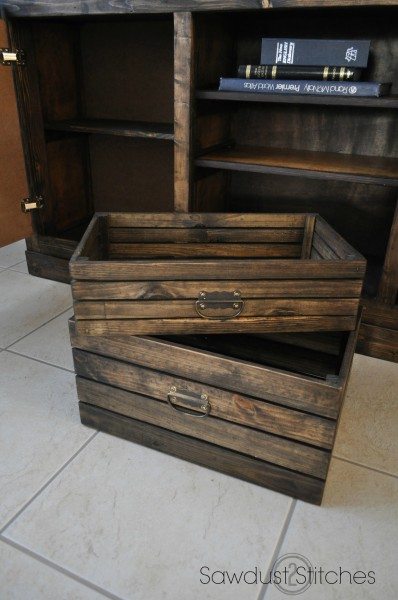
 sawdust2stitches crates for garage sale flip

Look  how pretty!  Sawdust2stitches garage sale flip 
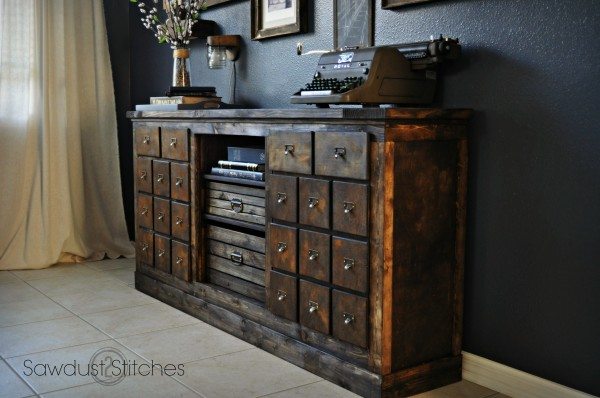
With lots of great hidden storage!  Perfection!
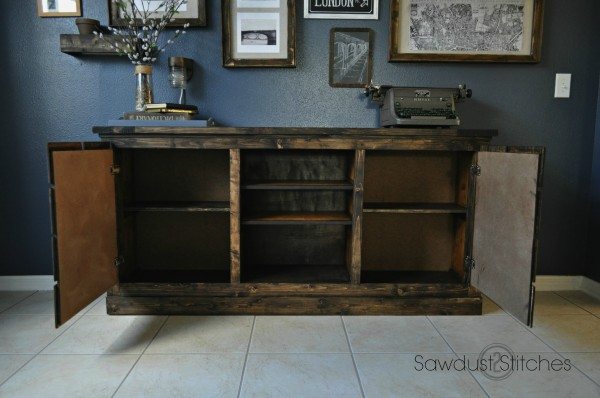
   Apothecary with Shelves open sawdust2stitches  sawdust2stitches

Cost Breakdown :

  • Hinges $10.00
  • Pulls $6.00
  • Trim Pieces $25.00 (Approximately,  I had some on hand.
  • Cabinet $5.00

Total Cost $46.00!  I flipped it, and sold it for $375. 00

Apothecary with shelves sawdust2stitches

  Enjoy, and Happy Holidays!

Corey

Digiprove sealCopyright secured by Digiprove © 2015

More from my site

  • Dresser Makeover into a Mini MudroomDresser Makeover into a Mini Mudroom
  • Media Cabinet Makeover into a LockerMedia Cabinet Makeover into a Locker
  • Secret Compartment MirrorSecret Compartment Mirror
  • Turn a cabinet into a Locker!Turn a cabinet into a Locker!
  • Pub Table MakeoverPub Table Makeover
  • Ikea Cubbies into a Rustic ApothecaryIkea Cubbies into a Rustic Apothecary

in Furniture Makeover, Makovers, Tutorials, Uncategorized # Cabinets, Furniture, Makeover, Re-purpose, Stain

Reader Interactions

you may also like
Back of Door Spice Rack
Pool Patio Design
How To: Exterior Door Makeover
Out-feed Assembly Workshop Table

Comments

  1. Denise says

    January 13, 2015 at 1:55 pm

    It looks awesome – nice work!

  2. Lauren @blesserhouse says

    January 13, 2015 at 7:43 pm

    You are a magician, Corey! I cannot get over this! I literally JUST painted a buffet I’d found on Craigslist, and if this post had come a day sooner, I would totally be using your concept. Pinning and sharing!

    • coreydecker@gmail.com says

      January 14, 2015 at 7:27 pm

      Thanks Lauren, but sorry what a bummer. I hate when I get ideas a little too late. I guess you just have another excuse to be on the lookout, right !?

  3. Melody says

    January 13, 2015 at 10:55 pm

    You’re amazing, wish we were neighbors!

    • coreydecker@gmail.com says

      January 14, 2015 at 7:26 pm

      Well there are some homes for sale in our neighborhood;).

  4. Mindi says

    January 14, 2015 at 7:38 pm

    LOVE, love, LOVE!!! You know how you do this is going to start showing up every where?! It is too cool not to copy. Look for it someday on my blog! 🙂

    • coreydecker@gmail.com says

      January 16, 2015 at 4:06 am

      PLEASE do! I’m going to want to see pictures!
      Thanks for stopping by!

  5. Jenise @ DIYFunIdeas.com says

    January 17, 2015 at 3:46 pm

    Gorgeous! And simply brilliant the way you made the small drawers!

    • coreydecker@gmail.com says

      January 18, 2015 at 1:56 am

      Thanks Jenise, the larger storage are just so much more practical!

  6. Yvette says

    January 18, 2015 at 6:05 pm

    Absolutely beautiful! I need a table or chest for my entry and this iwould be a great addition to my home. I guess the hunt is on. Thanks!

    • coreydecker@gmail.com says

      January 18, 2015 at 8:02 pm

      Start hitting up craigslist! Would love to see pictures if you ever do make one! Thanks for reading!

  7. Cindy says

    January 19, 2015 at 7:09 am

    no way! that is an awesome transformation. what a creative idea to cut the doors and reapply with glue. what a beautiful piece!

    • coreydecker@gmail.com says

      January 20, 2015 at 1:07 am

      Thanks so much! I just love the small drawers too! Thanks for reading.

  8. coreydecker@gmail.com says

    January 23, 2015 at 3:05 am

    Thanks so much for taking the time to look around! This is one of my favorites too. 🙂

  9. Aurie Jenkins says

    January 28, 2015 at 6:30 pm

    This is AWESOME!! I love it. I have been wanting to do one for awhile and I need something to go behind my couch that separates our living room from our office and I think this would be perfect. Ill be on the look out now. What a fantastic project.

    • coreydecker@gmail.com says

      January 28, 2015 at 9:24 pm

      Thanks so much Aurie!

  10. Clancy says

    February 13, 2015 at 10:49 pm

    Love the wall color in this post. What is the paint brand and name of the color?

    • coreydecker@gmail.com says

      February 16, 2015 at 11:48 pm

      Thanks so much, it is one of my favorites. It is blue-gray slate by Glidden.

  11. TwoPlusCute says

    February 22, 2015 at 9:05 pm

    Oh my! It is awesome! *pins*
    The crates were a brilliant addition.

    • coreydecker@gmail.com says

      February 23, 2015 at 12:52 am

      Thank you so much! I am a big fan of the crates too. Instant character.

  12. merce says

    March 22, 2015 at 11:40 pm

    AMAZING, WHAT A GREAT JOB YOU DID. I WILL SHOW YOU MINE WHEN I FINISH IT. THANKS.

    • coreydecker@gmail.com says

      March 24, 2015 at 1:05 am

      I can’t wait to see it !

Primary Sidebar

  • Facebook
  • Instagram
  • Pinterest
  • Twitter
  • YouTube
IMG_9167 (1).jpg fd

Popular Projects

  • How to: Faux Brick Wall
  • Cheap White Curtains
  • Ikea Cubbies into a Rustic Apothecary
  • Cabinet Transformed Into A Kitchen Island
  • R.V. Makeover
  • How to: R.V. Curtains
DIY & Design

Meet Corey

Hi everyone, my name is Corey, and I have a problem. I can’t leave well enough alone… The best therapy usually involves a variety of power tools. So, in the few “spare” moments I am not entertaining my two beautiful, rambunctious, boys, I can typically be found hunched over a sewing machine and/or covered in sawdust. All in the efforts to create a perfect balance of aesthetics and practicality in our home.
read more

Join our mailing list!

DIY & design ideas - right in your inbox!

Top Hits!

  • How to: Faux Brick Wall
  • Cheap White Curtains
  • Ikea Cubbies into a Rustic Apothecary

Featured

Back of Door Spice Rack

Categories

  • 70's Ranch Home
  • Around the House
  • Build Plans
  • Crafts
  • Current Home
  • Decor Makeovers
  • Dresser
  • Exterior
  • Fall
  • First Home
  • Furniture Makeover
  • Hidden Compartment
  • Kitchen
  • Lighting
  • Makovers
  • Master Closet
  • Organization
  • R.V.
  • Room Makeovers
  • Seasonal
  • Seating
  • Sewing
  • Shelving
  • Small Builds
  • Smart Home
  • Spring
  • Summer
  • Tables
  • Tablescape
  • Tutorials
  • Uncategorized
  • Wall Art
  • Wall Decor
  • Winter
  • Workshop

Footer

Contact Me: Corey@Sawdust2Stitches.com

Latest ‘Grams

Follow on Instagram
2020 © Your Blog Name
theme by soleilflare
Enter your name and email and get the weekly newsletter... it's FREE!
Your information will *never* be shared or sold to a 3rd party.