• Blog
  • About
  • Press
  • Privacy

Let’s be social!

  • Skip to primary navigation
  • Skip to main content
  • Skip to primary sidebar
  • Skip to footer
Sawdust 2 Stitches

Sawdust 2 Stitches

  • Tutorials
    • Around the House
    • Organization
    • Wall Decor
    • Sewing
  • Makeovers
    • R.V.
    • Room Makeover
    • Furniture Makeover
    • Decor Makeover
  • Build Plans
    • Small Builds
    • Wall Decor
    • Dresser
    • Tables
    • Seating
    • Shelving
    • Hidden Compartment
  • Seasonal
    • Summer
    • Spring
    • Fall
    • Winter
  • Home Tours
    • First Home
    • Current Home
    • 70’s Ranch Home
  • Workshop

Dresser Re-Purposed into Antique Ice Box

September 16, 2015

Dresser Repurpose hardwareOk sports fans, I am particularly psyched out of my mind about today’s post! Today I am teaming up with a group of very talented DIY bloggers in a
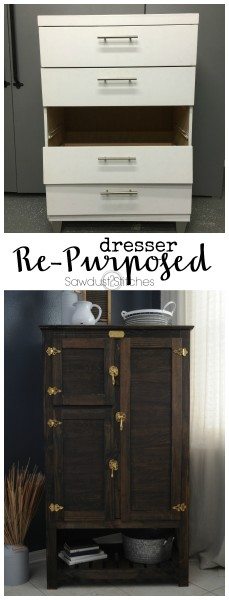
“Re-purpose It” challenge.

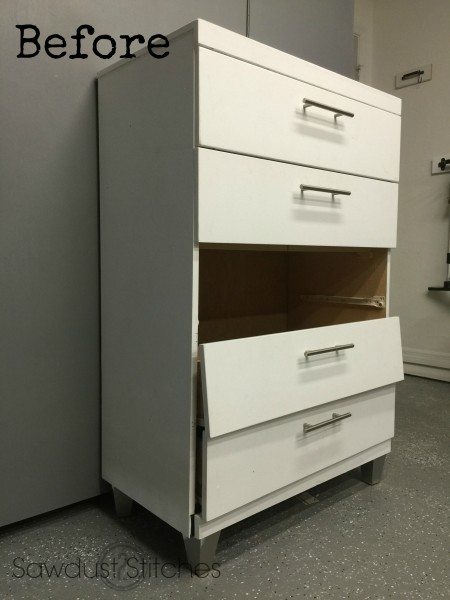
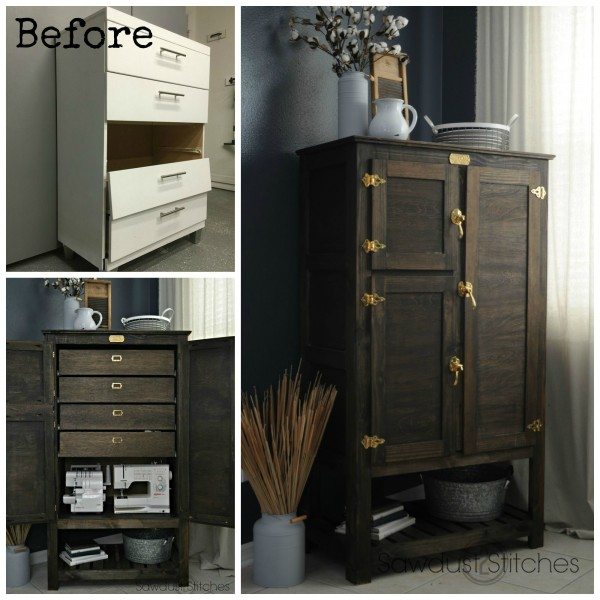
For my project I decided to take on the dresser that was banished to our guest room. It has been slowly falling apart and definitely needed a little lovin’ … Let’s dive in, shall we ?

dresser repurpose before sawdust2stitches.com DISCLAIMER: Let’s be real,  this is NOT a detailed build plan, it is  more of a basic breakdown of the process I went through.  HOWEVER… here is general list of the tools and supplies I used.

Tools Suggested:

  • Table Saw
  • Nail Gun
  • Drill
  • Kreg Jig

Materials Used:

  • 1/4″ wood paneling (4’x8′)
  • 1×3″ boards
  • Wood Glue
  • (3) Ice Box Hardware Kits- Available at D. Lawless Hardware
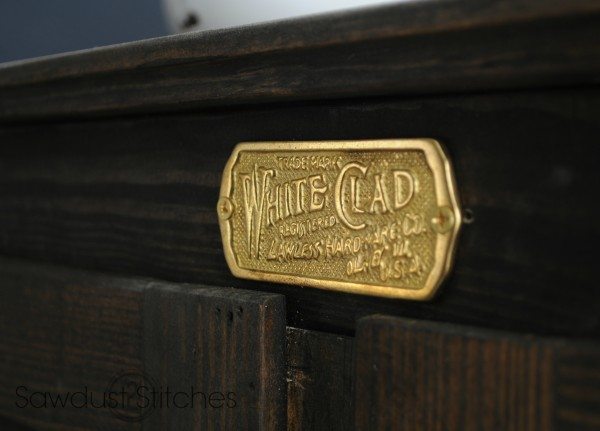
  • (1) Ice Box Sign
  •  Sandpaper

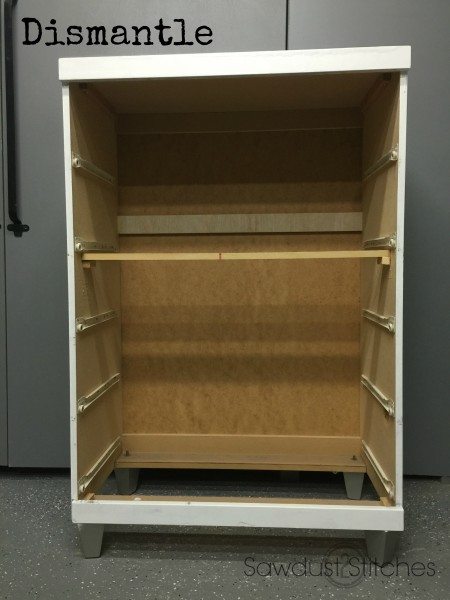
Alrighty, I started by dismantling that sucker!  I kind of took it down to the bones. It had a decent frame, but it needed some MINOR improvements. 🙂

dismantle dresser sawdust2stitches.com

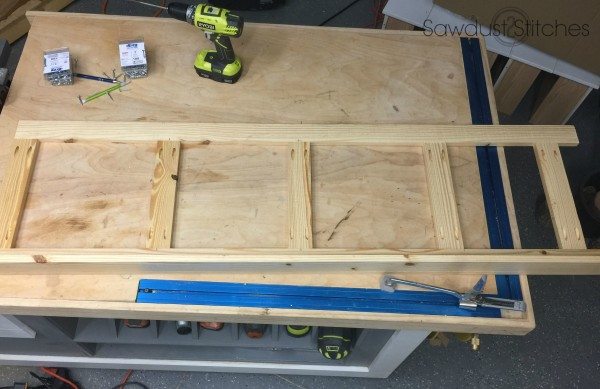
Once dismantled,  I started constructing a frame out of cheap-o 1×3’s. (Pretty sure that is their technical term.)  I made two of these frames (see image below) one  for each side.

build frame sawdut2stitches.com

I then cut and attached a piece of 1/4″ paneling to the sides. I wanted to be able to give the exterior a nice stained finish. So I slathered it up with wood glue, and then tacked it in place for good measure.  I then attached the newly constructed frames to the sides. (On top of the freshly installed paneling.)  dresser re purpose attach frame sawdust2stitches

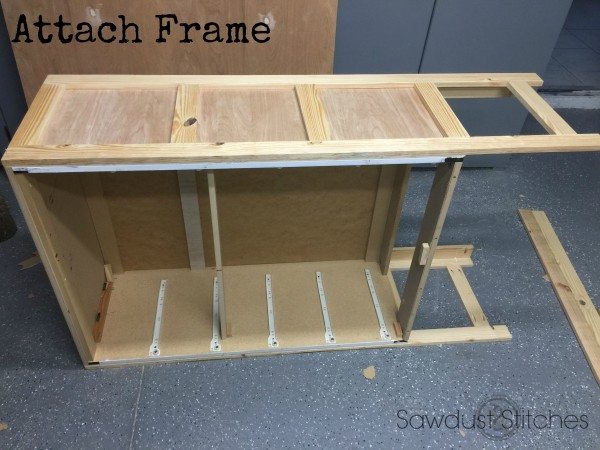
After the side frames were attached, I then needed to make it look pretty. It needed a face frame.

Attach Front Frame sawdust2stitches.com

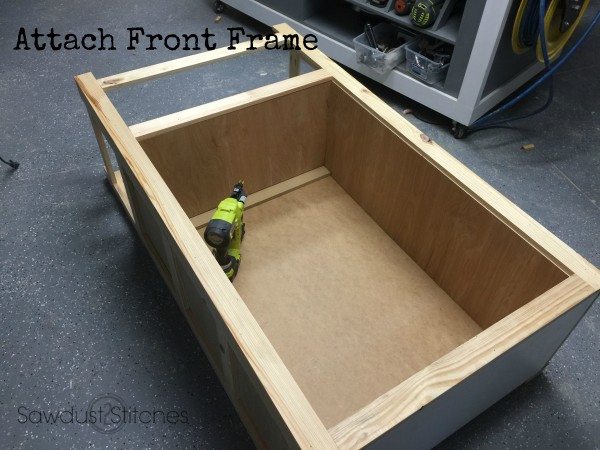
Looking prettier already! dresser re purpose www.sawdust2stitches.com

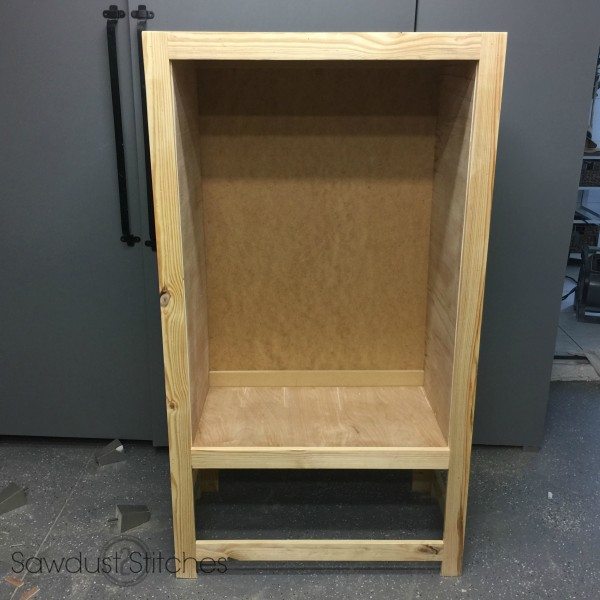
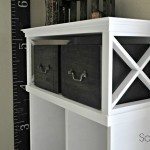
Going into this project, I knew I wanted to give this dresser some additional height. (Hence the constructed frame.)  The reasoning?  I wanted to create a lower shelf.  I wanted to give it a rustic look  AND  I am also cheap, so yet again I turned to 1×3’s. Add slats dresser repurpose sawdust2stitches.com

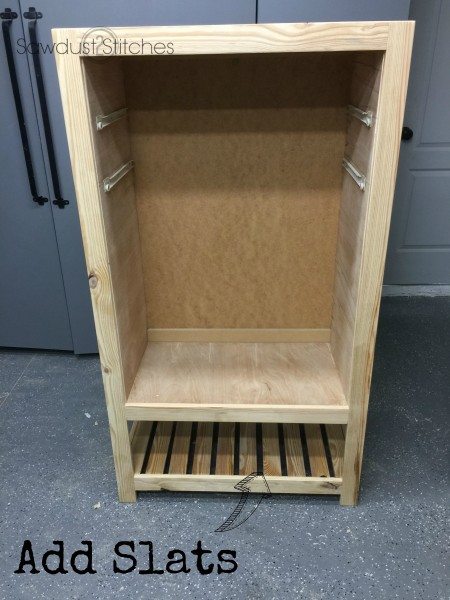
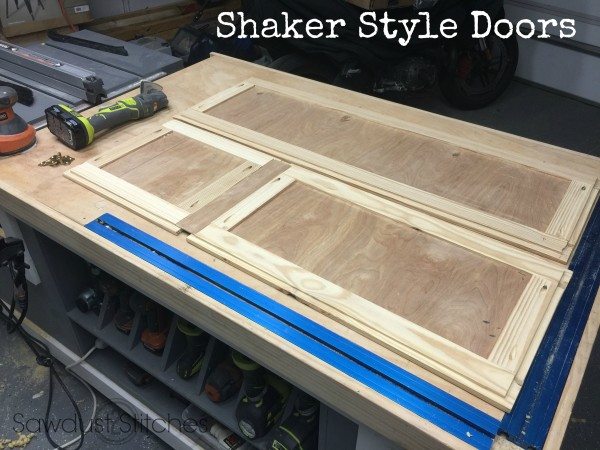
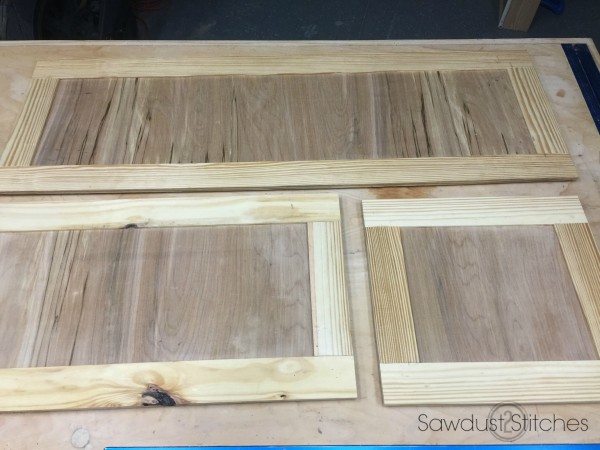
Now I needed some doors on this sucker.   I made shaker style cabinet doors.  Its just a little more work and a lot-a-bit of math.  The only  thing that is different about these shaker style doors is that I needed to route out a lip on the edge to accommodate  the specialty hinges.

assemble shaker style doors sawdust2stitches.com

Pretty right !?

dresser re purpose challenge www.sawdust2stitches.com

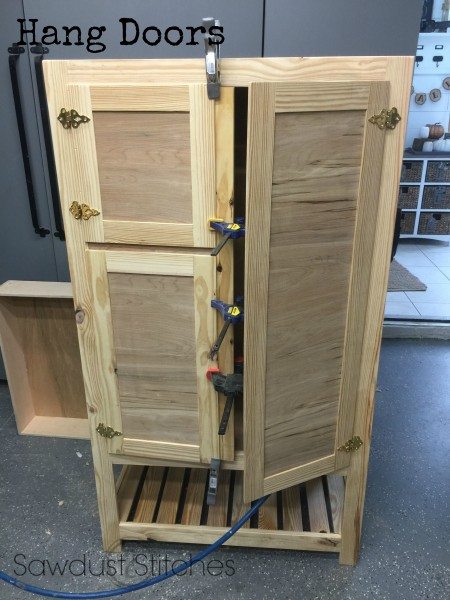
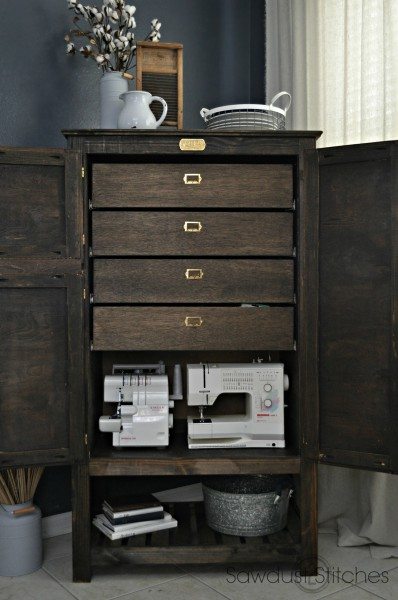
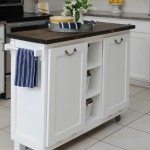
I then added the hardware and a center board that would  make it APPEAR as if all of these doors work independently. (Spoiler Alert: They don’t 🙂 )

resser re purpose www.sawdust2stitches.com

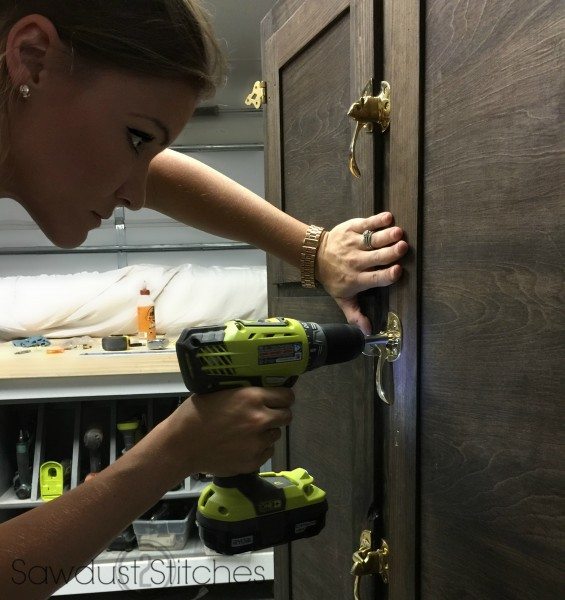
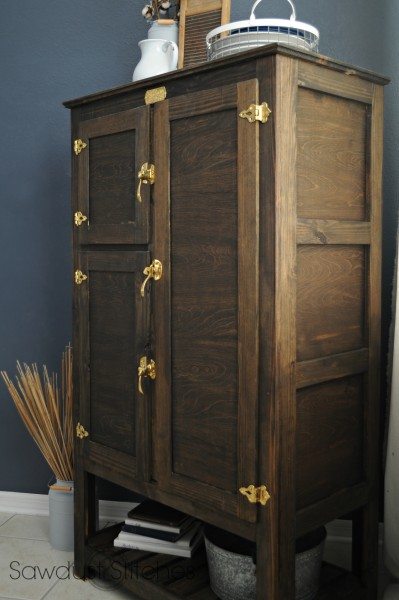
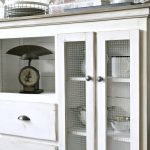
Now it is time for the GORGEOUS hardware. I  got mine from D. Lawless Hardware, and honestly it is the best price point I was able to find anywhere!

Dresser re-purpose sawdust2stitches.com

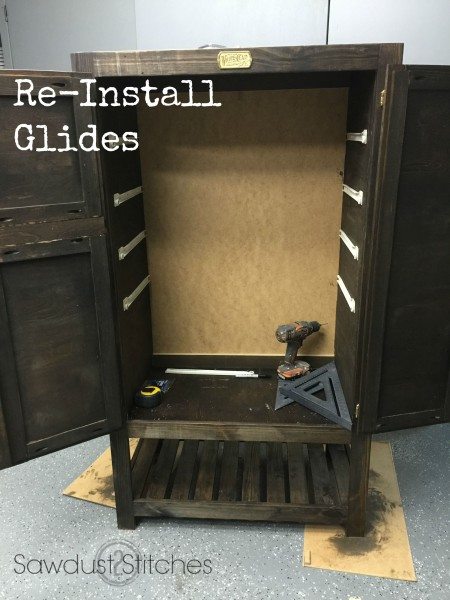
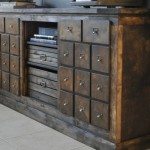
(So… you may have noticed in the mean time I stained my cabinet…I ran out of materials and my son was napping… ) Now for the cool part. Time to reinstall the drawers. I spaced  my  drawers a little differently than they were originally placed.

2015-09-13 13.19.07

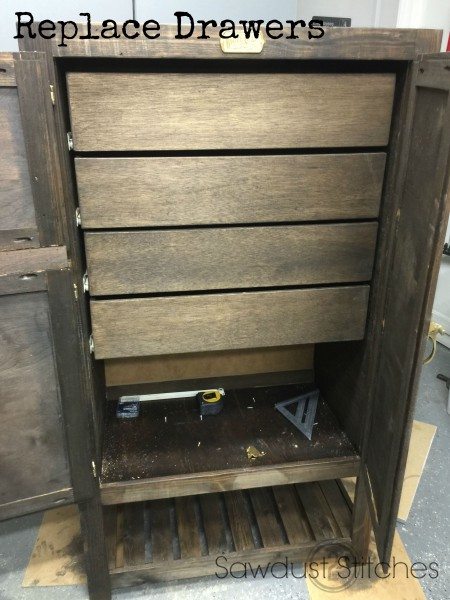
I then added my drawers. (I did decide resurface the drawers fronts so that it would all have a cohesive look.)

Dresser re purpose it sawdust2stitches

  Last step: It needed a top!  I scored a 1″ x 12″x 6′ from the 70% off section at Home Depot.  Using a Kreg Jig I joined the boards together. I cut them down, and then routed the edge to make it pretty. 2015-09-13 17.22.33 ss

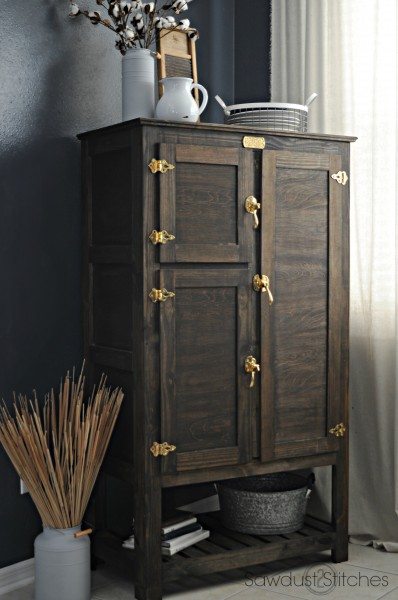
    Then I  attached and stained that bad boy!2015-09-13 17.46.24 sawdust2stitches

dresser makeover right side sawdust2stitches  Dresser Repurpose hardware   dresser repurpose sawdust2stitches.com open  Dresser Re-purpose www.sawdust2stitches.com


Thanks for reading and Take Luck,

Corey

The ultimate dresser repurpose


Dresser Makeover Repurposed into Ice Box by www. Sawdust2stitches.com


Digiprove sealCopyright secured by Digiprove © 2015

More from my site

  • Workshop Table for X-Carve  (Using OLD cabinets!)Workshop Table for X-Carve (Using OLD cabinets!)
  • A Cabinet Makeover that will turn heads!A Cabinet Makeover that will turn heads!
  • Dresser Makeover into a Mini MudroomDresser Makeover into a Mini Mudroom
  • Media Cabinet Makeover into a LockerMedia Cabinet Makeover into a Locker
  • Cabinet Transformed Into A Kitchen IslandCabinet Transformed Into A Kitchen Island
  • Garage Sale FlipGarage Sale Flip

in Furniture Makeover, Kitchen, Makovers, Organization, Uncategorized # Re-purpose

Reader Interactions

you may also like
Master Bathroom Makeover
Board and Batten Island Makeover
DIY Pull Out Drawer Storage
DIY Drawer Dividers

Comments

  1. gail says

    September 16, 2015 at 10:03 am

    Corey,

    That’s an unbelievable transformation of that old dresser! When I saw the teaser image, I was really wondering what this was in it’s former life.

    great job!
    gail

    • coreydecker@gmail.com says

      September 16, 2015 at 1:34 pm

      A compliment from the Queen of re-purposing. Color me flattered. Thanks so much Gail!

  2. Mindi says

    September 16, 2015 at 10:40 am

    Shut the front door!! Corey. Lets talk, not only are you cute and fun, have awesome dance moves, and hilarious in your writing…you are killing it in giving furniture A-MAZE-ING facelifts. You are the furniture plastic surgeon IMHO!!! I can’t tell you how much I love this!! Pinned. Thank you so much for participating in the challenge girl!!

    • coreydecker@gmail.com says

      September 16, 2015 at 1:34 pm

      Mindi, you are such a doll, thank you! YOu better stop you are gonna give me an ego trip ;). Thanks so much for hosting, I loved participating!

  3. Kim (TheKimSixFix) says

    September 16, 2015 at 11:54 am

    Holy crap woman! That is amazing.. and I am so happy to see I am not the only one addicted to 1x3s because of their price point!

    It is so pretty now! It is like the frog prince of furniture! <3

    • coreydecker@gmail.com says

      September 16, 2015 at 1:33 pm

      Gotta love the cheap-o’s! Am I right ! ? Thanks Lady!

  4. Funky Junk Interiors says

    September 16, 2015 at 12:08 pm

    Oh my gosh. What dresser? SERIOUSLY….

    Such a gorgeous, rustic, high end piece now! Love the idea of doors on the outside. So stunning Corey! Beyond anything I’d even comprehend…

    • coreydecker@gmail.com says

      September 16, 2015 at 1:32 pm

      Whoa, coming from you I will take that as a HUGE compliment. Thanks so much Donna. FYI your pictures came out stunning!

  5. Kathy Cano-Murillo says

    September 16, 2015 at 12:46 pm

    You are so talented and skilled, I’m blown away. GREAT job!!!!

    • coreydecker@gmail.com says

      September 16, 2015 at 1:31 pm

      Thanks so much Kathy!

  6. Merethe says

    September 16, 2015 at 12:51 pm

    You are my DIY hero!!! What a beautiful job you just did, and what an inspiration! I got a similar job in Denmark, can’t wait to show you!!

    • coreydecker@gmail.com says

      September 16, 2015 at 1:31 pm

      I can’t wait to see it! Please make sure you send it over once you finish it !?
      \

  7. Diena Cameron says

    September 16, 2015 at 4:48 pm

    Wow, Corey, beautiful job. I just know that had to take alot of math at which i am not good at. ) = I just can’t get over the fact that that was a dresser ! Amazing, just Amazing <3

  8. Larissa ~ Prodigal Pieces says

    September 16, 2015 at 9:32 pm

    Okay…so i just picked myself up off the floor so I could type. AMAAAAZING, AMY!! 😀

    • Larissa ~ Prodigal Pieces says

      September 16, 2015 at 9:34 pm

      Okay…so that was supposed to say OH MY, not AMY…thank you to my toddler. Well, you get the idea.

    • coreydecker@gmail.com says

      September 18, 2015 at 8:43 am

      Haha oh Larissa, you flatter me! Thank you so much lady!

  9. Amy says

    September 16, 2015 at 10:55 pm

    Corey you are something else, how do you even think of these things!?! The new dresser is amazing and beautiful. I love the choice of hardware, it really pops.

  10. Tali says

    September 17, 2015 at 8:17 am

    Wow! I am Speechless! what a great transformation! You are so awesomely creative!

    • coreydecker@gmail.com says

      September 18, 2015 at 8:42 am

      Thank you so much!

  11. Becky says

    September 17, 2015 at 8:38 am

    Completely and totally STUNNING.

  12. Lucy @ Patina Paradise says

    September 17, 2015 at 3:57 pm

    This is a pretty amazing makeover! I am in awe and would love it if you would link it to our furniture only party Friday’s Furniture Fix, tonight at 9PM EST. Hope to see you there! http://www.patinaparadise.com/2015/09/fridays-furniture-fix-8.html

  13. Alison says

    September 18, 2015 at 5:38 am

    Wow, that is just stunning, love the stain/finish you’ve used.

    • coreydecker@gmail.com says

      September 18, 2015 at 8:19 am

      Thanks Alison! I used Jacobean by Minwax!

  14. Katie @ Little House of Four says

    September 18, 2015 at 9:04 pm

    Girl, you are so incredibly talented! This makeover is AH-mazing and probably one of my favorites! Great job on another fantastic repurpose!

  15. Karen @ Dogs Don't Eat Pizza says

    September 18, 2015 at 11:09 pm

    Holy transformation, Batman! That is AWESOME! I love it. I more than love it. Really gorgeous.

  16. Tone says

    September 22, 2015 at 3:25 am

    That is insane!! Nothing more, nothing less! Love it!

    • coreydecker@gmail.com says

      September 23, 2015 at 3:57 pm

      Thanks so much!

  17. Glenda says

    October 12, 2015 at 11:01 pm

    This is amazing, you are so clever! Would love to copy your creation but unfortunately I can’t purchase the hardware or anything like it in Australia. 🙁 I’ll either have to come up with a creative solution or wait till my next trip to the USA. Thanks so much for sharing your creation.

    • coreydecker@gmail.com says

      October 16, 2015 at 10:45 pm

      Oh I am sorry to hear that! If you search “Ice box hardware” you might have more luck?

  18. Michelle says

    October 20, 2015 at 3:08 pm

    Unbelievably amazing! Just gorgeous and I’ll bet this will be flooding Pinterest!

    • coreydecker@gmail.com says

      October 22, 2015 at 9:20 pm

      Thanks Michelle! Fingers crossed 🙂

  19. Nancy says

    October 21, 2015 at 3:23 pm

    I can’t say anything! I’m speechless! You must have a genius mind.

    • coreydecker@gmail.com says

      October 22, 2015 at 9:19 pm

      Thank you so much Nancy!

  20. Samson's Mom says

    November 14, 2015 at 9:54 am

    Could you pretty please include a more detailed tutorial of the cabinet doors? I want to make this so bad, but can’t seem to figure out the doors. If not, still a fantastic tutorial and drool-worthy piece of furniture!

    • coreydecker@gmail.com says

      November 15, 2015 at 9:41 pm

      I would really like to at some point, BUT if you are looking for something a little more immediate, there are some great tutorials available. I would suggest using a “shaker Style ” door. Here is one such tutorial. http://www.remodelaholic.com/shaker-cabinet-door/ best of luck!!

Primary Sidebar

  • Facebook
  • Instagram
  • Pinterest
  • Twitter
  • YouTube
IMG_9167 (1).jpg fd

Popular Projects

  • How to: Faux Brick Wall
  • Cheap White Curtains
  • Ikea Cubbies into a Rustic Apothecary
  • Cabinet Transformed Into A Kitchen Island
  • Workshop Assembly Table
  • The BEST Beach Blanket ever!
DIY & Design

Meet Corey

Hi everyone, my name is Corey, and I have a problem. I can’t leave well enough alone… The best therapy usually involves a variety of power tools. So, in the few “spare” moments I am not entertaining my two beautiful, rambunctious, boys, I can typically be found hunched over a sewing machine and/or covered in sawdust. All in the efforts to create a perfect balance of aesthetics and practicality in our home.
read more

Join our mailing list!

DIY & design ideas - right in your inbox!

Top Hits!

  • How to: Faux Brick Wall
  • Cheap White Curtains
  • Ikea Cubbies into a Rustic Apothecary

Featured

Master Bathroom Makeover

Categories

  • 70's Ranch Home
  • Around the House
  • Build Plans
  • Crafts
  • Current Home
  • Decor Makeovers
  • Dresser
  • Exterior
  • Fall
  • First Home
  • Furniture Makeover
  • Hidden Compartment
  • Kitchen
  • Lighting
  • Makovers
  • Master Closet
  • Organization
  • R.V.
  • Room Makeovers
  • Seasonal
  • Seating
  • Sewing
  • Shelving
  • Small Builds
  • Smart Home
  • Spring
  • Summer
  • Tables
  • Tablescape
  • Tutorials
  • Uncategorized
  • Wall Art
  • Wall Decor
  • Winter
  • Workshop

Footer

Contact Me: Corey@Sawdust2Stitches.com

Latest ‘Grams

The bathroom reveal is LIVE! Here is just one The bathroom reveal is LIVE! 

 Here is just one small view of this new, improved, and somewhat magical bathroom.  I have been dreaming about remodeling my bathroom for years and I can finally say it was worth the work and the wait. 
 For real though, can you even get enough of this tile ?? I know I can’t get enough, but I certainly knew HOW much to get. Did you know that The Home Depot app has project calculators for a wide range of materials INCLUDING tile, so you  can know exactly how much product you  need? You better believe it!
 I have details about this feature and more reveal images on the site today. 
#linkinprofile #ThdDoerProject #HomeDepotPartner @homedepot
Sneak Peek… of our completely renovated master b Sneak Peek… of our completely renovated master bathroom!  I have put off giving our bathroom a makeover for 5 years.  I think there are a lot of reasons people put off big projects … time, money, skills, knowledge, tools?  While The Home Depot can’t completely eliminate the list, they can certainly shorten it!  With a library of “How-to Guides”, helpful resources like “Project Calculator” and a vast inventory of tools to rent The Home Depot can certainly make any daunting project more achievable. 

@homedepot #THDDoerProject #HomeDepotPartner
I have put off giving this kitchen island a faceli I have put off giving this kitchen island a facelift for 6 years! I always prioritized projects I perceived would have the biggest impact. Well, HOT DANG  I under estimated the difference a kitchen island could make!I have a full tutorial on the site today. #sponsored @dapproducts 

Photo credit: @ashleynavarrophotography
I’m on a kitchen organizing kick, and these pull I’m on a kitchen organizing kick, and these pull-out drawer are easier than ever to make using the new (extremely intuitive/user-friendly @kregjig 720 PRO.
I have a full tutorial on the site today.#linkinbio #sponsored
Photo Credit: @ashleynavarrophotography
My organizing heart could just burst!! I’m still My organizing heart could just burst!! I’m still organizing the kitchen, but so far I have fit all the contents from the existing pantry AND freed up an entire lower and upper cabinet that contained pantry items.  #winning
Would you believe me if I told you that where this Would you believe me if I told you that where this beautiful custom-built pantry sits, used to be a small builder grade closet? Talk about untapped potential!? While the closet/pantry served its purpose, the space was not well utilized and was altogether unremarkable. With the help of The Home Depot this pantry is not only extremely functional it is a gorgeous feature in my kitchen. 
Sometimes we might look past or forget the untapped potential and resources. 
For example, did you know The Home Depot has a TON of resources to help you with your projects?  Did you know that you can do image search in their mobile app? Yup! Just take a picture of the needed item scan it on your app and find the product in a flash! In fact you  can add it right to your cart and have it ready to be picked up at available stores or lockers!
#THDDoerProject #HomeDepotPartner @homedepot
Follow on Instagram
2020 © Your Blog Name
theme by soleilflare
Enter your name and email and get the weekly newsletter... it's FREE!
Your information will *never* be shared or sold to a 3rd party.