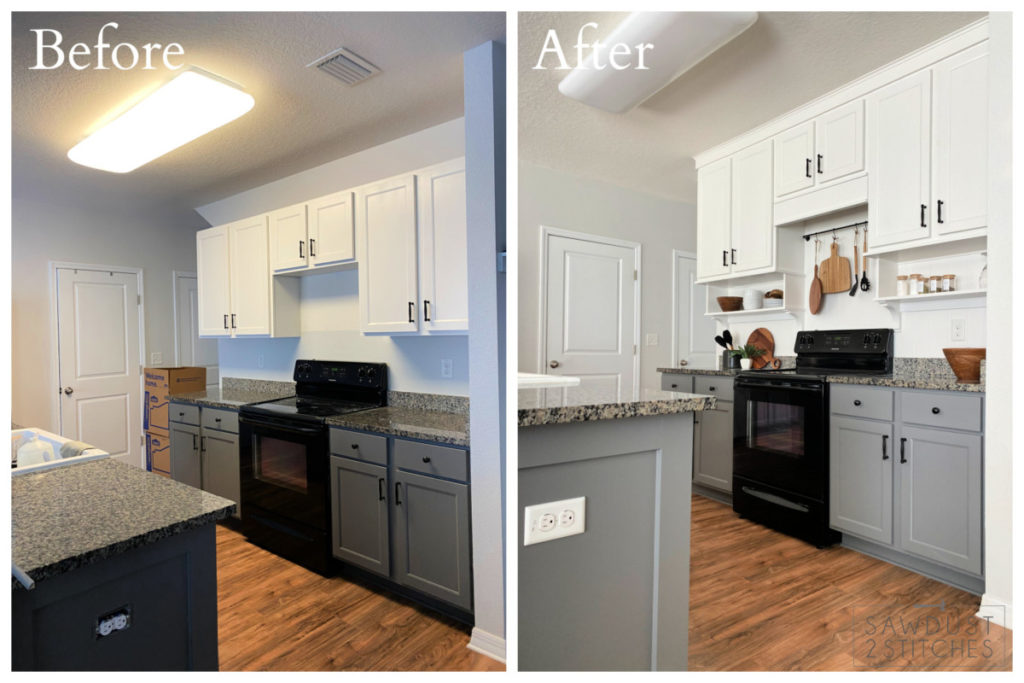
Raised Kitchen Cabinet Makeover: My Sister-in-law and Brother had a basic standard kitchen. They did a marvelous job and added character by painting their kitchen cabinets. It made the space 100x’s better, but it still felt like it was missing something. Originally the plan was to build up the cabinets to the ceiling, but we were in a bit of a time and $$ crunch so we opted to raise the original cabinets to the ceiling and create a cute custom shelf underneath. A big thank you to the the great folks at DAP and their wonderful product line that I have known and trusted for YEARS!
This post is sponsored by Dap Products*
| Tools Suggested | Materials Used |
| Eye Protection | 3/4″ Plywood |
| Hearing Protection | Nickel Gap Paneling |
| Sander 180-220 grit | Trim and Corbels as Desired |
| Drill | Weldwood Wood Glue |
| Sponge Sanding Block | Alex Flex Caulk |
| Pin Nailer (Optional) | DAP Plastic Wood All Purpose Wood Filler |
| Miter Saw | DAP Premium Wood Filler |
| Table Saw | Paint |
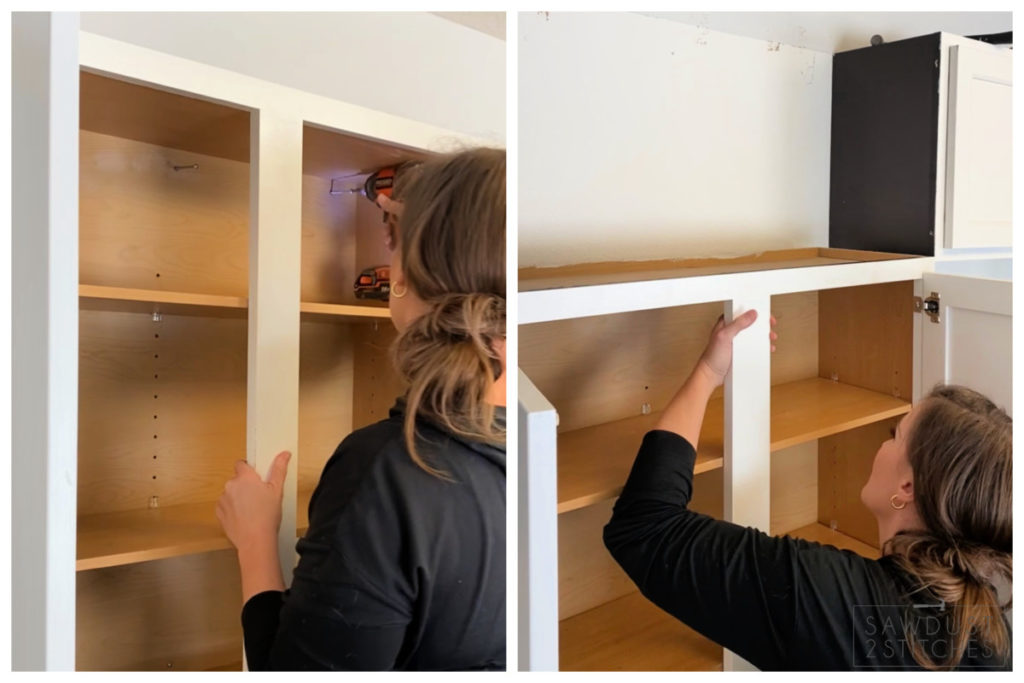
Remove Cabinets
When removing an upper cabinet I would suggest having someone to help carry the weight, or install a ledger board beneath it.
( A ledger board is a board that is secured to the wall under a cabinet that will help carry it’s weight while either removing or installing a cabinet.)
Most cabinets are secured through the interior back and into a stud in the wall behind it. Often times there will be screws that connect the cabinet to the bordering cabinet.
Re-Install Cabinets
Once all the cabinets are down, it is time to reinstall them! Remember that “ledger board” we talked about? It is time to take careful measurements and attach a board to the wall at your preferred LEVEL height. In this case I raised the cabinets 9.5″, the goal was to raise the cabinets so that they are 3.75″ from the ceiling.
Keep in mind practicality, you will still need to be able to access at least the bottom cabinet shelf. For reference they have 8′ ceilings and 30″ cabinets.
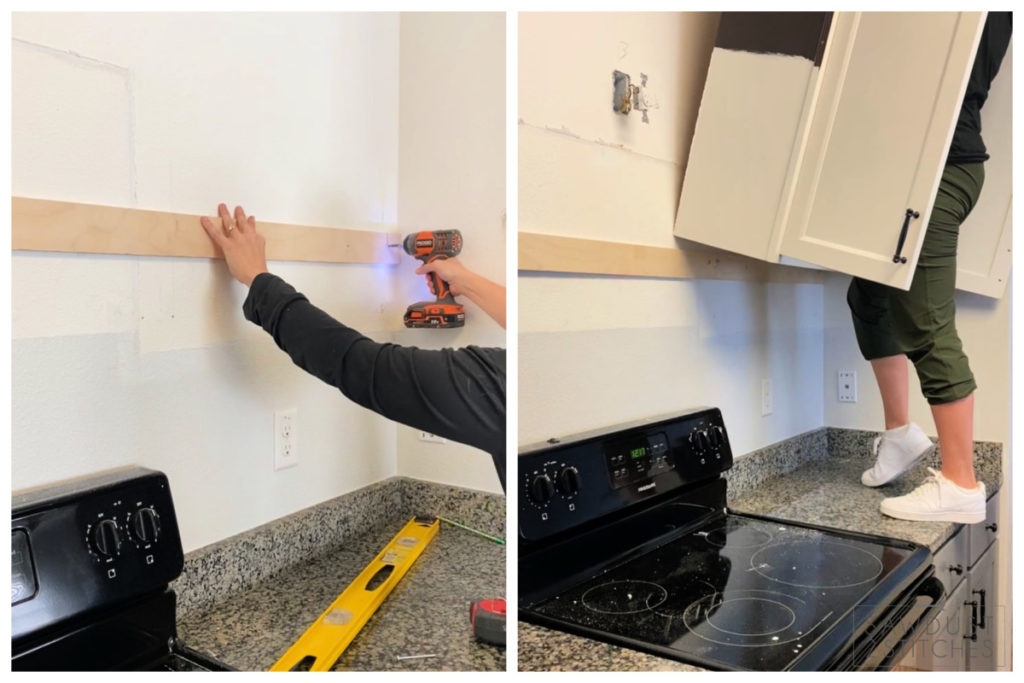
Theoretically, when raising cabinets you can use the same screw holes that were originally used to install. If your cabinets were originally installed correctly then the screws should be going into studs. If you are raising the cabinets directly up you SHOULD still be hitting studs with your screws. ( Studs run vertically, thus you will be still hitting the same stud, only 9.5″ higher.)
Add Trim
As noted earlier, I installed the cabinets 3.75″ from the ceiling. This was planned! I ultimately planned on using a 1×4″ primed board to bridge the gap between the top of the cabinets and the ceiling.
The first step in this process is beefing up the top of the cabinet so that I had something to attach the 1×4″ trim board to. To do this I used scrap piece of 3/4″ plywood and tacked them to the top of the cabinet. ( As you can see in the image below the top of the cabinet has a dead space where the face frame (front of the cabinet) extends 3/4″ up past the cabinet carcass (cabinet box). The plywood will bridge that gap and give me a solid way to secure a 2×4 to the top of the cabinet.
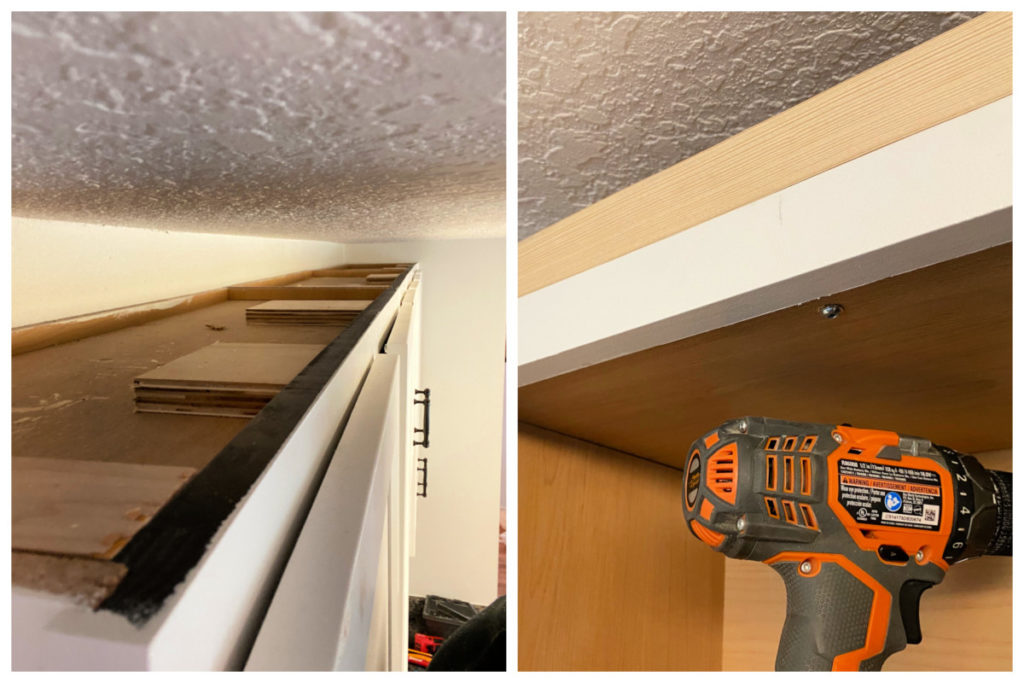
I drove 2.5″ screws up through the cabinet box, through the 3/4″ plywood and into the 2×4″ board. This will ensure that the 2×4 is stable and can support the next step: TRIM.
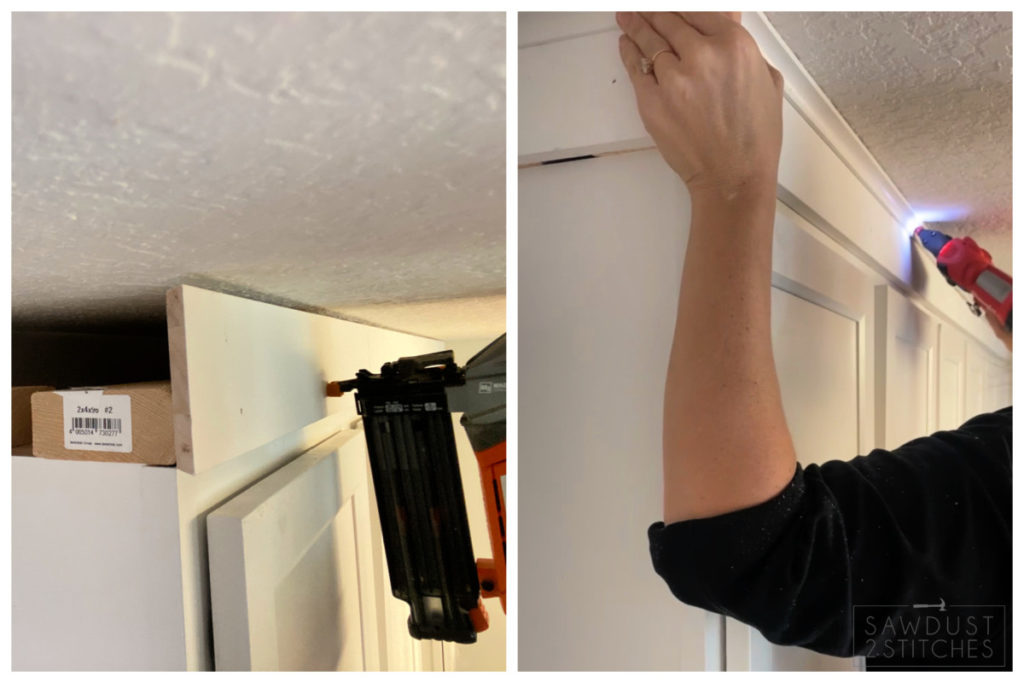
As stated earlier I used 1×4″ primed pine finger board. First, measure and cut boards to desired length. Using 1.5″ 16 gauge nails I attached the primed board to the front of the 2×4″.
With most ceilings you will have subtle elevation changes. In order to hide any gaps I like to use 3/4″ PVC cove molding (paired with Alex Flex All Purpose Caulk) to hide gaps and create a decorative look. ( If you have a pin nailer, I would highly recommend using it on light weight trim.
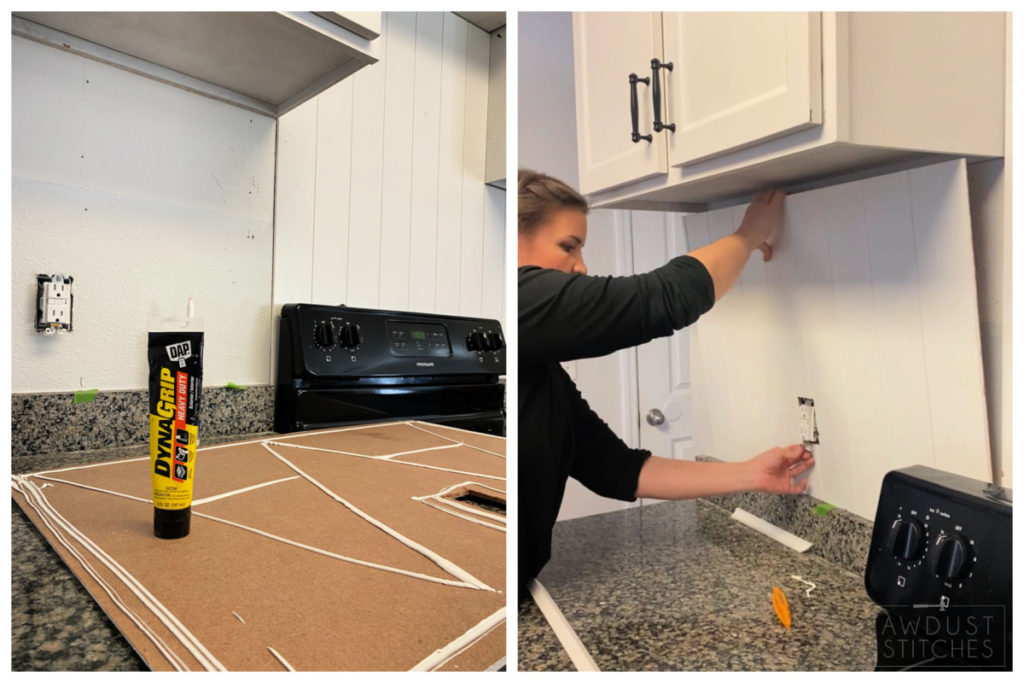
Install Backsplash
This kitchen had a basic 3.5″ counter backsplash. Which is perfect opportunity to use paneling! (I would not suggest resting MDF paneling directly on a counter top where it would be more susceptible to water damage.)
For more details on on how to install paneling I have a more in-depth tutorial here.
Build Under Cabinet Shelf
So… we have a pretty backsplash and cabinets that are sitting 9.5 inches higher than standard… now what ?! We DEFINITELY still want to utilize that lower space. The goal is to create additional storage space higher (inside the cabinet), NOT to take away the functional lower space. In order to do that I’m going to BUILD a lower shelf.
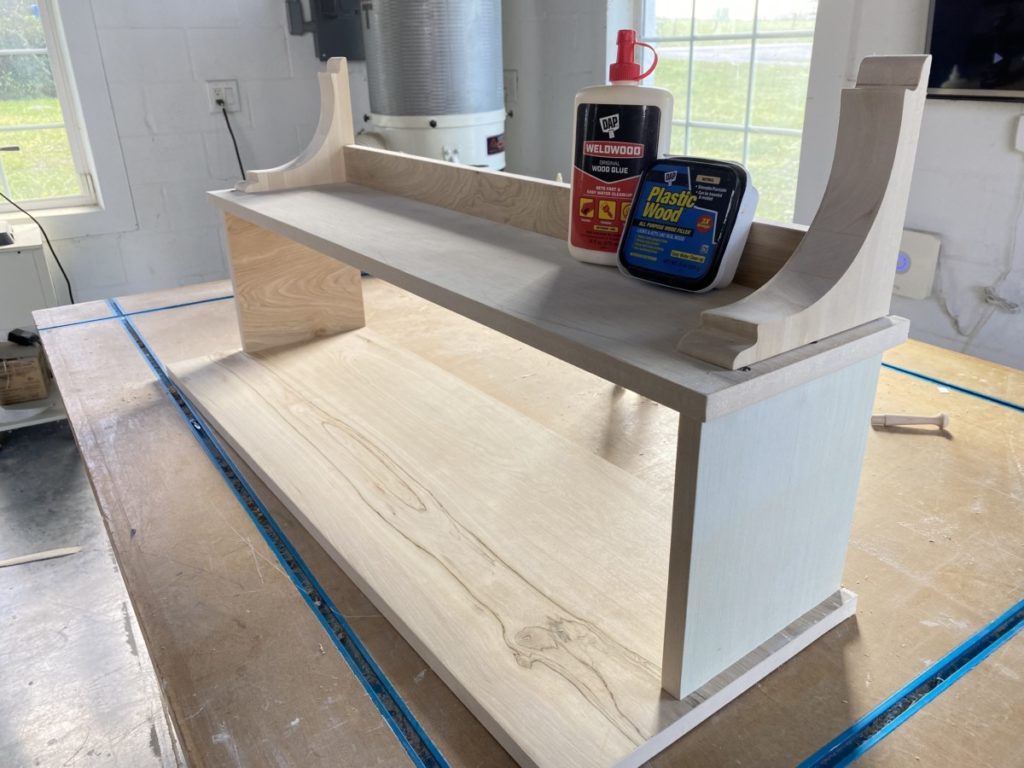
These lower shelves are custom made to the cabinet above it.

Prep Under Cabinet Shelves
The secret to making this new shelf look seamlessly integrated is in the finish work ! After the build is complete, we need to make it look PERFECT! To do that I use DAP Plastic Wood All Purpose Wood Filler to hide any nail holes. Once dry sand smooth with 220 grit sandpaper. Before painting use Alex Flex Caulk to make all the seams disappear!
After all the finish work is complete it is time for paint. These cabinets were previously painted by the owner. Luckily, they had extra paint on hand. If you are trying to match these to factory finish cabinets, I would recommended taking one of your cabinet doors to Sherwin Williams and have them color match and give a finish recommendation. (Paint will also be used to paint the trim.)
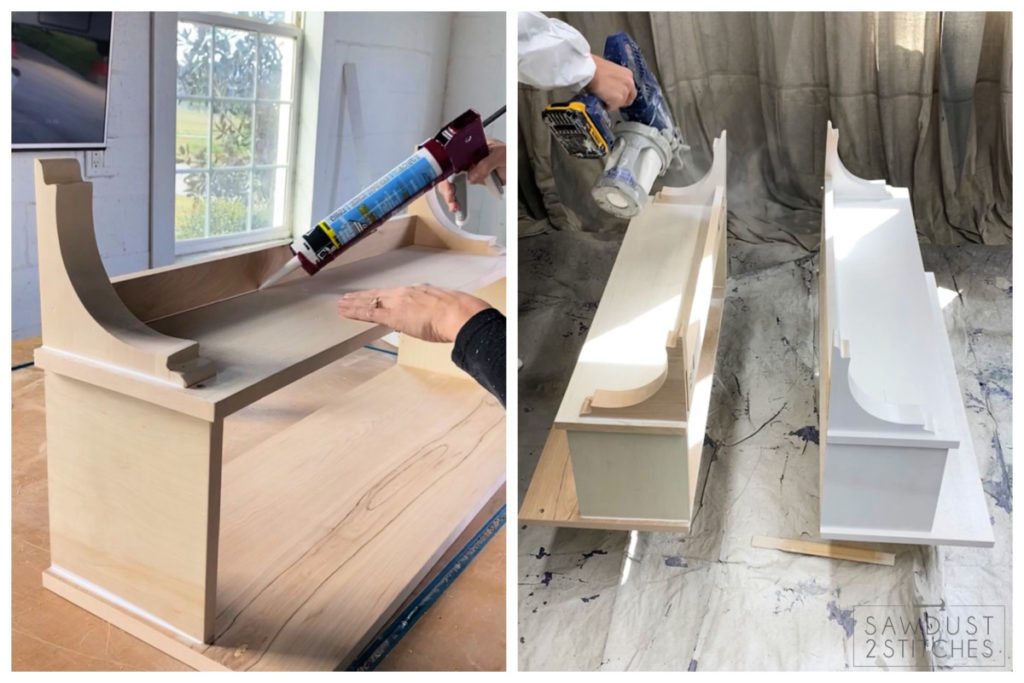
I prefer to use a paint sprayed when working on cabinetry, if you are looking to paint your existing cabinets, or just need a quick tutorial on hand painting cabinets I have a full tutorial here.
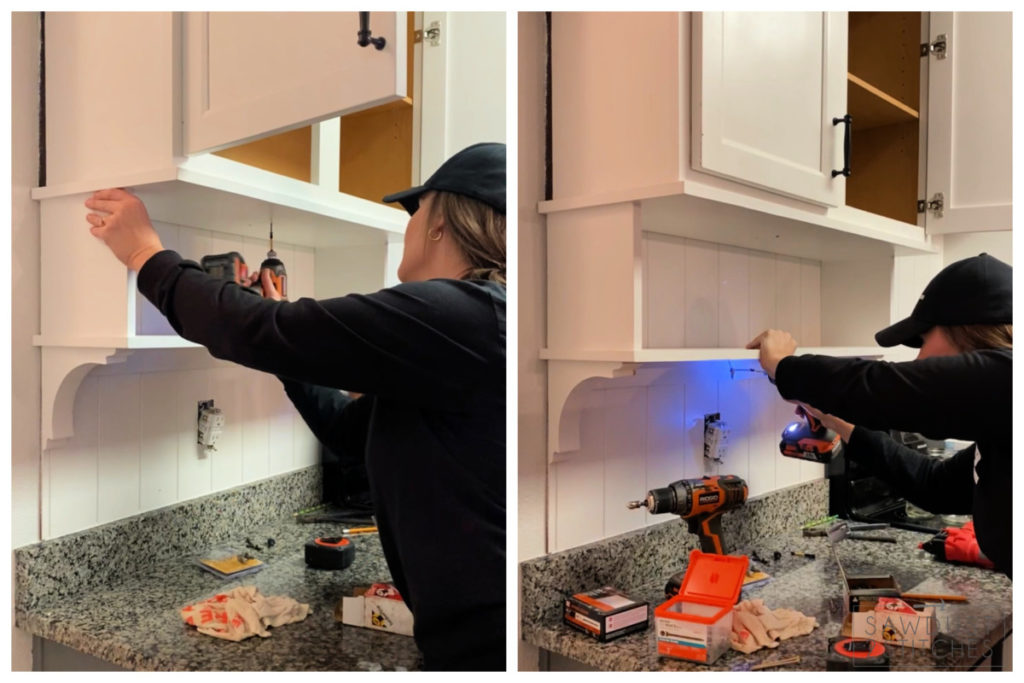
When designing this build I incorporated back supports that would allow for an easy install. I drove 2.5″ screws through the back support and into the studs behind them. ( I marked the stud placement when installing the upper cabinets.)
I then secured the shelf to the bottom of the cabinet. This will help carry the weight and hide any seams or gaps between the new shelf and the old cabinet.
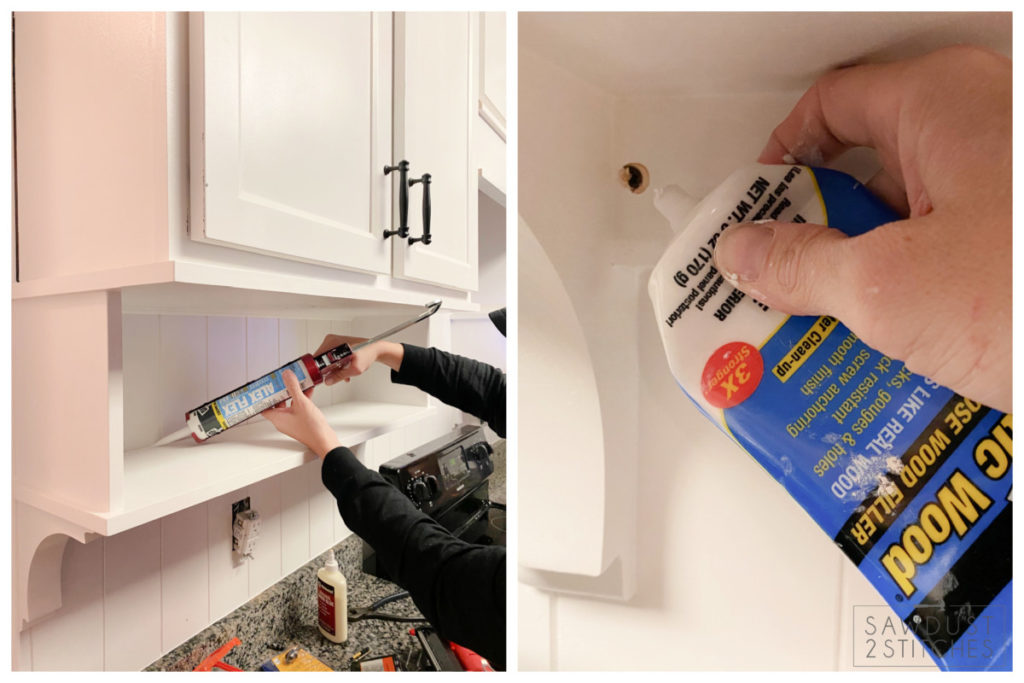
Repair and Paint
Now to make it all look unified. I CANNOT STRESS THIS ENOUGH… don’t skip the finish work! When done properly it will make this cabinet look like it was custom built for this space, NOT an afterthought.
Fill all the screw holes that were created from installing the shelf. When working on painted pieces I hands-down prefer DAP Plastic Wood All Purpose Wood Filler. Simply, fill holes, allow to dry and then sand smooth.
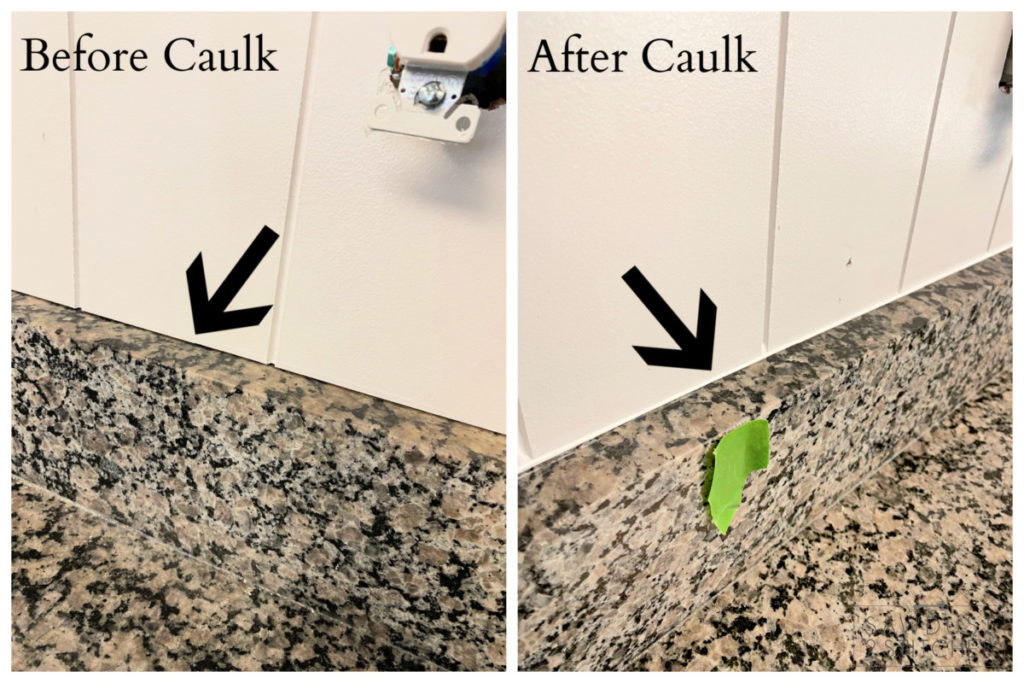
Next, make sure EVERY joint and seam is caulked with Alex Flex Caulk. Filling these seams before painting will ensure a seamless appearance.
I typically will do all my finish work at the same time. In this case I needed to fill any nails holes in the trim using DAP Plastic Wood All Purpose Wood Filler and caulk all the trim joints and seams.
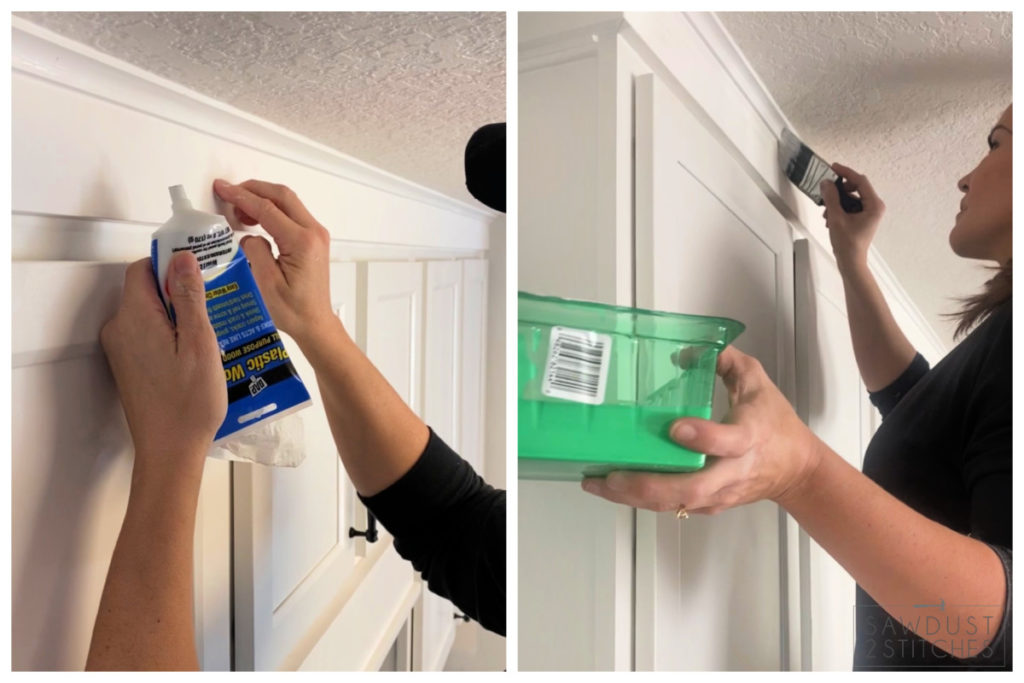
Caulking is not only for aesthetics, it is also for practicality. For instance where the “backsplash” paneling meets the counter backsplash. Using a good waterproof caulk like AMP Kitchen Bath and Plumbing Sealantwill help protect that joint from water damage.
After all caulk is dry do any necessary paint touch up!
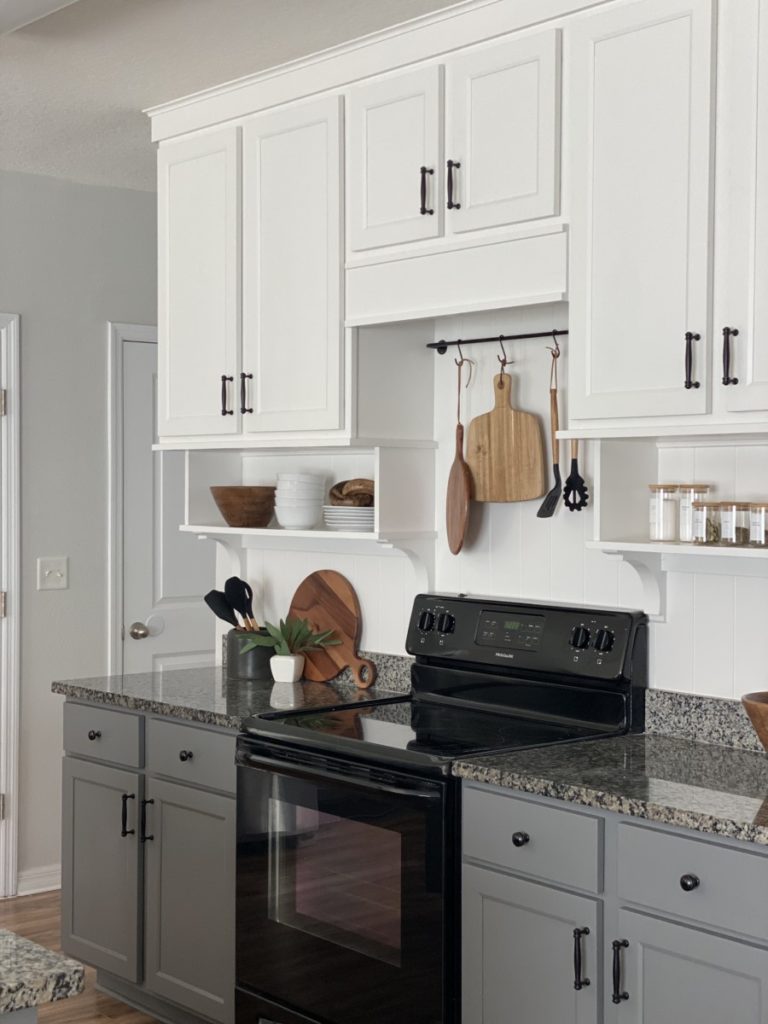
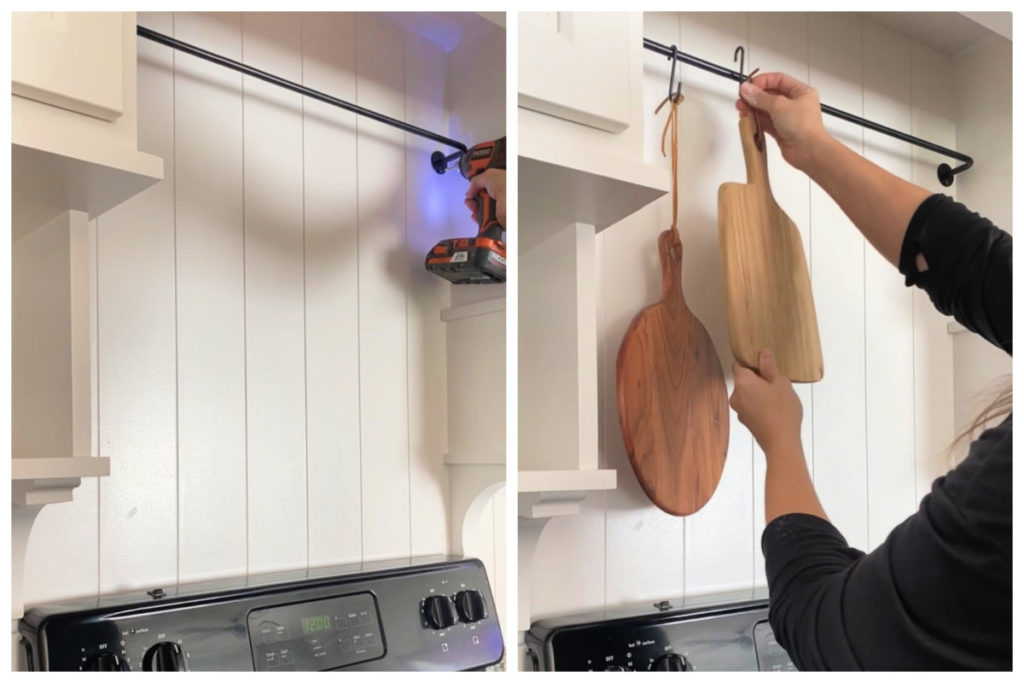
Add Decorative Touches
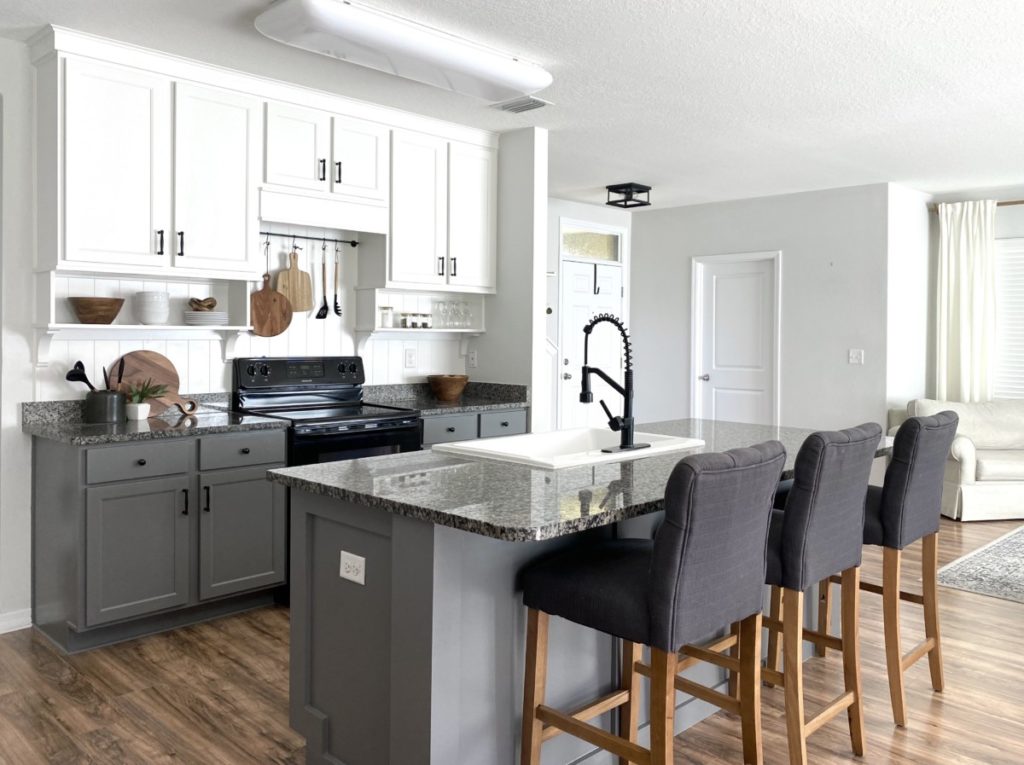
To finish up the space I used an inexpensive pot rack to fill the blank space above the range. Lastly, I used their plates and cups to the lower shelf. The point of this shelf and raised cabinets is to increase storage not to loose it… SO without further adieu, I give you a “Raised Cabinet Kitchen”!
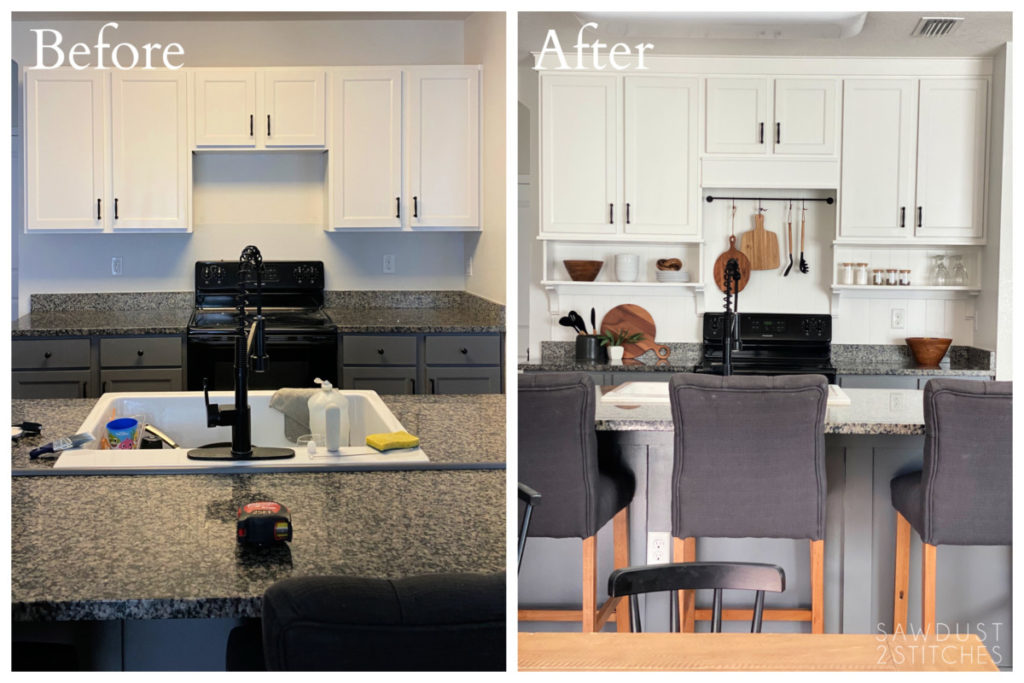
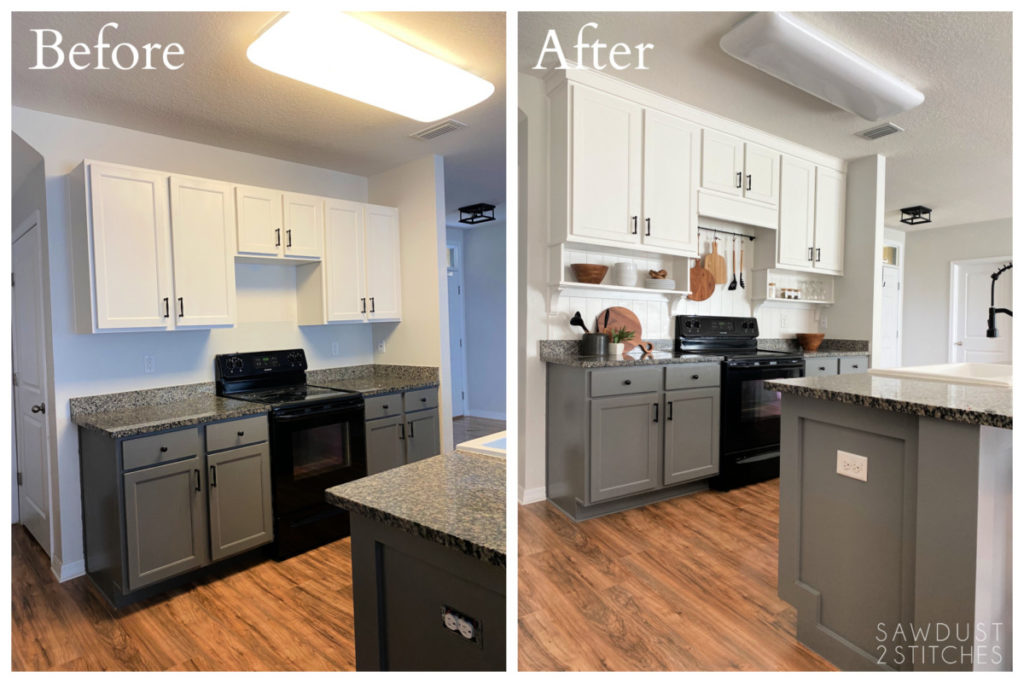
Raised Kitchen Cabinet Makeover
Ta-da! It’s amazing what just a few days and elbow grease can do for a space! The differences actually take a minute to pinpoint, but the impact is huge!

Raised Kitchen Cabinet Breakdown
| Cabinets | $0 | Used Existing |
| 2″x4″ board | $4 | |
| 1×4″ Primed Board | $16 | |
| Cove Molding | $ 7 (x2) | |
| Nickel Gap Board Backsplash | $37 | |
| Shelf Plywood | $0 | I had scraps. (Less then 1 sheet) |
| Corbels | $10 (x4) | |
| Paint | $0 | Had leftover |
| Pot Rack | $20 | |
| Total | = $131 |
For LESS than $150 we completely transformed this space!!! Granted I had some supplies on hand. Obviously, this will be based on how large your kitchen is. In order to make these shelves I used less than a half sheet. ( Plywood could run up to $80 a sheet.)
I CAN NOT get over how much a difference raising cabinets can make. Thanks so much for taking the time to read and if you aren’t following along social, please consider checking it out!
Take Luck,
Corey
Raised Kitchen Cabinets
Sources:
- Upper Cabinet Color- Sherwin Williams “Snowbound”
- Lower Cabinet Color- Behr
- Wall Pot Rack- Amazon
- Decorative Utensils- Amazon
- Nickel-gap Boards- Home Depot
- Shelf Corbels- Lowes