
I am still on my PVC kick. So naturally when I dreamed up a new idea I pulled out all my left over PVC pipe and joints and started playing with different possibilities. I found some dimensions I liked and got to work, here is what I did and what you will need.
Tools Required:
Rubber Mallet
Sand Paper
Saw ( I would suggest a Miter Saw)
Drill
1″ Paddle Bit
Sander ( Suggested)
Materials Needed:
Spray Primer
Metallic Spray Paint
Stain
2×10 wood planks (Amount varies by project size)
3/4″ PVC pipe (Amount varies by project size)
“T” PVC Joints (Amount varies by project size)
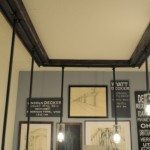
I started by using sand paper and scuffed up all the PVC pipe. Once they were roughed up, I cut them down to my predetermined measurements.
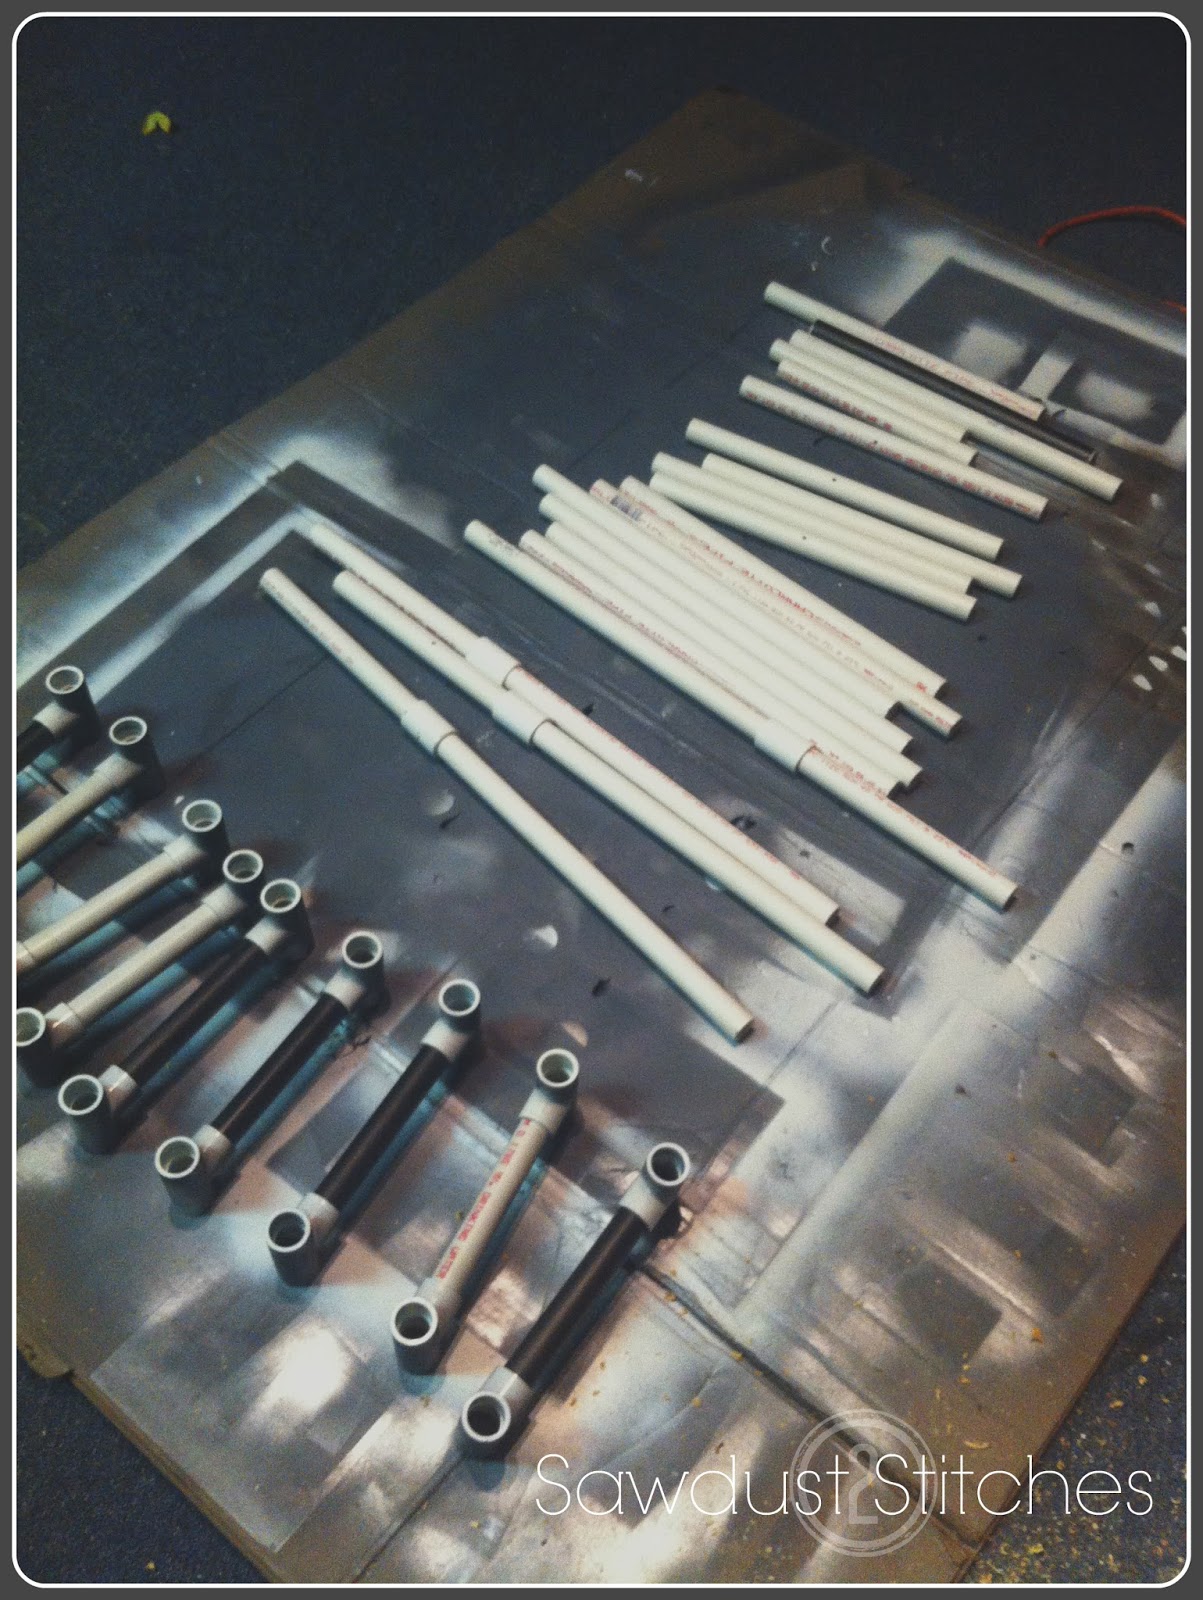
Once cut, I put together my brackets, and then primed ALL my pieces. I used a spray primer, I HIGHLY suggest it. It is cheaper than metal spray paint, and it coated all my pvc quickly. Since it was all primed gray, it didn’t require as much of the expensive metallic spray paint to cover the original white PVC.

After you have primed all your pieces you need to paint all your PVC in your choice of metal finish. I used Rustoleum’s Oil Rubbed Bronze. Let it dry COMPLETELY. I am warning you , once painted, it becomes really difficult to pull the PVC pieces apart.

While the PVC pipes were drying I worked on the shelves.
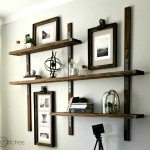
For the shelves I used 2×10’s, in varying lengths. You can adjust the length of the shelves to fit your own needs. I used a paddle bit to drill 1″ holes that would allow the PVC to fit through. After the holes were drilled I sanded the boards and then stained them.
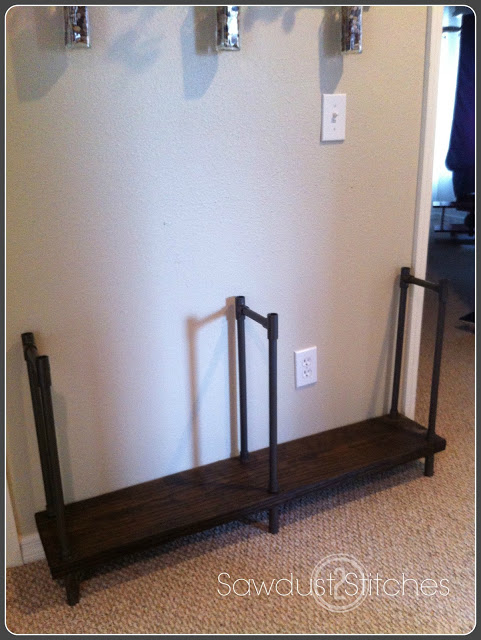
I then started assembling the shelves. I kind of made up the measurements as I went, and what I thought looked good.
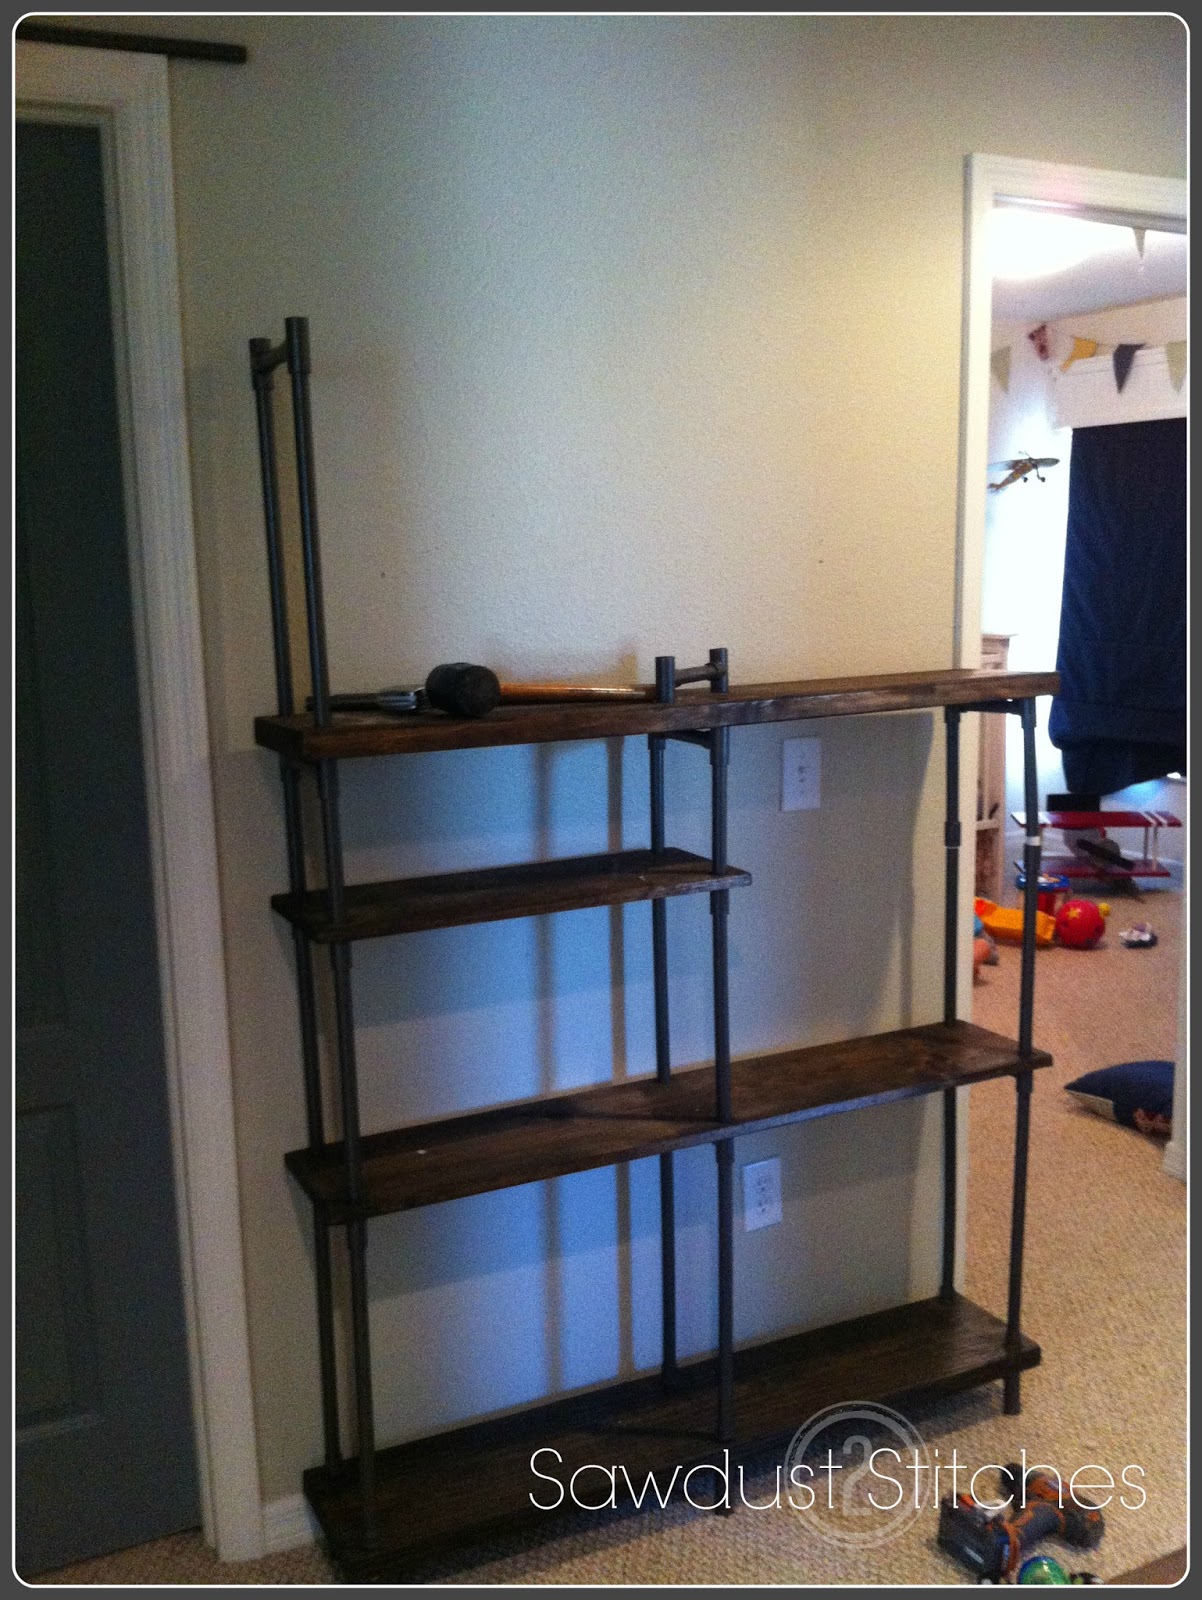
Slowly but surely it started to come together. I suggest using a rubber mallet. Making the pieces fit together sometimes required a little finesse.
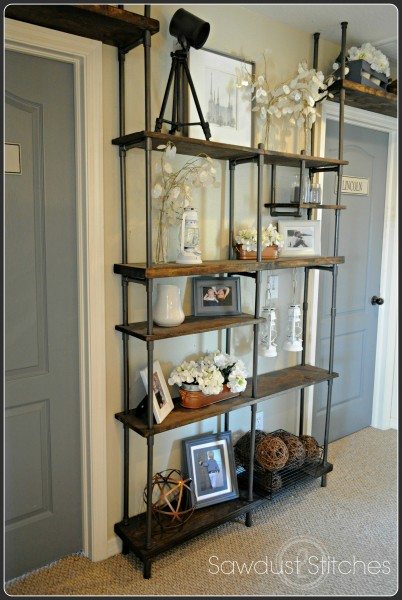
All that is left to do is add some decor! I love the way it fills the space, and all for less than $50.00!
 Copyright secured by Digiprove © 2015


So I see the shelves over the doors, was there pvc pipes on the other side of the door holding up the shelf?
I actually planned for the shelves to hit right at the top of the door frame, so that they would be supported partially by the door casing. For additional support you can easily use a bracket on the far wall (the wall that the shelf runs into). I did actually screw the shelf directly into the door casing from above. Hopefully that helps!
Corey
Found this post over at Upcycled Treasures – such a awesome, and affordable, solution to those expensive shelf systems. Kudos to you for a great idea, and thanks for sharing!
Thanks for checking us out! I agree, I love the look of the cast iron pipe, but it would have been a small fortune! This was a fraction of the cost, and everyone always assumes it is the real deal. I love it!
I have been looking at the black plumbing pipe for this project in my library. Then I found your post on Pinterest. Would you think this would be sturdy enough for an application in my library?
Tara,
Thanks for reading! Great question, if it is going to be supporting a lot of weight I think I would just use a thicker pvc pipe. The one featured is only 1 inch. The thicker pipe would increase the stability and the support considerably. I would also consider mounting it to the wall using something like this:
http://www.homedepot.com/p/Halex-3-8-in-1-2-in-Conduit-and-Pipe-Hangers-5-Pack-26780/100130865
I would LOVE to see pictures of this if you do it. It sounds gorgeous!
Can you tell me, do you have some sort of “stopper” at the feet and again where the PVC meets the ceiling? And is the unit just so snug that it is not secure to either the wall or the ceiling in some way? Thank you!
The pieces I used for the top and the bottom I believe are called “Flange Adapters” They look like this http://www.pchemlabs.com/product.asp?pid=1387 . There really isn’t any tension between the floor and the ceiling, but it is fairly sturdy. If you are concerned about stability you can use some of these! http://www.homedepot.com/p/Halex-3-8-in-1-2-in-Conduit-and-Pipe-Hangers-5-Pack-26780/100130865 to secure them to the wall. Hopefully that helps!