I don’t have a huge kitchen, so I have found it fairly important to utilize every square inch. Do you remember the tutorial about the conver-table ? Well, shortly after making a table that was able to serve multiple functions, I decided I needed a bench to match! I really wanted to have a kids eating area, so when we had company they could sit at the “adult table”. I had looked into making a cute little table and chairs for the kiddos, but like I mentioned earlier, I don’t have a huge kitchen. What a conundrum !?
Challenge Accepted!
Not only do I have a tutorial below, but Ana White is a rockstar and has drafted up the plans and they are available on her site! Don’t have access to a tablesaw!? She has a solution for that!
Materials Used:
- Wood Glue
- 2.5″ Wood Screws
- Wood Plugs
- 2×8 (12′)
- 2×10 (8′)
- Shelf Support Bracket
- Spray Paint
Tools Suggested:
- Miter Saw
- Table Saw
- 18g Nail Gun
- Drill
- 3/8″ drill bit
- Kreg Jig

- Orbital Sander
Cut List:
2×8
4@ 17″ (2 of which requires additional cuts)
2@ 36″(1 of which requires additional cuts)
2×10
1@ 18.5″
2@ 17″
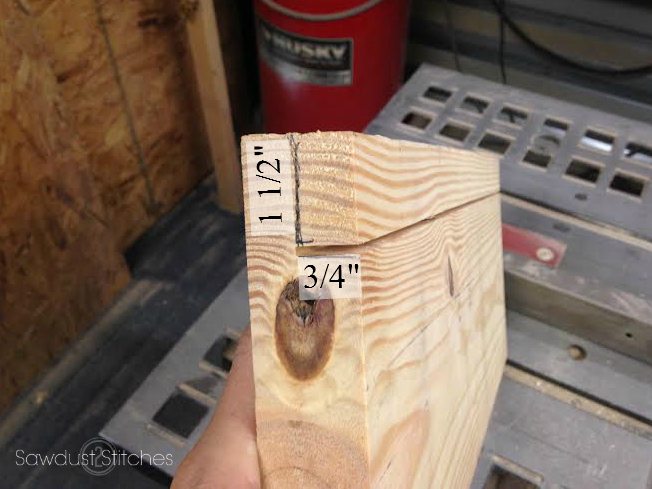
Legs
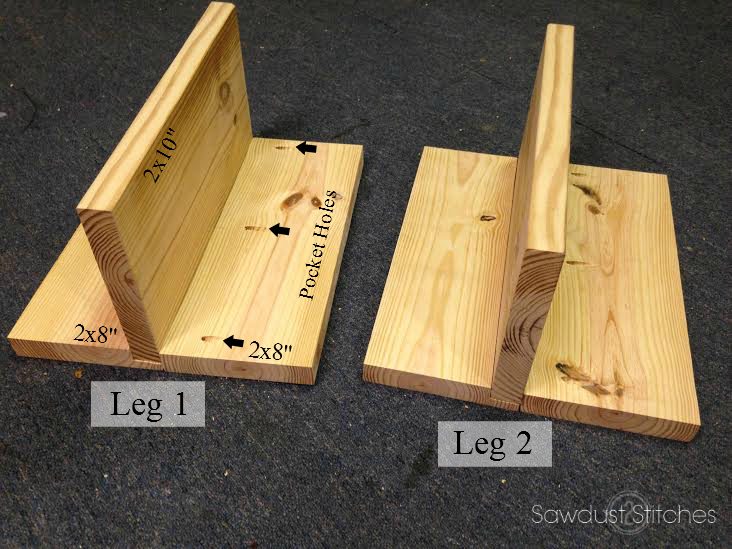
Begin by taking 2 of the 2×8’s that are cut at 17″. Using a tablesaw cut a notch out of the entire length of the 17″ board. Then repeat the same process on the second board.
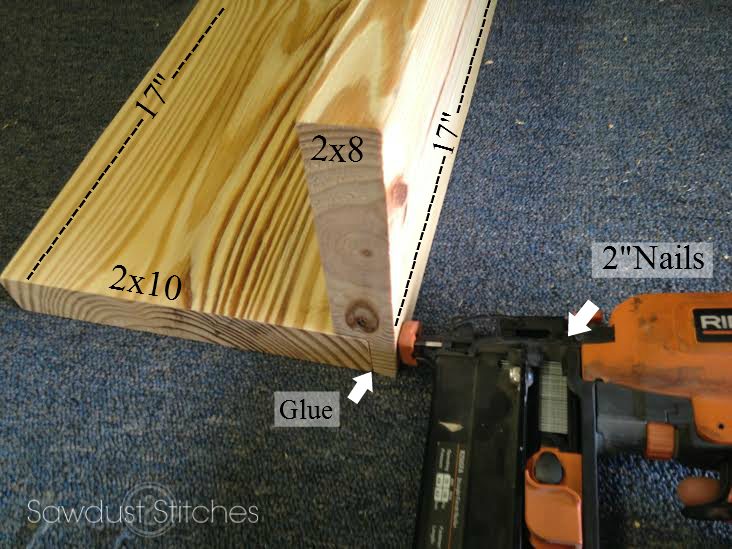
Next take the 2×10 cut at 17″ and line it up the with 2×8 that has the notch cut out. Dab a little bit of glue in the joint and then for added precaution I used 16 gauge 2″ finishing nails.
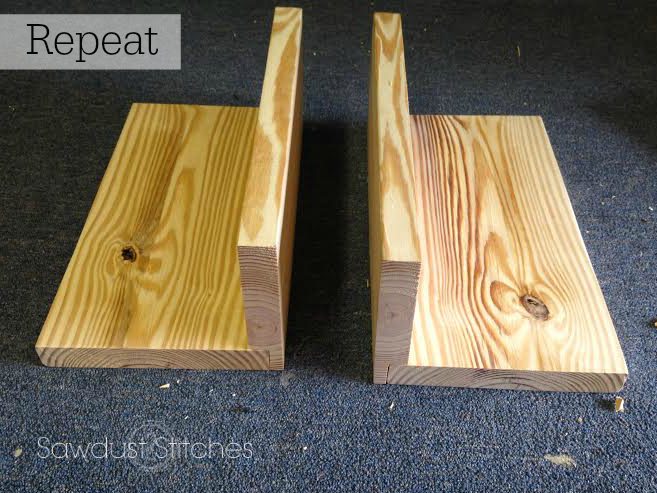
Repeat the the same process on the other notched out board.
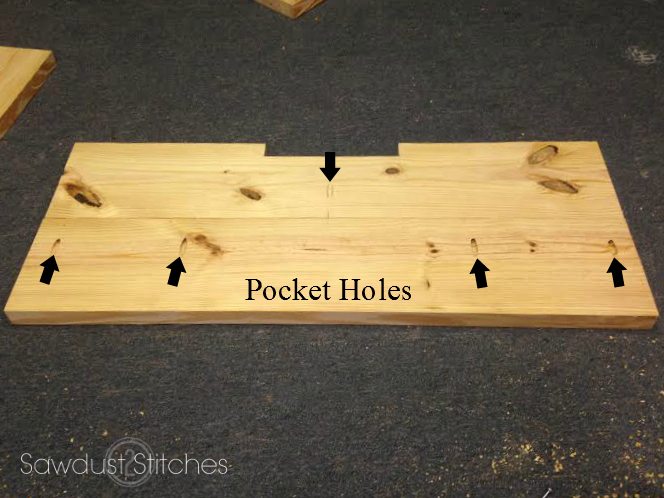
For the next step on the legs, use a Kreg Jig System![]() and drill 3 holes on the 2 remaining 2×8″ boards. ( These will become the chair backs)
and drill 3 holes on the 2 remaining 2×8″ boards. ( These will become the chair backs) 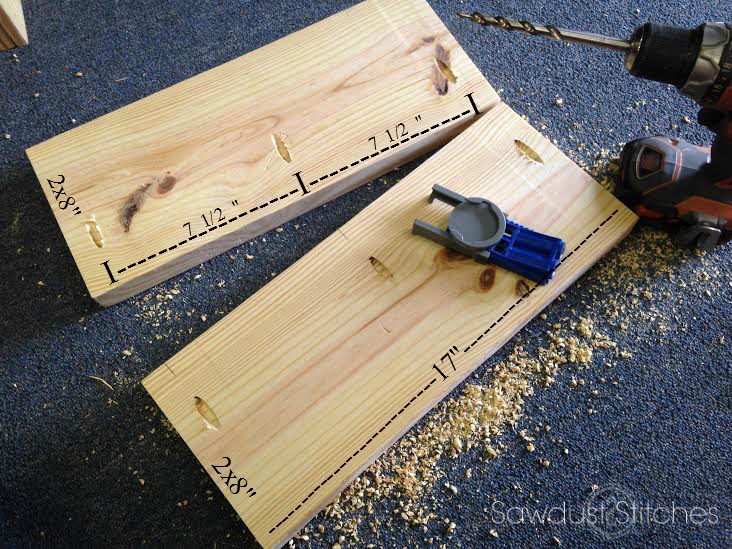
Again I used a little bit of wood glue on the joint and then reinforced with 2 1/2″ screws via the pocket holes. I then repeated on the remaining leg.
To hide the pocket holes, I use these awesome little guys!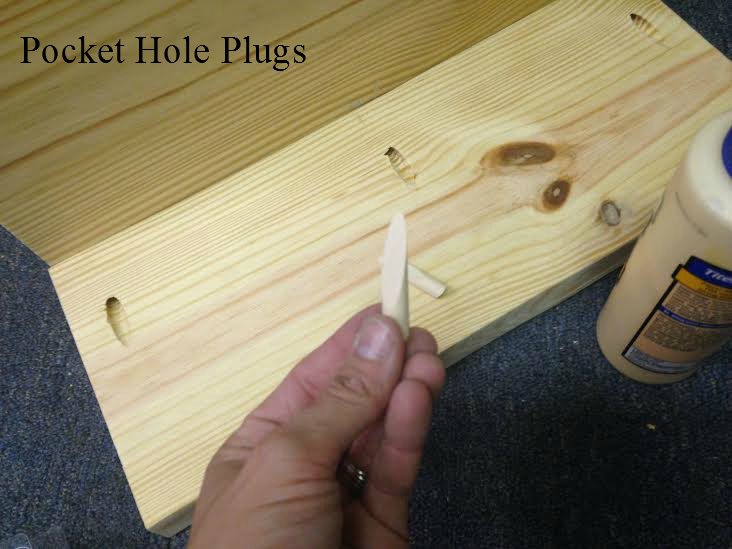 Just use a dab of glue and use then to fill the pocket holes.
The Top
For the top I used (2) 2×8’s. This is where it gets a little tricky. Using a jigsaw I cut out a 9″ section in the center of one of the boards. I needed the slot to be 9 ” and 1 1/2′ deep. ( The table top board will eventually will sit on this cut out.) 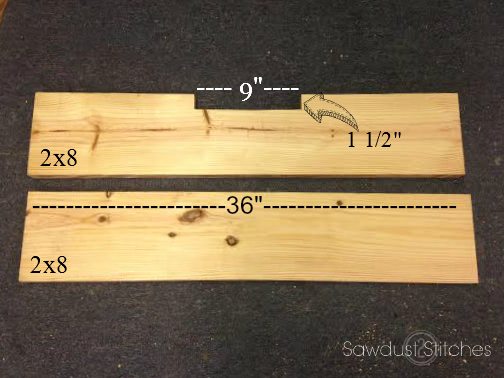 Using the Kreg Jig again, I drilled pocket holes that would allow me to join both 2×8’s together. For added precaution I used a little bit of wood glue on the seam. I then used 2 1/2″ screws to fasten the two boards together via the pocket holes. ( Again, I used pocket hole plugs to hide the pocket holes.)
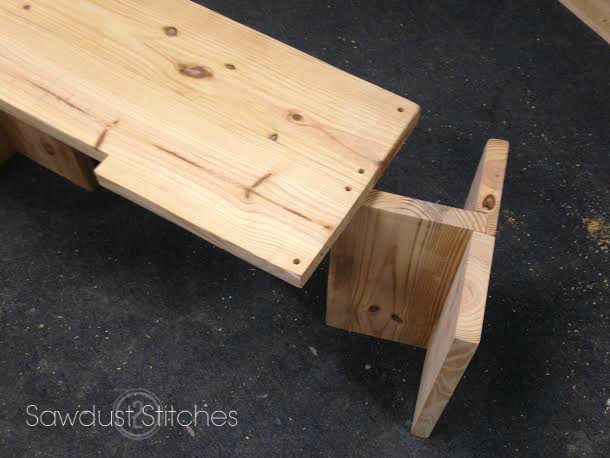
 Now it is time to attach the legs to the top!
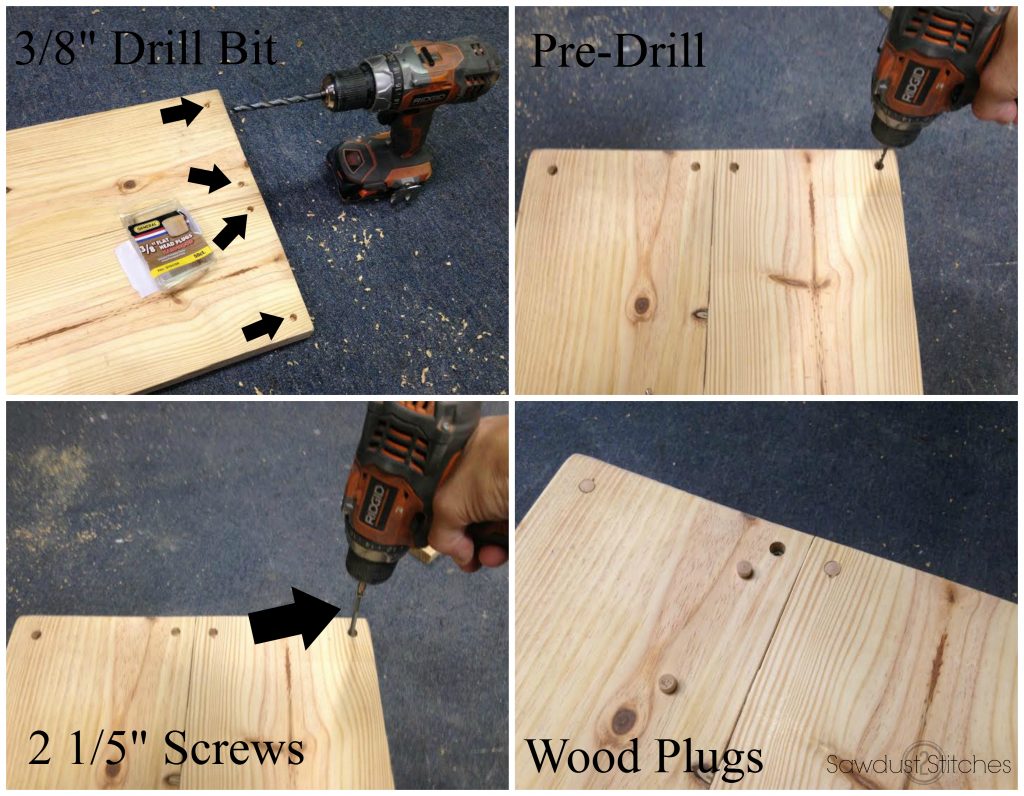
 I wanted to conceal the screws as much as possible so I used “wood plugs”. In order to use these I simply used a drill bit (determined by the size plug) in this case I used a 3/8″ bit. I drilled only partially through the board with this bit. I then followed up with a much smaller bit to pre- drill . ( This helps prevent the board from splitting.) After the hole is pre-drilled I used 2 1/2″ wood screws to secure the leg to the top. I then added a small amount of wood glue to the wood plugs and put them in the screw holes.
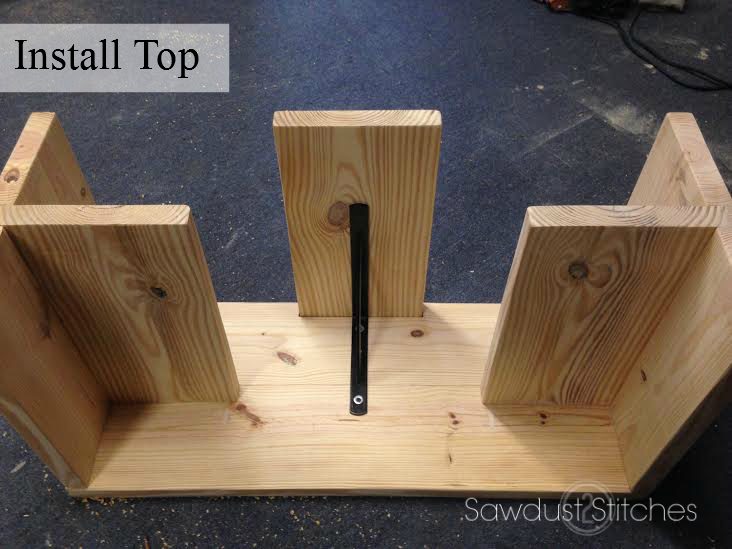
 The last part of the bench/ table is the “kids table top” in order to give the table top a more support I opted to use a heavy duty shelf support. I didn’t want the hardware sticking out like a sore thumb so I used an “Oil rubbed bronze” spray paint to help it blend in a little better.
 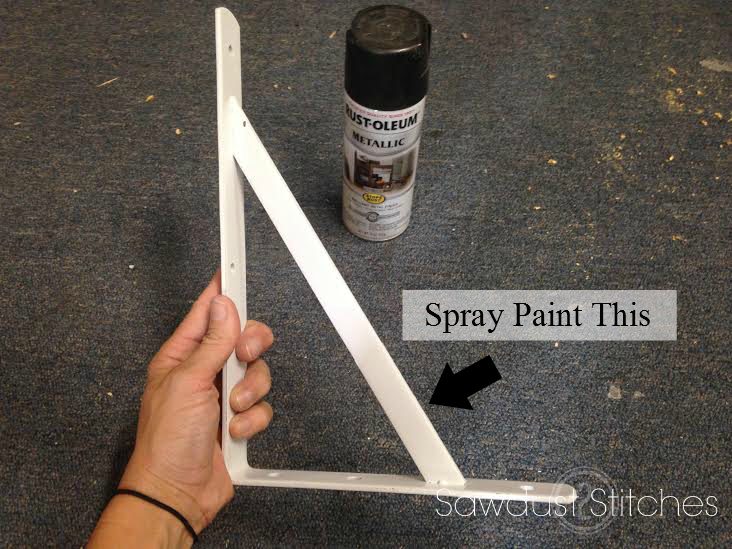 After the bracket had completely dried I installed it so that it would be centered.
 Now it’s time for the table top! Using the remaining 2×10″ I placed it in the previously cut out notch, and then secured it to the bracket from the underside.
I also secured the table top on the topside. Again, I repeated the same steps as earlier. I partially drilled with a 3/8″ bit and then pre-drilled with a smaller bit. Secured it in place with 2 1/2″ wood screws, followed with 3/8″ wood plugs. 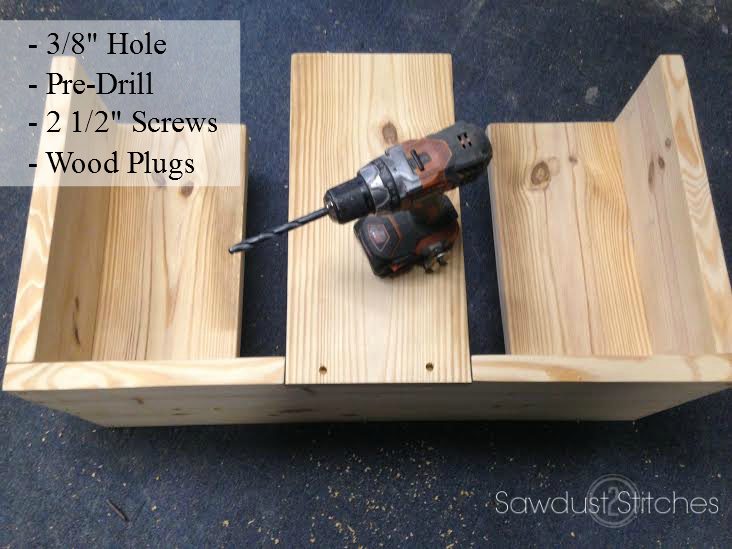
Finish Work
That completes the structural aspect now, on to the finish work. Bust out the wood filler and fill any and all holes. I normally apply a small amount to the top of all the the wood plugs. It fills in all the small crannies and does a great job camouflaging the wood plugs.
After the wood filler has completely dried, I used an orbital hand sander to smooth out the entire piece, paying special attention to the areas where a wood plug was used.
Now, it is ready for stain and or paint. I opted for Minwax Jacobean stain and then followed up with the “Satin Finish” polyurethane.

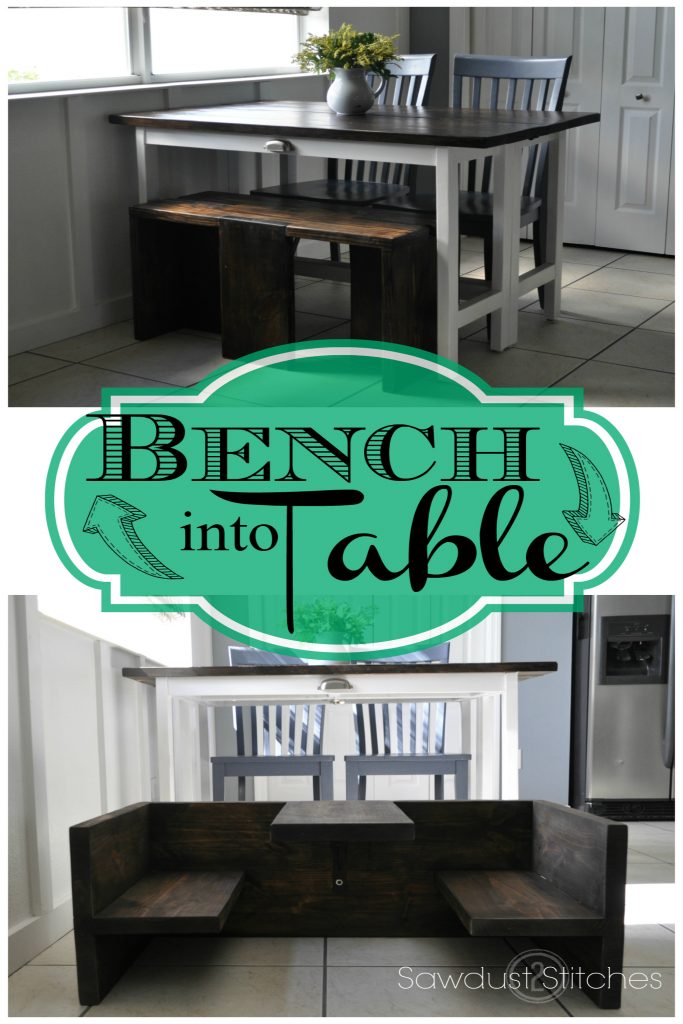
Mission Completed!
A space saving STURDY bench, that when flipped on its side, is an AWESOME kids eating area, complete with two chairs and a table. Booyah!
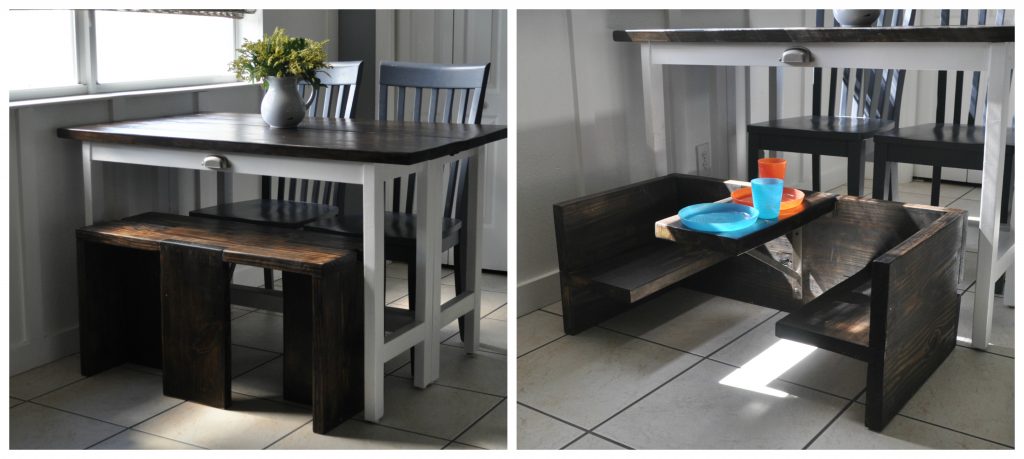


That is totally awesome. No fancy hinges, no folding … you just tip it over and it’s ready to go.
QUESTION: How did you think of the design? Was it an AHAH moment, did you see something similar, or what?
Thank you! Actually it all started with all those thoughts… hinges etc… but I kind of did have a mini “ah-ha” moment. I was watching my son take his step stool and stick it on his lap like a table… no lightning bolts, but it got me thinking about dual purpose seating. Thanks so much for taking the time to comment!
This is Pure Genius!!! I can’t wait to make this for my little man 🙂
Thanks Lacey! My kids love it, hope he does too!
This Amazingly awesome and you ARE a genius! I love it, love it, love it!
This is one of the most genius things I’ve ever seen. Just such a smart use of space. Too bad my kids are 12 and 10! Lol
Dang we are a few years late! Haha thanks for taking the time to comment though! Just keep it bookmarked for 20 years for grand kids !? hah
I love this! Such a cute idea! We have a kitchen, living and dining room combo so we don’t have much space either. We have a table shoved into a corner and thought about purchasing a bench that matches our chairs for the back side. I like this idea so much better! This would be great for my 2 year old for not only eating but crafts and coloring etc! I am curious what the finished dimensions are though! I would want to.make sure it will fit at our table before I tackle the project. Thanks so much for sharing! !
This sounds like it would be perfect for you! Mine is appox. 14.5 ” deep 36″ wide and 18.5″ tall. Good luck and thank you for commenting!
Thank you so much Lisa!