*THIS POST CONTAINS AFFILIATE LINKS AND IS PAID FOR IN PART BY PARTNERSHIPS WITH The Home Depot
Based on my current Instagram feed and auto-populated Pinterest pins, I am not the only one who has functional office space on the brain! I had been tossing around the idea of homeschooling my kids for the past few years, then 2020 happened. It was the tiny nudge I needed to make the dive. I still don’t know if this will be our long term plan, but it is certainly our current one.
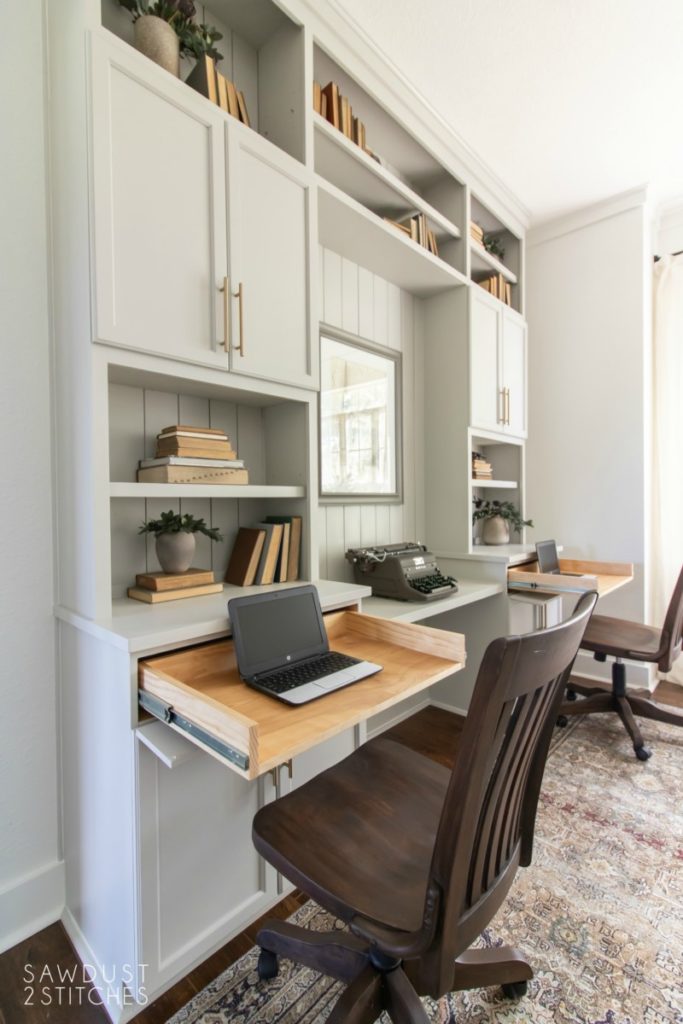
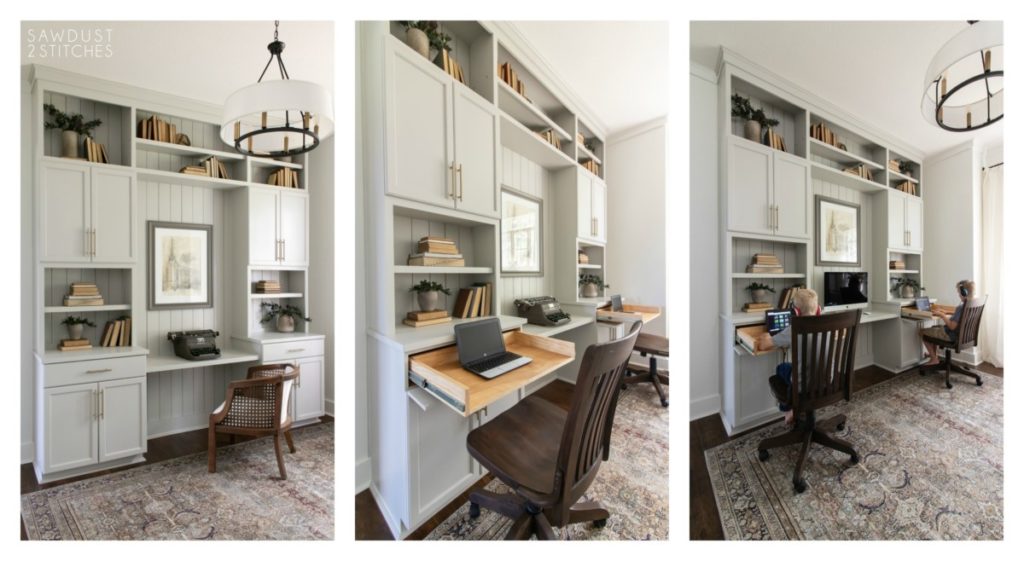
While I have dreamed about building my dream office for years, those plans were rerouted and put on the fast track. I was about to enter the chaotic new school year and I needed organization and I needed it fast! I was wanting built-ins but trying to accommodate desks for the kids and it was proving to be a problem. UNTIL I had brilliant ideas of how to have my cake and eat it too! This idea would allow me to have my beautiful dream office and still give my kids each the designated workspace they needed!
Here is the clincher, I was nearly positive I could use pre-assembled cabinets to knock out this project even quicker, WINNING!
Gather Supplies
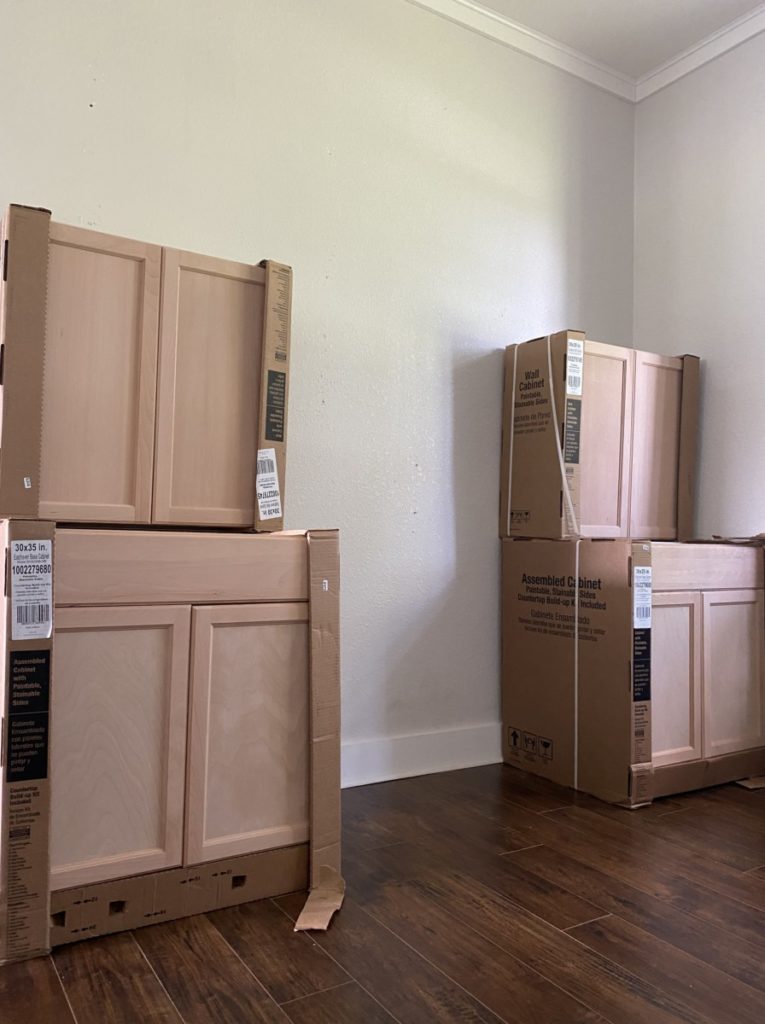
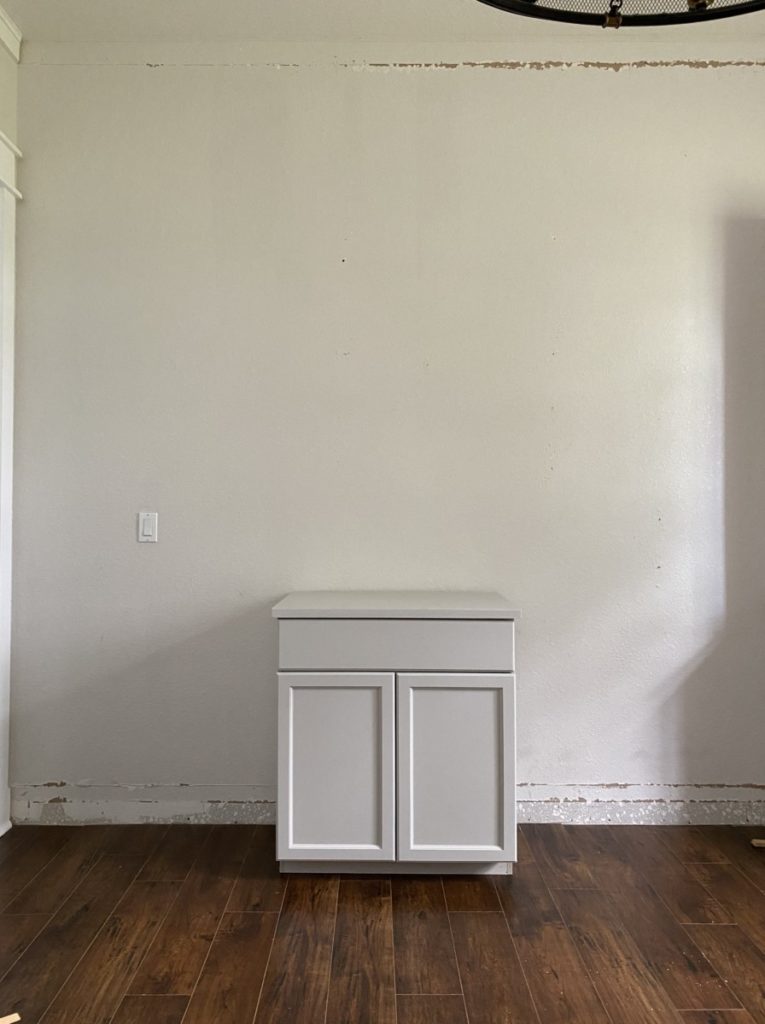
First thing I needed was cabinets! If you have ever been in a kitchen then you know the average size of a base cabinet. They are fairly large and getting them from the back of the store to the front and into your vehicle is a workout! I just ordered ahead and had mine picked up curbside! Wait, did you know you could do that !? You better believe it!
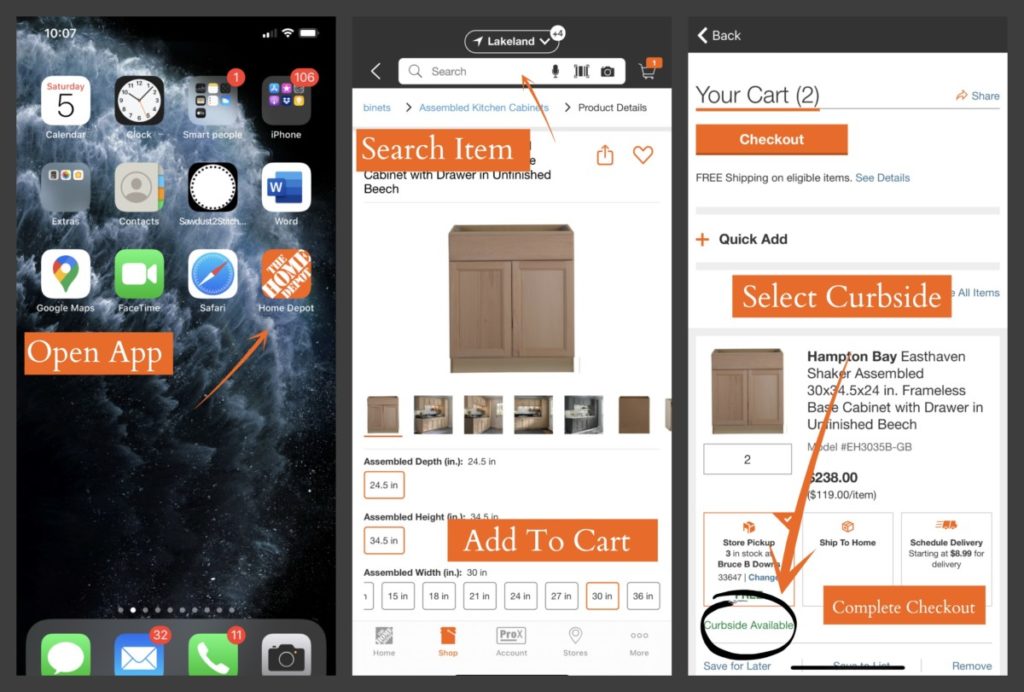
When I arrived at my local Home Depot I had my cabinets ready and waiting for me.

Modify Cabinets *OPTIONAL*
The biggest issue I had with using preassembled cabinets was the dimensions. I like to make everything custom and the cabinets were are little deeper and taller than I would have preferred. I was just going to have to deal with it… or did I ?
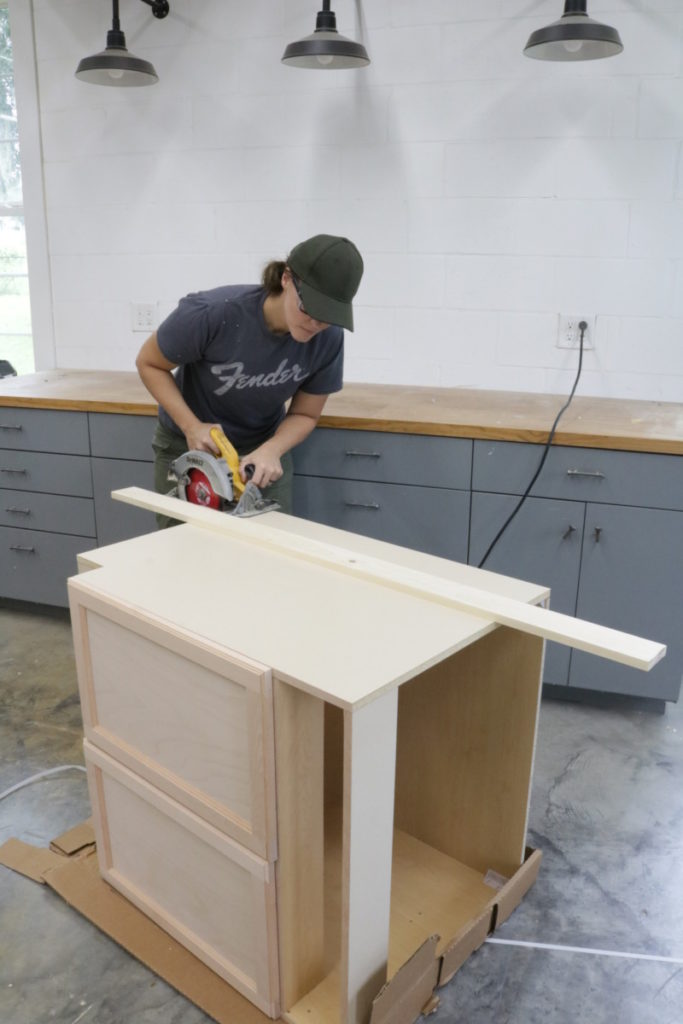
My brain started racing and I had an idea. An idea that required me to do some tweaking to the cabinet, so why not modify the size of the cabinet as well?!
If you would like to read more about how I modified the lower cabinet you can get all the details here. (This is a COMPLETELY optional step! You can easily re-create this look with standard size cabinets.)
Countertops
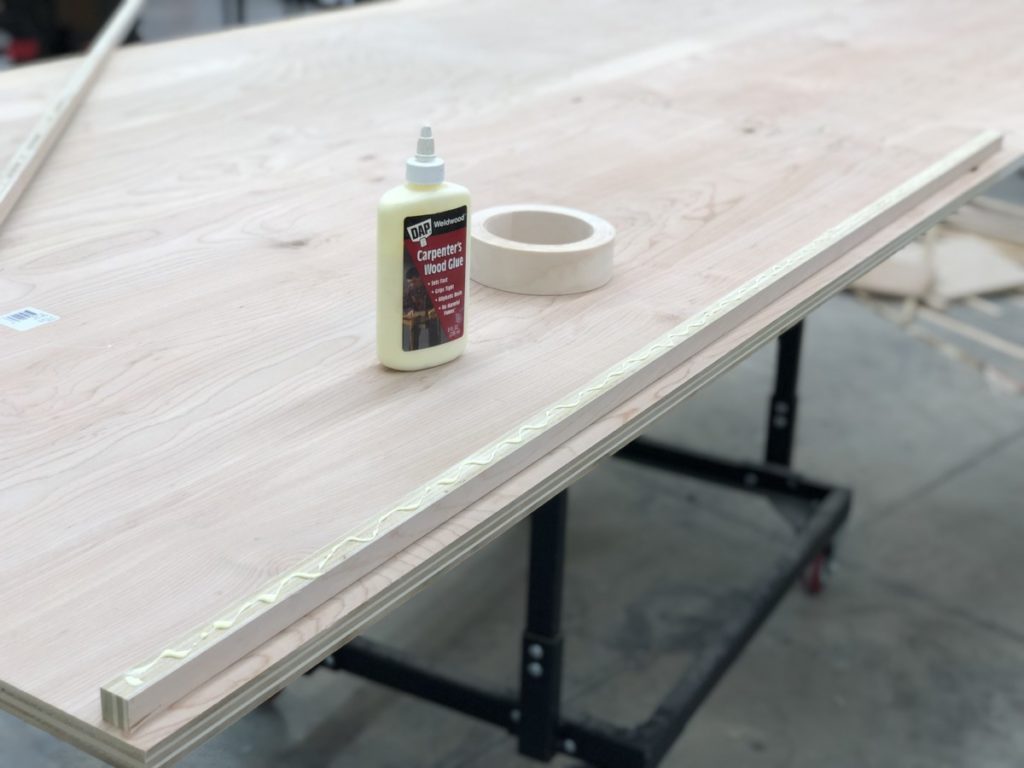
Something to consider before moving forward with your built-ins is countertops. In the past I have used 3/4″ plywood as counters for my workspaces and have loved them. You can see them here:
While there are several ways to create plywood counters I opted to do a stacked edge and then iron on edge banding to create a seamless look. You can get the full countertop tutorial here.
I know I have said it before and I will say it again. There are always ways to accommodate different skill levels. If you are a little afraid to use a table saw and would prefer to just purchase counter tops, that is an option.

I actually checked out The Home Depot, they have a ton of in-store options, but if they don’t have exactly what you are looking for in-store, I am certain you can find it online. Not only can you find exactly what you are looking for, you can also rely on fast and free shipping on over one million items! #winning
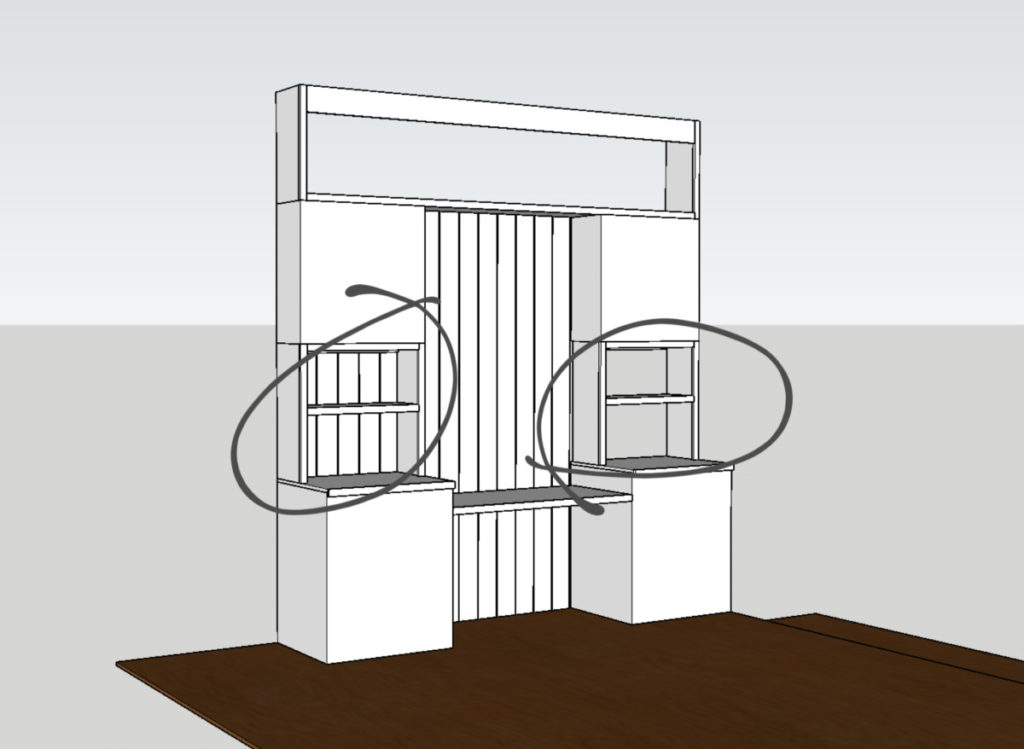
Build Shelves / Upper Supports
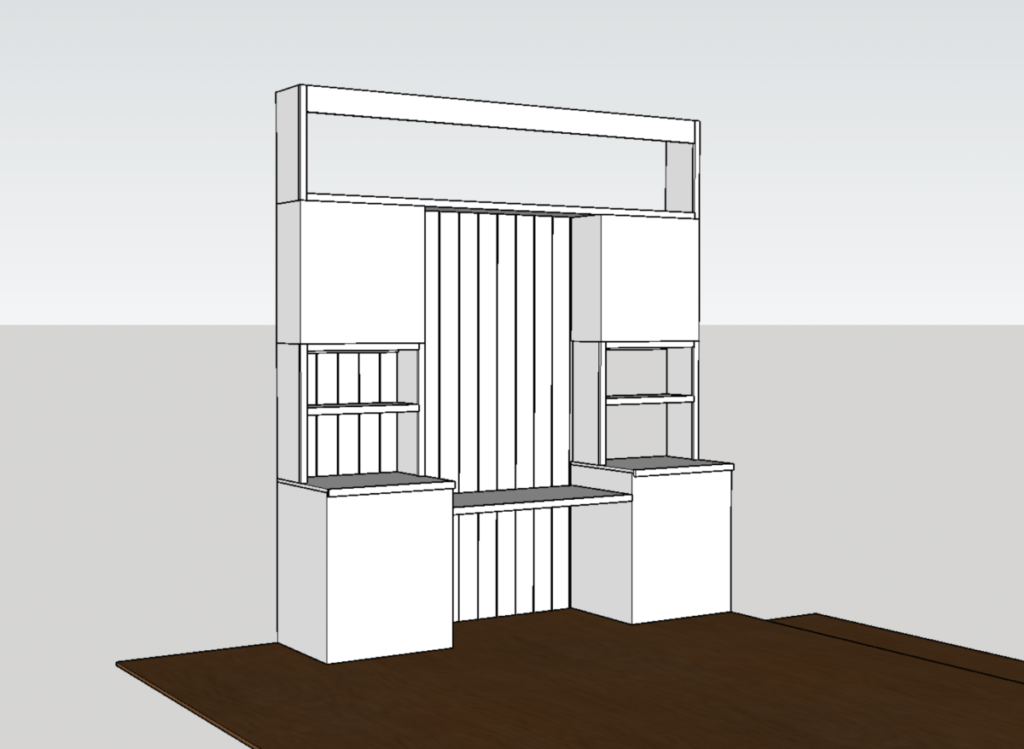
Now that I had my upper and lower cabinets home, I needed to create a unified large unit that felt like a custom built-in. I needed to connect the dots! The first step would be forging a connection between both base units and their corresponding upper units.
I had an idea. I would create a shelf that would not only unify the upper and lower cabinets but it would also serve as shelves and a platform to support my upper cabinets! Win.
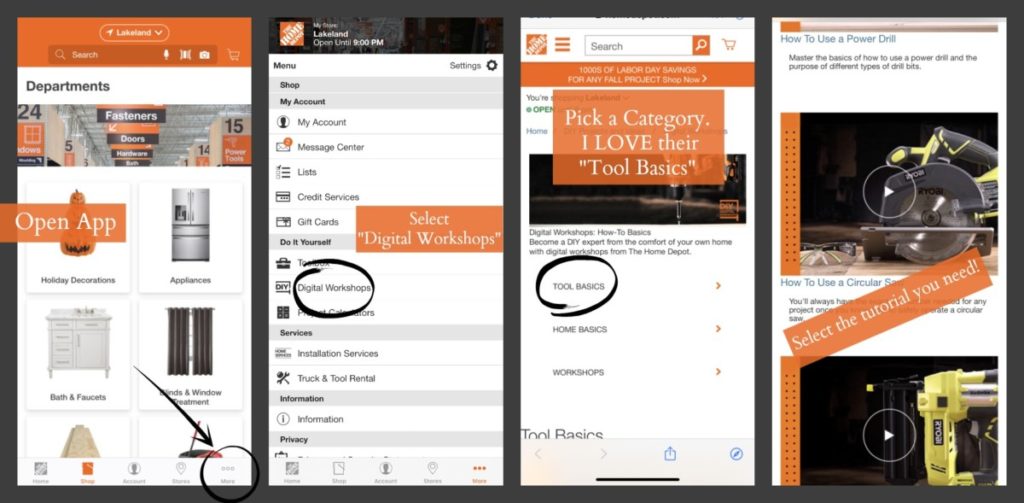
While this is a simple build I understand that sometimes using a new tool can be an overwhelming and daunting task. By virtue of the fact that you are here, means you are in in the right place. There are a ton of great resources online to help you learn new skills. As a safe bet I love to direct people to The Home Depot Guides . I know with full confidence that I am sending you to a credible source written by professionals for beginners.
The cabinet units are a simple build and would actually be a great beginner project. I designed this project hoping that it would be feasible for a novice learner but also present a more skilled builder options to create one-of-a kind pieces.
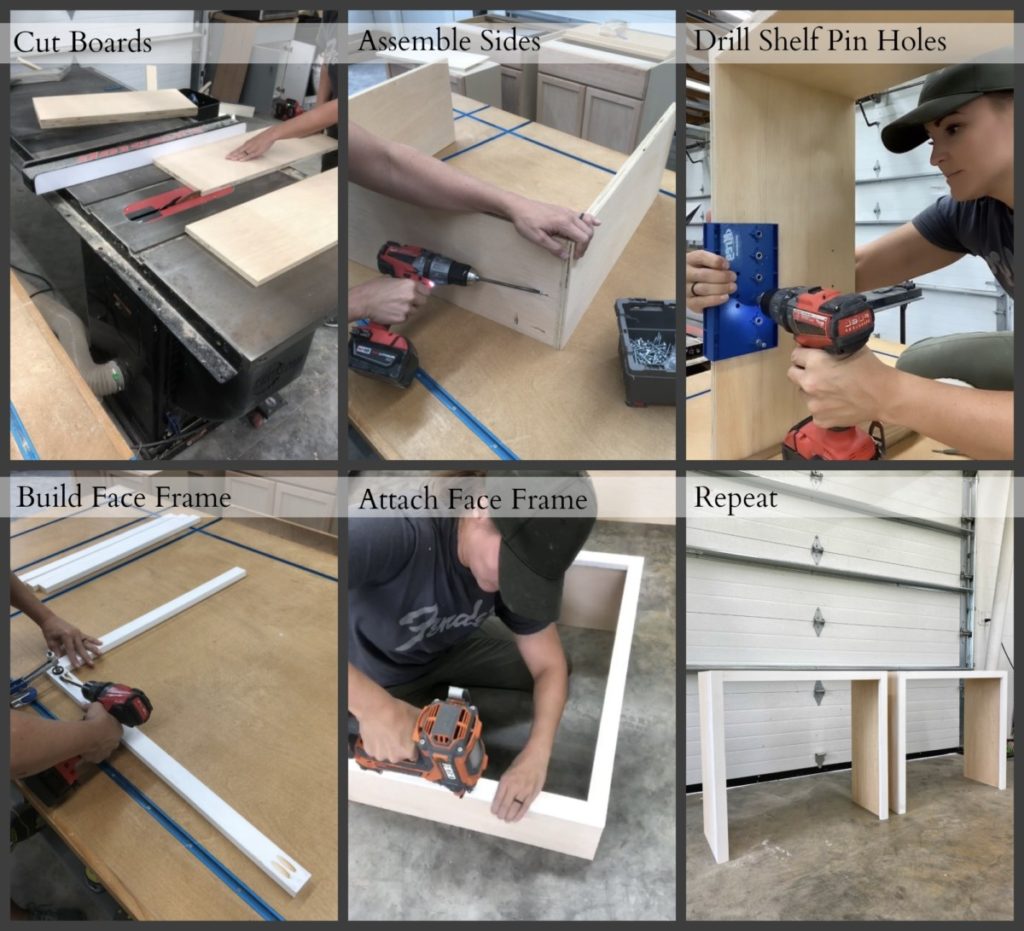
Things to consider:
Height and Width- The size of these shelves will vary depending on the height of your ceiling and your cabinet selections. For a size reference I have 10′ ceilings , so I designed my connecting shelf unit to be 27″ tall. I used 30″ wide cabinets, so I built my shelves to be the exact width and depth as my upper cabinets.
(Cabinets come in MANY different dimensions, which is yet another reason that this project could work for any size or space.)
Backing – I knew I wanted to use shiplap boards behind my open shelving areas. Before building I needed to take into account the 1/2″ thickness of my shiplap boards when I was building my units.
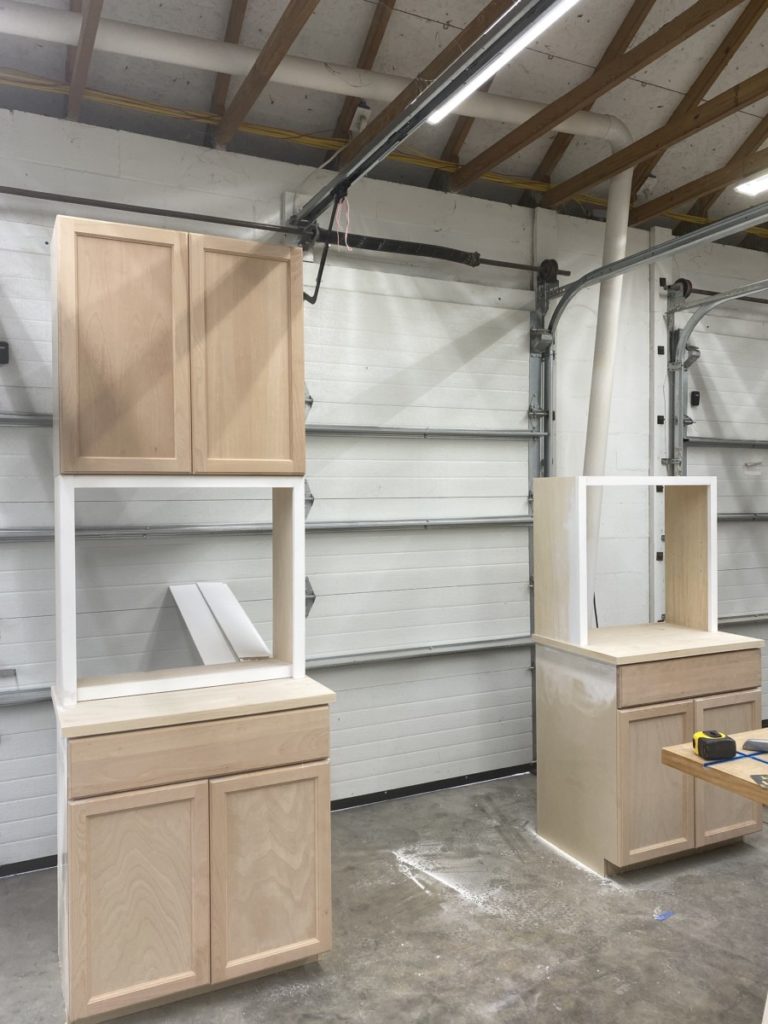
Build Upper Unit
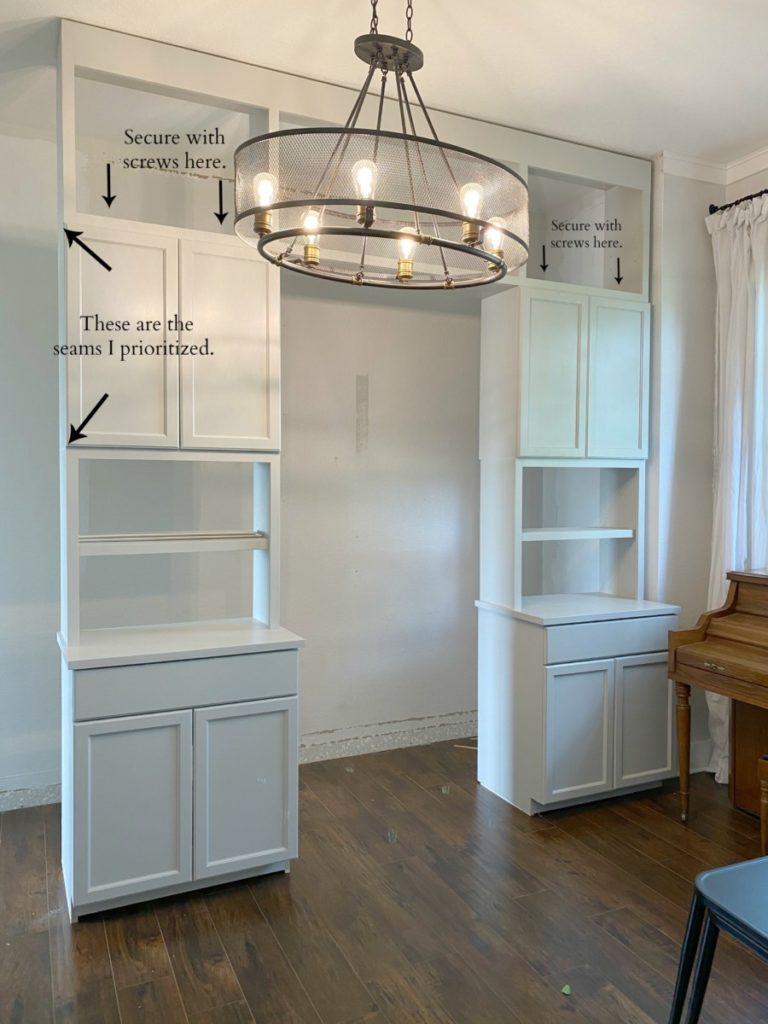
The two towers that would frame in my desk were looking beautiful, now it was time to connect the unit together! As I said before I wanted this to have a built-in feel. In order to create this look I needed the unit to come within a few inches of the ceiling so that I could add ceiling molding and give it a true built-in feel.
I decided to make one very long unit to span the distance between the two towers. For size reference my upper unit is 25″ tall and 104″ long. It is not a small unit, but like I said, the build is a simple one and can be altered to fit any space.

Things to consider when building:
Backing: I needed to take into account the depth of my backer boards (in my case shiplap boards) when designing/building. One option would be to attach all the units directly to the wall and then paint the wall to create a unified feel. It would eliminate the need to accommodate a backing board and save some money.
Length: My unit is pretty big! I didn’t want to compromise the length of my desk. I wanted to maximize as much of the office wall as I could. This required the use of longer than standard 96″ boards being ripped and cut. (You could technically splice, fill and sand two boards together.)
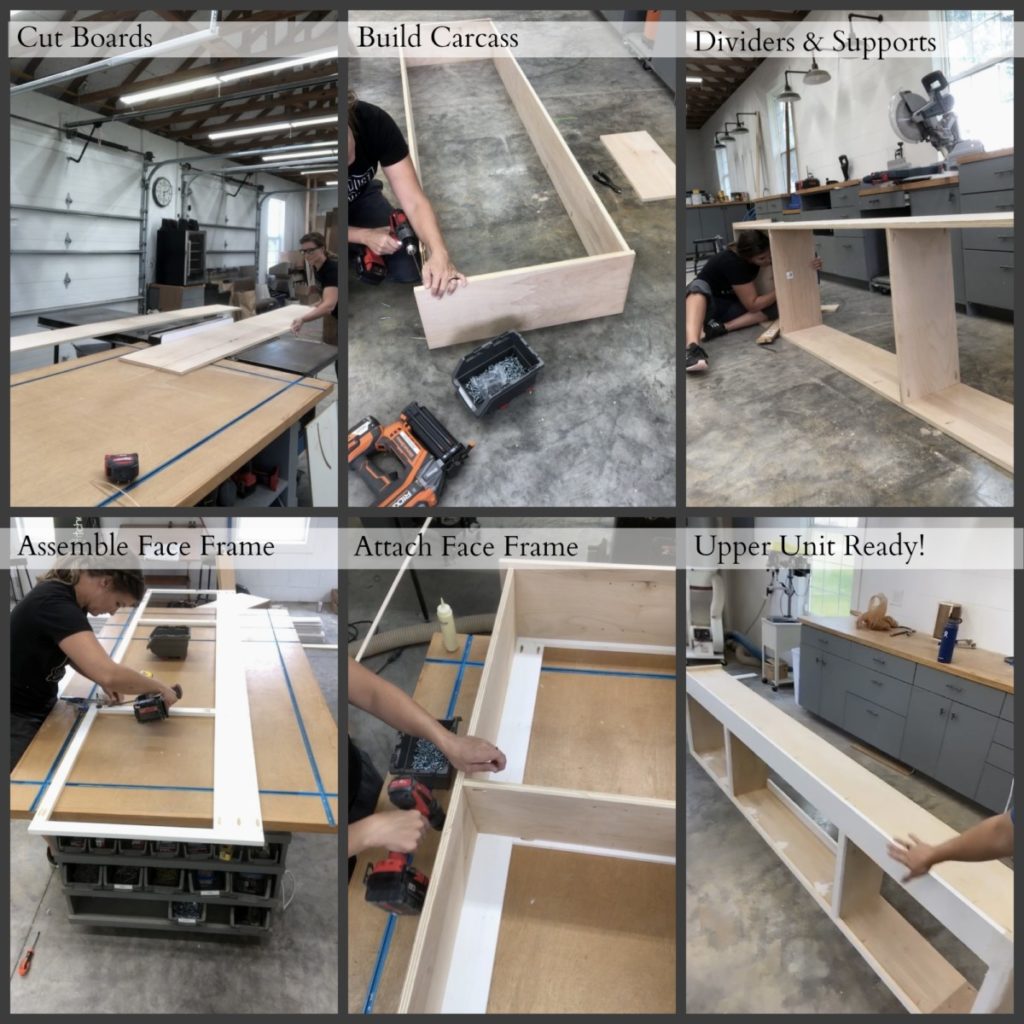
If you are a little skittish about building a big unit, this is totally optional for this built in desk. In reality all you need is the two base cabinets and a desk to span the distance between them, but I have always been “extra” and I like it. We are all in different phases of life, do what works for you!
Painting
Before I brought my units inside I opted to paint them in my shop. Regardless if you are using a sprayer or rolling paint on here are my tried and true steps for painting cabinets:
- Lightly Sand (Even with brand new cabinets.)
- Roll or Spray first coat of primer OR paint and primer.
- Allow to dry.
- Lightly sand with a fine grit sanding sponge.
- Wipe down with a slightly damp cloth.
- Apply another coat of paint.
- Allow Dry.
- Lightly sand with a finish sanding sponge.
- Wipe down with a slightly damp cloth.
- Apply another coat of paint.
Repeat this process until you have full coverage. Once full coverage is achieved stop! Do not lightly sand the topcoat. This process has always given me a beautiful smooth finish.
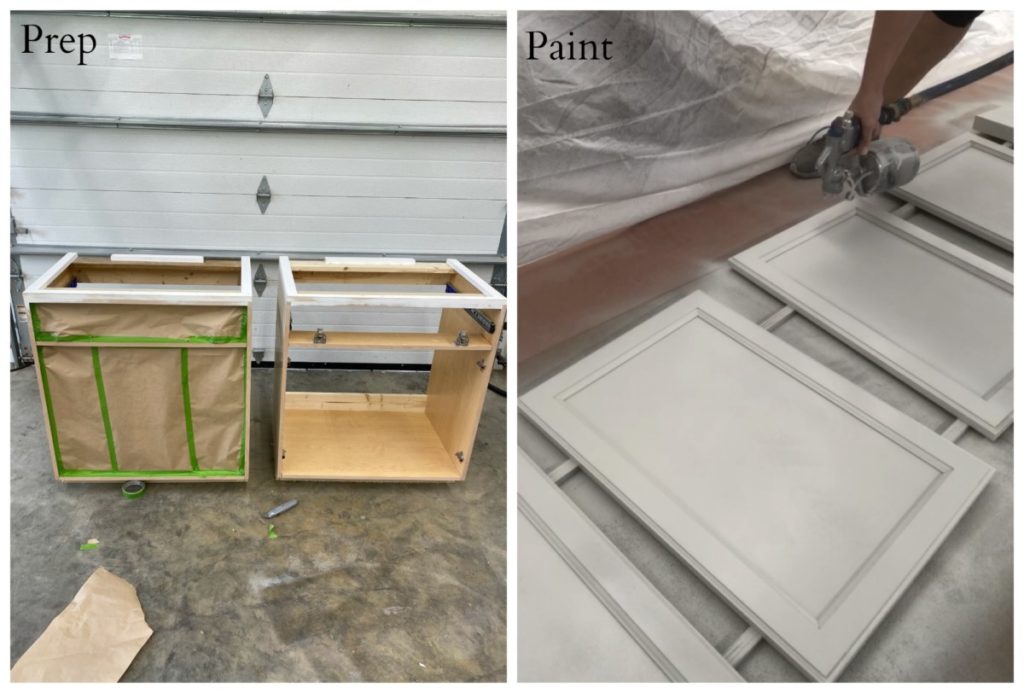
Prime, and paint all units and allow ample time for them to dry before beginning install. If you would prefer paint in place (which I would if I were rolling) then skip this step for now and revisit after the units are installed.
Install
Here it starts to get tricky and is a reason that I can’t give an in-depth tutorial when it comes to built-ins. All spaces are tricky and have odd quirks. For instance, our floor slopes slightly and one of our walls bows. Something to consider as you proceed. 🙂 While there may be a few hiccups you need to work around in your home the basics order remains the same.
Something to consider: If you are planning on trimming out the unit to look like a built-in you will need to remove the existing base boards and potentially crown molding. (Depending on the height of your unit.)
Bring in the base cabinet with countertop installed. ( I secured my countertop from underneath, driving 1 1/4″ through cabinet supports and into the countertop.)
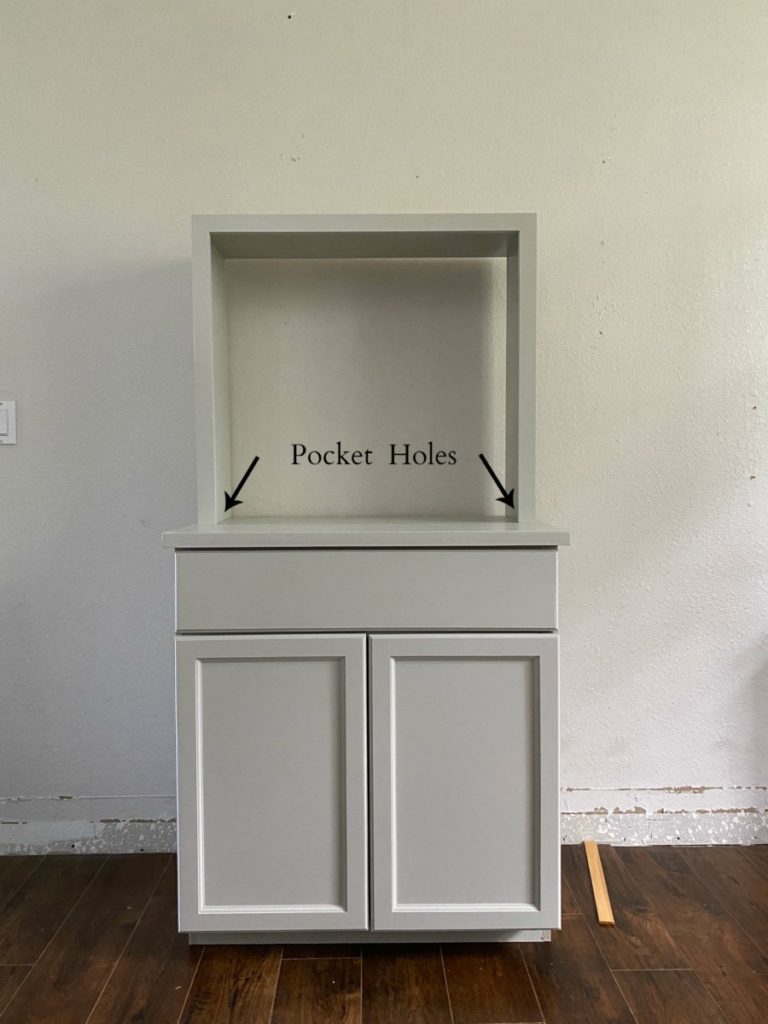
Stack the previously assembled shelf on top of the countertop. I designed mine to be centered on my countertop. I then used pocket holes to secure the shelf to the countertop. This is where you will see how close your measurements were! The goal is to have the joints meet flush and then fill with wood filler. If you are slightly off, no big deal. It’s easy enough to add a small piece of scribe molding to hide any discrepancies.
Repeat the same process for both towers. It is at this point that I was ecstatic with the look but also… “WHOA this thing is ginormous!”.
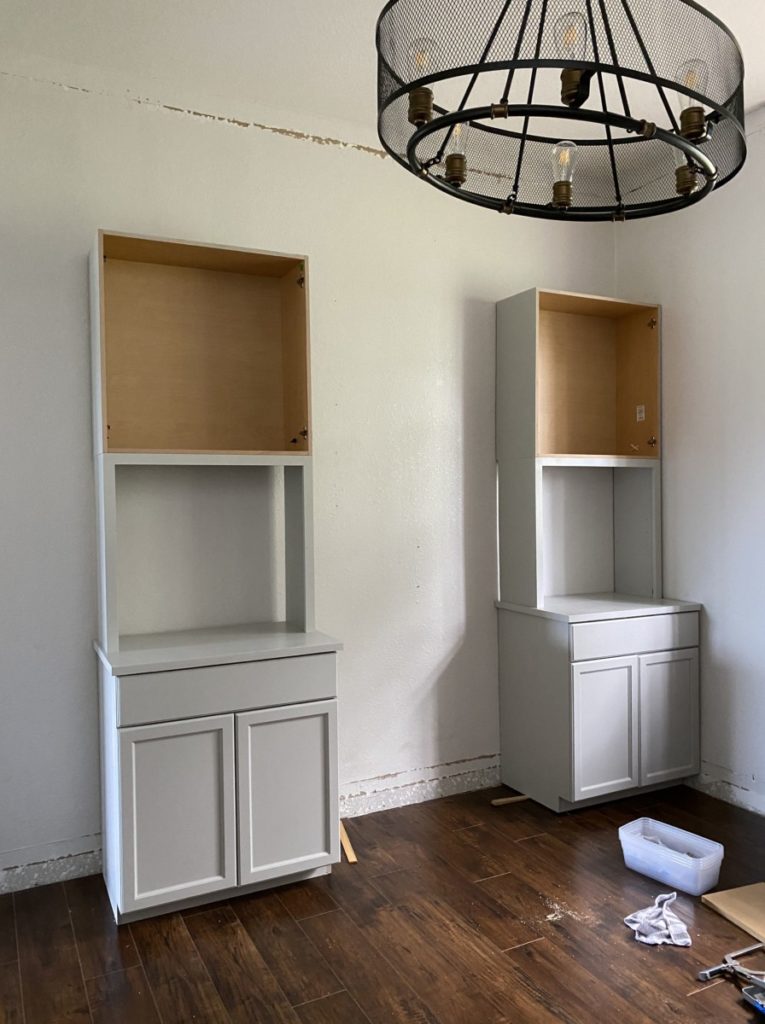
Next, the connecting shelf needs to be set in place. My husband had to help me put this behemoth in place. Again, I paid close attention to the seams showing at the visible end of the cabinet.
Install Nickel Gap Board
Once the upper shelf unit is secured I started to dial in all my dimensions. I measure the distance between my two upper cabinets and then cut a 1×6″. board using the those measurements. I then installed the board at the base of the unit connecting my two lower cabinets. This will stabilize the entire unit and ensure that it is square but will also give me a board to attach my shiplap/nickel gap boards to!
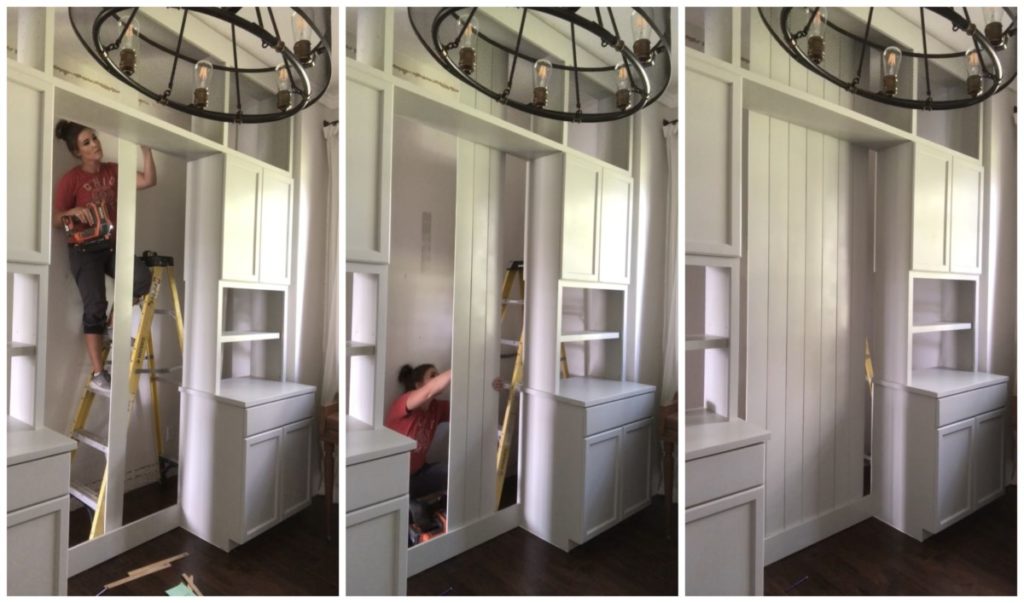
A nickel gap/shiplap board is not at all necessary for built-ins. In actuality it requires a little extra planning (Take into consideration the depth of the board when building the units, and it is an additional cost. But the heart wants what the heart wants.) I had a ridiculous desire to have my boards centered in the unit. So I made my life far more complicated than it needed to be and started in the center. I attached my nickel gap boards directly to the back of the unit using 2″ finish nails and an 18 g nail gun.
Secure Unit to Wall
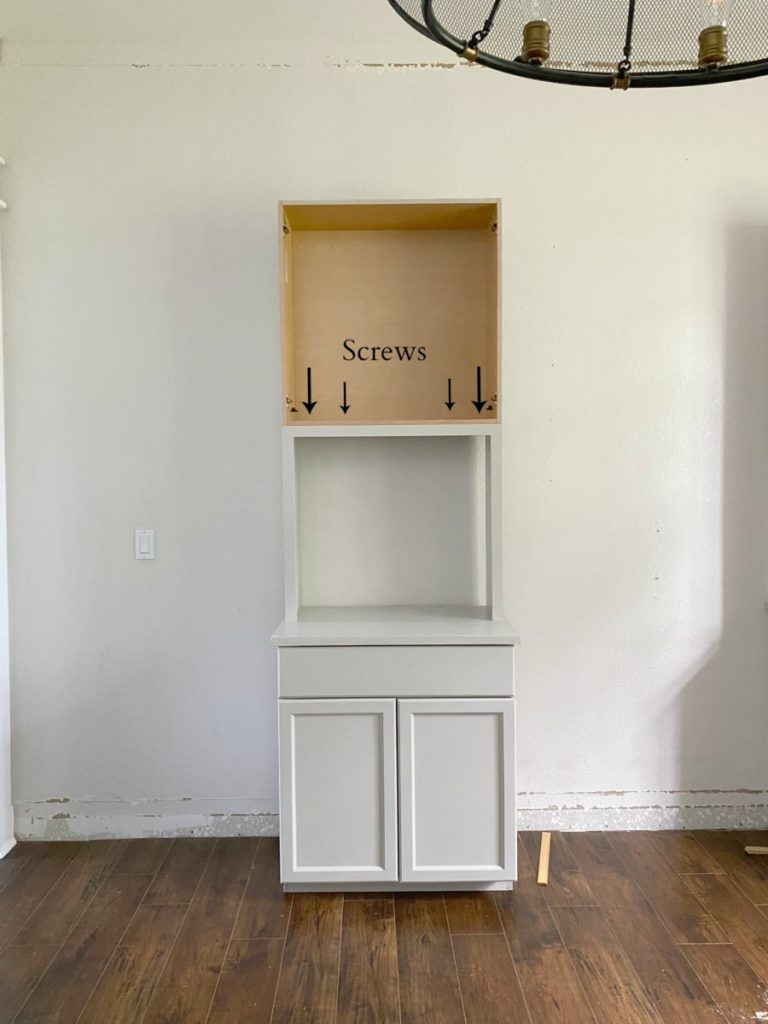
This is step is not required but suggested. Once the backing is attached I secured it to the wall. I found that the best connection points was inside the upper and lower cabinets. Before pushing the entire unit flush to the wall I took note of the stud placement so that I could use those dimensions. Using a 3″ screw I anchored the massive unit to the wall. Again, not necessary but suggested. I didn’t want to run the risk of it toppling should it be used as a jungle gym, but also I knew I would want to trim in the unit to match the existing floor and ceiling trim molding.
Install Desk
Last thing I needed to add to this built-in desk, was a desk! Depending on your preferred height install supports on both base cabinets. The desk will span between these two supports.
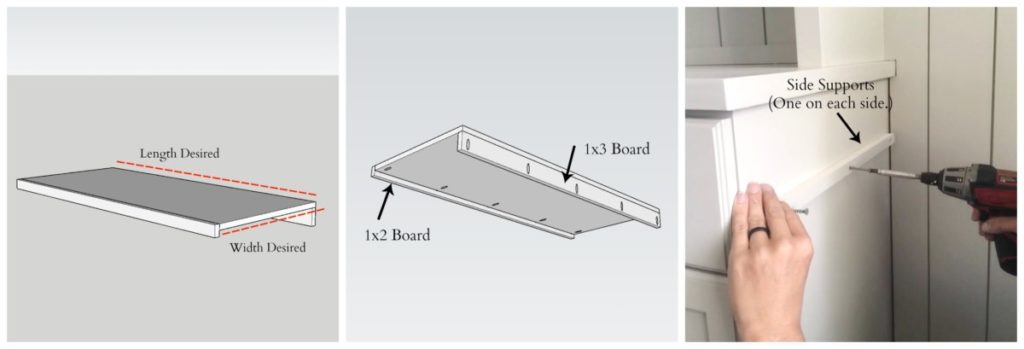
Once supports are installed place the desktop on top of the supports. Once certain of a proper fit apply an adhesive where the bottom of the desk board and the side supports meet. Then using a 1 1/4″ screw attach the 1×3 back desk support to either the wall or in my case the ship lap boards.
Finishing Touches
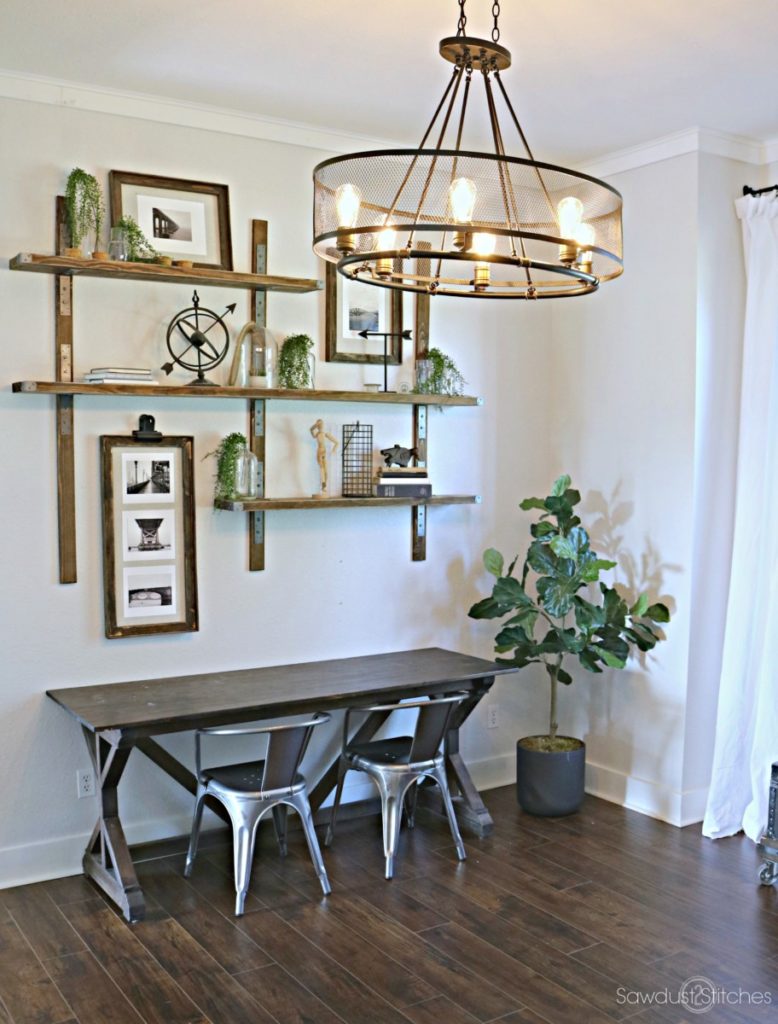
While my local Home Depot has a great selection of lighting, I had a very specific idea in mind when it came to the finishing touches for the space. I wanted a light fixture that was simple, and elegant. I wanted it to add to the look of the space while not being a distraction. Thus the reason I opted to remove the existing one. It was AWESOME and such a statement piece, but it felt distracting.
* Do you want to swap out a light fixture but don’t know how? Remember those Home Depot guides I mentioned earlier? They have you covered: “How to install a light fixture.” I am telling you guys, they have it all!
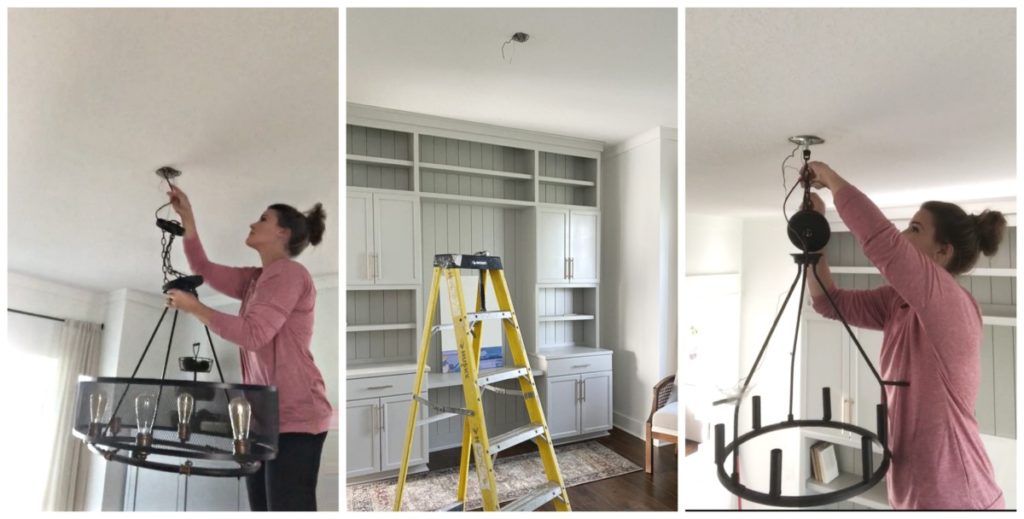
It’s amazing how the little details can make a huge difference to a space. I feel that throwing in a few books and the new light fixture warm the whole office up!
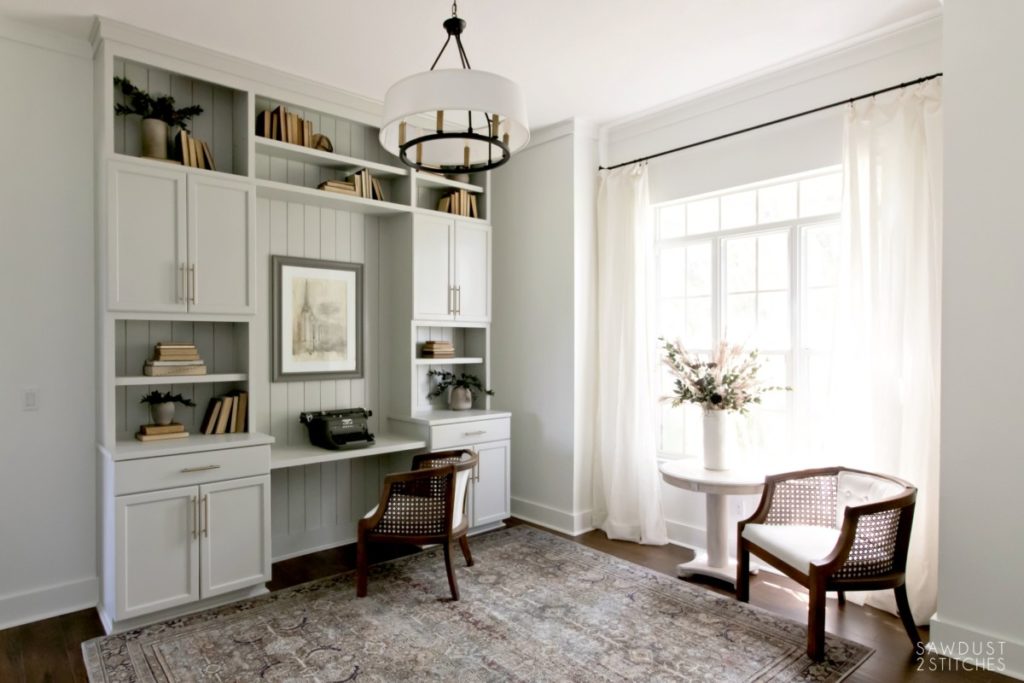
Without further ado, I give you my completely transformed office using builder grade cabinets!
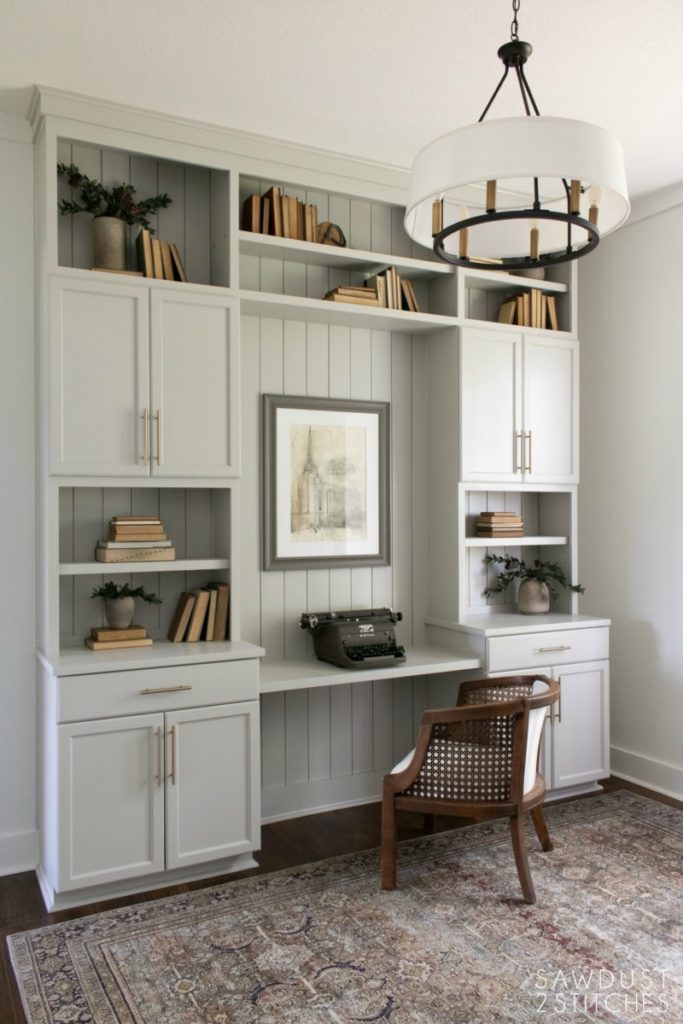
Would you ever look in the space and feel like someone just tossed some kitchen cabinets in the room? Nope! Using premade cabinets for this project allowed me to knock out this project in a fraction of the time and would be a project that could easily be tailored to any space or skill level.
Thanks so much for following along with the office makeover, and stay tuned I just might have some more plans up my sleeve. 😉
Take Luck,
Corey
Sources:
- Nickel Gap Board : The Home Depot
- Upper Cabinet: The Home Depot
- Lower Cabinets : The Home Depot
- Liberty Bronze Drawer Pulls :The Home Depot
- Old- Cage Light Fixture: The Home Depot –Home Decorators Collection
- New- Drum Light Fixture : The Home Depot
- Wall Color- Pure White Behr
- Cabinet Color – Repose Gray 150%
- Rolling Chairs- Facebook Marketplace ( You can get something similar here.)
 Copyright secured by Digiprove © 2020


Curious. You mentioned “If you would like to read more about how I modified the lower cabinet you can get all the details here. (This is a COMPLETELY optional step! You can easily re-create this look with standard size cabinets.)” However, it doesn’t appear to have a link to follow so we can see your steps in modifying the cabinets.
Thanks!
stay tuned, it will be live very soon. 🙂
That is absolutely gorgeous!
Wow….that looks custom.. Great job!!
I have to ask….where did the rug come from?
Unbelievable! Such a great job!
Thank you so much!
As if by magic this post arrived in my inbox. I have been scouring the internet for days trying to figure out how to create usable, practical storage and a home office. This is brilliant and perfect and I am going to completely do this to that room. Thank you! Would you be willing to source the original industrial light fixture in the room before you started? It would be perfect for the look I’m going for. Thanks so much for this post!!
Glad I could be of help! Yes, the other light fixture was also from Home Depot. There is a link at the end of the post. 🙂