Hey there Sportsfans, I am absolutely ecstatic about today’s tutorial. I am teaming up with Home Depot team to bring you my own personal flair to their Stocking Post! I honestly could not be more pleased with the finished product! #DIYworkshop #Sponsored

Home Depot Offers Workshops!
- The Home Depot offers Workshops at all of their locations for do-it-yourselfers of all ages and experience levels. If you are interested in learning more, there is more info HERE.
- There are three types of Workshops offered – Do-It Yourself (DIY), Do-It-Herself (DIH) and Kids.
- Customers can learn how to build décor projects, how to make easy home repairs and how to operate tools through demonstrations and step-by-step instructions.
- Visit and Home Depot to REGISTER learn more.
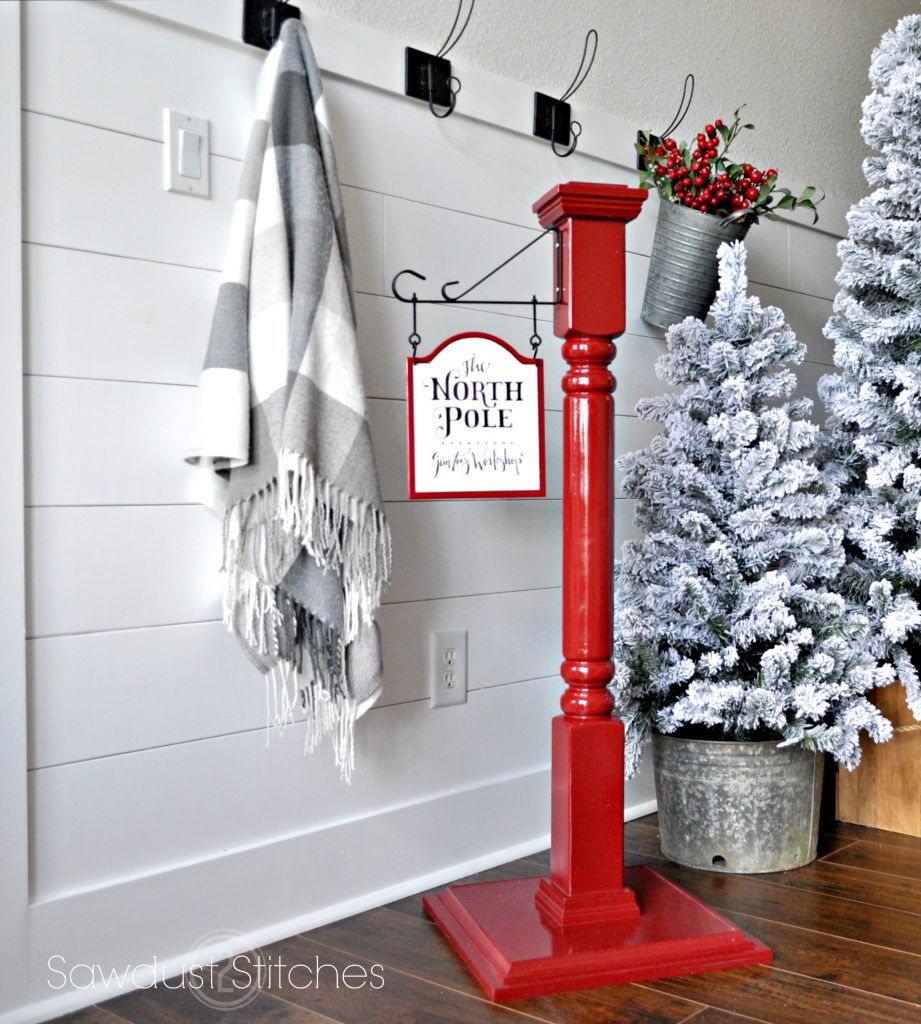
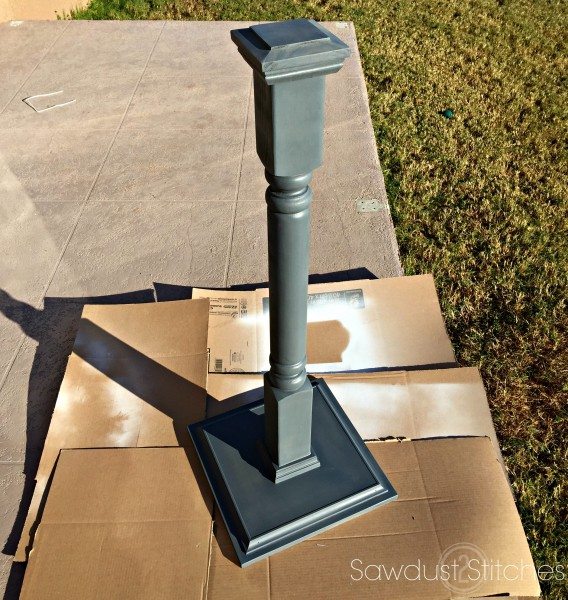
Stocking Post
Supplies Used:
- Deck Post ( I used a turned post)
- Post Cap
- Post Base Cover
- 3/4″ Plywood
- Trim
- Caulk
- Plant Hanger
- “S” Hooks
- Eyelet hooks with bolt
- Paneling
Tools Suggested
- Miter Saw
- Drill
- Drill Bit
- Finish Nailer (For trim)
Disclosure: Some of the links provided are affiliate links. By purchasing through these links it supports this site and helps keep content free. You can read more about how we do this with no extra cost to you.
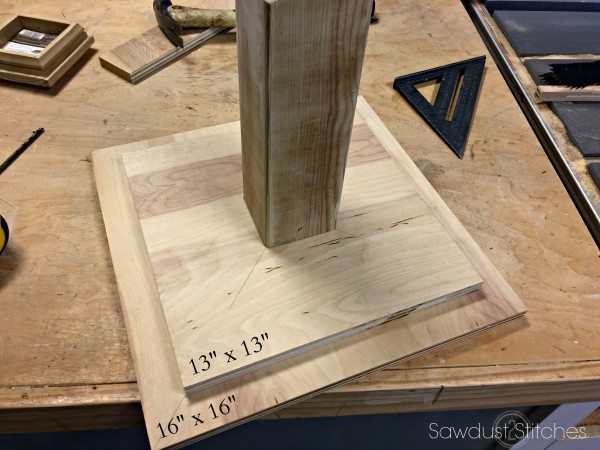
Step 1. Cut List
4″ x 4″ Post Cut @ 41″
3/4″ Plywood @ 16″x 16″
3/4″ Ply wood @ 13″x 13″
Step 2. Secure Post to Base
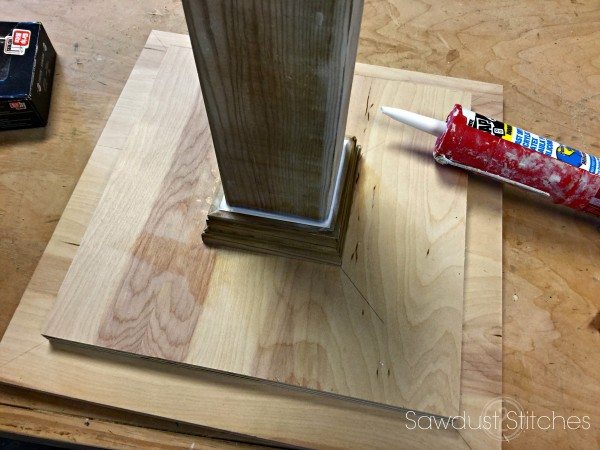
To be stable, this post requires a 16″x 16″ base, BUT I wanted my base to have two tiers. So I added a second layer (the 13″ x 13″ board). I began by centering my 13″x 13″ board and securing to the post using wood glue and reinforced with 3″ screws. 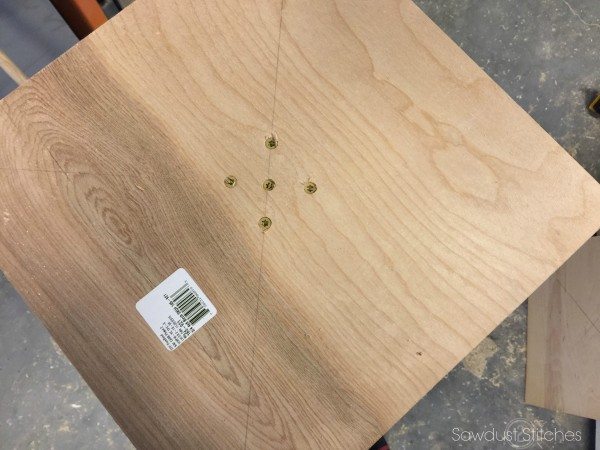 Once the 13″ x 13″ board was secure, I covered the bottom side with wood glue and repeated the above process with the 16″ x 16″ board. Base Completed!
Step 3. Trim
Time to make it pretty! Home Depot sells these nifty little base moldings specifically for fence posts. They come pre cut and ready to install! I just fit it in place and then filled the gap with a paintable caulk.
I also wanted to dress up the edges of the plywood. For the first tier I added a small amount of trim around the base. These will all be cut 13″ from short point to short point with 45 degree cuts on the end. I used wood glue and reinforced with a small finish nail. For the bottom tier I filled the plywood layers with a wood filler, allowed to dry , and then sanded smooth.
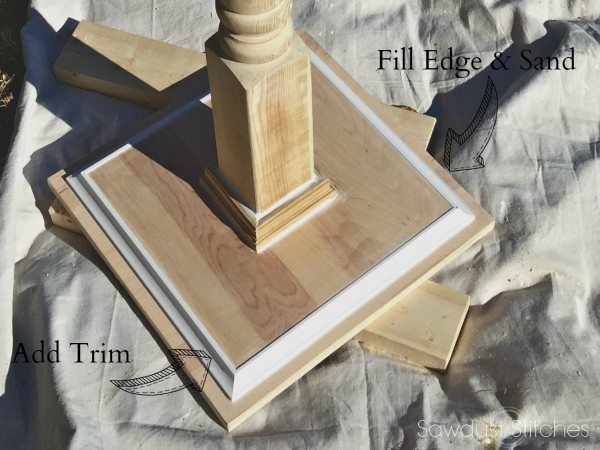
The last piece of decorative trim it needed was a post cap. Again this was an easy fix, they sell post caps in several different styles at the Home Depot. I selected this one. Just add an ample amount of would glue and allow to dry! 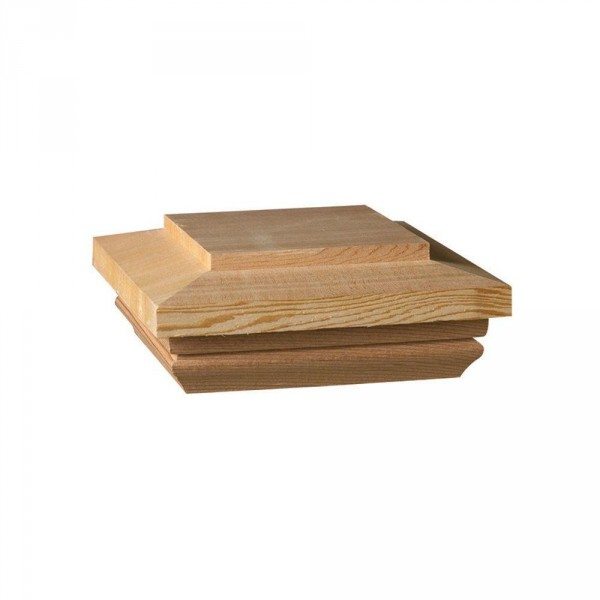
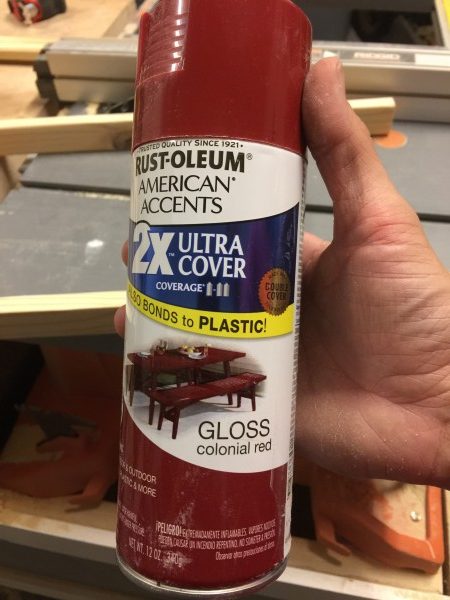
Step 4. Prime and Paint
Before you pick up a paint brush, or a spray can, I highly encourage you do a little prep work. Fill any and all nail holes with filler, and caulk all joints. This will make a world of a difference to your finished product!
I used a spray primer on my post. Once the initial coat had dried, I did a quick once over with a foam sanding block. I swear it helps create a prefect smooth finish!
 Next we are ready for paint. I wanted mine to be a glossy read. Colonial Red is my go to for Christmas, so I went with that.
Step 5. Add Hardware
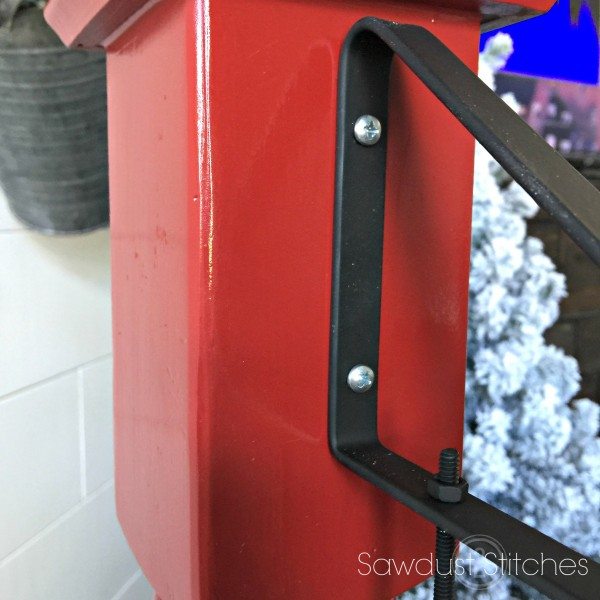
To hang the sign I used a pot hanging bracket. They can be found in the “Garden Section” of the Home Depot. They come in two different size, and I opted for the smaller 9″ bracket.
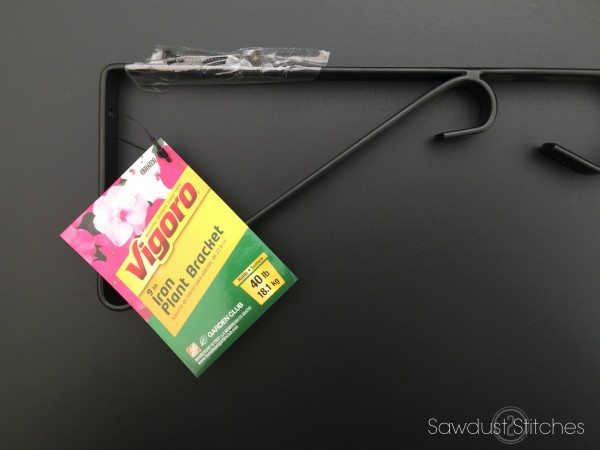
This particular size did not have holes in the bracket so I took matter into my own hands.
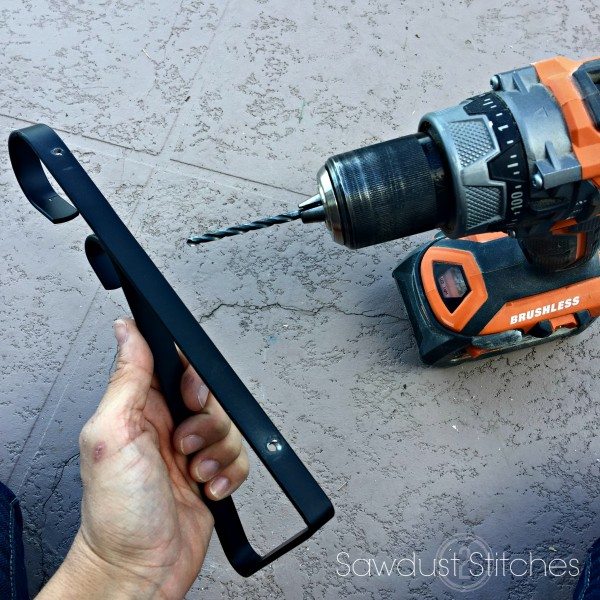
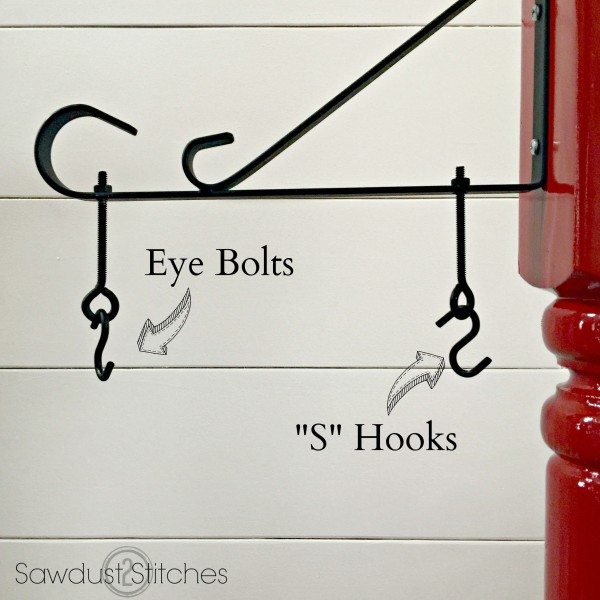
Step 6. More Hardware
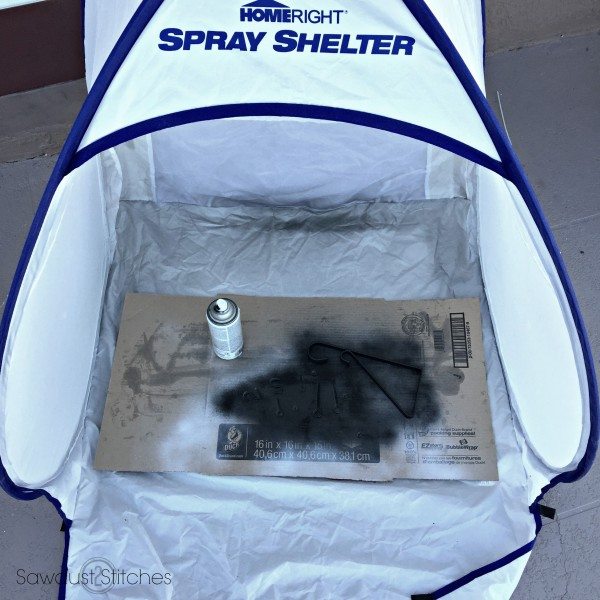
In order to hang the sign from the bracket I needed to use two “S” hooks, and two eyelet bolts. They normally come in a solver finish, so I had to correct that. I gave all my hardware a quick coat of matte black paint.
When I was installing the bracket, I had a “scratch my head moment”. I cannot for the life of me figure out the screw placement for the bracket. You will need to measure, mark and pre-drill your screws, because you will not have the luxury of a drill. You will need screw them in the old school way, by hand. (I would not be able to say that with a straight face.) Moving on.
Ta-Da! You see where I am going with this right ?!
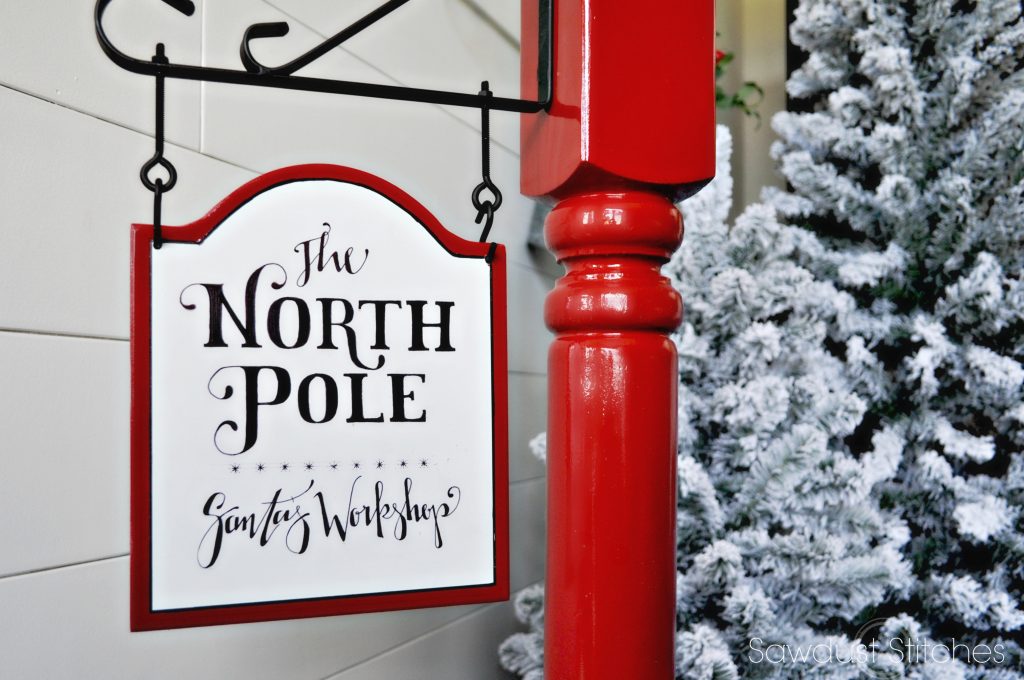
Step 7. Create a Sign
I wish I could say I used a stencil of a template, but I didn’t. This is good ol’ fashion straight edge and pencil style. I did however tape off the interior of the sign and used a bit of the red spray paint, in order to create the boarder. The rest of it was just a permanent marker (Both regular and fine point).
Here is a basic north-pole-template of what I did. Please feel free print it off and use it! (Ignore all the excess pencil markings, haha, you can tell it is the original.) It would be easy enough to transfer using carbon paper. 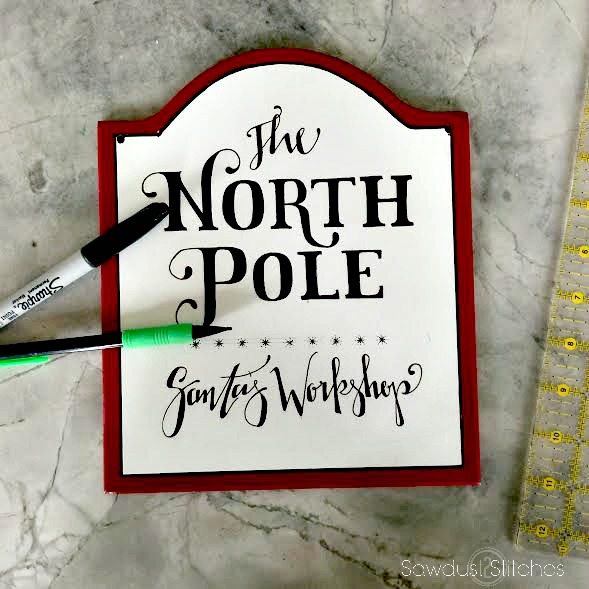
Once your sign is complete, you will need to drill two holes in the top corners of your sign. This is where you will insert your “S” hooks, that will allow you to hang your sign.
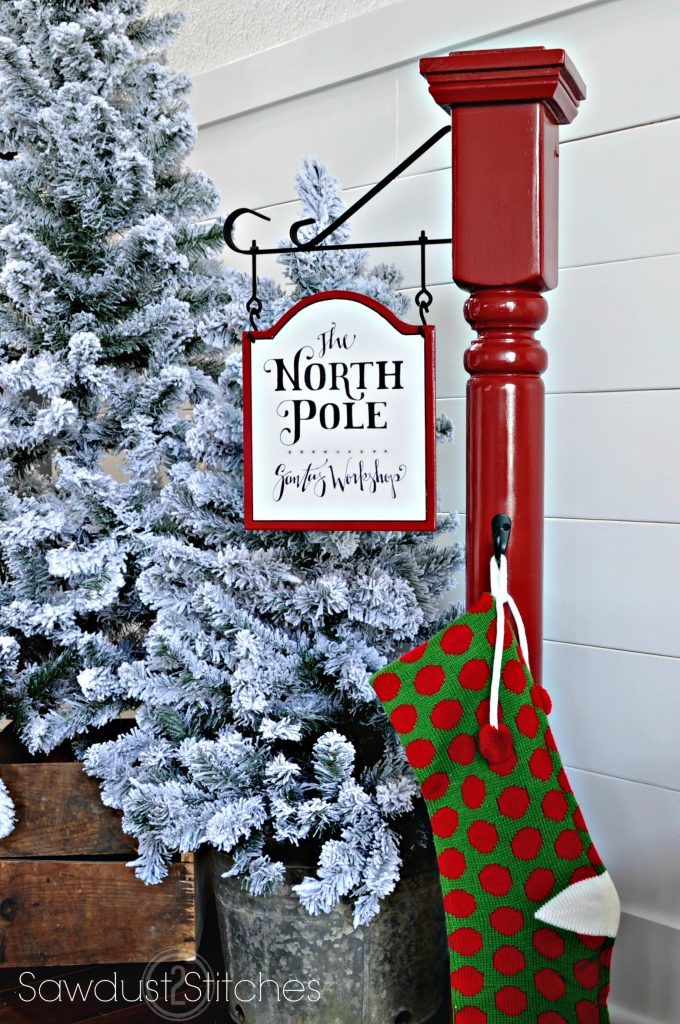
Step 8. Add Stockings
I absolutely LOVE the way my post turned out, and I will probably use mine purely as a decorative piece. However, if you are looking for a place to hang your stockings, I have got you covered! All you need to to is add some hooks. 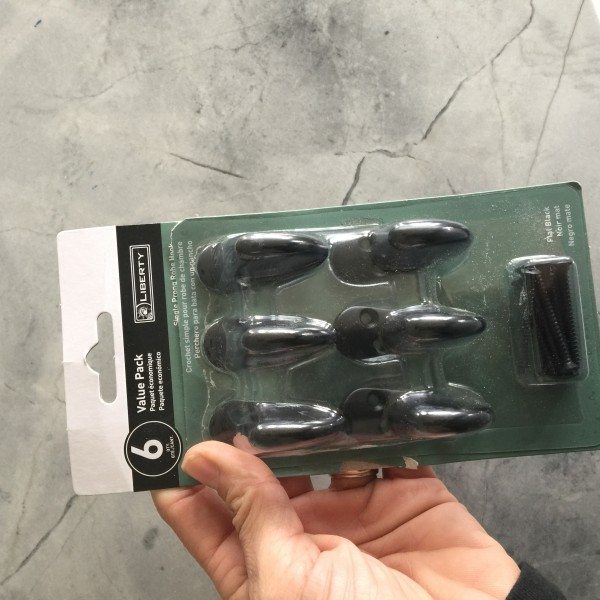
There you have it ! Add as few or ass many hooks as you would like/need.
But seriously how CUTE is this ? Like I said, I am using this just to look pretty, just because I like it!
Make sure you check out all of my talented friends to see how they added their own twist to a Stocking Post. You can find all of their project links here:![]()
Domestic Charm \\ Homemade By Carmona \\ My Altered State
Smart Girls DIY \\ Chaotically Creative \\ Ciburbanity
Lazy Guy DIY \\ Build Basic \\ That’s My Letter
Her Toolbelt \\ The Handmade Home \\ The Heathered Nest
Designer Trapped \\ The Chronicles of Home \\ Cherished Bliss
Just a Girl and Her Blog \\ House of Wood \\ Shades of Blue Interiors
Uncookie Cutter \\ Ella Claire Inspired \\ Shine Your Light Blog
Remodelando La Casa \\ Paper Daisy Design \\ Fix This Build That
Take Luck,
Corey

 Copyright secured by Digiprove © 2016


This is so perfect!!
Love this take much better! First time in a home without a mantel this Christmas.
Loved the set up as well, with the tree and the blanket hanging on the wall, can I ask where the hooks on your wall came from?!
Of course, I got them from Hobby Lobby! Thanks for stopping by.
I absolutely adore this! I’ve been looking to make a sign exactly like this for Halloween. Thank you SO much for the step-by-step instructions. I’ll be giving this a go for sure. I stumbled across you via a “seasonal decor” tag on Bloglovin’ and I’m so glad I did. Thank you! Sue at The World of Suzy Homemaker
May I ask where you found the sign at to write on? Did not see any info. on the sign just the North Pole template. Thank you
Oh sorry, I must have been spacing it that day. I cut it our of 1/4″ mdf paneling using a jigsaw.