*This post is sponsored by DAP and does contain affiliate links.
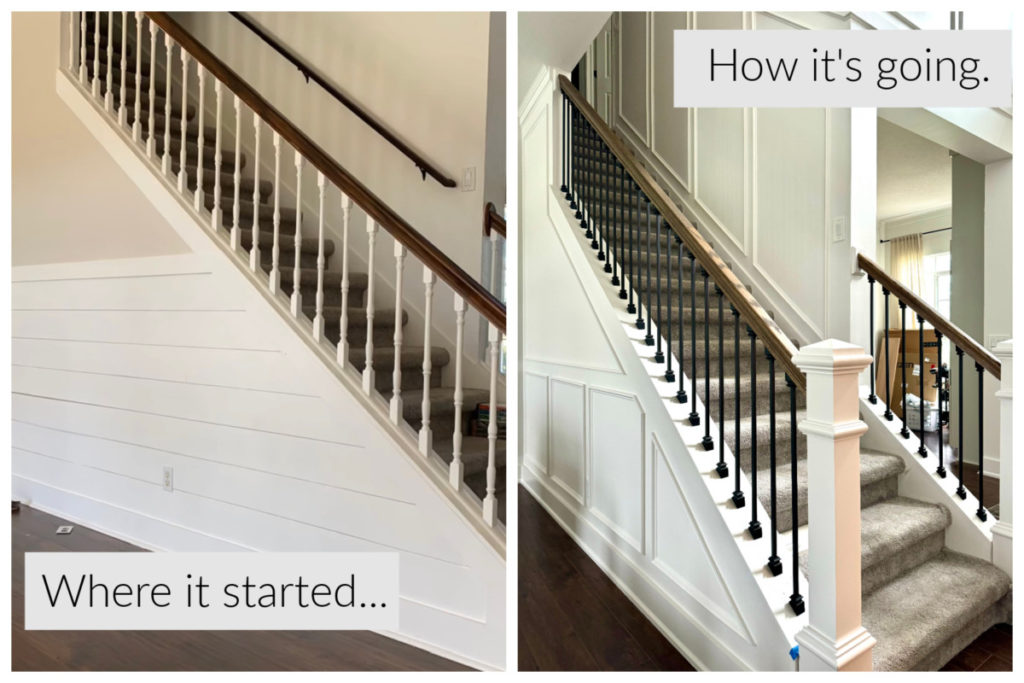
I have wanted to tackle the stairs for 7 years now! When we first moved in, I stained the handrail and painted the balusters… that held me over, until now. With the recent family room makeover I decided it is time to tackle the stairs! I started with the balusters and handrail (which you can see the process in my Instagram Stories) but now it’s time for the Stair Tread Makeover! I am teaming up with the great folks over at DAP to make it happen.
| Tools Suggested | Materials Used |
| Eye Protection | 1/2″ Sanded Primed Plywood |
| Hearing Protection | Retrocraft Red Oak Stair Treads |
| Pliers, PryBar, Hammer | ZAR Oiled Leather Stain |
| Table Saw | General Finishes Flat Poly-Acrylic |
| Stair Tread Measuring Tool | Paint (Snowbound by Sherwin Williams) |
| Pin Nailer | DAP Alex Fast Dry Caulk |
| DAP HD MAX Construction Adhesive | |
| Table Saw/ Circular | DAP Weldwood Professional Wood Glue |
| Tape Measure | |
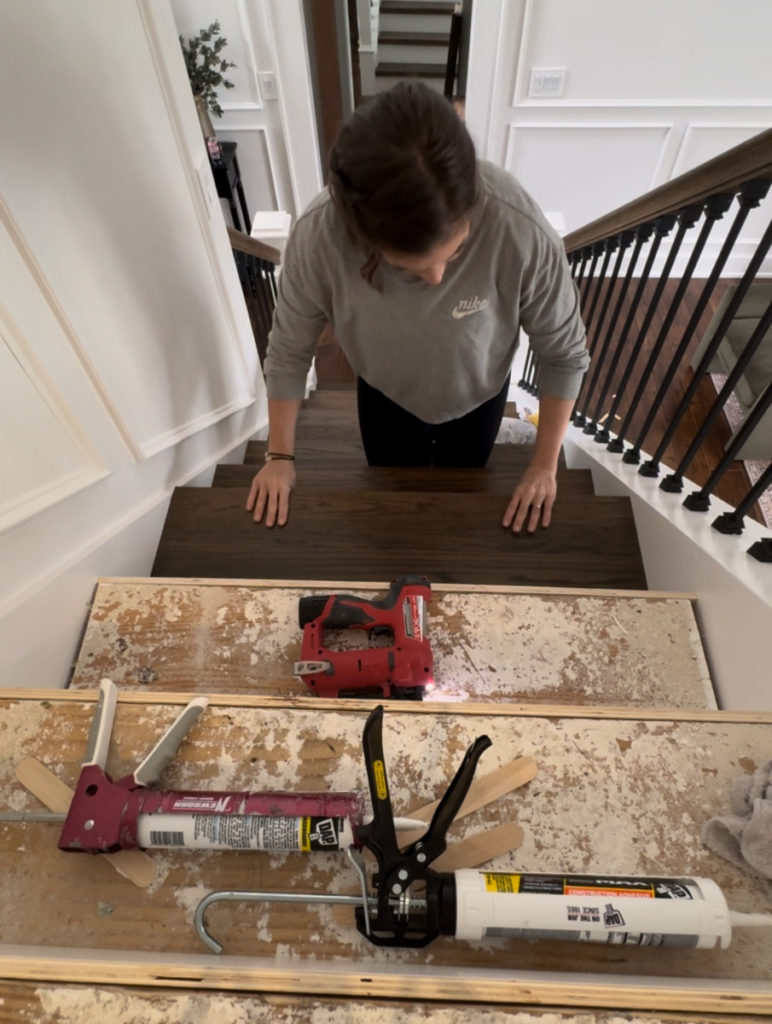
Remove Carpet for Stair Tread Makeover
Before we can begin the process of install we first need to get our stairs back to square one. That includes, but is not limited to tearing out the carpet. I found the easiest way to remove the carpet was to use any form of pliers. Basically any tool that will allow you to get a nice firm grip while sparing your hands from the inevitable staples.
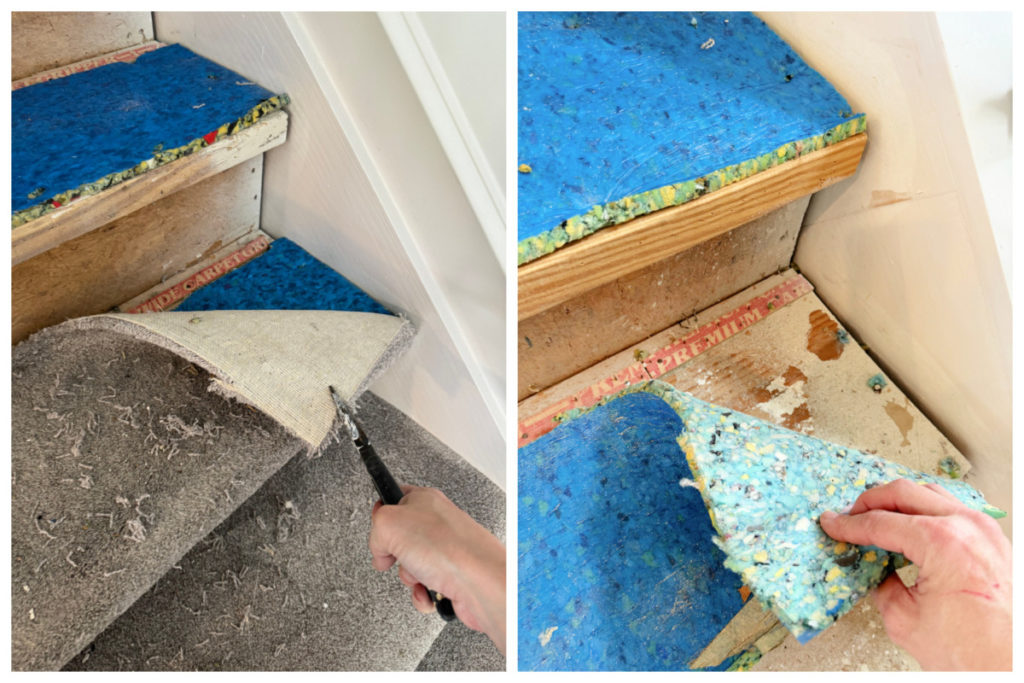
After the carpeting AND padding is removed it’s time to begin the arduous task of removing all the staples and the tack strip. This just takes a little patience, time, and I would recommend a flat head screw driver, a slim pry bar and a hammer.
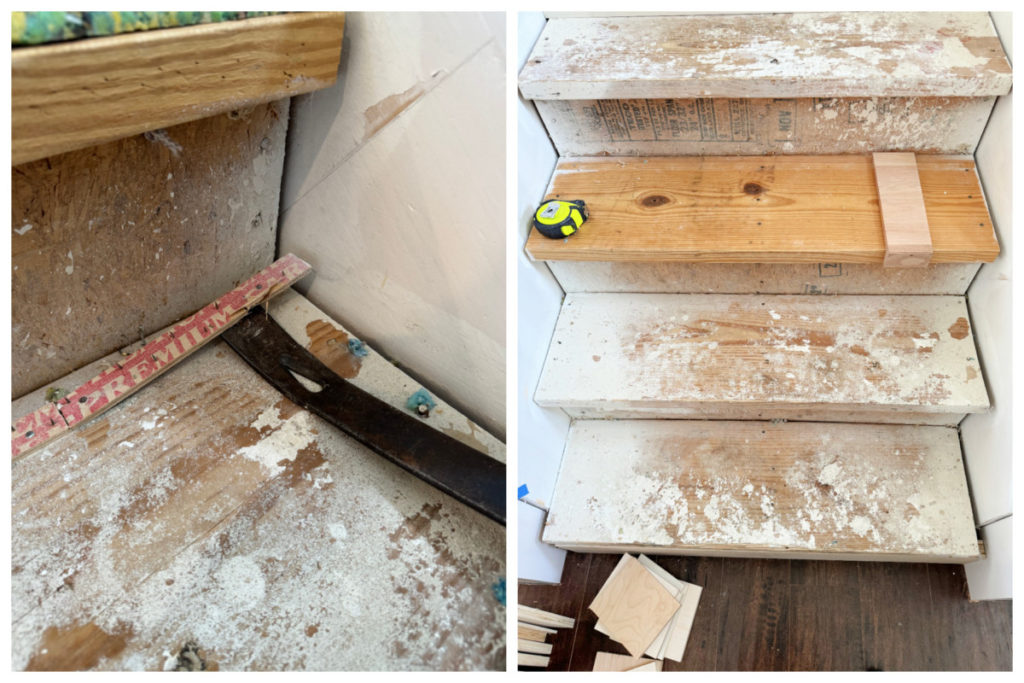
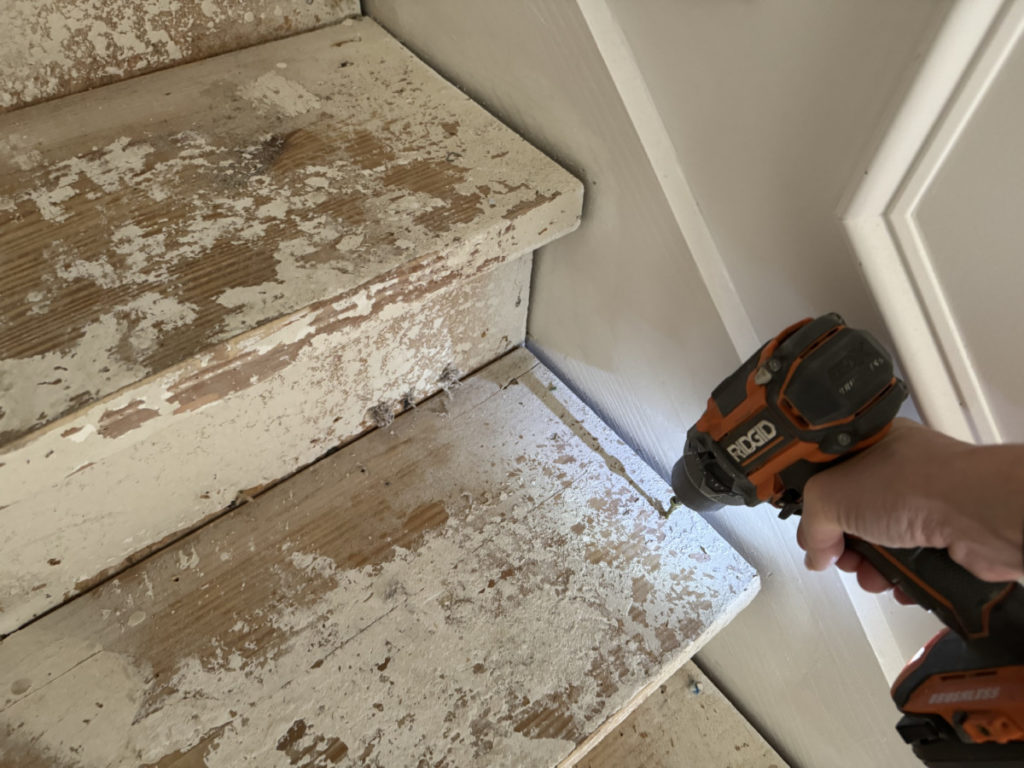
While all of the stair treads are exposed in a raw state, NOW would be an excellent time to repair any squeaky stairs. I used 3.5″ power pro screws to really tighten any loose treads.
Build-Out Toe Kick
For this staircase makeover I am using retro fit stair treads. The difference between retrofit and standard is that retrofit were intended to be installed over existing treads. The main tread is only a 1/2″ thick as opposed to a standard tread that is 3/4″, also a retrofit tread has a lip to cover existing tread.
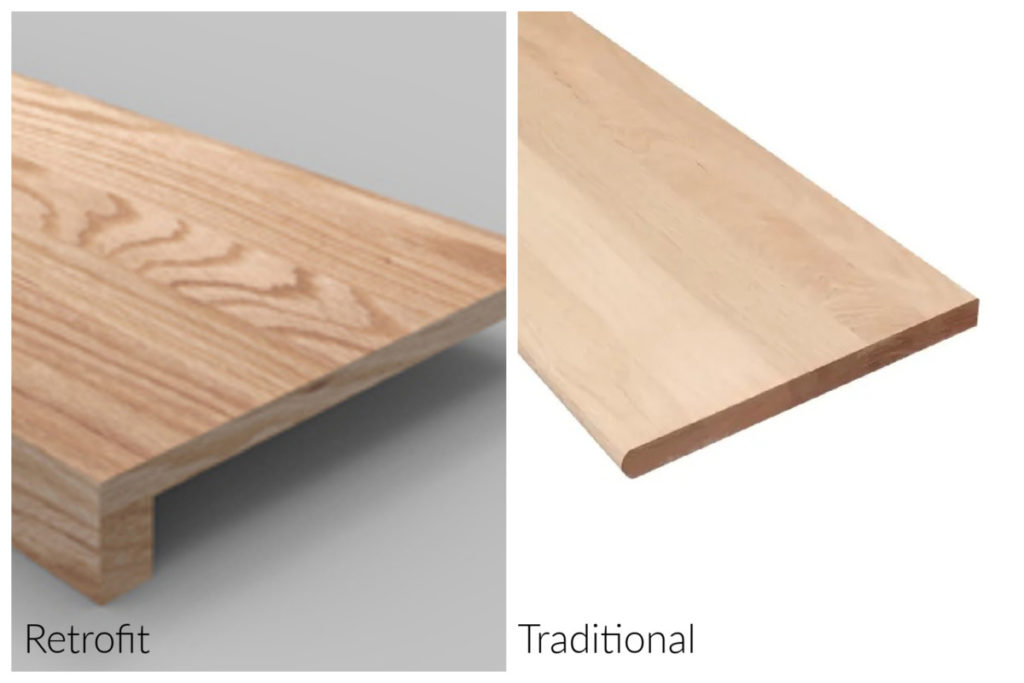
I opted for retrofit BECAUSE… firstly I found these treads for 50% off and I couldn’t pass them up. ( I don’t know if this course actually saves any time compared replacing the treads, but I really liked the look of the thick tread.)
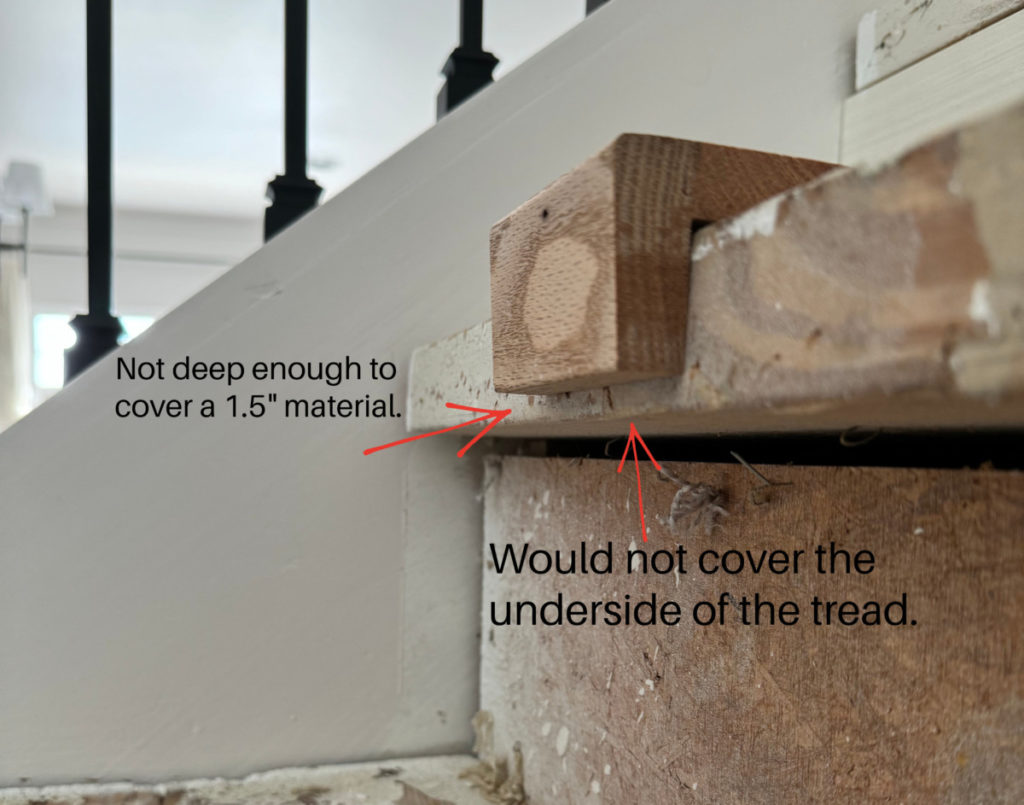
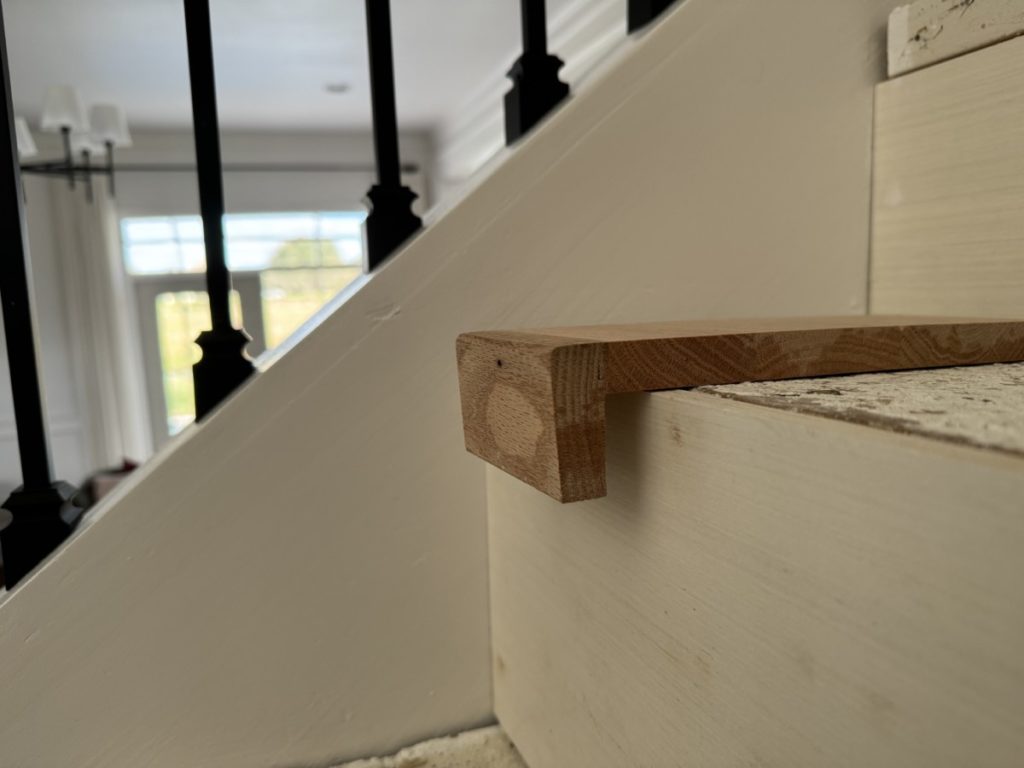
Using retrofit does come wiht a few complications. The retrofit was inteded to cover a traditional 3/4″ material hardwood tread, NOT construction grade 2x materials. So the lip is not long enough to cover the tread and it does not “cup” the tread… meaning the underside of the nose is exposed.
Again, it probably would have been easier to rip everything out and go with traditional treads, but I have an idea. 🙂
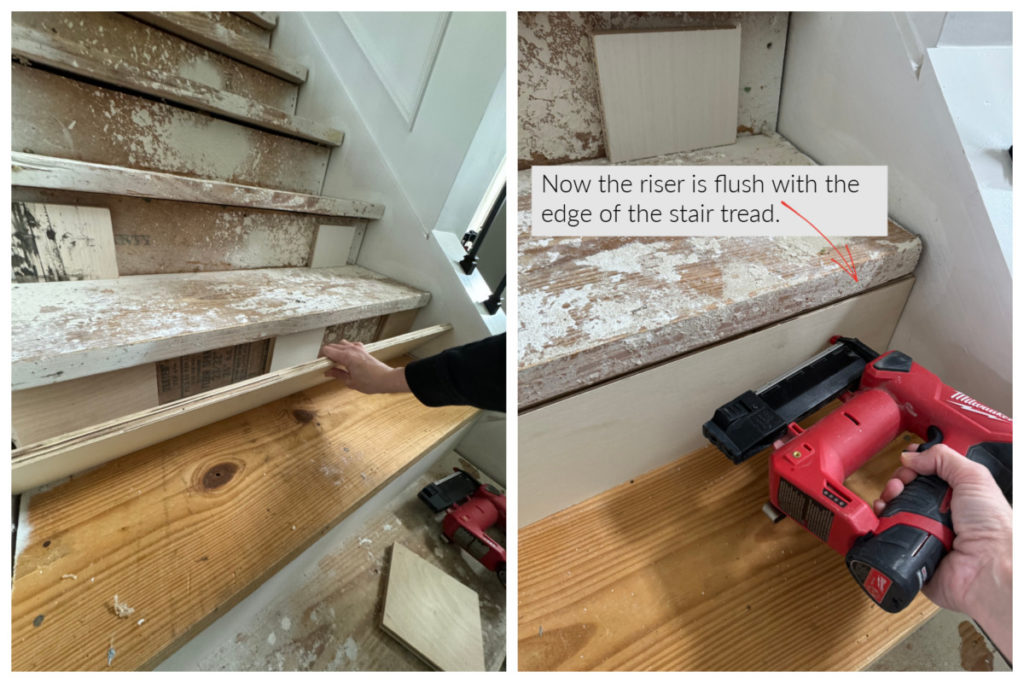
The Goal: To make the front of the stair tread flush with the riser, so that when a new riser is installed it will cover the existing tread, and allow the new retrofit tread to fit in place perfectly.
I am not the first person to ever encounter this problem. In fact as I researched a lot of DIYer’s cut the front of the stair nose off. While that is an option, which would require either a.) cutting the treads in place using an assortment of saws, and creating a decent mess or b.) removing the tread then using a table saw to cut and then reinstall… none of these options sounded great…
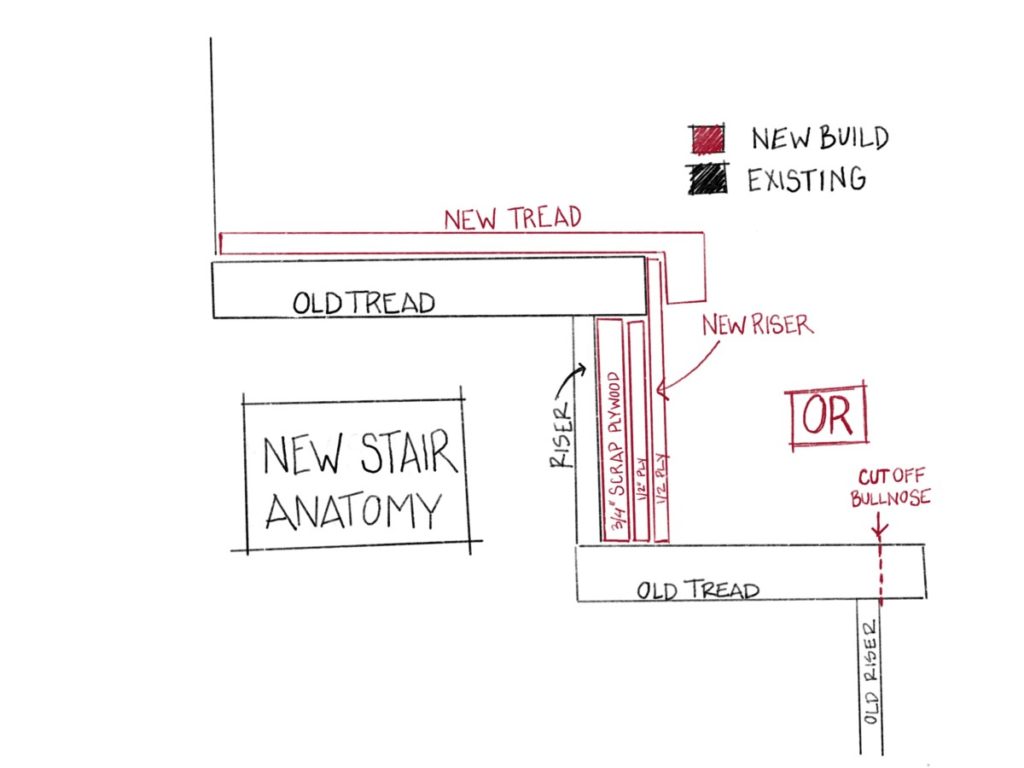
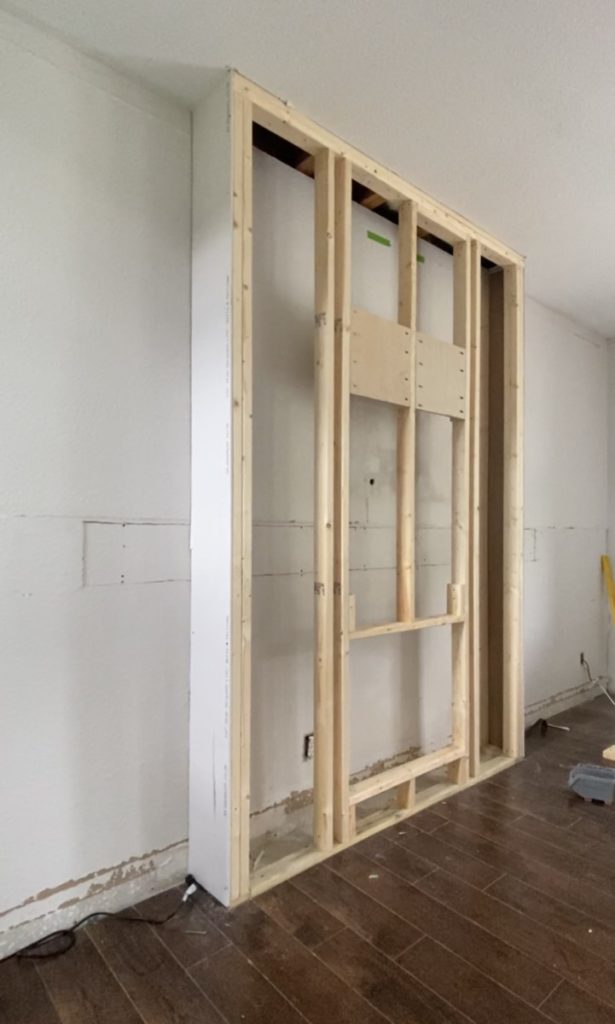
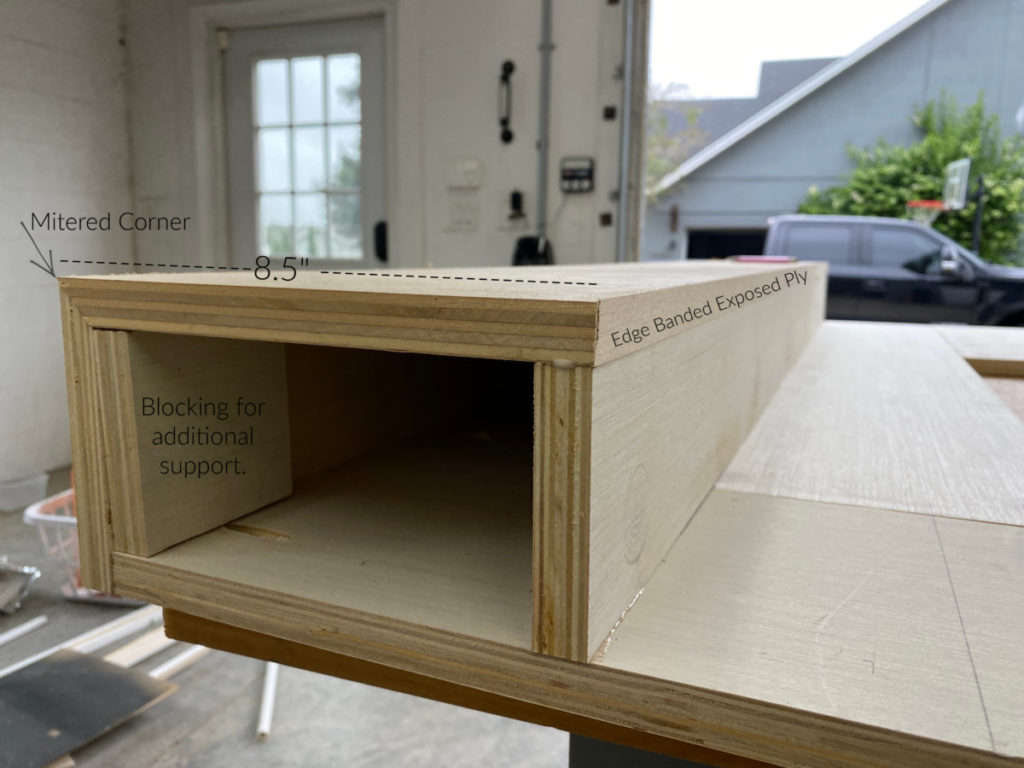
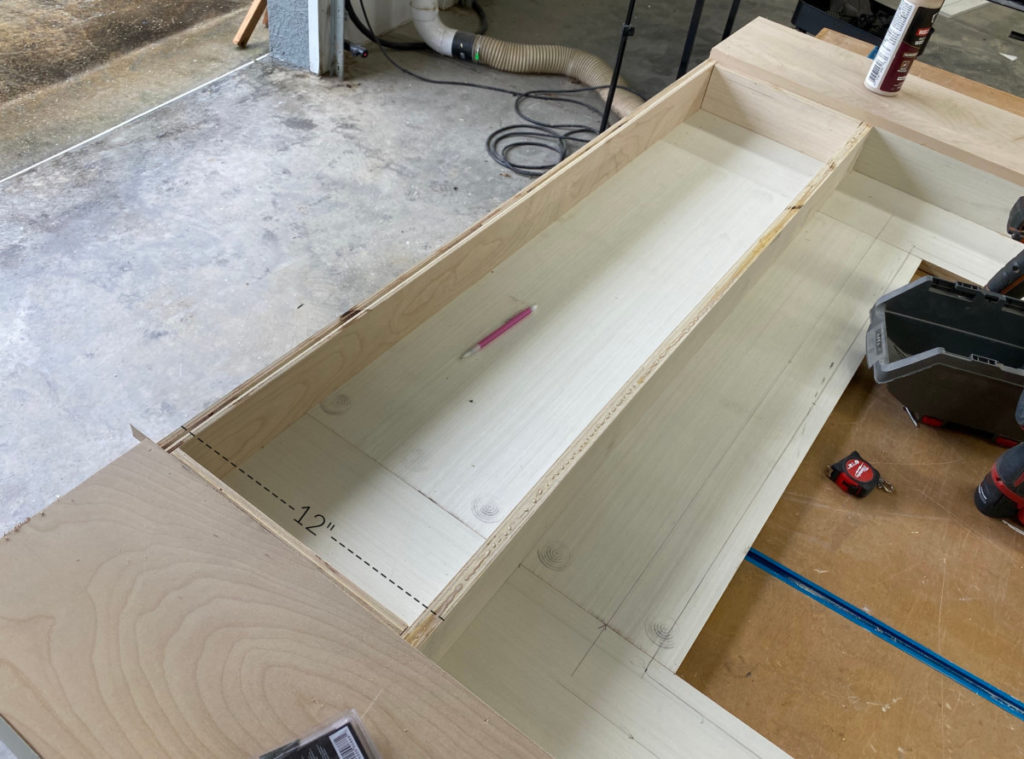
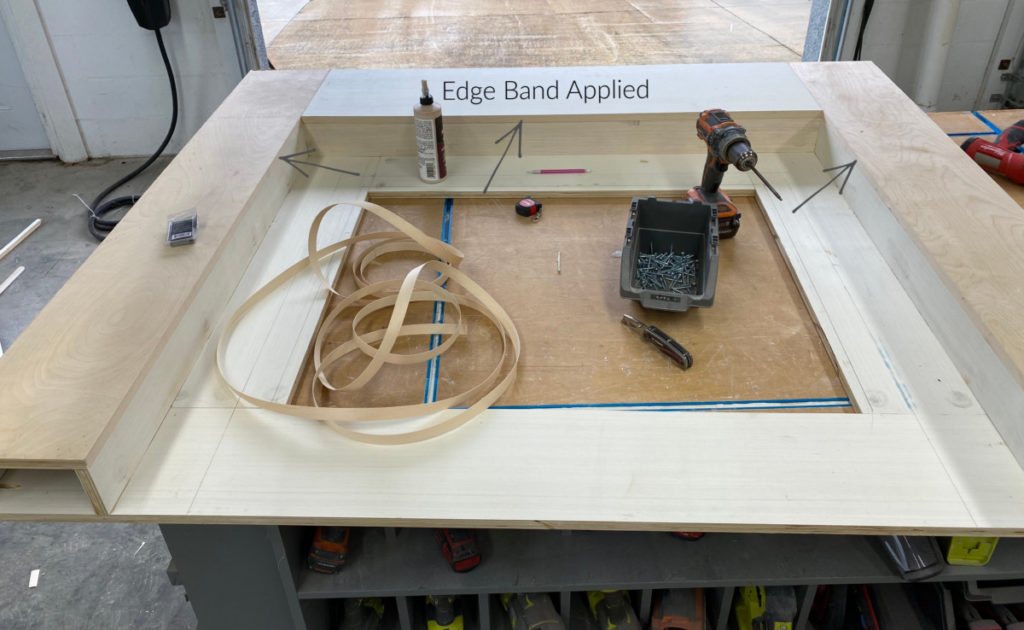
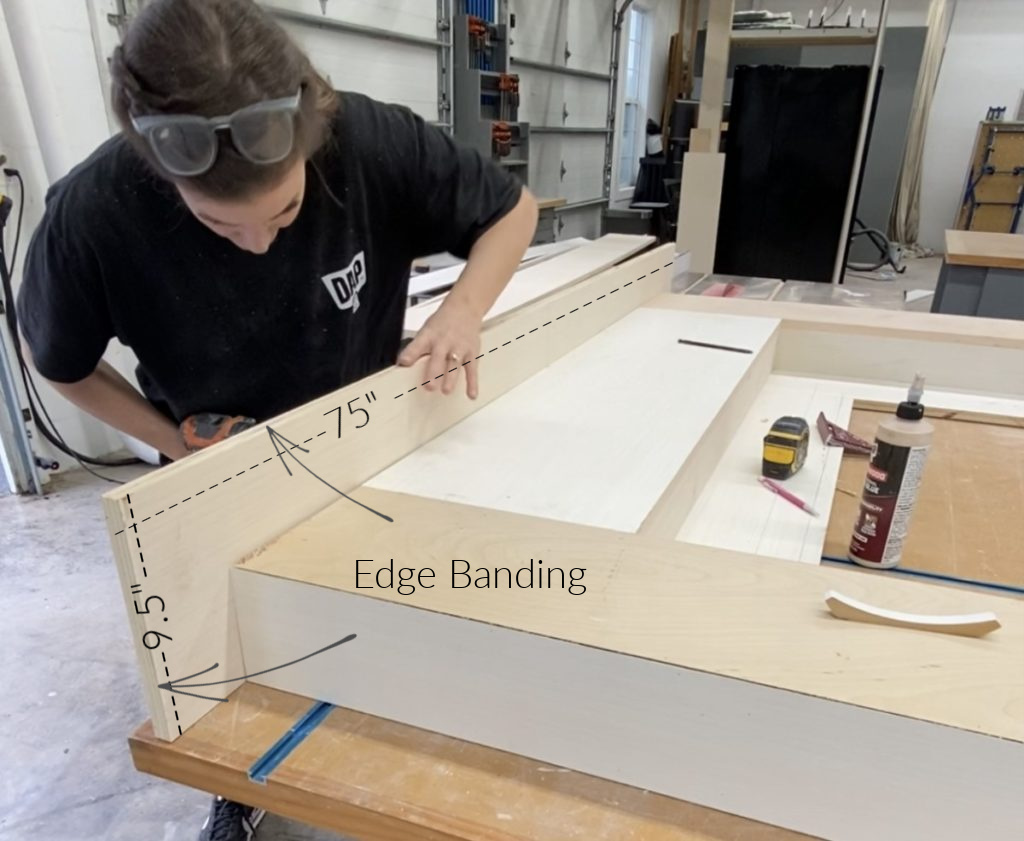
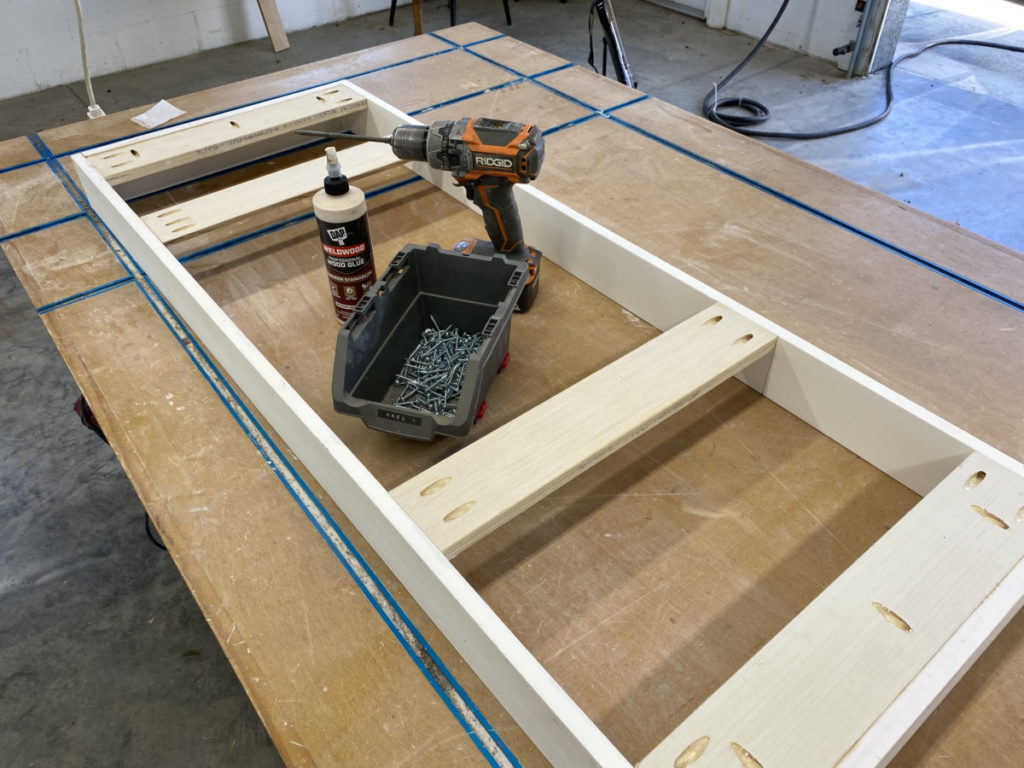
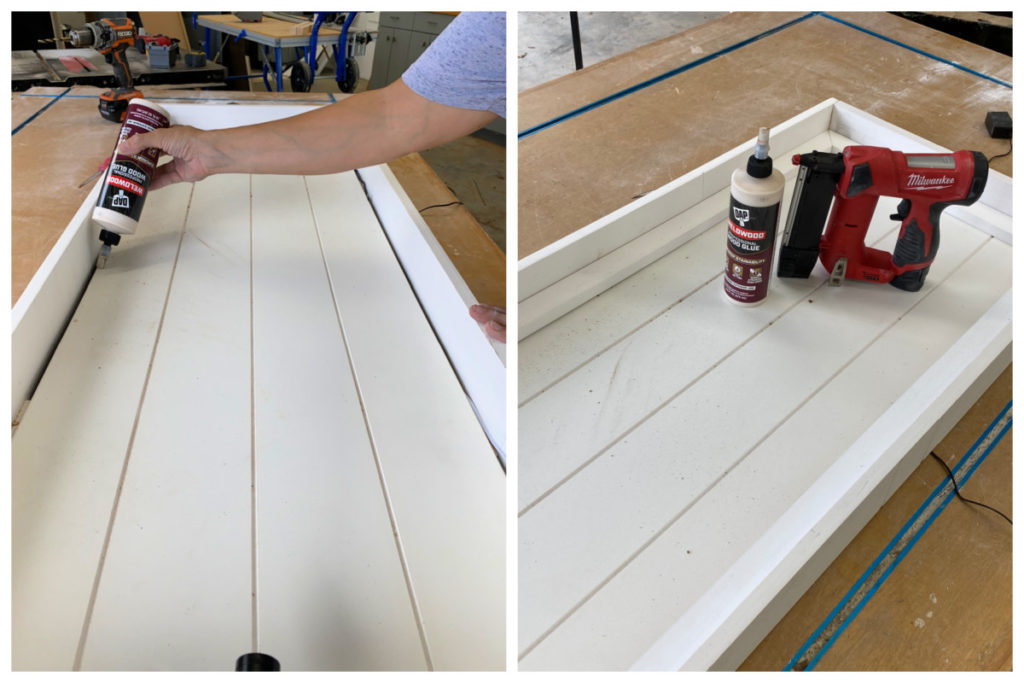
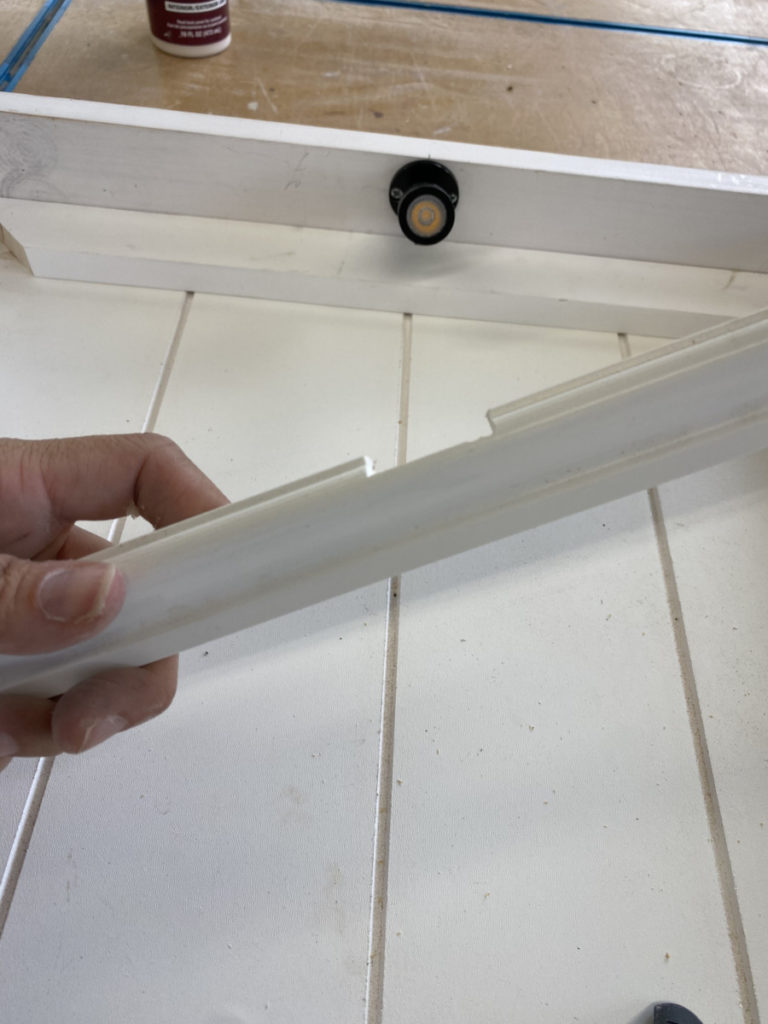
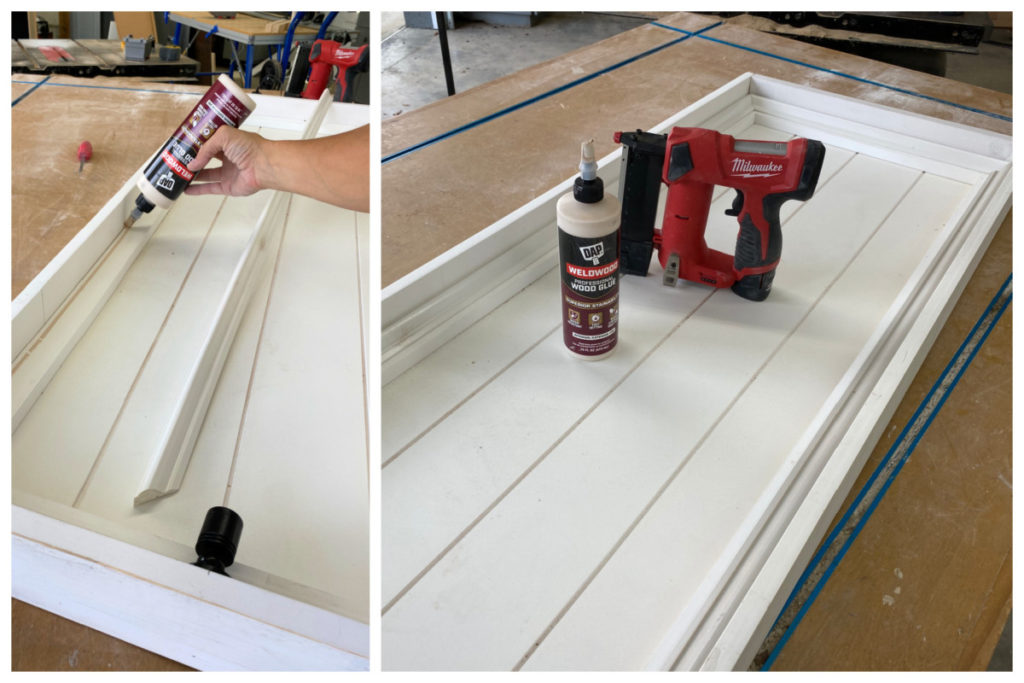
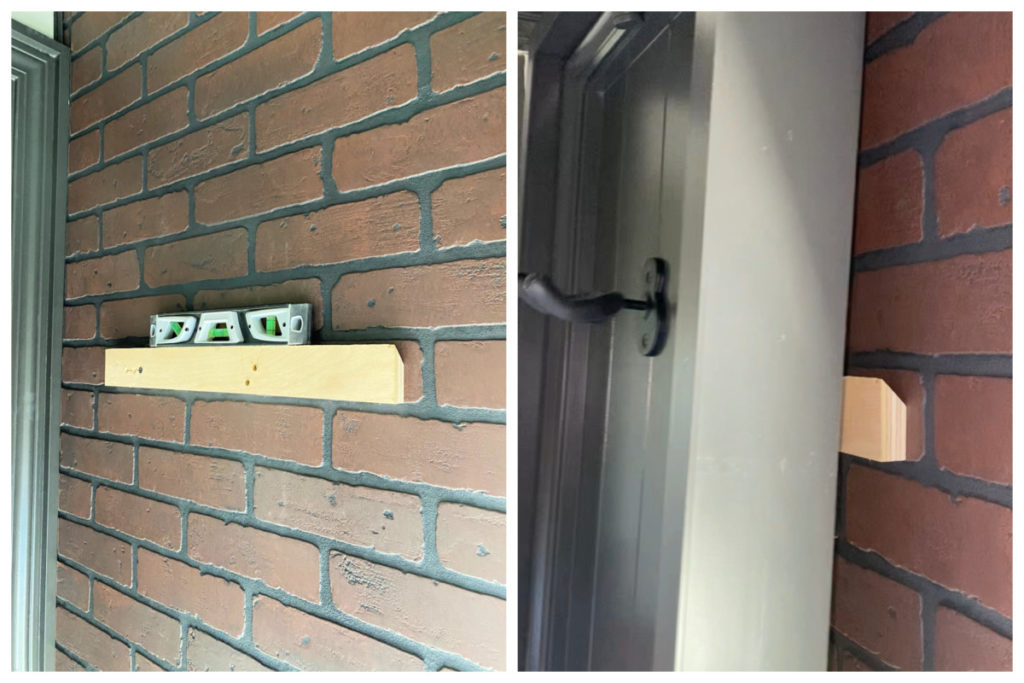
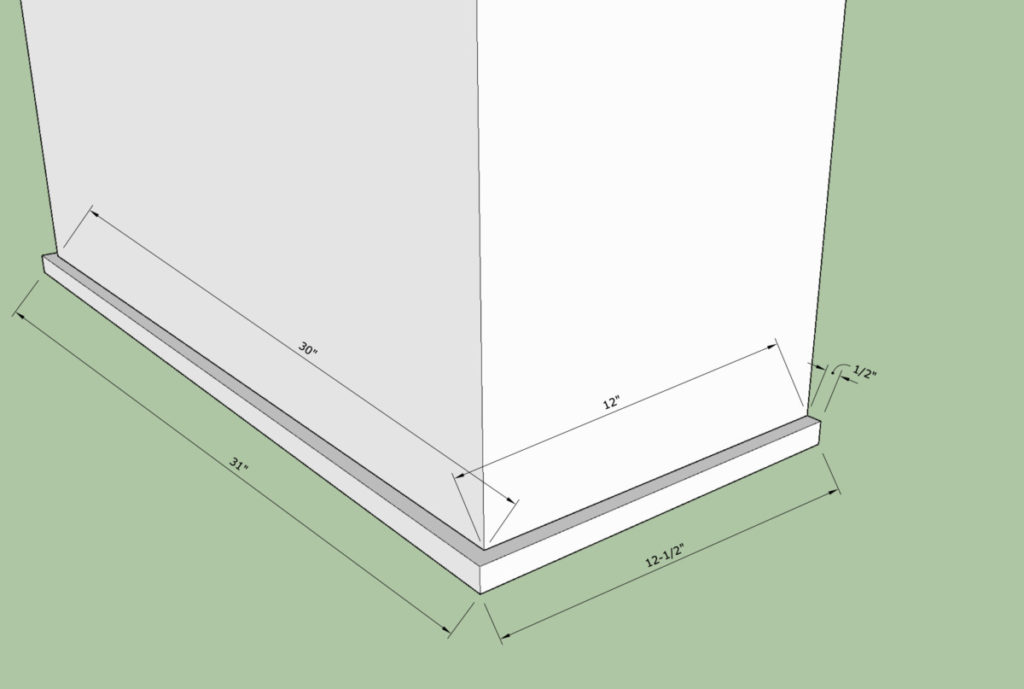
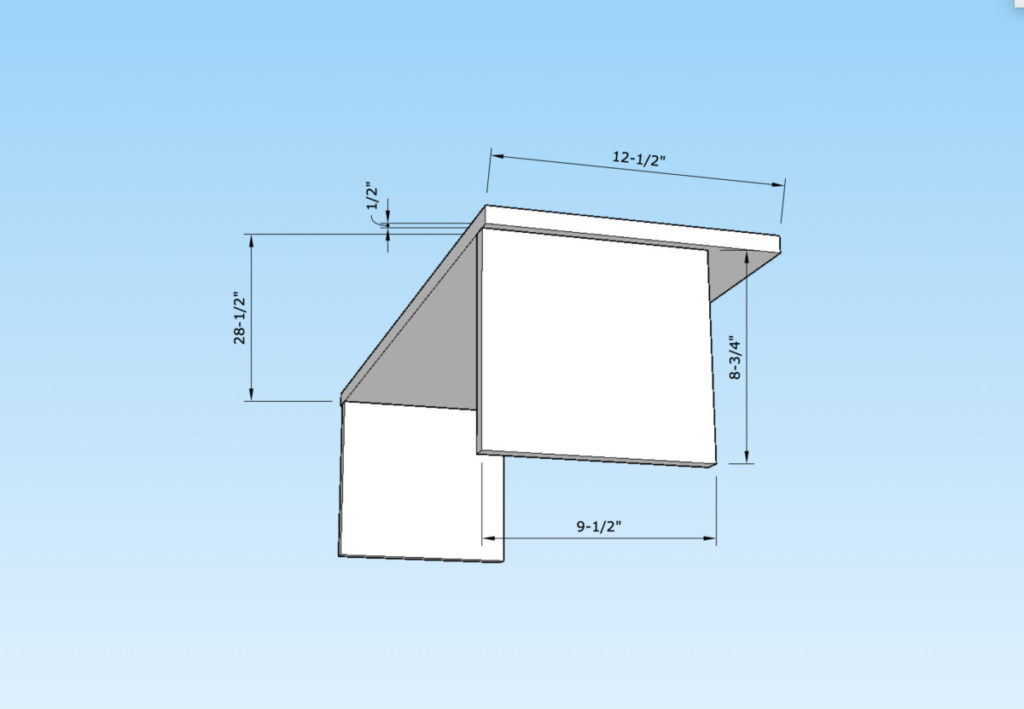
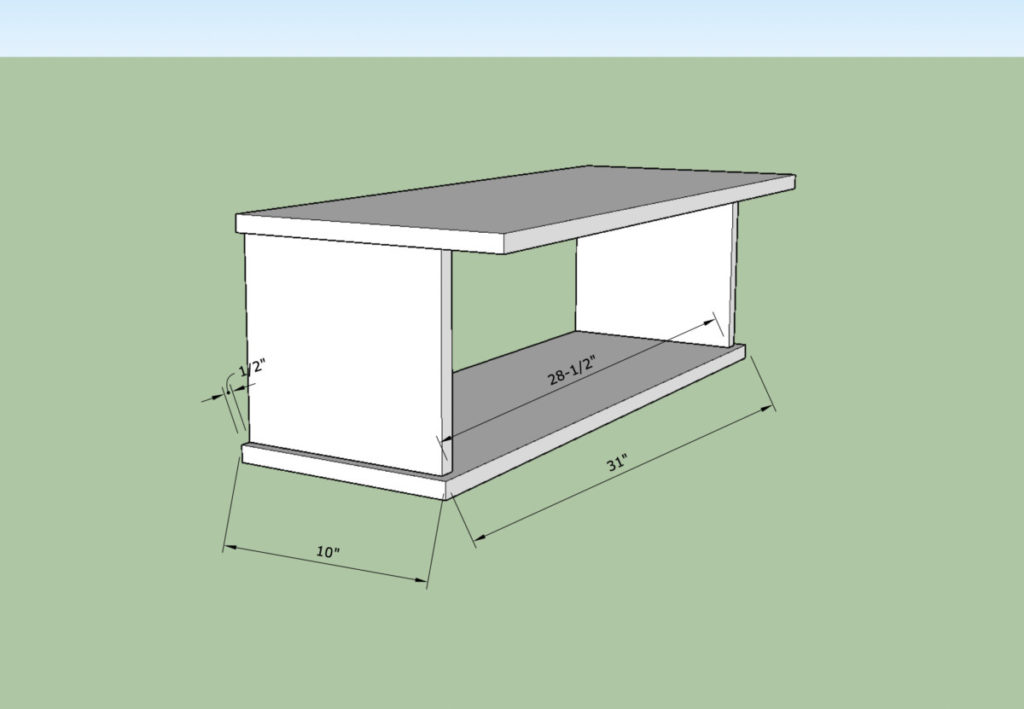
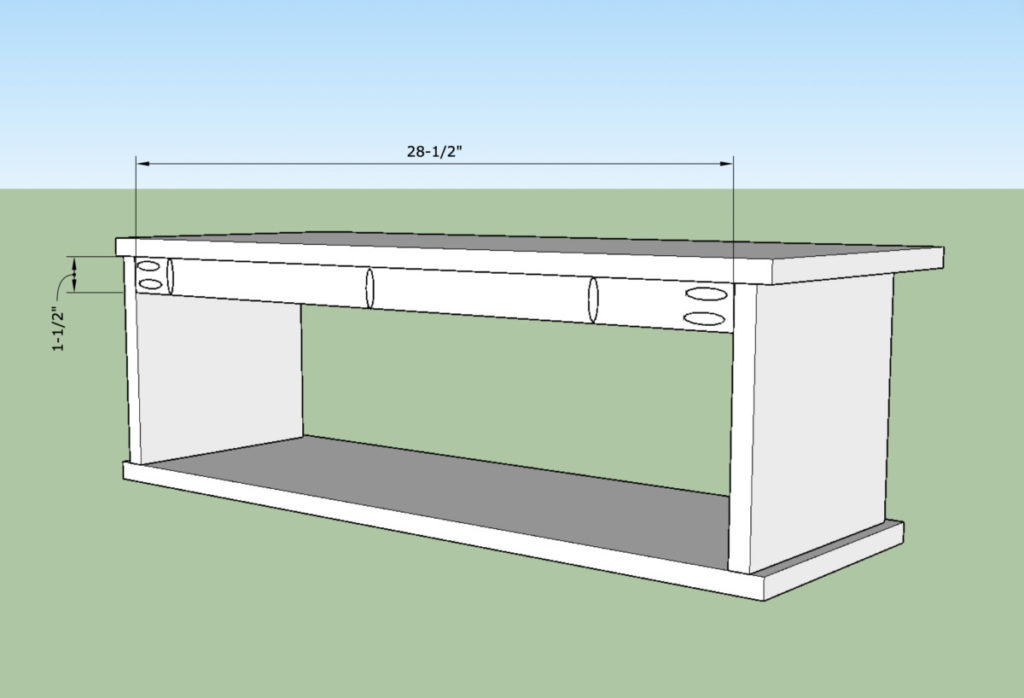
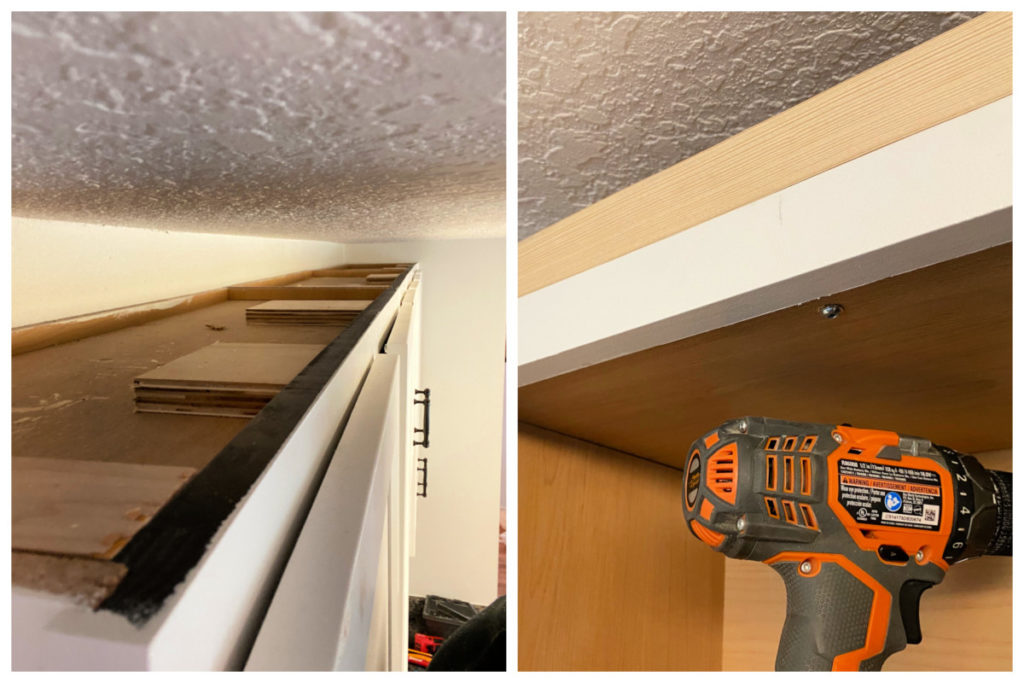
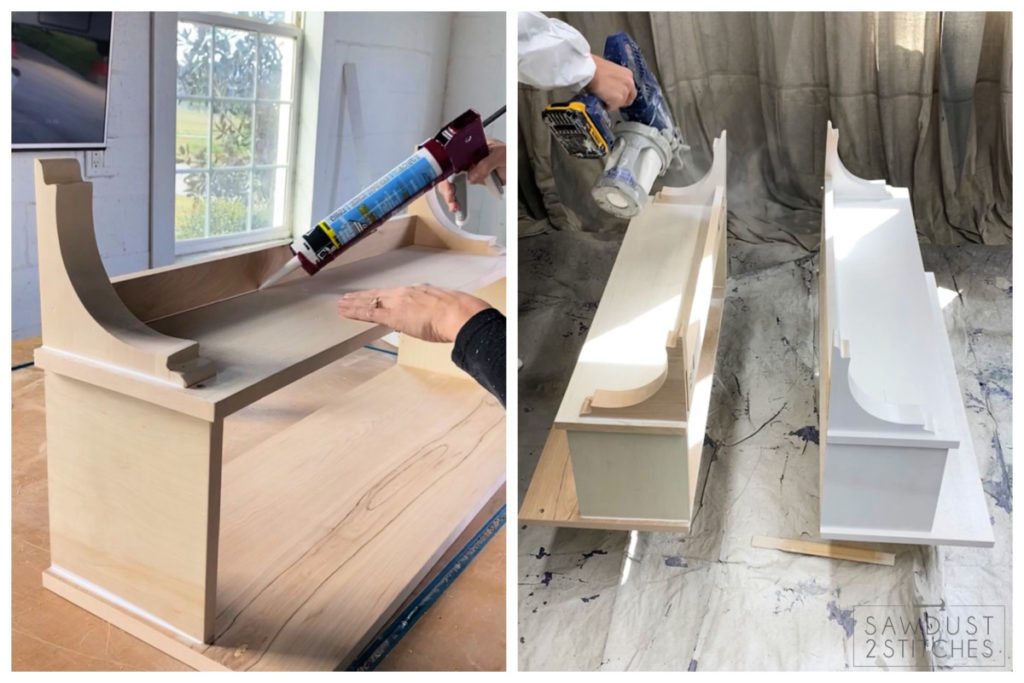
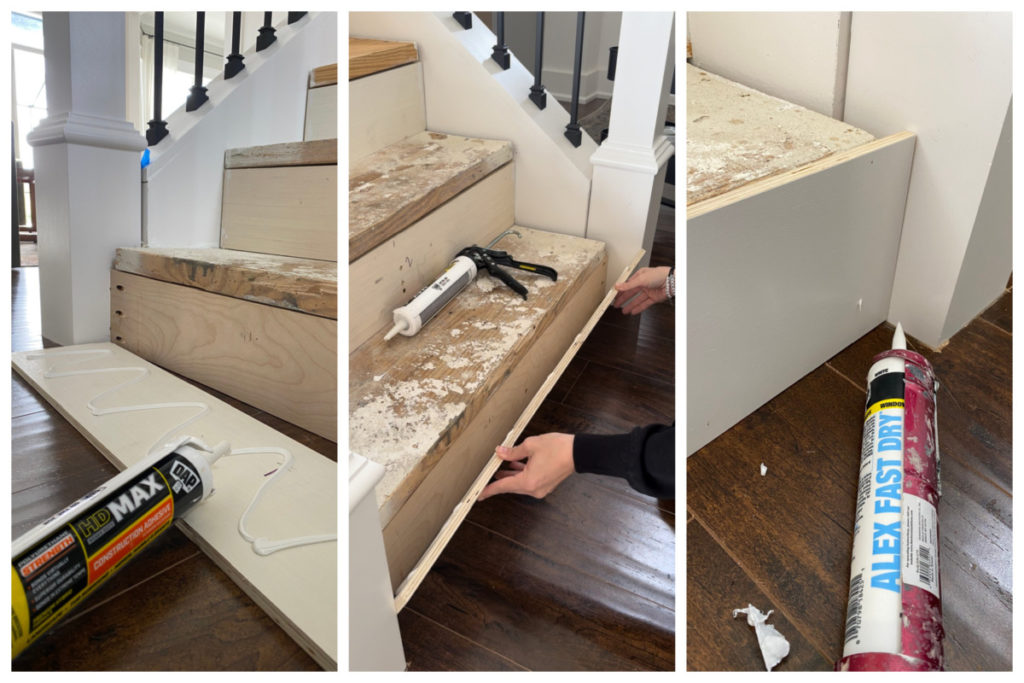
May I present Option C.) : Reminder, the goal is to make the front of the existing tread flush with the riser. Well, instead of cutting off the nose, I am filling in the toe kick area. For $37 in sheet goods, I was able to create spacers using scraps of plywood. I used DAP HD MAX Construction Adhesive to secure the scraps and then tacked in place with a pin nailer.
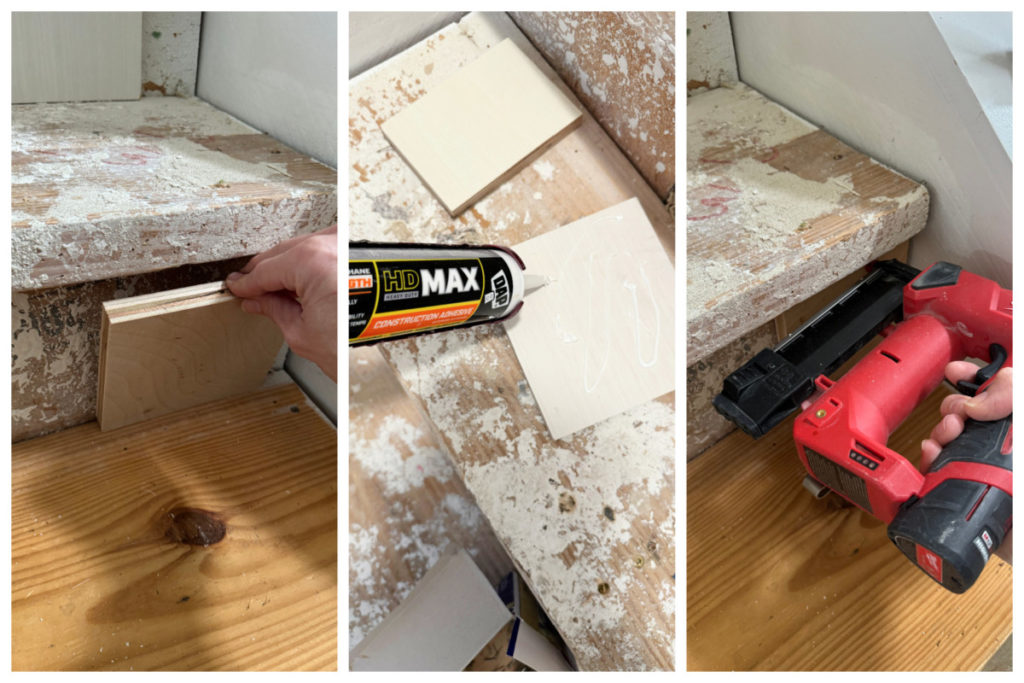
After the spacers were installed I cut a piece of 1/2″ plywood to bridge the rest of the gap. ( I could have used 2×6″ boards, BUT after doing some math it would have been $$$.)
Measure & Cut Risers
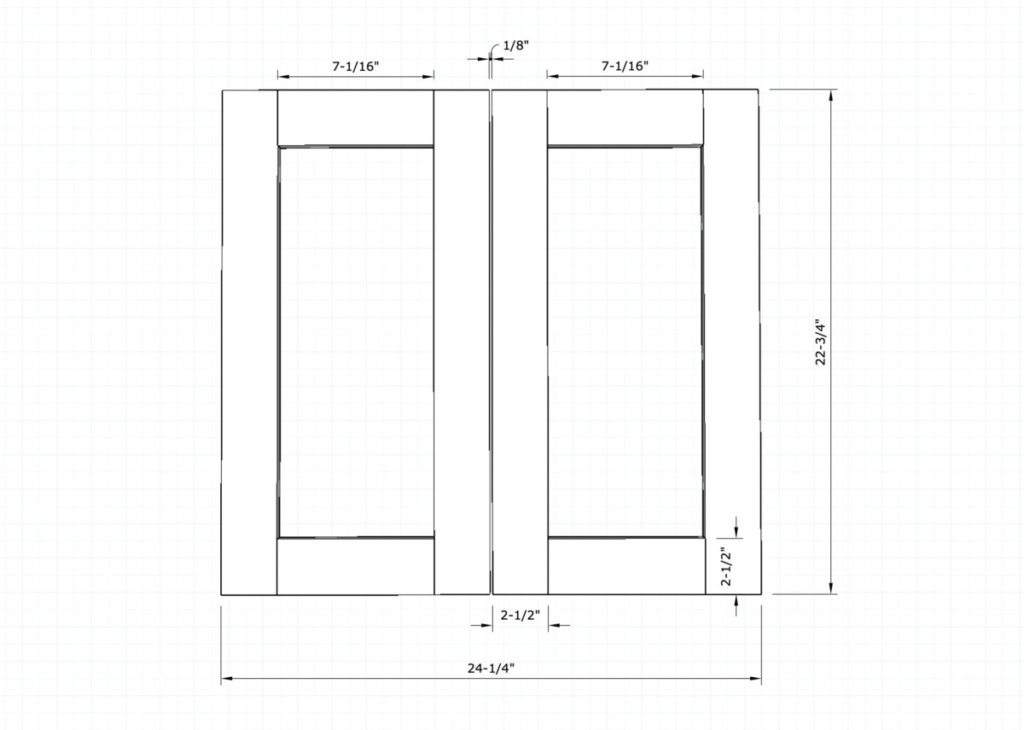
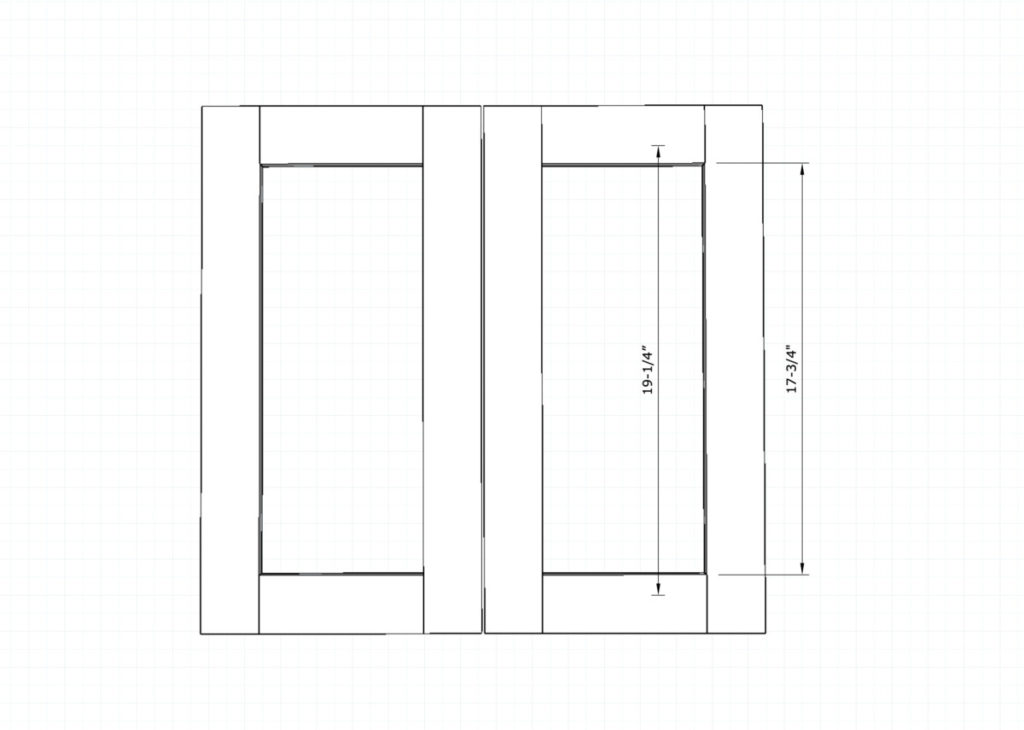
Time to prep the risers. There are quite a few options when it comes to riser materials. The purpose of a riser is purely decorative. I have seen risers made of 1/4″ mdf paneling, however, I wanted something a little more substantial. I used 1/2″ sanded and primed plywood. It is easy to paint, and will not run the risk of it ” waving” or “bowing” with time.
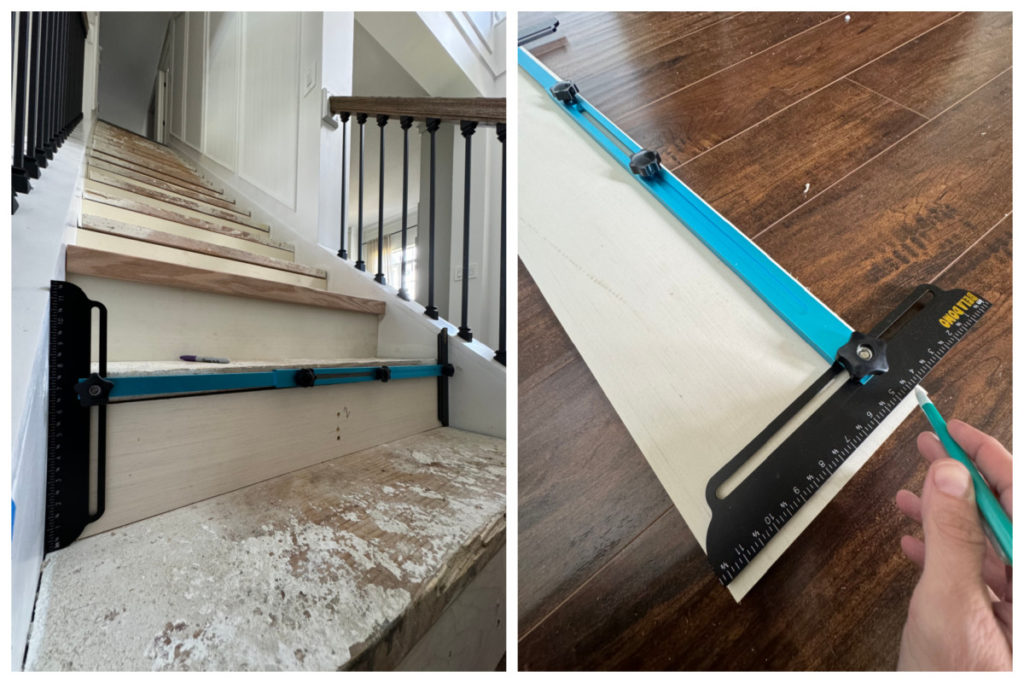
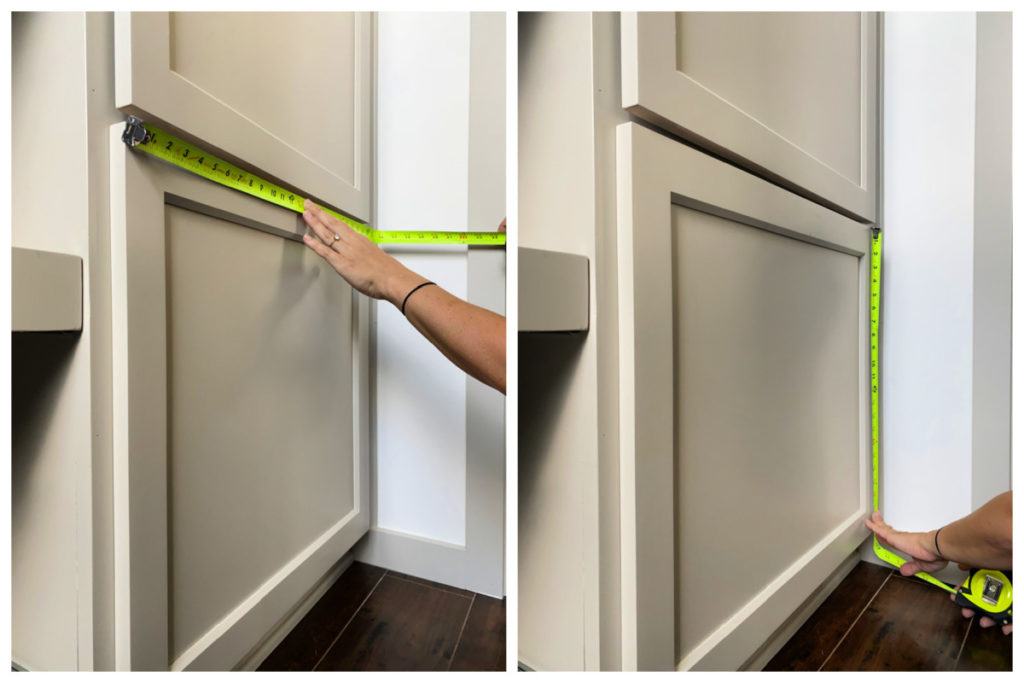
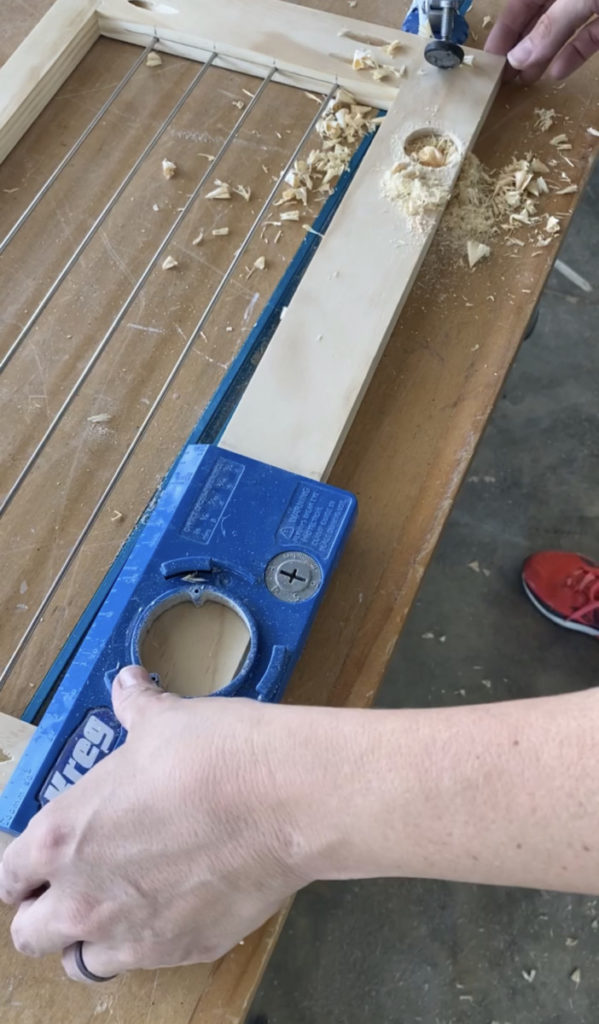
My house has some very wonky walls, and nothing is square. In all reality MOST homes have some weird walls, that is why I am using a stair tread measuring device. It is a very easy device to use, and comes with instructions. It essentially allows you to quickly make a template of each riser, and then you transfer the template to your riser material .
PRO TIP: When marking risers, number your risers and it counterpart.
After all the risers were cut, REST them in place. This will allow for a thorough test fit, AND the risers need to be in place before measuring for the treads.
Measure and Cut Treads for Makeover
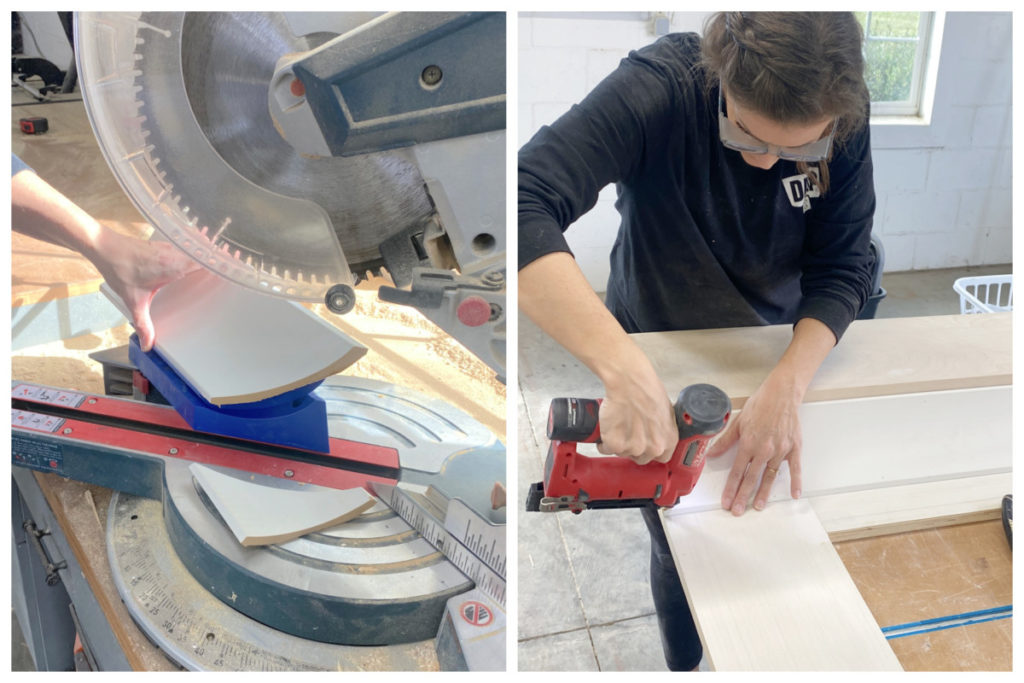
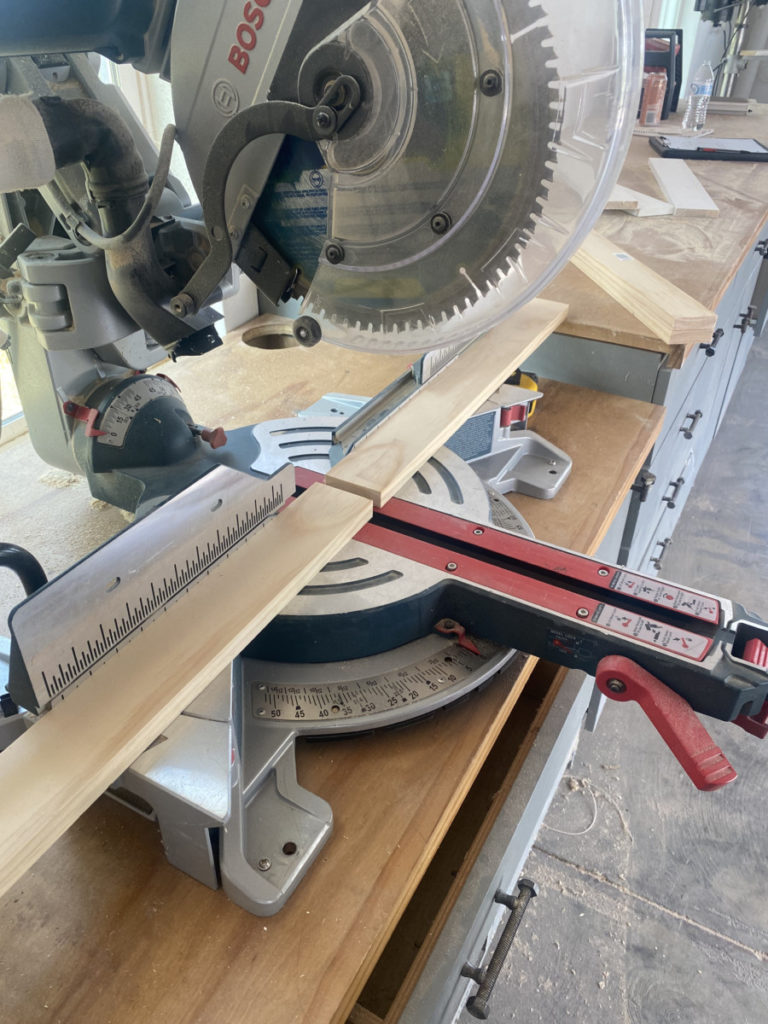
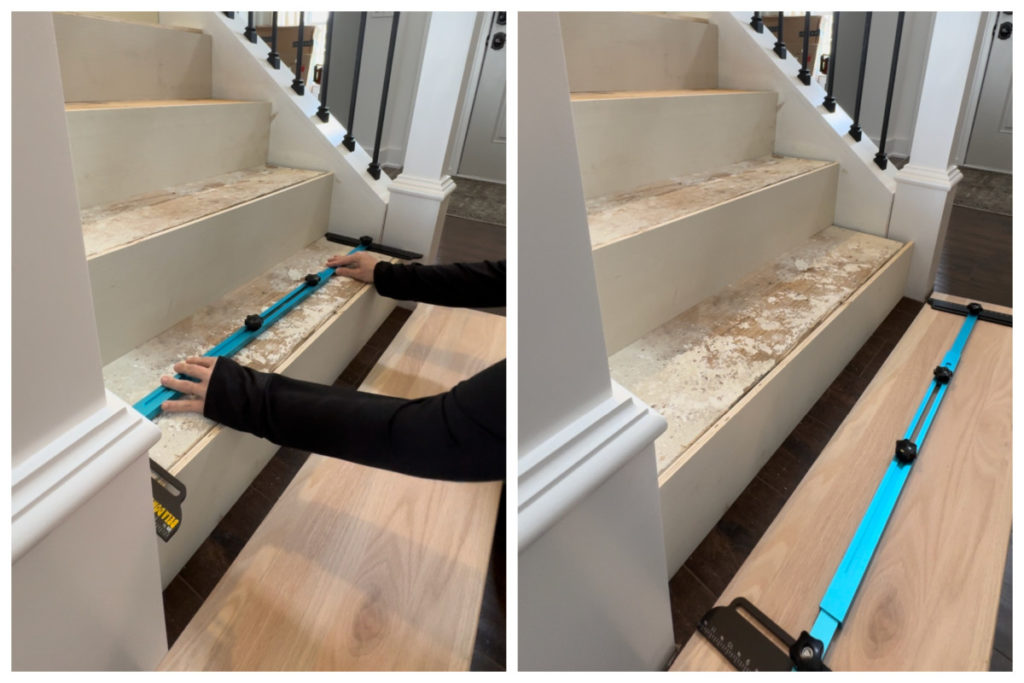
Measuring for treads is a similar process to measuring for risers. Use the tread measuring tool to measure the treads, transfer measurement and then cut using a miter saw.
Depth of Tread
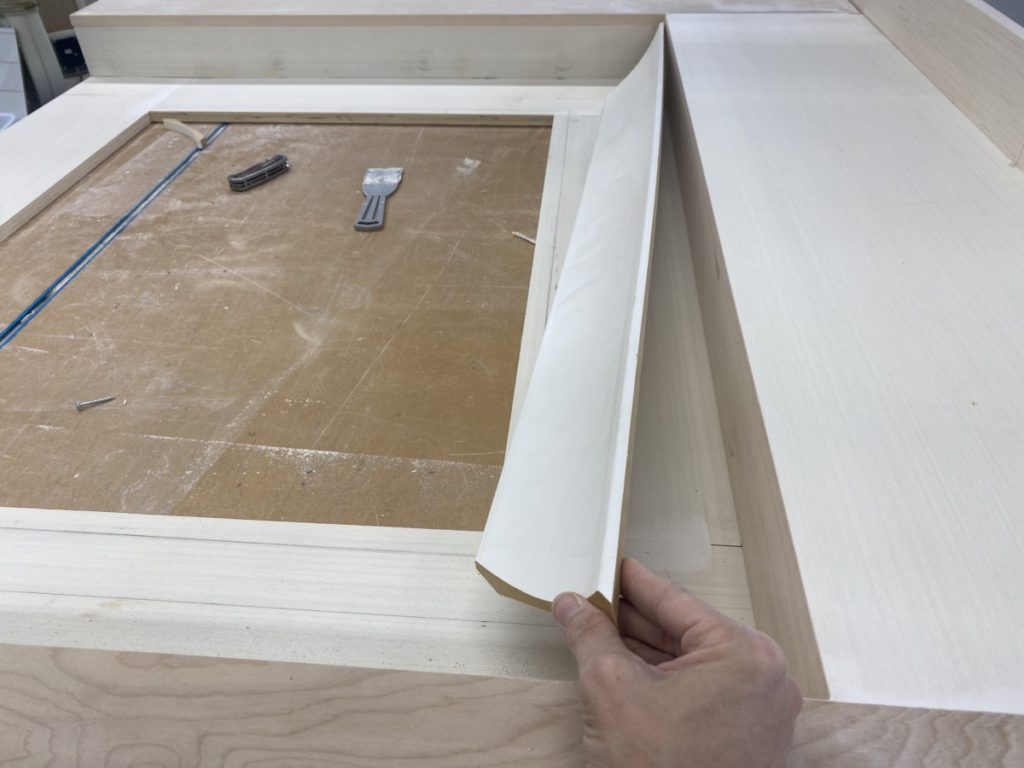
All homes stair depth is going to vary slightly. The idea behind the retrofit stair tread is that it can be ripped to the necessary depth to fit your current tread. As you can see in the image below there is a substantial gap between the tread lip and the riser.
There are 3 options on how to handle this.
A.) Leave the gap. It won’t be weird, but there will be a visible gap. (I cannot speak to it’s structural integrity though.)
B.) Measure the distance between the lip of the tread and the riser, then rip that much off the back of the stair tread. (“Rip”- Use a table saw or circular saw to cut off a long strip).
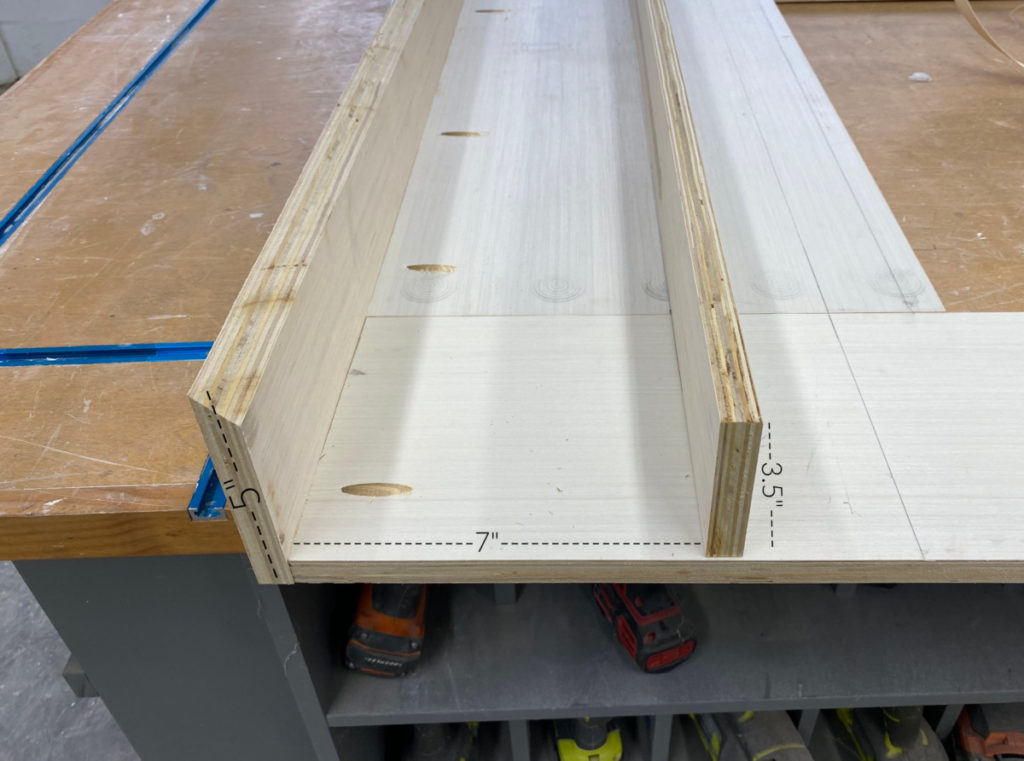
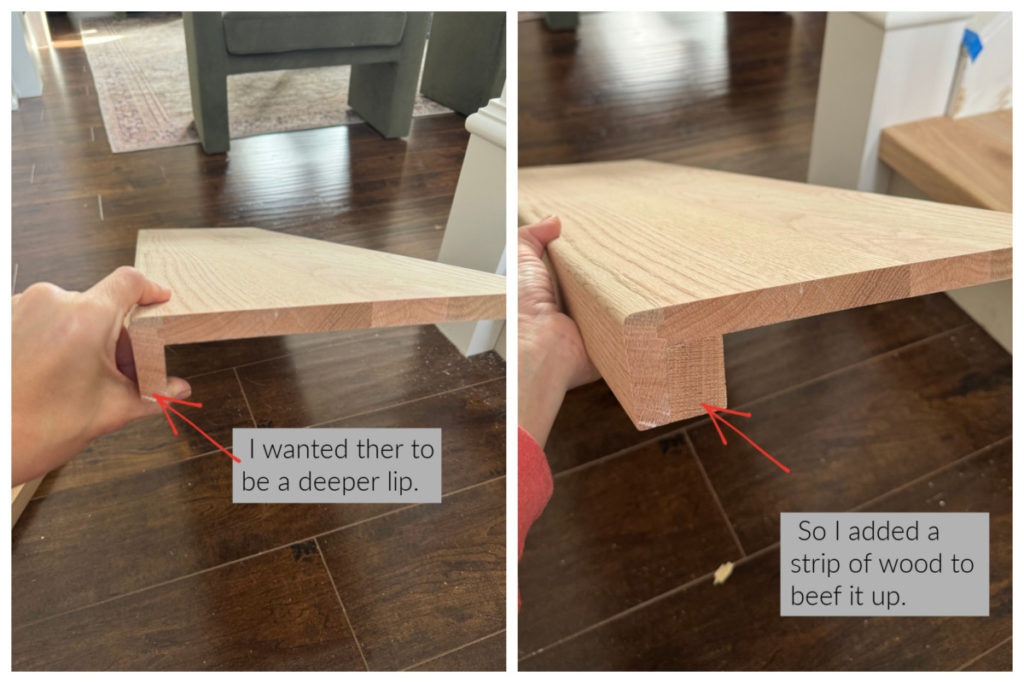
C.) Bulk up the nose of the tread using an additional piece of material.
Both options “A” and “B” are considerably easier than option “C”, but I naturally opted for the more complicate route.
Option “C” would allow for max tread depth AND would create a deeper “toe kick” area. Both of which were very important to my husband. (And in my opinion look better as well.)
Something to consider: When considering the best option for you, check your local building codes to make sure you are in compliance. International building code says the stair treads cannot be less than 10.5 inches deep. Option “A” may not be a viable option if you loose too much depth.
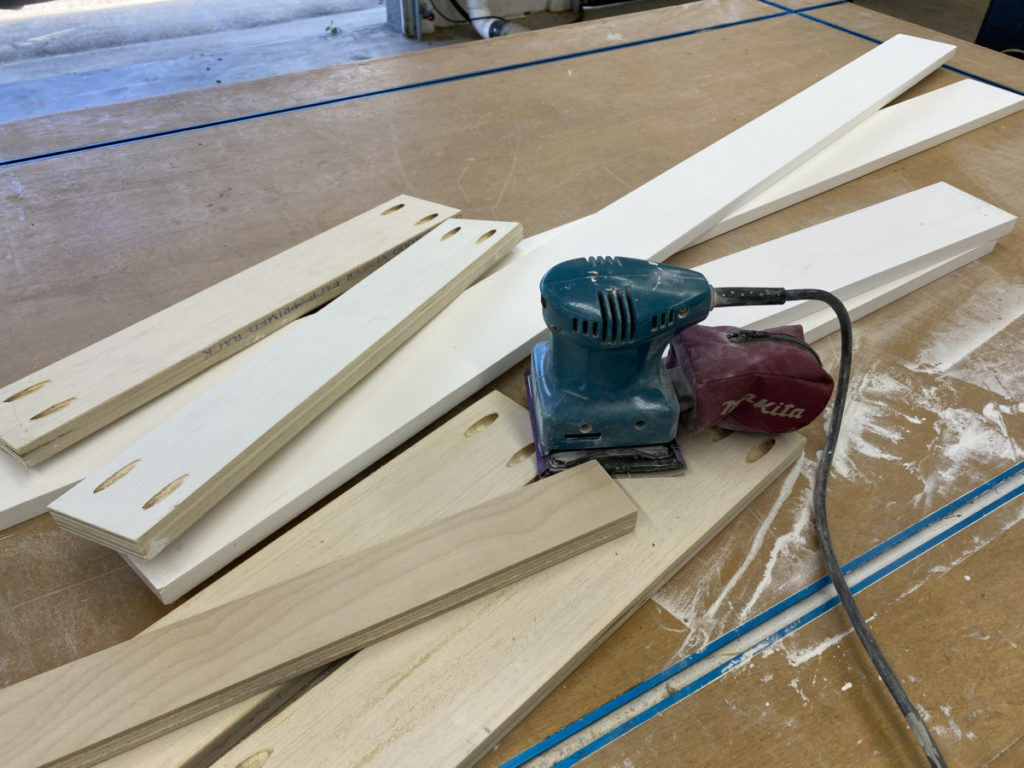
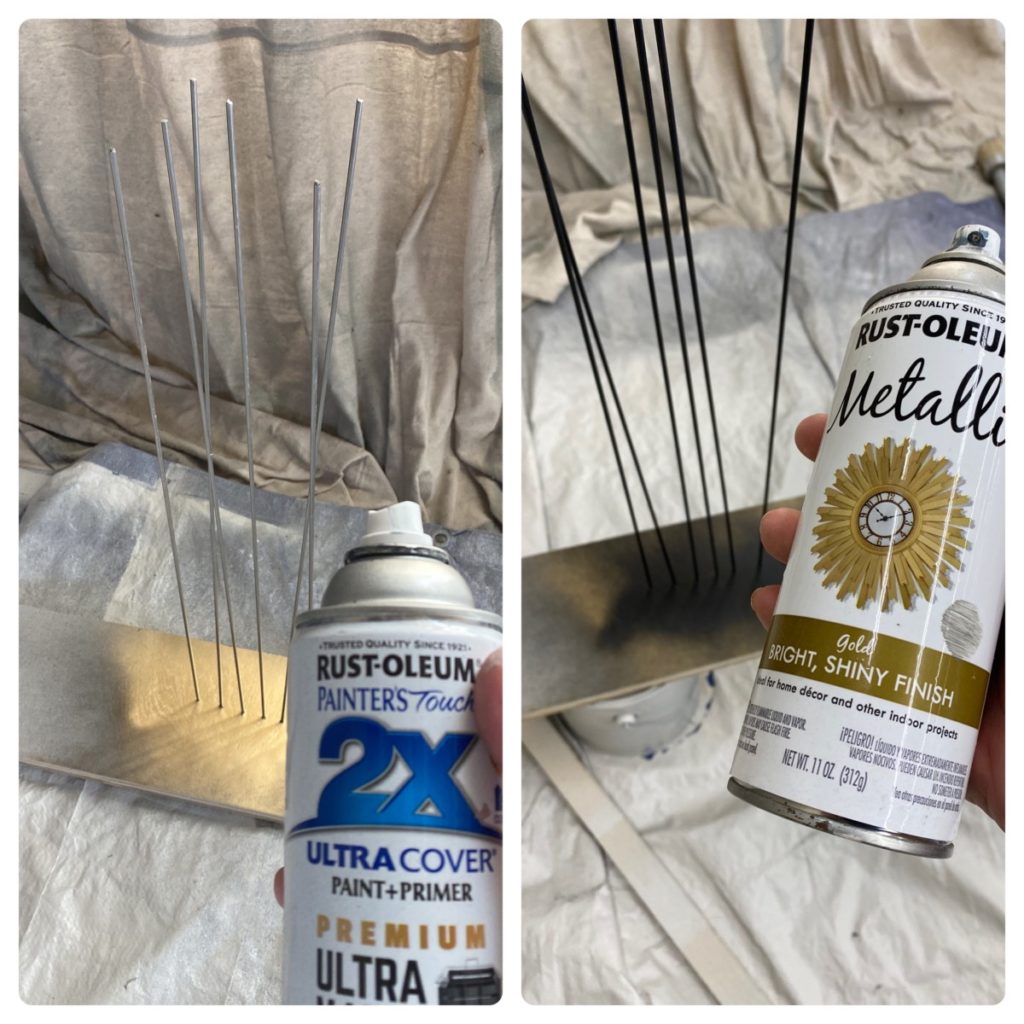
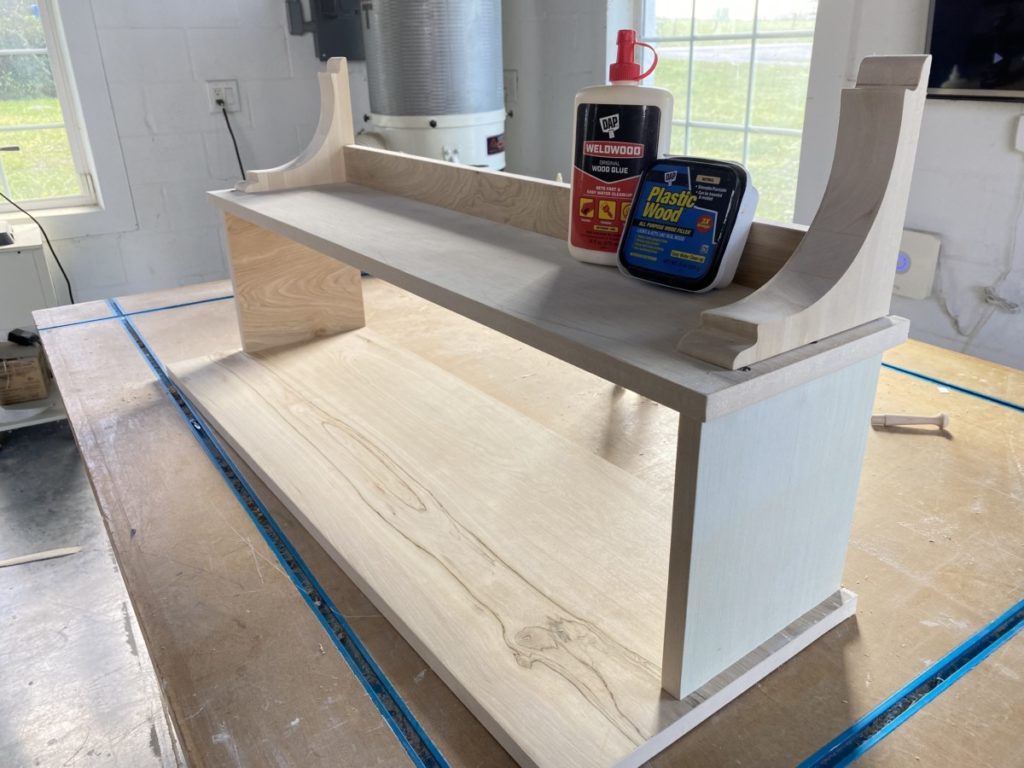
I planned to stain these treads, because of this I needed to match wood species. (If you are painting that will not be necessary.) These treads are red oak, I started to look into boards by the foot and it was adding up $$ pretty quickly. Then I had the idea to rip up a traditional red oak tread. It worked perfectly and only cost about $35 in materials.
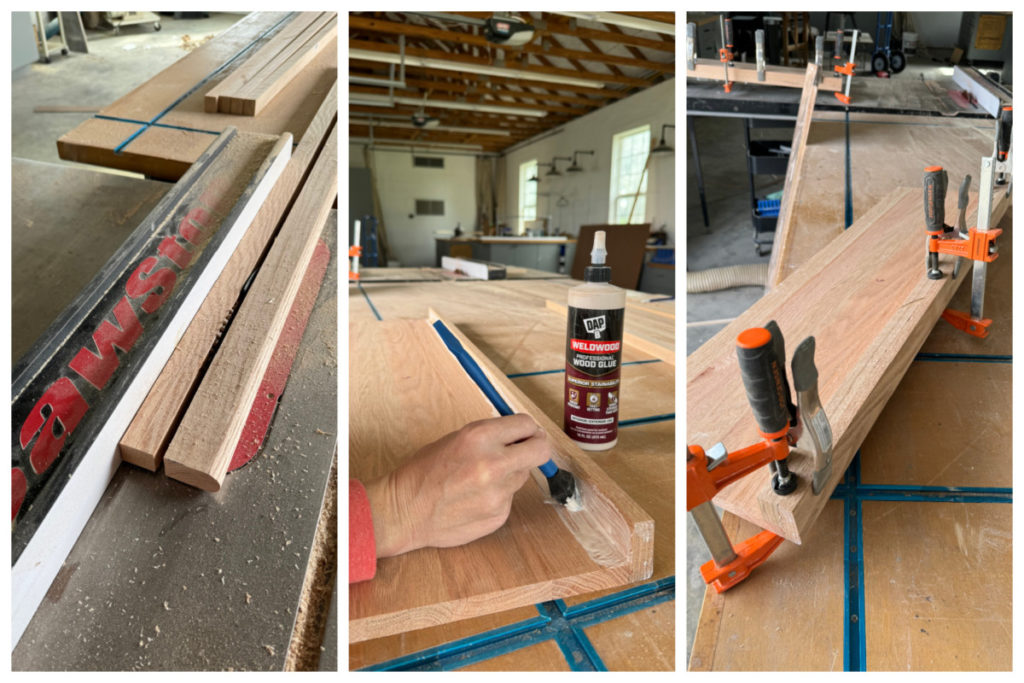
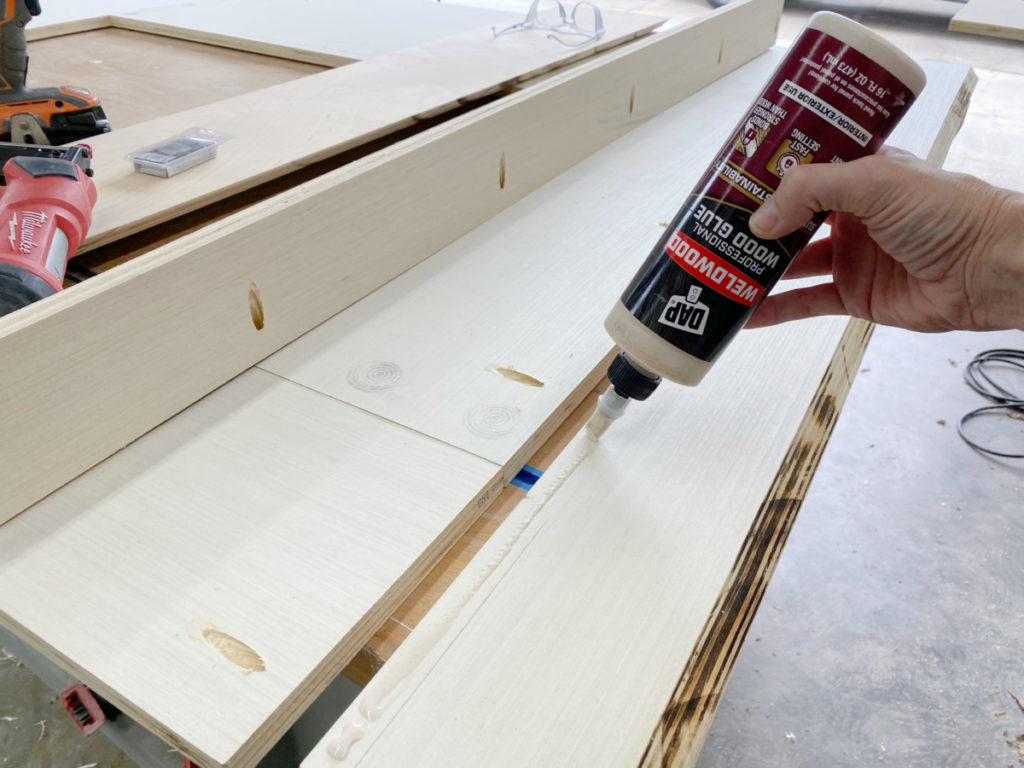
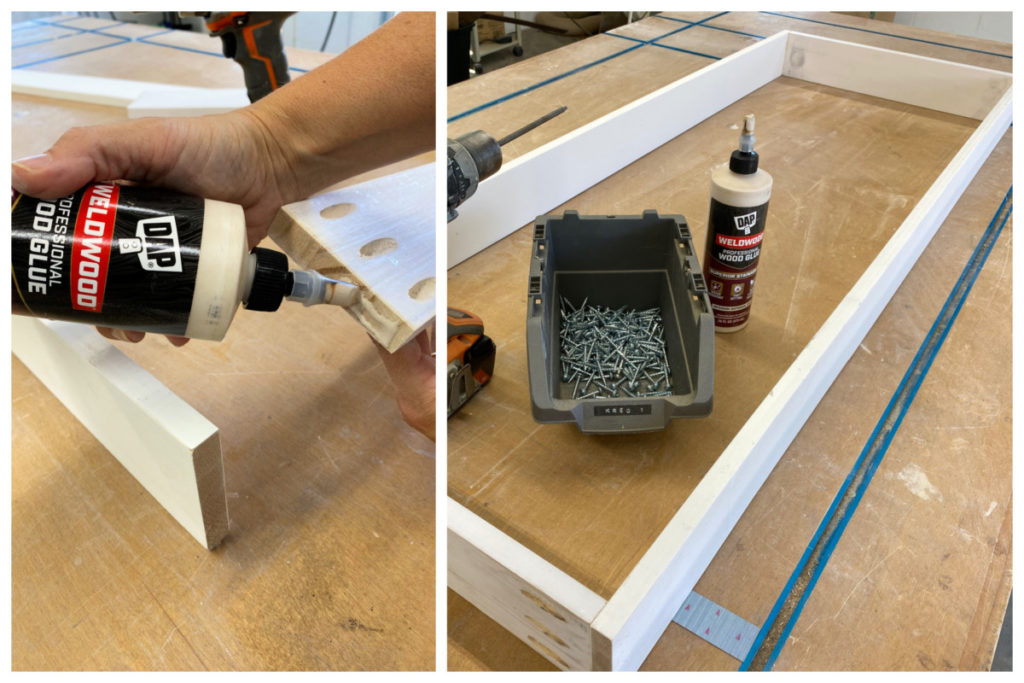
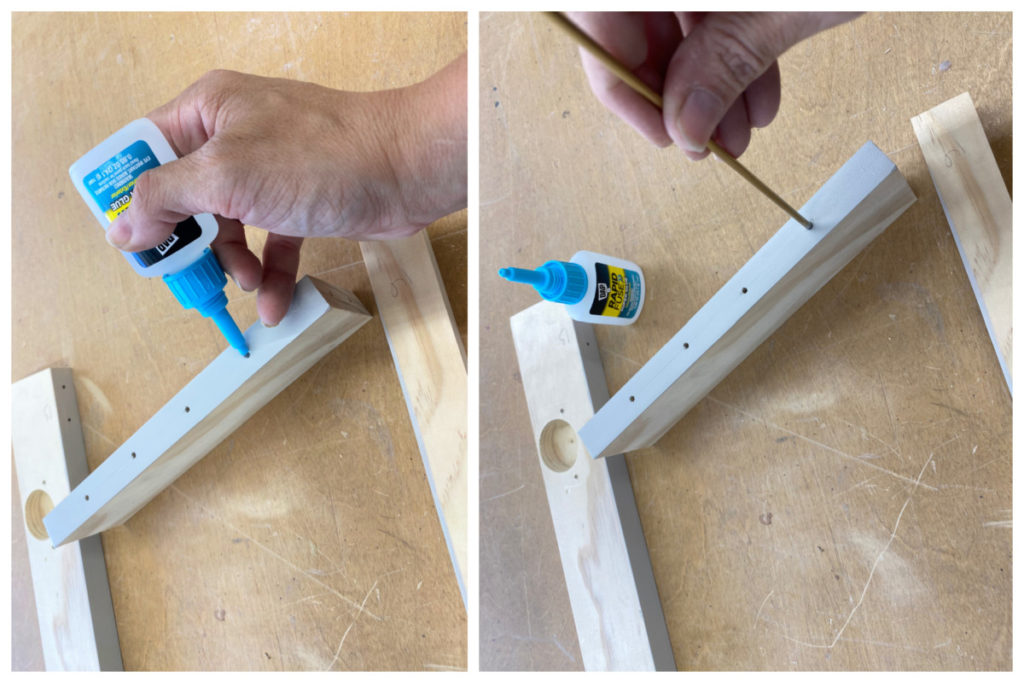
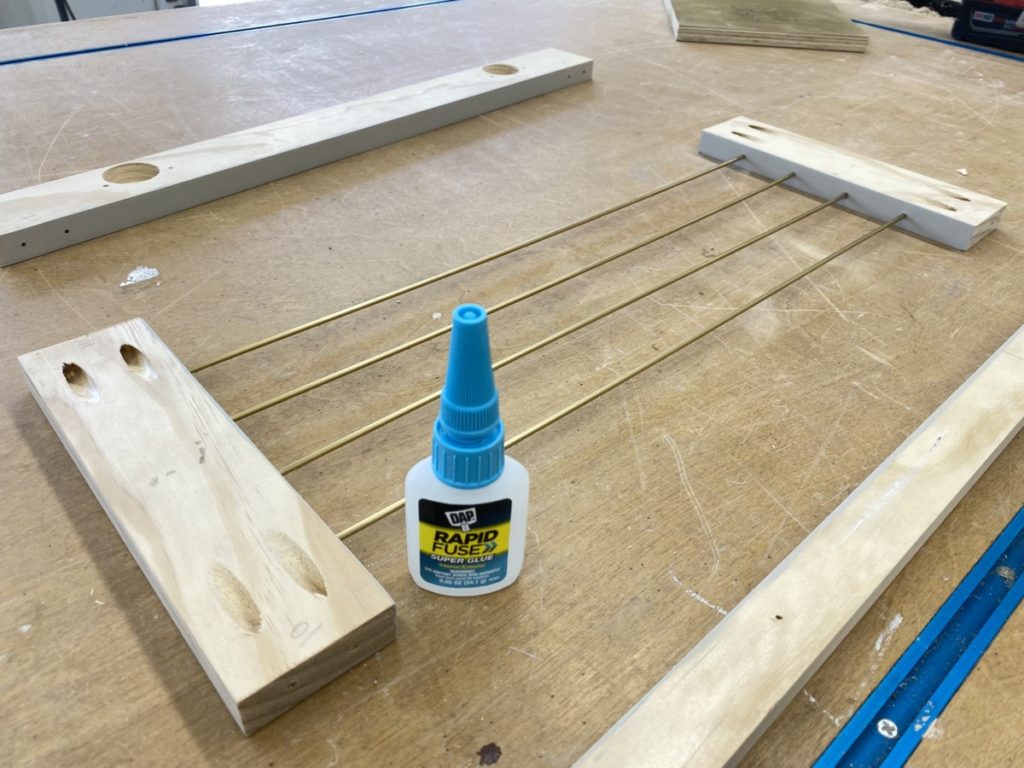
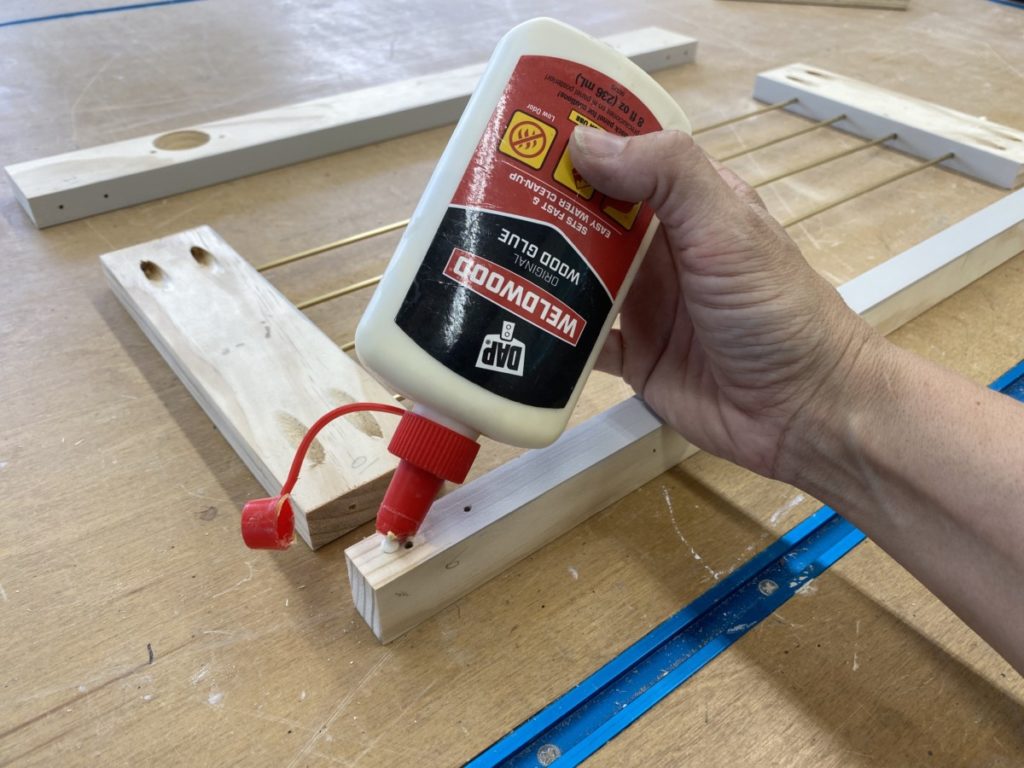
I ripped the stair tread using a table saw and then applied DAP Weldwood Professional Wood Glue and then clamped overnight. Worked like a charm.
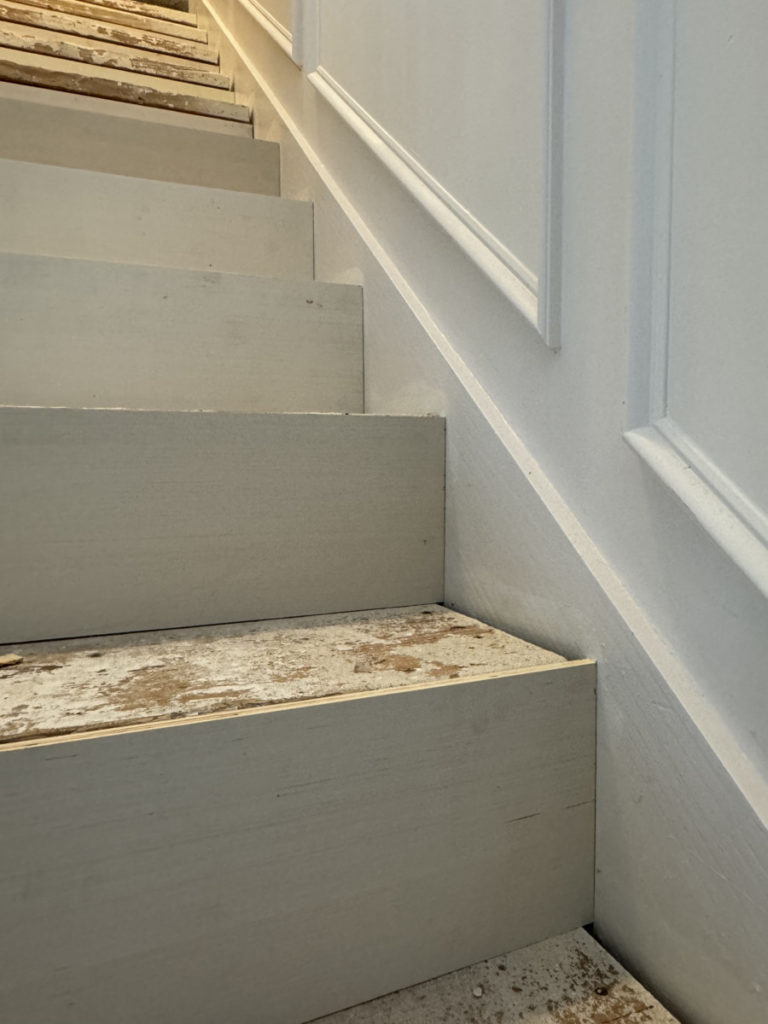
Paint Risers
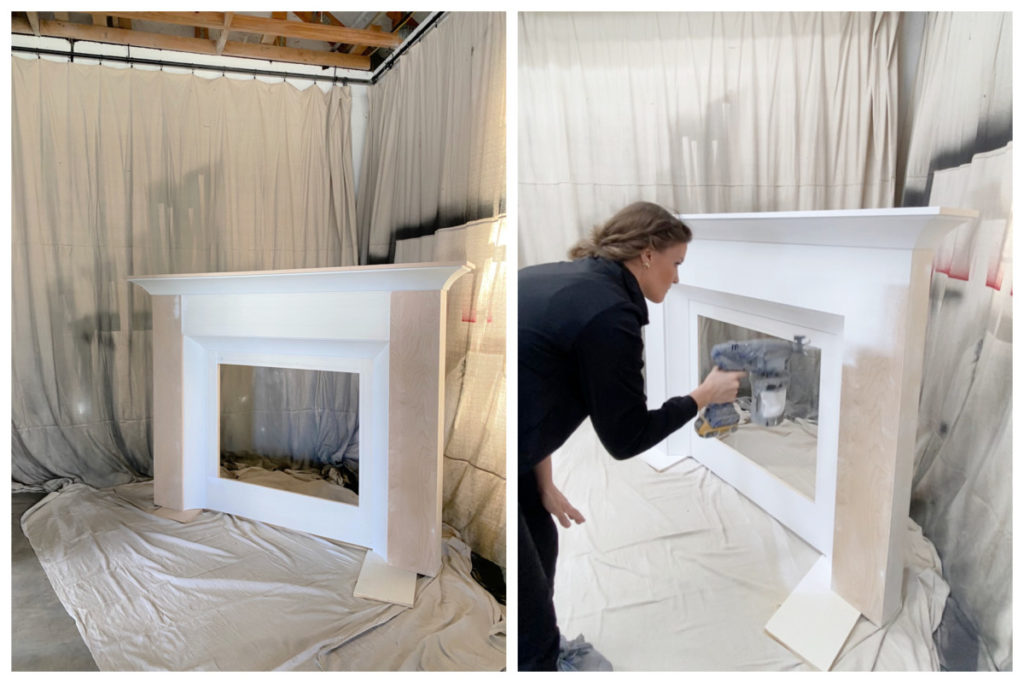
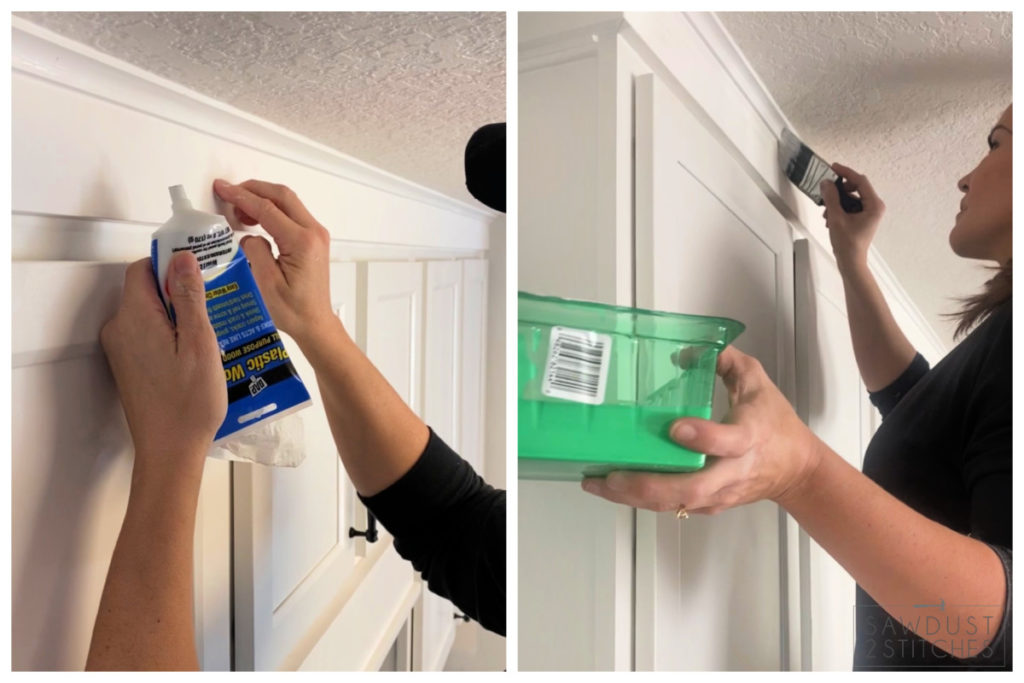
There are plenty of options when it comes to riser aesthetics. I’ve seen them stained, wall-papered, ship-lapped and stenciled, but I opted for a classic painted white riser. I used Sherwin Williams “Snowbound” in a a Semi-Gloss finish. The glossier the sheen, the easier it is to clean.
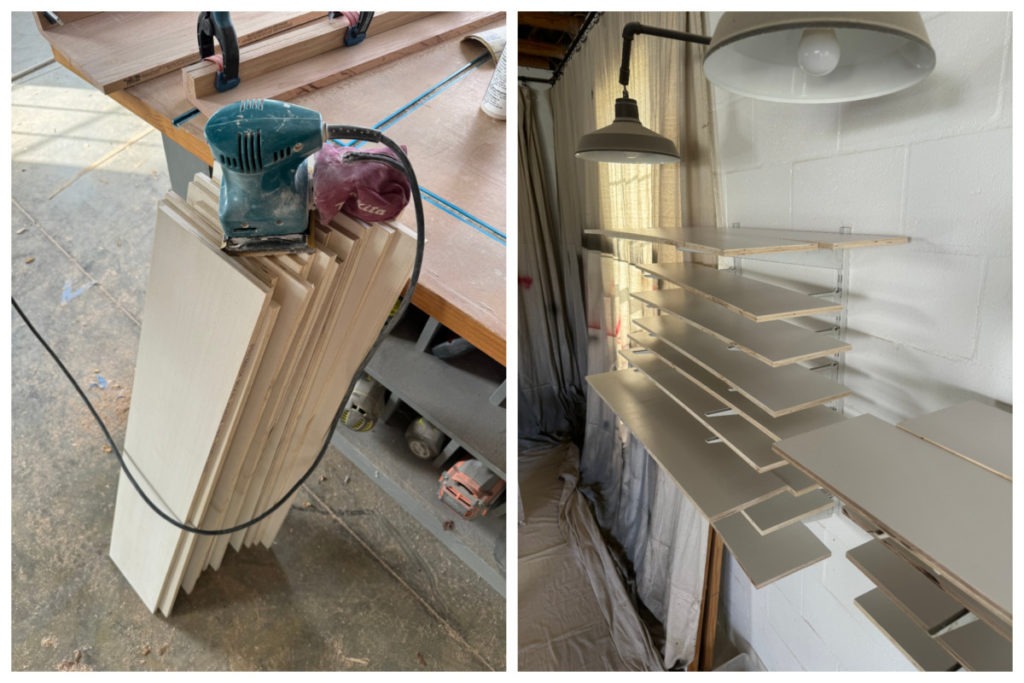
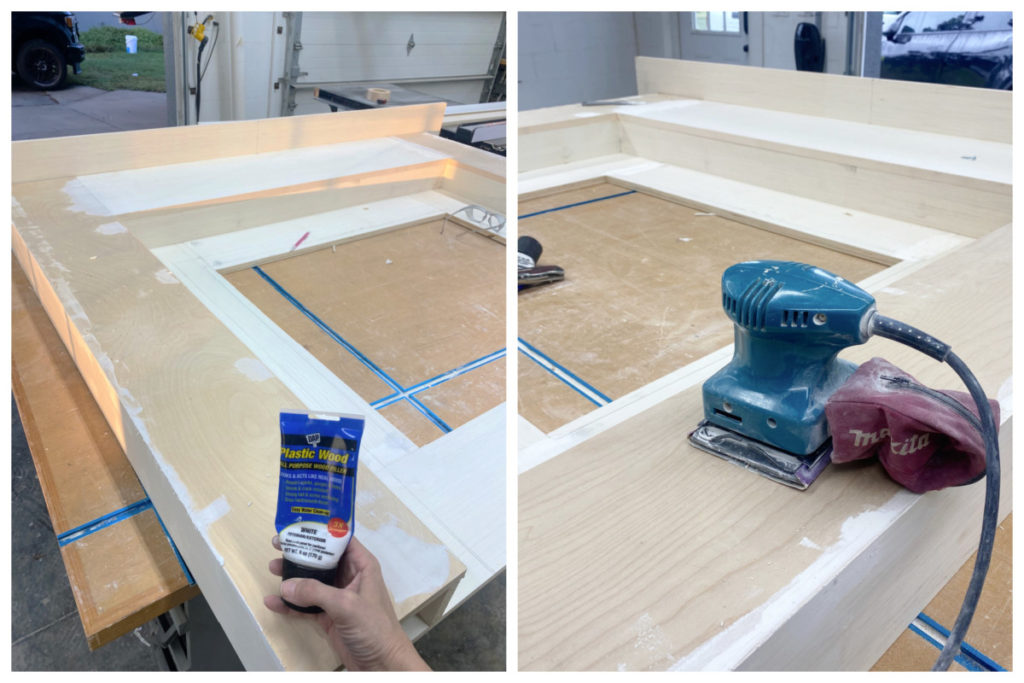
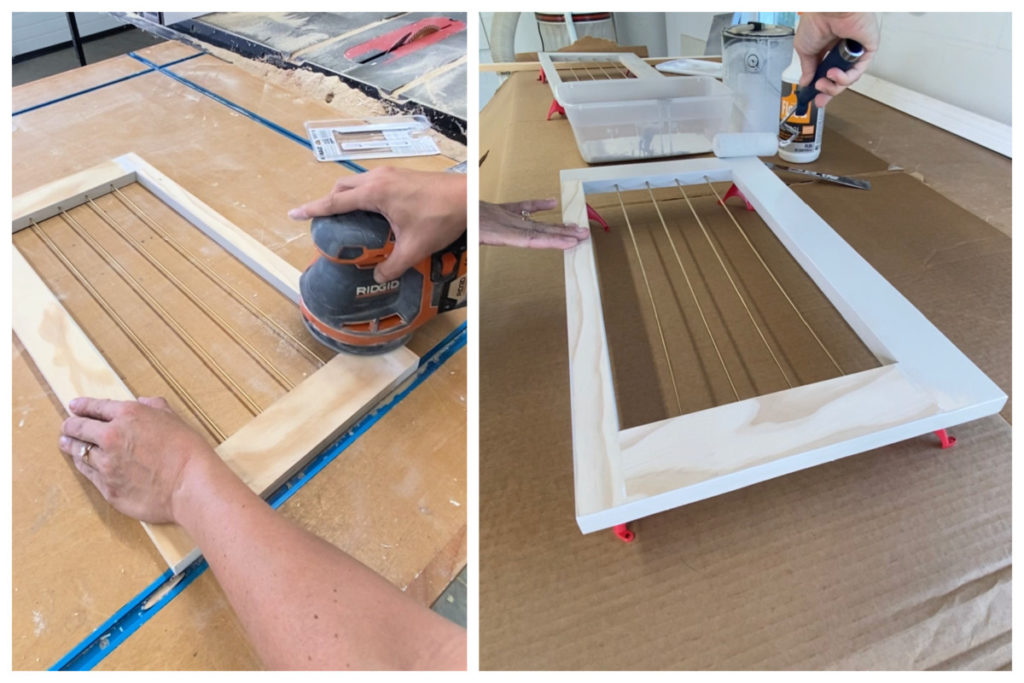
As stated before I am using a 1/2″ primed plywood. It is very smooth and technically does not require sanding, but I quickly gave them a “once over” with 220 grit paper. After which I used a paint sprayer to paint all my treads. I ended up doing two coats of paint, making sure to use a finish sponge sander in-between coats.
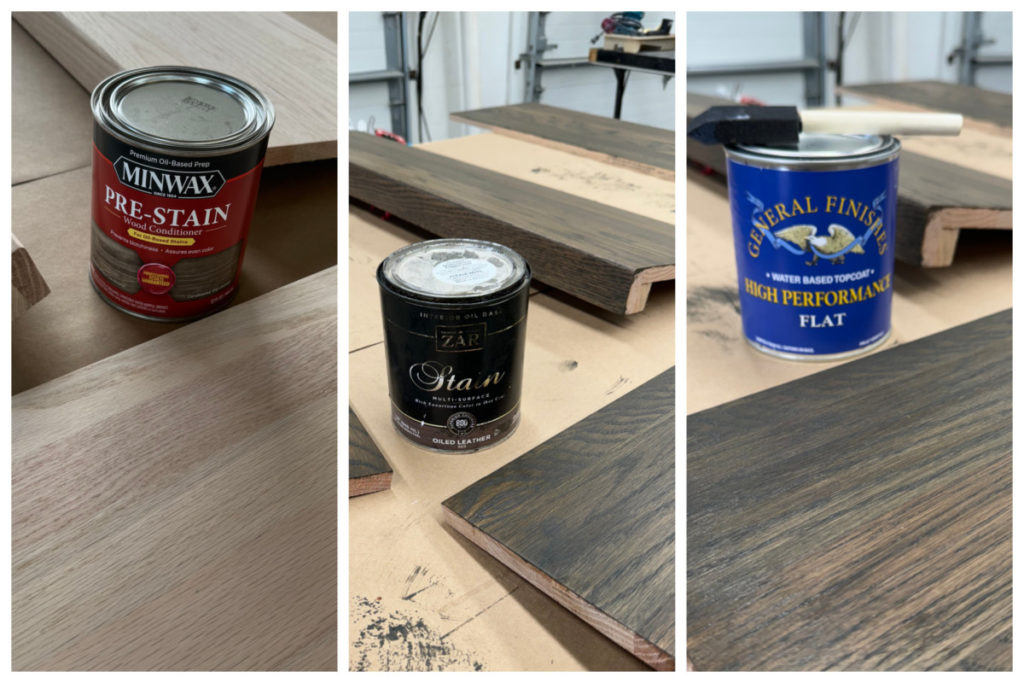
Stain Treads
When staining it is always recommended to use a pre-stain. There is some debate on whether it is actually necessary when you are using hardwoods. These stair treads are red oak and take stain much more evenly that a soft wood ( pine for example), but I prefer to always use a pre-stain.
After the pre-stain I proceeded to stain stair treads using ZAR Oiled Leather Stain. Red Oak naturally has red undertones in it. ZAR’s “Oiled leather” has a green undertone that neutralizes the red and creates a rich walnut color!
I applied one coat of stain and allowed it to dry over night before applying a second coat. Adding multiple layers of stain will deepen the stain color.
I allowed my stair treads to dry for 72hours in ideal drying conditions before applying any form of sealant.
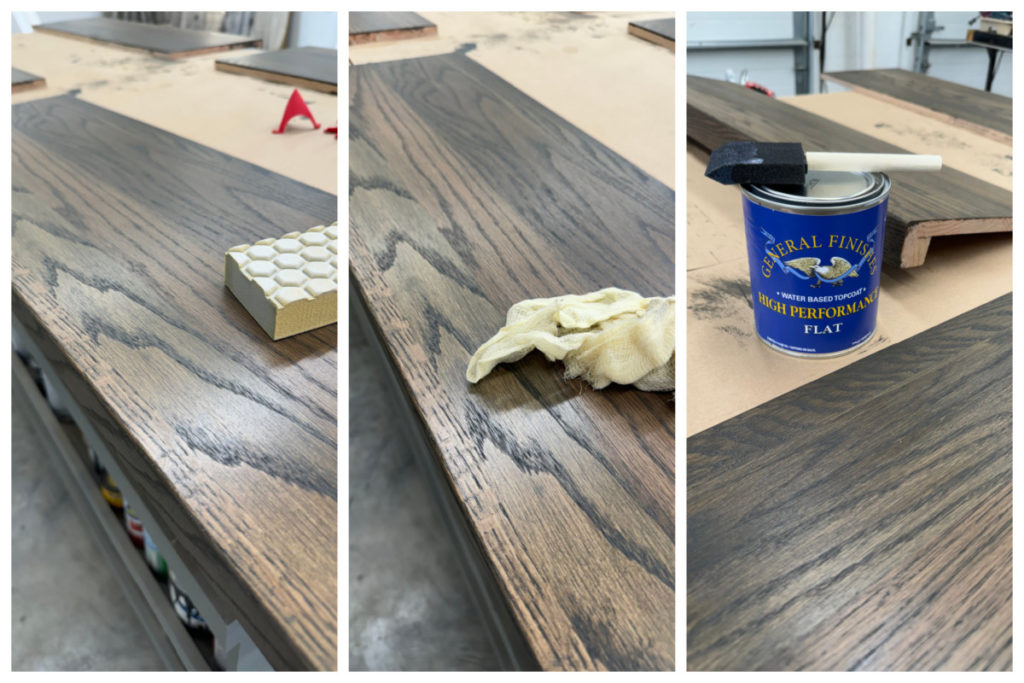
When it comes to sealing stained projects there are quite a few options Polyurethane and Poly-acrylic being the two most popular. Polyurethane (oil-based) is known for it’s durability, but as it dries and ages develops a yellow/amber color. I did not want my stairs to have a slight yellow hue. So I did my research on the most durable poly-acrylic (water-based), and found a poly that I LOVE. I used General Finishes High-Performance Top Coat in “Flat”. I applied three coats, and used a 220 grit sanding sponge and tack cloth in-between each coat.
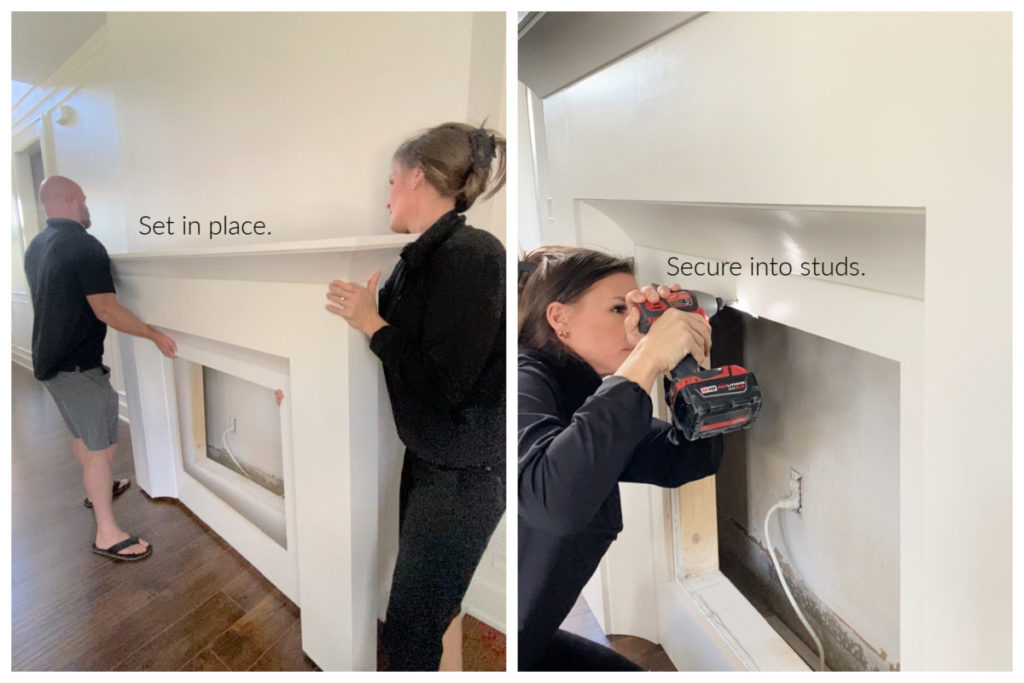
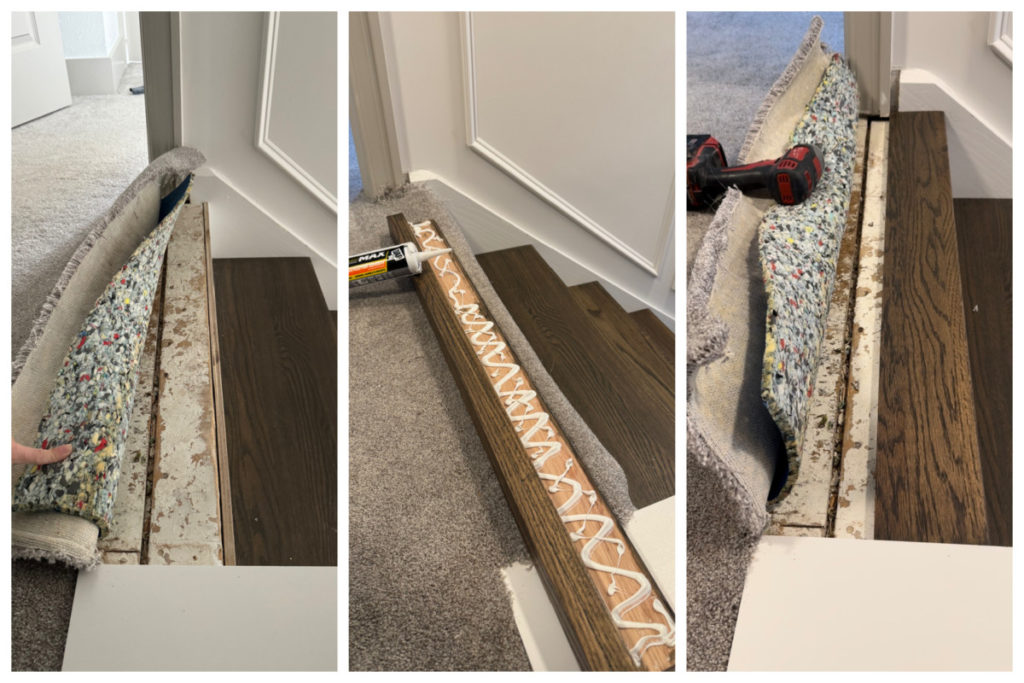
Install Risers
Now time for the fun part, install! Because of the time and effort that was taken into fitting, measuring and marking these this part will be rewarding and quick!
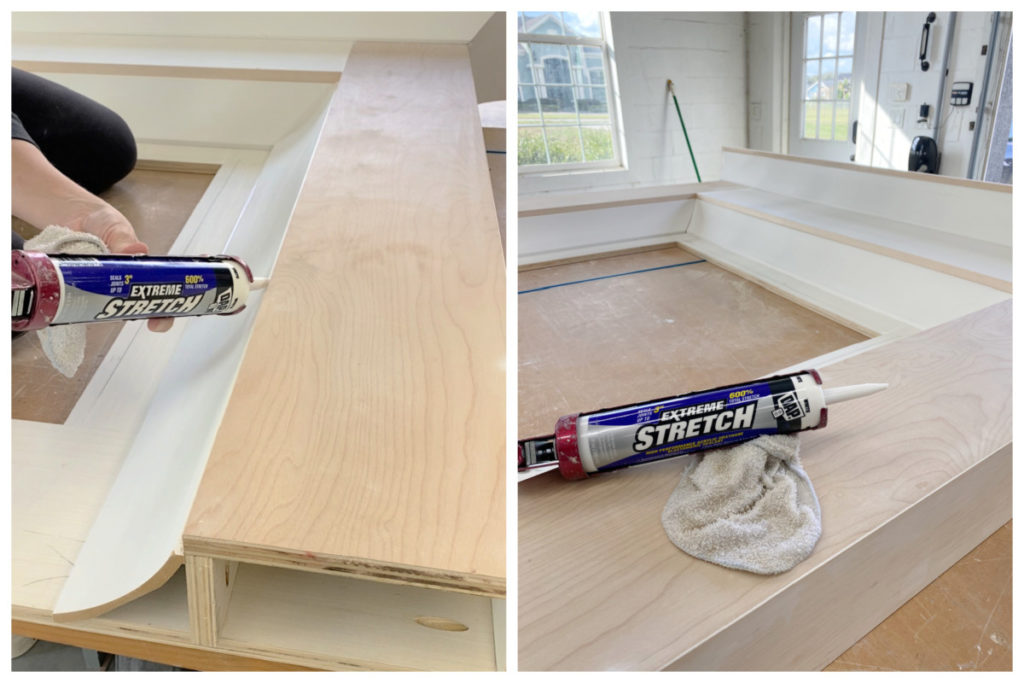
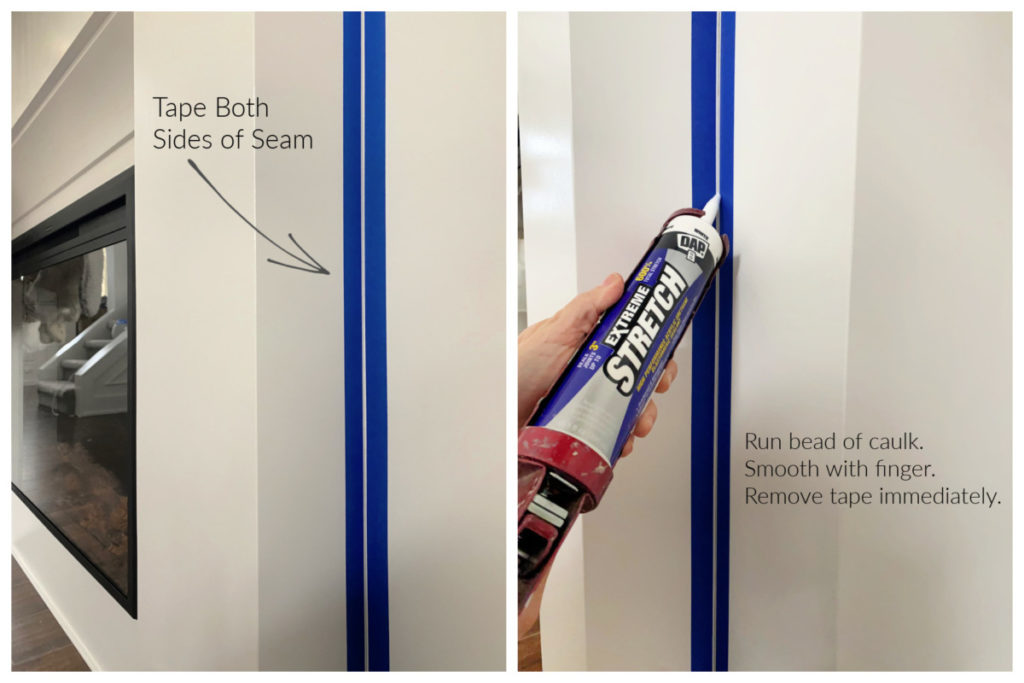
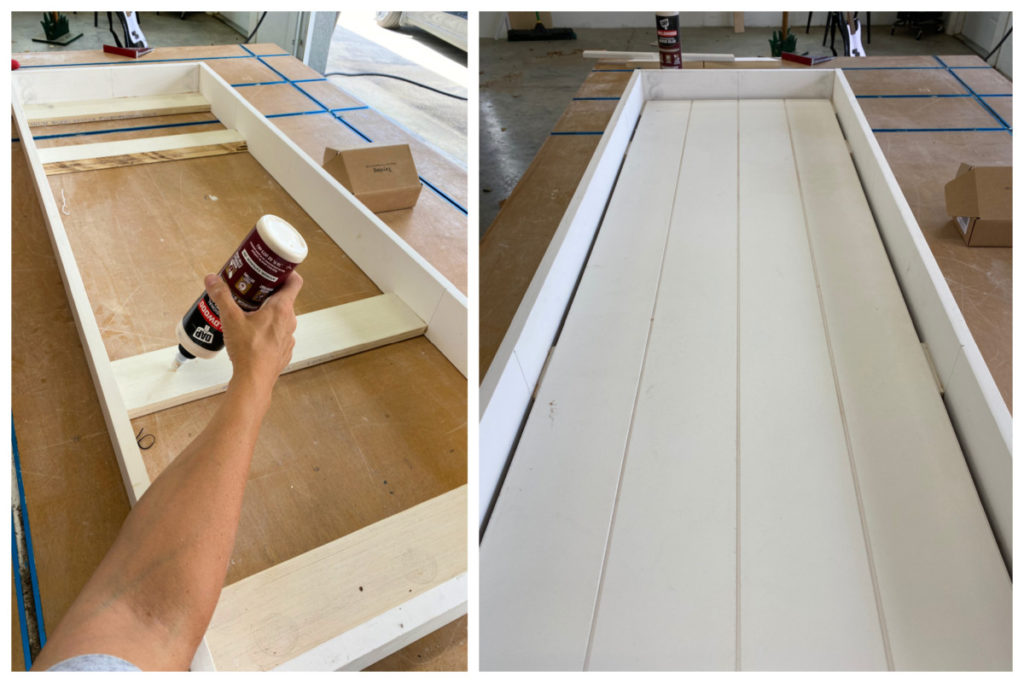
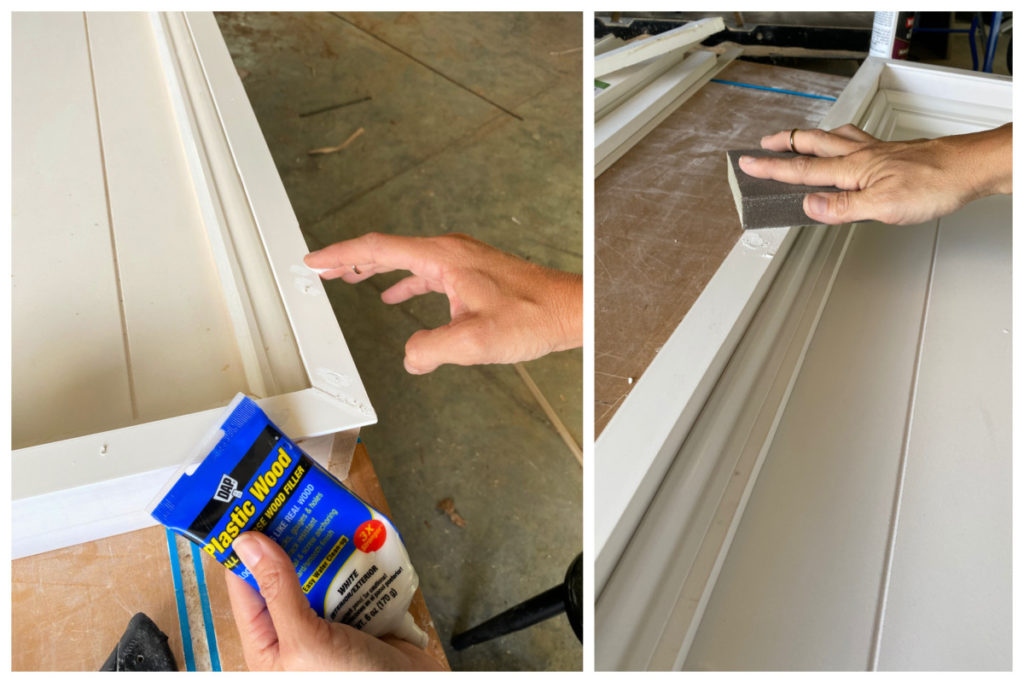
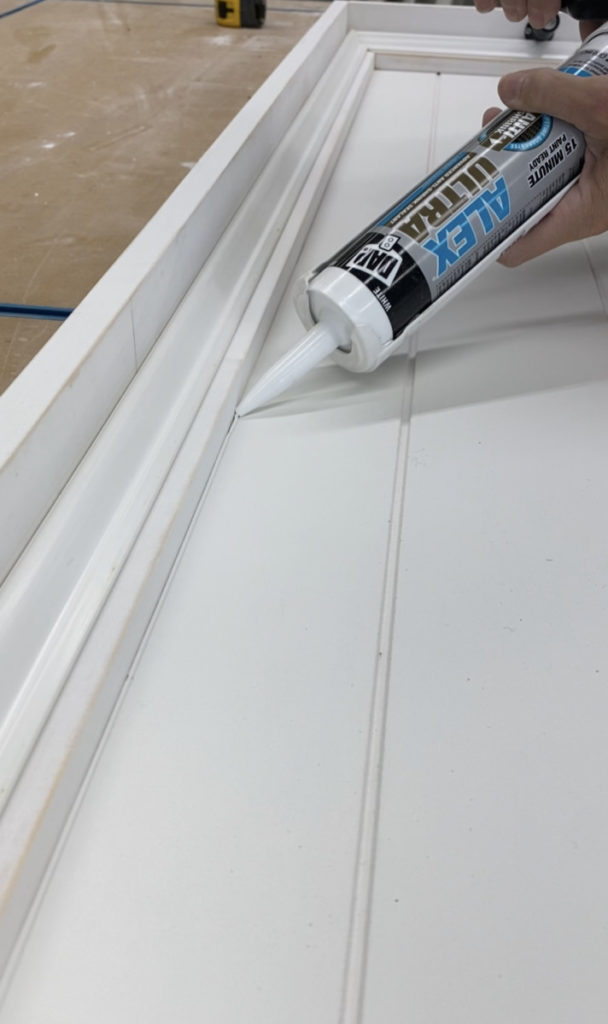
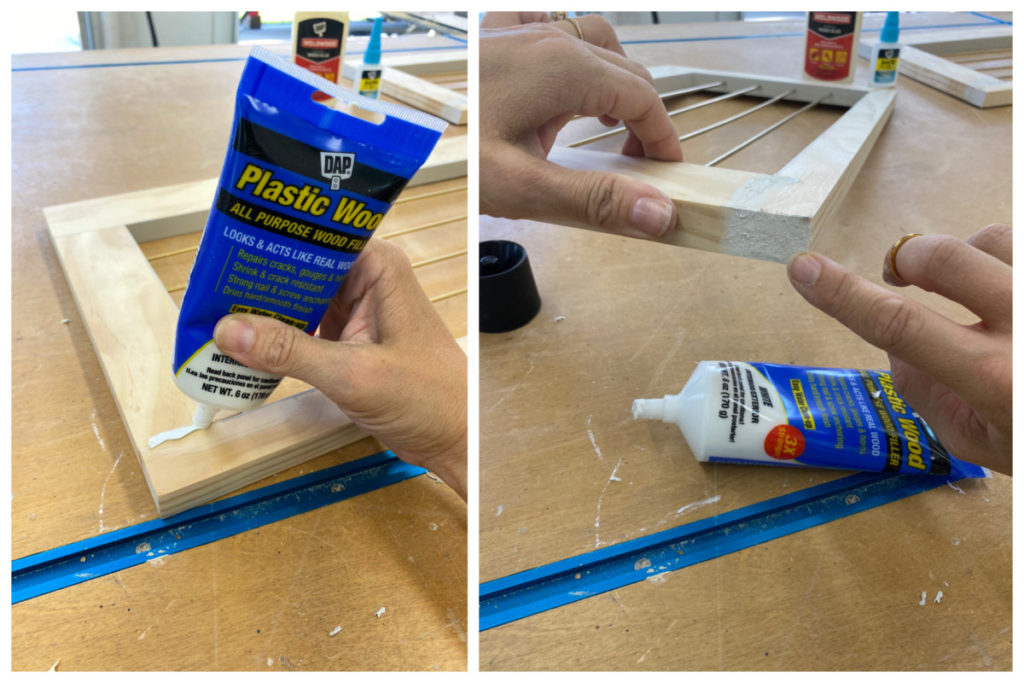
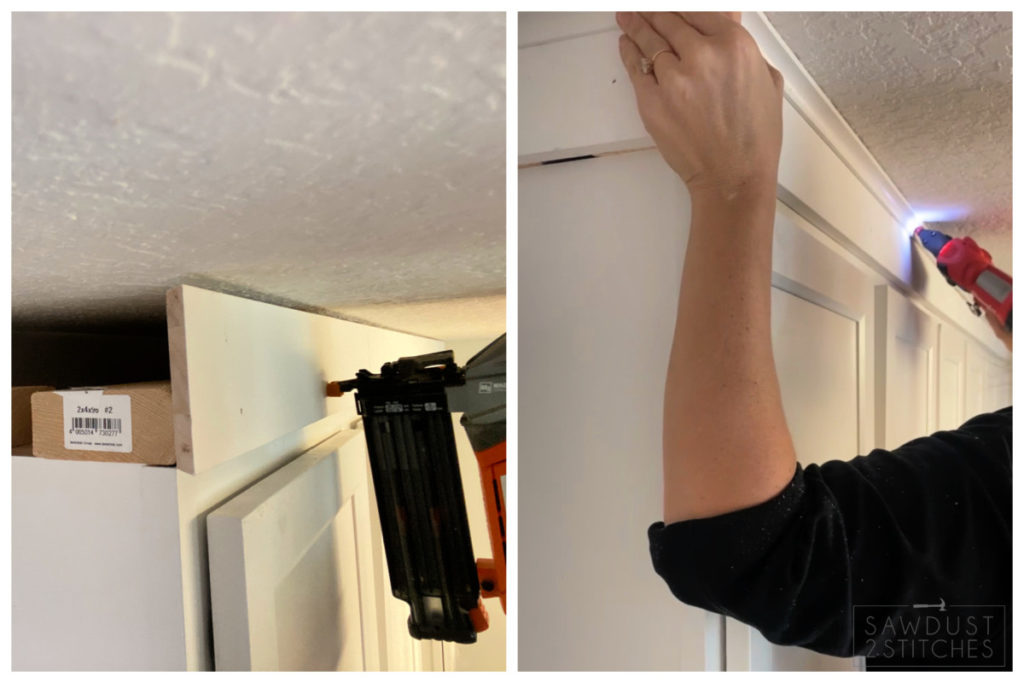
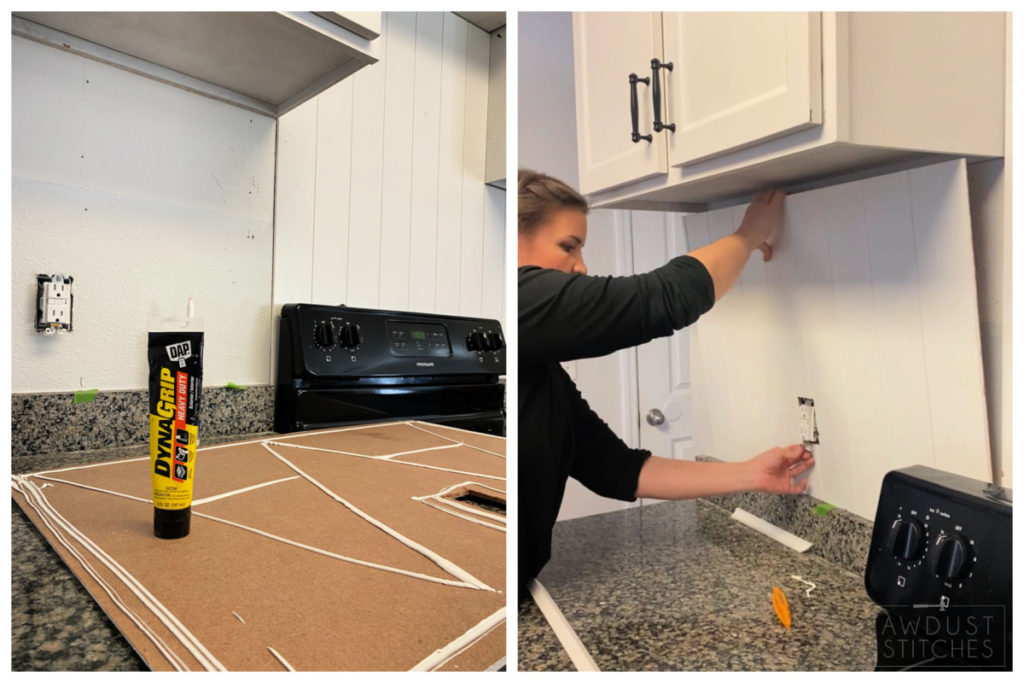
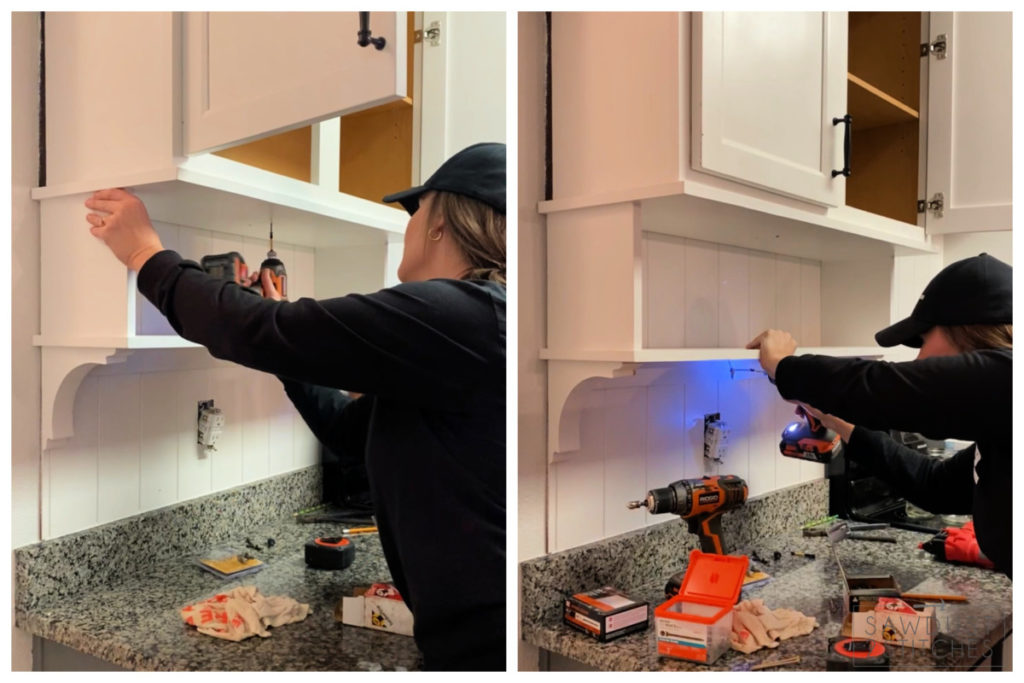
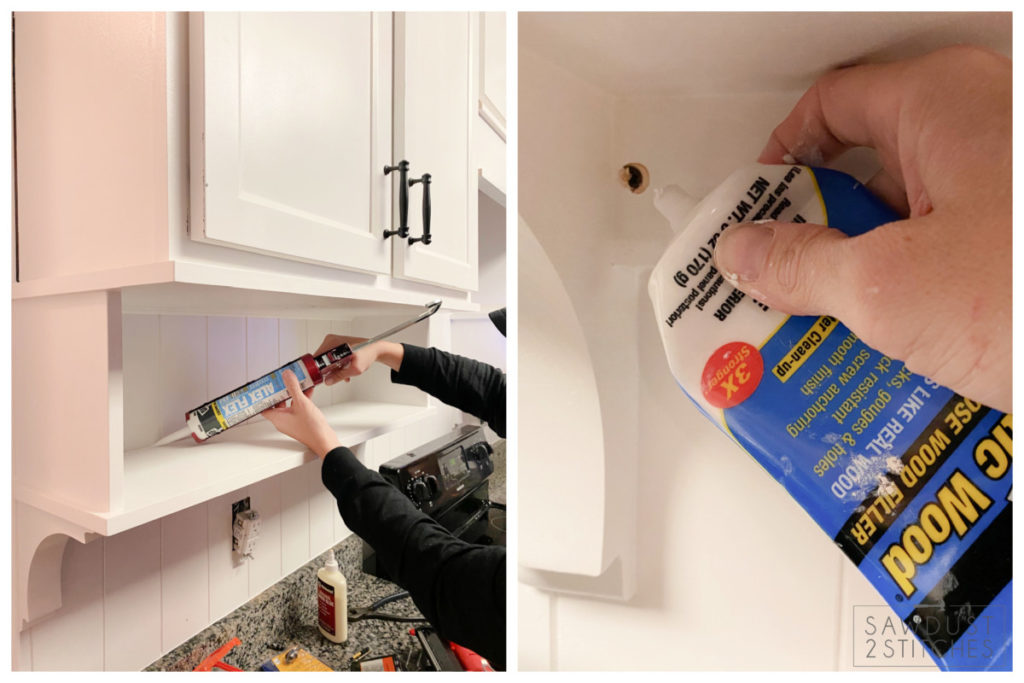
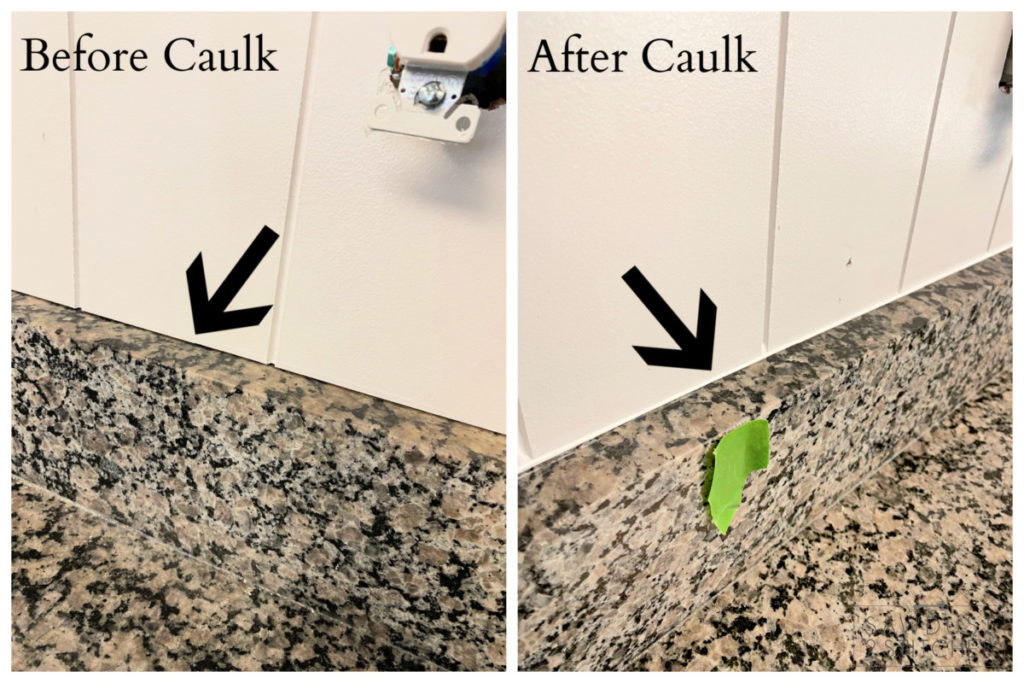
Simply apply a liberal amount of construction adhesive to the back of the stair riser and then push firmly into place. I used DAP HDMAX it is a high performance adhesive that bonds to virtually ALL materials, including wet surfaces, it even works well in extreme temperatures! Not that my steps will be in extreme temperatures, but when I am putting this much effort into a project I want to make sure I am using the BEST. Once in place use DAP Alex Fast Dry Caulk to hide any corner seams. I love Alex Fast Dry, it is very user friendly, and it paint ready in as little as 20 minutes! Now, you could easily install all the risers at once or could rotate installing riser/tread. The only thing necessary is to install the front riser and back riser before installing the tread..
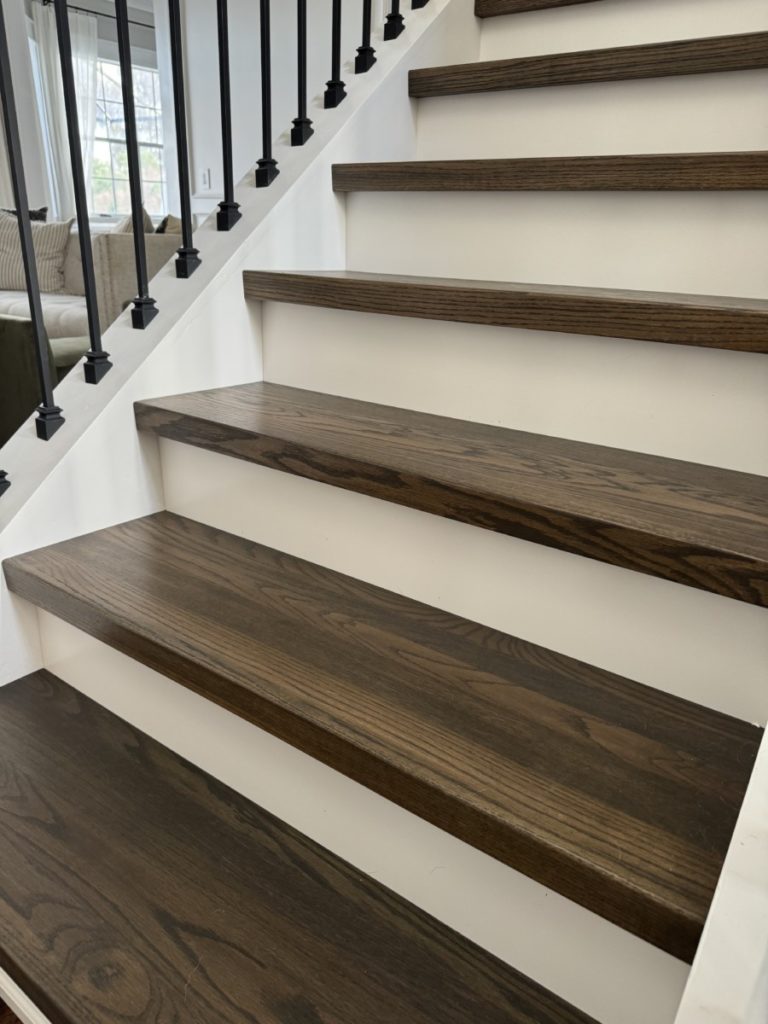
Install Treads
To install the treads I used DAP HDMAX. This construction adhesive is AH-MAZING with exceptional adhesion. I would encourage you to use a liberal amount HDMAX so that you have quite a few points of contact with the bare tread and the new tread. In doing so you will eliminate squeaky stairs.
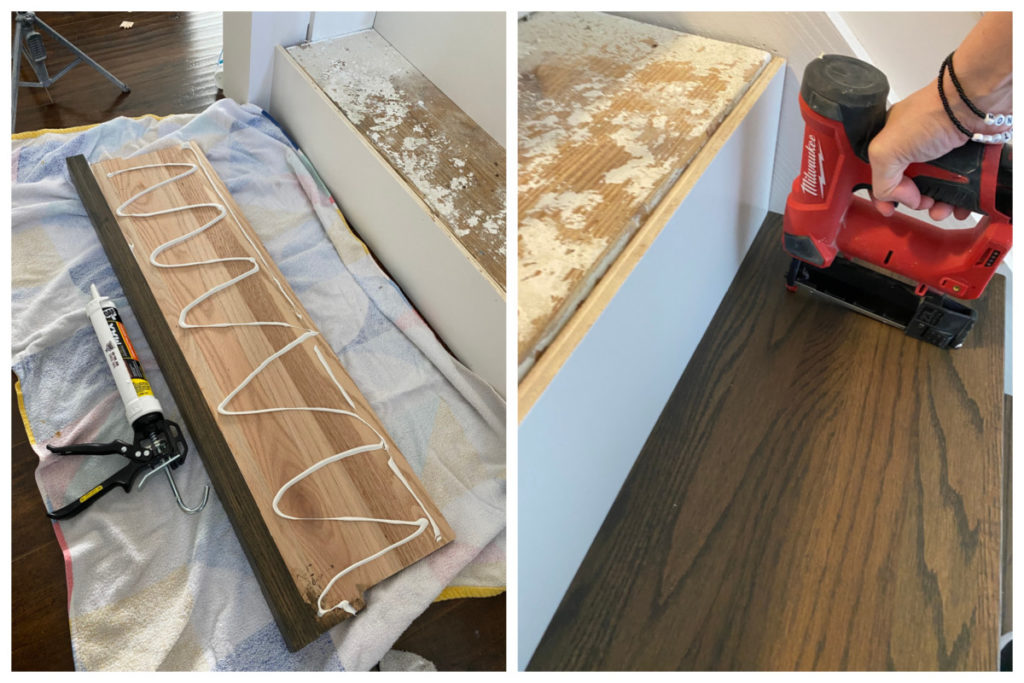
If desired you can put weights on each tread as the adhesive sets. However, I found that using a pin nailer to tack it in place to prevent shifting was all it needed. As I progressively worked my way up the stairs I would kneel on the previously installed step and act as a weight as it settled into place. I repeated the installation of riser/tread/riser etc… and I slowly worked my way up the entire staircase.
Top Step
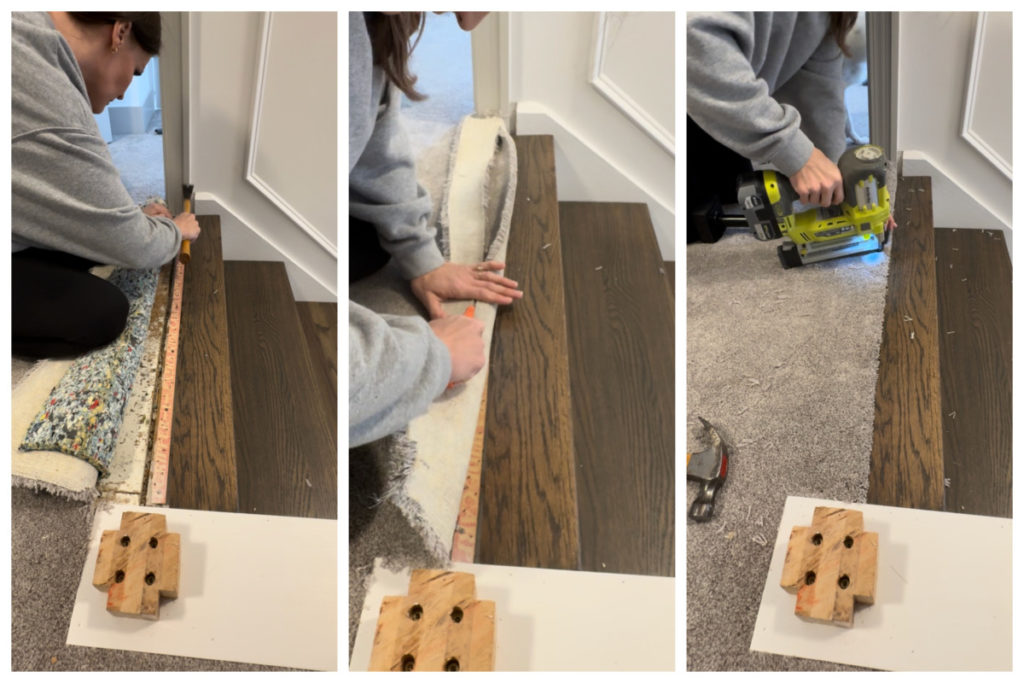
Top step is a fun little mind game. I have seen some instance where people leave the top step/nose carpeted. I was very tempted to use this approach, but you know me… I can’t leave well enough alone. Instead I tore up the carpet to expose the top lip. I prepped a stair tread in the same fashion the others were prepped, but on the top one I ripped down to approximately 4″. (This depth can vary based on your stairs.)
Again, I very liberally applied DAP HDMAX Construction Adhesive to the back of the tread, then installed in place and applied weights. After waiting the 4 hour recommended dry time I began carpet repair. This was a first for me but was not as difficult as I expected.
I reinstalled the tack strip, and cut the carpet to extend 1″ PAST my desired carpet stopping point. I then bent the carpet under itself 1″ and push it down on the tack strip. Using a knee kicker I pulled the carpet snug and did any necessary adjustment before tacking the carpet into place.
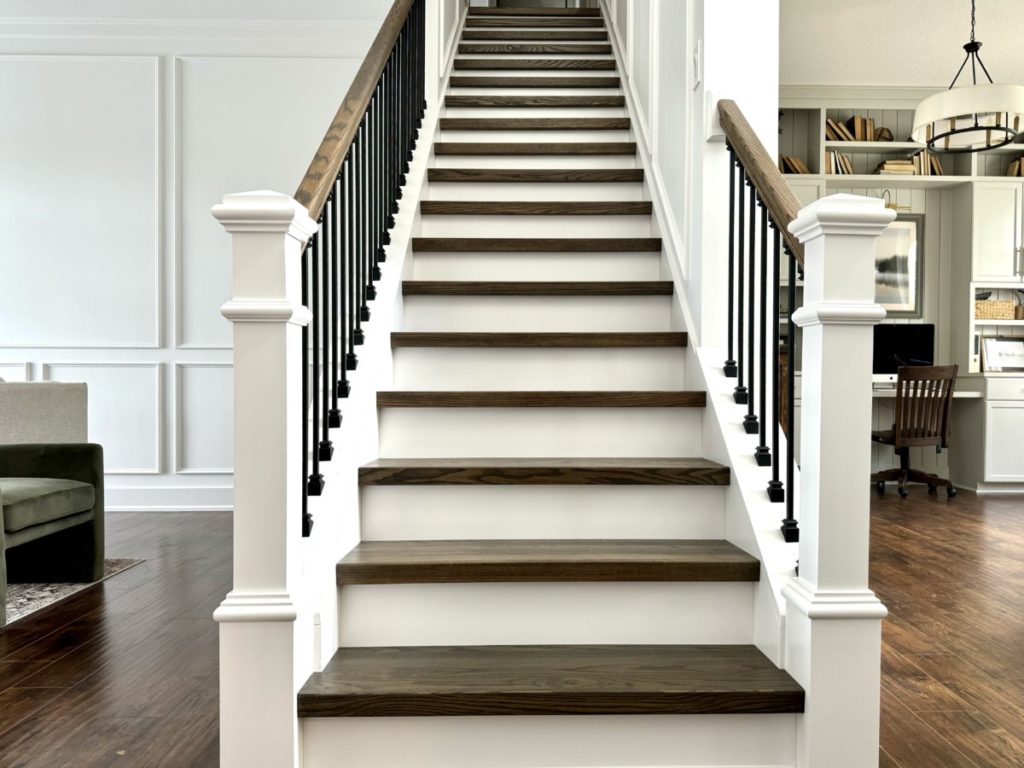
This project was a HUGE undertaking, one that I put off for years! Now that it is done, I regret not doing it sooner. Was it overwhelming, you bet! But once I got started I found that each individual step was totally doable. It is like eating an elephant… just one bite at a time!